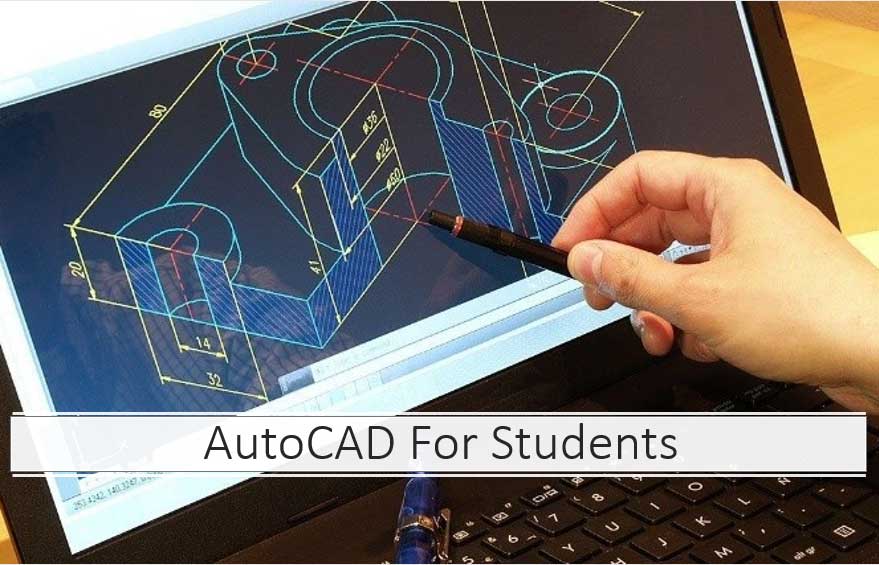
Topic autodesk autocad tutorial: Unlock your creative potential with our Autodesk AutoCAD tutorial, guiding you from basic concepts to advanced design techniques for professional-grade projects.
Table of Content
- What are some AutoCAD tutorials provided by Autodesk?
- Getting Started with AutoCAD
- Exploring the AutoCAD User Interface
- Basic Drawing and Editing Commands
- Creating Your First Drawing
- Learning to Use Drawing Tools
- Organizing Objects with Layers
- YOUTUBE: AutoCAD Basic Tutorial for Beginners - Part 1
- Advanced Object Types and Editing Techniques
- Dimensioning and Annotation Techniques
- Introduction to 3D Modeling
- Advanced 3D Modeling and Rendering
- Tips, Tricks, and Best Practices
- Preparing for AutoCAD Certification
What are some AutoCAD tutorials provided by Autodesk?
Autodesk provides several AutoCAD tutorials to help users learn and enhance their skills. Some of the tutorials available are:
- AutoCAD Quick Start Guide: This tutorial provides a basic introduction to AutoCAD, including the interface and essential functions. It is a great starting point for beginners.
- Create 2D Objects: This tutorial focuses on teaching users how to create and organize 2D objects using layers, basic drawing tools, ortho, and object snap. It is useful for those who want to learn how to work with 2D drawings.
In addition to these tutorials, Autodesk also offers the option to search their knowledge base for AutoCAD documentation and troubleshooting articles. This is helpful when looking for specific information or trying to resolve issues.
READ MORE:
Getting Started with AutoCAD
Welcome to the first step in mastering AutoCAD, the premier drafting software used by professionals worldwide. This section will introduce you to the basics of AutoCAD, setting the foundation for your journey into design and drafting excellence.
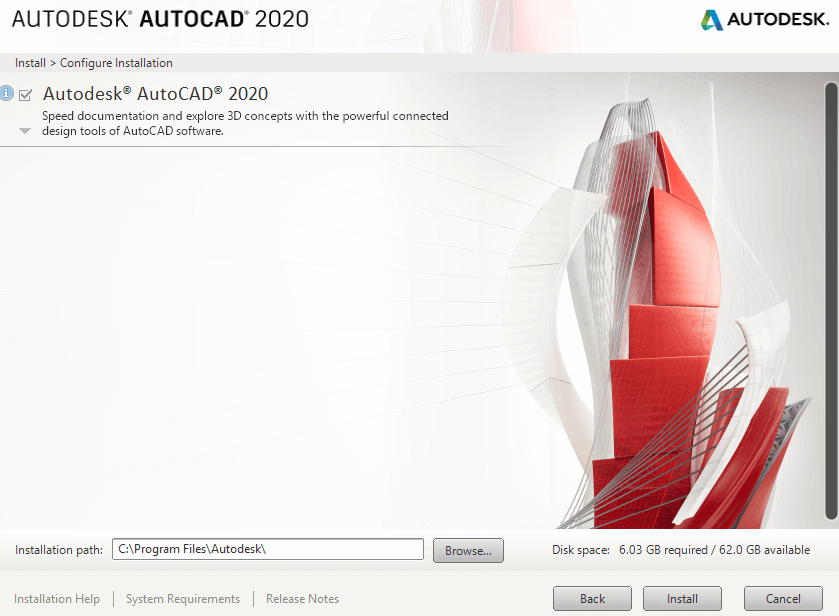
- Download and Install AutoCAD: Begin by downloading the latest version of AutoCAD from Autodesk\"s official website. Follow the installation guide to set up the software on your computer.
- Explore the User Interface: Familiarize yourself with the AutoCAD workspace and interface. Learn about the Ribbon, Toolbars, Command Line, and Drawing Area to navigate the software efficiently.
- Set Up a Drawing Environment: Learn how to configure your drawing settings, including units, scales, and drawing limits. This step is crucial for creating precise and accurate designs.
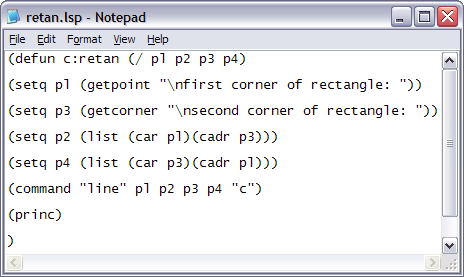
- Basic Drawing Commands: Start with basic drawing commands like LINE, CIRCLE, RECTANGLE, and POLYLINE. Practice using these commands to create simple shapes and layouts.
- Using Object Snaps: Discover how to use Object Snaps (OSNAP) for precision drawing. Object Snaps allow you to accurately position new elements in relation to existing objects.
- Layer Management: Understand the importance of layers in organizing your drawings. Learn how to create, name, and manage layers to keep your project organized.
- Save and Open Drawings: Learn the process of saving your work in different formats and opening existing drawings. This knowledge is essential for managing your AutoCAD files.
By completing these steps, you\"ll have a solid foundation in AutoCAD, ready to move on to more complex designs and techniques. Remember, practice is key to becoming proficient in AutoCAD, so explore each feature and tool as you progress.

Exploring the AutoCAD User Interface
The AutoCAD user interface is designed to provide easy access to the tools and features you need to create precise, detailed designs. This section will guide you through the various components of the interface, helping you become familiar and efficient with the environment.
- Ribbon: The Ribbon at the top contains tabs (Home, Insert, Annotate, etc.) that organize the tools into groups for easy access. Hover over icons to see tool names and shortcuts.
- Command Line: Located at the bottom, the Command Line is where you can type commands directly, view prompts, and get feedback as you work.
- Toolbars: Customizable and floating, Toolbars provide quick access to frequently used tools. Right-click any toolbar area to customize your setup.
- Properties Palette: This palette shows the properties of the selected object and allows you to modify them easily. It\"s a crucial tool for detailed design work.
- DesignCenter: Access DesignCenter to manage and insert blocks, xrefs, and named objects from other drawings. It\"s a powerful feature for reusing elements.
- Workspace Switching: AutoCAD allows you to switch between different workspaces tailored to various tasks, such as drafting, 3D modeling, or layout editing.
- Navigation Tools: Use the navigation tools like Zoom, Pan, and the ViewCube for 3D models to efficiently move around your drawing.
- Model and Layout Tabs: Switch between Model (working space for creating designs) and Layout tabs (pages for printing) to work on different aspects of your project.
By exploring and getting comfortable with the AutoCAD user interface, you\"ll enhance your productivity and ability to execute complex designs with ease. Practice using each component to build your confidence and speed in navigating the software.
Basic Drawing and Editing Commands
Mastering AutoCAD\"s basic drawing and editing commands is essential for creating precise and professional drawings. This section will cover the fundamental tools you need to start designing.
- LINE: Create straight line segments. Click to set the start point, then click again to set the end point, or type coordinates.
- POLYLINE: Draw connected lines and arcs as a single object. Use for creating complex shapes and paths.
- CIRCLE: Draw circles by specifying the center point and radius or diameter.
- RECTANGLE: Create rectangles by specifying two opposite corners.
- ARC: Draw arcs by specifying three points: start, end, and a point on the arc.
- ERASE: Remove objects from your drawing. Select the objects to erase or use selection windows.
- TRIM: Trim objects to meet the edges of other objects. Select cutting edges, then the parts of objects you want to remove.
- EXTEND: Extend objects to meet the edges of other objects. Select boundary edges, then the objects to extend.
- COPY: Duplicate objects. Select objects to copy, then specify the base point and second point to determine the copy\"s location.
- MIRROR: Create a mirrored copy of selected objects. Specify two points for the mirror line.
- MOVE: Relocate objects. Select objects, then specify the base point and second point to determine the new location.
- ROTATE: Rotate objects around a base point. Select objects, specify the base point, then define the rotation angle.
- SCALE: Resize objects. Select objects, specify the base point, then enter a scale factor.
These commands form the backbone of your design process in AutoCAD, enabling you to create, modify, and refine your drawings. Practice these commands to build a solid foundation in AutoCAD drafting techniques.

Creating Your First Drawing
Creating your first drawing in AutoCAD is an exciting step towards becoming proficient in computer-aided design. This section will guide you through the process of creating a basic drawing, introducing you to essential tools and techniques.
- Open AutoCAD and Start a New Drawing: Launch AutoCAD and select \"New\" from the startup screen or use the \"New\" command under the application menu to open a new drawing file.
- Set Up Your Drawing Environment: Before you start drawing, set up your working environment. This includes setting the correct units (e.g., millimeters or inches), drawing limits, and scale, to ensure your design is accurately represented.
- Use Basic Drawing Commands: Begin with simple commands like LINE, RECTANGLE, and CIRCLE to draw basic shapes. These commands can be accessed from the Ribbon or typed directly into the command line.
- Practice Precision Drawing: Learn to use Object Snaps (OSNAP) to draw with precision. Snapping to specific points on objects, such as endpoints, midpoints, and centers, helps in creating accurate geometry.
- Modify Your Drawing: Use editing commands like MOVE, COPY, ROTATE, and SCALE to modify your drawing objects. These commands allow you to adjust, replicate, or change the orientation and size of your design elements.
- Layers and Properties: Organize your drawing by using layers. Assign different elements of your drawing to different layers, each with its own color, linetype, and line weight. This organization aids in managing complex drawings.
- Save Your Work: Regularly save your drawing by using the \"Save\" or \"Save As\" commands. Choose a meaningful file name and location for easy access and management.
By following these steps, you\"ll complete your first AutoCAD drawing, laying the foundation for more complex designs. Remember, the key to mastery is practice and exploration of AutoCAD\"s vast toolset.

_HOOK_
Learning to Use Drawing Tools
AutoCAD\"s comprehensive suite of drawing tools enables the creation of virtually any shape or design. This section will guide you through the fundamentals of using these tools effectively to enhance your drafting skills.
- Line Tool: The most basic drawing tool, perfect for creating straight lines. Experiment with clicking points on the canvas or entering specific coordinates for precision.
- Polyline Tool: Ideal for creating connected sequences of lines and arcs. Explore the options to create wide polylines, tapered polylines, and closed loops.
- Circle Tool: Learn to draw circles by specifying the center point and radius. Investigate alternative methods such as drawing by diameter or through two or three points.
- Arc Tool: Create arcs by specifying three points: start, end, and a point along the arc\"s path. Practice using different arc creation methods for varied design needs.
- Rectangle Tool: Quickly draw rectangles by specifying opposite corners. Dive into the options to create rectangles with filleted or chamfered corners.
- Ellipse Tool: Draw ellipses by specifying the center, endpoint of one axis, and endpoint of the other. Explore creating elliptical arcs as well.
- Spline Tool: Use splines for creating smooth curved lines through a set of points. Understand how to modify the spline\"s curvature and tension for dynamic shapes.
- Trim and Extend Tools: Master these editing tools to refine your drawing. Trim away unnecessary parts of objects or extend them to meet other objects.
- Offset Tool: Create parallel copies of lines, polylines, circles, arcs, or splines. Learn how this tool can be used for creating concentric shapes and multiple offset distances.
- Mirror Tool: Duplicate objects in a symmetrical fashion. Perfect for creating mirrored copies of your design elements.
- Array Tool: Create multiple copies of objects in a rectangular or polar pattern. Experiment with different array configurations to quickly populate your drawings with repeated elements.
Engaging with these tools will open up a world of possibilities for your designs. Practice using each tool to become proficient and discover how they can be combined to create complex drawings.

Organizing Objects with Layers
Effective layer management is crucial for maintaining an organized and efficient workflow in AutoCAD. Layers allow you to separate different elements of your drawing, making it easier to edit, view, and print your designs. This section will guide you through the process of using layers to organize your drawing objects.
- Understanding Layers: Think of layers as transparent sheets stacked on top of each other. Each layer can contain a variety of objects, and you can control the visibility, color, linetype, and other properties of each layer independently.
- Creating New Layers: Learn how to create new layers for different elements of your design. For example, you might have separate layers for dimensions, text, construction lines, and main geometry.
- Setting Layer Properties: Customize the properties of each layer to improve the clarity and visual appeal of your drawing. Assign different colors, linetypes, and lineweights to make each layer distinct.
- Using Layers Effectively: Place objects on the appropriate layer as you create them. This practice helps in keeping your drawing organized and makes it easier to edit specific parts of your design without affecting others.
- Layer States: Save and restore different layer configurations to quickly switch between various views of your drawing. This is particularly useful for presenting different aspects of your design or focusing on specific details.
- Layer Tools: Familiarize yourself with layer tools such as Layer Freeze, Layer Lock, and Layer Isolate. These tools allow you to control the visibility and editability of layers, helping to simplify complex drawings.
- Managing Layer Standards: Understand the importance of adhering to layer standards, especially when collaborating with others. Using standardized layer names and properties ensures consistency across different drawings and projects.
By mastering layer management, you will enhance your ability to create clear, organized, and professional drawings in AutoCAD. Layers are a powerful feature that, when used effectively, can significantly improve your drafting process.

AutoCAD Basic Tutorial for Beginners - Part 1
Looking to enhance your skills or learn something new? This tutorial video is your go-to resource! Discover step-by-step instructions and expert tips to easily master a variety of topics. Watch now and become a pro in no time!
AutoCAD for Beginners - University Course
Ready to take your education to the next level? This university course video will unlock endless opportunities for personal and professional growth. Expand your knowledge, fuel your passion, and get ready to excel in your chosen field. Enroll today and embark on an enriching academic journey!
Advanced Object Types and Editing Techniques
As you become more comfortable with AutoCAD\"s basic features, you\"ll want to explore advanced object types and editing techniques to further enhance your designs. This section delves into sophisticated tools and methods that can elevate your drafting skills to the next level.
- Polylines and Splines: Beyond basic lines and arcs, learn to create and edit polylines and splines for more complex shapes. Understand how to convert between these types for greater flexibility.
- Hatches and Gradients: Add texture and visual interest to your drawings with hatch patterns and gradients. Master the use of hatch scales and angles to convey material types and shadows.
- Blocks and Dynamic Blocks: Discover how to create reusable block definitions and dynamic blocks with adjustable parameters. Blocks can streamline your workflow by simplifying the management of standard elements.
- Attributes and Data Extraction: Learn to attach data to objects using attributes and extract that data to tables within your drawing or external files. This technique is valuable for creating parts lists and schedules.
- External References (Xrefs): Use external references to incorporate other drawings into your current project without increasing file size. Understand how to manage and update Xrefs as project requirements change.
- Layer Filters and Layer States: Become adept at using layer filters to manage large drawings with many layers. Save and restore layer states to quickly switch between different layer configurations.
- Advanced Editing Commands: Explore advanced editing commands like ALIGN, STRETCH, and ARRAY. These commands offer sophisticated ways to modify objects in your drawing to fit exact specifications.
- Customization and Scripting: Customize AutoCAD to fit your specific needs by creating custom commands, toolbars, and menus. Learn basic scripting to automate repetitive tasks and increase efficiency.
By mastering these advanced techniques, you\"ll be able to tackle more complex projects with confidence. Each new skill opens up possibilities for creativity and efficiency in your designs.

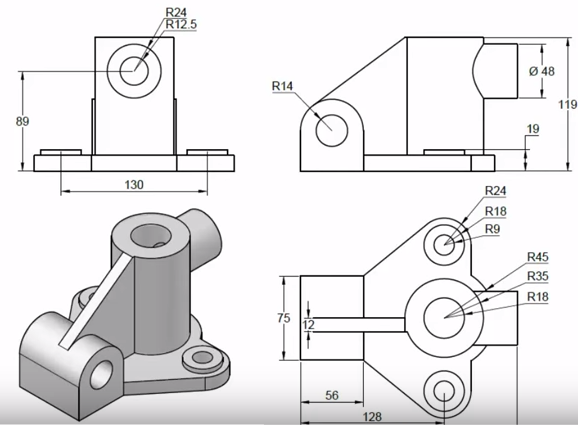
Dimensioning and Annotation Techniques
Dimensioning and annotation are crucial in AutoCAD for creating clear and precise technical drawings. These techniques allow you to communicate important information about the size, shape, and features of your design. This section will guide you through the process of adding dimensions and annotations to your drawings in AutoCAD, ensuring that your designs are easy to understand and ready for production.
Adding Dimensions
To start dimensioning your drawing, use the Dimension tool located on the Annotate tab. AutoCAD offers various dimensioning tools to suit different needs:
- Linear Dimensions: Measure the distance between two points in your drawing.
- Aligned Dimensions: Similar to linear dimensions but aligned with the line you are measuring.
- Radial Dimensions: Measure the radius of arcs and circles.
- Diametrical Dimensions: Measure the diameter of circles.
- Angular Dimensions: Measure angles between lines or points.
When you select a dimensioning tool, click on the points or lines in your drawing that you want to measure, and AutoCAD will automatically create a dimension. You can then move the dimension to the desired location and adjust its properties for clarity and style.
Customizing Dimension Styles
AutoCAD allows you to customize the appearance of your dimensions through the Dimension Style Manager. Here you can set text size, dimension line color, arrow style, and more. To access the Dimension Style Manager, go to the Annotate tab and click on the Dimension Style icon. Creating a custom dimension style ensures consistency across your drawings.
Using Annotation Tools
Annotations in AutoCAD include text, leaders, and tables. They provide additional information about your design, such as material specifications or assembly instructions.
- Adding Text: Use the Text tool to add notes or labels to your drawing. You can customize the font, size, and alignment of your text in the Text Style dialog box.
- Creating Leaders: Leaders point to specific parts of your drawing and often include a text note. Use the Leader command to draw a line from the point of interest to a place where you can add descriptive text.
- Inserting Tables: Tables are useful for listing parts, dimensions, or any tabular information. The Table command allows you to create a table where you can define rows, columns, and fill in your data.
Annotation Scaling
Annotation scaling is a powerful feature in AutoCAD that ensures your annotations appear at the correct size and scale in different viewports. You can enable annotation scaling for dimensions, text, and other annotative objects so that they automatically adjust to the scale of the viewport or the printed drawing.
Best Practices for Dimensioning and Annotation
- Keep your dimensions and annotations clear and easy to read. Avoid clutter by placing dimensions outside of the drawing area when possible.
- Use layers to organize your dimensions and annotations separately from the drawing geometry. This makes editing and revisions easier.
- Regularly update your dimension styles and text styles to maintain consistency across different drawings and projects.
- Review your dimensions and annotations carefully before finalizing your drawing. Ensure accuracy and completeness to avoid mistakes in the manufacturing or construction process.
By following these dimensioning and annotation techniques in AutoCAD, you will create professional and precise technical drawings that effectively communicate the details of your design.
Introduction to 3D Modeling
3D modeling in AutoCAD is a powerful tool that allows designers to create realistic simulations of their projects, offering a detailed view of every angle and aspect of the design. This section introduces the fundamental concepts and techniques for creating 3D models in AutoCAD, guiding you through the process of turning your 2D drawings into three-dimensional representations.
Understanding the 3D Workspace
AutoCAD provides a specialized workspace for 3D modeling, which optimizes the user interface for 3D design tasks. This includes toolbars and commands specifically for 3D modeling. To access the 3D modeling workspace, switch from the default drafting workspace via the workspace switcher located in the application status bar.
Starting with 3D Models
Creating a 3D model in AutoCAD typically begins with basic geometric shapes called primitives. These include:
- Boxes (cuboids)
- Cylinders
- Spheres
- Cones
- Pyramids
You can create these shapes using the commands found in the \"Modeling\" panel of the \"Home\" tab. Each shape can be adjusted by specifying dimensions during creation or by using editing commands afterward.
Modifying 3D Objects
After creating basic 3D shapes, you can modify them to achieve the desired form of your design. AutoCAD offers a variety of tools for modifying 3D objects, including:
- Extrude: Extend a 2D object into a 3D object by adding depth.
- Revolve: Create complex 3D objects by revolving a 2D object around an axis.
- Presspull: Easily extrude and offset surfaces in a 3D model.
- Fillet: Round the edges of a 3D object.
- Chamfer: Create a beveled edge between two surfaces of a 3D object.
Using Solid Editing Tools
AutoCAD\"s solid editing tools provide further capabilities to refine your 3D models. These tools include:
- Union: Combine multiple 3D objects into a single unit.
- Subtract: Use one 3D object to cut away parts of another.
- Intersect: Create a 3D object from the overlapping volume of two or more objects.
- Slice: Cut a 3D object into two parts with a plane.
Visualizing 3D Models
Visualizing your 3D model is crucial for understanding its shape and form. AutoCAD offers several visualization tools, including:
- 3D Views: Rotate, zoom, and pan around your 3D model to view it from different angles.
- Visual Styles: Apply different visual styles to view your model in wireframe, shaded, or rendered form.
- Rendering: Create photorealistic images of your 3D model with lighting and materials.
Conclusion
Introduction to 3D modeling in AutoCAD opens up a world of possibilities for design visualization and analysis. By starting with basic shapes and using the tools available for modification and visualization, you can create detailed and accurate 3D models of your designs. As you become more familiar with these techniques, you will be able to explore more complex modeling strategies, enhancing your ability to communicate your design ideas effectively.
_HOOK_
Advanced 3D Modeling and Rendering
Advancing your skills in 3D modeling and rendering with AutoCAD elevates your designs to new levels of realism and complexity. This section delves into more sophisticated techniques for creating intricate 3D models and producing high-quality renders. Mastering these skills will allow you to present your designs in the most compelling and realistic manner possible.
Working with Mesh Models
Mesh modeling is a versatile method for creating complex, organic shapes that are difficult to achieve with solid modeling tools. In AutoCAD, you can convert solid objects into mesh models and manipulate their faces, edges, and vertices to model intricate details and smooth forms. Use the Mesh tools under the \"Mesh\" tab to explore the full potential of mesh modeling.
Surface Modeling Techniques
Surface modeling is another advanced technique for creating complex 3D shapes. It allows for the creation of smooth, flowing forms that can be precisely controlled. AutoCAD\"s surface modeling tools let you create and edit NURBS (Non-Uniform Rational B-Splines) surfaces, offering a high degree of flexibility in shaping your models. Utilize commands like SWEEP, LOFT, and NETWORK to create sophisticated surface models.
Advanced Solid Editing
Beyond basic solid editing commands, AutoCAD provides advanced tools that allow for more complex modifications of 3D solids. Techniques such as blending edges, sculpting, and Boolean operations can be used to refine your models. Experiment with these tools to merge objects, create hollow spaces, or craft intricate details on your 3D models.
Creating Detailed Architectural Models
For architectural designs, AutoCAD\"s 3D modeling capabilities enable you to create detailed models of buildings, including interior and exterior elements. Use walls, windows, doors, and other architectural objects to build up your design. Then, apply materials and textures to add realism to your models, simulating real-world surfaces and finishes.
Applying Materials and Textures
Materials and textures bring your 3D models to life, adding color, patterns, and realism. In AutoCAD, you can apply various materials to your models and customize their properties, such as glossiness, transparency, and texture. Use the Materials Browser to select from a wide range of predefined materials or create your own custom materials to match your design needs.
Lighting and Rendering
The final step in 3D modeling is rendering, which simulates how light interacts with your models. AutoCAD\"s rendering tools allow you to place lights, adjust their intensity and color, and set up the environment settings to produce realistic images. Pay attention to the types of lighting (e.g., point lights, spotlights, ambient light) and the rendering settings to achieve the desired mood and realism in your renders.
Exporting and Sharing 3D Models
Once your 3D model is complete, you may need to export it for fabrication, presentation, or collaboration. AutoCAD supports exporting to various file formats, enabling you to share your models with other software or stakeholders. Consider the requirements of the end-use of your model to choose the appropriate export options, ensuring compatibility and maintaining the integrity of your design.
Conclusion
Advanced 3D modeling and rendering in AutoCAD are essential skills for professionals looking to push the boundaries of their designs. Through mesh and surface modeling, detailed architectural designs, application of materials and textures, and sophisticated lighting and rendering techniques, you can create stunning visualizations that bring your ideas to life. Practice and experimentation are key to mastering these advanced capabilities, leading to more dynamic and engaging presentations of your work.

Tips, Tricks, and Best Practices
Enhancing your AutoCAD skills involves learning not just the tools and features but also adopting strategies that can make your work more efficient, accurate, and visually appealing. This section compiles essential tips, tricks, and best practices to help you optimize your workflow, increase productivity, and improve the quality of your designs in AutoCAD.
Efficient Use of Layers
Layers are fundamental in organizing your AutoCAD drawings. Use them strategically to separate different elements of your design, such as electrical layouts, plumbing, and structural details. This organization makes it easier to edit, display, or hide specific parts of your drawing as needed.
Customizing the Workspace
AutoCAD allows you to customize your workspace to suit your preferences and workflow. Tailoring the interface by arranging toolbars, command palettes, and the ribbon can significantly enhance your efficiency. Save your workspace configuration so you can easily switch between task-specific layouts.
Keyboard Shortcuts
Memorizing keyboard shortcuts for frequently used commands can drastically reduce your design time. Customize your own shortcuts for a more personalized experience, and keep a list handy for quick reference.
Using Dynamic Blocks
Dynamic blocks offer flexibility and power, allowing you to modify the shape, size, or configuration of a block within your drawing. Utilize dynamic blocks for elements that come in various sizes or configurations to streamline your design process.
Effective Dimensioning
Dimensioning is not just about measuring; it\"s about clarity and communication. Use consistent dimension styles, and make sure dimensions are clear and easy to read. Avoid clutter by spacing dimensions appropriately and using leader lines smartly.
Data Extraction
AutoCAD\"s data extraction tool can save you time by pulling information directly from your drawings into tables or external files. Use it to create bills of materials, schedules, or lists without manually entering data.
Regularly Saving and Backing Up
Regular saves and backups can prevent loss of work due to software crashes or other unforeseen problems. Use AutoCAD\"s automatic save feature and consider cloud storage options for backups.
Using External References (Xrefs)
External references allow you to include other drawings within your current drawing without actually importing the file. This keeps your drawing file size down and ensures that any updates to the referenced file are automatically reflected in your drawing.
Practicing Proper File Management
Maintain a structured system for organizing your project files and related documents. Use clear naming conventions and organize files into folders by project, stage, or another logical system. This makes it easier to locate, share, and archive your work.
Continuous Learning and Practice
The best way to improve your AutoCAD skills is through continuous learning and practice. Take advantage of online tutorials, forums, and training courses to learn new techniques and stay updated on the latest features and best practices.
By incorporating these tips, tricks, and best practices into your daily use of AutoCAD, you can enhance your productivity, improve your designs, and become more efficient in your drafting and design work.
READ MORE:
Preparing for AutoCAD Certification
Gaining AutoCAD certification is a valuable step in verifying your skills and knowledge in using AutoCAD software. Certification can enhance your credibility, improve your resume, and increase your opportunities in the drafting and design industry. Here\"s how to prepare effectively for your AutoCAD certification exam:
Understand the Certification Requirements
Before starting your preparation, familiarize yourself with the specific requirements for the AutoCAD certification you\"re aiming for. Autodesk offers different levels of certification, such as Certified User and Certified Professional. Check the Autodesk website for details on the exam format, objectives, and prerequisites.
Review the Exam Objectives
Autodesk provides a detailed list of exam objectives for each certification level. These objectives outline the topics and skills that will be tested. Use this list as a guide to focus your study and practice on the areas where you need improvement.
Take Official Autodesk Training Courses
Autodesk offers training courses designed to help users prepare for certification exams. These courses are available in various formats, including online, self-paced learning, and instructor-led classes. Taking an official course can provide you with comprehensive knowledge and hands-on experience.
Utilize AutoCAD Tutorials and Resources
Make use of the extensive range of tutorials and learning resources available from Autodesk and other reputable sources. These resources cover a wide array of topics, from basic functions to advanced techniques, and are invaluable for both beginners and experienced users looking to brush up on their skills.
Practice with Real Projects
The best way to prepare for the certification exam is by applying your AutoCAD skills to real-world projects. This hands-on experience will help you understand how to apply various commands and tools in different scenarios. Try to work on projects that cover a broad range of features and functions.
Join AutoCAD Forums and Communities
Engaging with AutoCAD forums and online communities can provide you with additional insights and tips from experienced users. These platforms are great for asking questions, sharing experiences, and receiving advice on preparing for the certification exam.
Take Practice Exams
Practice exams are an excellent way to gauge your readiness for the certification test. They can help you familiarize yourself with the format of the actual exam and identify areas where you need further study or practice. Autodesk and other educational providers offer practice exams that simulate the certification test environment.
Review and Refine Your Knowledge
As you prepare, continually review the exam objectives and your practice exam results to identify and focus on weak areas. Revisit tutorials and resources to reinforce your understanding and skills in these areas.
Stay Updated on AutoCAD Versions
Ensure that your preparation covers the specific version of AutoCAD on which the certification exam is based. Autodesk regularly updates its software, and the certification exam may focus on features and tools specific to the latest version.
Conclusion
Preparing for AutoCAD certification requires a combination of theoretical knowledge, practical experience, and familiarity with the exam format. By following these steps, you can enhance your AutoCAD skills, boost your confidence, and increase your chances of achieving certification. Good luck!
Embark on a journey to master AutoCAD with our comprehensive tutorials, from basic commands to advanced 3D modeling techniques. Elevate your skills, prepare for certification, and unlock your potential in design and drafting excellence.