Topic how to animate a 3d model in blender: Embark on a creative journey to bring your 3D models to life with Blender. This step-by-step guide will empower beginners to master the art of animation, unlocking endless possibilities for storytelling and design.
Table of Content
- How to animate a 3D model in Blender?
- Understanding Blender\"s Interface and Basic Setup
- Importing and Preparing Your 3D Model
- Rigging Your Model for Animation
- Understanding Keyframes and the Timeline
- Creating Your First Animation with Pose Mode
- YOUTUBE: How to Animate 3D Characters in 1 Minute
- Using the Graph Editor for Fine-Tuning Animations
- Applying Inverse Kinematics for Natural Movements
- Animating Facial Expressions and Lip Sync
- Adding Materials and Textures to Enhance Realism
- Lighting and Rendering Your Animated Scene
- Exporting Your Animation for Sharing
- Additional Tips and Resources for Learning Blender Animation
How to animate a 3D model in Blender?
To animate a 3D model in Blender, you can follow these steps:
- Open Blender and import your 3D model by going to File → Import → [choose the file format of your model].
- Select the 3D model by right-clicking on it in the 3D viewport.
- Go to the Layout workspace to access the animation tools.
- In the Dope Sheet or Timeline editor, set the current frame by clicking on the desired frame number.
- Add keyframes to the objects you want to animate by pressing I on your keyboard and selecting the desired property to animate.
- Move to another frame and transform the object by rotating, scaling, or moving it.
- Add keyframes again to capture the changed position or parameters of the object.
- Repeat steps 5-7 for each animation sequence you want to create.
- Play the animation by pressing the Play button in the timeline or pressing Spacebar.
- Adjust the timing and interpolation of keyframes using the Graph Editor or Dope Sheet.
- Rename, organize, or delete keyframes as needed for a clean animation workflow.
- Render the animation by going to Output Properties and selecting the desired output format and settings.
- Click on Animation to start rendering the animation.
By following these steps, you can animate your 3D model in Blender and create fluid and lifelike movements.
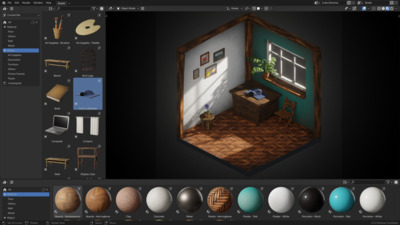
Understanding Blender\"s Interface and Basic Setup
Blender\"s interface might seem daunting at first, but its layout is designed to streamline the 3D animation process. Familiarizing yourself with its setup is the first step towards creating captivating animations.
- Workspace Areas: Blender\"s interface is divided into several areas, such as the 3D viewport, timeline, outliner, and properties panel. These can be customized according to your workflow.
- 3D Viewport: This is where you\"ll spend most of your time, as it displays the 3D scene. You can navigate the view using mouse controls - rotate with the middle mouse button, pan with shift + middle mouse, and zoom with the scroll wheel.
- Timeline: Located at the bottom, the timeline allows you to control the animation playback, set keyframes, and change the start and end frames of your animation.
- Outliner: The outliner shows a hierarchical list of all objects in the scene, making it easy to select and organize your models.
- Properties Panel: This panel provides access to all the properties of the selected object, including modifiers, materials, and physics settings.
Begin by selecting the default cube, then experiment with moving (G key), rotating (R key), and scaling (S key) it. These basic commands are essential for positioning your objects in the scene.
Remember, the key to mastering Blender\"s interface is practice. Start with simple tasks to build your confidence and gradually take on more complex projects.
Importing and Preparing Your 3D Model
Before animating, you need to import your 3D model into Blender. This process can vary depending on the format of your model, but Blender supports many common formats such as OBJ, FBX, and STL.
- Importing Your Model: Go to File > Import and select the format of your model. Navigate to your model\"s location, select it, and click \"Import\". Your model will appear in the 3D viewport.
- Checking Model Scale: Sometimes, imported models may not be to scale. You can adjust the scale by selecting the model, pressing \"S\", and then scaling it up or down. Use the grid in the 3D viewport as a guide.
- Applying Transformations: To avoid issues during animation, apply the model\"s transformations. With the model selected, press Ctrl+A and apply the location, rotation, and scale transformations.
- Optimizing Geometry: If your model is highly detailed, consider simplifying it by reducing the number of vertices, or use modifiers like Decimate to optimize without drastically changing its appearance.
- Setting Up Materials: If your model didn\"t come with materials or you wish to modify them, go to the Material Properties panel to add or edit materials. This will give your model the desired look before animation.
After these steps, your model will be properly imported and prepared in Blender, ready for rigging and animation. Remember, a well-prepared model is crucial for a smooth animation process.

Rigging Your Model for Animation
Rigging is the process of creating a skeletal structure for your model, which allows you to animate it by posing and moving bones. This step is crucial for bringing your 3D models to life in Blender.
- Creating an Armature: Start by adding an armature to your scene, which serves as the skeleton. Go to Add > Armature > Single Bone. This bone will be the basis of your rig.
- Placing Bones: Enter Edit Mode to adjust the size and position of your initial bone. You can extrude new bones from it by selecting the end of a bone and pressing E. Arrange the bones to match the major joints of your model.
- Naming Bones: Properly naming your bones is essential for organization, especially for complex models. Select a bone, go to the Bone Properties panel, and give it a descriptive name.
- Parenting Model to Armature: Once your armature is complete, you need to connect your model to it. Select your model, then shift-select your armature, and press Ctrl+P. Choose \"With Automatic Weights\" for Blender to automatically assign weights to the mesh based on bone proximity.
- Weight Painting: After automatic weighting, some areas of your model may not deform as expected. Use Weight Painting to manually adjust these weights. Select your armature, enter Pose Mode, then select your model and switch to Weight Paint Mode.
- Testing Rig: Before proceeding to animation, test your rig by selecting the armature, entering Pose Mode, and moving various bones to ensure the model deforms correctly.
Rigging can be intricate, but it\"s a critical step in animation. Taking the time to rig your model correctly will make the animation process smoother and more intuitive.
Understanding Keyframes and the Timeline
Keyframes and the timeline are fundamental elements of animation in Blender. They allow you to define the positions, rotations, and other properties of your objects at specific moments in time, creating the illusion of motion when played back.
- Timeline Overview: The timeline at the bottom of the Blender interface shows the current frame, playback controls, and allows you to scrub through your animation. You can adjust the start and end points of your animation here.
- Creating Keyframes: Move your playhead to the desired frame on the timeline where you want to set a keyframe. Select your object or bone, change its position, rotation, or scale, and then press \"I\" to insert a keyframe. Choose the type of keyframe (Location, Rotation, Scale, or LocRotScale) based on what property you want to animate.
- Keyframe Types: Location keyframes animate position, rotation keyframes animate rotation, scale keyframes animate size, and LocRotScale combines all three.
- Editing Keyframes: Keyframes appear as diamonds on the timeline. You can select and move them to change the timing of actions. To delete a keyframe, select it and press Delete.
- Interpolation: Blender automatically interpolates the frames between keyframes, creating smooth transitions. You can adjust the interpolation type in the Graph Editor for different effects (e.g., linear, bezier).
- Using the Dope Sheet: The Dope Sheet is an essential tool for managing keyframes. It provides a more detailed view of all keyframes and their timing, allowing for easier editing and organization.
Understanding how to use keyframes and the timeline effectively is key to creating dynamic and believable animations in Blender. Experimenting with different types of keyframes and interpolation can lead to more nuanced and lifelike animations.
_HOOK_
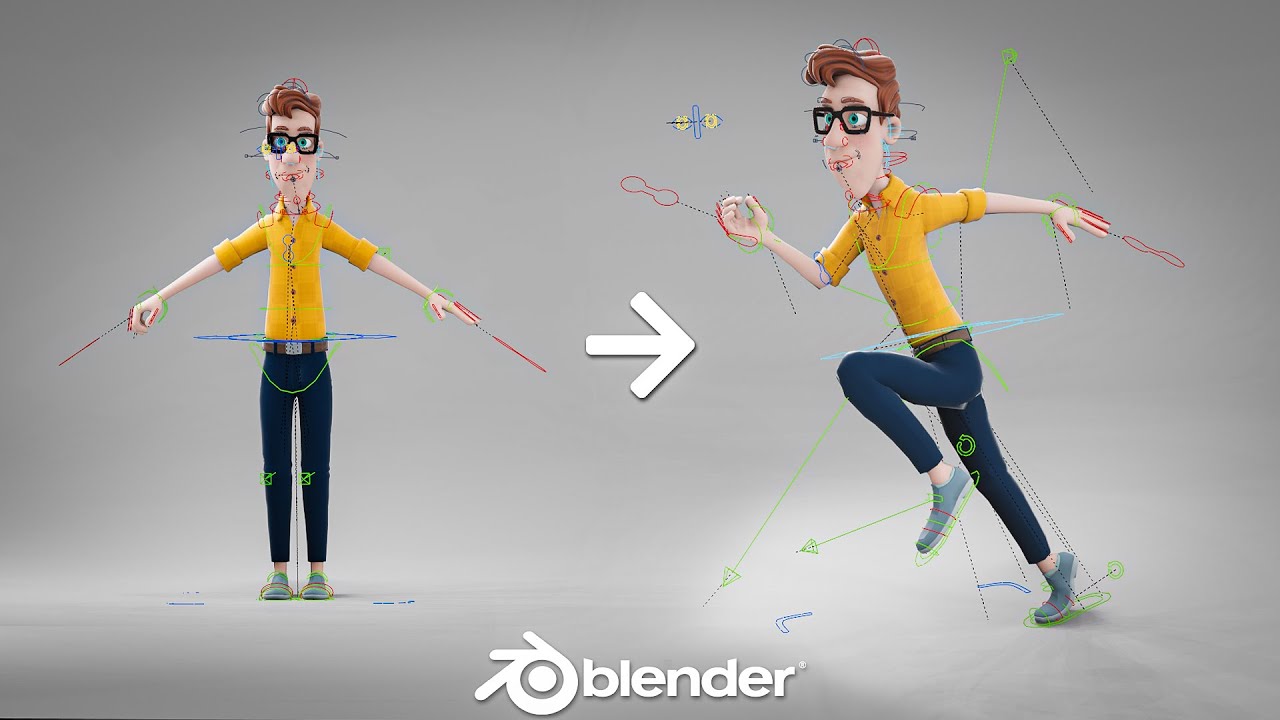
Creating Your First Animation with Pose Mode
Pose Mode in Blender is specifically designed for posing and animating rigged models. It\"s where you bring your character to life by moving its bones. Here\"s how to create your first animation using Pose Mode.
- Selecting Your Rig: With your rigged model ready, select the armature and switch to Pose Mode from the mode menu in the 3D viewport.
- Setting Up Your Initial Pose: Move to the first frame of your animation in the timeline. Select bones by right-clicking and use the G (grab), R (rotate), and S (scale) keys to position them for your starting pose. Insert a keyframe (press \"I\") for the bones you\"ve adjusted, typically choosing LocRotScale.
- Adding Movement: Scrub the timeline to a later frame where you want your next pose. Adjust the bones to create the desired movement or pose. Insert another keyframe for the new positions.
- Playback Your Animation: Use the playback controls in the timeline to play back your animation. You can adjust the speed of the animation by spreading the keyframes further apart or closer together.
- Refining Your Animation: To make your animation smoother, you might need to add more keyframes between the major poses for minor adjustments. This process, known as \"tweening,\" helps in creating more fluid movements.
- Using the Graph Editor: For more precise control over your animation, switch to the Graph Editor. It allows you to fine-tune the interpolation and timing of your keyframes, making your animation more realistic.
Creating your first animation in Pose Mode is an exciting step towards mastering Blender. Remember, practice is key. Experiment with different poses and movements to see what works best for your project.
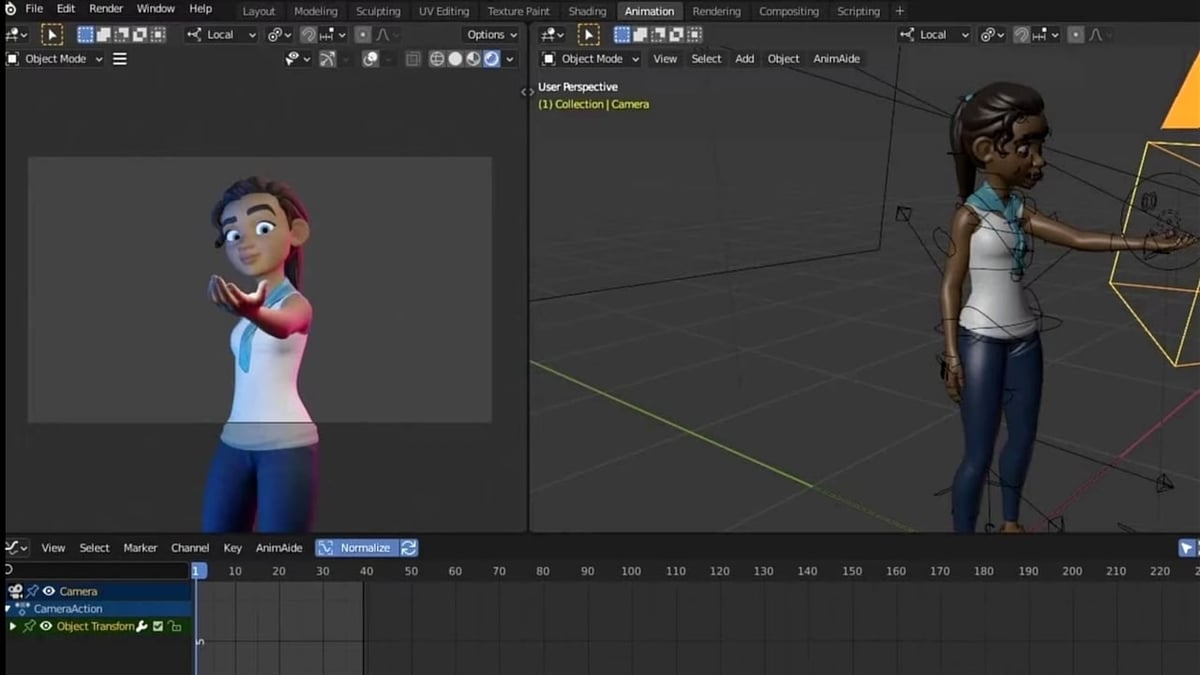
How to Animate 3D Characters in 1 Minute
Animating 3D Characters has never been more exciting! Step into a whole new world of creativity as you learn how to bring your favorite characters to life with incredible 3D animation techniques. Watch this captivating video and dive into the art of character animation today!
Using the Graph Editor for Fine-Tuning Animations
The Graph Editor in Blender is a powerful tool for refining the motion of your animations. It provides a detailed view of the animation curves, or \"f-curves\", that represent the change in properties like location, rotation, and scale over time. Here\"s how to use the Graph Editor to fine-tune your animations for more natural and dynamic results.
- Accessing the Graph Editor: Split your view and change one of the windows to the Graph Editor. You can do this by clicking on the editor type selector in any of the panels.
- Selecting F-Curves: In the Graph Editor, select the object or bone you want to refine. Its animation curves will appear. Click on a curve to select it and view its keyframe points and handles.
- Adjusting Keyframes: Move keyframes by clicking and dragging them. This adjusts the timing and value of the animated property at that frame. To make more precise adjustments, select a keyframe and use the G (grab) key.
- Editing Handles: Each keyframe has handles that control the curve\"s slope, affecting the acceleration and deceleration of the animation. Select and move these handles to smooth out or sharpen transitions between keyframes.
- Changing Interpolation: Right-click on a selected keyframe to change its interpolation type, such as Linear, Bezier, or Constant. This determines how the animation transitions between keyframes.
- Using the Dope Sheet: For broader adjustments, switch back to the Dope Sheet to reposition entire sets of keyframes or to scale their timing. This is helpful for adjusting the overall pacing of your animation.
By mastering the Graph Editor, you can achieve more precise control over your animations, creating movements that feel more lifelike and engaging. Experiment with different curve adjustments to see how they affect your animation\"s flow and realism.
The ABSOLUTE BASICS of 3D Animation in BLENDER – LeeDanielsART Tutorial
Ready to take your animation skills to the next level? Start with the basics of 3D animation in this informative and engaging video. Unleash your creativity as you learn fundamental techniques, master key concepts, and create stunning animations that will captivate your audience. Don\'t miss out on this valuable resource!
Applying Inverse Kinematics for Natural Movements
Inverse Kinematics (IK) is a technique in Blender that simplifies the animation process, especially for limbs and joints, by allowing for more natural movements through the control of chains of bones with an end effector. Here’s how to apply IK for more lifelike animations.
- Adding an IK Constraint: Select the bone where you want the IK effect to end (usually a hand or foot), then shift-select the bone where you want the IK chain to start. Press Shift+I and choose \"To Active Bone\" to add an IK constraint.
- Setting the Chain Length: In the Bone Constraints tab, adjust the Chain Length to specify how many bones back from the target the IK effect should influence. A shorter chain is good for arms; a longer chain might be used for legs or spines.
- Adjusting the Pole Target: Create a new bone outside of your main armature to act as a pole target. This controls the direction the knee or elbow points. Set this bone as the Pole Target in the IK constraint and adjust the Pole Angle to align your limb correctly.
- Controlling with the Target Bone: Move and rotate the target bone to control the movement of the entire IK chain. This simplifies posing, as you only need to adjust the end effector rather than each individual joint.
- Weight Painting for IK: Sometimes, you may need to fine-tune how the IK affects your mesh. Use weight painting to adjust the influence of the IK constraint on different parts of your model.
- Testing and Refinement: Test the movement of your IK setup by moving the target bone and adjusting as necessary. Ensure the movements look natural and adjust the constraint settings and weight painting as needed.
Applying inverse kinematics in Blender allows animators to create more realistic and natural movements with less effort. IK is particularly useful for animating limbs but can be applied to any chain of bones for improved control and efficiency in your animations.

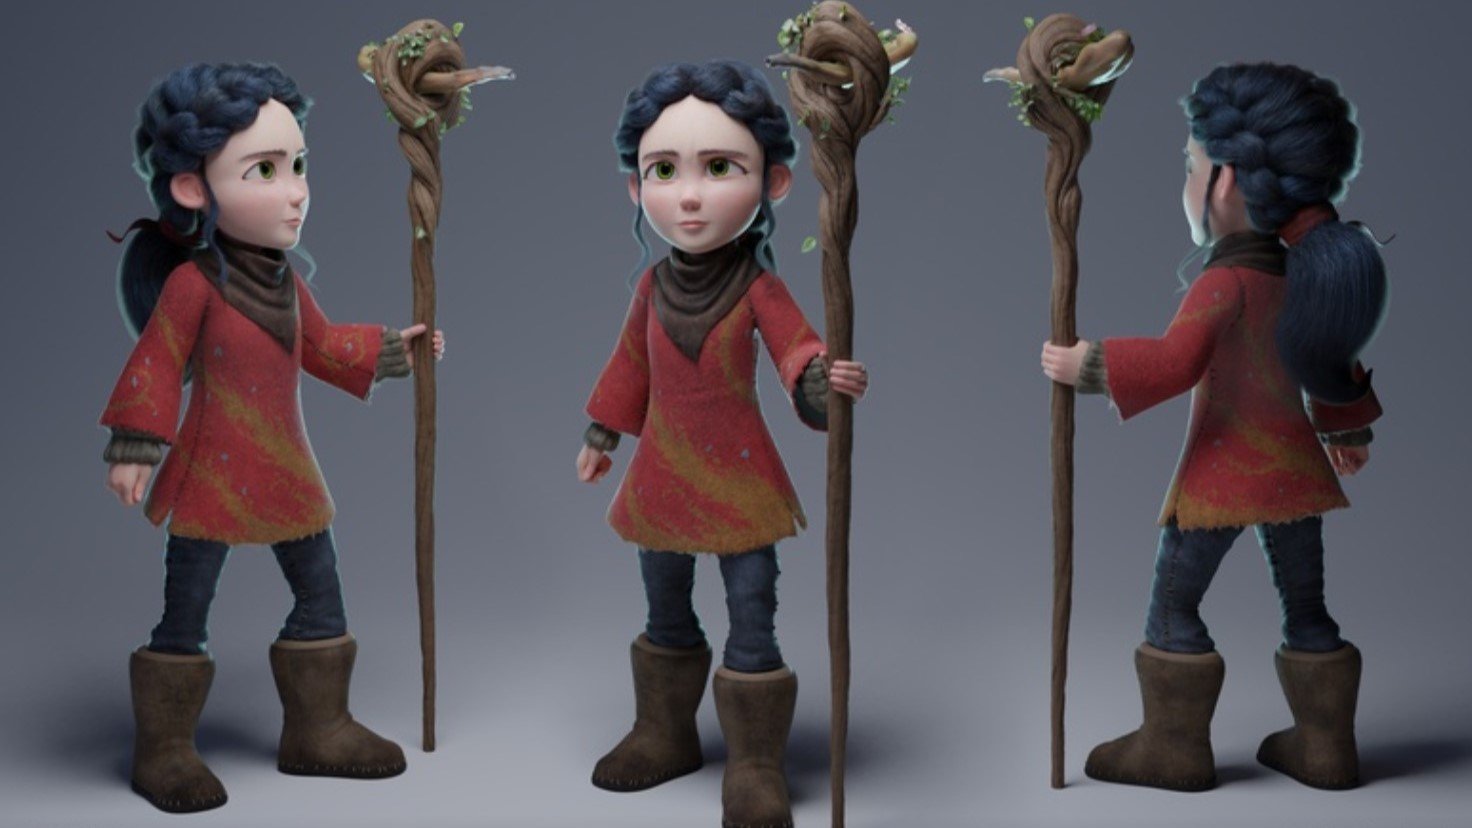
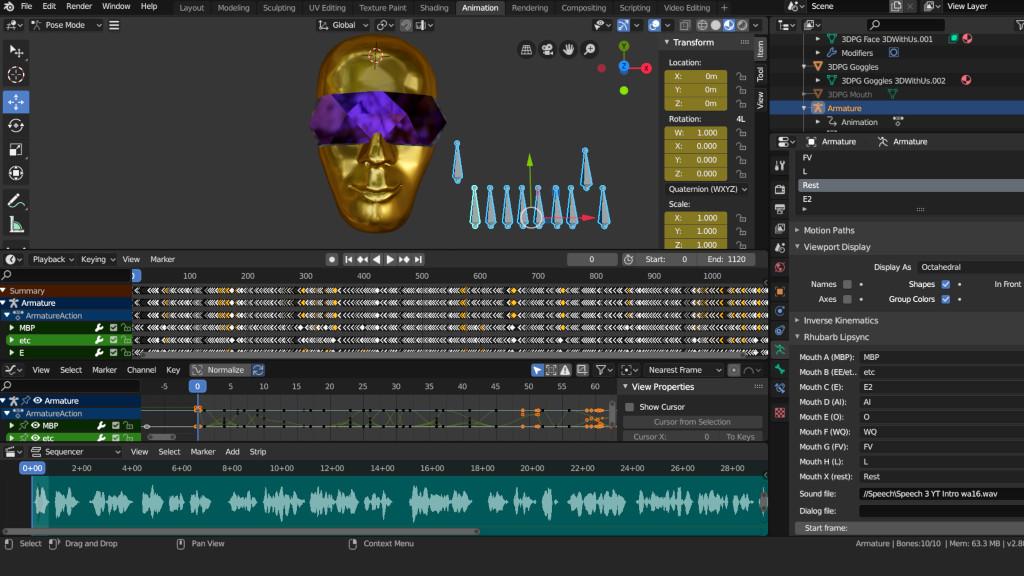
Animating Facial Expressions and Lip Sync
Animating facial expressions and achieving realistic lip sync in Blender can bring your characters to life. This process involves using a combination of shape keys and bone-driven animations to create expressive characters.
- Creating Shape Keys: Shape keys are used to deform your character\"s mesh for different facial expressions. In Object Mode, select your character’s mesh, go to the Object Data Properties panel, and add shape keys for various expressions (smile, frown, blink, etc.).
- Animating Shape Keys: Switch to the Animation workspace, and in the Dope Sheet, change to Shape Key Editor mode. Here, you can insert keyframes for each shape key to control their influence over time for your animation.
- Setting Up Lip Sync: For lip sync, create shape keys that correspond to the basic phoneme shapes that the mouth makes when speaking (e.g., A, E, I, O, U, M, B, P, F, etc.).
- Importing Audio: To sync the lip movements with dialogue, import your audio clip into Blender. Go to the Video Sequencer Editor, add your audio file, and then align your shape key animations with the audio waveform.
- Bone-Driven Facial Rigging: For more complex facial animations, consider creating a facial rig with bones. This allows for more nuanced control over facial features. Parent these bones to your mesh and use them in conjunction with shape keys for detailed expressions.
- Synchronizing Dialogue: Use the audio waveform in the Video Sequencer as a guide to match your shape key animations with the spoken words. Pay attention to the timing of consonants and vowels to make the lip movements convincing.
Animating facial expressions and lip sync requires patience and attention to detail. By combining shape keys with a robust facial rig, you can achieve highly expressive and natural-looking characters in Blender.

Adding Materials and Textures to Enhance Realism
Materials and textures are crucial for adding realism to your 3D animations in Blender. They define the appearance of your models, from color and glossiness to the intricacy of surfaces. Here\"s how to apply materials and textures to your models.
- Creating Materials: In the Properties panel, switch to the Material Properties tab. Click the \"New\" button to create a new material. You can adjust the color, specular intensity, and roughness to simulate various surfaces.
- Applying Textures: Textures give your materials complexity and detail. Go to the Texture Properties tab, click \"New\" to add a texture, and select the type of texture (Image or procedural). For image textures, you can use photographs or hand-painted textures.
- Mapping Textures: Properly map your textures to the model using the UV Mapping technique. In Edit Mode, unwrap your model (U key) and adjust the UV layout in the UV/Image Editor to align with your texture.
- Using Nodes for Advanced Materials: For more complex materials, switch to the Shader Editor and use nodes to combine different shaders, textures, and effects. Nodes offer powerful control over the final appearance of your materials.
- Simulating Real-World Materials: Use the Principled BSDF shader for realistic materials, adjusting parameters like metallic, subsurface scattering, and clearcoat to mimic real-world materials.
- Adding Bump and Normal Maps: Enhance surface detail without adding geometry by using bump and normal maps. These textures simulate the appearance of depth on a surface and are particularly useful for adding realism to fabrics, wood, and other materials.
By carefully crafting materials and applying textures, you can significantly enhance the realism of your 3D animations. Experiment with different settings and techniques to achieve the desired look for your projects.
_HOOK_
Lighting and Rendering Your Animated Scene
Lighting and rendering are crucial steps in the animation process, transforming your 3D scene into a final video or image with realistic lighting and shadows. Here\"s how to effectively light and render your scene in Blender.
- Setting Up Lights: Blender offers various light types (Point, Sun, Spot, Area) to mimic real-world lighting. Place lights strategically in your scene to highlight key areas, create depth, and set the mood. Adjust intensity and color to suit the scene\"s atmosphere.
- Using HDRI for Environmental Lighting: High Dynamic Range Images (HDRI) can be used for realistic environmental lighting. In the World Properties tab, add an environment texture and select an HDRI image. This provides natural lighting and reflections.
- Configuring Camera Settings: Position your camera to frame your scene correctly. In the Camera Properties tab, adjust focal length, depth of field, and other settings to achieve the desired composition and focus effects.
- Choosing a Render Engine: Blender includes different render engines like Eevee (real-time) and Cycles (ray-traced). Choose the one that best suits your needs based on quality and rendering time.
- Setting Render Properties: In the Render Properties tab, set your output resolution, frame rate, and file format. For animations, ensure you select a video format or a sequence of images.
- Adding Post-Processing Effects: Use the Compositor in Blender to add final touches like color grading, glare, or blur effects. This can greatly enhance the visual appeal of your rendered scene.
- Rendering Your Animation: With everything set up, click on Render > Render Animation (or press Ctrl+F12) to start rendering your scene. Rendering can take a significant amount of time, especially for complex scenes or high-quality settings.
Proper lighting and rendering are essential for bringing your animated scene to life. By carefully setting up your scene, choosing the right render settings, and applying post-processing effects, you can achieve stunning results that captivate your audience.
Exporting Your Animation for Sharing
Once you have completed your animation in Blender, the next step is to export it so you can share it with others. This section will guide you through the process of exporting your animation, ensuring it\"s in the right format and quality for your intended audience.
- Choose the Right Export Format: Blender supports various formats for exporting animations, including AVI, MPEG, and Quicktime for videos, and OBJ, FBX, and 3DS for 3D models. For most video-sharing platforms, MP4 (MPEG-4) is widely recommended due to its balance of quality and file size.
- Set Up Your Render Settings: Before exporting, adjust your render settings to match the quality and resolution you desire. You can find these settings in the Properties panel under the Render tab. Consider factors like frame rate, resolution, and aspect ratio, ensuring they align with your project\"s requirements.
- Include All Necessary Data: Ensure that all relevant data such as textures, materials, and external files are packed with your Blender file. Use the \"File\" menu to \"External Data\" > \"Automatically Pack into .blend\" to include these in your project file.
- Choose Your Export Location: Select where you want to save your exported file. It\"s a good idea to create a dedicated folder for your project exports to keep things organized.
- Export Your Animation: With everything set up, go to \"File\" > \"Export\" and choose your desired format. Follow the prompts to configure any additional options specific to the format you\"re exporting to, then click \"Export Animation\" or the equivalent button to begin the export process.
- Review the Exported Animation: After exporting, it\"s crucial to review your animation to ensure everything looks and plays as expected. Check for any issues with playback quality, missing textures, or other discrepancies that may have occurred during the export process.
- Share Your Work: Once satisfied with the exported animation, you\"re ready to share it. You can upload it to video sharing platforms, social media, or any other medium you prefer. Remember to consider copyright and licensing issues, ensuring you have the rights to all assets used in your animation.
Exporting your animation is the final step in the Blender animation process, allowing you to share your creative work with the world. By following these steps, you can ensure your animation is seen in the best possible light.
Additional Tips and Resources for Learning Blender Animation
Mastering Blender animation is a journey filled with learning and creativity. To help you along the way, here are some additional tips and resources that can enhance your skills and understanding of Blender animation.
- Practice Regularly: Like any skill, animation improves with practice. Set aside time regularly to experiment with different features and techniques in Blender.
- Join Blender Communities: Online communities and forums such as Blender Artists Forum or the Blender subreddit are great places to ask questions, share your work, and receive feedback from other Blender users.
- Follow Blender Tutorials: There are countless tutorials available online for Blender users of all skill levels. Websites like Blender Guru, CG Cookie, and BlenderNation offer tutorials that range from beginner to advanced topics.
- Study Animation Fundamentals: Understanding the basic principles of animation, such as timing, spacing, and anticipation, can greatly improve the quality of your work. Books like \"The Animator\"s Survival Kit\" by Richard Williams are excellent resources.
- Explore Blender Documentation: Blender\"s official documentation is an invaluable resource for learning about every aspect of the software. It\"s regularly updated and includes guides on everything from basic operations to advanced features.
- Participate in Challenges and Competitions: Engaging in community challenges or competitions can be a fun way to test your skills, learn new techniques, and see how other artists approach animation in Blender.
- Use Reference Materials: When animating, reference videos or images can be incredibly helpful. Studying the movement of real objects or people can provide insights into making your animations more realistic.
- Keep Up with Blender Updates: Blender is constantly being updated with new features and improvements. Stay informed about the latest updates and how they can impact your animation workflow.
By leveraging these tips and resources, you can continue to grow as a Blender animator. Remember, the journey of learning animation is ongoing, and every project brings an opportunity to learn something new.
Embark on a creative journey with Blender and unlock the full potential of 3D animation. With these comprehensive guides, tips, and resources, you\"re well on your way to bringing your imaginative worlds to life. Start animating today!