Topic floor plan tutorial autocad: Embark on a journey to master floor plan design using AutoCAD with our comprehensive tutorial, guiding you from basic concepts to advanced techniques for professional layouts.
Table of Content
- How to create a floor plan in AutoCAD?
- Understanding the Basics of AutoCAD for Floor Plans
- Setting Up Your Workspace for Efficiency
- Step-by-Step Guide to Creating Your First Floor Plan
- Utilizing Layers and Blocks for Organized Design
- Drawing and Modifying Walls, Doors, and Windows
- Adding Architectural Details and Furniture
- YOUTUBE: AutoCAD Floor Plan Tutorial
- Implementing Dimensions and Annotations for Clarity
- Applying Textures and Materials for Realistic Visuals
- Exporting and Sharing Your Floor Plan
- Tips and Tricks for Advanced Floor Plan Design
- Common Pitfalls to Avoid in Floor Plan Design
- Resources for Further Learning and Inspiration
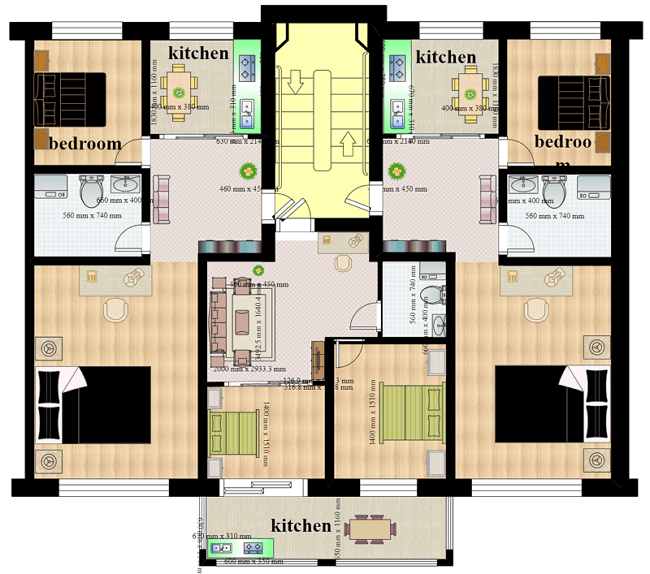
How to create a floor plan in AutoCAD?
To create a floor plan in AutoCAD, follow these steps:
- Launch AutoCAD and open a new drawing file.
- Set the necessary drawing units and scale for your floor plan.
- Start drawing the walls by using the LINE command. Specify the starting point and then the end point to create a line segment representing a wall.
- Continue drawing walls by repeating the previous step until the outline of your floor plan is complete.
- Add openings for doors and windows using the RECTANGLE or POLYLINE command.
- Use the HATCH command to fill in areas such as rooms with the desired pattern or color.
- Label the rooms and other important features using the TEXT command.
- Add dimensions to indicate the size of the rooms and other elements using the DIMENSION command.
- Add furniture and fixtures using AutoCAD blocks. You can either download pre-made blocks or create your own.
- Apply any finishing touches such as adding annotations, symbols, or additional details as needed.
- Save your floor plan and print or export it as required.
READ MORE:
Understanding the Basics of AutoCAD for Floor Plans
Starting with AutoCAD for floor plans requires familiarity with its interface and fundamental features. This section covers the essentials to get you up and running with creating detailed and accurate floor plans.
- Opening AutoCAD: Launch AutoCAD and familiarize yourself with the user interface. Locate the toolbar, command line, and drawing area.
- Setting Up a New Drawing: Begin by setting the correct unit of measurement. Go to \"Format\" > \"Units\" and select your preferred units (e.g., millimeters, inches).
- Drawing Basic Shapes: Learn how to draw basic shapes, such as lines, rectangles, and circles, which form the foundation of your floor plan. Use the \"LINE\", \"RECTANGLE\", and \"CIRCLE\" commands.
- Using Layers: Organize your drawing by using layers for different elements of your floor plan, such as walls, doors, and furniture. This will help in managing visibility and editing parts of your drawing efficiently.
- Creating Walls: Use the \"LINE\" or \"POLYLINE\" tool to draw the outer and inner walls of your plan. Adjust the line thickness to represent walls accurately.
- Adding Doors and Windows: Insert doors and windows by drawing them on the appropriate layers. Use blocks or draw them manually to indicate their positions.
- Dimensioning: Add dimensions to your floor plan to provide accurate measurements. Use the \"DIMLINEAR\" command for linear dimensions and \"DIMRADIAL\" for circular elements.
- Applying Text: Label rooms and areas using the \"TEXT\" command. Choose a readable font size and style to ensure clarity.
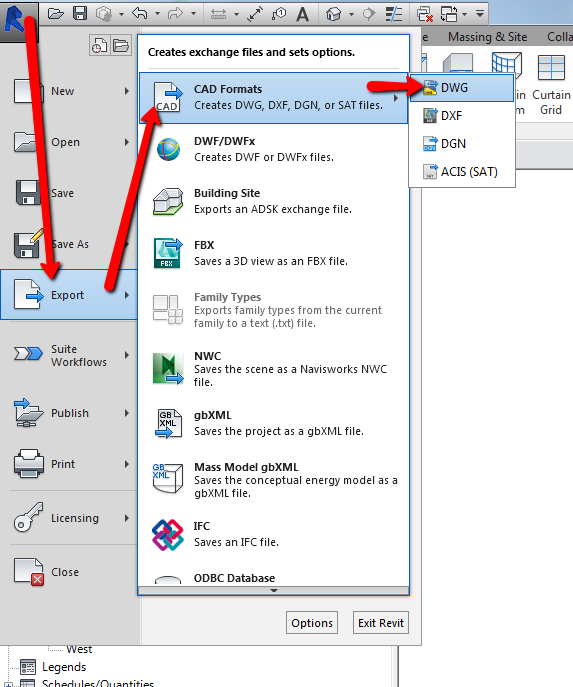
- Saving and Exporting: Regularly save your work. Export your floor plan in various formats (e.g., DWG, PDF) for sharing or printing.
By mastering these basics, you\"ll be well-equipped to tackle more complex floor plan projects and utilize AutoCAD\"s full potential for architectural design.

Setting Up Your Workspace for Efficiency
Optimizing your AutoCAD workspace is essential for efficient and productive floor plan design. This section will guide you through customizing your workspace for maximum productivity.
- Customize the User Interface: Tailor the AutoCAD interface to suit your workflow. Go to \"Workspace Settings\" and adjust the toolbars, command line, and palettes to have the tools you use most frequently easily accessible.
- Use Keyboard Shortcuts: Familiarize yourself with AutoCAD\"s keyboard shortcuts or create your own for common actions. This can significantly speed up your drawing process.
- Template Setup: Create or modify a template with predefined settings such as layer names, styles, and drawing units. This saves time when starting new projects.
- Layer Management: Organize your layers logically. Consider creating layers for different elements like walls, electrical, plumbing, and furniture for easier editing and visibility control.
- Block Library: Develop a library of blocks for frequently used items like furniture, doors, and windows. This allows for quick insertion without needing to redraw components.
- Tool Palettes: Customize tool palettes with commands, blocks, hatches, and other frequently used elements. This enables quick access and insertion into your drawings.
- Screen Real Estate: Arrange your workspace to maximize the drawing area. Minimize or auto-hide palettes that are not in constant use.
- Multiple Monitors: If possible, use multiple monitors to extend your workspace. Keep the drawing area on one screen and toolbars or palettes on the other for a less cluttered workspace.
- Regular Updates and Maintenance: Ensure AutoCAD is up to date with the latest features and bug fixes. Regularly clean up and organize your files for optimal performance.
By setting up your workspace for efficiency, you can streamline your design process, reduce errors, and increase productivity when working on floor plans in AutoCAD.

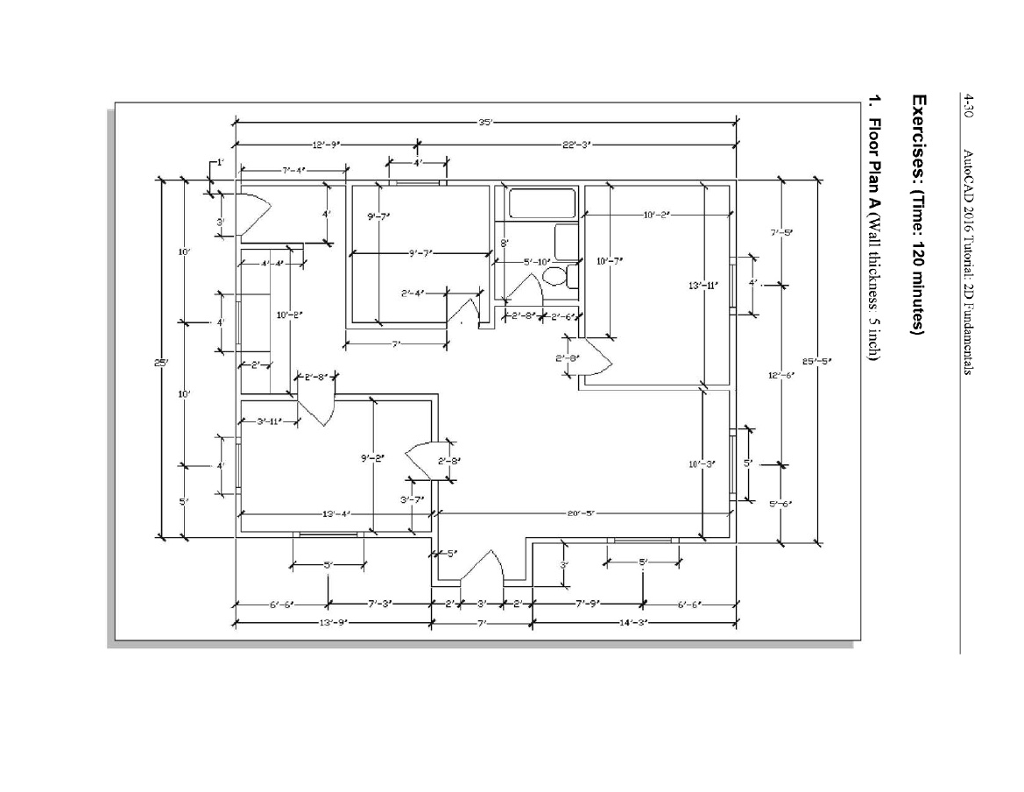
Step-by-Step Guide to Creating Your First Floor Plan
Creating your first floor plan in AutoCAD can seem daunting, but with a step-by-step approach, you\"ll find it\"s quite achievable. Follow these steps to create a basic floor plan that includes all the necessary details.
- Start a New Drawing: Open AutoCAD and start a new drawing using your pre-configured template that already includes your preferred settings and layers.
- Set Drawing Units: Ensure your drawing units are set to your project requirements. Use the \"UNITS\" command to set to architectural or metric, depending on your region.
- Draw the Exterior Walls: Begin by drawing the exterior walls of your design using the \"RECTANGLE\" or \"LINE\" tool, based on the dimensions of your plan.
- Add Interior Walls: Use the \"POLYLINE\" tool to draw interior walls, paying attention to the thickness for accuracy.
- Insert Doors and Windows: Place doors and windows by using blocks or drawing them manually. Make sure they\"re on the correct layer and accurately positioned.
- Add Architectural Features: Include important architectural features such as stairs, columns, and built-in cabinets using the appropriate tools and layers.
- Draw Dimensions: Use the \"DIMENSION\" tools to add measurements to your walls and spaces, ensuring your plan is clear and can be easily understood by others.
- Label Rooms and Spaces: With the \"TEXT\" tool, add labels to each room and space, including room names and square footage if necessary.
- Apply Finishing Touches: Add furniture, fixtures, and any other elements to give context to your space. Utilize blocks for efficiency and consistency.
- Review and Revise: Take time to review your floor plan. Check for accuracy, completeness, and ensure that it meets the project\"s requirements.
- Save and Export: Once satisfied, save your drawing. Export it to a preferred format like DWG or PDF for sharing or printing.
This guide provides a foundation for creating floor plans in AutoCAD, but remember, practice and experimentation are key to mastering the software\"s full capabilities.

Utilizing Layers and Blocks for Organized Design
Efficiently organizing your AutoCAD drawings with layers and blocks is crucial for managing complex floor plans. This approach enhances clarity and simplifies modifications. Here\"s how to effectively use layers and blocks in your design process.
- Understanding Layers: Layers in AutoCAD serve as a way to separate different elements of your drawing, such as walls, electrical layouts, and furniture. Each layer can be individually turned on or off, making it easier to work with complex components.
- Creating and Managing Layers: Start by creating layers for each aspect of your floor plan. Use descriptive names (e.g., \"Walls\", \"Doors\", \"Text\") and assign different colors for ease of identification.
- Assigning Elements to Layers: Ensure every element in your drawing is assigned to the appropriate layer. This practice keeps your drawing organized and makes it easier to edit specific features without affecting others.
- Using Blocks: Blocks are reusable symbols or objects that you can insert into your drawings. Create blocks for common elements like furniture, fixtures, and appliances to save time and ensure consistency across your designs.
- Creating a Block Library: Develop a library of blocks for various items you frequently use in your floor plans. This library can be a significant time-saver, allowing you to quickly add elements to your drawings.
- Inserting and Modifying Blocks: When you need to add an element from your block library to your drawing, simply insert the block onto the appropriate layer. Blocks can be easily scaled, rotated, and modified to fit your design needs.
- Layer States: Use layer states to save and restore different layer configurations. This feature is particularly useful when working on different aspects of your project or when needing to present specific views to clients or team members.
- Benefits of Organized Layer and Block Use: A well-organized drawing makes it easier to navigate, edit, and understand your design. It also facilitates collaboration with others, as they can quickly understand your layering system and find necessary elements.
By mastering the use of layers and blocks, you\"ll streamline your workflow, reduce errors, and create more detailed and organized floor plans in AutoCAD.
_HOOK_
Drawing and Modifying Walls, Doors, and Windows
Creating accurate walls, doors, and windows is fundamental to drafting a floor plan in AutoCAD. This section will guide you through the process of drawing these elements and making necessary modifications to suit your design needs.
- Drawing Walls: Use the \"LINE\" or \"POLYLINE\" tool to draw the exterior and interior walls. For walls of consistent thickness, set the \"POLYLINE\" width to represent the wall thickness accurately. Place exterior walls on a specific layer and use a different layer for interior walls to simplify modifications and visibility control.
- Adding Doors: Doors can be added by creating a gap in the wall and inserting a door block. Ensure doors are drawn to scale and placed accurately according to your plan. Use the \"BLOCK\" command to create and insert door symbols, facilitating easy replication and modification.
- Inserting Windows: Similar to doors, windows are added by creating openings in the walls and inserting window blocks. Adjust the size and placement to match your design specifications. Utilize layers dedicated to windows for better organization and editing flexibility.
- Modifying Walls: To modify wall lengths or positions, use the \"STRETCH\" or \"MOVE\" commands. These tools allow you to adjust your design as needed without redrawing elements from scratch.
- Editing Doors and Windows: If adjustments to doors or windows are necessary, use the \"ROTATE\", \"SCALE\", or \"MIRROR\" commands to modify their orientation, size, or position. Ensure that these modifications meet the functional and aesthetic requirements of your floor plan.
- Utilizing Layers for Modifications: Keep your design organized by making modifications on the correct layers. This approach ensures that changes can be made easily without affecting unrelated elements of your floor plan.
- Dimensioning and Annotation: After drawing and modifying walls, doors, and windows, add dimensions and annotations to provide clear, measurable details that are essential for construction or further design work.
By following these steps, you can efficiently draw and modify walls, doors, and windows in AutoCAD, creating a solid foundation for your floor plan designs.

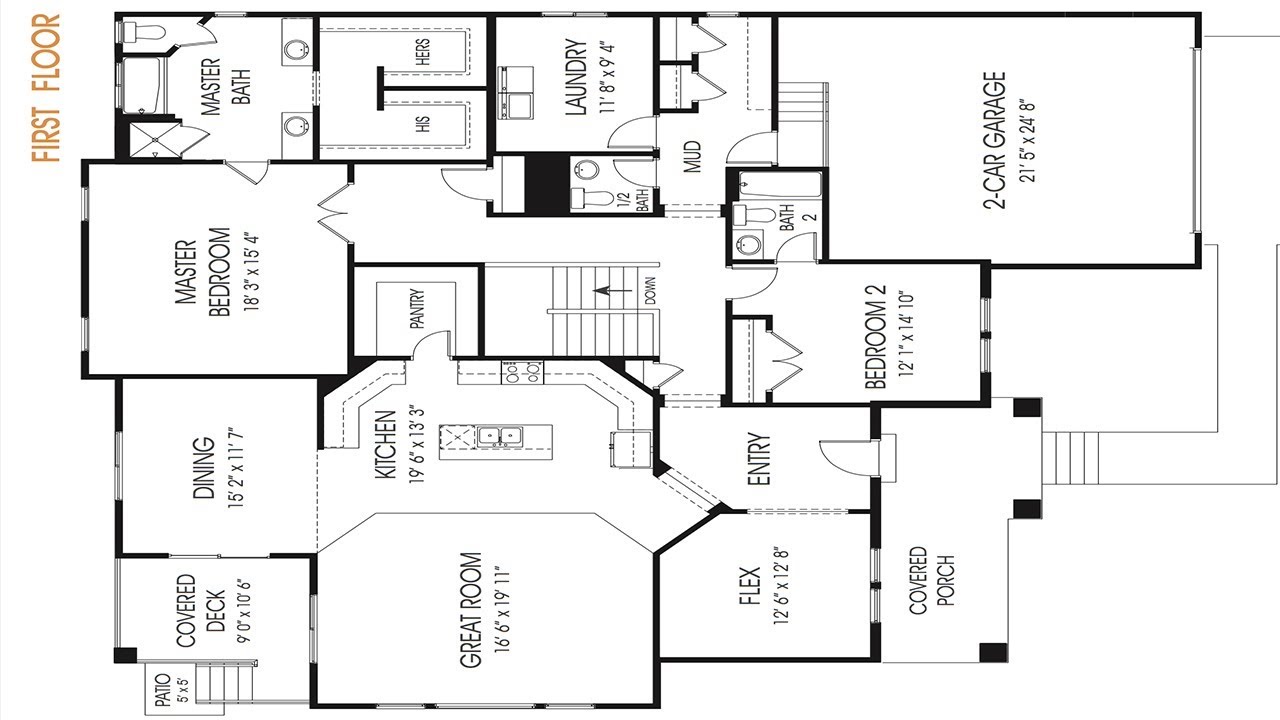
Adding Architectural Details and Furniture
Enhancing your floor plan with architectural details and furniture not only adds realism but also provides a clearer understanding of space utilization. This section guides you through the process of incorporating these elements into your AutoCAD floor plans.
- Using Blocks for Furniture: AutoCAD\"s block functionality allows you to insert pre-designed furniture elements into your floor plans. Access the \"Tool Palettes\" or \"DesignCenter\" to find and insert furniture blocks, such as sofas, tables, and chairs, placing them on a dedicated layer for easy management.
- Customizing Furniture Blocks: If the available blocks don\"t meet your needs, you can create custom furniture blocks. Use the \"BLOCK\" command to create a new block, drawing the furniture piece to scale. This allows for consistent reuse in current and future projects.
- Architectural Details: Add architectural details such as moldings, trims, and built-ins using the \"LINE\" and \"POLYLINE\" tools. These details should be placed on a separate layer from the main structural elements to maintain drawing organization.
- Adding Textures and Materials: While detailed textures and materials are more commonly used in rendering software, basic representations can be added to your AutoCAD floor plan using hatches. Use the \"HATCH\" command to fill areas with patterns that represent different materials, enhancing the visual appeal of your plan.
- Dimensioning for Details and Furniture: Provide dimensions for architectural details and furniture to ensure clear communication of your design intent. Use the \"DIMENSION\" command to add accurate measurements, facilitating easier interpretation and implementation.
- Layer Management: Ensure each type of detail and piece of furniture is placed on its appropriate layer. This organizational strategy simplifies the editing process and allows for the selective display of information.
- Reviewing and Adjusting Layouts: After adding details and furniture, review your layout to ensure everything is correctly placed and scaled. Make adjustments as necessary to optimize space usage and aesthetic appeal.
Incorporating architectural details and furniture into your floor plans not only brings your designs to life but also aids in the visualization and planning process, making your plans more informative and engaging.
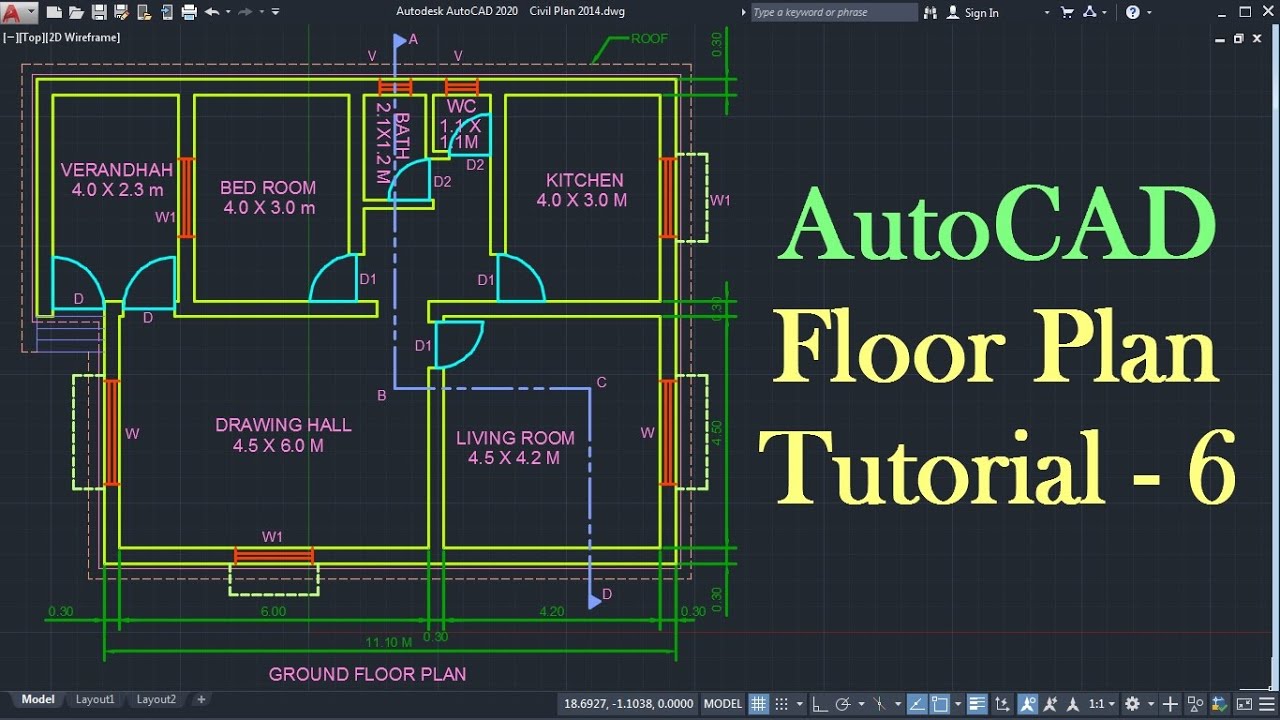
AutoCAD Floor Plan Tutorial
Are you ready to up your design game? Discover the power of AutoCAD and unlock endless possibilities to create stunning 2D and 3D models. Watch this video tutorial now and take your designs to new heights!
AutoCAD 2D Basics - Tutorial to draw a simple floor plan PART 1
Create your dream home with ease using floor plans! This video tutorial will guide you step-by-step in creating professional floor plans that perfectly suit your style and needs. Don\'t miss out on the opportunity to transform your space!
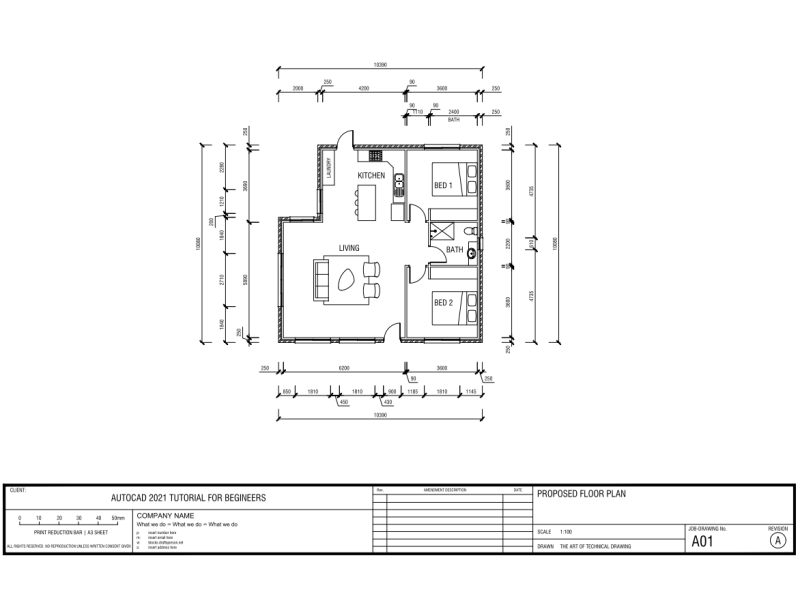
Implementing Dimensions and Annotations for Clarity
Dimensions and annotations are critical for conveying the precise measurements and important details of your floor plan in AutoCAD. This section provides a step-by-step guide on how to effectively add these elements for clear and understandable plans.
- Adding Dimensions: Start by using the \"DIMLINEAR\" command for straight dimensions along walls and the \"DIMRADIAL\" for curved elements like arches. Ensure each dimension is placed on a separate \"Dimensions\" layer for organization.
- Dimension Styles: Customize your dimension style through the \"Dimension Style Manager\". Here, you can adjust text size, arrow styles, and line weight to ensure that your dimensions are clear and aesthetically pleasing.
- Using Leaders and Text: For annotations, use the \"MLEADER\" command to point to specific features of your plan with a leader line and text. This is ideal for noting material specifications or construction notes.
- Room Labels: Clearly label each room using the \"TEXT\" command. Include room names and any other relevant information such as floor finishes or ceiling heights.
- Door and Window Tags: Utilize tags to identify doors and windows. Each tag should correspond to a schedule that details the type, size, and other specifications of the doors and windows used in the plan.
- Creating Schedules: AutoCAD allows for the creation of dynamic blocks and tables that can serve as schedules for doors, windows, and other elements. These schedules automatically update as changes are made to the plan.
- Checking for Clarity: After implementing dimensions and annotations, review your plan to ensure that all elements are correctly labeled and that the dimensions are accurate and readable. Adjust text sizes and line weights as needed for clarity.
By carefully implementing dimensions and annotations, you provide all the necessary information for understanding the spatial relationships, sizes, and requirements of your floor plan, ensuring that it can be accurately interpreted and implemented.
Applying Textures and Materials for Realistic Visuals
While AutoCAD is primarily a drafting tool, applying textures and materials can enhance your floor plans with a touch of realism, making them more visually appealing and easier to interpret. Follow these steps to apply textures and simulate materials in your AutoCAD floor plans.
- Understanding Hatch Patterns: AutoCAD\"s \"HATCH\" command allows you to fill areas with patterns that simulate various materials and textures. Explore the hatch pattern library to find suitable textures for flooring, walls, roofs, and other elements.
- Selecting Materials: Choose materials that accurately reflect the intended finish of each space. Use concrete patterns for sidewalks, wood grains for floors, and simple patterns to represent carpeting or tiles.
- Applying Hatches: To apply a texture, select the \"HATCH\" command, then pick the area you wish to fill. In the hatch creation menu, select the pattern and adjust the scale and angle to achieve the desired appearance.
- Layer Management for Textures: Assign hatches to specific layers based on the material they represent. This allows you to control the visibility of different materials, which is especially useful during the design review process.
- Editing Hatch Patterns: If a texture doesn\"t fit your needs, use the \"HATCHEDIT\" command to modify its properties, such as scale, angle, or even the pattern itself. This flexibility allows you to customize materials to match your design vision precisely.
- Consistency in Application: Ensure that the textures and materials used throughout the floor plan are consistent in scale and representation. This consistency helps in maintaining a cohesive visual language across the plan.
- Review and Adjust: After applying textures, review your floor plan to ensure that the materials convey the correct information and add to the overall readability of the plan. Adjust as necessary to enhance clarity and visual appeal.
Applying textures and materials in AutoCAD can significantly enhance the presentation of your floor plans, providing a richer understanding of the intended design and material finishes.

Exporting and Sharing Your Floor Plan
While AutoCAD is primarily a drafting tool, applying textures and materials can enhance your floor plans with a touch of realism, making them more visually appealing and easier to interpret. Follow these steps to apply textures and simulate materials in your AutoCAD floor plans.
- Understanding Hatch Patterns: AutoCAD\"s \"HATCH\" command allows you to fill areas with patterns that simulate various materials and textures. Explore the hatch pattern library to find suitable textures for flooring, walls, roofs, and other elements.
- Selecting Materials: Choose materials that accurately reflect the intended finish of each space. Use concrete patterns for sidewalks, wood grains for floors, and simple patterns to represent carpeting or tiles.
- Applying Hatches: To apply a texture, select the \"HATCH\" command, then pick the area you wish to fill. In the hatch creation menu, select the pattern and adjust the scale and angle to achieve the desired appearance.
- Layer Management for Textures: Assign hatches to specific layers based on the material they represent. This allows you to control the visibility of different materials, which is especially useful during the design review process.
- Editing Hatch Patterns: If a texture doesn\"t fit your needs, use the \"HATCHEDIT\" command to modify its properties, such as scale, angle, or even the pattern itself. This flexibility allows you to customize materials to match your design vision precisely.
- Consistency in Application: Ensure that the textures and materials used throughout the floor plan are consistent in scale and representation. This consistency helps in maintaining a cohesive visual language across the plan.
- Review and Adjust: After applying textures, review your floor plan to ensure that the materials convey the correct information and add to the overall readability of the plan. Adjust as necessary to enhance clarity and visual appeal.
Applying textures and materials in AutoCAD can significantly enhance the presentation of your floor plans, providing a richer understanding of the intended design and material finishes.
_HOOK_
Tips and Tricks for Advanced Floor Plan Design
Mastering advanced floor plan design in AutoCAD requires not only a strong foundation in the basics but also an understanding of the nuanced techniques that can elevate your drawings. Here are some tips and tricks to enhance your floor plan designs:
- Utilize Dynamic Blocks: Save time by creating dynamic blocks for common elements such as furniture, doors, and windows. These blocks can be easily adjusted for size and properties without needing to redraw them.
- Implement Layer Management: Organize your drawing by using layers effectively. Assign specific elements to layers (e.g., electrical, plumbing) to simplify visibility control and streamline modifications.
- Use Reference Drawings: Import external references (Xrefs) for large projects to keep your file sizes manageable and improve drawing performance. Xrefs are especially useful for collaborating on projects, as changes in the reference file automatically update in your drawing.
- Explore Advanced Text and Dimension Styles: Create custom text and dimension styles to ensure consistency across your drawings. This can help in maintaining a professional appearance and clarity in your designs.
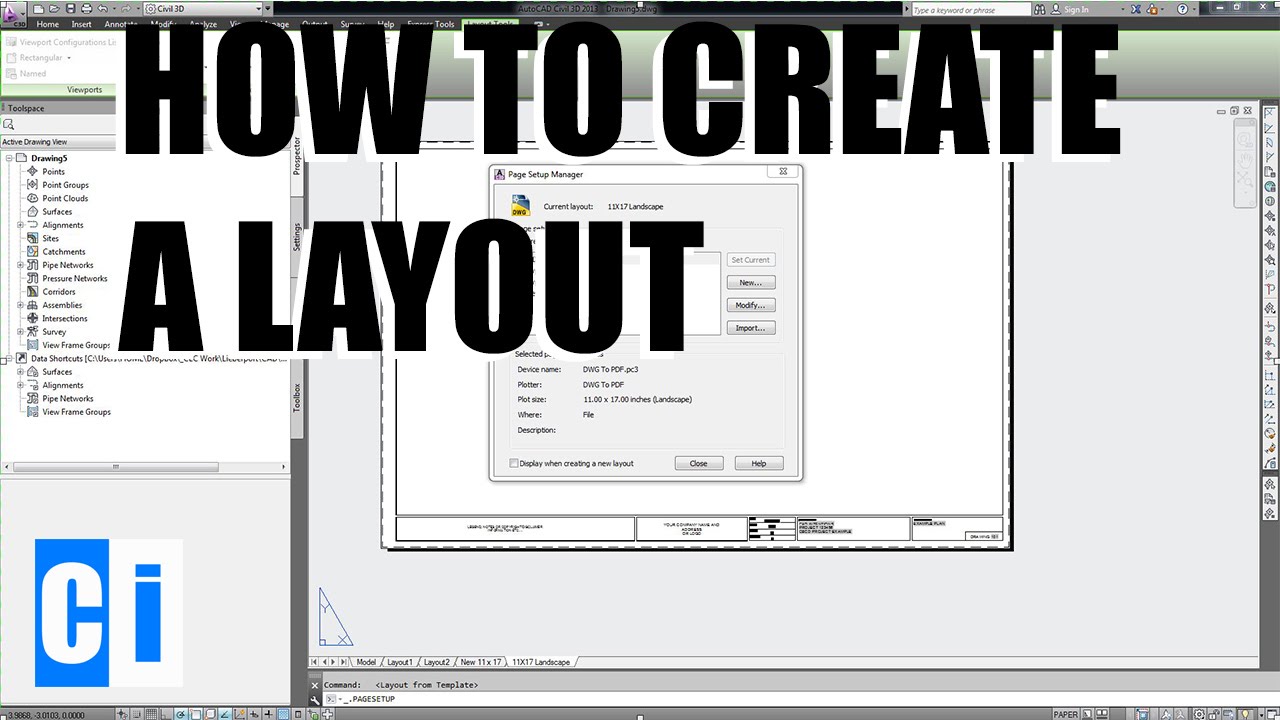
- Master the Use of Layouts and Viewports: For presenting your work, use layouts and viewports to display different views of your floor plan on a single sheet. This method is efficient for showing detailed sections alongside the overall plan.
- Apply Hatch Patterns and Gradients: Enhance the visual appeal of your floor plans by applying hatch patterns to denote different materials or areas. Gradients can also be used to add depth or highlight specific sections.
- Shortcut Keys: Increase your efficiency by mastering AutoCAD\"s shortcut keys. Customizing these shortcuts for the commands you use most can significantly speed up your workflow.
- Data Extraction: Use AutoCAD\"s data extraction tool to generate tables from your drawing objects. This can be particularly useful for creating schedules or inventories directly from your floor plan.
- Parametric Constraints: Apply parametric constraints to maintain relationships between objects in your design. This ensures that changes to one element (e.g., the length of a wall) automatically update related elements (e.g., adjacent walls).
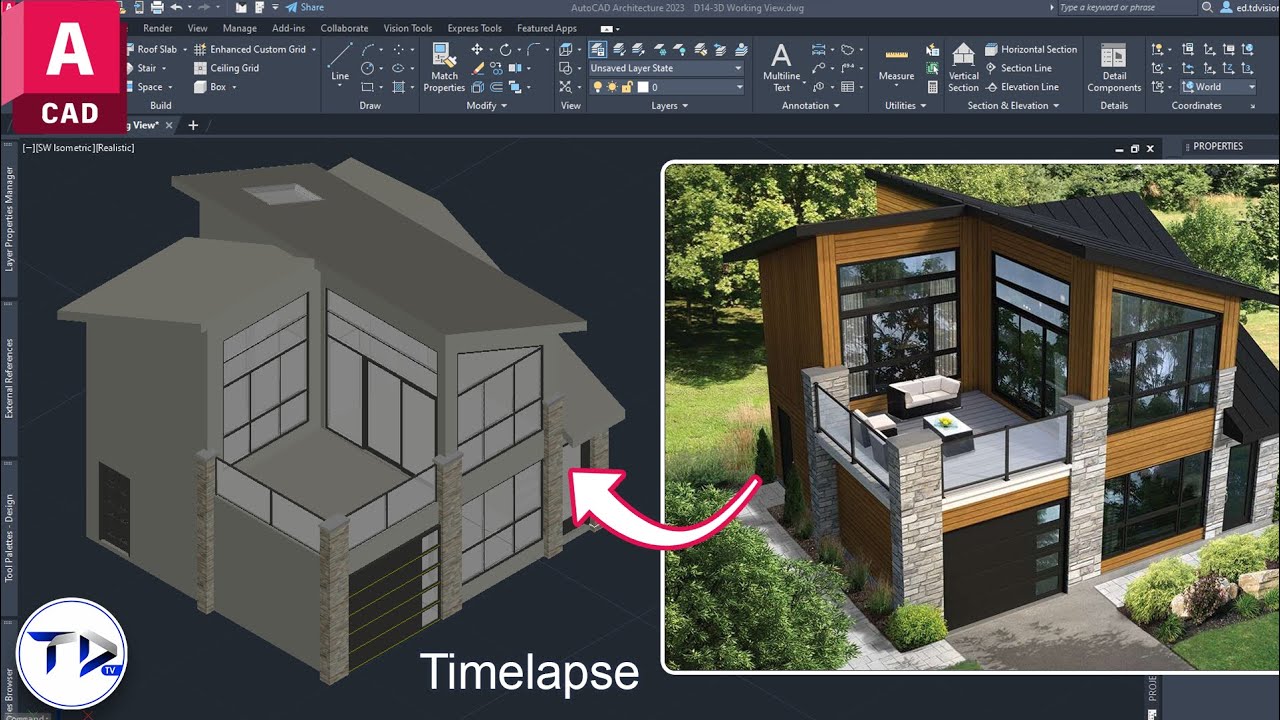
- Explore 3D Views: While floor plans are typically 2D, generating 3D views can provide valuable insights into the spatial relationships within a building. Use AutoCAD\"s 3D tools to create walkthroughs or renderings that can complement your floor plans.
Incorporating these advanced techniques into your AutoCAD workflow will not only improve the quality of your floor plans but also enhance your productivity and the communicative value of your designs. Always continue learning and exploring new features within AutoCAD to stay ahead in the field of architectural design.
Common Pitfalls to Avoid in Floor Plan Design
Designing floor plans in AutoCAD is a critical step in the architectural design process, but there are common pitfalls that can affect the quality and functionality of your designs. Being aware of these can help you create more effective and accurate floor plans.
- Ignoring Scale and Proportions: Always work with the correct scale and maintain accurate proportions between spaces. Disproportionate rooms or incorrect scaling can lead to unrealistic designs and problems during construction.
- Overlooking User Needs: Each space should be designed with the end-user in mind. Neglecting the needs of the occupants can result in a design that is beautiful but not functional.
- Inadequate Circulation Space: Ensure there is enough space for movement between areas. Inadequate hallways, doorways, and passageways can lead to congestion and diminish the usability of a space.
- Poor Placement of Windows and Doors: Windows and doors should be placed thoughtfully to enhance natural light, ventilation, and flow within the space. Improper placement can affect the room\"s functionality and comfort.
- Ignoring Building Codes and Standards: Compliance with local building codes and standards is crucial. Overlooking these regulations can lead to legal issues and costly modifications down the line.
- Lack of Flexibility: Designing too specifically for a current use without considering future changes can make a space quickly become obsolete. Incorporate flexibility in your designs to accommodate future needs.
- Insufficient Storage: Failing to include enough storage space is a common oversight that can impact the livability of a space. Plan for adequate storage solutions in your designs.
- Underestimating the Importance of Lighting: Lighting plays a crucial role in defining the ambiance and functionality of a space. Both natural and artificial lighting should be carefully planned.
- Forgetting about Privacy: In residential designs, in particular, consider the privacy between different spaces. Strategic placement of rooms and sound insulation should be considered to enhance privacy.
- Neglecting Outdoor Spaces: Outdoor spaces and how they connect with the interior are often overlooked. Consider transitions between indoor and outdoor areas to enhance the overall design.
Avoiding these pitfalls requires careful planning, attention to detail, and an understanding of the fundamentals of design and architecture. By keeping these common mistakes in mind, you can improve your floor plan designs and avoid issues that could compromise your projects.
READ MORE:
Resources for Further Learning and Inspiration
Expanding your knowledge and skills in floor plan design using AutoCAD can be both exciting and overwhelming. Fortunately, a wealth of resources is available to guide you through learning and inspiration. Here are some valuable resources to further your education and spark your creativity:
- AutoCAD Official Training Guides: Autodesk offers comprehensive training materials and tutorials that are perfect for beginners and advanced users alike. Their official guides cover everything from basic functionalities to complex design techniques.
- Online Courses and Tutorials: Websites like Udemy, Coursera, and LinkedIn Learning provide a range of courses that cater to different skill levels, from introductory courses to advanced architectural design with AutoCAD.
- YouTube Channels: Many experienced AutoCAD professionals share their knowledge on YouTube. Channels like CAD in black, The Lazy Arquitecto, and Mufasu CAD offer tutorials that are easy to follow and cover various aspects of floor plan design.
- AutoCAD Forums and Online Communities: Joining forums and online communities such as the Autodesk forums, Reddit\"s r/AutoCAD, or the CADTutor forum can be incredibly helpful. These platforms allow you to ask questions, share your work, and receive feedback from experienced users.
- Books and eBooks: There are numerous books available that focus on AutoCAD for architectural design. Titles such as \"Mastering AutoCAD for Architecture\" and \"AutoCAD and Its Applications Comprehensive\" provide in-depth insights and practical exercises.
- Inspirational Architecture Websites: Websites like ArchDaily, Dezeen, and Architectural Digest showcase innovative designs and can be a great source of inspiration for your own projects.
- Local Workshops and Meetups: Participating in local AutoCAD workshops or meetups can provide hands-on experience and networking opportunities with other designers and architects.
- Software Updates and Webinars: Stay updated with the latest AutoCAD features and participate in webinars offered by Autodesk. New tools and functionalities can significantly impact your design process and efficiency.
By exploring these resources, you can stay at the forefront of design technology, find inspiration for your projects, and continuously improve your skills in floor plan design using AutoCAD.
Embark on your journey to mastering AutoCAD for floor plans with our comprehensive guide, designed to equip you with the skills, techniques, and inspiration needed to bring your architectural visions to life.