Topic 3d tutorial autocad: Embark on your 3D design journey with our AutoCAD tutorial, unlocking the secrets to mastering 3D modeling, enhancing your skills, and bringing your imaginative projects to life effortlessly.
Table of Content
- How can I find a playlist of AutoCAD 3D tutorials and exercises on YouTube?
- Getting Started with 3D in AutoCAD
- Understanding the AutoCAD Interface for 3D Modeling
- Basic 3D Modeling Concepts
- Creating Your First 3D Model
- Advanced 3D Modeling Techniques
- Using 3D Editing and Modification Tools
- YOUTUBE: AutoCAD 2018 3D Tutorial for Beginners
- 3D Materials and Lighting
- Rendering and Presenting 3D Models
- Tips for Efficient 3D Modeling Workflows
- Resources for Further Learning and Practice
How can I find a playlist of AutoCAD 3D tutorials and exercises on YouTube?
You can find a playlist of AutoCAD 3D tutorials and exercises on YouTube by following these steps: 1. Open your web browser and go to the YouTube website. 2. In the search bar, type \"AutoCAD in 3D tutorials and exercises playlist\" and press Enter. 3. Look for the search results that match your query. In this case, the first search result is a playlist titled \"Autocad in 3D - tutorials and exercises\" on the YouTube channel. 4. Copy the URL of the playlist. In this case, the URL is \"https://youtube.com/playlist?list=PLe_I-JWckL7HOx1Ft6AdoZVUyVepxDnf4\". You can now access the AutoCAD 3D tutorials and exercises playlist on YouTube using the copied URL.
READ MORE:
Getting Started with 3D in AutoCAD
Beginning your journey into 3D modeling with AutoCAD opens a world of possibilities. This section guides you through the initial steps to navigate the 3D environment, ensuring a solid foundation for your creative projects.
- Understanding the Workspace: Start by familiarizing yourself with the 3D workspace. Switch to the 3D modeling workspace to access all the tools necessary for 3D modeling.
- Basic Navigation: Learn to navigate the 3D view. Practice zooming, panning, and orbiting your view to understand your model from all angles.
- Setting Up Units: Ensure your units are set up correctly for your project. Access the units control through the application menu to select your preferred measurement system.
- Creating Simple 3D Shapes: Begin by creating simple 3D shapes to get a feel for the modeling process. Use commands like BOX, CYLINDER, or SPHERE to create basic forms.
- Viewing in 3D: Utilize the view cube and the navigation bar for switching between different perspectives and views, enhancing your spatial understanding of the model.
- Using Visual Styles: Apply different visual styles to better see your model\"s edges, faces, and shading. This helps in understanding the form and function of your design.
With these steps, you\"re now ready to dive deeper into 3D modeling with AutoCAD. Remember, practice and experimentation are key to mastering the 3D environment.

Understanding the AutoCAD Interface for 3D Modeling
Navigating the AutoCAD interface for 3D modeling is crucial for efficient design work. This section breaks down the essential components and tools, simplifying your learning curve.
- Ribbon: The Ribbon at the top provides access to all the 3D tools, organized in tabs. Explore the \"Home,\" \"Insert,\" \"Annotate,\" \"View,\" and especially the \"3D Modeling\" tabs for relevant tools.
- Command Line: The command line, located at the bottom, is where you input commands directly, a fast and powerful way to execute actions without navigating through menus.
- Tool Palettes: Tool palettes offer easy access to frequently used tools and commands. Customize your palettes to streamline your workflow.
- ViewCube: The ViewCube in the top-right corner allows for intuitive orientation control, enabling you to rotate your view around your model easily.
- Navigation Bar: Beside the ViewCube, the navigation bar helps with zooming, panning, and changing the view type – essential for fine-tuning your perspective.
- Modeling Workspace: Switch to the 3D modeling workspace for a tailored environment. This workspace optimizes the interface for 3D work, highlighting tools and palettes suited for modeling.
Understanding these interface elements is your first step towards mastering 3D modeling in AutoCAD. Experiment with each component to become more familiar with the software\"s capabilities.
Basic 3D Modeling Concepts
Grasping the fundamental concepts of 3D modeling in AutoCAD is essential for creating detailed and accurate designs. This section introduces the core ideas and practices to get you started.
- Primitives: Begin with primitive shapes like boxes, spheres, cylinders, cones, and pyramids. These basic forms can be combined or modified to create more complex models.
- Extrusion: Learn how to extrude 2D shapes into 3D forms. This technique is fundamental for adding depth to flat drawings.
- Revolve: Revolving a 2D shape around an axis generates symmetrical 3D objects, perfect for creating round items like wheels or vases.
- Boolean Operations: Use Boolean operations to unite, subtract, or intersect 3D objects. These operations are crucial for shaping and refining your models.
- Modification Tools: Familiarize yourself with modification tools such as move, rotate, scale, and mirror. These tools are essential for adjusting and positioning your 3D objects accurately.
- Surfaces and Solids: Understand the difference between surface modeling (creating 3D forms with no mass) and solid modeling (creating 3D forms with mass and volume). Both are useful for different types of projects.
- Mesh Modeling: Mesh modeling allows for more freeform creation, providing flexibility in creating complex shapes that are not easily achieved with solids or surfaces.
These basic concepts serve as the building blocks for all 3D modeling projects in AutoCAD. Mastery of these will enable you to tackle more advanced designs with confidence.
Creating Your First 3D Model
Embarking on creating your first 3D model in AutoCAD is an exciting milestone. This step-by-step guide will walk you through the process, from conceptualization to the final product.
- Start with a Plan: Sketch your idea on paper or in AutoCAD using simple 2D lines and shapes. This initial plan will serve as the blueprint for your 3D model.
- Select a Primitive Shape: Begin by creating a primitive shape that closely resembles the basic form of your model. Use commands like BOX, CYLINDER, or SPHERE.
- Modify the Shape: Use modification tools to adjust the dimensions and proportions of your shape. Commands like MOVE, ROTATE, and SCALE are essential for this stage.
- Add Details: Add complexity by extruding, revolving, or using Boolean operations to combine shapes. Focus on one section at a time to gradually build up details.
- Apply Materials: Give your model a realistic appearance by applying materials. Choose from AutoCAD\"s library or create custom materials to suit your design.
- Set Up Lighting: Proper lighting can dramatically enhance the look of your model. Experiment with different lighting settings to highlight the best features of your design.
- Render the Model: Use the rendering tool to create a photorealistic image of your model. Adjust settings like quality and resolution to get the best result.
By following these steps, you\"ll create your first 3D model in AutoCAD. Remember, practice is key to improving your skills, so don\"t hesitate to experiment with different techniques and tools.
_HOOK_
Advanced 3D Modeling Techniques
Once you have a grasp on the basics of 3D modeling in AutoCAD, you can explore more sophisticated techniques to elevate your designs. This section delves into advanced strategies for creating intricate and detailed models.
- Solid Editing Tools: Master the solid editing tools such as SLICE, FILLET, CHAMFER, and SHELL to modify solids in complex ways, adding detail and sophistication to your models.
- Surface Modeling: Dive into surface modeling to create complex shapes with smooth curves and sleek finishes. Use LOFT, SWEEP, and NETWORK commands to manipulate surfaces in nuanced ways.
- NURBS Modeling: Utilize Non-Uniform Rational B-Splines (NURBS) for greater control over curves and surfaces. This technique is ideal for automotive and product design, where precision and smoothness are critical.
- Custom Materials and Textures: Develop custom materials and textures to give your models a unique look. Experiment with the Material Editor to adjust glossiness, opacity, and reflectivity.
- Advanced Lighting and Rendering: Enhance your models with advanced lighting techniques and high-quality rendering settings. Explore global illumination, HDRI backgrounds, and ray tracing for photorealistic outputs.
- Parametric Modeling: Implement parametric constraints to control dimensions and relationships between objects. This powerful feature ensures that changes to one part automatically update related parts.
- 3D Printing Preparation: Prepare your model for 3D printing by ensuring it is watertight, and has the correct thickness and support structures. Use the STLOUT command to export your model in a compatible format.
These advanced techniques require patience and practice to master, but they will significantly enhance your ability to create professional and complex 3D models in AutoCAD.
Using 3D Editing and Modification Tools
AutoCAD\"s suite of 3D editing and modification tools empower users to refine their designs with precision. Understanding how to effectively use these tools is crucial for any 3D modeling project. Here\"s an overview of essential tools and techniques to enhance your modeling workflow.
- Presspull: Easily modify 3D solids or create new solids by selecting a face or plane and extruding it with the PRESSPULL tool.
- Grip Editing: Use grips to dynamically move, rotate, and scale objects. This intuitive method allows for quick adjustments to your model\"s geometry.
- Align: The ALIGN command can precisely position objects in 3D space by aligning them with specific points on another object.
- Mirror: Create symmetrical models by mirroring objects across a specified mirror line. This tool is indispensable for designs that require symmetry.
- Array: Generate multiple copies of objects in a pattern with the ARRAY command. Use POLAR to create circular patterns or RECTANGULAR for grid patterns.
- Trim and Extend: The TRIM and EXTEND commands are essential for adjusting the edges and boundaries of 3D objects to meet other geometry.
- Blend Surfaces: Create smooth transitions between surfaces using the BLEND command. This tool is particularly useful for organic shapes.
- Offset: Generate parallel copies of lines or surfaces at a specified distance using the OFFSET command. This is great for creating shells or additional layers on your model.
Mastering these tools will greatly enhance your ability to edit and refine your 3D models in AutoCAD, allowing for more creative freedom and precision in your designs.
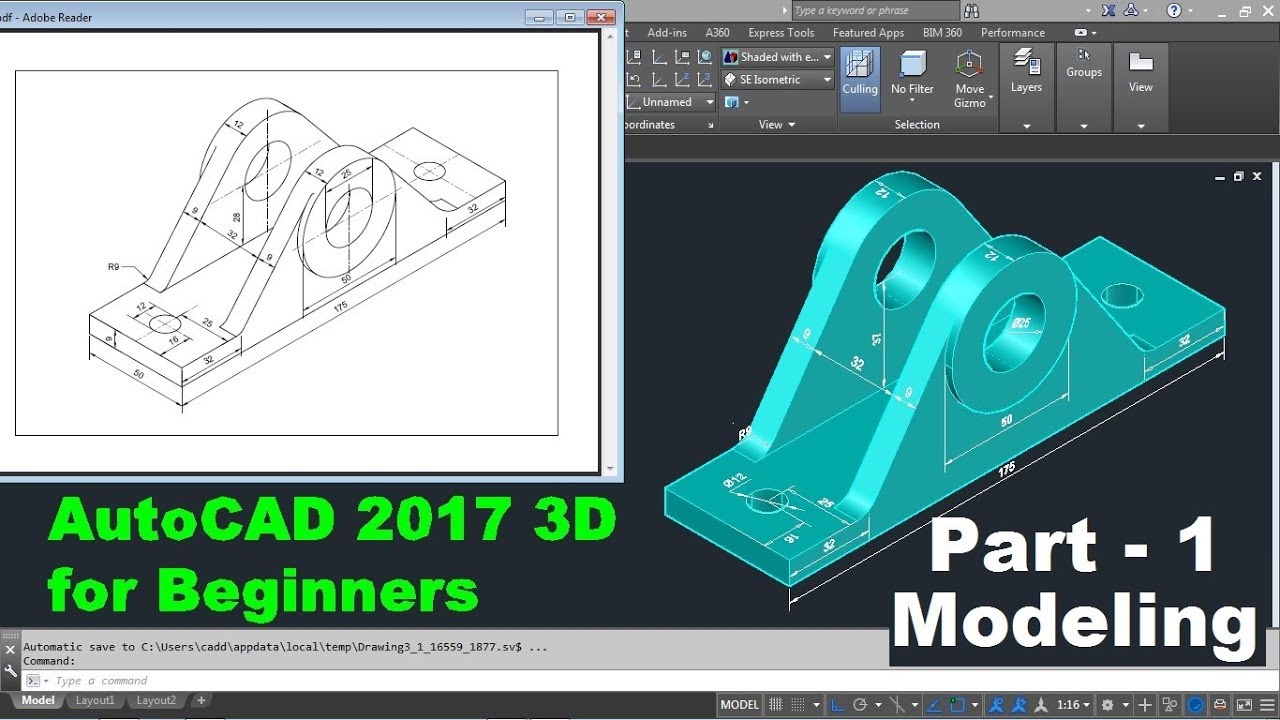
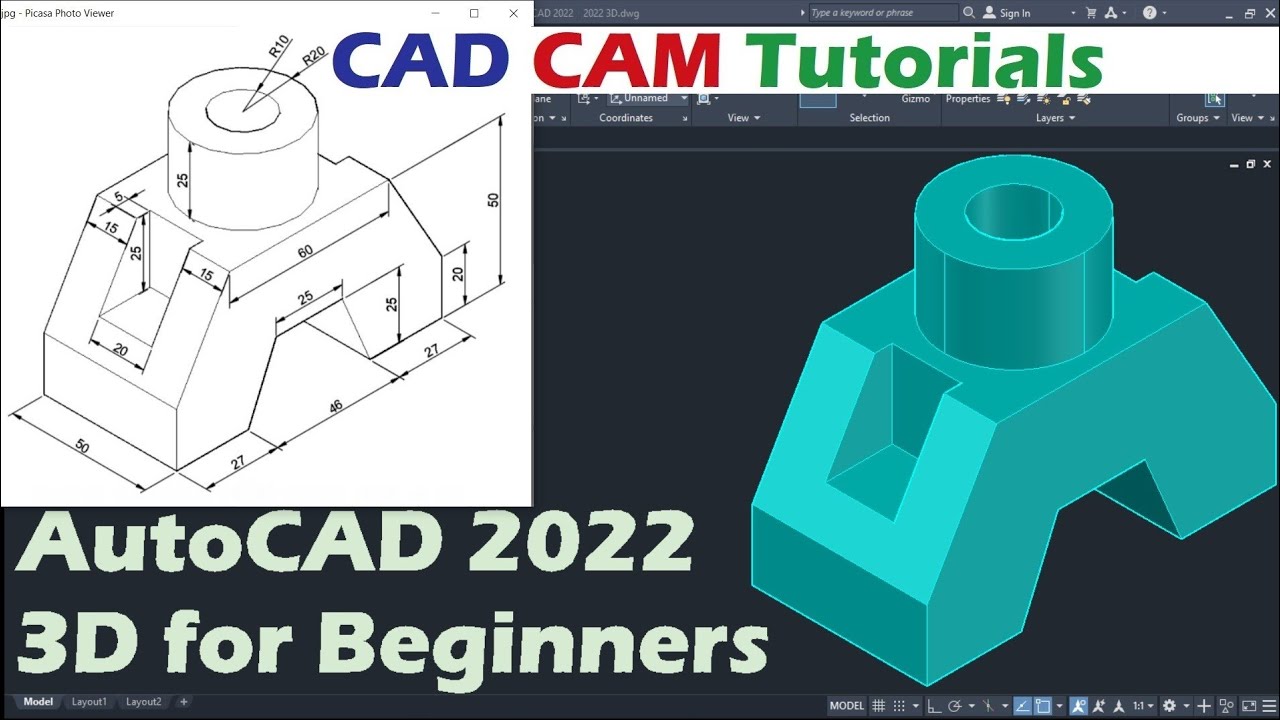
AutoCAD 2018 3D Tutorial for Beginners
Are you looking to learn something new? Our tutorial video is here to guide you step by step, making it easy for you to master the topic and become an expert in no time. Don\'t miss out on this valuable learning opportunity!
AutoCAD 3D Beginner Series - Part 1
Are you a beginner in this field and feeling overwhelmed? Our video is specially designed to help you get started with the basics. Our friendly approach and simplified explanations will give you the confidence and knowledge you need to take your first steps. Join us on this exciting journey of learning and growth!
3D Materials and Lighting
Applying materials and setting up lighting are key steps in bringing your 3D models to life in AutoCAD. These elements add realism and depth, enhancing the visual appeal of your design. Here’s how to effectively use materials and lighting in your models.
- Applying Materials: Access the Materials Browser to choose from a wide range of textures and finishes. Apply materials to individual faces or entire objects to simulate real-world surfaces.
- Creating Custom Materials: If the existing materials don’t meet your needs, create custom materials by adjusting properties like color, texture, transparency, and reflectivity to achieve the desired effect.
- Lighting Setup: Use the Lighting toolbar to add lights to your scene. Experiment with different types of light sources such as point lights, spotlights, and directional lights to highlight aspects of your model.
- Adjusting Light Properties: Modify the intensity, color, and direction of light sources to simulate various lighting conditions. This can dramatically change the mood and perception of your model.
- Sun and Sky Simulation: For architectural models, use the Sun & Sky system to simulate realistic outdoor lighting based on location, date, and time of day.
- Rendering: After setting up materials and lighting, use the rendering tool to create a photorealistic image of your model. Adjust rendering settings to balance quality and rendering time.
By carefully selecting materials and lighting, you can create compelling and realistic 3D models in AutoCAD. These tools offer the possibility to showcase your design in its best light.
Rendering and Presenting 3D Models
Rendering transforms your 3D models into lifelike images, showcasing your design in its most flattering light. Presenting these models effectively is crucial for conveying your vision. Here’s a guide to rendering and presenting your AutoCAD 3D models.
- Preparing for Rendering: Before rendering, ensure your model is complete, with all materials applied and lighting set up. Double-check the model for any missing elements or textures.
- Rendering Settings: Access the Render tab to customize settings such as resolution, quality, and environment. Higher settings produce better quality images but take longer to render.
- Choosing a Rendering Engine: AutoCAD offers several rendering engines. Experiment with different engines to find the one that best suits your project’s needs.
- Post-Processing: After rendering, use image editing software to adjust brightness, contrast, and saturation, or to add text and other elements to your rendered image.
- Creating Walkthroughs: For a more dynamic presentation, create a walkthrough of your model. This allows viewers to experience your design in a virtual space, adding depth to the presentation.
- Exporting Images and Videos: Export your rendered images and walkthrough videos in formats that are easy to share and present, ensuring compatibility with various devices and platforms.
- Presentation Tips: When presenting, contextualize your model within the real world. Explain the design choices and how the model meets the project requirements or solves specific problems.
Effective rendering and presentation can make a significant difference in how your 3D models are perceived, turning them from mere concepts into compelling visual stories.
Tips for Efficient 3D Modeling Workflows
Enhancing the efficiency of your 3D modeling workflow in AutoCAD not only saves time but also improves the quality of your designs. Here are practical tips to streamline your modeling process.
- Use Keyboard Shortcuts: Familiarize yourself with AutoCAD’s keyboard shortcuts for frequently used commands. This can significantly speed up your workflow.
- Customize Your Workspace: Tailor your workspace to fit your needs. Arrange toolbars, palettes, and ribbons for easy access to the tools you use most often.
- Apply Templates: Create templates with predefined settings for units, layers, and drawing scales. Templates save time on setup for new projects.
- Utilize Block Libraries: Build a library of blocks for common elements you use across projects. Dragging and dropping pre-made blocks into your design is faster than recreating them.
- Organize with Layers: Use layers to organize different parts of your model. This makes it easier to edit specific elements without affecting the whole model.
- Master Modeling Commands: Become proficient with a core set of modeling commands. Knowing when and how to use tools like EXTRUDE, REVOLVE, and SWEEP can make modeling more straightforward.
- Use External References: For large projects, link external references instead of embedding them in your file. This keeps your AutoCAD file size manageable and improves performance.
- Regularly Save and Back Up Your Work: Set up an automatic backup routine. Losing progress due to software crashes or hardware failures can set you back significantly.
- Stay Updated: Keep your AutoCAD software up to date. New updates often include performance improvements and new features that can enhance your workflow.
Implementing these tips can lead to a more efficient and enjoyable 3D modeling experience in AutoCAD, allowing you to focus on creativity and design quality.
_HOOK_
READ MORE:
Resources for Further Learning and Practice
Advancing your skills in 3D modeling with AutoCAD requires continuous learning and practice. Here are essential resources that can help you grow your expertise and keep up with industry trends.
- AutoCAD Official Training Guides: Autodesk offers comprehensive training guides and tutorials for users of all levels. These resources are great for understanding the fundamentals and advanced features.
- Online Courses: Platforms like Udemy, Coursera, and LinkedIn Learning provide in-depth AutoCAD courses taught by industry professionals. These courses often include project-based learning.
- YouTube Tutorials: YouTube hosts a vast number of tutorial channels dedicated to AutoCAD. Video tutorials can be particularly helpful for visual learners looking to master specific techniques.
- AutoCAD Forums and Communities: Join forums and online communities like the Autodesk forums, Reddit, and CADTutor. Sharing experiences and solutions with other users can be incredibly insightful.
- Books and eBooks: There are numerous books and eBooks available that cover AutoCAD 3D modeling. Titles range from beginner guides to advanced modeling techniques.
- Practice Projects: Applying what you learn through real-world projects is crucial. Challenge yourself with increasingly complex designs to build your skills.
- Webinars and Workshops: Attend webinars and workshops hosted by Autodesk and other educational institutions. These live sessions often cover new features and best practices.
Utilizing these resources will help you stay motivated and informed, allowing you to refine your AutoCAD 3D modeling skills and achieve your design goals.
Embarking on your 3D modeling journey with AutoCAD opens endless possibilities. By leveraging these tutorials and tips, you\"re well on your way to transforming your creative visions into reality with confidence and skill.