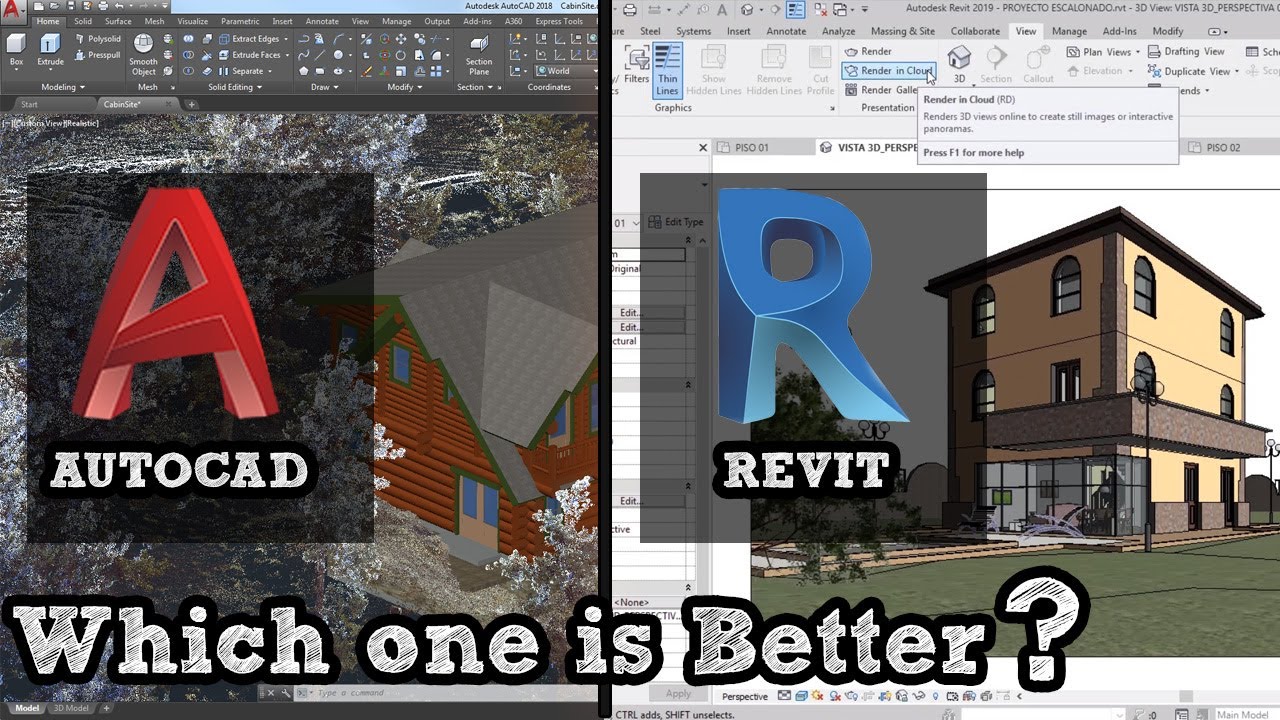
Topic tutorial lisp autocad: Discover the power of AutoLISP with our comprehensive tutorial on AutoCAD customization and automation, designed to enhance your drafting efficiency and creativity.
Table of Content
- What are some beginner AutoLISP tutorial series for AutoCAD?
- Getting Started with AutoLISP in AutoCAD
- Basic AutoLISP Functions and Syntax
- Creating and Loading AutoLISP Programs
- Automating Tasks with AutoLISP
- Working with Strings and Lists in AutoLISP
- Using AutoLISP to Manipulate AutoCAD Objects
- YOUTUBE: Visual LISP for AutoCAD Tutorial
- Advanced AutoLISP: Dialog Boxes and Interface Customization
- Debugging and Error Handling in AutoLISP
- Integrating AutoLISP with External Files and Databases
- Best Practices for Structuring AutoLISP Code
- Resources and Further Learning for AutoLISP
What are some beginner AutoLISP tutorial series for AutoCAD?
There are several beginner AutoLISP tutorial series available for AutoCAD:
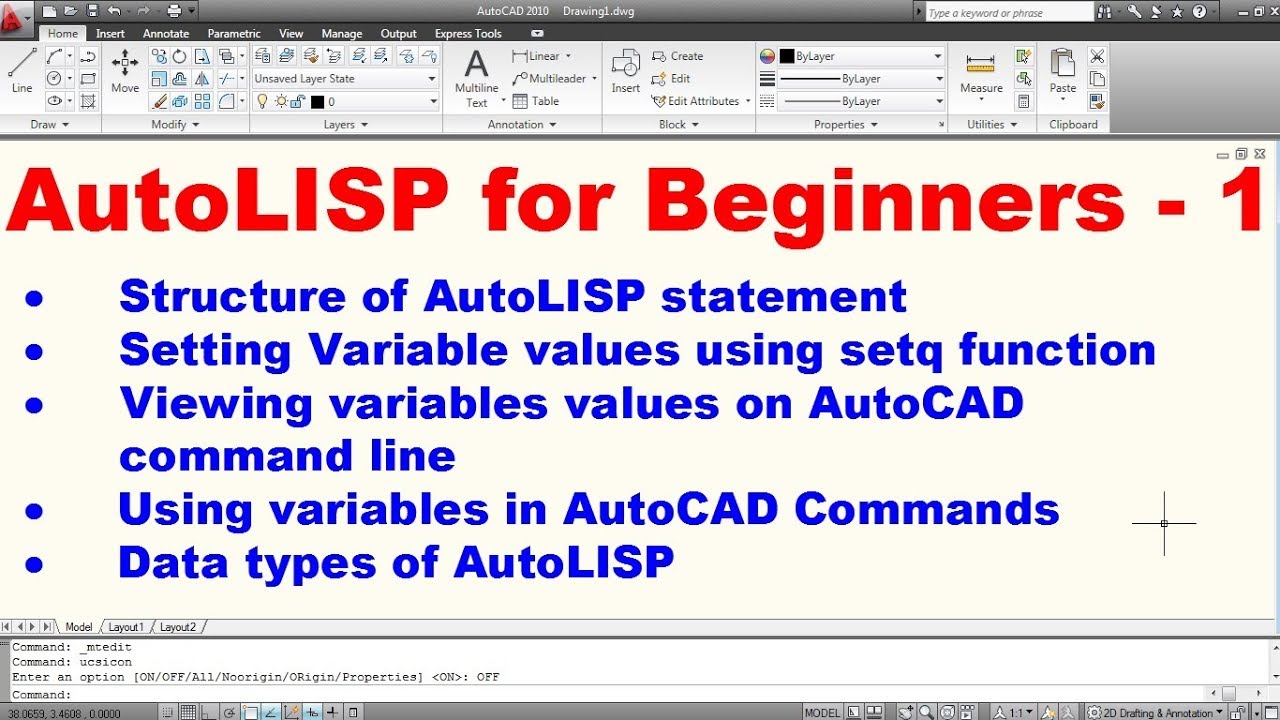
- Lesson 1 of a beginner AutoLISP tutorial series: This tutorial covers the basics of AutoLISP, allowing you to code a simple but useful program. It assumes no prior knowledge of AutoLISP and guides you step-by-step.
- Working with AutoLISP Expressions at the AutoCAD Command Prompt: This tutorial explains how to work with AutoLISP expressions directly at the AutoCAD command prompt. It demonstrates how to retrieve and use values stored in user-defined variables.
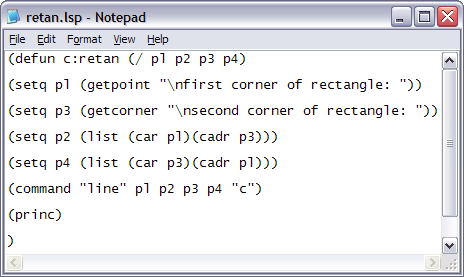
- Defining a function and setting variables: This tutorial focuses on defining functions using the DEFUN command and setting variables using the SETQ command. It explains the different types of variables available in AutoLISP, such as integer and real.
These tutorials provide a solid foundation for beginners to learn AutoLISP programming in AutoCAD. They cover various aspects of AutoLISP, from basic coding to working with expressions and variables.
READ MORE:
Getting Started with AutoLISP in AutoCAD
AutoLISP is AutoCAD\"s inbuilt programming language designed for automating and customizing your CAD environment. Here’s how to start harnessing its power:
- Understand the Basics: Familiarize yourself with AutoLISP syntax and functions. Start with simple commands to get a feel for programming.
- Open the AutoLISP Editor: Access the Visual LISP Editor through AutoCAD by typing VLIDE in the command line. This environment is where you\"ll write, debug, and run your scripts.
- Create Your First Script: Begin with a simple script, such as one that draws a line or a circle, to understand how to manipulate AutoCAD objects with AutoLISP.
- Load and Run Scripts: Learn how to load your AutoLISP files into AutoCAD using the APPLOAD command, then run them directly in the command line to see your code in action.
- Explore AutoLISP Functions: Delve into the extensive library of AutoLISP functions that allow you to interact with the AutoCAD environment, including drawing, modifying objects, and user interface customization.
- Practice: The key to mastering AutoLISP is practice. Try modifying examples and gradually increase the complexity of your scripts.
With dedication and experimentation, you\"ll soon be able to automate repetitive tasks, customize commands, and much more, making your CAD workflow more efficient and personalized.
Basic AutoLISP Functions and Syntax
Learning the fundamentals of AutoLISP syntax and functions is essential for creating effective scripts in AutoCAD. Here\"s a primer to get you started:
- Understanding Syntax: AutoLISP code is written in expressions, which are enclosed in parentheses. Each expression starts with a function name followed by its arguments. For example, (+ 1 2) adds the numbers 1 and 2.
- Common Functions: Basic functions include arithmetic operations like + (addition), - (subtraction), * (multiplication), and / (division). There are also functions for manipulating lists, such as car (returns the first element of a list) and cdr (returns the rest of the list).
- Variables: You can store values in variables using the setq function, which stands for \"set quote\". For example, (setq x 10) assigns the value 10 to the variable x.
- Conditional Statements: Use if to evaluate conditions. The basic syntax is (if condition then-part else-part), where the else-part is optional.
- Looping: Loops can be created using functions like repeat (repeats an action a specified number of times) and while (continues an action while a condition is true).
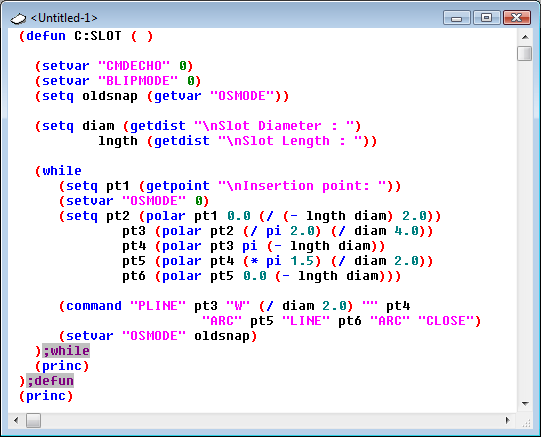
- Creating Functions: You can define your own functions using the defun keyword. This is useful for encapsulating and reusing code. The syntax is (defun functionName (arguments) body).
These basic elements form the foundation of AutoLISP programming, enabling you to automate tasks and extend AutoCAD\"s capabilities. As you grow more comfortable with these concepts, you\"ll be able to tackle more complex scripts and workflows.
Creating and Loading AutoLISP Programs
Creating and loading AutoLISP programs into AutoCAD streamlines and automates your CAD workflows. Follow these steps to develop and implement your own AutoLISP scripts:
- Write Your AutoLISP Code: Start by opening a text editor that can save files in plain text format. Write your AutoLISP code here, following the AutoLISP syntax and functions.
- Save Your File: Save your script with the .lsp file extension. Choose a meaningful name that reflects the script\"s functionality.
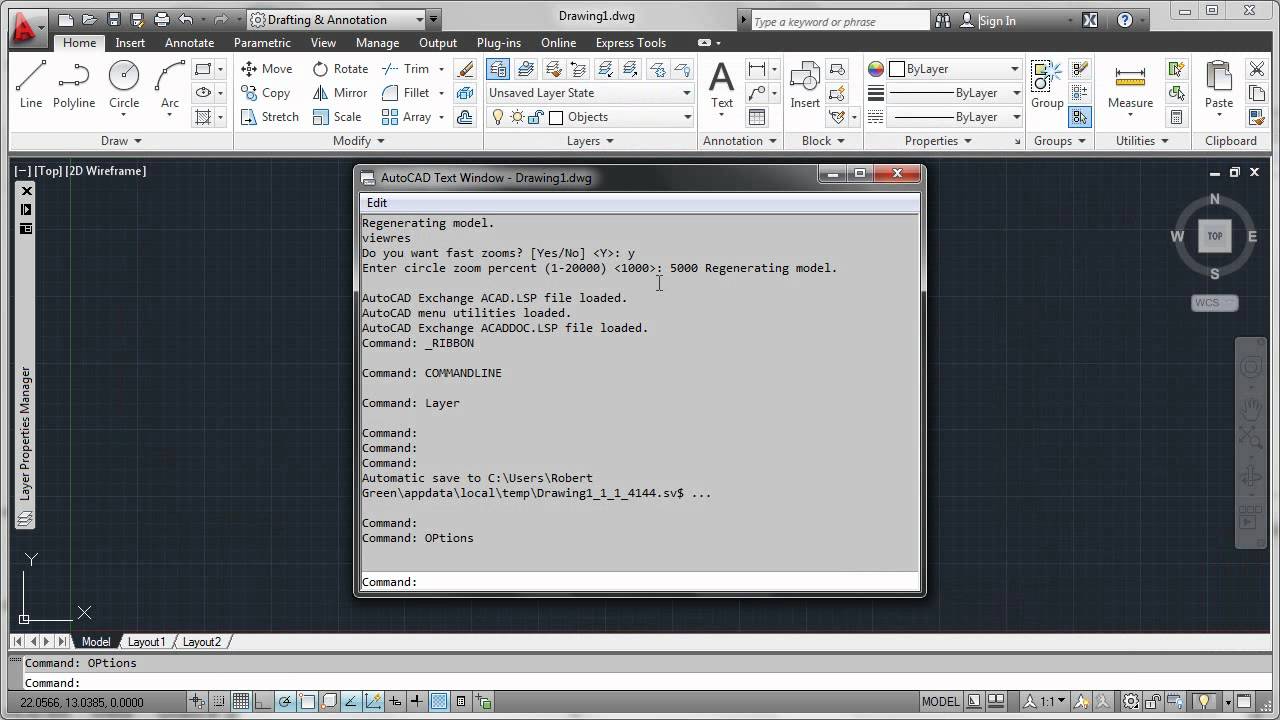
- Load the Script into AutoCAD: Open AutoCAD, and use the APPLOAD command to open the Load/Unload Applications dialog. Browse to your .lsp file, select it, and click \"Load\".
- Run Your Script: After loading your script, you can run it by typing the name of the main function defined in your script into the AutoCAD command line.
- Automate Loading: To automatically load your script each time AutoCAD starts, add it to the Startup Suite in the Load/Unload Applications dialog or use the acad.lsp file to load custom scripts automatically.
This process allows you to harness the full power of AutoLISP for custom tasks, from simple automation to complex workflows. Experiment with different scripts to find out how much you can optimize your drafting process.
Automating Tasks with AutoLISP
AutoLISP enables the automation of repetitive tasks in AutoCAD, boosting productivity and ensuring consistency in your designs. Here’s how to get started with automating tasks:
- Identify Repetitive Tasks: Begin by identifying tasks you frequently perform in AutoCAD that can be automated. Common examples include drawing setup, object creation, and attribute editing.
- Learn Basic AutoLISP Commands: Familiarize yourself with basic AutoLISP commands related to your tasks. This might include commands for creating lines, circles, setting layer properties, or modifying object attributes.
- Write Your Script: Using a text editor, start writing your script. Structure your code by defining a main function that encapsulates the task you want to automate.
- Test Your Script: After writing your script, test it in AutoCAD to ensure it performs as expected. Use the APPLOAD command to load your script, then execute it by calling its main function.
- Refine and Expand: Based on the results, refine your script as needed. Once you’re comfortable, consider expanding your script to include error checking or to automate more complex tasks.
- Share and Collaborate: AutoLISP scripts can be shared with colleagues, enhancing productivity across your team. Encourage feedback and collaborate on developing more sophisticated automation scripts.
By automating tasks with AutoLISP, you can significantly reduce manual input, minimize errors, and free up time for more creative aspects of your design projects.
_HOOK_
Working with Strings and Lists in AutoLISP
Strings and lists are fundamental data types in AutoLISP, used for handling text and grouping data, respectively. Here\"s how to effectively work with these types:
- Manipulating Strings: AutoLISP offers functions for string manipulation, such as strcat for concatenation, strlen for length, and substr for extracting substrings. For example, (strcat \"Hello, \" \"world!\") returns \"Hello, world!\".
- Creating Lists: Lists are created by enclosing elements in parentheses, such as (list 1 2 3). They can store mixed data types, including other lists, making them versatile for data organization.
- Accessing List Elements: Use car to access the first element and cdr for the rest of the list. For deeper nesting, combine these functions, or use nth to access a specific element directly.
- Modifying Lists: Lists are immutable, meaning you cannot change them directly. Instead, use functions like append, cons, and reverse to create modified versions of existing lists.
- Looping Through Lists: To process each element in a list, use looping constructs such as dolist or foreach. These loops allow you to apply operations to each item in a list efficiently.
- Working with Association Lists: Association lists (alist) are key-value pairs stored in lists. They are crucial for accessing and modifying drawing properties in AutoCAD. Use assoc, rassoc, and subst to work with alists.
Mastering strings and lists will significantly enhance your ability to handle complex data structures and perform sophisticated manipulations in your AutoLISP programs.
Using AutoLISP to Manipulate AutoCAD Objects
AutoLISP provides a powerful suite of functions for manipulating objects within AutoCAD, enabling precise control over the drawing environment. Follow these steps to master object manipulation:
- Selecting Objects: Use the ssget function to select objects based on criteria like type, layer, or properties. For example, (ssget \"X\" \"((0 . \"LINE\"))) selects all line objects.
- Creating Objects: Functions such as line, circle, and text allow you to create new drawing entities. Specify the necessary parameters like start and end points for a line, or center and radius for a circle.
- Modifying Objects: With functions like move, rotate, and scale, you can modify objects\" positions, orientations, and sizes. These functions typically require selecting the objects to modify and providing transformation parameters.
- Getting and Setting Properties: Use getpropertyvalue and setpropertyvalue to read and write properties of objects, such as layer, color, or line type. This allows for dynamic adjustments based on your scripting needs.
- Deleting Objects: The entdel function is used to remove objects from the drawing. Be sure to select the objects accurately before deletion to avoid unintended loss of data.
- Iterating Over Selection Sets: Utilize looping constructs like foreach to apply operations to each object in a selection set. This is useful for batch processing, such as changing properties for multiple objects at once.
By mastering these techniques, you can automate complex drawing operations, enhance productivity, and unlock new possibilities in your AutoCAD projects with AutoLISP.
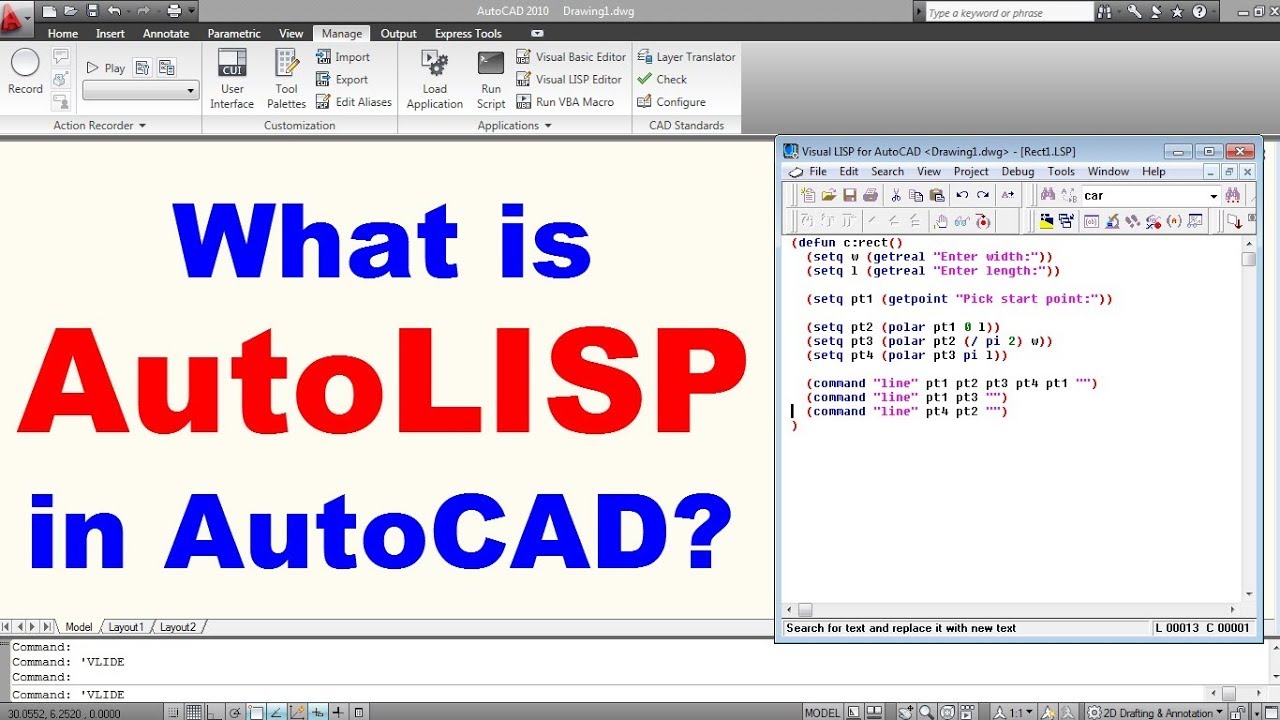
Visual LISP for AutoCAD Tutorial
Get ready to feast your eyes on the stunning visuals in this mind-blowing video! From vibrant colors to captivating animations, you won\'t be able to take your eyes off the screen. Don\'t miss out on this visual extravaganza!
Load a Lisp or Application in AutoCAD Tutorial
Looking for a quick solution to speed up your loading times? Look no further! This video will show you simple and effective techniques to optimize your website\'s load speed, ensuring a seamless browsing experience for your visitors. Watch it now to supercharge your website\'s performance!
Advanced AutoLISP: Dialog Boxes and Interface Customization
Enhancing user interaction and interface customization in AutoCAD through AutoLISP can significantly improve efficiency and usability. Here’s how to implement advanced interface customizations and dialog boxes:
- Understanding DCL: Dialog Control Language (DCL) works alongside AutoLISP to create custom dialog boxes. Start by learning the basics of DCL syntax and structure to design user interfaces.
- Creating a DCL File: Use a text editor to write your DCL code, defining the layout and elements of your dialog box, such as buttons, text fields, and sliders. Save this file with a .dcl extension.
- Integrating DCL with AutoLISP: In your AutoLISP script, load the DCL file using the load_dialog function. Then, use new_dialog to display the dialog box defined in the DCL file.
- Handling User Input: Utilize callback functions in your AutoLISP code to respond to user actions within the dialog box. This allows you to capture input and execute actions when users interact with dialog elements.
- Customizing the AutoCAD Interface: Beyond dialog boxes, AutoLISP can be used to add custom commands, modify toolbars, and create new menu items, tailoring the AutoCAD environment to fit your specific needs.
- Sharing and Deployment: Once your custom dialog boxes and interface enhancements are tested, share them with your team. Use AutoCAD\"s support for AutoLISP to deploy these customizations across different workstations.
By combining AutoLISP with DCL, you can create powerful, user-friendly dialog boxes and customize the AutoCAD interface, streamlining workflows and enhancing the drafting experience.

Debugging and Error Handling in AutoLISP
Efficient debugging and error handling are crucial for developing robust AutoLISP applications in AutoCAD. Here are strategies to identify and resolve issues in your scripts:
- Use Visual LISP Editor: The Visual LISP Editor provides tools for debugging AutoLISP code, such as breakpoints, step execution, and variable watches. Familiarize yourself with these features to efficiently track down errors.
- Check for Syntax Errors: Syntax errors are common when learning AutoLISP. Ensure all expressions are correctly formatted and closed with parentheses. The editor\"s syntax highlighting can help identify problems.
- Runtime Error Handling: Implement error handling in your scripts using the error function. This allows you to catch exceptions and handle them gracefully, preventing the script from terminating unexpectedly.
- Logging and Messaging: Use the (princ) and (alert) functions to output debug information to the AutoCAD command line or display messages to the user. This can help trace the flow of execution and pinpoint issues.
- Validate Inputs: Ensure that your script correctly handles all types of input, including invalid or unexpected data. Use conditional statements to check inputs and respond appropriately.
- Test in Isolation: When encountering complex issues, isolate parts of the script and test them separately. This can help identify the source of the problem more quickly.
- Consult Documentation and Resources: Leverage the extensive AutoLISP documentation and online forums when stuck. Many common issues are well-documented and discussed by the AutoCAD community.
By applying these debugging and error handling techniques, you can improve the reliability and user experience of your AutoLISP programs, making them more effective tools for automation within AutoCAD.

Integrating AutoLISP with External Files and Databases
Integrating AutoLISP with external files and databases can significantly extend the capabilities of your AutoCAD applications, enabling complex data manipulations and storage. Here’s how to accomplish this integration:
- Reading from External Files: Use functions like open, read-line, and close to read data from text files. This can be useful for importing configurations, settings, or data points for use in your drawings.
- Writing to External Files: Similarly, you can output data to text files using open (in write mode), write-line, and close, allowing you to export coordinates, object properties, or custom data structures.
- Interacting with Databases: For more complex data storage and retrieval, you can connect to databases using AutoLISP through COM or ODBC interfaces. This requires a basic understanding of database operations and SQL queries.
- Using External Libraries: AutoLISP allows you to call functions from external DLLs (Dynamic Link Libraries), enabling integration with custom libraries or third-party APIs for specialized tasks.
- Data Formatting and Parsing: When working with external data, you may need to format or parse data to match the expected structure in AutoCAD or the external source. Utilize string manipulation and list handling functions in AutoLISP for these tasks.
- Error Handling: Always implement error handling when interacting with external files and databases to manage exceptions, such as file not found, read/write errors, or database connection issues.
By leveraging these techniques, you can create AutoLISP applications that interact seamlessly with external data sources, enhancing the automation and customization possibilities within AutoCAD.
_HOOK_
Best Practices for Structuring AutoLISP Code
Writing clean, maintainable, and efficient AutoLISP code is crucial for creating robust AutoCAD applications. Here are some best practices to follow:
- Use Descriptive Variable Names: Choose variable names that reflect their purpose, making your code easier to understand and maintain.
- Organize Code into Functions: Break your code into functions, each handling a specific task. This not only improves readability but also reusability.
- Comment Your Code: Use comments to explain the purpose of functions, the logic behind complex sections, and the meaning of variables. This is invaluable for you and others who may work on your code in the future.
- Handle Errors Gracefully: Include error handling to manage and respond to unexpected conditions without crashing the script or AutoCAD.
- Avoid Hard-Coding Values: Use variables for values that may change, such as layer names or scale factors. This makes it easier to update your code as needed.
- Use Consistent Formatting: Adopt a consistent style for indentations, spacing, and parentheses placement. This uniformity helps in reading and understanding the code.
- Test Incrementally: Test your code frequently as you develop it. This helps identify and fix errors early in the development process.
- Document Your Work: Include a header comment in each script file describing its purpose, author, and date of creation. Also, document any dependencies or external requirements.
- Reuse Code: Leverage existing libraries and code snippets where possible to avoid reinventing the wheel. This can significantly speed up development time.
By adhering to these best practices, your AutoLISP code will be more efficient, readable, and easier to maintain, leading to more reliable and powerful AutoCAD customizations.

READ MORE:
Resources and Further Learning for AutoLISP
Expanding your knowledge and skills in AutoLISP is key to unlocking the full potential of AutoCAD customization. Here are valuable resources for further learning:
- Official AutoCAD Documentation: Autodesk provides comprehensive guides and reference materials for AutoLISP on their official website, which is a must-read for beginners and experienced users alike.
- Online Tutorials and Courses: Websites like Coursera, Udemy, and LinkedIn Learning offer courses ranging from basic to advanced AutoLISP programming, often with hands-on projects.
- Forums and Community Groups: Participate in forums such as the Autodesk forums, CADTutor, and TheSwamp. These communities are great for asking questions, sharing knowledge, and finding custom scripts.
- Books: Several books cover AutoLISP programming in depth, such as \"AutoLISP to Visual LISP: Design Solutions for AutoCAD\" which provides insights into developing sophisticated CAD tools.
- Practice Exercises: Practice is crucial. Look for exercises online that challenge you to solve real-world problems with AutoLISP, or try automating tasks you regularly perform in AutoCAD.
- YouTube Tutorials: YouTube has numerous tutorial channels dedicated to AutoCAD and AutoLISP programming, offering visual and practical learning experiences.
- Sample Scripts: Study and modify sample scripts to understand their structure and functionality. Autodesk and many community forums provide libraries of sample scripts for learning purposes.
By leveraging these resources, you can continually improve your AutoLISP programming skills, enhancing your ability to automate tasks, customize workflows, and create powerful tools within AutoCAD.
Embark on your journey to mastering AutoLISP in AutoCAD, unlocking the door to endless customization and automation possibilities, enhancing both your productivity and creativity in the drafting process.