Topic autocad tutorial beginner: Embark on your AutoCAD journey with our beginner tutorial, designed to introduce you to the essentials of drafting and design. Unlock your creative potential and start bringing your ideas to life today!
Table of Content
- What are some AutoCAD tutorial videos for beginners?
- Understanding AutoCAD Basics
- Setting Up AutoCAD for Success
- Learning the Fundamental Commands
- Mastering Drawing and Drafting Techniques
- Utilizing Precision Tools for Accurate Designs
- Editing and Modifying Drawings
- YOUTUBE: AutoCAD Basic Tutorial for Beginners - Part 1
- Layer Management for Organized Projects
- Introduction to 3D Modeling
- Applying Text and Dimensions to Drawings
- Using Blocks and Xrefs for Efficiency
- Layouts and Viewports: Preparing for Printing
- Customization and Tool Palettes
- AutoCAD Shortcuts and Productivity Tips
- Collaboration in AutoCAD: Sharing Files and Design Collaboration
- Common Issues and Troubleshooting
- Exploring Advanced AutoCAD Features
- Continuing Education: Resources and Communities for Learners
What are some AutoCAD tutorial videos for beginners?
Here are some AutoCAD tutorial videos for beginners:
- AutoCAD Learning Videos - These videos cover topics such as touring the AutoCAD user interface, creating 2D objects, modifying 2D objects, creating text and dimensions, plotting a drawing layout, and Xref layer property.
- Welcome to the world of CAD - This video tutorial introduces the basics of AutoCAD, teaching you the commands and concepts you need to know.
- AutoCAD 2023 Tutorial for Beginners: 6 Steps to Success - This tutorial covers six essential steps for beginners to succeed in learning AutoCAD. The steps include knowing the UI, 2D sketching, 3D modeling, and moving and aligning objects.
READ MORE:
Understanding AutoCAD Basics
Starting with AutoCAD can seem overwhelming, but mastering the basics is your first step towards becoming proficient. This section will guide you through the fundamental aspects of AutoCAD, ensuring a solid foundation for your CAD journey.
- Interface Familiarization: Begin by familiarizing yourself with the AutoCAD interface. Learn about the ribbon, toolbars, command line, and drawing area to navigate the software efficiently.
- Basic Commands: Get to know the essential commands such as LINE, CIRCLE, RECTANGLE, and ARC. These commands are the building blocks for creating simple drawings.
- Using the Command Line: The command line is a powerful tool in AutoCAD. Learn to use it to execute commands, which can speed up your workflow significantly.
- Setting Up a Drawing: Understand how to set up a new drawing, including choosing the right drawing units, limits, and scales to match the specifications of your project.
- Drawing Precision: AutoCAD offers various tools to draw precisely. Learn about object snaps, ortho mode, and polar tracking to create accurate designs.
- Basic Drawing Techniques: Practice basic drawing techniques by creating simple geometric shapes and modifying them using commands like MOVE, COPY, ROTATE, and SCALE.
- Layers: Discover how to use layers to organize your drawing. Layers help in managing different elements of your design, making it easier to edit and navigate through complex drawings.
- Saving and Opening Drawings: Learn the importance of regularly saving your work and how to open existing drawings for editing or review.
By the end of this section, you will have a clear understanding of AutoCAD\"s basic functionality, ready to move on to more complex designs and features. Remember, practice is key to becoming proficient in AutoCAD.

Setting Up AutoCAD for Success
Properly setting up AutoCAD is crucial for maximizing efficiency and productivity. This section will walk you through the essential steps to configure AutoCAD for an optimized drafting experience.
- Choosing the Right Workspace: Select a workspace that suits your needs. AutoCAD offers several workspaces, including drafting and annotation, 3D basics, and 3D modeling. Customizing your workspace can streamline your workflow.
- Setting Drawing Units: Before starting a project, set your drawing units. This determines the measurement system (imperial or metric) you\"ll be using in your designs.
- Customizing the User Interface: Customize the user interface according to your preference. This can include adjusting the ribbon, tool palettes, and command line location to enhance accessibility and efficiency.
- Creating Templates: Templates save time by pre-defining settings like drawing units, layers, and plot styles. Create templates with these settings to maintain consistency across your projects.
- Importing and Exporting Settings: If you use AutoCAD on multiple computers, learn how to import and export your customized settings. This ensures a familiar working environment, regardless of the workstation.
- Layer Management: Develop a solid layer management strategy. Define a naming convention for layers and consistently apply it to keep your drawings organized.
- Plotting and Publishing Settings: Familiarize yourself with plotting settings. Set up plot styles and page setups to ensure your drawings are accurately represented when printed or published.
- Keyboard Shortcuts and Command Aliases: Customize keyboard shortcuts and command aliases for frequently used commands. This can significantly speed up your drawing process.
By taking the time to properly set up AutoCAD, you ensure a smoother, more efficient drafting process, allowing you to focus more on design and less on managing your tools and settings.

Learning the Fundamental Commands
Mastering the fundamental commands in AutoCAD is essential for creating precise and detailed designs. This section covers the key commands that every beginner should know to start drafting effectively.
- LINE: Creates straight lines. Click to define the start point, then another point to define the end.
- CIRCLE: Draws a circle based on a center point and radius. Enter the center point and then the radius to complete the circle.
- RECTANGLE: Produces rectangles. Specify the first corner point, then the diagonal corner point.
- POLYLINE: Draws a series of connected lines and arcs. This command is versatile for creating complex linear shapes.
- ARC: Creates arcs. You can define an arc by specifying the start point, end point, and another point along the arc\"s path.
- TRIM: Removes parts of objects to meet the edges of other objects. Select cutting edges first, then the part of the object you wish to trim away.
- EXTEND: Lengthens objects to meet the edges of other objects. Select boundary edges first, then the object you wish to extend.
- COPY: Duplicates objects a specified distance away from the original. Select objects to copy, then the base point and second point to define the distance.
- MIRROR: Creates a mirrored copy of selected objects. Choose objects, then define two points to form the mirror line.
- ROTATE: Rotates selected objects around a base point. Specify the base point and rotation angle.
- SCALE: Resizes selected objects around a base point. Specify the base point and a scale factor.
- MOVE: Relocates objects from one point to another. Select objects, then specify the base point and second point to define the move distance.
- DIMENSION: Adds measurements to your drawing, such as distance, radius, or angle, enhancing the clarity and professionalism of your work.
Practicing these commands will develop your skills and efficiency in AutoCAD, forming the foundation for more advanced techniques and designs.

Mastering Drawing and Drafting Techniques
Enhancing your drawing and drafting techniques in AutoCAD allows you to produce professional and accurate designs. This section delves into strategies for improving your drafting skills and efficiency.
- Effective Use of Snap and Grid: Enable snap and grid features to align objects precisely. Adjusting the grid settings according to the scale of your drawing can significantly enhance accuracy.
- Layer Management: Organize your drawings by using layers effectively. Assign different elements of your design to layers by color, type, or other criteria for easy management and visibility.
- Creating Complex Shapes with Polylines: Use polylines for creating complex shapes. Polylines allow for greater control and can be edited more efficiently than individual lines or arcs.
- Utilizing Blocks and Groups: Streamline your workflow by creating and using blocks for repetitive elements. Groups can also organize and manage collections of objects that are frequently used together.
- Applying Hatch Patterns: Use hatch patterns to fill areas or denote materials. Hatching can add depth and context to your drawings, making them more informative and visually appealing.
- Dimensioning and Text: Accurately dimension your drawings and add text annotations for clarity. Proper use of dimension styles and text can communicate important information effectively.
- Isometric Drawing Techniques: Explore isometric drawing techniques to represent three-dimensional objects on a two-dimensional plane, enhancing the visual representation of your designs.
- Advanced Selection Techniques: Master the use of advanced selection techniques, such as window, crossing, and filter selection, to improve efficiency in editing and manipulating objects.
- Efficient Use of External References (Xrefs): Incorporate external references to keep your main drawing file size manageable and to ensure consistency across related drawings.
- Customization for Productivity: Customize AutoCAD settings, tool palettes, and command aliases to fit your workflow. Personalized shortcuts and toolbars can significantly speed up the drafting process.
By focusing on these techniques, you can refine your drafting skills, leading to more precise, detailed, and efficient AutoCAD designs.

_HOOK_
Utilizing Precision Tools for Accurate Designs
Accuracy is key in creating professional AutoCAD drawings. This section highlights the precision tools available in AutoCAD and how to use them to achieve highly accurate designs.
- Object Snaps (Osnap): Use object snaps to draw with precision. Snaps allow you to accurately select points on existing objects, such as endpoints, midpoints, and centers.
- Grid and Snap Settings: Adjusting the grid and snap settings can help in aligning objects precisely. Use these settings to snap to exact points and maintain consistency in your drawing.
- Ortho Mode: Ortho mode constrains cursor movement to horizontal or vertical directions, enabling you to draw perfectly straight lines.
- Polar Tracking: Polar tracking guides your cursor along specified angles, making it easier to draw in alignment with other objects or at precise angles.
- Object Tracking (OTRACK): Object tracking allows you to align objects based on the extension of their paths or edges, even without snapping directly to an object.
- Dynamic Input: Dynamic input provides contextual interface right at the cursor, showing dimensions, angles, and options as you draw or modify objects.
- Dimensional Constraints: Apply dimensional constraints to maintain relationships between objects, ensuring that changes to one part of your drawing can automatically update others accordingly.
- Parametric Constraints: Use parametric constraints to define geometrical relationships between objects, such as parallelism, perpendicularity, and tangency, enhancing the precision of your designs.
- Measuring Tools: Utilize measuring tools like DISTANCE, AREA, and VOLUME to obtain precise measurements within your drawing, aiding in accurate design and analysis.
- QuickCalc: QuickCalc is a powerful on-screen calculator that can help you perform calculations directly within AutoCAD, ensuring accuracy in dimensions and placements.
Mastering these precision tools will elevate the accuracy of your designs, making your AutoCAD drawings more professional and reliable.

Editing and Modifying Drawings
As your AutoCAD projects evolve, editing and modifying drawings becomes a necessary skill. This section outlines essential techniques to efficiently alter your designs.
- MOVE: Reposition selected objects within your drawing. Choose the objects, then specify the base point and the new location.
- COPY: Duplicate objects to another location. Select the objects and then indicate the base point and destination point.
- ROTATE: Turn objects around a base point. Select what you want to rotate, the base point, and then enter the rotation angle.
- SCALE: Resize objects by specifying a base point and scale factor. This allows for proportional enlargement or reduction.
- TRIM: Remove parts of an object that overlap with others. Select the cutting edges, then the parts of the objects you want to trim away.
- EXTEND: Lengthen objects to meet the edges of another object. Choose the boundary edges, then the objects to extend.
- MIRROR: Create a mirrored copy of objects across a specified axis. This is useful for symmetrical designs.
- STRETCH: Alter objects by moving selected portions. Select objects with a crossing selection, then drag to the new position.
- OFFSET: Create parallel copies of objects at a specified distance. Useful for creating concentric shapes and parallel lines.
- ARRAY: Duplicate objects in a rectangular, polar, or path pattern. Configure the number of copies and their arrangement.
- FILLET: Round the edges of two intersecting lines or polylines. Specify the radius of the curve and then select the lines.
- CHAMFER: Bevel the edges where two objects meet. Set the distance or angle for the chamfer, then select the two objects.
- LAYER MANAGEMENT: Utilize layers to organize and manipulate objects more efficiently. This can involve changing an object\"s layer, color, or line type.
Understanding and applying these editing techniques can greatly enhance the flexibility and efficiency of your design process in AutoCAD.
AutoCAD Basic Tutorial for Beginners - Part 1
In this tutorial video, you will learn step-by-step instructions on how to master a new skill or technique. Whether you\'re a complete beginner or have some experience, this video will guide you through the process and help you become an expert in no time!
AutoCAD Tutorial for Beginners in 12 MINUTES!
Calling all beginners! This video is specially designed for you. It provides a comprehensive introduction to the subject, breaking down complex concepts into simple, digestible chunks. By the end of this video, you\'ll have a solid foundation and the confidence to dive deeper into the world of [keyword].
Layer Management for Organized Projects
Effective layer management is crucial for maintaining organized and manageable AutoCAD drawings. This section introduces strategies for using layers to enhance project organization and efficiency.
- Understanding Layers: Layers in AutoCAD serve as a means to segregate different elements of your drawings, such as electrical layouts, plumbing, and structural details. Each layer can have its own color, line type, and line weight.
- Creating and Naming Layers: Create layers for each distinct element or section of your design. Use clear and consistent naming conventions to easily identify the purpose of each layer.
- Setting Layer Properties: Assign specific properties to each layer, including color, line type, and line weight. This not only organizes your drawing but also assists in visual differentiation of elements.
- Using Layers in Your Workflow: As you draw, consistently assign objects to the correct layer. This practice keeps your drawing organized and makes future edits more manageable.
- Layer States: Save and restore layer states to quickly switch between different views of your drawing. This is especially useful for presenting different aspects of your project.
- Freezing and Locking Layers: Freeze layers to hide them and reduce the complexity of your view. Lock layers to prevent modification without hiding them.
- Layer Filters: Use layer filters to manage which layers are displayed, based on specific criteria or naming conventions. This is useful in large drawings with many layers.
- Layer Transparency: Adjusting the transparency of layers can aid in creating more readable prints and presentations, allowing for the overlay of information without visual clutter.
- Layer Isolation: Isolate selected layers to focus on specific parts of your drawing without distractions from other elements.
- Managing Layer Standards: Establish and adhere to layer standards within your organization or project. This ensures consistency across drawings and among different users.
Mastering layer management techniques allows you to maintain clean, organized, and efficient AutoCAD drawings, significantly enhancing your productivity and the clarity of your projects.
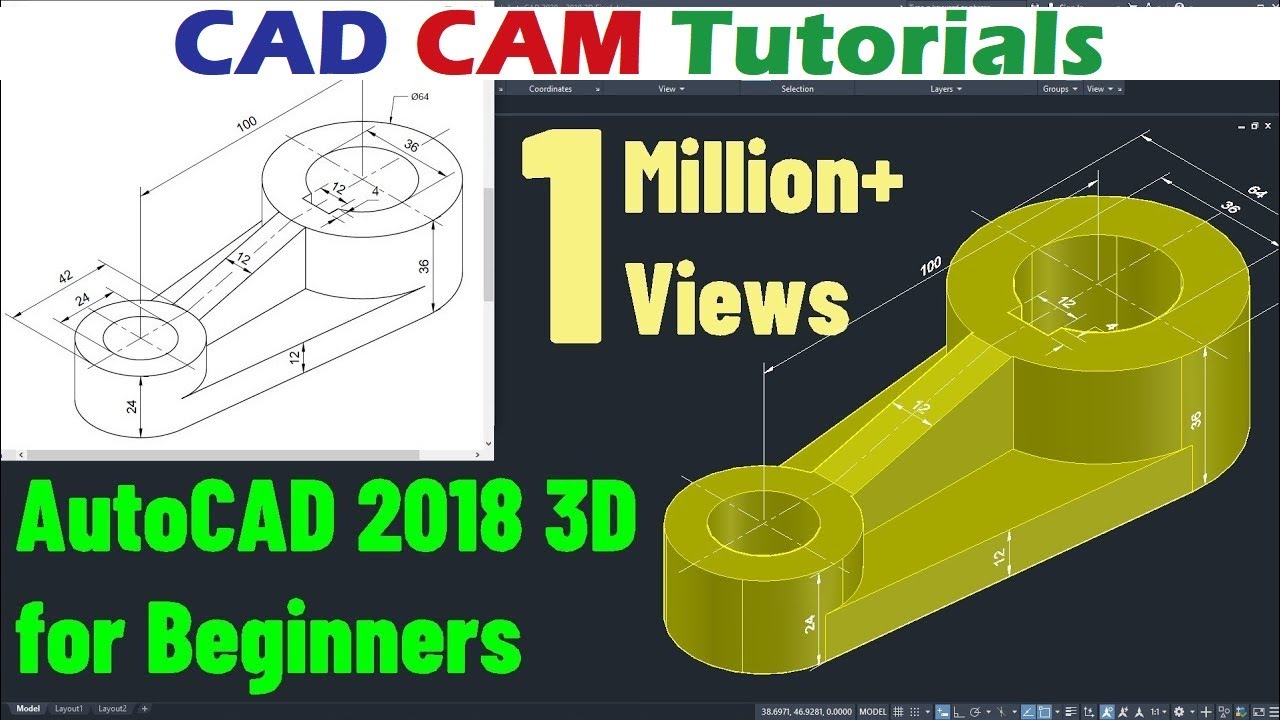
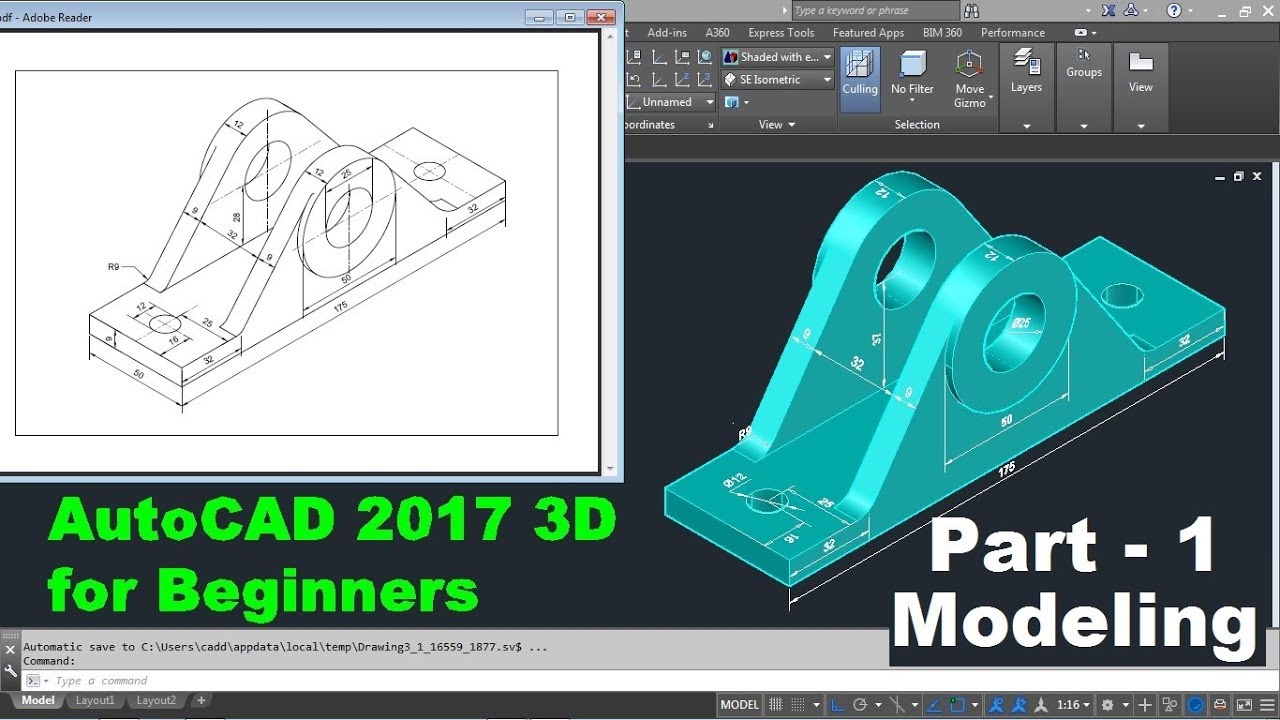
Introduction to 3D Modeling
3D modeling in AutoCAD elevates your designs from flat drawings to realistic representations. This section guides you through the basics of starting with 3D modeling, empowering you to bring your projects to life.
- Understanding 3D Space: Familiarize yourself with navigating and visualizing in 3D space. Learn how to use the view cube and steering wheels to orbit, pan, and zoom your 3D models.
- Starting with Primitives: Begin your 3D modeling journey by creating simple 3D shapes, or primitives, such as boxes, spheres, cylinders, cones, and toruses. These basic forms are the building blocks of more complex models.
- Modifying 3D Objects: Explore the tools for modifying 3D objects including extrude, revolve, loft, and sweep. These commands allow you to transform 2D shapes into 3D forms and modify them to achieve your desired shape.
- Creating 3D Solids and Surfaces: Understand the difference between 3D solids and surfaces. Use solids for volume-centric models and surfaces for complex geometries with intricate details.
- Boolean Operations: Utilize Boolean operations—Union, Subtract, and Intersect—to combine or remove parts of 3D objects, creating complex shapes and forms.
- 3D Navigation: Master the techniques for effective 3D navigation. Practice rotating, zooming, and panning to view your models from different perspectives.
- Applying Materials and Textures: Enhance the realism of your 3D models by applying materials and textures. This step adds surface detail that reflects real-world characteristics.
- Lighting and Rendering: Learn the basics of lighting and rendering to give your 3D models a more lifelike appearance. Experiment with different light sources and rendering settings to achieve the desired visual effects.
- Exporting 3D Models: Familiarize yourself with the process of exporting your 3D models for 3D printing or use in other applications. Understand the file formats and requirements for successful export.
By mastering these introductory 3D modeling concepts, you will be well on your way to creating detailed, realistic projects in AutoCAD.

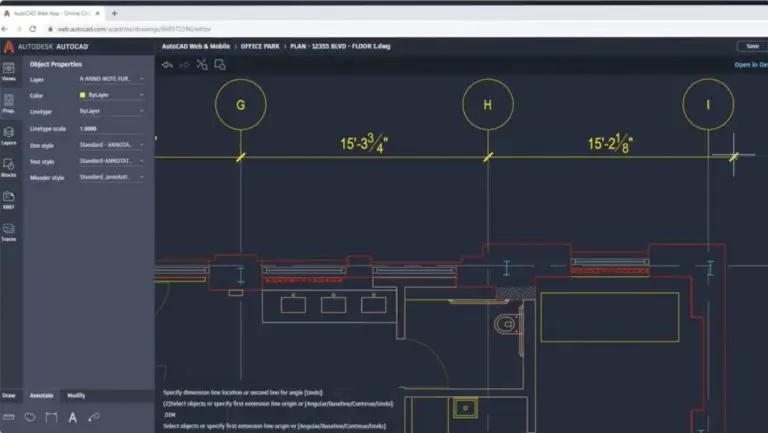
Applying Text and Dimensions to Drawings
Text and dimensions are crucial for conveying information in your AutoCAD drawings. This section explores how to effectively apply text and dimensions to enhance the clarity and communicative value of your designs.
- Adding Text: Learn to use the TEXT and MTEXT commands to add single-line and multi-line text. Customize font style, size, and orientation to match your project requirements.
- Setting Up Text Styles: Create text styles for consistent application across your drawings. Define font, height, alignment, and other properties for uniformity.
- Dimensioning Techniques: Utilize various dimensioning tools such as linear, radial, angular, and ordinate dimensions to specify distances, angles, radii, and coordinates clearly.
- Customizing Dimension Styles: Similar to text, set up dimension styles to ensure consistency in how dimensions are displayed, including arrowheads, text placement, and line weight.
- Using Leaders: Apply leaders to point out important features within your drawing. Leaders can include text or blocks for effective annotation.
- Tables for Data Representation: Insert tables to organize data efficiently within your drawings. Customize columns, rows, and cell styles to match the drawing’s aesthetics.
- Applying Fields: Use fields to insert auto-updating text such as date, filenames, or values from the drawing properties. This ensures that your information remains current.
- Annotative Objects for Scalability: Make use of annotative text and dimensions to ensure that they automatically adjust to the scale of the viewport, maintaining readability across different drawing scales.
- Layer Management for Text and Dimensions: Organize your text and dimensions on separate layers. This allows for easy editing and visibility control, without affecting the rest of the drawing.
Integrating text and dimensions effectively in your AutoCAD drawings not only communicates essential information but also enhances the professional quality of your designs.
_HOOK_
Using Blocks and Xrefs for Efficiency
Blocks and external references (Xrefs) are powerful tools in AutoCAD that enhance efficiency and ensure consistency across large projects. This section explains how to leverage these features for streamlined workflow and improved project management.
- Creating and Using Blocks: Learn to create blocks by combining multiple objects into a single entity. Use blocks for repetitive elements like doors, windows, and furniture to save time and reduce file size.
- Editing Blocks: Discover methods to edit blocks using the Block Editor. This allows you to modify a block without affecting its instances, maintaining consistency across your drawings.
- Inserting Blocks: Insert blocks into your drawings with ease. Adjust insertion points, scale, and rotation to fit your design requirements.
- Managing Block Libraries: Organize your blocks into libraries for easy access and sharing among team members. This practice enhances collaboration and standardizes design elements.
- Understanding External References (Xrefs): Xrefs allow you to link other drawings into your current drawing without embedding them. This keeps your file size manageable and ensures that all linked files are updated when changes are made.
- Attaching and Detaching Xrefs: Learn how to attach drawings as Xrefs and manage their paths. Understand how to detach Xrefs when they are no longer needed.
- Layer Management in Xrefs: Manage layers in Xrefs to control visibility and appearance within your drawing. This includes freezing, locking, or changing the color of layers from the Xref without altering the original file.
- Using Xrefs for Collaboration: Utilize Xrefs in collaborative environments to work on different parts of a project simultaneously. This method ensures that all team members have access to the most current version of each drawing.
By mastering the use of blocks and Xrefs, you can significantly improve the efficiency and consistency of your AutoCAD projects, making them easier to manage and update.
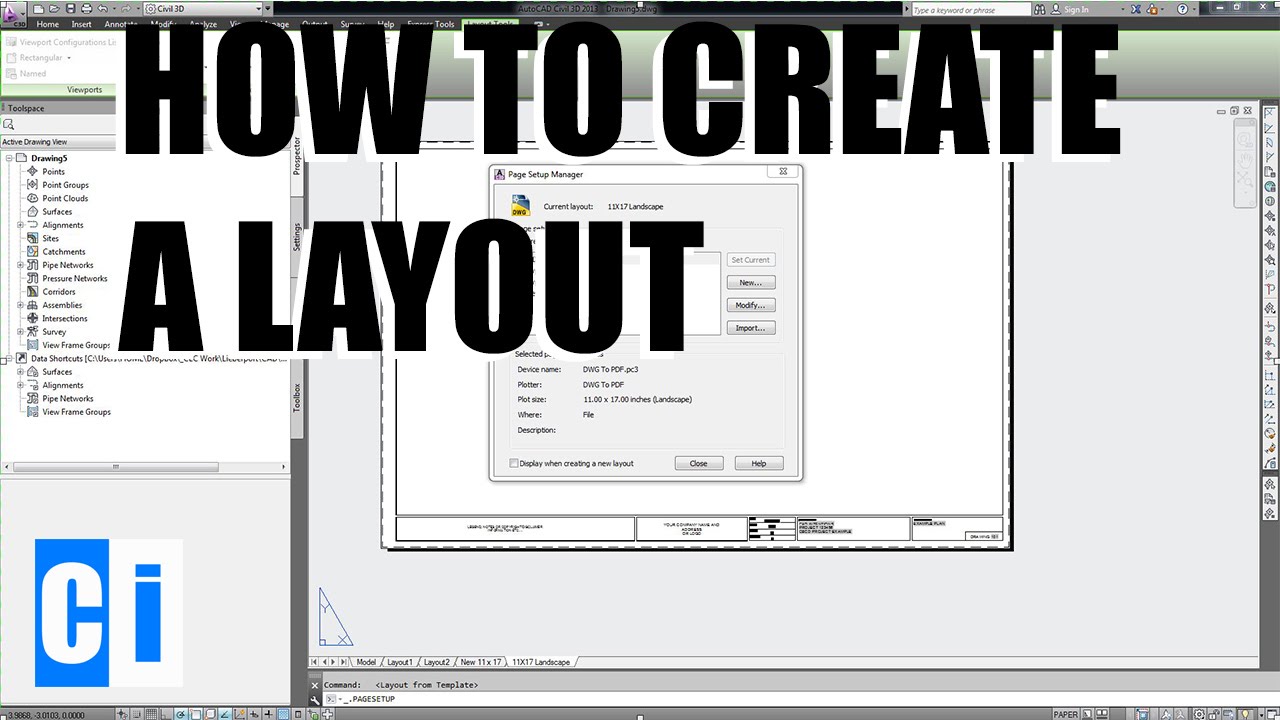
Layouts and Viewports: Preparing for Printing
Preparing your AutoCAD drawings for printing involves understanding layouts and viewports. This section guides you through setting up your drawing for a professional-quality printout.
- Understanding Layouts: Layouts represent the virtual paper where your design will be printed. Learn how to create and customize layouts to match the paper size and orientation you need.
- Configuring Viewports: Viewports are windows on your layout that display views of your model. Discover how to create multiple viewports within a layout to show different parts or aspects of your design simultaneously.
- Setting the Scale in Viewports: Scaling your viewports correctly is crucial for accurate representation. Learn to set the scale of your viewports so that the printed drawing reflects the real-world dimensions accurately.
- Layer Visibility in Viewports: Manage which layers are visible in each viewport. This allows for greater control over what information is presented in your printouts.
- Adding Annotations in Paper Space: Annotations such as dimensions, text, and titles can be added in paper space. Position them strategically within your layout for clarity and readability.
- Plotting Your Drawing: Understand the plotting process, including selecting the correct printer/plotter, paper size, plot area, and plot scale. Also, explore plot styles to achieve the desired line weights, colors, and styles in your printed output.
- Printing to PDF: Learn to print your layouts to PDF for sharing or digital archiving. This involves configuring the PDF plotter settings for optimal results.
- Checking the Print Preview: Always check the print preview before printing. This step helps identify any issues with scale, layout, or visibility that need correction.
By following these steps, you can ensure that your AutoCAD drawings are properly prepared for printing, resulting in professional and accurate physical representations of your designs.
Customization and Tool Palettes
Customizing AutoCAD to fit your specific workflow can significantly increase productivity. This section discusses how to personalize your workspace and use tool palettes for efficient access to frequently used tools and commands.
- Personalizing the Workspace: Tailor your workspace by arranging the ribbon, toolbars, and panels according to your preferences. Learn how to save your workspace for future use.
- Creating Custom Tool Palettes: Create tool palettes that cater to your project needs. Include commands, blocks, hatch patterns, and other frequently used elements for quick access.
- Adding Tools to Palettes: Discover how to add tools to your palettes by dragging commands, blocks, or scripts from the command list or from existing drawings.
- Organizing Tool Palettes: Organize your tool palettes into groups for different project types or stages of work. This organization can streamline your workflow and reduce the time spent searching for specific tools.
- Sharing Tool Palettes: Learn the process for exporting and importing tool palettes, allowing you to share your custom setups with team members or across different machines.
- Custom Commands and Macros: Enhance your productivity by creating custom commands and macros. Automate repetitive tasks by recording actions or writing scripts.
- Modifying Shortcut Keys: Customize shortcut keys for frequently used commands to speed up your design process. Assign shortcuts that are intuitive and easy to remember.
- Using Quick Access Toolbar: Utilize the Quick Access Toolbar for your most-used commands. Customize it to include shortcuts to commands you use on a daily basis.
By customizing AutoCAD to better suit your working style and utilizing tool palettes for quick access to tools and commands, you can make your design process more efficient and personalized.
AutoCAD Shortcuts and Productivity Tips
Enhancing your productivity in AutoCAD involves learning shortcuts and employing strategies that save time. This section is dedicated to sharing tips and shortcuts that can streamline your drafting process.
- Keyboard Shortcuts: Familiarize yourself with keyboard shortcuts for common commands. For example, use \"C\" for CIRCLE, \"L\" for LINE, \"PL\" for PLINE, and \"TR\" for TRIM. Customizing your own shortcuts can further improve efficiency.
- Mouse Gestures: Utilize mouse gestures for quick access to frequently used commands. Right-click and drag in specific directions to activate commands without moving away from your work area.
- Command Aliases: Customize command aliases in the PGP file for quicker command execution. This lets you enter your own abbreviations for any command.
- Using the Command Line: Enhance your speed by using the command line for direct command input and dynamic input for options while in a command.
- Ribbon and Toolbar Customization: Tailor the ribbon and toolbars to include tools you use most often. Removing unused panels can also reduce clutter and focus your workspace.
- Palette Transparency: Adjust the transparency of tool palettes when they\"re not in use, allowing for better screen real estate management without losing access to tools.
- Template Use: Create templates with predefined settings for layers, styles, and layouts to avoid setting up new projects from scratch.
- Block and Xref Efficiency: Use blocks for repetitive elements and Xrefs for external references to keep your files light and manageable.
- Layer Management: Use layer filters and layer states to quickly switch between different layer configurations, saving time when working with complex drawings.
- Batch Processing: Learn to use batch processing for repetitive tasks across multiple files, such as plotting, purging, or applying changes.
By incorporating these shortcuts and productivity tips into your workflow, you can significantly enhance your efficiency and reduce the time spent on routine tasks in AutoCAD.
Collaboration in AutoCAD: Sharing Files and Design Collaboration
Effective collaboration in AutoCAD enhances productivity and ensures that projects benefit from the collective expertise of the team. This section outlines strategies for efficient sharing and collaboration on designs.
- Utilizing AutoCAD’s Cloud Features: Use AutoCAD’s cloud storage and collaboration features to share drawings and collaborate in real-time. This allows team members to access and update files from anywhere.
- Sharing Drawing Files: Understand the best practices for sharing DWG files, including using eTransmit for packaging associated files and using reference paths to ensure that all elements display correctly.
- External References (Xrefs): Use Xrefs to link different parts of a project without merging them into a single file. This allows multiple users to work on different aspects of the project simultaneously.
- Using Data Linking for Collaboration: Link external data sources to your drawings, allowing for live updates and ensuring that everyone has access to the most current information.
- Communication Tools: Leverage built-in communication tools within AutoCAD for instant messaging and annotations. This facilitates clear and instant feedback among team members.
- Version Control: Implement version control practices to manage changes and maintain a history of revisions. This is crucial for tracking progress and ensuring data integrity.
- Collaboration Platforms: Integrate AutoCAD with collaboration platforms like Autodesk BIM 360 or other project management tools. These platforms provide a centralized space for project data, communication, and version control.
- Access Control: Manage user permissions to control access to sensitive or critical design files. This ensures that only authorized personnel can make changes.
- Training and Standards: Establish collaboration standards and provide training for team members. Consistent use of tools, templates, and naming conventions can greatly enhance collaborative efforts.
By adopting these collaboration strategies, teams can work more cohesively on AutoCAD projects, leading to improved efficiency, creativity, and project outcomes.
_HOOK_
Common Issues and Troubleshooting
Even the most experienced AutoCAD users encounter issues. Understanding how to troubleshoot common problems can save time and frustration. This section addresses common challenges and their solutions.
- File Compatibility Issues: When receiving files from different versions of AutoCAD, use the SAVEAS command to save back to an earlier version or DWG TrueView to convert files.
- Performance Slowdowns: Regularly purge unused objects with the PURGE command and audit your drawings with the AUDIT command to improve performance.
- Printing Problems: For printing issues, check plotter settings, update drivers, and ensure that the plot scale is correctly set. Using the PLOTTERMANAGER command can help configure plotter settings.
- Missing External References (Xrefs): Use the ETRANSMIT or PACKANDGO commands to bundle drawings and their references for sharing. Ensure paths to Xrefs are relative, not absolute, for portability.
- Layer Management Conflicts: If layers aren’t behaving as expected, use the LAYMRG command to merge problematic layers and reset their properties.
- Block Editing Issues: When blocks don\"t behave as intended, use the REFEDIT command to edit block definitions directly. Ensure all changes are saved back to the block.
- Dimension Style Inconsistencies: Use the DIMSTYLE command to standardize dimension styles across drawings. This ensures consistency in appearance and readability.
- Command Line Missing or Docked Incorrectly: If the command line is missing or misplaced, use the COMMANDLINE command to restore it. Dock it at the bottom for easy access.
- Custom Settings Lost After Update: Backup CUIX files and workspace settings before updating AutoCAD. Restore these files after an update to maintain your custom settings.
- Software Crashes and Instability: Regularly update AutoCAD and your computer\"s operating system. Check for compatibility issues and ensure that your hardware meets the software’s requirements.
By systematically addressing these common issues, you can maintain a smooth workflow and minimize downtime in your AutoCAD projects.
Exploring Advanced AutoCAD Features
As you become more comfortable with the basics of AutoCAD, delving into its advanced features can unlock even greater potential in your designs. This section covers sophisticated tools and techniques that can elevate your projects.
- 3D Modeling Tools: Beyond basic 3D shapes, learn to use the Mesh and Surface modeling tools for creating complex geometries and organic shapes. Experiment with the Solid editing commands to modify 3D models.
- Parametric Constraints: Apply parametric constraints to control the dimensions and relationships between objects. This powerful feature ensures that your design adheres to specific standards and requirements.
- Dynamic Blocks: Enhance your block library with Dynamic Blocks. Add flexibility to your blocks through parameters and actions that allow for on-the-fly modifications without the need for multiple block definitions.
- Advanced Rendering Techniques: Utilize AutoCAD\"s rendering tools to create photorealistic images of your models. Adjust materials, lighting, and environment settings to achieve realistic effects.
- Custom Scripting and Automation: Learn to write custom scripts and use AutoLISP for automating repetitive tasks. This can significantly speed up your workflow and reduce errors.
- Data Extraction: Use the DATAEXTRACTION command to pull information from your drawings into tables or external files. This is invaluable for creating bills of materials, schedules, and other documentation.
- Customization with APIs: For those with programming skills, exploring AutoCAD\"s APIs for .NET, ObjectARX, and AutoLISP can open up custom tool development, offering tailored solutions for your specific needs.
- Advanced Plotting and Publishing: Dive deeper into plotting and publishing options for sharing your work. Learn about batch plotting, electronic publishing, and creating sets of drawings for distribution.
- Working with Geospatial Data: Integrate geospatial data into your drawings for projects that require geographic location referencing. Utilize the GEOLOCATION command to add maps and aerial imagery directly into your designs.
- Collaboration with Design Teams: Explore advanced collaboration features, including reference model coordination and cloud-based file sharing, to enhance teamwork and project integration.
By mastering these advanced features, you can push the boundaries of your design capabilities in AutoCAD, leading to more innovative and efficient project outcomes.
READ MORE:
Continuing Education: Resources and Communities for Learners
The journey to mastering AutoCAD doesn\"t end with the basics. Continuing your education through various resources and engaging with the community can greatly enhance your skills and knowledge. Here are some valuable avenues for ongoing learning.
- Online Courses and Tutorials: Platforms like Udemy, Coursera, and LinkedIn Learning offer a wide range of AutoCAD courses, from intermediate to advanced levels, catering to various specializations.
- AutoCAD Blogs and Forums: Follow AutoCAD blogs and participate in forums such as the Autodesk forums, CADTutor, and the AUGI community. These platforms are excellent for staying updated on new features, tips, and troubleshooting advice.
- Books and eBooks: There are numerous comprehensive guides and reference books available for AutoCAD. These resources are great for deep dives into specific topics or functions within AutoCAD.
- YouTube Channels: Many experienced AutoCAD professionals share their knowledge through YouTube channels. These videos can provide visual and practical guidance on a variety of topics.
- Workshops and Webinars: Attend workshops and webinars hosted by Autodesk and other educational institutions. These sessions often cover updates, advanced techniques, and industry-specific applications of AutoCAD.
- AutoCAD Certification: Consider pursuing AutoCAD certification through Autodesk. This not only validates your skills but also keeps you motivated to learn and understand the software more deeply.
- User Groups: Joining an AutoCAD user group can provide networking opportunities, peer support, and insights into how others are utilizing AutoCAD in different industries.
- Practice Projects: Apply your skills to real-world projects or challenges. Engaging with practical work can reveal new learning opportunities and areas for improvement.
- Feedback from Peers: Share your work with peers and mentors for constructive feedback. This can help you identify areas for growth and new techniques to explore.
By leveraging these resources and actively participating in the AutoCAD community, you can continue to grow as a professional, keeping your skills sharp and relevant in the evolving world of design and drafting.
Embark on your AutoCAD journey with confidence, armed with the knowledge from this comprehensive guide. Continue exploring, learning, and connecting with the community to unlock your full potential in design and drafting.