Topic autocad 3d tutorial for beginners: Welcome to the ultimate AutoCAD 3D tutorial for beginners, designed to equip you with the skills needed to create stunning 3D models and designs effortlessly.
Table of Content
- What are some beginner-friendly AutoCAD 3D tutorials?
- Understanding the AutoCAD 3D Interface
- Basic 3D Modeling Concepts
- Navigating the Workspace in 3D
- Creating Simple 3D Shapes
- Modifying 3D Objects
- Using Basic 3D Editing Tools
- YOUTUBE: AutoCAD 2018 3D Tutorial for Beginners New Title: AutoCAD 2018 3D Tutorial for Beginners
- Advanced 3D Modeling Techniques
- Materials and Texturing Basics
- Lighting and Rendering Fundamentals
- Preparing Your Model for 3D Printing
- Exporting and Sharing 3D Models
- Tips and Tricks for Efficient 3D Design
What are some beginner-friendly AutoCAD 3D tutorials?
There are several beginner-friendly AutoCAD 3D tutorials available online that can help you kickstart your learning journey. Here are some options:
-
\"Autocad in 3D - Tutorials and Exercises\" playlist on YouTube:
-
Access the playlist: Autocad in 3D - Tutorials and Exercises
-
This playlist provides a variety of video tutorials and exercises specifically focused on AutoCAD 3D. It covers topics such as creating 3D objects, modifying objects in 3D space, and working with materials and rendering.
-
-
\"AutoCAD 3D Basics - Tutorial to help beginners learn AutoCAD 3D\" on YouTube:
-
Access the tutorial: AutoCAD 3D Basics - Tutorial to help beginners learn AutoCAD 3D
-
This tutorial provides a step-by-step guide for beginners to learn AutoCAD 3D. It covers basic concepts such as creating 3D models, using 3D tools, working with layers, and creating realistic renderings.
-
-
\"AutoCAD 3D Modeling Exercise Tutorial for Beginners\" on YouTube:
-
Access the tutorial: AutoCAD 3D Modeling Exercise Tutorial for Beginners
-
This tutorial focuses on practical exercises to help beginners practice AutoCAD 3D modeling. It covers various exercises where you can create 3D models of objects like a chair, a house, or a car.
-
These tutorials provide a good starting point for beginners to learn AutoCAD 3D and gain hands-on experience with various 3D modeling techniques. Remember to practice regularly and experiment with different tools and features to enhance your skills.
READ MORE:
Understanding the AutoCAD 3D Interface
Getting familiar with the AutoCAD 3D interface is the first step towards mastering 3D modeling. The interface is designed to provide easy access to the tools and features you need to create complex 3D designs.
- Workspace Switching: Learn how to switch between different workspaces to access 3D tools effectively.
- Toolbars and Panels: Identify and customize toolbars and panels that are specifically used for 3D modeling.
- Command Line: Utilize the command line for efficient 3D modeling commands and shortcuts.
- ViewCube: Use the ViewCube for easy navigation and orientation of your 3D models.
- Navigation Bar: Explore the navigation bar for tools like Pan, Zoom, and Orbit to view your model from different angles.
- Modeling Workspace: Familiarize yourself with the 3D modeling workspace and its environment to optimize your modeling process.
By understanding these components, you’ll be better prepared to navigate the AutoCAD 3D environment and start creating your own 3D designs.

Basic 3D Modeling Concepts
Understanding the foundational concepts of 3D modeling is crucial for beginners to start creating their own 3D designs in AutoCAD. Here, we break down these concepts into manageable parts.
- Primitives: Discover how basic shapes like cubes, spheres, and cylinders can serve as the building blocks for more complex models.
- Extrusion: Learn how to extend a 2D shape into a 3D form by extruding it, creating depth and volume.
- Revolve: Find out how revolving a 2D shape around an axis can create symmetrical 3D objects.
- Boolean Operations: Understand how to combine, subtract, and intersect 3D shapes to create new forms.
- Mesh Modeling: Explore mesh modeling techniques for creating organic shapes with vertices, edges, and faces.
- Surface Modeling: Get to grips with surface modeling to create complex, smooth surfaces that can be adjusted with control points.
Mastering these basic concepts will empower you to start experimenting with 3D modeling in AutoCAD, paving the way for more advanced techniques and projects.
Navigating the Workspace in 3D
Navigating the 3D workspace in AutoCAD is essential for efficiently viewing and editing your models. This section guides you through the basic navigation tools and techniques to enhance your 3D modeling experience.
- Zoom: Learn how to zoom in and out to get a closer look at your model or to view it from a distance.
- Pan: Discover how to move your viewpoint horizontally or vertically to view different parts of your model.
- Orbit: Understand how to rotate your view around the model to see it from various angles and perspectives.
- ViewCube: Use the ViewCube to quickly navigate to standard viewpoints like Top, Front, and Side or to rotate the view freely.
- 3D Navigation Tools: Explore additional 3D navigation tools such as the SteeringWheels and the Walk and Fly tools to move through your model as if you were walking or flying.
- Camera Controls: Adjust camera settings to change the focal length or to simulate real-world camera effects.
Mastering these navigation techniques will make your 3D modeling process more intuitive and efficient, allowing you to focus on creating detailed designs.
Creating Simple 3D Shapes
Creating simple 3D shapes is a fundamental skill in AutoCAD, providing a foundation for more complex designs. This section will guide you through the steps to create basic 3D geometric forms.
- Box (Cube): Start with a box to understand the basics of 3D volume creation. Use the BOX command, specify a corner, and define the length, width, and height.
- Cylinder: Learn how to create cylinders for objects like columns or pipes. Use the CYLINDER command, choose the base center point, and set the radius and height.
- Sphere: Create spheres by using the SPHERE command. Select the center point and specify the radius to model spherical objects like balls or globes.
- Cone: Cones are made using the CONE command. Define the base center point, radius, and height to create cone-shaped objects.
- Pyramid: Use the PYRAMID command to explore how to create pyramids with a square or rectangular base by specifying the base area and height.
- Torus: Torus shapes are created with the TORUS command, ideal for modeling donut-shaped objects. Choose the center point, specify the major and minor radii.
These simple 3D shapes serve as the building blocks for more intricate models. Practice creating and modifying these shapes to develop your 3D modeling skills in AutoCAD.

_HOOK_
Modifying 3D Objects
Once you have created basic 3D shapes in AutoCAD, the next step is learning how to modify these objects to refine your designs. This section covers essential modification tools and techniques.
- Move: Use the MOVE command to change the position of a 3D object within your workspace.
- Rotate: The ROTATE command allows you to turn a 3D object around a specified axis for proper orientation.
- Scale: With the SCALE command, you can resize your 3D objects proportionally in all dimensions or individually along the X, Y, or Z axis.
- Trim and Extend: Trim excess edges or extend the edges of 3D objects to meet the edges of another object using the TRIM and EXTEND commands.
- Offset: Create parallel copies of 3D surfaces or edges at a specified distance using the OFFSET command.
- Mirror: The MIRROR command can duplicate your 3D object as a mirrored copy across a specified mirror line, useful for symmetrical designs.
- Fillet and Chamfer: Use FILLET to create a rounded edge between two surfaces or CHAMFER to create a beveled edge.
- Boolean Operations: Combine multiple 3D objects into a single complex object or subtract one from another using UNION, SUBTRACT, and INTERSECT commands.
Mastering these modification techniques will greatly enhance your ability to manipulate and refine your 3D models in AutoCAD, allowing for more sophisticated and detailed designs.
Using Basic 3D Editing Tools
AutoCAD\"s suite of basic 3D editing tools enables you to manipulate and refine your 3D models with precision. This section introduces you to these tools, helping you enhance your 3D designs effectively.
- Extrude: Extend 2D shapes into 3D forms by pulling them outwards, adding depth to flat drawings.
- Presspull: Similar to extrude, but allows you to dynamically modify 3D models by pushing or pulling on a face.
- Revolve: Create complex 3D objects by revolving a 2D shape around an axis.
- Sweep: Sweep a 2D shape along a path to create 3D objects with varying cross-sections.
- Loft: Generate 3D shapes by lofting between multiple shapes to create smooth transitions.
- Shell: Hollow out a solid 3D object or create a shell with a specified thickness.
- Slice: Cut through 3D objects with a plane to see inside or to create separate parts.
- Union, Subtract, and Intersect: Perform Boolean operations to combine or modify objects by adding, subtracting, or finding their intersection.
Learning to use these editing tools proficiently will enable you to bring complexity and detail to your 3D models, making your designs stand out.
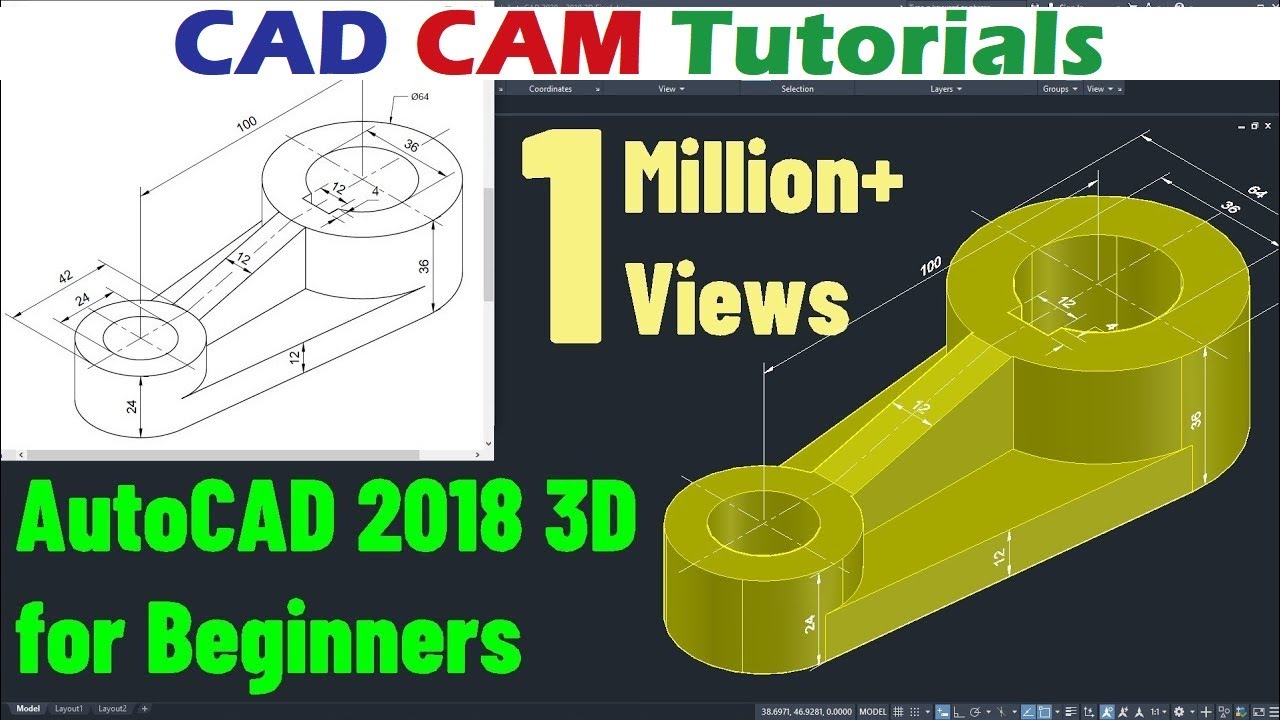
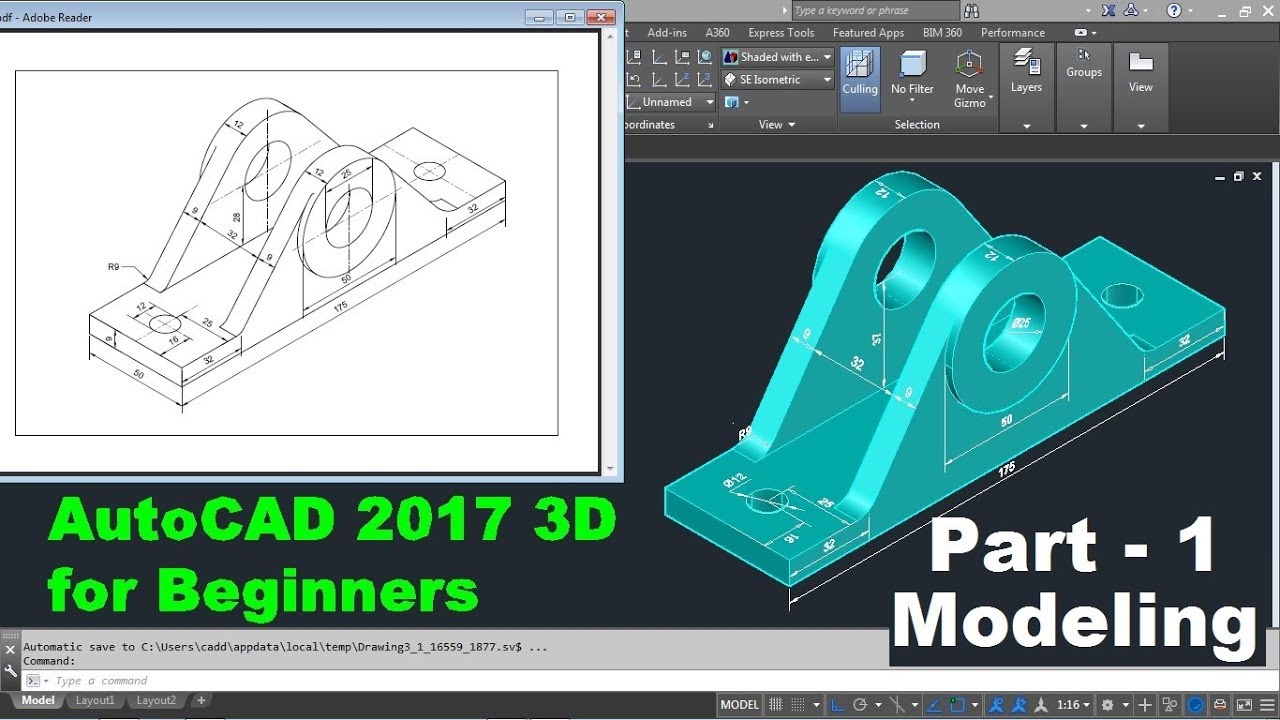
AutoCAD 2018 3D Tutorial for Beginners New Title: AutoCAD 2018 3D Tutorial for Beginners
Want to level up your CAD skills? Check out this amazing AutoCAD 3D tutorial that will guide you through the process of creating stunning 3D designs. Perfect for both beginners and experienced CAD users!
AutoCAD 2021 3D Tutorial for Beginners New Title: AutoCAD 2021 3D Tutorial for Beginners
Are you new to AutoCAD? No worries, this beginners tutorial will teach you the basics from scratch. Dive into the world of CAD and learn how to create precise 2D and 3D drawings with ease. Don\'t miss out on this opportunity to kickstart your CAD journey!
Advanced 3D Modeling Techniques
As you progress beyond basic 3D modeling in AutoCAD, exploring advanced techniques can further enhance your designs. These methods allow for more intricate and detailed creations.
- Solid Editing: Refine your models with solid editing tools to add complexity and detail, such as filleting edges, slicing solids, and editing faces.
- Surface Modeling: Create complex surfaces that can be modified and manipulated to achieve organic shapes and smooth finishes.
- NURBS Modeling: Utilize Non-Uniform Rational B-Splines (NURBS) to create highly accurate and flexible 3D geometry.
- Mesh Modeling: Work with mesh models for more freedom in sculpting and editing organic shapes, perfect for conceptual designs.
- Parametric Constraints: Apply constraints to maintain relationships between objects, ensuring that your design adapts to changes intelligently.
- 3D Scanning and Import: Incorporate real-world objects into your designs by importing 3D scanned data, offering a base for complex modeling.
- Visualization Techniques: Employ advanced rendering and visualization techniques to bring your models to life with realistic materials, lighting, and environments.
- Custom Scripts and Automation: Streamline repetitive tasks and complex operations with custom scripts and AutoCAD\"s automation features.
Mastering these advanced techniques will significantly expand your 3D modeling capabilities, allowing you to tackle more sophisticated projects with confidence.
Materials and Texturing Basics
Adding materials and textures to your 3D models in AutoCAD enhances realism and helps convey the intended aesthetic of your designs. This section introduces the fundamentals of applying materials and textures.
- Applying Materials: Learn to apply different materials to your 3D objects to simulate real-world surfaces, such as metal, glass, wood, and concrete.
- Creating Custom Materials: Discover how to create custom materials by adjusting properties like color, texture, and reflectivity to achieve the desired look.
- Mapping Textures: Understand how to map textures onto your 3D models, adjusting their scale, rotation, and position for realistic effects.
- Using UVW Mapping: Explore UVW mapping to accurately apply textures on complex or irregular surfaces, ensuring they look correct from all angles.
- Adjusting Lighting: See how lighting affects the appearance of materials and textures, and learn to adjust lighting settings to highlight your designs.
- Rendering: Render your models to preview how materials and textures will look under different lighting conditions, refining them for the final output.
Mastering materials and texturing will take your 3D models to the next level, making them more compelling and visually appealing in presentations and visualizations.
Lighting and Rendering Fundamentals
Proper lighting and rendering are key to bringing your 3D models to life in AutoCAD. This section covers the basics of lighting your scenes and rendering them for final presentation.
- Types of Lights: Understand the different types of lights available in AutoCAD, including point lights, spotlights, and directional lights, and how they can be used to simulate natural and artificial lighting conditions.
- Placing Lights: Learn the strategies for placing lights in your scene to highlight specific features, create mood, or simulate realistic lighting environments.
- Adjusting Light Properties: Explore how to adjust properties such as intensity, color, and fall-off to achieve the desired lighting effect.
- Global Illumination: Discover the role of global illumination in adding realism to your scenes by simulating the complex interaction of light in an environment.
- Rendering Settings: Familiarize yourself with the rendering settings in AutoCAD, including resolution, shadows, and reflections, to produce high-quality images of your models.
- Post-Processing: Learn basic post-processing techniques to enhance your rendered images, such as adjusting brightness, contrast, and adding filters.
Mastering these lighting and rendering fundamentals will significantly enhance the visual quality of your 3D projects, making them more realistic and visually engaging.
_HOOK_
Preparing Your Model for 3D Printing
3D printing your AutoCAD models can be a rewarding final step to bring your designs into the physical world. However, it requires careful preparation to ensure your model is printable, structurally sound, and aesthetically pleasing. Follow these steps to prepare your AutoCAD 3D model for printing:
- Check Model Integrity: Begin by examining your model for any errors or inconsistencies. Use AutoCAD\"s solid editing tools to repair gaps, overlaps, and other issues that might affect the printability of your model.
- Simplify the Design: Complex models with intricate details may cause problems during printing. Simplify your design by reducing the number of small details and optimizing the geometry for printing.
- Ensure Water-Tightness: Your model must be a single, solid object without any holes (water-tight) to be 3D printed successfully. Use the \"STL Check\" command to identify and fix any issues that could lead to printing failures.
- Optimize Wall Thickness: Check the wall thickness of your model to ensure it is sufficient to be printed. Too thin walls may not print correctly, while too thick walls may waste material and increase printing time.
- Scale the Model: Adjust the size of your model to fit the printing bed of your 3D printer. Consider the physical constraints of your printer and scale your model accordingly.
- Choose the Right Orientation: Orient your model in a way that minimizes the need for support structures, reduces printing time, and ensures the best possible surface quality.
- Generate Supports: If your model has overhanging parts, you\"ll need to generate support structures to prevent them from collapsing during printing. Use AutoCAD or your printer\"s software to add supports where necessary.
- Export Your Model: Once your model is ready, export it in a format compatible with your 3D printer, typically STL or OBJ. Ensure the export settings match your printer\"s requirements.
- Pre-Print Checks: Before sending your model to the printer, use the printer\"s software to do a final check. Look for any potential printing issues and adjust print settings such as resolution, infill density, and print speed to optimize the print.
- Print a Test Model: If possible, print a small test version of your model to check for any errors or adjustments needed before committing to the final print.
By following these steps, you can ensure that your AutoCAD model is properly prepared for 3D printing, leading to a successful and satisfying printing experience.
Exporting and Sharing 3D Models
After creating your 3D model in AutoCAD, you may want to export it for use in other applications or share it with colleagues and clients. Exporting and sharing your models effectively involves several steps to ensure compatibility and maintain the integrity of your designs. Here\"s how to do it:
- Choose the Right Format: Determine the most appropriate file format for your needs. Common formats for exporting 3D models include STL (for 3D printing), OBJ (for graphics and animation), and FBX (for game development). AutoCAD also supports the export of DWG and DXF files for further editing in other CAD software.
- Check Model Compatibility: Before exporting, ensure your model is compatible with the target application. This might involve checking dimensions, scale, and any application-specific requirements.
- Prepare the Model: Simplify your model if necessary, by reducing complexity and removing unnecessary elements. This can help to reduce file size and improve compatibility with other software.
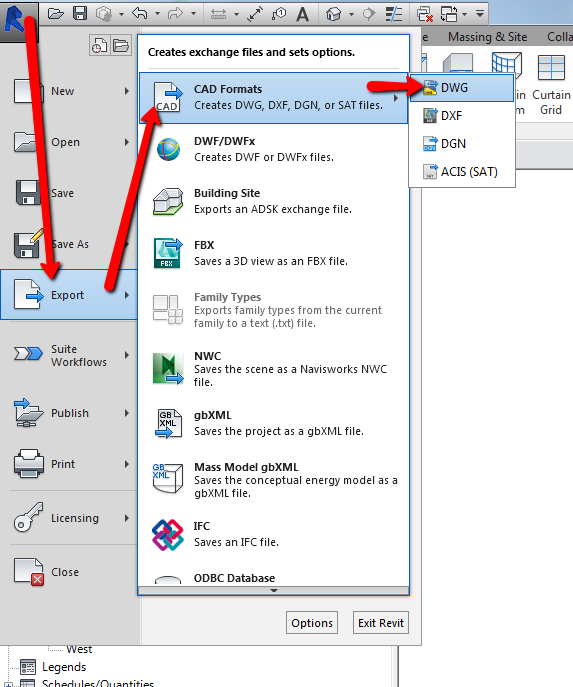
- Export the Model: Use the export function in AutoCAD. Navigate to the application menu (the big \"A\"), select \"Export,\" and then choose your desired format. Adjust any settings specific to the format, such as tessellation quality for STL files.
- Include Textures and Materials: If your model includes textures or materials, ensure they are included in the export if the format supports it. This may involve additional steps or the use of plugins.
- Share the Model: For sharing, consider the file size and the recipient\"s ability to open the file. Compress large files and use cloud storage or specialized services for sharing 3D models. Include any necessary instructions or notes about the model.
- Use Collaboration Platforms: For collaborative projects, consider using platforms designed for 3D model sharing and viewing, such as Autodesk Viewer. These platforms allow for easy viewing, commenting, and revision tracking without the need for specialized software.
Exporting and sharing your 3D models from AutoCAD can open up new possibilities for collaboration, presentation, and further development of your designs. By following these steps, you can ensure a smooth transition of your work to other platforms and users.
READ MORE:
Tips and Tricks for Efficient 3D Design
Efficient 3D design in AutoCAD not only speeds up the design process but also enhances the quality of your models. Whether you are a beginner or looking to refine your workflow, these tips and tricks can help you get the most out of your 3D design experience:
- Use Keyboard Shortcuts: Familiarize yourself with AutoCAD\"s keyboard shortcuts. This can significantly speed up your workflow by reducing the time spent navigating through menus.
- Customize Your Workspace: Tailor the AutoCAD interface to suit your needs. You can customize toolbars, command aliases, and the ribbon to have your most-used tools readily available.
- Master the Use of Layers: Organize your model by using layers. This helps in managing visibility, editing, and segregating different elements of your design, making it easier to work with complex models.
- Apply the Use of Blocks: For repetitive elements within your models, create and use blocks. This not only saves time but also reduces the file size, making your model more efficient to work with.
- Utilize Reference Objects: Use reference objects like images or PDFs as a guide to create accurate and detailed models. This is especially useful when working on models that need to match existing objects or spaces.
- Experiment with Modeling Techniques: AutoCAD offers various modeling techniques such as solid, surface, and mesh modeling. Experiment with these techniques to find the most efficient way to create your designs based on their complexity and requirements.
- Make Use of Rendering Tools: Use AutoCAD’s rendering tools to get a realistic view of your models. This can help in identifying any design flaws and also in presenting your ideas more effectively.
- Stay Updated: AutoCAD is constantly being updated with new features and improvements. Stay updated with the latest versions and features to make the most of the software’s capabilities.
- Learn from the Community: Join AutoCAD forums and communities. These platforms are a great way to learn new tips and tricks, solve problems, and share your knowledge with others.
- Practice Regularly: Like any skill, proficiency in 3D design comes with regular practice. Challenge yourself with new projects to continuously improve your skills.
Implementing these tips and tricks can significantly enhance your efficiency in 3D design using AutoCAD. Remember, the key to mastering AutoCAD lies in continuous learning and practice.
Embark on your 3D design journey with our AutoCAD tutorial for beginners, and unlock the full potential of your creative ideas. Dive into a world where efficiency meets innovation, and transform your vision into reality today.