Topic adobe illustrator paint bucket: Explore the vibrant world of digital art with the Adobe Illustrator Paint Bucket tool. This versatile feature transforms simple designs into stunning visuals, making it a favorite among graphic artists and illustrators. Dive into creativity and color with ease!
Table of Content
- How to apply fill and stroke attributes when painting in Adobe Illustrator with the paint bucket tool?
- Understanding the Live Paint Bucket Tool
- Getting Started with the Tool
- Advanced Techniques and Tips
- Gap Detection and Management
- Enhancing Artwork with the Paint Bucket Tool
- Final Touches and Adjustments
- YOUTUBE: Adobe Illustrator - How To Fill Color with the Paint Bucket Tool
- Troubleshooting Common Issues
How to apply fill and stroke attributes when painting in Adobe Illustrator with the paint bucket tool?
To apply fill and stroke attributes when painting in Adobe Illustrator with the paint bucket tool, you can follow these steps:
- Select the object or area where you want to apply the fill and stroke.
- Go to the \"Tools\" panel and select the \"Paint Bucket\" tool.
- Specify the fill and stroke attributes you want to apply by selecting the desired colors and stroke settings in the \"Color\" and \"Stroke\" panels.
- Click on the area you want to fill with the paint bucket tool.
If you want to apply the fill and stroke attributes to multiple objects or areas simultaneously, you can use the \"Live Paint Bucket\" tool:
- Select all the objects or areas you want to paint.
- Go to the \"Object\" menu, hover over \"Live Paint,\" and choose \"Make\" to convert the selection into a live paint group.
- With the \"Live Paint Bucket\" tool selected, choose the desired fill and stroke attributes in the \"Color\" and \"Stroke\" panels.
- Click on the objects or areas to apply the selected fill and stroke attributes.
Note that the availability and exact location of the tools and panels may vary depending on the version of Adobe Illustrator you are using. It\'s also important to ensure that the objects or areas you want to paint are not locked or hidden.
READ MORE:
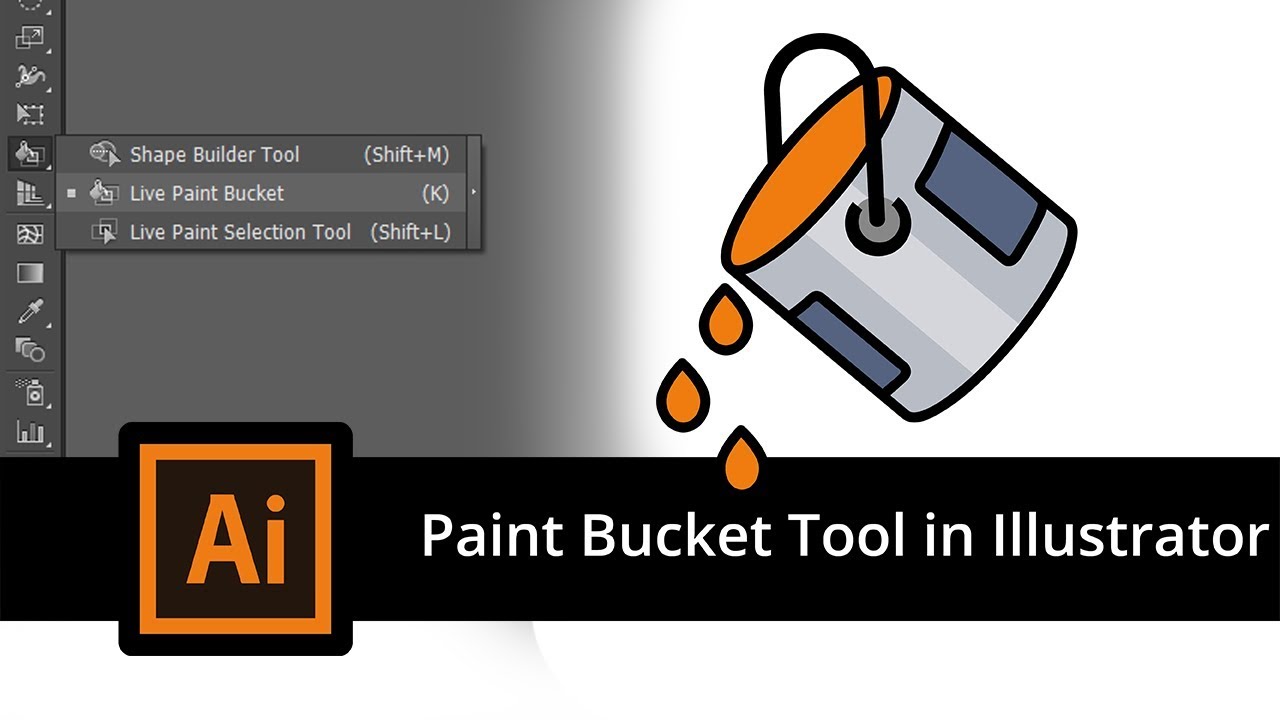
Understanding the Live Paint Bucket Tool
The Live Paint Bucket Tool in Adobe Illustrator is a dynamic and versatile tool that enables artists to fill and color their vector illustrations with ease. Located in the toolbar, usually alongside the Shape Builder Tool, it is symbolized by an icon resembling a bucket pouring paint. To use it, first select your object, then click on the paint bucket icon in the toolbar.
- Activating the Tool: You can access the Live Paint Bucket Tool by pressing \"K\" on your keyboard, or find it in the Edit Toolbar menu if it\"s not immediately visible.
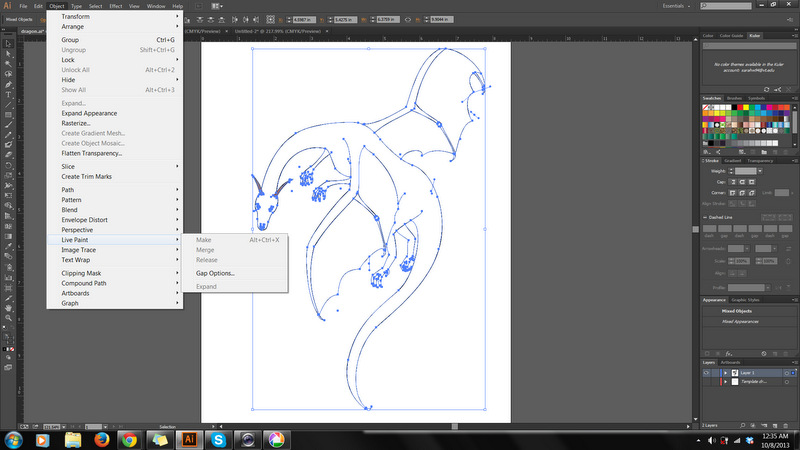
- Creating Live Paint Groups: To use the tool, convert your selected objects into a Live Paint group via Object > Live Paint > Make. This step is crucial for enabling the coloring functionality of the tool.
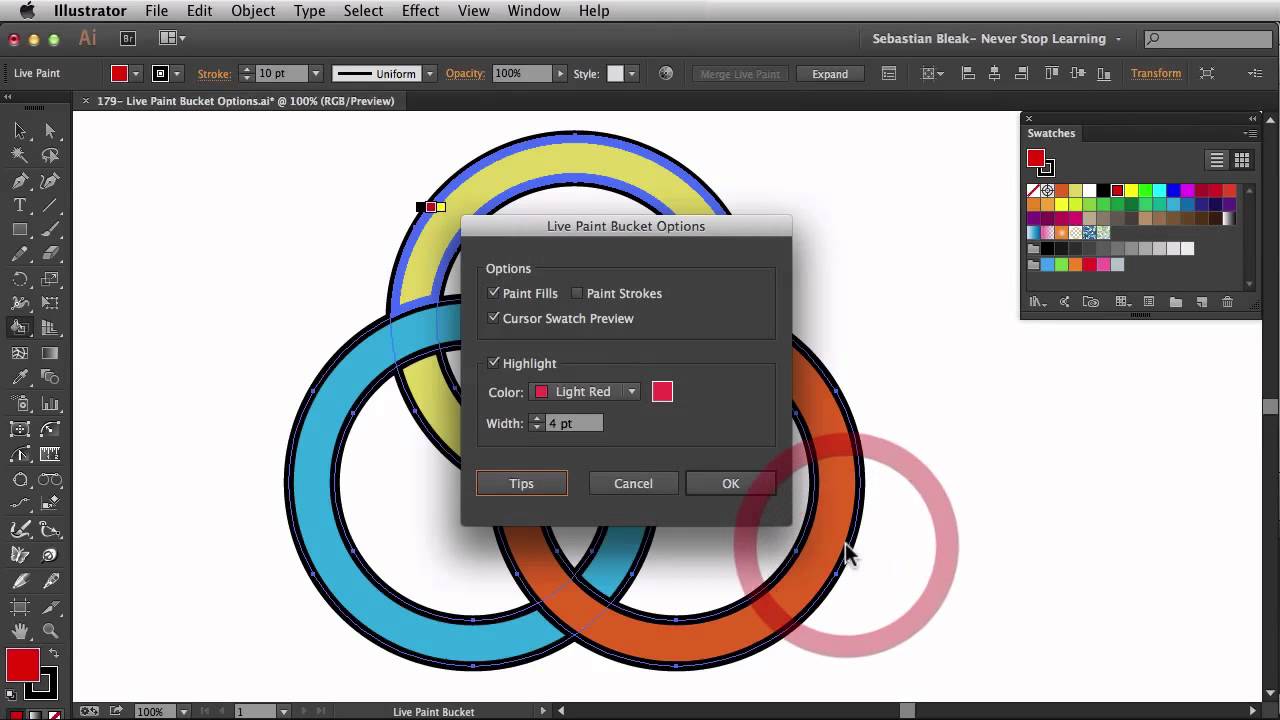
- Coloring with the Tool: Hover over the area you wish to color and click to apply your chosen color. The tool provides a swatch preview, allowing you to see the color before applying it.
- Managing Gaps: The Live Paint Bucket Tool can detect and fill gaps within complex shapes. In case of gaps, use the Gap Options dialog (Object > Live Paint > Gap Options) to manage gap detection and size, enhancing the coloring process.
- Advanced Techniques: Experiment with gradient and pattern fills for more complex and interesting effects. The tool also allows for adjustments in stroke attributes and supports various coloring options, including the use of global colors and color wheels.
Remember to use keyboard shortcuts for a more efficient workflow. For example, \"B\" selects the paint bucket tool, \"X\" swaps foreground and background colors, and \"Alt\" and \"Shift\" modify fill options. Lastly, the Live Paint Selection Tool, hidden within the toolbox, enables targeted editing within a Live Paint Group.
Getting Started with the Tool
Embarking on your journey with the Adobe Illustrator Live Paint Bucket Tool begins with understanding its fundamentals. This tool revolutionizes how you add color to vector artwork, simplifying the process and enhancing creativity.
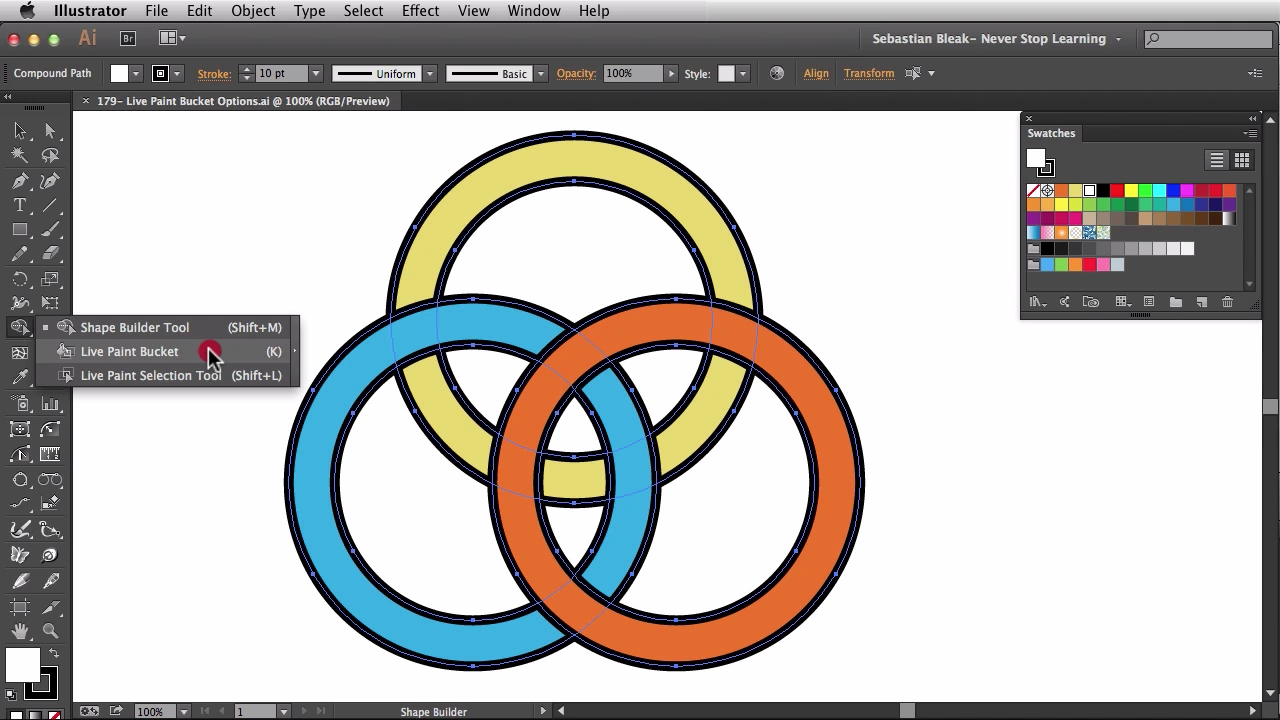
- Locating the Tool: Found in the Illustrator toolbar, the Live Paint Bucket Tool is nestled under the Shape Builder tool. A quick way to access it is by pressing \"K\" on your keyboard.
- Creating Overlapping Shapes: Begin by creating shapes that overlap. These can be simple geometric shapes or more complex designs, depending on your project.
- Forming a Live Paint Group: Select the shapes you intend to color and convert them into a Live Paint Group. This is done through Object > Live Paint > Make.
- Choosing Colors: Prepare your color palette in advance. Select colors from the Swatches panel or use the Eyedropper tool for precise color matching.
- Applying Color: With the Live Paint Bucket tool active, hover over the area to be colored. It will highlight, showing a preview of the color. Click to apply the chosen color.
- Managing Gaps: If your design has gaps, use the Gap Options (Object > Live Paint > Gap Options) to detect and fill them. This feature is vital for seamless coloring, especially in intricate designs.
- Keyboard Shortcuts: Utilize keyboard shortcuts for efficiency. For example, \"B\" for selecting the paint bucket tool and \"X\" to swap foreground and background colors.
Finally, experiment with the tool and practice coloring various shapes and designs. Remember, the Live Paint Bucket Tool is not just about filling areas with color; it\"s about bringing your creative visions to life with precision and ease.
Advanced Techniques and Tips
Once you\"re comfortable with the basics of the Adobe Illustrator Paint Bucket tool, it\"s time to explore some advanced techniques and tips to further enhance your artwork.
- Gradient and Pattern Fills: Beyond solid colors, the tool allows for the application of gradients and patterns. Experiment with different gradient types and pattern fills to add depth and texture to your designs.
- Stroke Attribute Adjustment: Before filling, adjust the stroke attributes (weight, color, style) to achieve unique effects. This can add an extra layer of sophistication to your artwork.
- Working with Gaps: Utilize the Gap Detection feature to automatically fill gaps within complex shapes. This ensures a more polished and professional finish.
- Keyboard Shortcuts: Enhance your efficiency by using shortcuts like \"B\" for selecting the paint bucket tool and \"X\" to swap foreground and background colors.
- Live Paint Selection Tool: For finer control, use the hidden Live Paint Selection Tool to edit individual paths within a Live Paint Group, allowing for detailed adjustments of both fill and stroke attributes.
- Creating Custom Colors: Use the Eyedropper tool to sample colors from images for a perfect match. Adjust the tolerance settings for precise color picking.
- Layering and Paint Group Management: Properly manage your layers and paint groups for complex artwork. This helps in keeping your project organized and easier to edit.
Remember, mastering these advanced techniques requires practice and experimentation. Each project offers a new opportunity to explore the full potential of the Live Paint Bucket Tool in Adobe Illustrator.
Gap Detection and Management
Effective gap detection and management are crucial for seamless color application in Adobe Illustrator\"s Live Paint Bucket tool. This section will guide you through identifying and managing gaps to ensure your artwork looks polished and professional.
- Understanding Gap Issues: When working with the Live Paint Bucket tool, small gaps in the artwork can prevent the tool from filling areas as expected. This is common in hand-drawn or complex vector paths.
- Activating Gap Detection: To enable gap detection, select your Live Paint object, then navigate to Object > Live Paint > Gap Options. This will open a dialog where you can choose how the tool handles gaps.
- Choosing Gap Detection Settings: In the Gap Options dialog, you can select the size of the gaps you want the tool to recognize and fill - small, medium, or large. There\"s also an option to customize the gap size according to your specific needs.
- Closing Gaps Manually: For more control, use the Direct Selection Tool to manually close gaps. This method is especially useful for fine-tuning areas where automatic gap detection might not be sufficient.
- Finalizing Gap Adjustments: Once you\"ve set your gap detection preferences and manually adjusted as needed, apply these settings. The Live Paint Bucket tool will now recognize and fill these gaps when applying color.
- Using Gap Detection in Complex Artwork: Gap detection is particularly useful in detailed and complex artwork, where manually finding and closing each gap would be time-consuming and impractical.
By mastering gap detection and management, you can ensure that your Live Paint Bucket tool fills every intended area of your artwork, no matter how complex the design might be.

_HOOK_
Enhancing Artwork with the Paint Bucket Tool
The Adobe Illustrator Paint Bucket tool is not just for basic coloring; it\"s a powerful asset for enhancing your digital artwork. This section will explore how to use this tool to add depth, texture, and sophistication to your designs.
- Adding Textures and Patterns: Use the Paint Bucket tool to apply various textures and patterns to your artwork. This can be achieved by selecting pattern swatches or creating your own custom patterns.
- Creating Gradients: The tool also allows for gradient fills, offering a smooth transition between multiple colors. Experiment with linear, radial, and angular gradients to add dimension to your artwork.
- Color Blending: Blend different colors to achieve a more natural and dynamic look. This technique is particularly useful in illustrations and vector paintings.
- Stroke Customization: Modify the stroke attributes before filling to create unique effects. Adjusting the stroke weight, color, and style can dramatically change the overall appearance of your design.
- Layering Colors: Apply multiple layers of color to add complexity to your designs. Use the tool to fill different areas with varying colors and opacities, building up layers to achieve the desired effect.
- Gap Management: Effectively use the gap detection feature to ensure that all areas of your design are filled, even the most intricate parts. This leads to a more cohesive and professional-looking piece.
By leveraging these advanced capabilities, the Paint Bucket tool can elevate your artwork from simple to sophisticated, giving your designs a polished and refined look.

Final Touches and Adjustments
Applying the final touches and adjustments using the Adobe Illustrator Paint Bucket tool can significantly enhance the quality and impact of your artwork. This section will guide you through refining your designs for a polished finish.
- Reviewing Your Artwork: After applying the initial colors, take a step back and review your artwork. Look for areas that might need more depth or a change in color for better visual impact.
- Adjusting Colors: If a color doesn’t look right, use the Paint Bucket tool to easily modify it. Remember to consider how different colors interact with each other and the overall color scheme.
- Refining Details: Zoom in to your artwork and refine the smaller details. This might include tightening up edges, ensuring gaps are filled, or smoothing out color transitions.
- Layer Management: Organize your layers effectively. This step is crucial for complex illustrations where multiple elements overlap. Proper layer management ensures that edits are easier to apply and keep track of.
- Experimenting with Opacity: Adjust the opacity of filled areas for nuanced effects, especially when overlaying colors or creating shadows and highlights.
- Utilizing Live Paint Selection Tool: For targeted adjustments, use the Live Paint Selection Tool. This allows you to select and modify individual paths within a Live Paint group.
- Saving Different Versions: As you make adjustments, consider saving different versions of your artwork. This practice allows you to compare changes and choose the best version.
By carefully applying these final touches and adjustments, your artwork will not only reflect your artistic vision but also display a professional level of detail and polish.
Adobe Illustrator - How To Fill Color with the Paint Bucket Tool
\"Create stunning graphic designs and illustrations with ease using Adobe Illustrator! Unlock your creativity and learn how to master powerful tools, create custom shapes, and bring your ideas to life in this must-watch video tutorial.\"
Illustrator Tutorial - How To Use The Live Paint Bucket Tool
\"Discover the magic of the paint bucket tool! Transform your artwork and make color adjustments effortlessly with this handy feature. Watch this video and learn how to use the paint bucket tool like a pro to achieve professional-looking designs in no time.\"
READ MORE:
Troubleshooting Common Issues
When using the Adobe Illustrator Paint Bucket tool, users may occasionally encounter issues that can hinder their workflow. This section provides solutions to some common problems, ensuring a smoother design experience.
- Tool Not Recognizing Areas: If the Paint Bucket tool is not recognizing areas to fill, check if the artwork has been converted into a Live Paint Group. This can be done via Object > Live Paint > Make.
- Dealing with Gaps: Gaps in artwork can prevent the tool from working correctly. Use the Gap Options (Object > Live Paint > Gap Options) to manage and fill these gaps.
- Color Not Applying Correctly: If the color isn\"t applying as expected, ensure the correct layer is selected and the object is part of a Live Paint Group.
- Unexpected Color Changes: Accidental color changes can occur if the wrong swatch is selected. Double-check the Swatches panel to ensure the correct color is chosen.
- Keyboard Shortcuts Not Working: Sometimes, keyboard shortcuts may not respond. Resetting Illustrator preferences or ensuring no conflicting shortcuts can resolve this.
- Tool Performance Issues: For performance issues, like lagging, ensure your Illustrator version is up to date and your system meets the software’s requirements.
- Expanding Live Paint Groups: To make individual edits or to finalize designs, expand your Live Paint Groups via Object > Live Paint > Expand. This converts the fills into standard Illustrator paths.
Understanding these troubleshooting tips can significantly enhance your efficiency when working with the Paint Bucket tool in Adobe Illustrator.
In conclusion, mastering the Adobe Illustrator Paint Bucket tool unlocks endless creative possibilities. From simple color fills to intricate designs, this tool enhances your artwork, making your creative journey both enjoyable and rewarding.