Topic mask adobe illustrator: Discover the art of "Mask Adobe Illustrator" and transform your designs. This guide unveils powerful masking techniques, enhancing creativity and precision in your digital illustrations.
Table of Content
- How to create a clipping mask in Adobe Illustrator?
- Understanding Clipping Masks in Illustrator
- Creating Clipping Masks: A Step-by-Step Guide
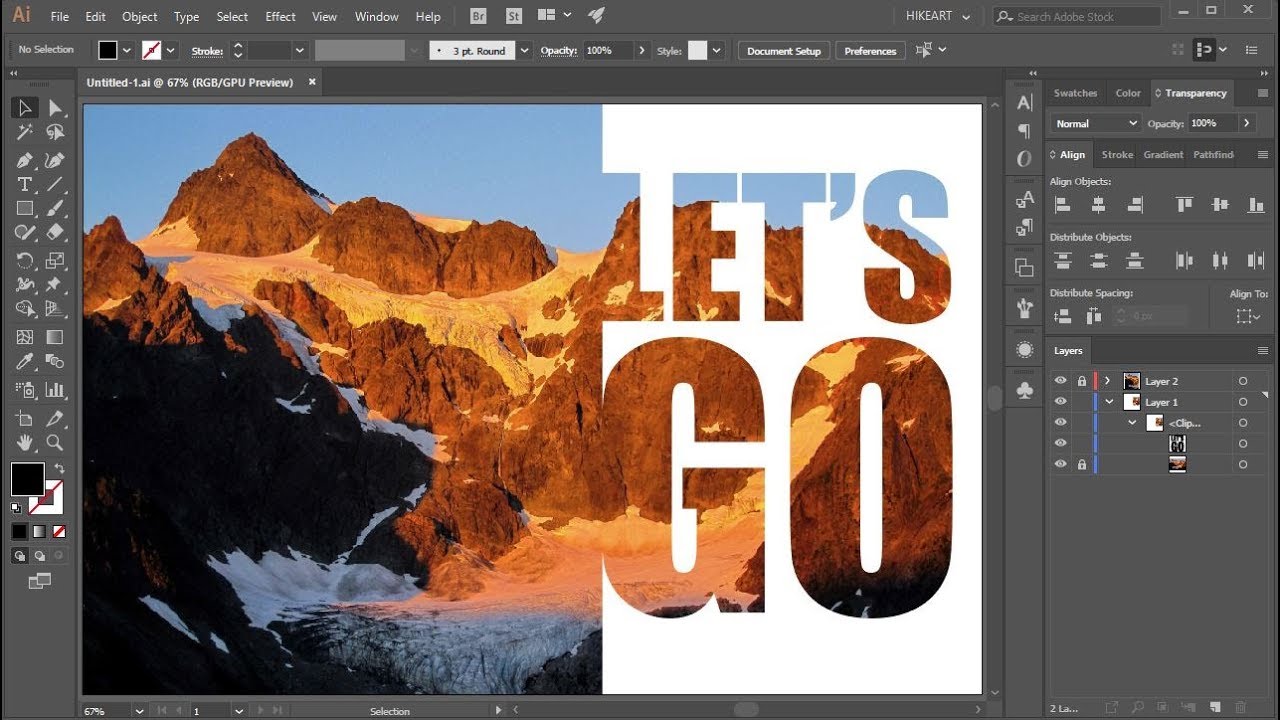
- Advanced Clipping Mask Techniques for Text and Typography
- Using Opacity Masks for Creative Effects
- Masking Multiple Objects for Complex Designs
- Editing and Modifying Clipping Masks
- YOUTUBE: Making a Clipping Mask in Adobe Illustrator
- Draw Inside Mode: An Alternative to Traditional Masking
How to create a clipping mask in Adobe Illustrator?
Creating a clipping mask in Adobe Illustrator is a useful technique that allows you to hide parts of objects, images, or shapes. Here is a step-by-step guide on how to create a clipping mask:
- Select the object or shape you want to use as the mask. This will serve as the clipping path.
- Move the object or shape to the front (if necessary) by going to \'Object\' in the menu bar, selecting \'Arrange,\' and then choosing \'Bring to Front.\'
- Arrange the objects or shapes you want to clip within the mask. Ensure that the objects or shapes are positioned correctly.
- Select all the objects you want to clip with the masking shape. You can do this by clicking and dragging the Selection Tool (black arrow) over the objects, or by holding down the Shift key and individually selecting each object.
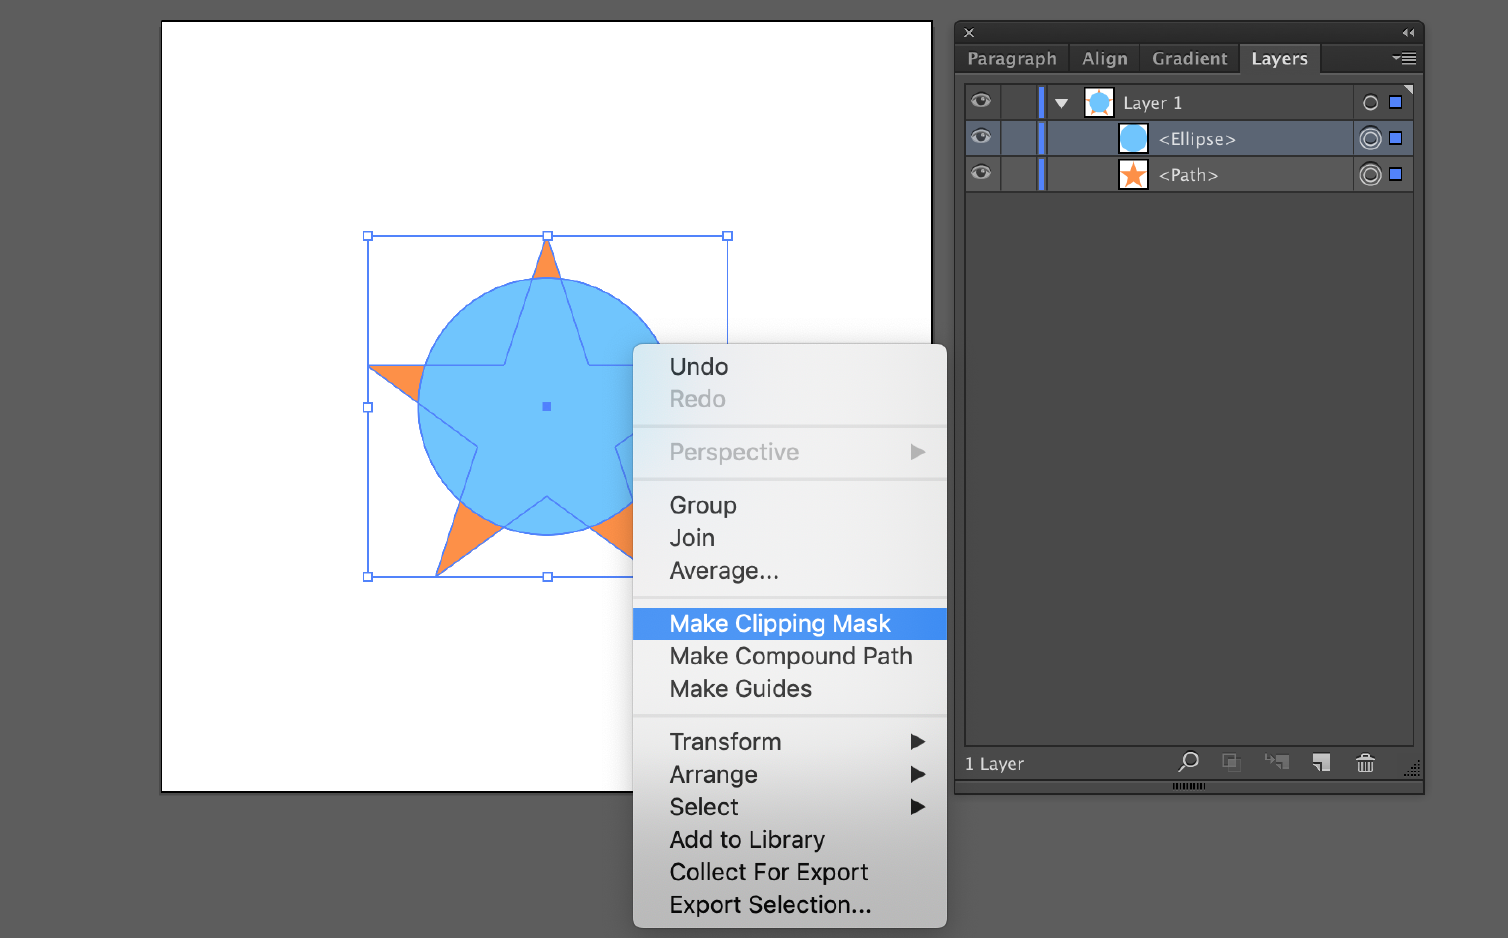
- Once all the objects are selected, go to the \'Object\' menu and choose \'Clipping Mask,\' and then select \'Make.\' Alternatively, you can use the shortcut key Command/Control + 7 to create a clipping mask.
- You will notice that the objects are now clipped within the shape or object you selected as the mask.

READ MORE:
Understanding Clipping Masks in Illustrator
Clipping masks in Adobe Illustrator are powerful tools for creating diverse designs, like collages or patterns within shapes. They allow you to mask objects so only parts within the mask\"s shape are visible. This is useful for applying patterns inside text or other shapes.
- Basic Clipping Mask Creation: Start by placing the object (like text) above the pattern. If the object is behind, bring it to the front. Then, select both and create the clipping mask via Object > Clipping Mask > Make, or use the shortcut Command/Ctrl + 7. This clips the pattern inside the object.
- Editing Clipping Masks: To adjust the mask, use the Layers Panel to select and modify the elements within the \"Clip Group\". This allows for resizing and repositioning the pattern.
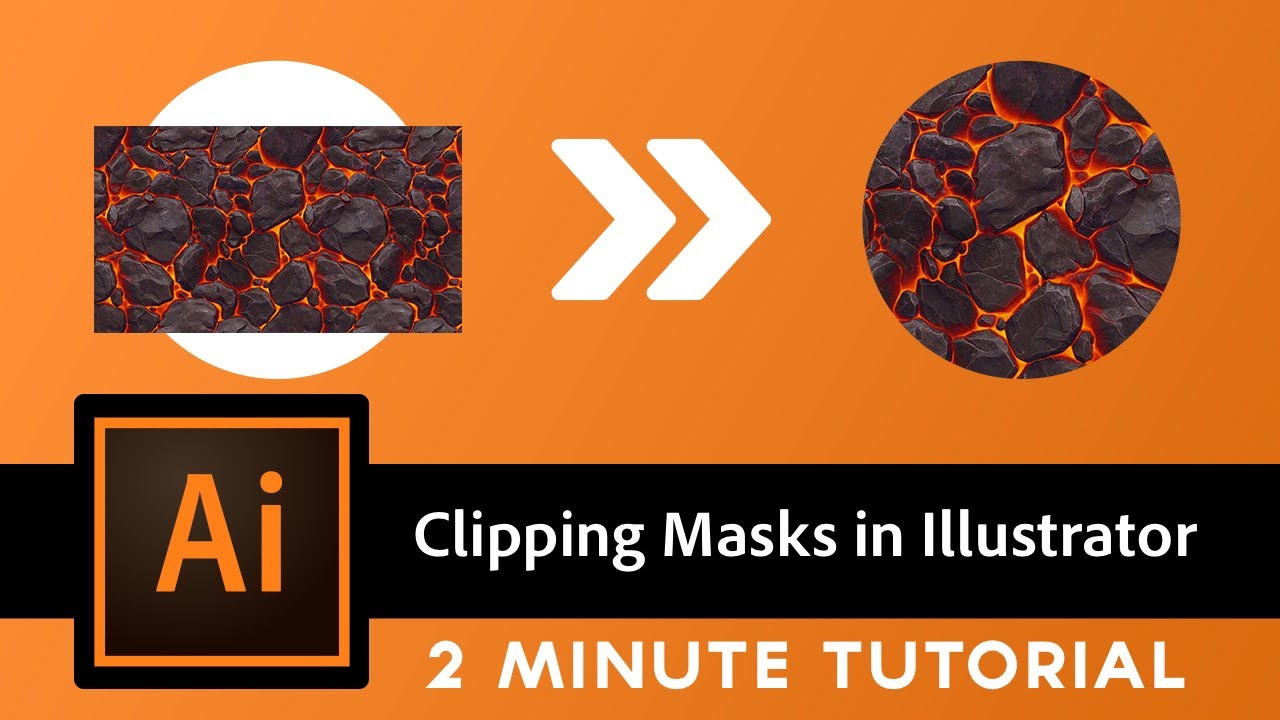
- Masking Images: You can also mask images by selecting the image and clicking \"Mask\" in the Properties panel. This creates a clip group which can be edited later.
- Draw Inside Mode: Another method is using the Draw Inside mode. Select the text or shape, then click the Drawing Modes button and choose Draw Inside. This confines new drawings to the inside of the selected shape.
- Opacity Mask: Similar to Photoshop\"s layer masks, this uses grey shades to control visibility. A dark gradient in the mask can make parts of the design more visible.
Remember, clipping masks in Illustrator are non-destructive, allowing you to edit them without permanently altering the underlying objects. This offers great flexibility in design and creative exploration.
Creating Clipping Masks: A Step-by-Step Guide
Clipping masks in Adobe Illustrator are versatile tools for creative designs, allowing you to mask artwork within a specific shape. This process is key for intricate design work, such as fitting patterns into text or creating collage effects.
- Preparing Your Elements: Begin by opening a new Illustrator document and preparing the objects for your mask, like text and the pattern or image you wish to use. Ensure the text or object is above the pattern or image.
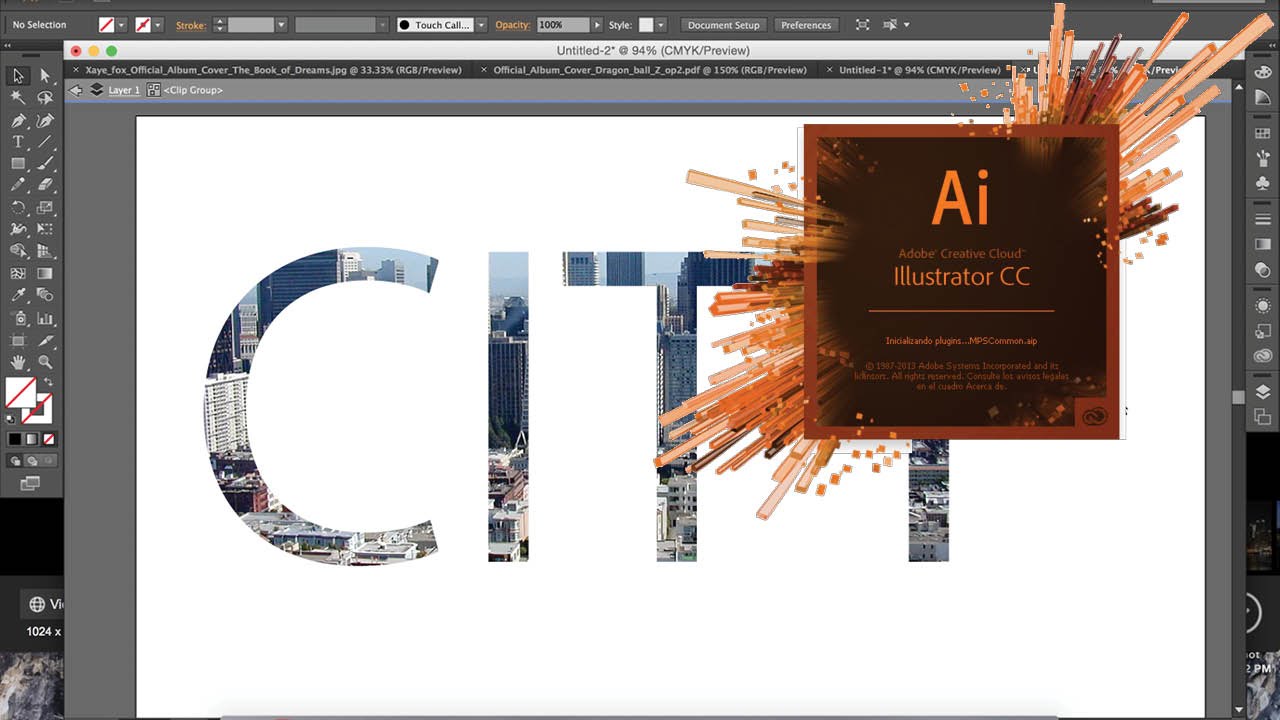
- Creating the Clipping Mask: Select both the object (e.g., text) and the pattern/image. Navigate to Object > Clipping Mask > Make, or use the keyboard shortcut Command/Ctrl + 7. The pattern or image will now only show within the bounds of your text or object.
- Adjusting the Mask: To edit the mask, access the Layers Panel. You\"ll find a Clip Group containing the masked elements. Here, you can adjust the size and position of the pattern or image within the mask.
- Using Draw Inside Mode: Another method involves using the Draw Inside mode. Select your object, then choose Draw Inside from the tool bar. This mode lets you draw or insert images directly inside your selected object.
- Editing in Isolation Mode: Clipping masks in Illustrator are non-destructive. Double-click the clipping mask to enter Isolation Mode, allowing edits to the text and image. You can also add more elements within the mask here.
These steps provide a fundamental guide to creating and manipulating clipping masks in Illustrator, perfect for enhancing your designs with layered, complex visuals.
Advanced Clipping Mask Techniques for Text and Typography
Adobe Illustrator\"s clipping masks offer a world of creative possibilities, especially when it comes to text and typography. These advanced techniques enable designers to blend text with images, patterns, and more, creating striking visual effects.
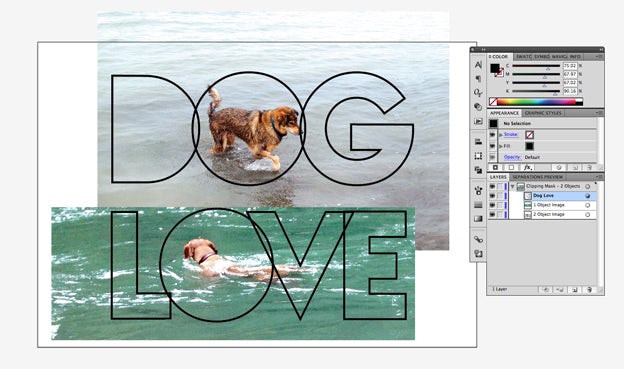
- Masking Text with Patterns: Begin by layering the text over your chosen pattern or image. Ensure the text layer is on top. Select both layers and use Object -> Clipping Mask -> Make. Alternatively, use the keyboard shortcut Command/Ctrl + 7. This method masks your text with the pattern, creating a unique design.
- Layer Adjustment: After applying the mask, you can adjust the layers in the Clip Group through the Layers Panel. This adjustment allows for resizing and repositioning of the pattern within the text, giving you precise control over the final appearance.
- Creating Dynamic Typography: By utilizing bold and thick fonts, you can create more impactful masked typography. Arrange your text over the artwork to be masked, ensuring complete coverage for desired effects.
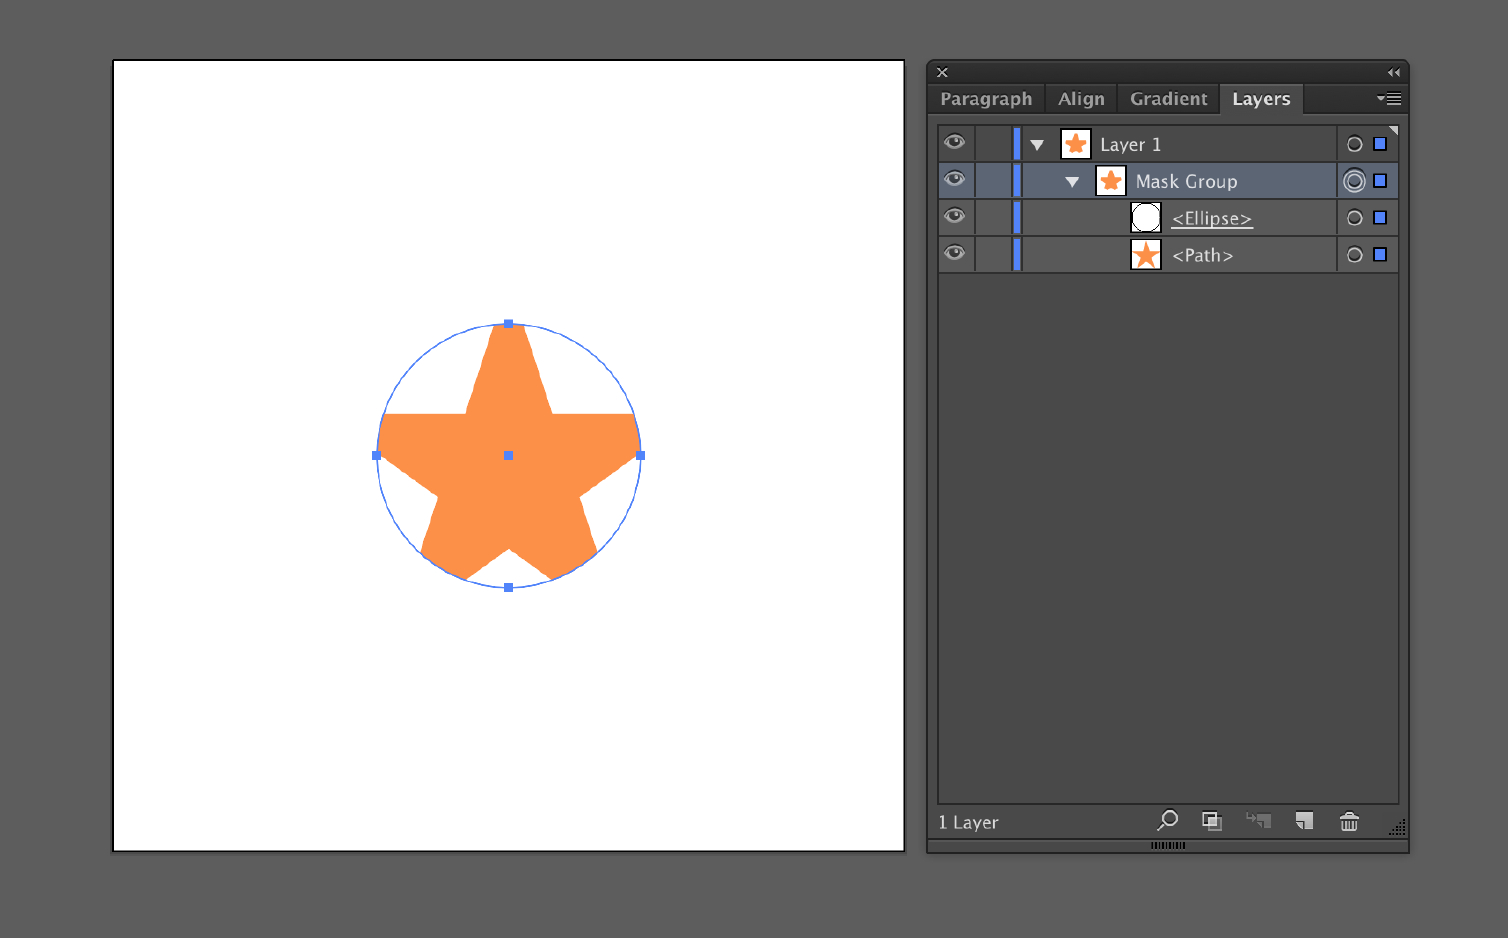
- Combining Shapes and Text: Experiment with different shapes and text layers to create more complex designs. For instance, overlaying a circle on a star and then applying a clipping mask can lead to innovative patterns and styles within your text.
- Editing and Experimentation: Clipping masks are non-destructive, which means you can freely edit the mask and the masked objects at any time. This flexibility encourages experimentation, allowing you to add or modify elements within the clipping mask.
These advanced techniques in Illustrator not only enhance your text and typography projects but also provide a platform for boundless creativity and innovation in design.
Using Opacity Masks for Creative Effects
Opacity masks in Adobe Illustrator are akin to layer masks in Photoshop, offering a sophisticated approach to controlling the visibility of your artwork. By using varying shades of gray, you can create stunning visual effects that add depth and intrigue to your designs.
- Understanding Opacity Masks: Opacity masks use black, white, and gray to hide or reveal aspects of your design. Black conceals, white reveals, and gray offers varying levels of transparency.
- Creating an Opacity Mask: Begin by selecting the object to mask and then choose a shape or path to be the mask. Place the mask shape above the object.
- Applying Gradients for Effect: Apply a gradient to the mask shape for a smooth transition between visible and hidden areas. This can create a dynamic and impactful visual effect.
- Using the Transparency Panel: With both the object and the mask shape selected, open the Transparency panel. Here, you\"ll find the \"Make Mask\" option, which will create your opacity mask.
- Editing Opacity Masks: Opacity masks are editable. You can adjust the gradient or the shape of the mask to fine-tune how it reveals or conceals the object beneath it.
- Inverting Masks: If the effect isn’t as expected, consider inverting the mask. This swaps the black and white areas, altering which parts of the image are visible or hidden.
Opacity masks are a powerful tool in Illustrator, perfect for creating complex visual effects and adding a professional polish to your designs.
_HOOK_
Masking Multiple Objects for Complex Designs
Masking multiple objects in Adobe Illustrator allows for creating intricate and complex designs. This technique is crucial for blending various elements seamlessly, adding depth and sophistication to your artwork.
- Selecting Objects: Begin by selecting all the objects you wish to mask. This can include a mix of text, shapes, and images.
- Creating the Clipping Path: Place the object you want to use as the clipping path above the selected objects. This could be a custom shape or a compound path.
- Applying the Clipping Mask: Select both the clipping path and the objects underneath, then navigate to the Object menu and choose Clipping Mask > Make. This groups the objects and applies the mask.
- Editing Within the Mask: To edit individual elements within the mask, enter Isolation Mode. This can be done by double-clicking on the masked group.
- Releasing and Reapplying Masks: If adjustments are needed, you can release the mask via Object > Clipping Mask > Release, make your changes, and then reapply the mask.
- Layering Multiple Masks: For more complex designs, you can apply multiple clipping masks to a single group or object. Each mask will affect the combined result of the previous masks.
Through these steps, Illustrator enables designers to craft visually stunning compositions by effectively utilizing multiple objects within a single masking framework.

Editing and Modifying Clipping Masks
Editing and modifying clipping masks in Adobe Illustrator is a flexible process that allows for creative adjustments and refinements to your designs. This functionality is essential for fine-tuning your artwork and achieving the desired visual effect.
- Accessing the Clipping Mask: To edit a clipping mask, use the Selection tool to click on the masked object. This will enable you to see the \"Clip Group\" in the Properties panel, indicating the presence of a clipping mask.
- Editing Mask Contents: You can edit the contents within the mask by selecting the \"Edit contents\" button in the Properties panel. This allows you to scale, rotate, move, or replace the image or object within the mask.
- Modifying the Clipping Path: To alter the clipping path itself, click on the \"Edit clipping path\" button. This lets you transform the masking shape independently from the image or object it masks.
- Layer Management: When creating a clipping mask, the objects are grouped into a clip group within the Layers panel. You can navigate to the Layers Panel and expand the menu to find and select specific elements of the mask for adjustment.
- Releasing and Reapplying Masks: If more extensive edits are needed, you can release the clipping mask (Object > Clipping Mask > Release), make your changes, and then reapply the mask.
- Combining Multiple Patterns: For more complex designs, you can add multiple patterns or objects to a clip group, allowing for diverse and intricate masking effects.
These techniques provide a comprehensive approach to editing and modifying clipping masks in Illustrator, ensuring you can achieve the exact look and functionality you need in your designs.
Making a Clipping Mask in Adobe Illustrator
\"Learn how to create stunning graphics using the powerful technique of clipping masks! Our video tutorial will guide you step-by-step, making it easy to master this design tool and unlock endless possibilities for your creative projects. Don\'t miss out on enhancing your skills, watch now!\"
Masking in Adobe Illustrator Guide
\"Unlock the hidden potential of masking in graphic design with our insightful video tutorial. Discover how to expertly manipulate and blend images, text, and shapes, and create mesmerizing effects in no time. Whether you\'re a beginner or a seasoned designer, this video is a must-watch for anyone looking to elevate their artistic skills!\"
READ MORE:
Draw Inside Mode: An Alternative to Traditional Masking
Draw Inside Mode in Adobe Illustrator offers a streamlined and intuitive approach to masking, particularly useful for adding designs within a predefined shape. This mode simplifies the process of creating intricate designs within specific areas.
- Activating Draw Inside Mode: First, select the object you want to draw inside. Then, click on the Draw Inside mode button located at the bottom of the toolbar. This mode is signified by a dotted frame around the selected shape.
- Creating Your Design: With Draw Inside mode activated, any artwork or pattern you create will be confined within the bounds of the selected shape. This includes using tools like the Blob Brush Tool, where strokes will only appear inside the shape.
- Limitations of the Mode: Any part of your new design that extends beyond the borders of the selected shape will not be visible, ensuring that your artwork stays neatly within the predefined area.
- Exiting Draw Inside Mode: To return to normal drawing mode, you can either select another drawing mode from the toolbar or simply deselect the object.
This feature offers a convenient and efficient way to create detailed designs within specific areas, ideal for tasks like filling text with patterns or creating images within complex shapes. The non-destructive nature of this mode allows for easy adjustments and experimentation.
Embrace the art of masking in Adobe Illustrator to transform your creative visions into reality. This guide illuminates the path to mastering intricate designs, ensuring your digital artistry stands out in the ever-evolving world of graphic design.