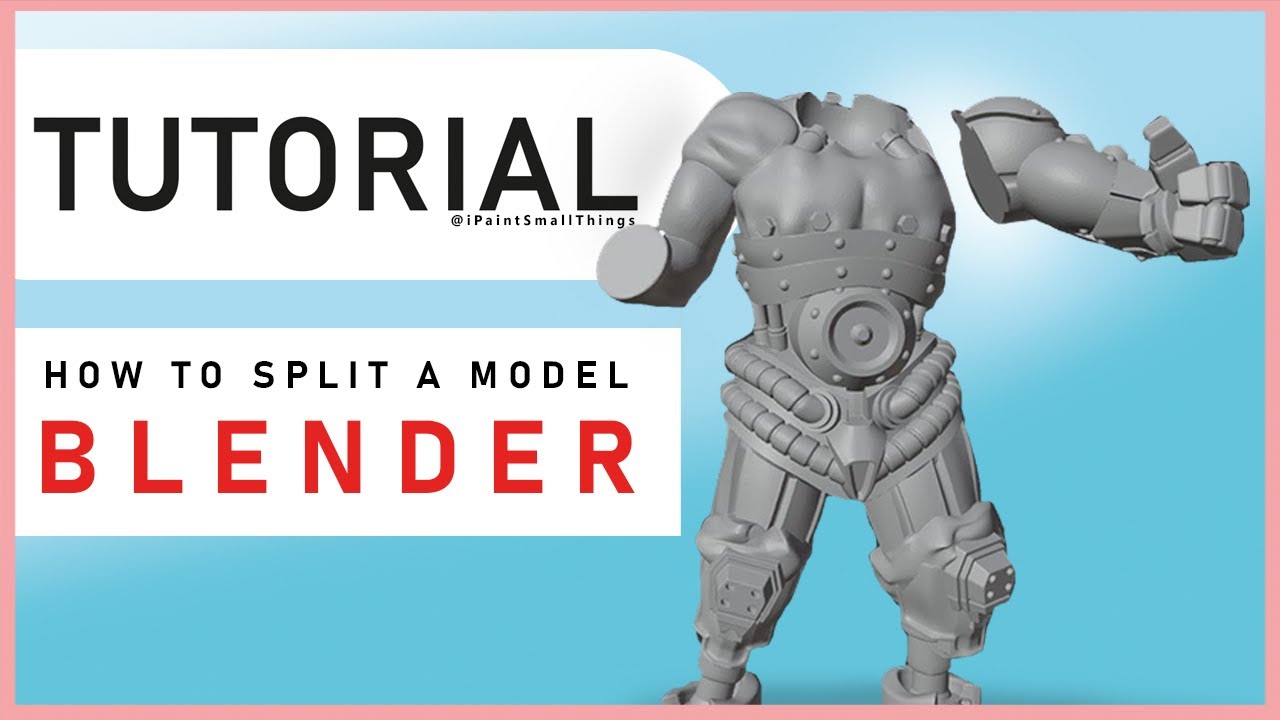
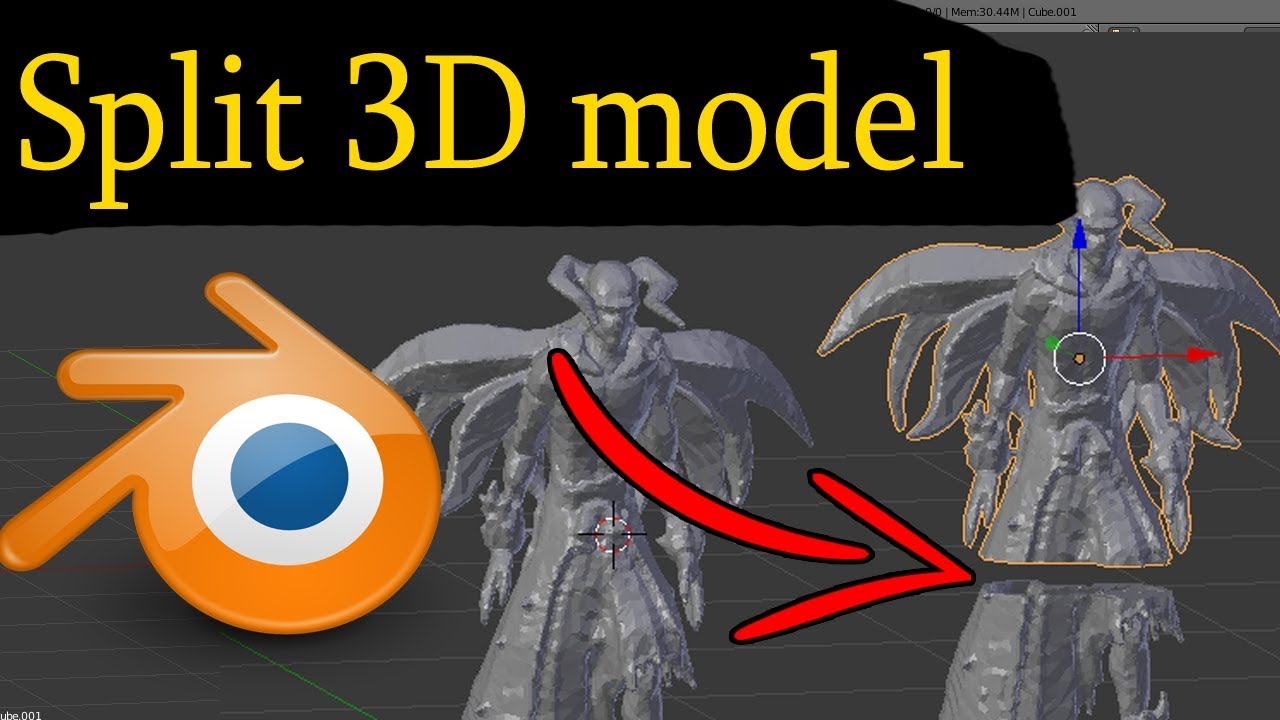
Topic how to split a model in blender: Discover the art of splitting models in Blender with ease. This guide illuminates step-by-step methods to efficiently separate your 3D creations, enhancing your animation and design workflow. Perfect for beginners and pros alike.
Table of Content
- How to split a model into separate objects in Blender?
- Separating Meshes Using the \"P\" Key
- Using Boolean Modifiers for Joining and Separating
- Separating Objects by Loose Parts
- Additional Tips
- Using Boolean Modifiers for Joining and Separating
- Separating Objects by Loose Parts
- Additional Tips
- YOUTUBE: Split Models in Blender Using the Bisect Tool
- Separating Objects by Loose Parts
- Additional Tips
- Additional Tips
- Introduction to Model Splitting in Blender
- Step-by-Step Guide to Using the \"P\" Key for Separating Meshes
- Utilizing Boolean Modifiers for Complex Splits
- Separating Objects by Loose Parts for Quick Splits
- Preserving Details: Face Maps, Vertex Groups, and UV Maps
- Advanced Techniques: Booleans for Cutting and Separating Parts
- Practical Applications: Animation, 3D Printing, and Editing
- Troubleshooting Common Issues with Splitting Models
- Additional Resources and Learning Tools
- Conclusion: Maximizing Efficiency in Blender Model Splitting
How to split a model into separate objects in Blender?
Here is a step-by-step guide on how to split a model into separate objects in Blender:
- Select the model you want to split by left-clicking on it in the 3D Viewport.
- Press the \"P\" key on your keyboard to access the separate tool menu.
- In the separate tool menu, choose the desired method to split the model:
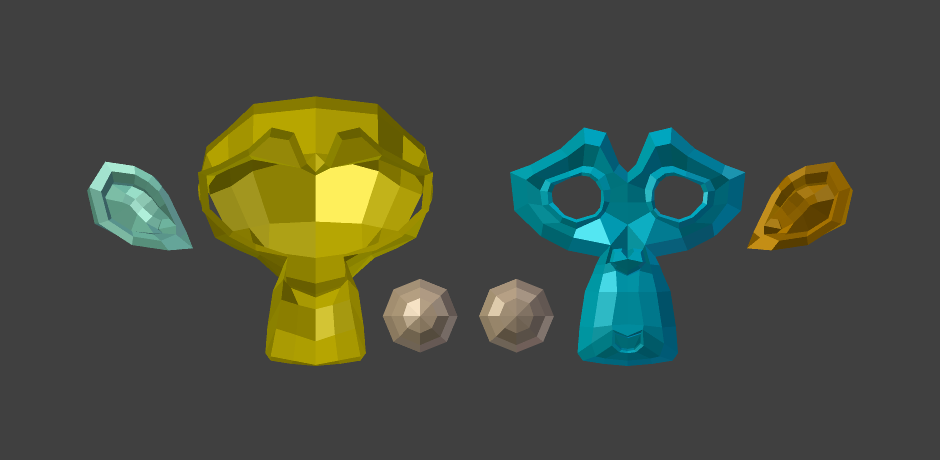
- If you select \"By Loose Parts,\" Blender will automatically split the model into separate objects based on disconnected and non-contiguous parts.
- If you select \"By Material,\" Blender will split the model into separate objects based on the different materials applied to its geometry.
- If you choose \"By Selection,\" Blender will split the model based on the currently selected vertices, edges, or faces.
- Alternatively, you can choose \"By Loose Parts + Material\" or \"By Loose Parts + Selection\" to combine multiple splitting criteria.
- After selecting the desired split option, Blender will separate the model into separate objects. You will now have multiple objects in your scene, each representing a separate part of the original model.
By following these steps, you can split a model into separate objects in Blender and have more control over individual parts for further editing or manipulation.
READ MORE:
Separating Meshes Using the \"P\" Key
- Select the object in Object Mode.
- Enter Edit Mode by pressing the Tab key.
- Select the faces you wish to separate.
- Press \"P\" and choose \"Selection\" to separate the selection into a new object.
This method allows you to separate parts of your mesh into new, distinct objects, which can be further edited or animated independently.
Using Boolean Modifiers for Joining and Separating
Boolean modifiers can be used not only for joining objects but also for separating parts of an object in a non-destructive manner.
- To join objects with a Boolean modifier, set the modifier to \"Union\" and select the target object.
- To separate objects, use a Boolean modifier with the \"Difference\" operation, using a cutter object to define what part of the mesh to separate.
Separating Objects by Loose Parts
If your model consists of unconnected parts, you can easily separate them into individual objects:
- In Edit Mode, select all parts of the mesh.
- Press \"P\" and choose \"By Loose Parts\".

Additional Tips
- Face maps can help you keep track of different parts of your model after they have been joined.
- Vertex groups and UV maps can be maintained or reassigned after separating objects to ensure correct material and texture application.
Conclusion
Blender offers multiple ways to split or separate models, each suitable for different scenarios. Whether you\"re preparing a model for animation, making it printer-friendly, or simply organizing your scene, these methods provide the flexibility needed for effective 3D modeling.

_HOOK_
Using Boolean Modifiers for Joining and Separating
Boolean modifiers can be used not only for joining objects but also for separating parts of an object in a non-destructive manner.
- To join objects with a Boolean modifier, set the modifier to \"Union\" and select the target object.
- To separate objects, use a Boolean modifier with the \"Difference\" operation, using a cutter object to define what part of the mesh to separate.
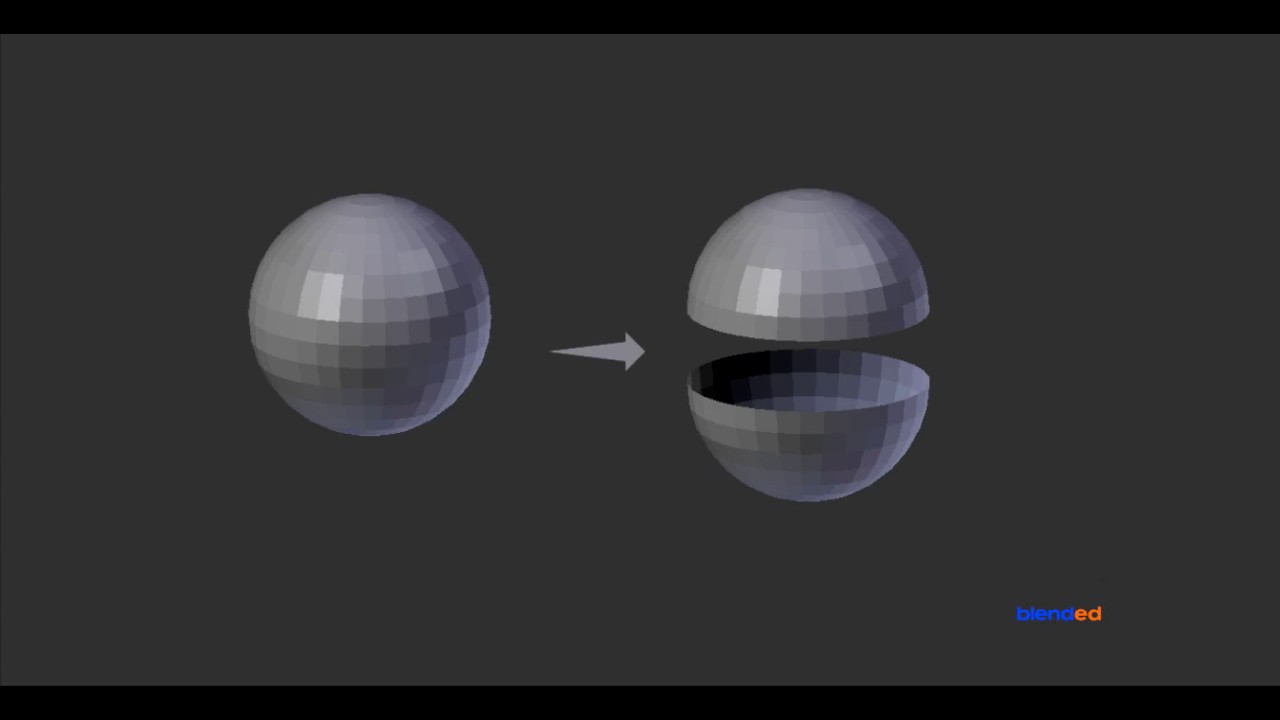
Separating Objects by Loose Parts
If your model consists of unconnected parts, you can easily separate them into individual objects:
- In Edit Mode, select all parts of the mesh.
- Press \"P\" and choose \"By Loose Parts\".
Additional Tips
- Face maps can help you keep track of different parts of your model after they have been joined.
- Vertex groups and UV maps can be maintained or reassigned after separating objects to ensure correct material and texture application.
Conclusion
Blender offers multiple ways to split or separate models, each suitable for different scenarios. Whether you\"re preparing a model for animation, making it printer-friendly, or simply organizing your scene, these methods provide the flexibility needed for effective 3D modeling.
Split Models in Blender Using the Bisect Tool
The Bisect Tool is here to revolutionize your designing experience! Discover how this powerful tool can effortlessly divide your creation into symmetrical halves, allowing you to bring balance and precision to your designs. Watch the video now and unlock the endless possibilities that the Bisect Tool has to offer!
Separate Mesh in Blender 2.93
Say goodbye to complicated mesh editing with the Separate Mesh technique! This incredible method simplifies the process of breaking a mesh into separate components, enabling you to customize and manipulate each part individually. Dive into our video tutorial, and learn how to master the art of separating meshes with ease. Don\'t miss out on this game-changing technique!
Separating Objects by Loose Parts
If your model consists of unconnected parts, you can easily separate them into individual objects:
- In Edit Mode, select all parts of the mesh.
- Press \"P\" and choose \"By Loose Parts\".

Additional Tips
- Face maps can help you keep track of different parts of your model after they have been joined.
- Vertex groups and UV maps can be maintained or reassigned after separating objects to ensure correct material and texture application.
Conclusion
Blender offers multiple ways to split or separate models, each suitable for different scenarios. Whether you\"re preparing a model for animation, making it printer-friendly, or simply organizing your scene, these methods provide the flexibility needed for effective 3D modeling.

_HOOK_
Additional Tips
- Face maps can help you keep track of different parts of your model after they have been joined.
- Vertex groups and UV maps can be maintained or reassigned after separating objects to ensure correct material and texture application.
Conclusion
Blender offers multiple ways to split or separate models, each suitable for different scenarios. Whether you\"re preparing a model for animation, making it printer-friendly, or simply organizing your scene, these methods provide the flexibility needed for effective 3D modeling.
Introduction to Model Splitting in Blender
Splitting a model in Blender is an essential skill for 3D artists and designers. It allows for greater flexibility in animation, texturing, and rendering processes. Whether you\"re working on complex scenes, creating detailed models for 3D printing, or setting up models for animation, understanding how to effectively split your models into manageable parts can significantly improve your workflow.
This process involves separating a single mesh into multiple parts, which can then be edited, animated, or textured separately. Blender provides several methods to accomplish this, each suited to different needs and scenarios.
- Using the \"P\" key in Edit Mode to separate selected vertices, edges, or faces.
- Employing Boolean modifiers for precise cuts or to split models along defined shapes.
- Separating by material or loose parts to automatically divide models based on their existing attributes.
Understanding these methods will enable you to tackle a wide range of projects with ease, from intricate character models to complex mechanical assemblies. Each technique has its own set of advantages, and knowing when and how to use them is key to mastering Blender\"s powerful modeling capabilities.
Step-by-Step Guide to Using the \"P\" Key for Separating Meshes
Separating meshes in Blender is a fundamental skill for 3D modeling, enabling you to work on individual parts of a model independently. The \"P\" key is your shortcut to efficiently splitting your model within the Edit Mode. Follow these steps to master mesh separation:
- Start by selecting the object you wish to split. Ensure it\"s in Object Mode.
- Switch to Edit Mode by pressing the Tab key or by selecting it from the mode menu in the 3D viewport\"s header.
- Using the selection tools (vertex, edge, or face select), highlight the part of the mesh you want to separate.
- Once you have your selection, press the \"P\" key. A menu will appear with several options for separation.
- Choose \"Selection\" to separate the selected vertices, edges, or faces into a new object. Alternatively, you can separate by material or loose parts based on your project needs.
After following these steps, the separated part will become a new, independent object that you can select and edit separately from the original mesh. This method is particularly useful for creating complex models that require detailed editing on specific sections or preparing models for animation.
- Tip: Use the \"L\" key to select linked vertices, edges, or faces quickly. This is handy for separating parts of a mesh that are not physically connected but are part of the same object.
- Tip: After separating the mesh, you might want to rename the new objects to keep your scene organized.
Utilizing Boolean Modifiers for Complex Splits
Boolean modifiers in Blender are powerful tools for performing complex splits, allowing you to cut and combine objects in a non-destructive manner. This technique is ideal for creating intricate designs, mechanical parts, or any model requiring precise alterations. Follow these steps to use Boolean modifiers effectively:
- Select the object that you want to modify. Ensure it\"s in Object Mode.
- Go to the Modifiers tab in the Properties panel and add a Boolean modifier.
- Choose the operation type based on the desired effect: Union, Difference, or Intersect.
- Select the second object that will influence the split as the Boolean target.
- Adjust the modifier settings as needed to achieve the desired result.
- Apply the modifier to make the operation permanent.
This process can create complex shapes and forms by subtracting, adding, or intersecting meshes. The Boolean modifier is particularly useful for architectural designs, prototyping, and where precision is crucial.
- Tip: Ensure that both objects involved in the Boolean operation are closed meshes for best results.
- Tip: Use the Shade Smooth option to smooth out any sharp edges after applying the Boolean modifier.
Booleans can sometimes result in non-manifold geometry or other mesh issues. It\"s essential to review the mesh after applying Boolean operations and clean up any problem areas manually or with Blender\"s cleanup tools.
Separating Objects by Loose Parts for Quick Splits
Blender offers a straightforward method for separating models into individual objects based on their disconnected parts, known as \"Separating by Loose Parts\". This technique is especially useful when dealing with models composed of multiple, unconnected elements that need to be edited or animated separately. Follow these steps to quickly split your model into its constituent parts:
- Select the object you wish to separate in Object Mode.
- Switch to Edit Mode by pressing the Tab key.
- Press A to select all parts of the model if they are not already selected.
- Press P to open the separate menu, and then choose \"By Loose Parts\".
Immediately after executing these steps, Blender will automatically create individual objects from each unconnected part of the original mesh. This method is highly efficient for models imported from other software, scanned data, or any complex object made up of distinct parts.
- Tip: After separating the model into loose parts, it\"s a good idea to rename the new objects to maintain an organized scene.
- Tip: Use the Outliner to easily select and manage the newly created objects.
Separating by loose parts is a non-destructive process, allowing for flexible adjustments and optimizations to your workflow. Whether you\"re preparing a complex scene for animation or simplifying the process of texturing and rigging, this method provides a quick and effective solution.
_HOOK_
Preserving Details: Face Maps, Vertex Groups, and UV Maps
When splitting models in Blender, preserving the intricate details such as face maps, vertex groups, and UV maps is crucial for maintaining the quality and integrity of your 3D models. These elements are essential for animation, texturing, and ensuring that your models look as intended in different scenes. Here\"s how to keep these details intact during and after the splitting process:
- Face Maps: Useful for organizing different areas of your model for editing or animation. Before splitting your model, create face maps to easily select and manage specific regions later.
- Vertex Groups: These are crucial for deformation, animation rigs, and assigning weights to various parts of your mesh. Ensure that vertex groups are correctly assigned to maintain control over your model\"s parts.
- UV Maps: Preserving UV maps is essential for texturing. When splitting a model, ensure that UVs are properly unwrapped and assigned so that textures align correctly on each piece of your model.
To preserve these details:
- Before splitting, duplicate any necessary data blocks (like UV maps or vertex groups) to the new objects if they will be shared.
- Use the \"Data Transfer\" modifier to copy details from one part of the model to another if splitting has already occurred.
- Regularly check the integrity of your face maps, vertex groups, and UV maps in the \"Object Data Properties\" tab to ensure they remain consistent across your project.
By carefully managing these aspects, you can ensure that your models retain their full functionality and appearance, no matter how complex the splitting process might be. This meticulous attention to detail will significantly enhance the quality of your final 3D projects.
Advanced Techniques: Booleans for Cutting and Separating Parts
Boolean operations in Blender are a powerful method for cutting and separating parts of your models with precision. These operations allow for complex modifications that are not easily achieved with manual editing. Here\"s how to leverage Booleans for your 3D modeling projects:
- Understanding Boolean Operations: Blender\"s Boolean modifier can perform three main operations - Difference, Union, and Intersect. Each serves a unique purpose in modifying your models.
- Preparation: Before applying a Boolean operation, ensure both your target and cutter objects are clean meshes. This means removing any non-manifold edges, doubles, or internal faces.
- Applying Booleans:
- Select your target object and add a Boolean modifier from the modifier tab.
- Choose the operation type based on the desired outcome (Difference for cutting, Union for merging, and Intersect for overlapping parts).
- Select the object to use as the cutter in the Boolean modifier\"s settings.
- Apply the modifier to execute the operation.
- Cleanup: After applying the Boolean operation, inspect the geometry for any issues and clean up as necessary. Booleans can sometimes create complex mesh topology that requires manual correction.
Advanced tips:
- Non-Destructive Workflow: Use Booleans in a non-destructive workflow by keeping the modifier unapplied, allowing for adjustments to be made easily.
- Complex Cuts: For intricate designs, consider using a high-density mesh for the cutter object to achieve more detailed cuts.
- Performance: Boolean operations can be computationally intensive. Work in solid view mode to improve viewport performance when dealing with complex Boolean operations.
Mastering Boolean operations opens up a realm of possibilities for creative and technical modeling in Blender. Whether you\"re creating detailed architectural elements, intricate machinery, or simply need to split a model into parts, Booleans offer a versatile solution.
Practical Applications: Animation, 3D Printing, and Editing
Splitting models in Blender is not just a technical necessity; it has vast practical applications across various industries. Whether you\"re animating characters, preparing models for 3D printing, or simply editing complex scenes, understanding how to effectively split and manage models can significantly enhance your workflow and project outcomes.
- Animation: Splitting models allows for more detailed and manageable animation rigs. Separating limbs, facial features, or clothing can help animators achieve more nuanced and realistic movements.
- 3D Printing: For 3D printing, splitting a model into parts can be essential for printing large objects or those with complex geometries. It enables printing in parts that fit the printer\"s build volume, which can then be assembled into the final product.
- Editing: In model editing, splitting can simplify the process of making detailed adjustments. By focusing on smaller sections of a model, artists can achieve higher precision and better manage their scenes.
Additionally, these techniques allow for better resource management in Blender. By working on parts of a model individually, you can reduce the computing power required and make the 3D modeling process more efficient.
Each of these applications demonstrates the versatility and necessity of being adept at splitting models in Blender. Whether improving the realism of an animated character, ensuring the printability of a 3D model, or refining the details of a complex scene, the ability to effectively split and manage models is invaluable.
Troubleshooting Common Issues with Splitting Models
Splitting models in Blender can sometimes present challenges, especially when dealing with complex geometries or large scenes. Here are some common issues you might encounter and how to resolve them:
- Non-Manifold Edges: These occur when an edge is shared by more than two faces. Use the \"Select Non-Manifold\" option in Edit Mode to identify and correct these issues.
- Loose Parts Not Separating: Ensure you\"re in Edit Mode and have selected all vertices before using the \"P\" key to separate by loose parts. If parts still don\"t separate, check for hidden faces connecting them.
- Boolean Modifier Failures: Booleans can fail for several reasons, including non-manifold geometry or overlapping vertices. Ensure both target and cutter objects have clean, manifold geometries. Applying a \"Remesh\" modifier to the objects before performing Boolean operations can sometimes help.
- Preserving UV Maps and Vertex Groups: After splitting a model, UV maps and vertex groups might not automatically transfer to the new parts. To prevent this, manually duplicate the necessary data to the new objects or use Blender\"s data transfer tools.
Additionally, performance issues can arise when splitting highly detailed models. Working in Solid view mode, rather than Material or Rendered view, can help mitigate performance drops. If Blender crashes during the operation, consider splitting the model into smaller sections or simplifying the geometry before attempting again.
By understanding these common pitfalls and knowing how to address them, you can ensure a smoother modeling process and achieve the desired outcomes with your Blender projects.
Additional Resources and Learning Tools
Mastering the art of splitting models in Blender is a journey that involves continuous learning and practice. To further enhance your skills, numerous resources and learning tools are available. Here are some valuable resources to consider:
- Blender Official Documentation: The official Blender Manual is an excellent starting point for understanding the fundamentals of model splitting and using Blender\"s wide range of features.
- Online Tutorials and Courses: Platforms like Blender Guru, CG Cookie, and Udemy offer comprehensive tutorials and courses ranging from beginner to advanced levels, covering everything from basic splitting techniques to complex modeling projects.
- Blender Community Forums: Engaging with the Blender community through forums like Blender Artists and the Blender subreddit can provide insights, tips, and assistance from fellow Blender enthusiasts and professionals.
- YouTube Channels: YouTube hosts a plethora of Blender tutorial channels that offer visual and practical guides on splitting models and other 3D modeling techniques, with creators like Blender Guru and CG Geek.
- Books and eBooks: For those who prefer written guides, several books and eBooks are available that delve into Blender\"s capabilities, including model splitting, with detailed explanations and examples.
Exploring these resources can significantly expand your knowledge and skill set in Blender, allowing you to tackle more complex projects with confidence. Remember, practice and experimentation are key to mastering any new technique.
_HOOK_
READ MORE:
Conclusion: Maximizing Efficiency in Blender Model Splitting
Mastering model splitting in Blender is a pivotal skill that enhances your 3D modeling efficiency, opening the door to more complex and detailed projects. Whether you\"re working on animations, preparing models for 3D printing, or refining designs, the ability to effectively split and manage models is invaluable. Here are key takeaways to maximize efficiency in Blender model splitting:
- Understand the Tools: Familiarize yourself with Blender\"s array of tools for splitting models, including the \"P\" key for separating meshes, Boolean modifiers for precise cuts, and the \"L\" key for selecting linked parts.
- Plan Your Approach: Before starting, plan how you will split your model. This foresight can save time and ensure that your workflow is smooth and logical.
- Practice Precision: Precision in selecting the parts to split or separate is crucial. Use Blender\"s selection tools effectively to ensure accuracy in your work.
- Stay Organized: Keep your project organized by naming split parts clearly and managing your outliner efficiently. This will make navigating your project easier and speed up your workflow.
- Continuous Learning: Stay updated with the latest Blender tutorials, forums, and guides. The 3D modeling landscape is always evolving, and continuous learning will enhance your skills and efficiency.
By incorporating these strategies into your workflow, you can significantly enhance your productivity and creativity in Blender. Remember, the goal is not just to split models but to do so in a way that complements your overall project and brings your visions to life with precision and ease.
Mastering the skill of splitting models in Blender opens up endless possibilities for creativity and efficiency in your 3D projects. Embrace these techniques to transform your workflow and bring your most intricate designs to life with precision and ease.