Topic how to model guns in blender: Discover the art of modeling guns in Blender, a comprehensive guide designed for enthusiasts eager to master digital weapon creation with precision and creativity.
Table of Content
- How can I create realistic gun models in Blender?
- Getting Started
- Modeling Techniques
- Texturing and Materials
- Rendering and Exporting
- Conclusion
- Modeling Techniques
- YOUTUBE: How to Model Any Gun in Blender - Overview
- Texturing and Materials
- Rendering and Exporting
- Conclusion
- Texturing and Materials
- Rendering and Exporting
- Conclusion
- Rendering and Exporting
- Conclusion
- Conclusion
- Introduction to Gun Modeling in Blender
- Essential Tools and Setup for Blender
- Step-by-Step Process for Modeling Basic Gun Shapes
- Advanced Techniques for Adding Detail and Realism
- Texturing and Material Application for Realistic Effects
- Lighting and Rendering Tips for Gun Models
- Exporting Your Model for Game Engines or Animation
- Common Pitfalls and How to Avoid Them
- Resources for Further Learning and Inspiration
- Conclusion and Encouragement for Practice
How can I create realistic gun models in Blender?
Creating realistic gun models in Blender can be achieved by following these steps:
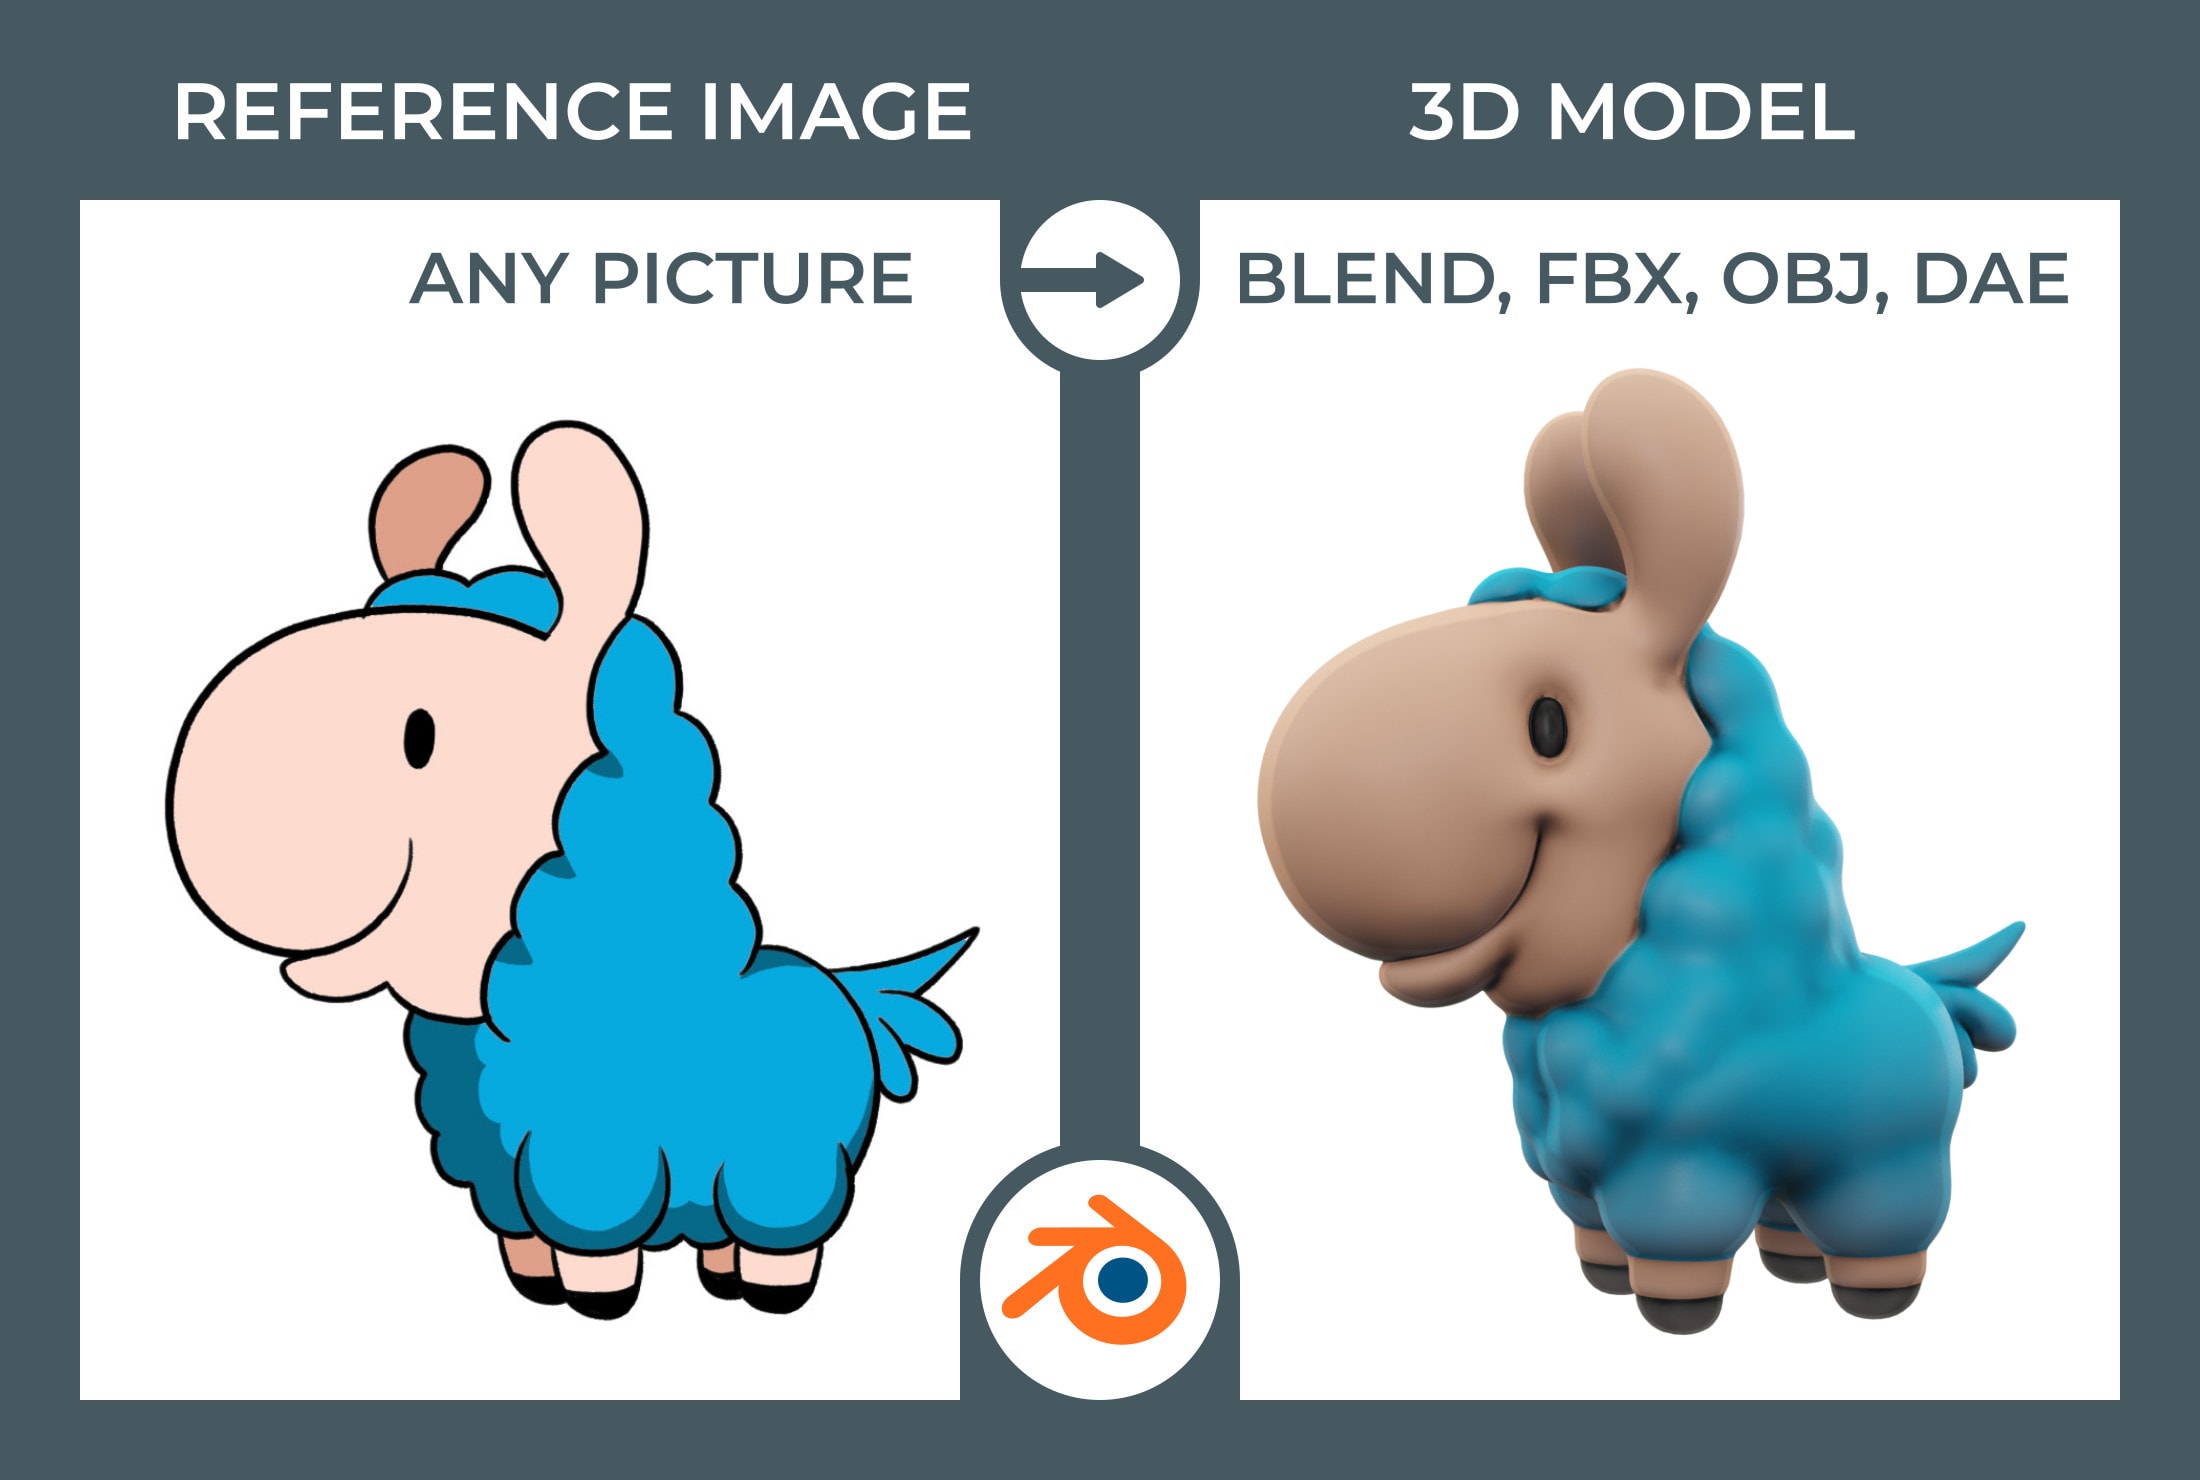
- Collect reference images: Find high-quality images of the specific gun model you want to create. This will serve as a reference during the modeling process.
- Import reference images: In Blender, go to the \"Viewport Overlays\" dropdown menu and enable the \"Background Images\" option. Import the reference images for the front, side, and top views of the gun.
- Set up the modeling workspace: Create a new project or open an existing one in Blender. Set up the workspace by adjusting the layout and enabling the necessary tools such as the viewport, properties panel, and 3D viewport.
- Create a base mesh: Start by adding a basic object like a cube or a cylinder. Scale and shape it to match the proportions of the gun\'s body.
- Model the main components: Use the reference images and add additional geometry to model the major components of the gun, such as the barrel, slide, grip, and trigger guard. Pay attention to details and try to match the contours and shapes as closely as possible.
- Add details and refine: Use extrusions, loop cuts, and other modeling techniques to add intricate details to the gun model, such as screws, grooves, and panel lines. Take your time to refine each part and ensure they align with the reference images.
- Create materials and textures: Once the modeling is complete, assign appropriate materials to each part of the gun. Adjust the material properties, like color, reflectivity, and roughness, to achieve a realistic appearance. You can also create or download texture maps, like diffuse, specular, and bump maps, to enhance the detail and realism of the gun model.
- Add lighting and set up a scene: Position light sources in your 3D scene to illuminate the gun model realistically. Experiment with different lighting setups to achieve the desired results.
- Apply rendering and post-processing: Set up the rendering settings in Blender, such as resolution, format, and output location. Render the final image or animation of the gun model. You can further enhance the rendered output using post-processing techniques like color correction, depth of field, and compositing in Blender\'s compositor.
- Save and export: Once you are satisfied with the result, save your Blender project file and export the gun model in a suitable file format, such as OBJ or FBX, for further use in other software or game engines.
READ MORE:
Getting Started
- Download and install the latest version of Blender.
- Familiarize yourself with Blender\"s interface and basic modeling tools.
- Gather reference images for the gun you wish to model to ensure accuracy.

Modeling Techniques
1. Blocking Out the Basic Shape
Start by creating the basic shape of your gun using simple mesh objects like cubes and cylinders. This process, known as blocking, helps in establishing the overall proportions and layout of the firearm.
2. Adding Details
Once the basic shape is in place, begin adding details by subdividing the mesh and sculpting finer features like the trigger, barrel, and sights. Utilize Blender\"s array of modifiers to aid in this process.
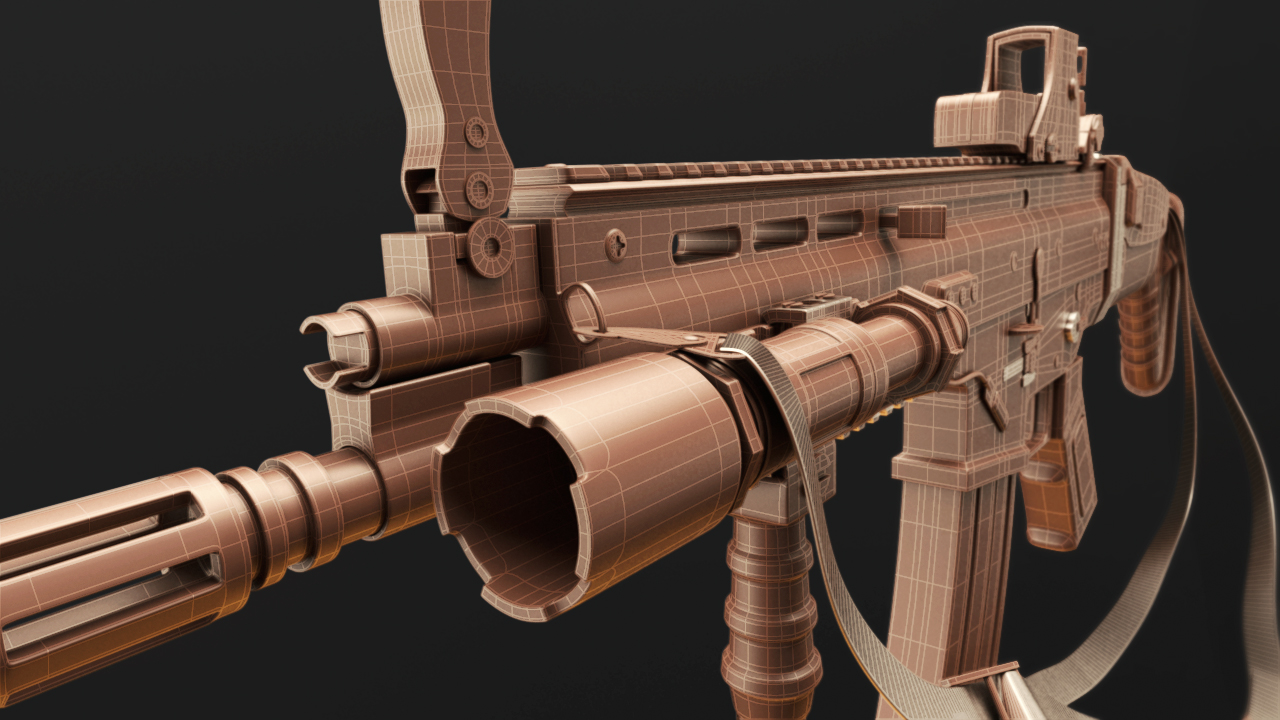
3. Hard Surface Modeling
For parts of the gun that require precision and crisp edges, employ hard surface modeling techniques. This involves careful control of edge loops and vertices to maintain sharpness and detail.
Texturing and Materials
After modeling, apply textures and materials to give your gun realism or the desired stylized look. Use Blender\"s shading and texturing tools to create materials like metal, plastic, and wood, adjusting properties such as roughness, metallic, and specular to achieve the desired effect.
Rendering and Exporting
- Set up lighting and camera angles to highlight your model\"s features.
- Render your model using Blender\"s Cycles or Eevee engine for high-quality images.
- Export your model in the desired format for use in games, animations, or other visualizations.
_HOOK_
Conclusion
Modeling guns in Blender can be a rewarding process, allowing for great creativity and precision. By following these steps and continuously practicing, you can develop the skills to create highly detailed and realistic firearm models. Remember, the key to mastering Blender is patience and perseverance.
Modeling Techniques
1. Blocking Out the Basic Shape
Start by creating the basic shape of your gun using simple mesh objects like cubes and cylinders. This process, known as blocking, helps in establishing the overall proportions and layout of the firearm.
2. Adding Details
Once the basic shape is in place, begin adding details by subdividing the mesh and sculpting finer features like the trigger, barrel, and sights. Utilize Blender\"s array of modifiers to aid in this process.
3. Hard Surface Modeling
For parts of the gun that require precision and crisp edges, employ hard surface modeling techniques. This involves careful control of edge loops and vertices to maintain sharpness and detail.
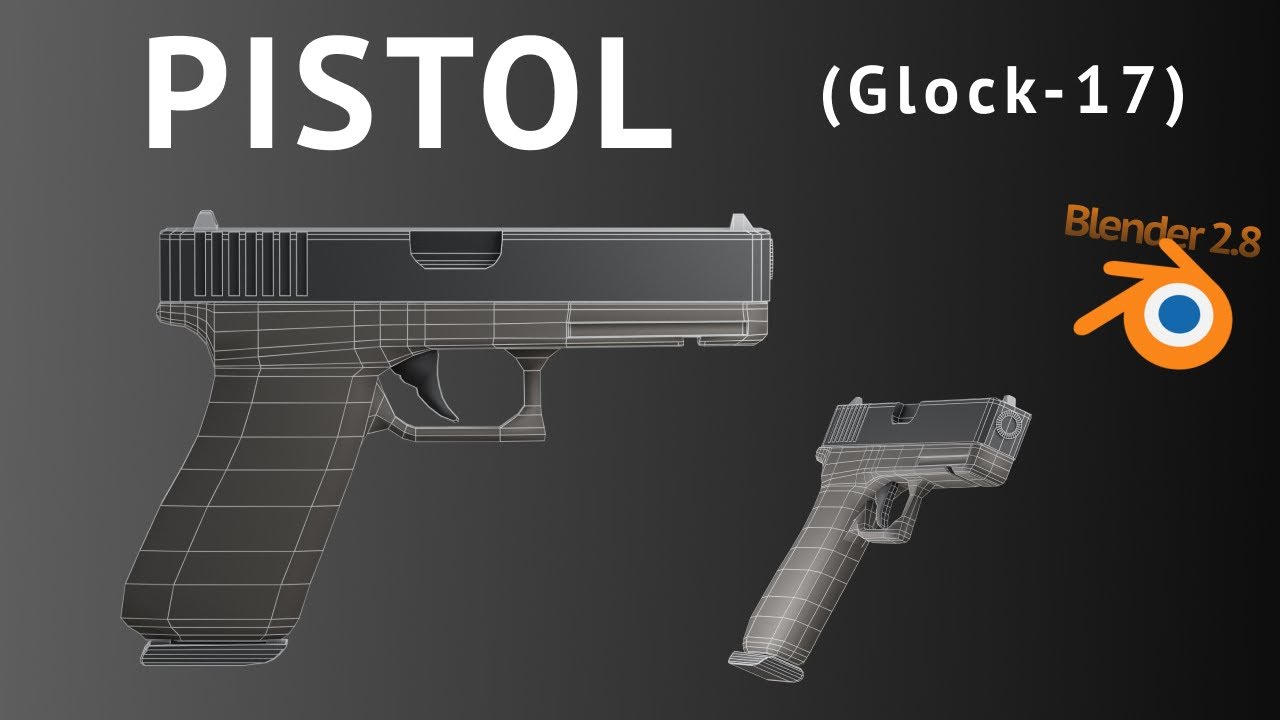
How to Model Any Gun in Blender - Overview
\"Explore the fascinating world of gun modeling with this captivating video! Learn step-by-step how to create intricate and realistic gun models using cutting-edge techniques and expert tips. Get ready to bring your creative vision to life and become a master gun modeler!\"
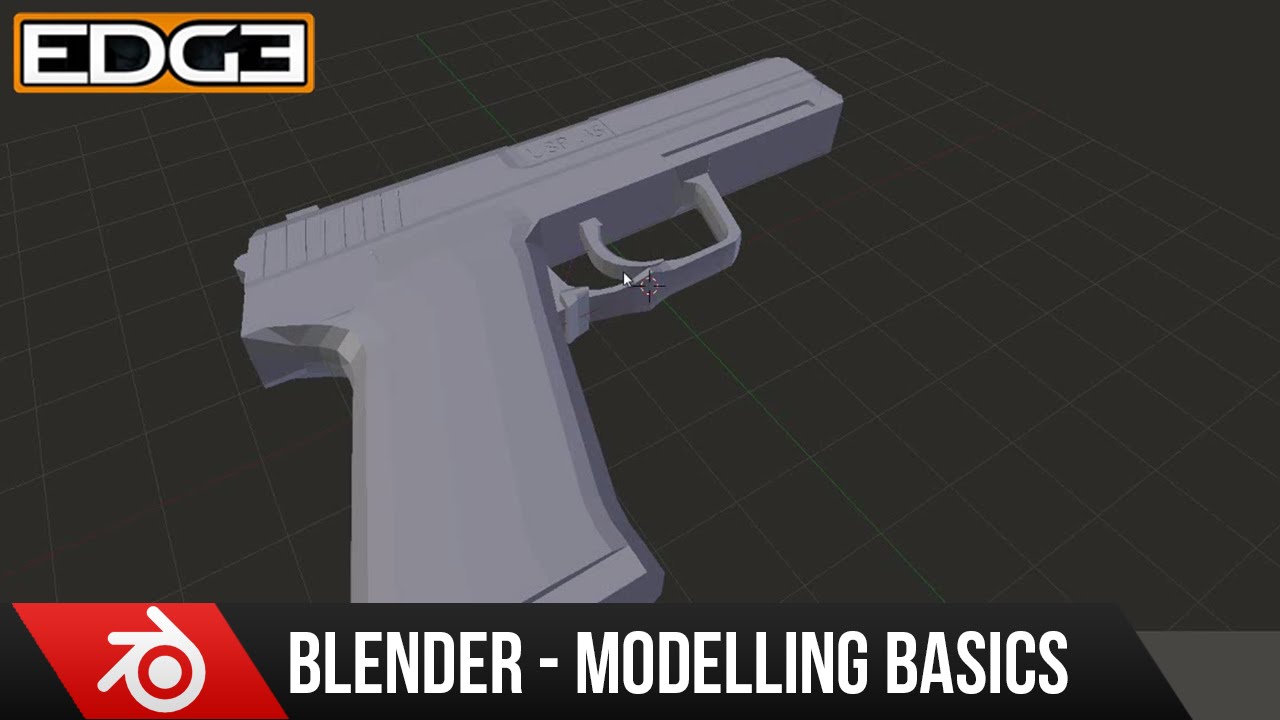
Modeling A Gun In Blender - Beginner Tutorial
\"Calling all aspiring 3D artists! Unleash your creativity with this mind-blowing Blender tutorial that will take your skills to the next level. Discover the secrets behind creating stunning visual effects, breathtaking animations, and captivating designs. Join the community of Blender enthusiasts and embark on an exciting journey of limitless possibilities!\"
Texturing and Materials
After modeling, apply textures and materials to give your gun realism or the desired stylized look. Use Blender\"s shading and texturing tools to create materials like metal, plastic, and wood, adjusting properties such as roughness, metallic, and specular to achieve the desired effect.
Rendering and Exporting
- Set up lighting and camera angles to highlight your model\"s features.
- Render your model using Blender\"s Cycles or Eevee engine for high-quality images.
- Export your model in the desired format for use in games, animations, or other visualizations.
Conclusion
Modeling guns in Blender can be a rewarding process, allowing for great creativity and precision. By following these steps and continuously practicing, you can develop the skills to create highly detailed and realistic firearm models. Remember, the key to mastering Blender is patience and perseverance.

_HOOK_
Texturing and Materials
After modeling, apply textures and materials to give your gun realism or the desired stylized look. Use Blender\"s shading and texturing tools to create materials like metal, plastic, and wood, adjusting properties such as roughness, metallic, and specular to achieve the desired effect.
Rendering and Exporting
- Set up lighting and camera angles to highlight your model\"s features.
- Render your model using Blender\"s Cycles or Eevee engine for high-quality images.
- Export your model in the desired format for use in games, animations, or other visualizations.
Conclusion
Modeling guns in Blender can be a rewarding process, allowing for great creativity and precision. By following these steps and continuously practicing, you can develop the skills to create highly detailed and realistic firearm models. Remember, the key to mastering Blender is patience and perseverance.
_HOOK_
Conclusion
Modeling guns in Blender can be a rewarding process, allowing for great creativity and precision. By following these steps and continuously practicing, you can develop the skills to create highly detailed and realistic firearm models. Remember, the key to mastering Blender is patience and perseverance.
Introduction to Gun Modeling in Blender
Gun modeling in Blender opens a world of creativity and technical skill, allowing artists to craft detailed and realistic weapons for various applications. Whether for game development, animation, or personal projects, understanding the basics of gun modeling is essential. This section introduces you to the fundamentals, ensuring a solid foundation for your journey into digital weaponry design.
- Understanding Blender\"s Interface: Familiarize yourself with Blender’s comprehensive tools and settings to streamline your modeling process.
- Importance of Reference Images: Learn why gathering high-quality reference images is crucial for accurate modeling.
- Setting Up Your Project: Initial steps to prepare your Blender workspace for efficient modeling.
Modeling guns in Blender requires patience, attention to detail, and practice. By starting with the basics, you can progressively build your skills, moving from simple models to intricate designs. Let\"s embark on this exciting journey to unlock the potential of Blender for gun modeling.
Essential Tools and Setup for Blender
Before diving into gun modeling, it’s crucial to understand and configure the essential tools and settings in Blender. This setup ensures a smooth and efficient modeling process, allowing you to focus on creating detailed and realistic models.
- Latest Blender Version: Always start with the latest version of Blender to take advantage of new features and improvements.
- Customizing the Interface: Tailor Blender’s interface to your preferences, focusing on tools you\"ll use frequently for gun modeling.
- Navigating the 3D Viewport: Master the navigation controls to efficiently move, zoom, and rotate around your model.
- Understanding Mesh Modeling Tools: Familiarize yourself with key mesh modeling tools such as extrude, loop cut, and bevel for creating complex shapes.
- Modifiers for Efficiency: Learn how to use modifiers like Mirror, Solidify, and Subdivision Surface to speed up the modeling process and add detail.
- Shading and Texturing Tools: Get to know the shading and texturing options in Blender for adding realism to your gun models.
Setting up Blender correctly and understanding its tools are fundamental steps in becoming proficient in gun modeling. These essentials serve as the building blocks for creating high-quality digital weapons, paving the way for more advanced techniques and detailed work.
Step-by-Step Process for Modeling Basic Gun Shapes
Modeling guns in Blender begins with understanding the basic shapes and components that make up firearms. This guide will walk you through a step-by-step process to create a simple handgun model, which can be a foundation for more complex projects.
- Setting Up Your Reference Images
- Start by importing reference images of the gun you want to model. Place them in the front, top, and side views in Blender to guide your modeling process. This ensures accuracy and proportion in your model.
- Creating the Basic Shape
- Use the Add Mesh > Cube option to start your model. Enter Edit Mode (Tab key) and begin shaping the cube to match the basic outline of your gun using the reference images. Use the vertex, edge, and face selection tools to manipulate the cube.
- Adding Details to the Frame
- Once the basic shape is established, start adding details like the grip, trigger guard, and barrel. Use the loop cut tool (Ctrl+R) to add more geometry for detailed parts. Extrude (E key) parts like the grip and trigger guard from the main body.
- Modeling the Slide
- For semi-automatic handguns, the slide is a distinct part. Create a new cube for the slide and shape it according to your reference. Make sure it aligns properly with the frame of the gun.
- Adding Small Details
- Details like screws, sights, and the hammer can be added by creating small cubes and shaping them to match these parts. Boolean modifiers can also be useful for adding or subtracting shapes.
- Refining the Model
- Switch to Sculpt Mode to refine the model and add organic details or smoother transitions between parts. Use various sculpting brushes to achieve the desired effect.
- Checking Proportions and Details
- Periodically compare your model to the reference images from multiple angles to ensure accuracy in proportions and details. Adjust as necessary.
Once you have completed these steps, your basic gun shape is ready. You can proceed to add textures, materials, and further details to enhance realism.
Advanced Techniques for Adding Detail and Realism
Once you have modeled the basic shape of your gun in Blender, the next step is to add details and realism to make it more lifelike. Advanced techniques involve a combination of modeling skills, texture application, and fine adjustments. Follow these steps to enhance your gun model:
- High-Poly Modeling
- Transition your model to high-poly by adding subdivisions. Use the Subdivision Surface modifier to smooth out the geometry and add more vertices for detailing. Pay close attention to areas that require high levels of detail, such as engravings and intricate mechanical parts.
- Normal Mapping
- For efficiency in games or animations, create normal maps from your high-poly model to simulate the appearance of complex details on a low-poly model. This involves baking the details of the high-poly model onto the low-poly version, significantly reducing computational load while maintaining visual complexity.
- Texturing and UV Unwrapping
- Use UV unwrapping to lay out the 3D model\"s surfaces in a 2D image editor. Apply realistic textures to your gun, including metal finishes, wear and tear, and other surface details. Utilize image textures and procedural textures to achieve lifelike materials.
- Material Nodes
- Blender’s Shader Editor allows you to create complex material setups using nodes. Combine Principled BSDF with various texture maps (diffuse, roughness, metallic, normal) to simulate realistic materials. Experiment with node settings to achieve the desired look, such as brushed metal or oiled surfaces.
- Detail Sculpting
- For organic or worn-out parts, use Blender\"s sculpting tools to add scratches, dents, and wear. Sculpting allows for a more artistic approach to adding imperfections that make the model look used and realistic.
- Decals and Stickers
- Add decals, labels, and stickers to your model for additional realism. These can include manufacturer logos, warning labels, or decorative designs. Use the Image as Planes feature to import these details and apply them to your model.
- Environmental Effects
- Incorporate environmental effects like rust, dirt, and oil smudges. Use particle systems for dust or procedural textures for rust and wear, tailoring the effects to match the story or setting of your model.
By applying these advanced techniques, your gun model will have enhanced detail and realism, making it ready for use in animations, games, or renders. Practice and experimentation with these methods are key to mastering gun modeling in Blender.
_HOOK_
Texturing and Material Application for Realistic Effects
Applying textures and materials to your gun model in Blender is a crucial step in achieving realistic effects. This process involves mapping detailed images or patterns onto the 3D surface of your model to simulate real-world materials. Follow these steps to enhance the realism of your gun model:
- UV Unwrapping
- Begin by UV unwrapping your model. This process involves projecting the 3D model onto a 2D plane to allow for accurate texturing. In Blender, enter Edit Mode, select all faces, and use the UV Mapping options to unwrap your model. Aim for minimal stretching to ensure textures appear correctly on your model.
- Choosing Textures
- Select appropriate textures for the different parts of your gun. Metal textures for the body, grip textures for the handle, and specific finishes like matte or glossy can be applied to different components. Utilize high-quality images or procedural textures to achieve the best results.
- Applying Textures
- Use Blender\"s Shader Editor to create material nodes for your model. Attach image textures to the Principled BSDF shader\"s color input for basic texturing. Adjust the mapping coordinates to fit the texture properly onto your model\"s surface.
- Adjusting Material Properties
- Modify the properties of your materials to match the physical characteristics of real-world objects. Adjust settings like roughness, metallic, specular, and normal mapping to simulate different surfaces accurately. For example, increase the metallic and decrease the roughness for metal parts to reflect light realistically.
- Adding Detail with Bump and Normal Maps
- Enhance the realism of your textures with bump and normal maps. These maps simulate the microsurface details of materials, adding depth and realism without the need for additional geometry. Apply them through the Normal Map node connected to your shader.
- Environmental Texturing
- Consider how environmental factors like wear, tear, and weathering would affect your gun. Use additional texture layers such as dirt maps, scratch maps, and rust textures to add age and realism to your model. Blend these textures using mix nodes in the Shader Editor.
- Final Adjustments
- Review your model in different lighting conditions to ensure materials and textures look realistic. Make final adjustments to texture scales, color values, and material properties as needed. Sometimes, subtle changes can make a significant difference in achieving photorealistic results.
By following these steps, you can apply textures and materials to your gun model in Blender, significantly enhancing its realism and preparing it for rendering or game engine integration. Remember, the key to realistic texturing is observation and replication of real-world materials.
Lighting and Rendering Tips for Gun Models
Effective lighting and rendering are essential for showcasing your gun models in Blender with the highest level of realism. These tips will help you set up your scene for impressive results, highlighting the detailed work you\"ve put into your model.
- Choosing the Right Lighting Setup
- Start by choosing a lighting setup that complements the features of your gun model. Three-point lighting is a popular choice, consisting of a key light, fill light, and back light. This setup highlights the details of the model, provides depth, and reduces harsh shadows.
- Utilizing HDRI for Environment Lighting
- High Dynamic Range Imaging (HDRI) can provide your model with a realistic environmental context. HDRI maps simulate the lighting of real-world environments, offering a natural and cohesive lighting effect that enhances the realism of your model.
- Adjusting Light Intensity and Color
- Adjust the intensity and color of your lights to match the mood and setting of your scene. Warmer tones can suggest a daylight setting, while cooler tones can mimic nighttime or industrial environments. Experiment with different settings to see what best showcases your model.
- Softening Shadows
- Soft shadows can add realism to your renders. Use soft area lights or adjust the shadow softness settings in your light source properties. Soft shadows mimic real-world lighting more accurately than hard shadows, especially in outdoor or softly lit indoor scenes.
- Setting Up Camera Angles
- Choose camera angles that best display the details of your gun model. Close-up shots can highlight textures and materials, while wider angles can show the gun in context. Experiment with different focal lengths and depths of field to achieve the desired effect.
- Rendering Settings
- Optimize your rendering settings for quality and efficiency. In Blender\"s Render Properties, adjust the samples for both viewport and render for cleaner images. Consider enabling denoising to reduce noise in low-light areas without increasing render times significantly.
- Post-Processing Effects
- Use Blender’s Compositor for post-processing effects such as color grading, bloom, and glare to enhance the final image. These adjustments can dramatically improve the visual impact of your render, making your gun model look more dynamic and realistic.
By applying these lighting and rendering tips, you can dramatically improve the presentation of your gun models, making them stand out with photorealistic details and convincing environmental integration.
Exporting Your Model for Game Engines or Animation
After completing your gun model in Blender, exporting it for use in game engines or animation projects is the next step. This process involves preparing your model to ensure compatibility and optimal performance in other software. Follow these guidelines to successfully export your model:
- Optimize Your Model
- Ensure your model is optimized for the target platform. This includes reducing the polygon count for game engines without sacrificing detail and ensuring that your model has clean topology. Use modifiers like Decimate if necessary to lower the polygon count.
- Apply Textures and Materials
- Make sure all textures and materials are correctly applied and show up as intended in Blender. Game engines often use different rendering systems, so it’s crucial to ensure that your materials are compatible. Bake complex materials into texture maps if necessary.
- UV Unwrap Your Model
- Confirm that your model is correctly UV unwrapped. This step is crucial for the textures to appear correctly in the game engine or animation software. Check for any stretching or overlapping UVs and correct them.
- Rigging and Animation
- If your gun model will have moving parts or animations, rig it accordingly. Use bones for parts like the trigger, hammer, and slide. Animate these parts within Blender if the animation will be exported, or prepare the rig for animation directly in the game engine.
- Choose the Correct Export Format
- Most game engines and animation software have preferred file formats. FBX and OBJ are widely supported and include options for exporting textures, materials, and animations. Choose the format that best suits your needs and check compatibility with your target platform.
- Exporting the Model
- Go to File > Export and select your chosen format. Adjust the export settings according to your needs. This includes selecting objects to export, applying transformations, and including textures and materials. For animations, ensure that the animation option is enabled and properly configured.
- Testing in the Target Platform
- After exporting, import your model into the game engine or animation software to test it. Check for any issues with textures, materials, or animations and adjust as necessary. This step may require going back to Blender to make adjustments and re-exporting the model.
By following these steps, you can ensure that your Blender gun model is ready for use in game development projects or animations, with all details preserved and optimized for performance on the target platform.
Common Pitfalls and How to Avoid Them
When modeling guns in Blender, certain common pitfalls can hinder the quality and efficiency of your work. Recognizing and avoiding these pitfalls is crucial for producing high-quality models. Here are some common issues and how to prevent them:
- Ignoring Reference Material
- Not using or improperly using reference images can lead to inaccuracies in your model. Always start with detailed reference materials, setting them up correctly in Blender to guide your modeling process.
- Overlooking Topology
- Poor topology not only affects the visual quality but also the functionality of your model, especially if it\"s intended for animation. Focus on maintaining a clean topology with quads, use loop cuts for adding details, and avoid unnecessary triangles and n-gons.
- Ignoring Scale and Proportions
- Inaccurate scale and proportions can make your model look unrealistic. Use Blender’s measurement tools to check the dimensions of your model against your reference images regularly during the modeling process.
- Neglecting Materials and Textures
- Applying materials and textures hastily can result in a model that looks flat or unrealistic. Spend time fine-tuning your materials and ensure that textures are correctly UV mapped to your model.
- Overcomplicating the Model
- Adding too much detail to your model can make it difficult to manage and slow down rendering times. Focus on the essential details and use normal or bump maps to suggest more complex textures without adding geometry.
- Forgetting to Optimize for Animation or Games
- If your model will be used in animation or games, forgetting to optimize it can lead to performance issues. Keep your polygon count in check and ensure that moving parts are correctly rigged and animated.
- Skipping Test Renders
- Not performing test renders can lead to surprises in the final output. Regularly render your model during the development process to check lighting, materials, and overall appearance.
By being mindful of these common pitfalls and actively working to avoid them, you can improve the quality of your gun models and streamline your workflow in Blender.
Resources for Further Learning and Inspiration
Improving your skills in modeling guns in Blender and staying inspired requires access to a variety of resources. Here are some suggestions for further learning and finding inspiration:
- Blender Tutorials
- Official Blender tutorials and user-contributed videos on platforms like YouTube are great for learning specific techniques or tackling advanced projects.
- Online Courses
- Websites like Udemy, Coursera, and LinkedIn Learning offer structured courses ranging from beginner to advanced levels, covering not only gun modeling but also broader 3D modeling and animation skills.
- Blender Community Forums
- Join forums such as Blender Artists or the Blender subreddit to connect with other artists, share your work, get feedback, and ask for advice on your projects.
- 3D Model Repositories
- Websites like Sketchfab and CGTrader allow you to explore professional gun models, providing inspiration and insights into how other artists construct their models.
- Artwork Galleries
- Platforms like ArtStation and Behance showcase high-quality 3D models and digital art, offering a wealth of inspiration for your own gun modeling projects.
- Books and Magazines
- There are many books dedicated to Blender and 3D modeling. Look for titles focused on game asset creation, character modeling, and realistic texturing techniques.
- Workshops and Conferences
- Participate in workshops and conferences, either virtually or in person, to learn from experienced professionals and see the latest trends and technologies in 3D modeling.
Exploring these resources will not only improve your skills but also keep you inspired to push the boundaries of your creative work in Blender.
_HOOK_
READ MORE:
Conclusion and Encouragement for Practice
Modeling guns in Blender is a skill that combines creativity with technical proficiency. It\"s a journey that requires patience, practice, and a passion for continuous learning. Whether you\"re a beginner looking to model your first gun or an experienced artist aiming to refine your techniques, the key to success lies in dedication and practice.
Remember, every professional once started as a beginner. The complexity of gun modeling provides a unique opportunity to hone your skills in modeling, texturing, lighting, and rendering. By tackling the challenges that come with creating realistic gun models, you\"ll not only improve your abilities in Blender but also gain valuable skills that apply to a wide range of 3D modeling projects.
Encourage yourself to experiment with different styles and techniques. Take inspiration from the world around you and the vast resources available online. Share your work with the community to receive feedback, learn from others, and, most importantly, keep your passion for 3D modeling alive.
In conclusion, let your journey in gun modeling be a testament to your growth as an artist. Embrace the challenges, celebrate your progress, and never stop pushing the boundaries of what you can create with Blender. Your dedication to mastering this craft will not only lead to stunning gun models but also to a deeper understanding of the art and science of 3D modeling.
So, grab your mouse and keyboard, fire up Blender, and start modeling. The only limit is your imagination!
Embark on a thrilling journey of creativity and precision with our comprehensive guide on modeling guns in Blender. Unlock your potential and bring your vision to life, one polygon at a time. Dive in and transform your ideas into stunning 3D models!