Topic how to model a sword in blender: Embark on a creative journey to master sword modeling in Blender, unlocking the secrets to crafting stunning, detailed weapons for your digital arsenal.
Table of Content
- How can I create a realistic sword model using Blender?
- Getting Started with Blender
- Understanding Blender\"s Interface
- Setting Up Your Project
- YOUTUBE: Modeling a Sword in 10 Minutes | Blender
- Basic Modeling Techniques
- Modeling the Sword Blade
- Modeling the Hilt, Guard, and Pommel
- Adding Details and Textures
- UV Mapping and Texture Painting
- Lighting and Rendering Your Sword
- Tips for Realistic Sword Design
- Exporting Your Model for Game Engines
How can I create a realistic sword model using Blender?
To create a realistic sword model using Blender, follow these steps:
- Start by launching Blender and creating a new project.
- Select the default cube object and press X then Delete to remove it.
- Go to the top menu bar and click on Add > Mesh > Plane.
- In the right-side panel, navigate to the Dimensions section and set the X and Y values to define the size of the blade. For example, you can set them to 2 units each.
- Switch to Edit Mode by pressing Tab or clicking on the mode selector at the top of the viewport.
- Select all vertices by pressing A.
- Extrude the blade by pressing E and then moving the mouse along the desired axis to define the length of the blade. You can also type in an exact value if needed.
- Switch to Object Mode and right-click on the plane object to bring up the context menu.
- Select Shade Smooth to create a smooth shading effect on the sword blade.
- With the blade still selected, press Shift + D to duplicate it.
- Move the duplicated blade up to create the guard of the sword.
- Increase the scale of the guard by pressing S and moving the mouse or typing in values.
- Select the original blade again and duplicate it once more using Shift + D.
- Move the duplicated blade toward the bottom of the guard to create the hilt.
- Adjust the scale and shape of the hilt as desired.
- To create the pommel, select the original blade again and duplicate it.
- Move the duplicated blade to the bottom of the hilt and scale it down to create a smaller shape.
- Adjust the scale and shape of the pommel as desired.
- You can further refine the details of the sword by adding bevels, textures, and materials.
- Save your work and export the sword model in the desired format for use in other applications or games.
READ MORE:
Getting Started with Blender
Before diving into the exciting process of modeling a sword in Blender, it\"s essential to familiarize yourself with the basics of this powerful 3D software. This section will guide you through setting up Blender, understanding its interface, and preparing for your first modeling project.
- Download and Install Blender: Visit the official Blender website to download the latest version of Blender. Ensure your computer meets the software requirements for a smooth experience.
- Explore the Interface: Upon launching Blender, take some time to navigate through its interface. Familiarize yourself with the 3D viewport, object mode, edit mode, and the properties panel.
- Customize Your Settings: Access the preferences menu to adjust Blender\"s settings according to your needs. You can customize themes, input settings, and add-ons to enhance your workflow.
- Learn Basic Operations: Practice basic operations such as scaling, rotating, and moving objects. These are crucial skills you\"ll use throughout the modeling process.
- Set Up Your Workspace: Organize your workspace by adjusting the layout and panels. A well-organized workspace can significantly improve your modeling efficiency.
With Blender installed and a basic understanding of its interface and operations, you\"re now ready to begin the exciting journey of modeling your very own sword. The following sections will guide you through each step of the process, from modeling the blade to adding the final touches.

Understanding Blender\"s Interface
Blender\"s interface may seem daunting at first, but with a little guidance, you\"ll find it to be highly intuitive and customizable. Understanding the layout, key areas, and functionalities will significantly enhance your 3D modeling experience.
Main Areas of Blender\"s Interface
- 3D Viewport: This is where you\"ll spend most of your time, viewing and editing your 3D models. You can rotate, pan, and zoom to inspect your model from every angle.
- Timeline: Located at the bottom, the Timeline allows you to control animations, set keyframes, and navigate through your animation frames.
- Outliner: On the top right, the Outliner displays a hierarchical list of all objects in your scene, making it easy to select and manage them.
- Properties Panel: Also on the right, this panel provides various settings for the active object, scene, rendering, materials, and more.
- Tool Shelf: On the left side of the 3D Viewport, it contains tools for transforming, editing, and creating objects. It can be toggled with the T key.
Customizing the Interface
Blender allows you to customize the interface to suit your workflow. You can:
- Resize and rearrange areas by dragging the borders between them.
- Open new windows or panels by dragging the corner of any area.
- Change the editor type of any area using the dropdown menu in the corner.
Navigating the 3D Viewport
Effective navigation is key to efficient modeling:
- Rotate View: Hold down the middle mouse button and move the mouse.
- Pan: Hold Shift + middle mouse button and move the mouse.
- Zoom: Scroll the middle mouse wheel or hold Ctrl + middle mouse button and move the mouse up and down.
Key Shortcuts
Learning some key shortcuts can speed up your workflow significantly:
- G to grab/move objects.
- S to scale objects.
- R to rotate objects.
- Use number keys 1, 3, 7 for front, side, and top views respectively (Numpad).
Conclusion
Getting comfortable with Blender\"s interface is the first step towards becoming proficient in 3D modeling. Take your time to explore and customize the interface according to your needs. With practice, navigating and using Blender will become second nature.
Setting Up Your Project
Before diving into modeling, setting up your Blender project correctly is crucial for a smooth workflow. This section will guide you through the initial steps to ensure your environment is optimized for creating a sword model.
Choosing the Right Version of Blender
Ensure you have the latest version of Blender installed to take advantage of all the features and improvements. You can download it from the official Blender website.
Setting Up the Workspace
Blender offers various workspaces for different tasks. For modeling, select the \"Modeling\" workspace from the top menu to access a set of tools and panels most relevant to your task.
Configuring Units and Scale
Accuracy is key in modeling, especially for objects that need to fit into a real-world scale or a specific game engine:
- Go to the Properties panel.
- Click on the Scene tab.
- Under Units, set the Length to \"Metric\" and the Unit Scale to 1.0 for real-world scaling.
Setting Up the Camera
A well-placed camera is essential for previewing your model:
- Select the camera object.
- Position it so that it faces the area where you\"ll be modeling your sword.
- Adjust the focal length in the Camera properties for a suitable view.
Adding a Reference Image
Using a reference image can significantly improve the accuracy and detail of your sword model:
- In the 3D Viewport, press Shift + A to add a new object.
- Select Image > Reference.
- Navigate to your reference image and add it to the scene.
- Position the reference image so that it\"s easily visible while you model.
Saving Your Project
Remember to save your project frequently to avoid losing progress. Go to File > Save As and choose a location and name for your Blender file.
Conclusion
With your project now set up, you\"re ready to start modeling your sword. This initial setup ensures that you have a solid foundation to work from, making the modeling process more efficient and enjoyable.

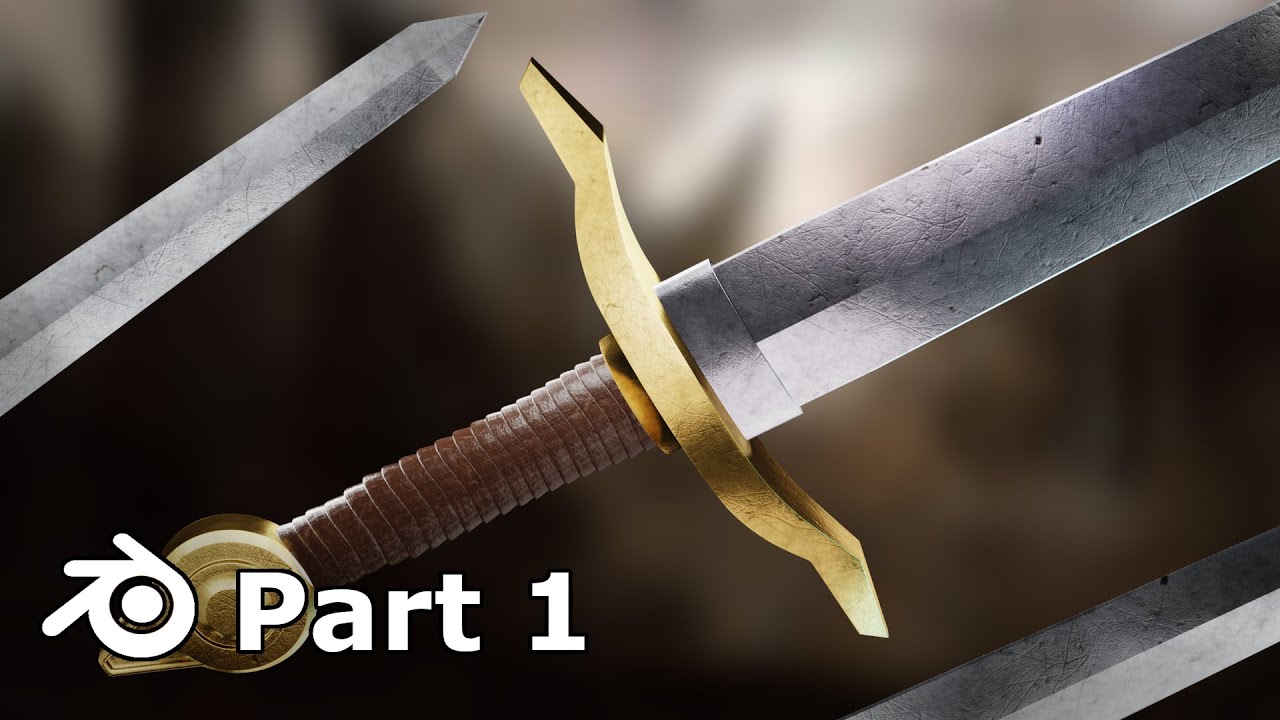
Modeling a Sword in 10 Minutes | Blender
Watch this fascinating video on sword modeling and learn how to create intricate and realistic 3D models of swords. Gain insight into the techniques and tools used by professionals in the industry. Be inspired to unleash your creativity and bring your sword designs to life.
Sword 3D Model Tutorial | Blender
Dive into the world of 3D modeling with this captivating video. Discover the power of this incredible technology as you watch experts take simple sketches and transform them into stunning lifelike creations. Watch as each detail comes to life, inspiring you to explore the endless possibilities of 3D modeling.
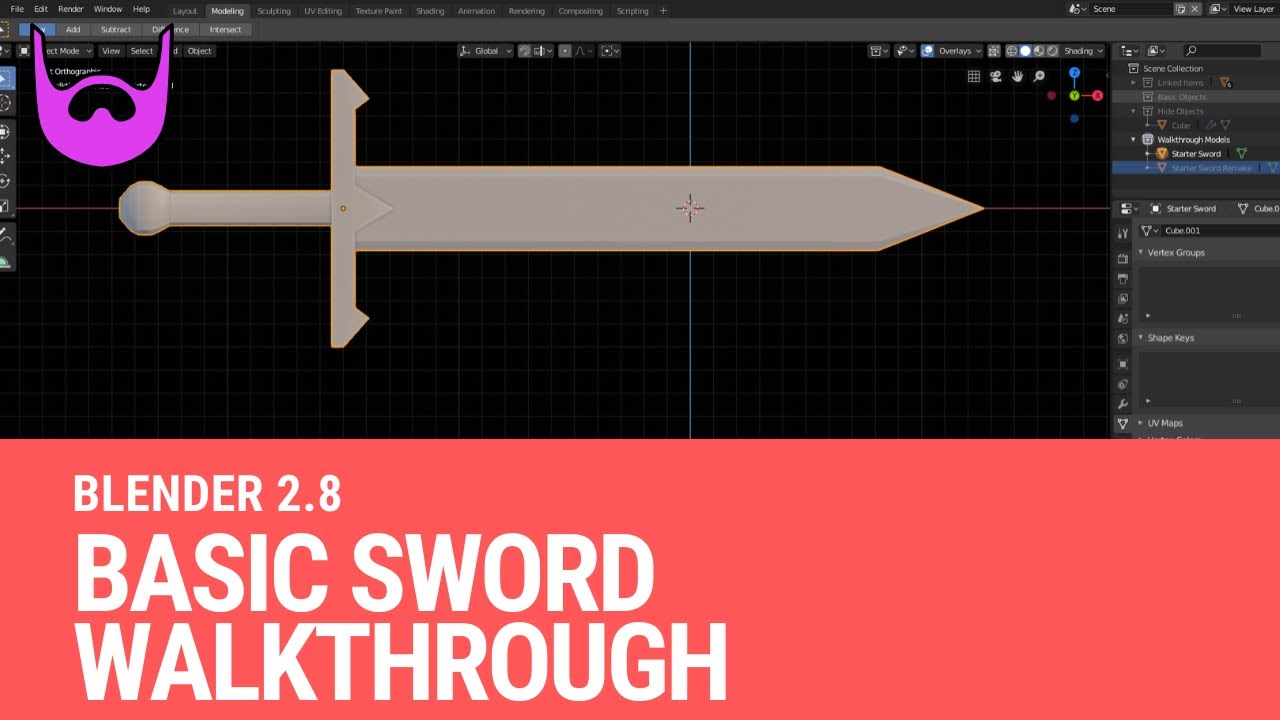
Basic Modeling Techniques
Mastering basic modeling techniques in Blender is essential for creating detailed and realistic models. This section covers foundational skills that you\"ll apply when modeling a sword, from manipulating basic shapes to more complex operations.
Starting with Basic Shapes
Every complex model begins with simple shapes. For a sword, you typically start with a cube or plane:
- Press Shift + A in the 3D Viewport and select Mesh > Cube or Plane as your starting point.
- Use the scale (S), rotate (R), and grab (G) tools to position your shape appropriately.
Editing Meshes
Editing meshes is crucial for shaping your basic objects into more complex models:
- Switch to Edit Mode by pressing Tab or selecting it from the mode menu in the 3D Viewport.
- Select vertices, edges, or faces to modify your shape using Right-Click or Shift + Right-Click for multiple selections.
- Use the extrude (E), inset (I), and loop cut (Ctrl + R) tools to add detail to your model.
Subdivision and Smooth Shading
For a more refined look, use subdivision and smooth shading:
- With your object selected, add a Subdivision Surface modifier from the modifier properties tab to smooth and subdivide the mesh.
- Apply smooth shading by right-clicking the object in Object Mode and selecting Shade Smooth.
Using Modifiers
Modifiers can automate and simplify complex modeling tasks:
- The Mirror Modifier is particularly useful for symmetrical objects like swords, ensuring both sides are identical.
- The Solidify Modifier can give thickness to flat objects, which is helpful for sword blades.
Booleans for Complex Shapes
Boolean operations allow you to combine objects in ways that create complex shapes:
- Use the Boolean Modifier to add or subtract mesh objects from each other, ideal for creating intricate hilt designs.
Conclusion
These basic modeling techniques form the foundation of your skill set in Blender. Practice these techniques to gain confidence and precision in your modeling projects. As you become more familiar with these tools, you\"ll find that creating a sword or any other model becomes a more intuitive and enjoyable process.

_HOOK_
Modeling the Sword Blade
Creating a realistic sword blade in Blender involves precise modeling techniques and attention to detail. This guide will walk you through the steps to model a basic sword blade, which can be adapted and detailed according to your specific design.
Starting with a Plane
Begin by adding a plane to represent the blade\"s broadest surface:
- Press Shift + A and select Mesh > Plane.
- Rotate the plane 90 degrees on the X-axis to stand it upright. Press R, type X, then 90, and press Enter.
- Scale the plane along the Y-axis (press S, Y) to elongate it into a blade shape.
Defining the Blade\"s Edge
To create the sharp edge of the blade:
- Enter Edit Mode (Tab).
- Add a loop cut down the middle of the plane by pressing Ctrl + R, then left-click and drag to position it in the center.
- Select the two vertices at the tip of the blade and scale them down on the Z-axis (S, Z, 0) to bring them to a sharp point.
Extruding the Blade
To give the blade thickness:
- Select all faces of the blade in Edit Mode.
- Extrude slightly along the Z-axis by pressing E, then Z, and move the mouse cursor slightly to create thickness.
Refining the Shape
Adjust the blade\"s overall shape to match your design:
- Use proportional editing (O) for smooth transitions when moving, scaling, or rotating vertices.
- Manipulate vertices along the blade\"s edge to create specific designs, like curves or indentations.
Adding Details
To add details like a fuller (the groove running down the blade) or engravings:
- Use the inset tool (I) on selected faces where you want to add details.
- Extrude or inset these areas to create the desired effects.
Applying Modifiers
Enhance the blade with modifiers for a polished look:
- Add a Subdivision Surface Modifier to smooth the blade.
- Use a Solidify Modifier if additional thickness is needed.
- Remember to apply a Shade Smooth from the object context menu for a more realistic appearance.
Conclusion
Modeling a sword blade in Blender combines basic and advanced modeling techniques. By following these steps, you can create a variety of sword designs, from simple broadswords to intricate fantasy blades. Experiment with different shapes and details to develop your unique creations.

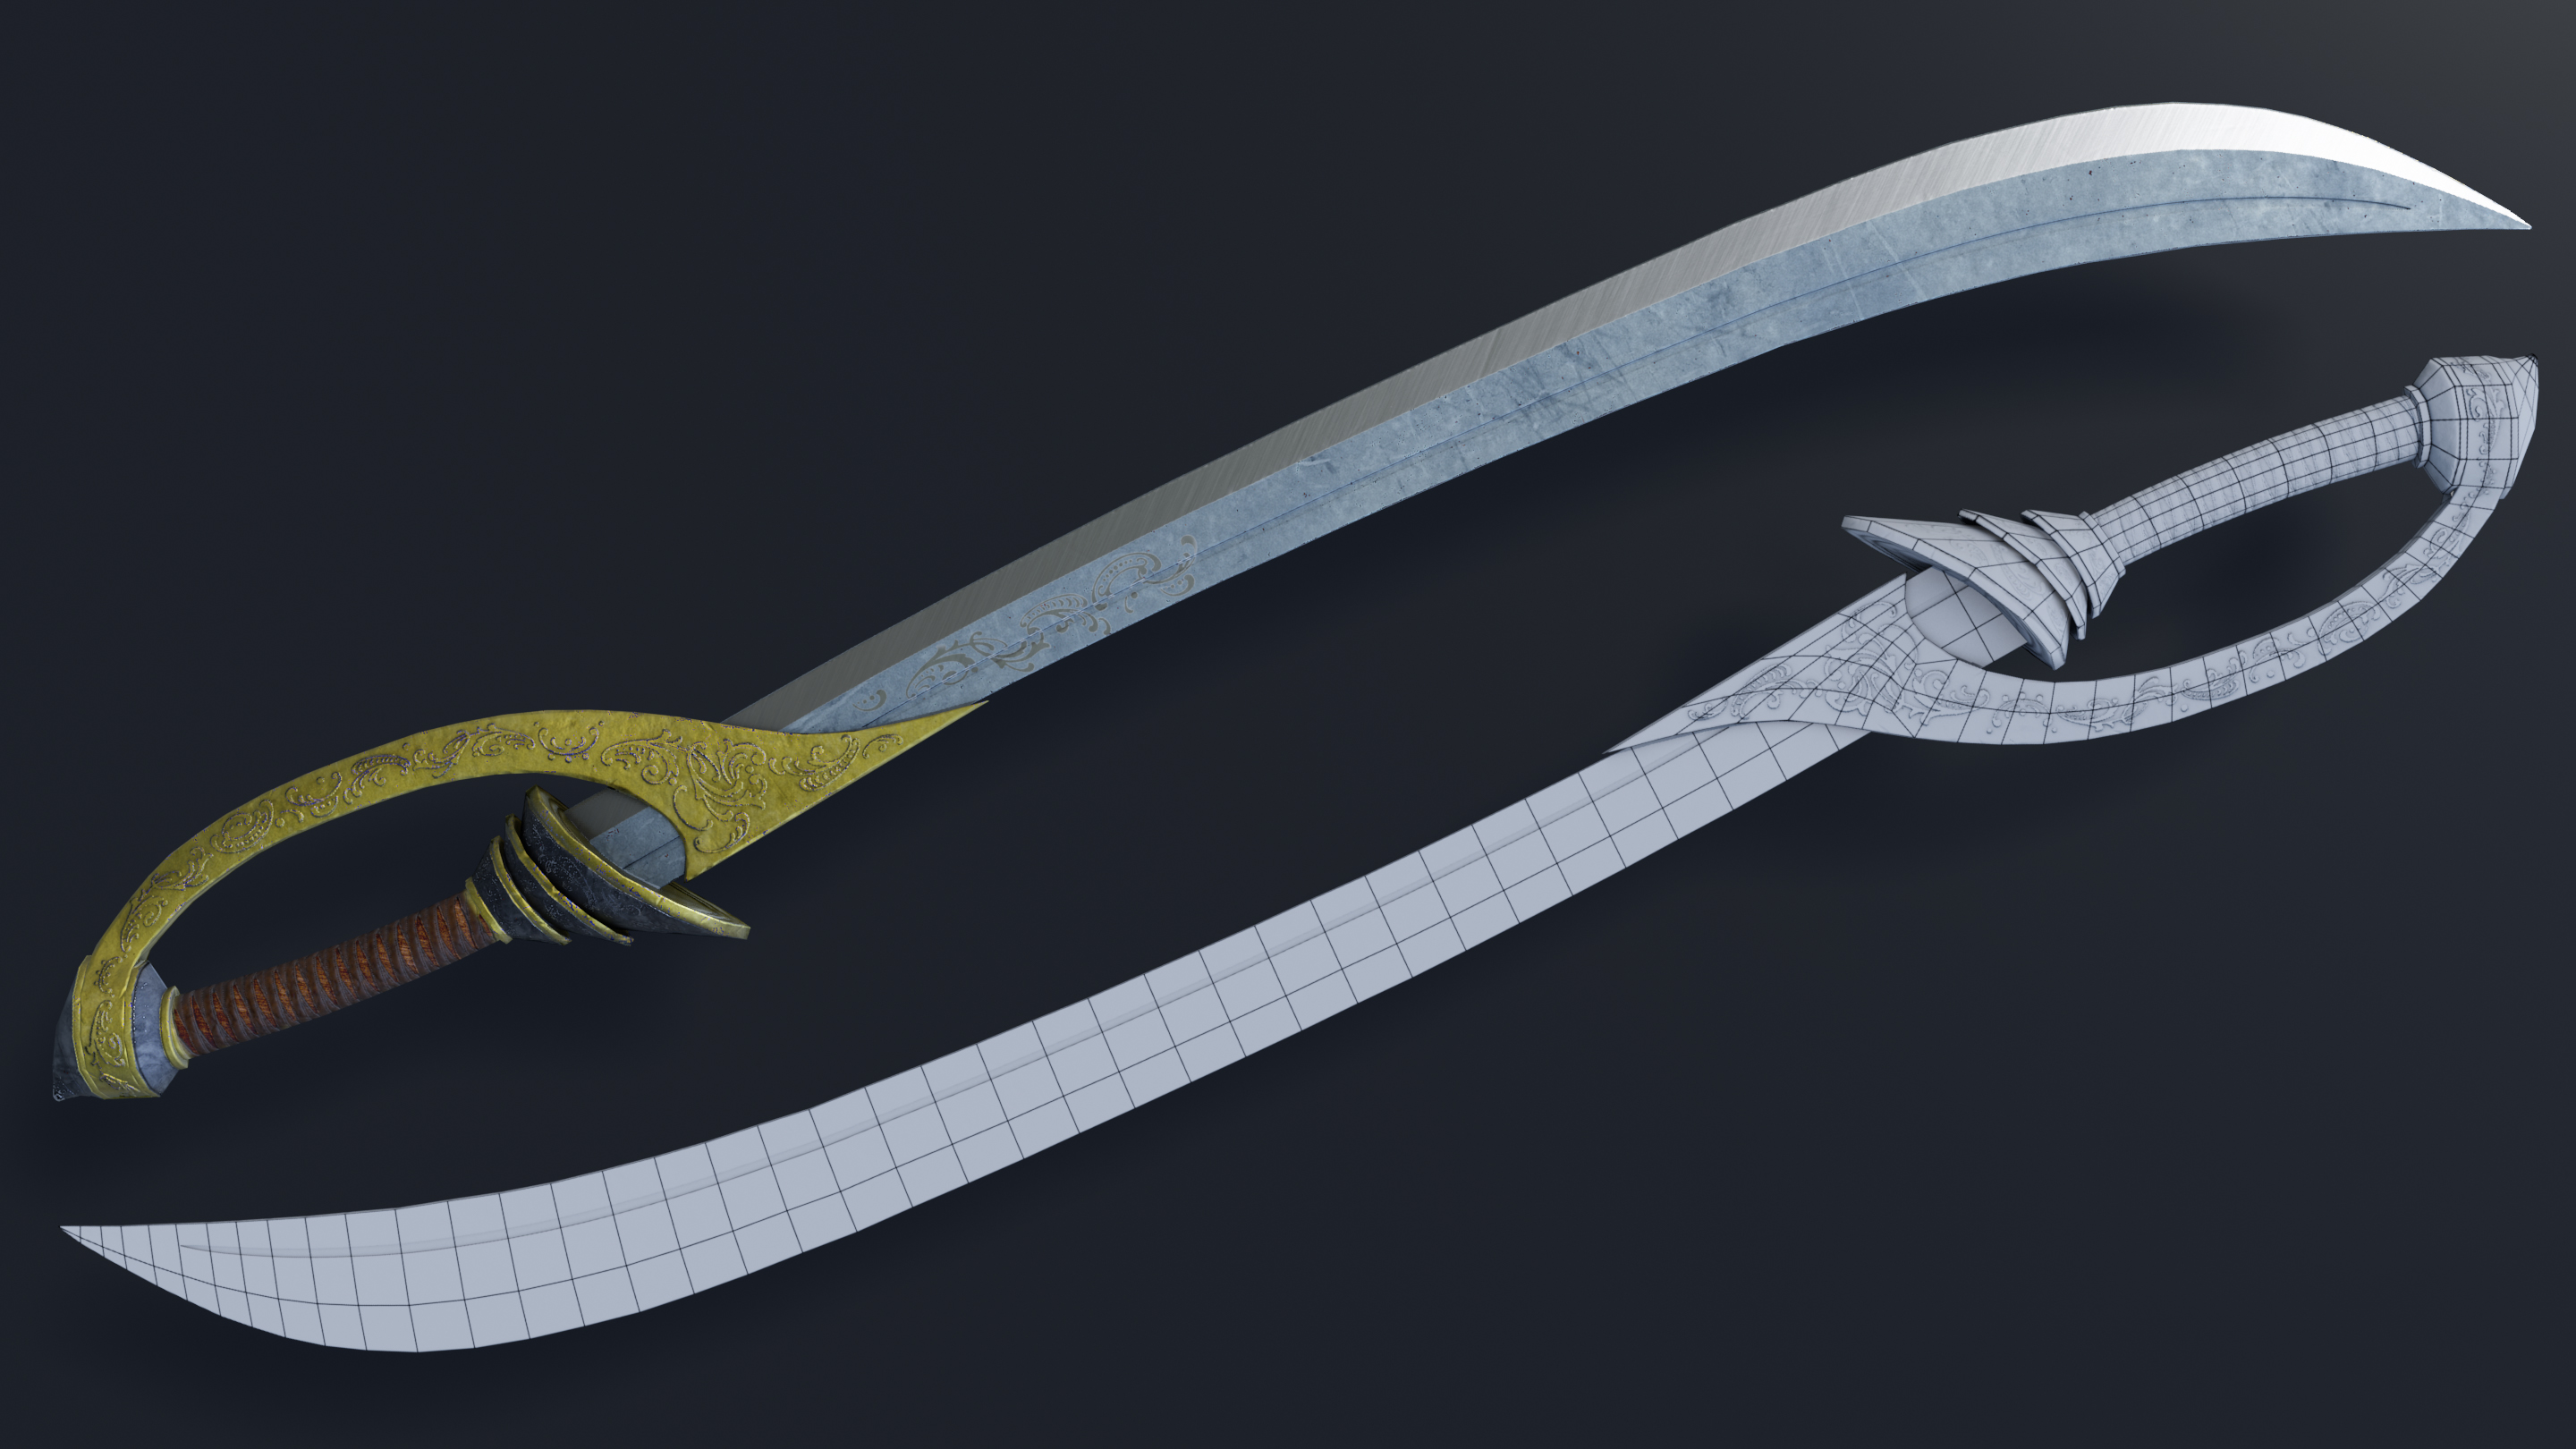
Modeling the Hilt, Guard, and Pommel
Modeling the hilt, guard, and pommel of a sword adds the finishing touches that bring your weapon to life. Each component requires careful attention to detail and technique. Follow these steps to model these essential parts of your sword in Blender.
Modeling the Hilt
- Start by adding a cylinder (Shift + A > Mesh > Cylinder) for the hilt base. Choose a vertex count that suits the level of detail you desire.
- Scale the cylinder on the Z-axis to achieve the desired length of the hilt.
- Enter Edit Mode (Tab) and select the top face. Use the inset tool (I) and extrude (E) to model any details like ridges or patterns on the hilt.
Creating the Guard
The guard can be created using a variety of methods, depending on its complexity:
- For a simple straight guard, add a cube (Shift + A > Mesh > Cube), scale it down, and then elongate it on one axis to stretch across the hilt.
- For more complex shapes, consider starting with a plane and using the extrude tool (E) to build the shape gradually. Adding a mirror modifier can help achieve symmetry.
- Use the solidify modifier (from the modifiers panel) to give the plane-based guard thickness.
Detailing the Guard
Add details to the guard using loop cuts (Ctrl + R) and extrusions (E) to create patterns, grooves, or ornamental designs. Proportional editing (O) can be useful for smoothly adjusting the curves and angles.
Modeling the Pommel
The pommel adds balance to the sword and can be a decorative piece:
- Add a sphere or another cylinder at the bottom of the hilt as the base for the pommel. Scale it to match the proportions of your sword.
- Modify the shape in Edit Mode, using extrude (E) and scale (S) to form the pommel\"s unique design.
- Consider adding a subdivision surface modifier to smooth out the pommel and give it a polished look.
Assembling the Sword
Once you have modeled the hilt, guard, and pommel, it\"s time to assemble them with the blade:
- Position each component accurately using the grab (G) and rotate (R) tools.
- Ensure that all parts are properly aligned and that the guard and pommel are securely attached to the hilt.
- Join all parts into a single object by selecting them and pressing Ctrl + J. This makes it easier to manage and edit the sword as a whole.
Conclusion
Modeling the hilt, guard, and pommel of a sword in Blender allows for a high degree of customization and detail, turning a simple blade into a masterpiece. By following these steps and experimenting with Blender\"s tools, you can create a wide variety of sword designs, each with its unique character and style.
Adding Details and Textures
After modeling the basic structure of your sword in Blender, the next step is to add details and textures that will bring your model to life. This process involves sculpting finer details and applying materials and textures to create a realistic and visually appealing sword.
Sculpting Details
Blender\"s sculpting tools allow you to add intricate details to your model:
- Switch to Sculpt Mode from the mode menu in the 3D Viewport.
- Select a brush, such as the Draw or Clay Strips brush, to add volume or carve details into your model.
- Use the Crease brush to define sharp lines and edges, which is particularly useful for enhancing the blade\"s edge or the guard\"s ornamental details.
- Adjust the brush size and strength to suit the level of detail you\"re aiming for.
Adding Materials
Materials define the color, reflectivity, and texture of your model:
- In the Properties Panel, go to the Material tab and click \"New\" to create a new material.
- Adjust the Base Color, Metallic, and Roughness sliders to create the desired material for your sword\"s blade, hilt, guard, and pommel.
- For a more realistic metal look, increase the Metallic slider and adjust the Roughness to control the reflectivity.
Applying Textures
Textures add surface details that make your model more realistic:
- To add a texture, first, ensure you have a material assigned to your object.
- In the Shader Editor, add a Texture node (Shift + A > Texture) and select an image texture or procedural texture.
- Connect the texture node to the Base Color input of the shader to apply the texture to your material.
- Use UV Mapping to accurately wrap your texture around the model. This may involve marking seams and unwrapping the model in Edit Mode.
Adding Bump and Normal Maps
Bump and normal maps simulate surface irregularities without adding extra geometry:
- In the Shader Editor, add a Bump or Normal Map node and connect it to the Normal input of your shader.
- Load your bump or normal map into the node. This will give the illusion of depth and detail on the surface of your sword.
Conclusion
Adding details and textures is a crucial step in creating a realistic and visually appealing sword model in Blender. By carefully sculpting details, applying materials, and utilizing textures, you can achieve a level of realism that brings your sword to life. Experiment with different techniques and settings to find the perfect look for your model.
UV Mapping and Texture Painting
UV mapping and texture painting are crucial steps in the process of texturing your sword model in Blender. UV mapping involves unwrapping your 3D model onto a 2D surface to accurately apply textures. Texture painting allows you to manually add color, details, and textures directly onto your model. Follow these steps to create detailed and realistic textures for your sword.
Preparing for UV Mapping
- Select your sword model and switch to Edit Mode (Tab).
- To make the UV mapping process easier, mark seams where the model would naturally unfold. Select edges where you want seams, press Ctrl + E, and choose Mark Seam.
- Once you\"ve marked your seams, select all by pressing A, then press U and select Unwrap to generate the UV map.
Adjusting the UV Map
After unwrapping your model, adjust the UV map for better texture alignment:
- Open the UV Editor window to see your UV map.
- Select and move UV islands to adjust their position and scale for a better fit with your textures. Ensure there\"s no overlap unless intentional for repeating patterns.
- Use the Pack Islands feature (in the UV Editor\"s menu) to efficiently use the texture space.
Texture Painting
Blender\"s texture painting tools enable you to add details directly onto your model:
- Switch to Texture Paint mode in the 3D Viewport.
- In the Texture Paint mode, select the brush tool and adjust its settings such as color, size, and strength to paint directly on your model.
- Use the stencil feature for precise control over texture placement, especially useful for logos, inscriptions, or decorative patterns.
- For detailed work, zoom in on your model and use a smaller brush size to add fine details or weathering effects.
Applying Textures
Once you have painted your textures or if you\"re using image textures:
- In the Shader Editor, create a new material for your sword.
- Add an Image Texture node and select your painted texture or any image texture you wish to use.
- Connect the Image Texture node to the Base Color input of the Principled BSDF shader.
- Adjust the material settings like Metallic and Roughness to match the physical properties of your sword\"s materials.
Finalizing Your Texture Work
Review your model in different lighting conditions to ensure the textures look realistic. Make any necessary adjustments to the UV map, texture paint, or shader settings for the best possible result.
Conclusion
UV mapping and texture painting are essential for adding realism and detail to your 3D sword model in Blender. By carefully unwrapping your model and applying detailed textures, you can create a visually stunning and realistic sword that stands out in any scene.
Lighting and Rendering Your Sword
Lighting and rendering are the final steps in bringing your sword model to life in Blender. Proper lighting highlights the details and textures of your sword, while rendering transforms your model into a stunning image. Follow these steps to effectively light and render your sword.
Setting Up Lighting
- Switch to the Layout workspace and select the default lamp. Delete it by pressing X.
- Add a new light source by pressing Shift + A, go to Light, and choose HDRI for environmental lighting or Area Light for more control.
- Position your light(s) around the sword to highlight its features. Use multiple lights if necessary to eliminate unwanted shadows.
- Adjust the strength and color of each light in the Light Properties panel to achieve the desired effect.
Configuring Camera Settings
Position the camera to frame your sword beautifully:
- Select the camera and position it using the G (grab) and R (rotate) keys.
- Adjust the focal length in the Camera Properties panel for a closer or wider shot, depending on the desired composition.
- Use the Rule of Thirds or center the sword in the frame for an appealing composition.
Choosing Render Settings
Blender offers two render engines, Cycles and Eevee. Choose one based on your needs:
- Cycles offers more realistic results with ray tracing but takes longer to render.
- Eevee is faster and uses real-time rendering techniques, suitable for previews or less resource-intensive projects.
- In the Render Properties panel, adjust the settings such as the render engine, output resolution, and sampling rate.
Applying Materials and Textures
Ensure your sword\"s materials and textures are correctly applied and visible in the chosen render engine:
- Review the material settings and make sure they are optimized for the render engine you\"re using.
- Check the texture mapping and ensure it\"s correctly applied to your model.
Rendering the Image
Once you\"re satisfied with the lighting, camera settings, and materials:
- Go to Render > Render Image (or press F12) to render your scene.
- After rendering, you can save the image by going to Image > Save As in the Image Editor.
Post-Processing
Blender\"s Compositor allows for post-processing to enhance your rendered image:
- Switch to the Compositing workspace and use nodes to adjust brightness, contrast, color balance, or add effects like glare.
- Experiment with different node setups to achieve the desired final look.
Conclusion
Lighting and rendering are key to showcasing your sword model in its best light. By carefully setting up your scene, choosing the right render settings, and applying post-processing effects, you can create a compelling and realistic image of your sword.
_HOOK_
Tips for Realistic Sword Design
Designing a realistic sword in Blender requires more than just technical skills; it also needs an understanding of historical and functional aspects of swords. Here are some tips to help you create swords that not only look impressive but also feel authentic and believable.
Study Historical Swords
- Research different types of swords from various cultures and time periods to understand their unique characteristics and purposes.
- Notice the variations in blade shapes, lengths, and the designs of hilts, guards, and pommels.
Understand Sword Anatomy
Knowing the parts of a sword will help you design each component with accuracy:
- Blade: Consider the blade\"s length, width, and thickness. Different blade types serve different purposes, such as cutting, thrusting, or both.
- Hilt (including the guard, grip, and pommel): Ensure it\"s proportionally sized to balance the blade and comfortable to hold.
Focus on Proportions
Proper proportions are crucial for a realistic design:
- A well-balanced sword typically has a center of gravity close to the hilt, making it easier to wield.
- The length of the hilt should correspond with the size of the blade to maintain balance.
Consider Materials and Craftsmanship
The choice of materials affects both the appearance and the function of the sword:
- Use textures and shaders that mimic real-life materials, such as steel for the blade and wood or leather for the grip.
- Detailing such as wear and tear, scratches, and engravings can add a sense of history and realism.
Implement Realistic Details
Small details can make a big difference in realism:
- Add subtle imperfections like nicks along the blade edge to show use and wear.
- Consider how the sword would have been forged and include appropriate forging marks.
Lighting and Rendering
Realistic lighting and rendering techniques are vital to showcasing your sword:
- Use HDRI lighting for natural environmental reflections on the blade.
- Adjust the metal material\"s roughness and specular settings to achieve a believable metal appearance.
Conclusion
Creating a realistic sword in Blender is an art that combines historical knowledge, attention to detail, and technical skill. By incorporating these tips into your design process, you can create swords that are not only visually stunning but also historically and functionally plausible.
READ MORE:
Exporting Your Model for Game Engines
Once you\"ve completed your sword model in Blender, the next step is to export it for use in game engines such as Unity or Unreal Engine. This process involves preparing your model, applying the right settings, and choosing the appropriate file format for seamless integration into your game project. Follow these steps to ensure your sword model is game-ready.
Optimizing Your Model
- Reduce the polygon count without significantly compromising the model\"s details to ensure optimal performance in the game engine. Use modifiers like Decimate if necessary.
- Apply all modifiers to your model before exporting. This can be done by selecting your model, going to the Modifiers tab, and clicking Apply for each modifier.
- Make sure your sword\"s scale, rotation, and location are applied (Ctrl+A) to avoid any issues once imported into the game engine.
UV Mapping and Textures
Ensure your model\"s UVs are properly unwrapped and that all textures are correctly applied:
- Check the UV layout in the UV/Image Editor to ensure there are no overlapping faces and that the space is used efficiently.
- Consolidate your textures into as few images as possible to optimize the game\"s performance. This might involve texture atlasing.
Choosing the Right Export Format
Most game engines support a variety of 3D model formats, with FBX and OBJ being among the most common:
- FBX: Ideal for complex models with animations. It supports mesh data, armature (skeleton) information, and animations.
- OBJ: Suitable for static models without animations. It\"s widely supported but doesn\"t include armature or animation data.
Exporting Your Model
- In Blender, go to File > Export and choose the format that best suits your needs (FBX or OBJ).
- In the export window, adjust the export settings. For FBX, you can choose to export only selected objects, apply scale, and include textures by embedding them.
- Choose a destination for your exported file, give it a name, and click Export.
Importing into a Game Engine
Once exported, your model is ready to be imported into a game engine:
- In Unity, import the model by dragging the FBX or OBJ file into the Assets folder of your project.
- In Unreal Engine, use the Import button in the Content Browser and select your exported file.
- Adjust the import settings in your game engine if necessary, such as scaling, materials, and textures.
Conclusion
Exporting your sword model from Blender and importing it into a game engine requires attention to detail and an understanding of the requirements of the engine you\"re using. By following these steps, you can ensure that your model looks as good in the game as it does in Blender and performs optimally.
Embark on a creative journey to forge your virtual sword in Blender, mastering each step from basic modeling to detailed texturing and final rendering. Unlock the artistry within and bring your unique weapon designs to life with our comprehensive guide.