Topic how to make hair in blender roblox: Unlock the secrets of creating custom hair for Roblox characters using Blender with our comprehensive guide, designed to empower beginners and enthusiasts alike to craft stunning, unique hairstyles effortlessly.
Table of Content
- What is the process for creating hair in Blender for use in Roblox?
- Getting Started with Blender and Roblox
- Preparing Your Blender Scene for Hair Creation
- Understanding Hair Modeling Basics in Blender
- Creating the Hair Base Using Curves
- Shaping and Styling Hair with Bezier Curves
- Converting Curves into Mesh for Detailed Editing
- YOUTUBE: How to Make UGC Hair Tutorial (ROBLOX)
- Texturing and Coloring Your Roblox Hair
- Exporting Hair from Blender to Roblox
- Importing and Applying Hair to Your Roblox Character
- Advanced Techniques for Realistic Hair Effects
- Common Issues and How to Solve Them
- Sharing Your Custom Hair with the Roblox Community
What is the process for creating hair in Blender for use in Roblox?
To create hair in Blender for use in Roblox, you can follow the steps below:
- Open Blender and load the Roblox character model.
- Add a curve circle to the scene. You can do this by navigating to Shift-A > Curve > Circle.
- Adjust the size and shape of the curve circle to match the desired hair style.
- In the Object Properties panel, rename the curve circle to \"Hair\".
- Enter Edit Mode for the Hair curve circle by selecting it and pressing Tab.
- Manipulate the Hair curve circle\'s control points to create the desired hair shape. You can use the Extrude and Smooth tools to refine the hair style.
- After finalizing the hair shape, exit Edit Mode by pressing Tab again.
- Apply a hair texture to the hair by using UV unwrapping and painting tools in Blender.
- Once you are satisfied with the hair texture, export the hair model from Blender as an FBX or OBJ file.
- In Roblox Studio, import the exported hair model and position it appropriately on the Roblox character\'s head.
- Adjust the hair\'s scale and rotation as needed to fit the character\'s head.
- Lastly, apply any additional animations or settings to the hair in Roblox Studio to make it compatible with your game.
Following these steps should allow you to create hair in Blender for use in Roblox.
READ MORE:
Getting Started with Blender and Roblox
Creating custom hair in Blender for Roblox characters is an exciting way to personalize your gaming experience. This section will guide you through the initial steps required to set up your environment for hair creation, ensuring you have the necessary tools and knowledge to start your design journey.
- Download and Install Blender: Ensure you have the latest version of Blender installed on your computer. Visit the official Blender website to download the software for free.
- Set Up Roblox Studio: To import your custom hair into Roblox, you\"ll need Roblox Studio. If you haven\"t already, download and install Roblox Studio from the Roblox website.
- Familiarize Yourself with Blender\"s Interface: Before diving into hair creation, take some time to understand Blender\"s layout, tools, and features. Look for tutorials or guides that focus on the basics of Blender.
- Learn Basic Modeling Techniques: Knowing how to manipulate vertices, edges, and faces in Blender is crucial. Practice by creating simple shapes and objects to get comfortable with the modeling process.
- Understand Roblox\"s Requirements: Review Roblox\"s guidelines for assets to ensure your custom hair will be compatible. This includes understanding the size, format, and how to upload your creation to the platform.
With these preliminary steps completed, you\"ll be well-prepared to start creating custom hair in Blender for your Roblox characters. Remember, practice and patience are key to mastering the art of 3D modeling and design.

Preparing Your Blender Scene for Hair Creation
Setting up your Blender scene correctly is crucial for efficiently creating custom hair for Roblox. This section will guide you through configuring your workspace and scene to optimize your hair design workflow.
- Open Blender and Create a New Project: Start by launching Blender and opening a new project to ensure a clean workspace.
- Set Up the 3D Viewport: Adjust the 3D viewport to give you a clear view of the workspace where you\"ll be creating the hair. This might involve zooming in or out and adjusting the angle of view.
- Import a Character Model: If you\"re designing hair for a specific Roblox character, import the character model into Blender. This ensures your hair creation fits perfectly. Use File > Import and choose the appropriate file format for your model.
- Adjust Lighting and Camera: Proper lighting and camera setup are essential for viewing your work. Adjust the scene\"s lighting to simulate a neutral environment, and position the camera to easily view the model\"s head.
- Create a New Layer for Hair: To keep your project organized, create a new layer in Blender for hair creation. This allows you to work on the hair separately from the character model.
- Prepare Reference Images: If you\"re working from a reference, load your reference images into Blender. You can use them as a background in the 3D viewport to guide your design.
With your Blender scene now properly set up, you\"re ready to start the creative process of designing custom hair for your Roblox character. Remember, a well-organized workspace is key to a smooth and efficient design process.

Understanding Hair Modeling Basics in Blender
Mastering the basics of hair modeling in Blender is essential for creating realistic and stylized hair for your Roblox characters. This section introduces fundamental concepts and techniques to get you started.
- Introduction to Blender\"s Hair Tools: Blender offers a variety of tools for hair modeling, including particle systems for realistic hair and bezier curves for stylized hair. Familiarize yourself with these tools to understand their functions and capabilities.
- Using Particle Systems for Realistic Hair: Learn how to use Blender\"s particle system to simulate realistic hair. This involves creating hair strands as particles that can be combed, cut, and styled within the particle edit mode.
- Creating Stylized Hair with Bezier Curves: For stylized hair, such as what is often seen in Roblox characters, using bezier curves allows for more control over the shape and flow of hair. Understand how to add, adjust, and manipulate curves to form the basic shape of your hair design.
- Modifying Hair Thickness and Density: Adjusting the thickness and density of hair is crucial for achieving the desired look. Explore how to modify these parameters within the particle system or curve settings to match your vision.
- Applying Modifiers for Additional Effects: Blender\"s modifiers, such as the Solidify or Subdivision Surface modifiers, can be applied to hair meshes to enhance detail and realism. Learn how to apply and adjust these modifiers effectively.
- Texturing and Coloring Hair: Adding texture and color is the final step in bringing your hair model to life. Discover the process of UV unwrapping your hair model and applying textures and materials to achieve realistic or stylized hair colors and effects.
By understanding these basic hair modeling techniques in Blender, you\"ll be well-equipped to start creating custom hair for Roblox characters that stand out in the game world.

Creating the Hair Base Using Curves
Using curves is a powerful method to create a base for stylized hair in Blender, offering precision and flexibility. This section walks you through the process of creating a hair base using curves, from setup to refinement.
- Starting with a Basic Curve: Begin by adding a bezier curve to your scene. This curve will serve as the foundation of your hair strand. Adjust the curve to match the desired flow and length of the hair.
- Adjusting Curve Thickness: To simulate the volume of hair, adjust the thickness of the curve. This can be done by editing the curve\"s radius in edit mode, allowing for variable thickness along the strand.
- Shaping the Hair: Use the handles of the bezier curve to shape the hair, creating natural or stylized bends and waves. This step is crucial for defining the overall style and movement of the hair.
- Duplicating and Modifying Curves for Volume: Once you have a single hair strand shaped to your liking, duplicate it and modify the duplicates to create volume. Position these strands around the head to form a full head of hair.
- Joining Curves for a Unified Mesh: After creating multiple hair strands, join them into a single object. This simplifies the process of editing and applying materials later on.
- Converting Curves to Mesh: To apply textures and further refine the hair, convert the curve-based hair into a mesh. This allows for more advanced editing techniques and the application of physics or simulations if desired.
By following these steps, you can create a detailed and customizable hair base using curves in Blender, setting the stage for further styling and texturing to match your Roblox character\"s look.

_HOOK_
Shaping and Styling Hair with Bezier Curves
Bezier curves offer unparalleled control and flexibility for shaping and styling hair in Blender, making them ideal for creating both realistic and stylized hair for Roblox characters. Follow these steps to master hair design using bezier curves.
- Selecting the Right Curve Type: Ensure you\"re using bezier curves for their ease of manipulation and control. Add a new bezier curve from the object menu to start.
- Initial Shaping: Enter edit mode to shape your curve. Move the control points and adjust the handles to create the basic silhouette of the hair strand. Aim for a natural flow that complements the character\"s head shape and style.
- Creating Volume and Depth: Duplicate your initial curve to add volume. Adjust each duplicate slightly to create depth and a fuller look, ensuring that all strands together form a cohesive hairstyle.
- Detailing and Refinement: Use the curve\"s edit mode to refine each strand, adding waves, curls, or straight lines as desired. This step is crucial for adding character and detail to the hairstyle.
- Using Modifiers for Advanced Styling: Experiment with Blender\"s array and curve modifiers to multiply and precisely position your hair strands. This technique can save time and enhance the hairstyle\"s complexity and realism.
- Finalizing the Hairstyle: Once satisfied with the overall shape and style, convert the bezier curves to a mesh for further editing, texturing, and preparation for export to Roblox.
By carefully shaping and styling hair with bezier curves, you can achieve a wide range of hair designs, from sleek and straight to voluminous and curly, ready to be showcased on your Roblox character.
Converting Curves into Mesh for Detailed Editing
After you have shaped and styled your hair using Bezier curves in Blender, the next crucial step is to convert these curves into a mesh. This conversion allows for more detailed editing and texturing, which is essential for creating realistic or stylized hair for your Roblox character. Follow these detailed steps to convert curves into a mesh and refine your hair model.
- Select Your Curve Object: In the Blender viewport, ensure that you are in Object Mode. Click on your hair curve object to select it. If you have multiple curves, you can select them all by holding the Shift key and clicking on each one.
- Convert Curves to Mesh: With your curve(s) selected, go to the Object menu at the bottom of the 3D viewport, hover over the Convert To option, and then select Mesh from Curve/Meta/Surf/Text. Alternatively, you can use the shortcut Alt+C (for Blender versions up to 2.79) or right-click to open the context menu and find the Convert to Mesh option in Blender 2.8 and later versions.
- Edit Your Mesh: Now that your hair is a mesh, you can enter Edit Mode by pressing Tab. Here, you can add, remove, or adjust vertices, edges, and faces for detailed modeling. This step is critical for refining the shape and volume of the hair, adding strands, or making other adjustments.
- Use Modifiers for Further Refinement: Blender’s modifiers can be extremely helpful in this stage. For example, the Subdivision Surface modifier can smooth out the hair, while the Solidify modifier can give the hair volume. Apply these modifiers as needed to achieve the desired look.
- Checking Normals: After converting to mesh and editing, ensure the normals are facing the correct direction for accurate shading. You can visualize normals in Edit Mode by going to the Overlay options and enabling the display for normals. If any normals are facing inward, you can select those faces and use the Mesh menu to recalculate (Shift+N) or flip (Alt+N) them.
- Finalizing the Mesh: Continue refining the mesh until you are satisfied with the hair’s shape, volume, and detail. This might include adding more geometry for finer strands or reducing polygons for performance optimization in Roblox.
Converting curves into mesh for detailed editing is a pivotal step in hair creation for Roblox in Blender. This process unlocks a vast array of tools and techniques in Blender for sculpting, detailing, and texturing your hair model, ensuring that your Roblox character stands out with unique and captivating hair designs.

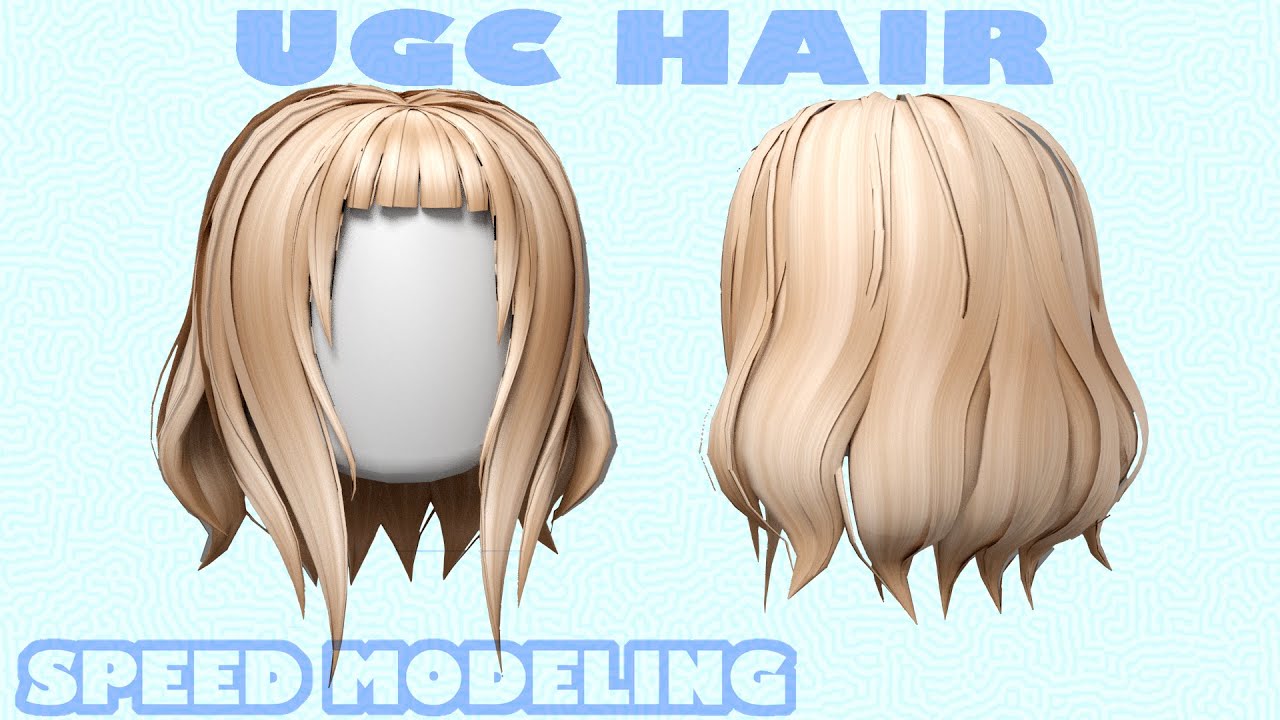
How to Make UGC Hair Tutorial (ROBLOX)
UGC: Get ready to dive into a captivating world of user-generated content! Join us as we explore the endless possibilities and creativity that UGC has to offer. This video is a must-watch for all the aspiring content creators out there!
How to Create Hair in Blender for Roblox Studio
Hair: Looking for some hair-spiration? Look no further! Whether it\'s tips for healthy hair, trendy hairstyles, or expert advice on haircare routines, this video is your ultimate guide. Get ready to elevate your hair game and unlock the secrets to luscious locks!
Texturing and Coloring Your Roblox Hair
After converting your hair model from curves to mesh in Blender, the next step is to bring your creation to life with textures and colors. Texturing and coloring are crucial for adding realism or achieving a specific style for your Roblox character\"s hair. Follow this step-by-step guide to texture and color your hair model.
- Unwrap Your Mesh: Before applying any textures, you need to unwrap your mesh to create a UV map. This process translates the 3D surface of your model into a 2D representation that can be used for texturing. In Edit Mode, select all vertices (A) and then press U to unwrap. Choose a method that suits your model, such as Smart UV Project for complex shapes or Unwrap for simpler ones.
- Create or Select a Texture: You can create your own hair texture in an image editing software or select an existing one. Your texture should include details such as hair strands, color variations, and highlights to achieve a realistic look.
- Apply the Texture: In Blender, switch to the Shading workspace. Add a new material to your hair mesh by clicking on the Material Properties tab and then the New button. Use the Shader Editor to add an Image Texture node. Connect this node to the Base Color input of the Principled BSDF shader. Open your texture image in the Image Texture node.
- Adjust the UV Map: Go to the UV Editing workspace to adjust your UV map as needed, ensuring that the texture aligns correctly with your model. This step might involve moving, scaling, or rotating UV islands to match the texture details with the corresponding parts of the hair model.
- Coloring Your Hair: If you want to modify the color directly in Blender, you can do so by adding a ColorRamp node between the Image Texture node and the Principled BSDF shader. This allows you to tweak the colors of your texture within Blender, enabling further customization.
- Test Render: Periodically do test renders to check how your hair looks with the texture and lighting. This will help you see the effect of different texture and color adjustments in a scenario similar to what you would see in Roblox.
Texturing and coloring your Roblox hair in Blender allows you to create a wide range of hair styles and colors, from natural looks to fantastical creations. By carefully unwrapping your mesh, selecting or creating detailed textures, and applying them with precision, your hair model will enhance the overall appearance of your Roblox character, making it truly unique.
Exporting Hair from Blender to Roblox
Once you have completed modeling, texturing, and coloring your hair in Blender, the next step is to export it to Roblox. This process involves several critical steps to ensure that your hair model is compatible with Roblox and looks as intended in-game. Follow these steps to successfully export your hair model from Blender to Roblox.
- Prepare Your Model for Export: Before exporting, ensure that your hair model is a single object. If you have multiple parts, join them by selecting all the parts and pressing Ctrl+J. Also, apply all transformations (location, rotation, scale) by pressing Ctrl+A and selecting the applicable transformations to ensure the model\"s position and size are correct.
- Reduce Polycount: Roblox has specific limits for polygon counts to maintain performance. Make sure your hair model does not exceed these limits by reducing the polycount if necessary. You can use Blender\"s Decimate modifier or manual mesh editing techniques to reduce complexity without significantly affecting the visual quality.
- Check Textures: Ensure that your textures are correctly applied and show up as expected. Roblox supports certain texture formats, so you may need to export your texture files separately in a compatible format (e.g., .png or .jpg).
- Export the Model: Once your model is ready, select it and go to File > Export > FBX (.fbx). In the export settings, choose \"Selected Objects\" and make sure to apply the scale transformation to FBX Units to match Roblox\"s scale. Also, under the Geometry tab, choose \"Normals Only\" to ensure the model retains its detailed shape without additional data that Roblox does not require.
- Import to Roblox Studio: Open Roblox Studio and create a new project or open an existing one where you want to add the hair. Go to the Toolbox, select the \"Models\" tab, and click on the \"Import\" button. Navigate to where you saved your exported FBX file and select it for importing. Follow the prompts to import your model into Roblox Studio.
- Adjust and Test in Roblox Studio: After importing, you may need to adjust the scale, rotation, or position of your hair model to fit your Roblox character correctly. Use Roblox Studio\"s tools to make these adjustments. Test your hair in-game to ensure it looks as expected and performs well without causing any issues.
Exporting hair from Blender to Roblox involves careful preparation, optimization, and testing to ensure that the hair looks as good in Roblox as it does in Blender. By following these steps, you can create custom hair that enhances your Roblox characters and sets them apart in the Roblox universe.

Importing and Applying Hair to Your Roblox Character
After successfully exporting your custom hair model from Blender, the next step is to import and apply it to your Roblox character. This process will enable you to see your creative work come to life within the Roblox platform. Follow these instructions to import your hair model into Roblox Studio and apply it to your character.
- Open Roblox Studio: Start by opening Roblox Studio. Either create a new project or open an existing one where you want to add your custom hair.
- Import the Hair Model: Navigate to the Toolbox within Roblox Studio. Select the ‘Models’ tab, then click on ‘Import’ and choose your exported hair model file (usually an .fbx file). Follow the import wizard to add your hair model to your game’s assets.
- Adjust Model Properties: Once imported, you may need to adjust the model’s properties to ensure it\"s correctly scaled and oriented for your character. Use the Properties panel in Roblox Studio to modify the size, position, and rotation as needed.
- Attach Hair to Character: To apply the hair to your character, you\"ll need to attach it to the head. This can be done by setting the hair model as a child of the character\"s head in the Explorer window. Ensure the hair model’s position is adjusted so that it sits naturally on the character\"s head.
- Apply Textures: If your hair model uses textures, make sure they are correctly linked in the properties of the hair model. You may need to upload your texture images to Roblox and set them in the Texture property of the relevant parts.
- Test Your Character: After attaching the hair to your character, it\"s important to test how it looks and behaves in-game. Enter Play mode in Roblox Studio to see your character in action. Pay attention to how the hair moves and ensure it doesn’t clip through the body or other objects.
- Make Adjustments as Necessary: Based on your testing, you might need to go back and make further adjustments to the hair\"s position, scale, or even the model itself in Blender and re-import it. This iterative process helps in achieving the best possible result.
Importing and applying hair to your Roblox character involves careful adjustment and testing to ensure that it looks perfect in-game. With patience and attention to detail, you can add a unique touch to your characters that showcases your creativity and enhances the gaming experience for players.
_HOOK_
Advanced Techniques for Realistic Hair Effects
Creating realistic hair effects in Blender for Roblox requires a blend of artistic skills and technical knowledge. While basic hair models can be created with simple techniques, achieving more lifelike appearances involves advanced methods. These techniques can help you simulate the complexity and dynamic qualities of real hair in your Roblox characters.
- Particle System for Hair Strands: Blender\"s particle system can be used to generate hair strands. This method allows for the creation of individual hair strands that can be combed, cut, and styled within Blender’s Particle Edit Mode. For Roblox, you’ll need to convert these strands into a mesh before exporting.
- Transparency and Alpha Textures: To give hair a soft, semi-transparent edge, use textures with alpha channels. This technique can simulate fine hair around the edges and tips, adding to the realism. Ensure the alpha textures are correctly set up in Blender and supported by Roblox’s material and texture settings.
- Shader Nodes for Dynamic Coloring: Utilize Blender’s Shader Editor to create complex materials that mimic the natural variation in hair color. Using nodes like Hair Info, you can vary the color along each strand or add subtle changes in hue and saturation that respond to light differently.
- Physics and Weight Painting for Movement: Although Roblox has its own physics engine, preparing your hair model with weight painting in Blender can influence how it moves. Define the movement of hair by weight painting areas that should be more flexible or rigid, then simulate or animate these properties in Blender to test the effect before exporting.
- Custom Shaders for Special Effects: For those with knowledge of coding shaders, creating custom shaders can elevate the realism of hair by adding effects such as glossiness, anisotropic reflections, or even simulating hair under different lighting conditions.
- Optimization Techniques: High-detail hair models can be resource-intensive. Use techniques like LOD (Level of Detail) modeling, where different versions of the hair are created for viewing at various distances. This ensures that your hair model looks good up close without compromising performance.
Advanced techniques for creating realistic hair effects in Blender for Roblox characters involve a combination of detailed modeling, texturing, and the use of Blender’s powerful particle and physics systems. While these methods require more time and effort, they significantly enhance the visual quality of hair, making your characters stand out with lifelike and dynamic hairstyles.

Common Issues and How to Solve Them
Creating hair for Roblox characters in Blender can come with its set of challenges. Here are some common issues that creators might face along with solutions to overcome them, ensuring a smoother workflow and better results.
- Issue: Hair Texture Appears Stretched or Distorted
- Solution: This usually occurs due to improper UV mapping. Revisit the UV map in Blender’s UV Editing layout. Use the ‘Smart UV Project’ option for automatic unwrapping or manually adjust the UVs to better match the hair mesh. Ensure the texture aligns correctly with the mesh in the UV/Image Editor.
- Issue: Hair Model Exceeds Roblox\"s Polygon Limit
- Solution: Use Blender’s Decimate modifier to reduce the number of polygons without significantly altering the model\"s appearance. Apply the modifier and adjust the ratio to find the right balance between detail and polygon count. Alternatively, manually remove unnecessary vertices in Edit Mode.
- Issue: Hair Does Not Attach Properly to the Character in Roblox
- Solution: Ensure the hair model is correctly positioned and oriented in Blender before exporting. In Roblox Studio, adjust the hair attachment point and use the ‘Weld’ constraint to secure the hair to the character\"s head, preventing it from detaching during movement.
- Issue: Exported Hair Lacks Detail or Textures Appear Blurry
- Solution: Verify the texture resolution and the export settings. Increase the texture resolution in your image editing software if necessary. When exporting from Blender, ensure that you have selected the correct texture embedding options and that the FBX export settings are optimized for quality.
- Issue: Hair Animation Does Not Work as Expected
- Solution: Hair animation in Roblox can be tricky due to its engine limitations. Focus on simple animations that can be supported. In Blender, create basic animations that don’t rely heavily on physics simulations. Test animations in Roblox Studio frequently to adjust for the engine’s capabilities.
- Issue: Performance Issues with Complex Hair in Roblox
- Solution: Optimize your hair model by reducing the polygon count and using textures wisely. Consider creating LOD (Level of Detail) versions of your hair for different viewing distances. This will help maintain performance while still providing visual detail when needed.
Encountering issues while creating hair for Roblox in Blender is common, especially for beginners. However, with patience and practice, these challenges can be overcome. Utilize Blender’s vast array of tools and features to adjust and solve any problem, ensuring your hair designs are both beautiful and functional in the Roblox environment.
READ MORE:
Sharing Your Custom Hair with the Roblox Community
Creating custom hair for your Roblox characters is not only a great way to showcase your creativity but also to contribute to the Roblox community. Sharing your designs can inspire others and add to the diversity of styles available in the game. Here\"s how you can share your custom hair creations with the Roblox community.
- Finalize Your Hair Design: Ensure your hair model is fully optimized for Roblox, including polygon count reduction, texture application, and testing in Roblox Studio. Your design should be polished and free of any glitches.
- Upload Your Creation to Roblox: In Roblox Studio, go to the ‘View’ tab and open the ‘Asset Manager’. From here, you can upload your hair model and textures to Roblox. Make sure you have the right permissions set for your assets, so others can use them.
- Set Permissions: Once uploaded, set the permissions of your hair asset. You can choose to make it public for anyone to use or restrict it to certain users. Consider making your asset public to contribute to the community and gain visibility.
- Create a Detailed Description: When uploading your asset, provide a detailed description and any necessary instructions for using the hair. Include tags that accurately describe your hair’s style, color, and theme to make it easily searchable.
- Share on Social Media and Forums: Increase the visibility of your custom hair by sharing it on social media platforms and Roblox forums. Include screenshots or videos showcasing your hair on characters and provide a link to your asset in the Roblox library.
- Engage with the Community: Respond to feedback and questions about your hair design. Engaging with the community can provide valuable insights for future creations and help you build a reputation as a talented designer within the Roblox community.
Sharing your custom hair with the Roblox community allows you to contribute to the game’s vibrant ecosystem. By following these steps, you can ensure your creations reach a wide audience, inspiring others and enriching the Roblox experience for all players.
Embark on a creative journey to bring your Roblox characters to life with unique hair designs made in Blender. This guide demystifies the process, empowering you to craft, texture, and share your creations, enriching the Roblox universe with your imagination.