Topic how to color a model in blender: Unlock the full potential of your 3D models in Blender by mastering the art of coloring. This guide will walk you through the process, making it easy and enjoyable to bring your creations to vibrant life.
Table of Content
- How to color a model in Blender?
- Understanding Blender’s Material and Shading Workspace
- Utilizing Vertex Colors for Detailed Coloring
- Applying and Editing Materials for Color Assignment
- Advanced Techniques: UV Unwrapping and Texture Painting
- Adjusting Viewport Display for Immediate Color Feedback
- Optimizing Models with Modifiers Before Coloring
- YOUTUBE: How to Add Color in Blender 3.0 - Colorize Beginner Tutorial
- Exporting and Importing Textures for Enhanced Detail
- Baking Textures for Efficient Rendering
- Customizing Colors Using Object Data Properties
- Effective Use of Blender for 3D Printing with Color
How to color a model in Blender?
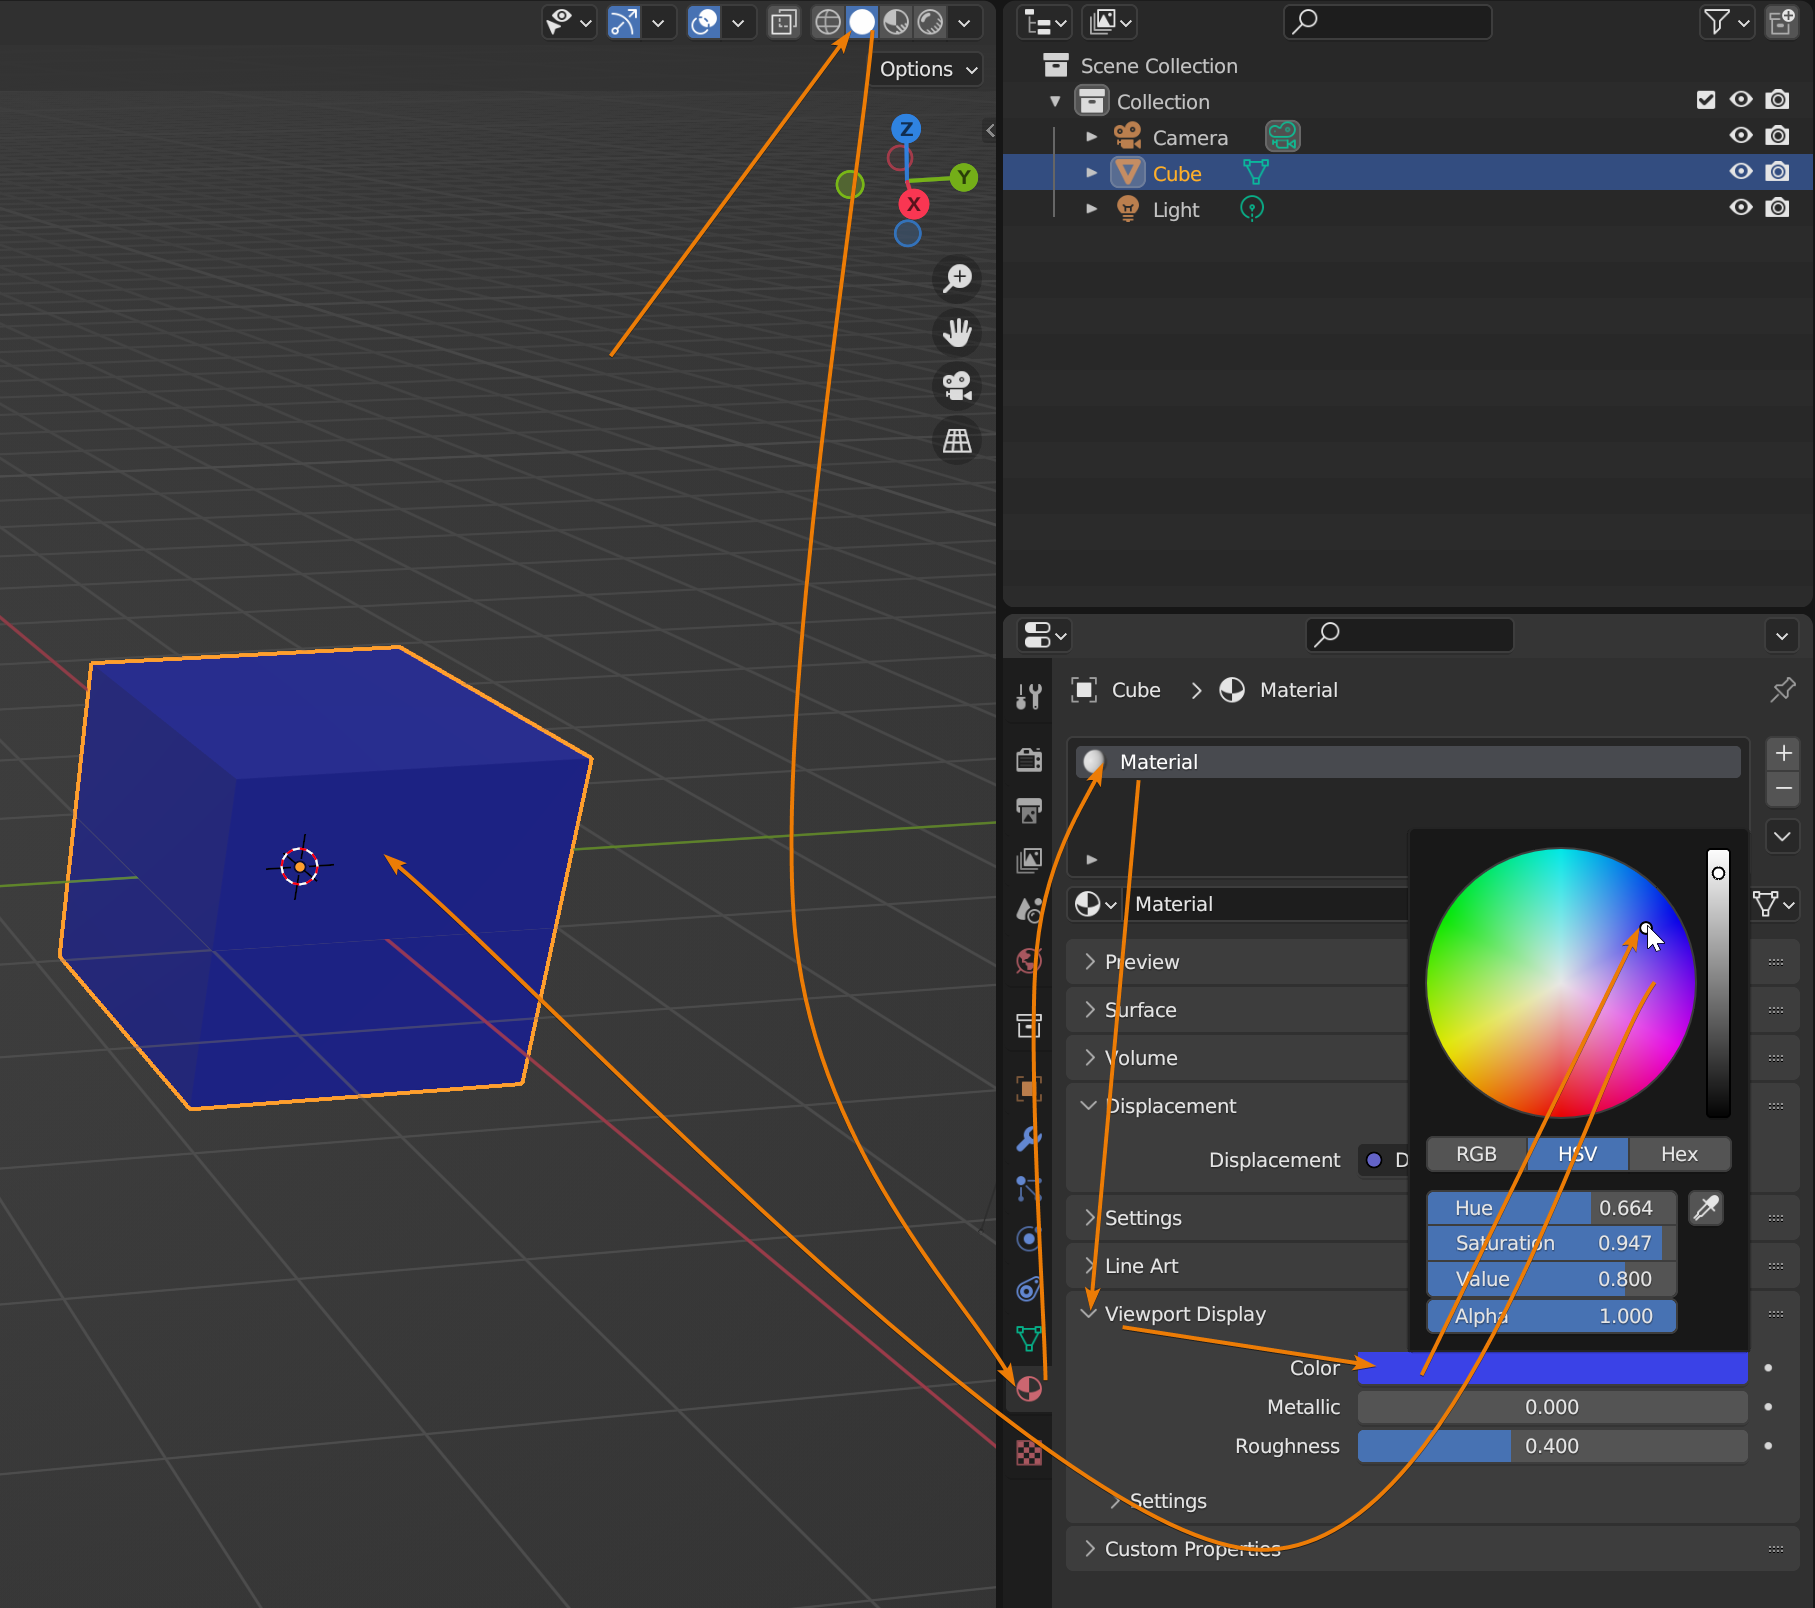
To color a model in Blender, you can follow these steps:
- Select the model you want to color by clicking on it.
- Open the Materials tab, which can be found in the Properties menu. You can access it by clicking on the icon that looks like a sphere.
- Click the New button to create a new material for your model.
- In the Viewport Display section, you will find an option to choose the Base Color of your material. Click on the color swatch and select a color from the color picker or enter specific RGB values.
- To assign the material to your model, click on the Assign button next to the material name.
- You can also adjust other properties of the material, such as roughness, metallic, emission, etc., to achieve the desired look.
- If you want to create a more complex material with textures or procedural effects, you can explore additional options in the Materials tab and use texture nodes in the Node Editor.
- Once you are satisfied with the color and material settings, you can render the scene to see the colored model in its final form.
Remember to save your project regularly to avoid losing any progress!
READ MORE:
Understanding Blender’s Material and Shading Workspace
The Material and Shading workspace in Blender is fundamental for coloring and texturing your 3D models. This section will guide you through navigating and utilizing this workspace to enhance your models with vibrant colors and realistic textures.
- Accessing the Shading Workspace: Begin by selecting the \"Shading\" workspace tab at the top of Blender. This dedicated workspace provides a node-based interface for creating and editing materials.
- Creating a New Material: Select your model and go to the \"Material Properties\" panel. Click \"New\" to create a new material. This material will be the basis for coloring your model.
- Understanding Nodes: Materials in Blender are composed of nodes. The \"Principled BSDF\" node is a versatile shader that allows for creating a wide range of materials. Connect it to the \"Material Output\" node.
- Adjusting Material Properties: Use the \"Base Color\" property of the Principled BSDF node to change the color of your material. You can also adjust other properties like \"Metallic\", \"Roughness\", and \"Specular\" to achieve the desired appearance.
- Previewing Your Material: Utilize the viewport shading mode to preview how your material looks on the model. Switch between \"Solid\", \"Material Preview\", and \"Rendered\" modes to see the material under different lighting conditions.
- Assigning the Material: If your model consists of multiple parts, you can assign different materials to different parts by selecting the faces in \"Edit Mode\", choosing the desired material, and clicking \"Assign\".
By mastering the Material and Shading workspace in Blender, you can unlock endless possibilities for coloring and texturing your models, bringing them to life with depth, realism, and creativity.

Utilizing Vertex Colors for Detailed Coloring
Vertex coloring is a powerful technique in Blender that allows for detailed and precise coloring of your models at a vertex level, enabling more complex and nuanced visual effects. Here\"s how to leverage vertex colors for your projects.
- Entering Vertex Paint Mode: Select your model and switch to \"Vertex Paint\" mode from the mode selection menu in the 3D viewport. This mode allows you to paint directly onto the vertices of your model.
- Selecting Colors: In Vertex Paint mode, use the color picker to select the color you wish to paint with. You can adjust the brush size and strength to suit your needs.
- Painting on Your Model: Click and drag over your model to apply color. The paint applies to vertices, and the colors will smoothly interpolate across faces.
- Using Masks for Precision: Utilize the mask tool to protect certain areas from being painted, allowing for more precise application of vertex colors.
- Saving Vertex Colors: Vertex colors are saved with your model file. Ensure you have the correct vertex color layer active when saving if you are working with multiple layers.
- Applying Vertex Colors in Materials: To use vertex colors in a material, add an \"Attribute\" node in the Shader Editor, set the name to the name of your vertex color layer, and connect it to the \"Base Color\" input of a shader.
Vertex coloring is especially useful for game assets, where texture memory is limited, or when aiming for a stylized look. By mastering vertex colors, you add a valuable tool to your Blender skill set for creating vibrant and dynamic 3D models.
Applying and Editing Materials for Color Assignment
Assigning colors to your 3D models in Blender is accomplished through the application and editing of materials. This process not only colors your model but also defines its surface properties, such as glossiness or roughness. Follow these steps to apply and edit materials for color assignment.
- Creating a New Material: With your object selected, go to the Material Properties panel and click the \"New\" button. This action creates a new material assigned to your object.
- Adjusting Base Color: In the material settings, find the \"Base Color\" option. Click on the color field to choose the color you want to apply to the object. This is the primary way to color your model.
- Editing Material Properties: Beyond the base color, you can adjust various properties like \"Metallic\", \"Specular\", \"Roughness\", and more to achieve the desired appearance of your object\"s surface.
- Previewing Changes: Use the viewport shading modes (Solid, Material Preview, Rendered) to preview the material changes on your model in real-time. Adjust settings as needed to get the right look.
- Assigning Materials to Parts of an Object: In Edit Mode, select the faces you wish to apply a different material to. With the faces selected, go to the Material Properties panel, select the material you wish to apply, and click \"Assign\".
- Using Nodes for Advanced Editing: For more control over the material\"s appearance, switch to the Shader Editor workspace. Here, you can add and connect different nodes (like Image Texture, Mix Shader, etc.) to create complex materials.
Through the careful application and editing of materials, you can significantly enhance the visual appeal of your 3D models in Blender, making them more realistic or stylized according to your project\"s needs.

Advanced Techniques: UV Unwrapping and Texture Painting
Mastering UV unwrapping and texture painting in Blender is essential for adding intricate details and lifelike textures to your 3D models. This guide will walk you through the process step by step.
- Preparing Your Model: Before starting, ensure your model is clean and optimized. Remove any unnecessary vertices and ensure the mesh topology is conducive to unwrapping.
- Marking Seams: In Edit Mode, select edges where you want your model to be \"cut\" for unwrapping. Press Ctrl+E and choose \"Mark Seam\". Strategic seam placement is key for efficient unwrapping.
- UV Unwrapping: With your seams marked, select all faces (A) in Edit Mode, then press U and choose \"Unwrap\". Blender will unfold your model based on the seams, displaying the layout in the UV/Image Editor.
- Adjusting the UV Map: In the UV/Image Editor, adjust your UV map to utilize the texture space efficiently. Ensure no overlapping occurs unless intentionally overlapping UVs for texture mirroring.
- Texture Painting: Switch to Texture Paint mode. Here, you can paint directly onto your model or its UV map. Use the various brushes and settings to add color, patterns, and details.
- Setting Up Materials: Ensure your model has a material assigned that utilizes the texture you\"re painting. This step is crucial for the texture to display correctly in renders.
- Exporting Textures: Once satisfied with your painting, you can export the texture from the UV/Image Editor. This texture can then be further edited in external software, if necessary, and re-imported into Blender.
Utilizing these advanced techniques allows for greater control over the visual appearance of your models, enabling the creation of complex and detailed textures that enhance your 3D projects.

_HOOK_
Adjusting Viewport Display for Immediate Color Feedback
Adjusting the viewport display in Blender is crucial for getting immediate feedback on how colors and textures will look in your final render. This section will guide you through optimizing your viewport settings for the best color representation.
- Switching to Material Preview: Change your viewport shading to \"Material Preview\" mode. This mode provides a more accurate representation of how materials and textures will appear in the final render.
- Using HDRI for Lighting: In \"Material Preview\" mode, you can select different HDRI environments to light your scene. This will give you a better understanding of how colors react under various lighting conditions.
- Enabling Color Management: Go to the \"Render Properties\" tab and find the \"Color Management\" section. Adjust the \"Look\" and \"Exposure\" settings to closely match the output of your final render.
- Adjusting Viewport Overlays: Customize the viewport overlays to either simplify the scene or add additional elements that might affect color perception, like shadows and cavity.
- Using the False Color Look: To better understand the exposure and distribution of light in your scene, switch the \"View Transform\" in \"Color Management\" to \"False Color\". This will not change your actual colors but will provide a visual representation of light intensity.
- Customizing Shading Settings: In the \"Shading\" panel (found in the top right of the viewport in \"Material Preview\" mode), adjust the shadow intensity, specular highlights, and other settings to refine how materials are displayed.
- Real-Time Rendering with Eevee: For a closer approximation to the final look, switch the viewport shading to \"Rendered\" mode using Eevee. This real-time engine provides a good balance between speed and visual fidelity.
By carefully adjusting these settings, you can ensure that the colors and textures in your Blender projects are accurately represented in the viewport, allowing for immediate and effective adjustments.
Optimizing Models with Modifiers Before Coloring
Optimizing your 3D models with modifiers before proceeding to coloring is a crucial step in the 3D modeling process in Blender. This approach not only simplifies the coloring process but also enhances the overall quality of your model. Here’s how you can effectively use modifiers for optimization.
- Decimate Modifier: Use the Decimate modifier to reduce the polygon count of your model without significantly altering its shape. This is particularly useful for complex models that require a lot of computational resources.
- Subdivision Surface Modifier: Apply the Subdivision Surface modifier to smooth your model. This modifier increases the number of polygons, making the model look more refined. It’s essential for adding details to areas that will be prominently colored or textured.
- Shrinkwrap Modifier: The Shrinkwrap modifier is useful for retopologizing your model. It allows the mesh to conform to the surface of another mesh, which can be beneficial when preparing your model for texturing and coloring.
- Boolean Modifier: Use the Boolean modifier for creating complex shapes by combining simple ones. This can help in creating detailed models that are easier to color and texture due to their simplified geometry.
- Remesh Modifier: The Remesh modifier is excellent for creating a uniform topology across your model. This is particularly useful when you plan to paint or sculpt details on your model’s surface.
- Mirror Modifier: For models that are symmetrical, the Mirror modifier can halve your workload by mirroring edits across an axis. This ensures consistency in coloring and texturing on symmetrical models.
- Solidify Modifier: The Solidify modifier adds thickness to thin or 2D shapes, making them more 3D-printing friendly and adding more depth for coloring and shading.
- Applying Modifiers: Once you are satisfied with the modifications, apply the modifiers before proceeding to coloring. This makes the changes permanent and ensures the model is optimized for the subsequent coloring process.
By leveraging these modifiers, you can significantly enhance the efficiency of your workflow in Blender, ensuring that your models are not only optimized for performance but also prepared for detailed coloring and texturing.

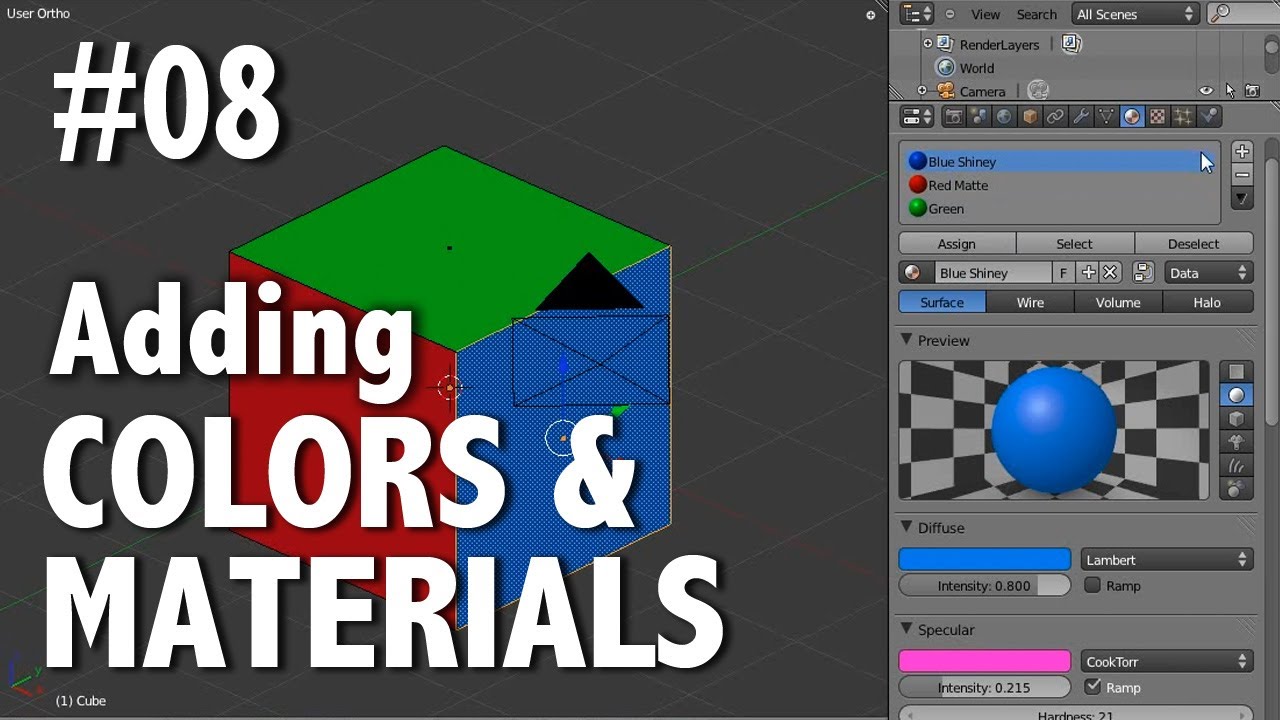
How to Add Color in Blender 3.0 - Colorize Beginner Tutorial
Get ready to be amazed as we explore the fascinating world of colorize! Watch this mind-blowing video and discover the ingenious techniques used to breathe life into black and white images, transforming them into vibrant works of art.
Blender Beginner Tutorial - Adding Materials & Painting in Sculpt Mode
Dive into the captivating realm of materials and unlock the secrets behind their mesmerizing properties. This insightful video will take you on a journey of discovery, shedding light on the incredible variety of materials that shape our world. Don\'t miss out on this eye-opening experience!
Exporting and Importing Textures for Enhanced Detail
Exporting and importing textures in Blender is a vital step for achieving enhanced detail and realism in your 3D models. This process allows you to utilize external image editing software for texture creation and refinement, then bring those textures back into Blender for application on your models. Follow these steps to effectively manage your textures for the best visual results.
- Preparing Your Texture for Export: If you\"ve created or painted a texture within Blender, ensure it\"s finalized and saved within the UV/Image Editor. Use the \"Image\" menu to save your texture externally.
- Choosing the Right Format: When saving textures, opt for formats that retain quality without significant compression, such as PNG or TIFF. This is crucial for maintaining the detail and color accuracy of your textures.
- Editing Textures Externally: Open your saved texture in an external image editing software. Here, you can adjust colors, add details, or create entirely new elements. Remember to save your changes.
- Importing Textures into Blender: Back in Blender, select your model and go to the Shader Editor. Create a new material or select an existing one and add an Image Texture node. Open your edited texture here.
- Applying Textures: Connect the Image Texture node to the appropriate shader input (e.g., Base Color, Roughness) depending on the type of detail you\"re adding. Adjust the mapping and tiling settings as needed to fit your model.
- Adjusting Texture Settings: Utilize the texture’s settings to fine-tune its appearance on the model. This includes scaling, rotation, and the influence on different material properties.
- Previewing and Adjusting: Use the Material Preview mode to see how your texture applies in real-time. Make any necessary adjustments to ensure the texture aligns correctly and enhances the model\"s detail.
By exporting and importing textures, you not only enhance the detail and realism of your 3D models but also leverage the power of external tools for texture creation and editing. This workflow is essential for artists looking to push the boundaries of their creative expression in Blender.

Baking Textures for Efficient Rendering
Baking textures in Blender is a powerful technique to enhance the efficiency of your rendering process. It involves pre-calculating the lighting, shading, and material details of a scene and saving them as textures. This method greatly reduces rendering times, especially for complex scenes. Follow these steps to bake textures effectively.
- Preparing Your Scene: Ensure your model is fully textured and shaded. Check that all materials and textures are correctly applied and previewed in the viewport.
- Setting Up Bake Type: Go to the Render Properties panel and find the \"Bake\" section. Choose the type of bake you want to perform (e.g., Combined, Ambient Occlusion, Normal, etc.), depending on the details you wish to capture in the texture.
- Configuring Bake Settings: Adjust the bake settings, including Margin, to control the spacing between UV islands, and the Resolution, to define the texture\"s detail level. Higher resolutions produce more detailed textures but increase baking time.
- Creating a New Image for Baking: In the UV/Image Editor, create a new image to bake the textures onto. Ensure this image is selected in the editor before baking.
- Selecting Objects for Baking: In the 3D Viewport, select the objects you want to bake. If baking to a single texture, ensure all selected objects share the same UV map.
- Performing the Bake: With everything set up, click the \"Bake\" button in the Bake section. Blender will start the baking process, which can take some time depending on the complexity of the scene and the bake settings.
- Saving the Baked Texture: Once baking is complete, save the baked texture from the UV/Image Editor. This texture can now be used in your materials to simulate the baked effects without the need for real-time calculations.
- Applying Baked Textures: Replace the materials in your scene with simpler shaders that use the baked textures. This will significantly improve render times while maintaining visual quality.
Texture baking is an essential skill for optimizing your Blender projects for faster rendering and performance. By pre-calculating complex effects, you can achieve high-quality visuals with minimal computational cost during final renders.
Customizing Colors Using Object Data Properties
Customizing colors using Object Data Properties in Blender is a technique that allows for the direct manipulation of object colors within the 3D Viewport, independent of the material settings. This feature is especially useful for organizing large scenes or highlighting specific parts of a model during the development process. Here\"s how to utilize Object Data Properties for customizing colors.
- Accessing Object Data Properties: Select your object and go to the Properties panel. Click on the Object Data Properties tab, which is represented by a green triangle icon.
- Enabling Vertex Colors: In the Object Data Properties, find the Vertex Colors section. Click the \"+\" button to add a new vertex color layer. This layer will allow you to paint directly onto the model.
- Painting Vertex Colors: Switch to Vertex Paint mode from the top menu in the 3D Viewport. Use the brush tools to apply colors directly onto your model. These colors are independent of any materials applied to the object.
- Adjusting Color in Edit Mode: You can also adjust colors in Edit Mode by selecting vertices, edges, or faces and assigning them specific colors through the Vertex Colors section.
- Utilizing Color for Organization: Use different colors to mark various parts of your model for easier identification. This is particularly helpful in complex scenes or models with numerous components.
- Previewing Colors: Ensure the \"Color\" option is enabled in the Viewport Shading settings to see the vertex colors applied to your object in the 3D Viewport.
- Applying Colors for Rendering: To include vertex colors in your renders, you must connect the Vertex Color data to the Color input of the shader used in your material. This is done within the Shader Editor.
By customizing colors using Object Data Properties, you gain an additional layer of control over the visual aspect of your models directly in the viewport, enhancing both the organization and the creative process in Blender.

_HOOK_
READ MORE:
Effective Use of Blender for 3D Printing with Color
Using Blender for creating 3D models for printing with color involves a careful process to ensure compatibility with 3D printing technology and the effective application of colors. This section outlines steps and tips for preparing your Blender models for 3D printing with color.
- Model Preparation: Ensure your model is solid (watertight) and free of non-manifold edges. Use the 3D Print Toolbox addon in Blender to check and fix common 3D printing issues.
- Applying Color: Colors can be applied to models in Blender using materials and vertex painting. For 3D printing, vertex colors are often used as they are geometry-based and don\"t require UV mapping.
- Exporting for 3D Printing: Export your model in a format that supports color and is compatible with your 3D printer. Formats like VRML and X3D are commonly used for color 3D printing.
- Optimizing Mesh Resolution: Adjust the mesh resolution to balance detail and printability. High-resolution models may not print better if the printer can’t reproduce the detail, and they can also increase file size and printing time.
- Checking Color Accuracy: Be aware that colors in Blender may not look the same when printed, due to differences in display and printing materials. Test print a small sample to adjust color application as needed.
- Using Compatible Printers: Ensure your 3D printer supports color printing. Full-color sandstone printers and multi-material FDM printers are examples of printers capable of producing colored objects.
- Preparing Files for Printing: Consult your printer’s guidelines for file preparation. Some printers require specific file configurations or the use of proprietary software for color printing.
By following these steps, you can effectively use Blender to create models for 3D printing with color, bringing your digital creations to life with the added dimension of color.
Unlock the full potential of your 3D models in Blender by mastering coloring techniques that bring your creations to life. From basic applications to advanced texturing, this guide ensures your projects shine with professional quality and detail.