Topic roblox rig for blender: Discover how to seamlessly integrate Roblox rigs into Blender, enhancing your animation and modeling projects with this comprehensive guide designed for creators at all levels.
Table of Content
- Where can I find a robust Roblox rig for Blender to use for animation purposes?
- Getting Started
- Importing into Blender
- Customizing the Rig
- Exporting Animations
- Resources
- Importing into Blender
- Customizing the Rig
- Exporting Animations
- YOUTUBE: How To Make GFX in 2023 - New FREE Rig
- Resources
- Customizing the Rig
- Exporting Animations
- Resources
- Exporting Animations
- Resources
- Resources
- Introduction to Roblox Rigging in Blender
- Step-by-Step Guide to Importing Roblox Rigs into Blender
- Customizing Your Roblox Rig in Blender
- Animating Your Roblox Character in Blender
- Exporting Your Blender Animations to Roblox
- Common Issues and Solutions When Working with Roblox Rigs in Blender
- Advanced Tips and Tricks for Blender Roblox Rigging
- Resources for Learning More About Blender and Roblox Integration
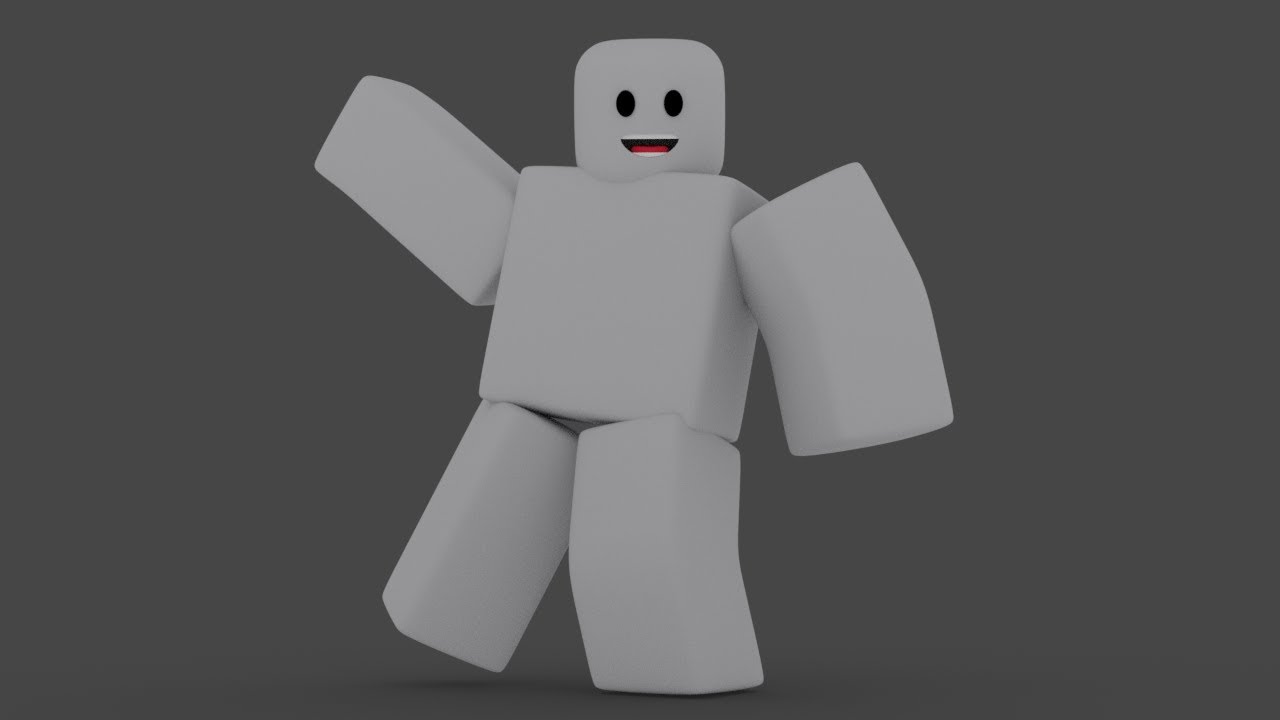
Where can I find a robust Roblox rig for Blender to use for animation purposes?
To find a robust Roblox rig for Blender to use for animation purposes, you can follow these steps:
- Search for Den_S\'s Blender rig exporter/animation importer plugin on the internet.
- Download and install the plugin to your Blender software.
- Use the plugin to export Roblox rigs into Blender for animation purposes.
- Alternatively, you can look for Roblox Starter Rigs that are designed to match the needs of creators making GFX.
- Ensure that the rig you choose has the necessary components like empty parts and attachments for easier animation.
READ MORE:
Getting Started
- Ensure you have Blender 2.8 or newer installed.
- Download the Roblox rig exporter plugin from the Roblox Developer Forum.
- In Roblox Studio, enable the plugin and select your character rig.
- Export the rig as an .obj file and save it on your computer.
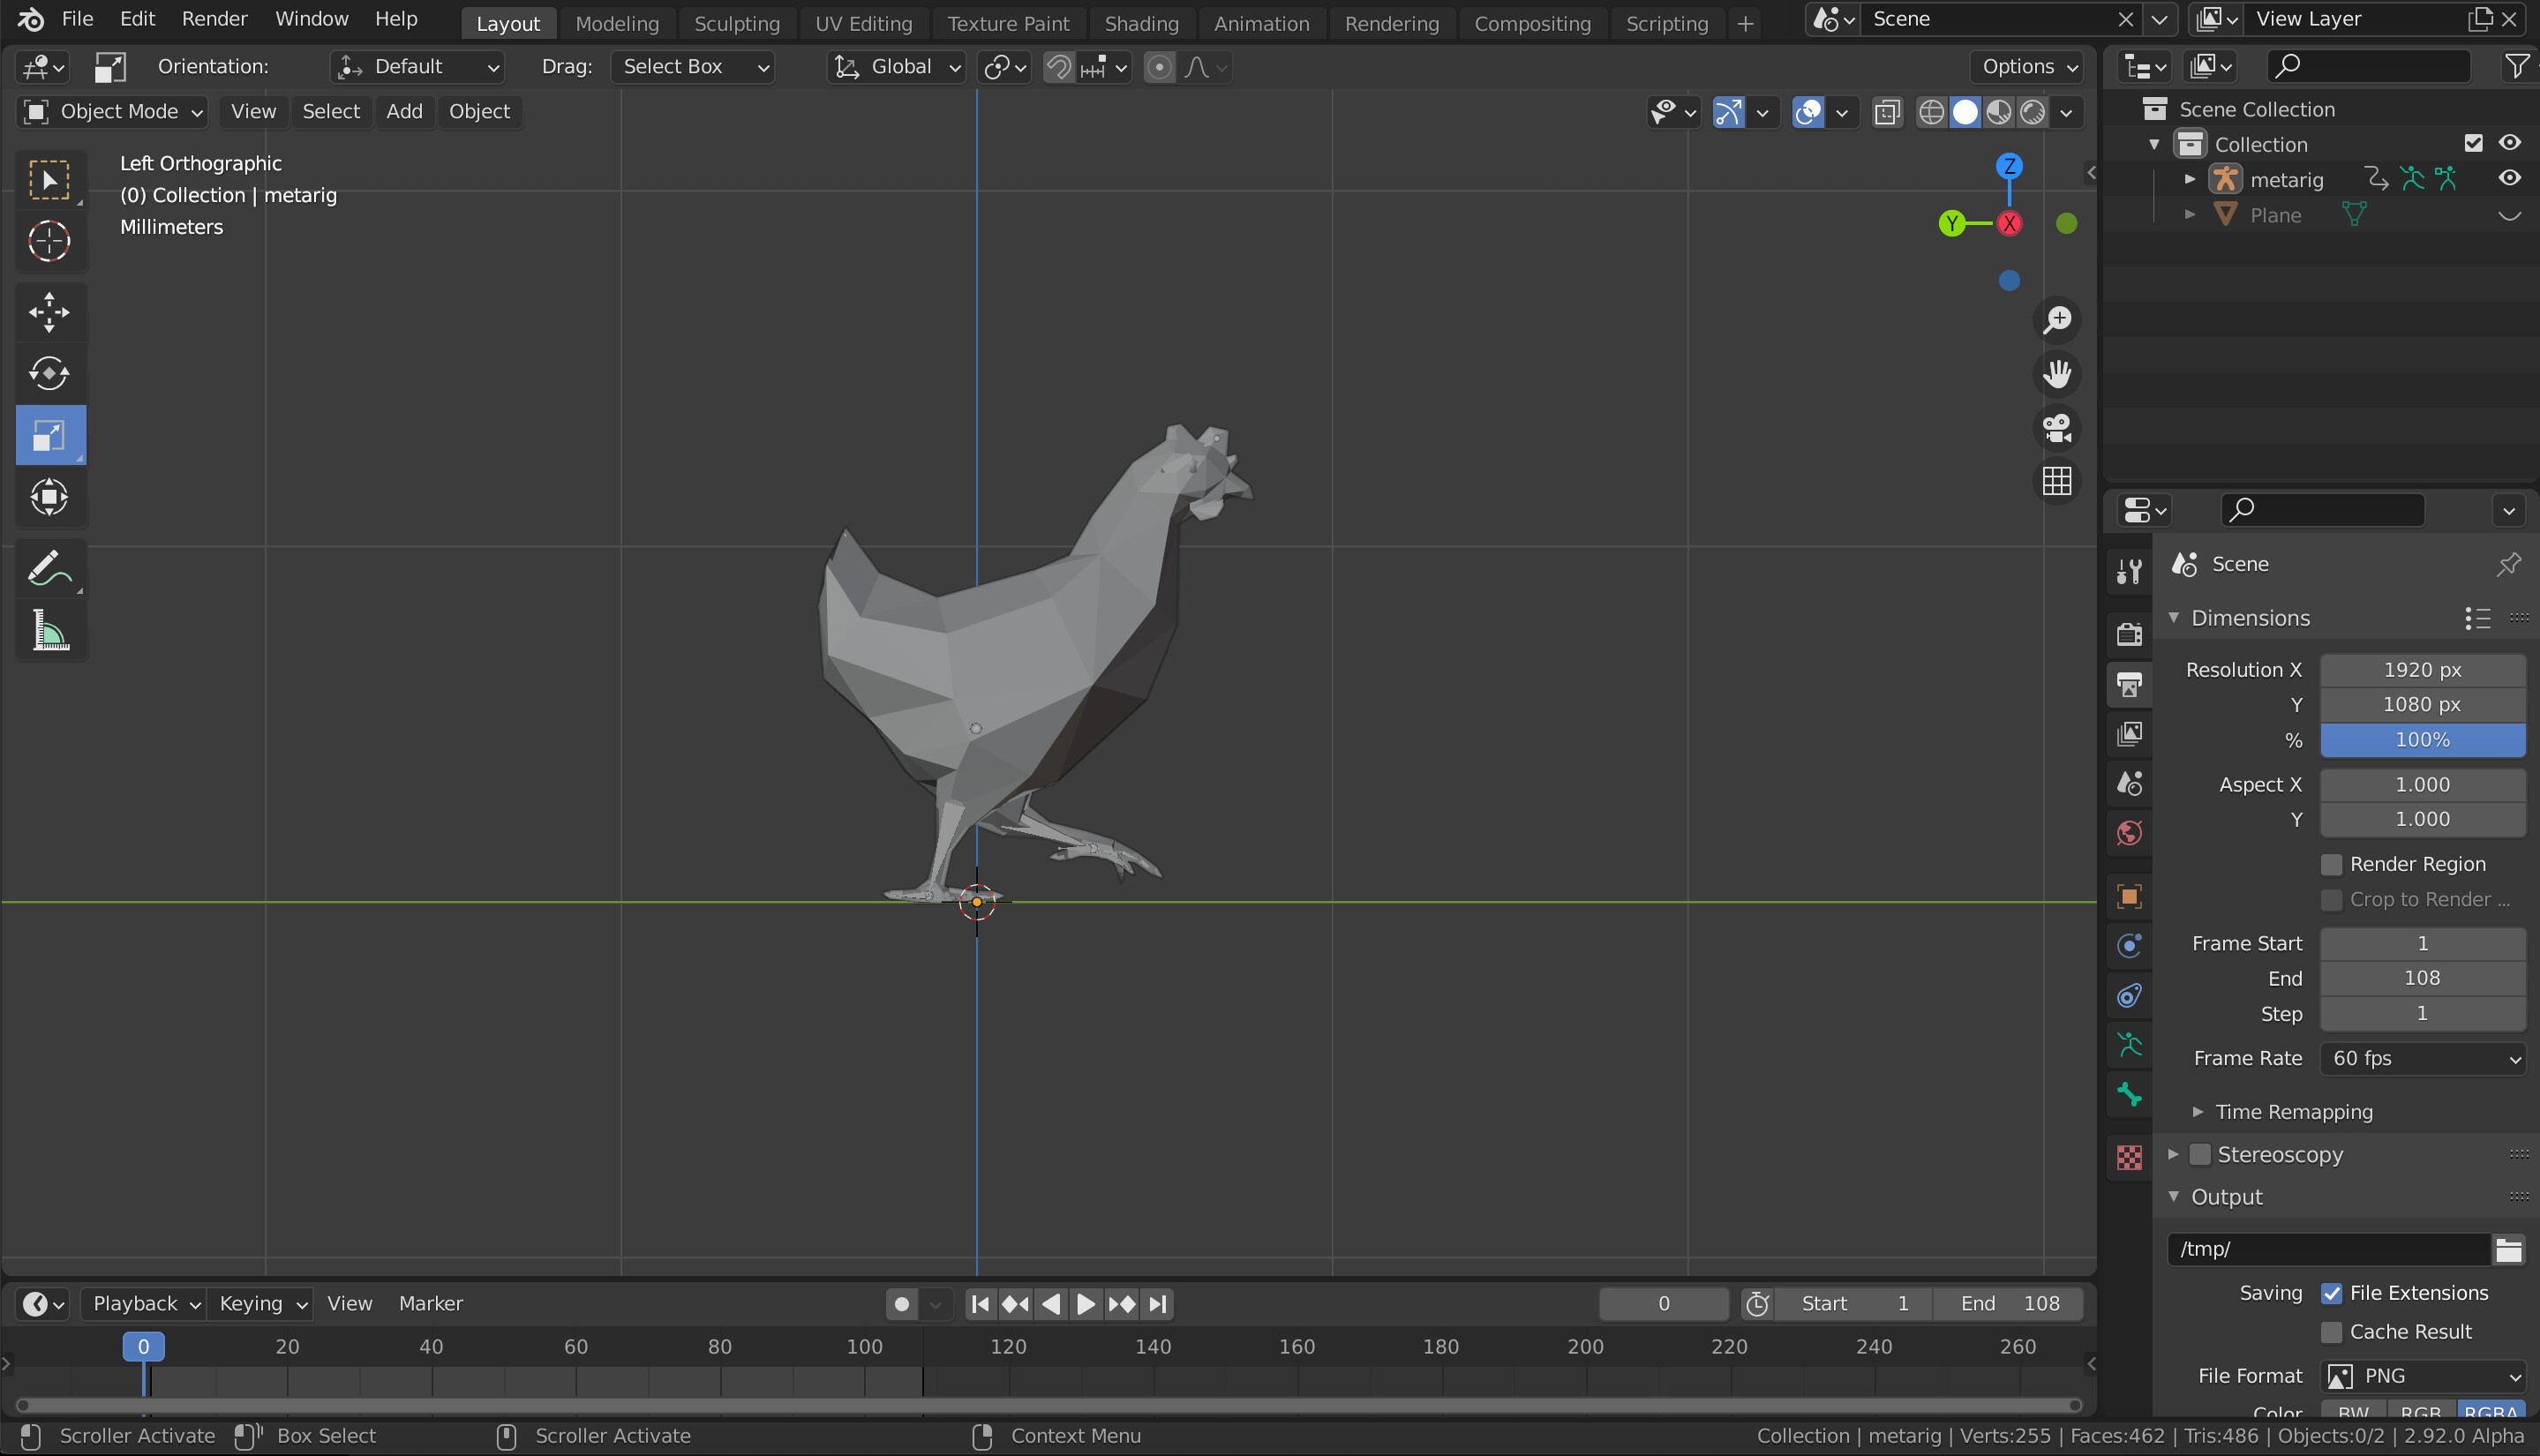
Importing into Blender
With your rig exported, it\"s time to import it into Blender:
- Open Blender and go to File > Import > Wavefront (.obj).
- Navigate to and select your exported .obj file.
- Adjust import settings if necessary and confirm to import the rig into Blender.

Customizing the Rig
Once imported, you can customize the rig to fit your needs:
- Edit bone structures for custom animations.
- Attach accessories and textures to personalize the character.
- Utilize Blender\"s tools to pose and animate your Roblox character.
Exporting Animations
After animating your character, you can export the animations back to Roblox:
- Use the Blender rig exporter to convert animations into a Roblox-compatible format.
- Import the animation file into Roblox Studio and apply it to your character.
_HOOK_
Resources
For more detailed instructions and advanced techniques, refer to the Roblox Developer Forum and Blender documentation. Both platforms offer extensive guides and community support to help you create stunning animations and models with Roblox rigs in Blender.

Importing into Blender
With your rig exported, it\"s time to import it into Blender:
- Open Blender and go to File > Import > Wavefront (.obj).
- Navigate to and select your exported .obj file.
- Adjust import settings if necessary and confirm to import the rig into Blender.

Customizing the Rig
Once imported, you can customize the rig to fit your needs:
- Edit bone structures for custom animations.
- Attach accessories and textures to personalize the character.
- Utilize Blender\"s tools to pose and animate your Roblox character.

Exporting Animations
After animating your character, you can export the animations back to Roblox:
- Use the Blender rig exporter to convert animations into a Roblox-compatible format.
- Import the animation file into Roblox Studio and apply it to your character.
How To Make GFX in 2023 - New FREE Rig
\"Experience the mesmerizing world of GFX in our latest video, where stunning visuals come to life with vibrant colors and intricate details. Get ready to be amazed by the power of graphics like never before!\"
How to Rig a Roblox Avatar in Blender Tutorial
\"Dive into the enchanting realm of Avatars with our captivating video, where fantastical characters and epic adventures await. Let your imagination soar as you explore the wondrous universe of Avatars in action!\"
Resources
For more detailed instructions and advanced techniques, refer to the Roblox Developer Forum and Blender documentation. Both platforms offer extensive guides and community support to help you create stunning animations and models with Roblox rigs in Blender.

_HOOK_
Customizing the Rig
Once imported, you can customize the rig to fit your needs:
- Edit bone structures for custom animations.
- Attach accessories and textures to personalize the character.
- Utilize Blender\"s tools to pose and animate your Roblox character.
Exporting Animations
After animating your character, you can export the animations back to Roblox:
- Use the Blender rig exporter to convert animations into a Roblox-compatible format.
- Import the animation file into Roblox Studio and apply it to your character.
Resources
For more detailed instructions and advanced techniques, refer to the Roblox Developer Forum and Blender documentation. Both platforms offer extensive guides and community support to help you create stunning animations and models with Roblox rigs in Blender.
_HOOK_
Resources
For more detailed instructions and advanced techniques, refer to the Roblox Developer Forum and Blender documentation. Both platforms offer extensive guides and community support to help you create stunning animations and models with Roblox rigs in Blender.
Introduction to Roblox Rigging in Blender
Roblox rigging in Blender offers a comprehensive pathway for animators and game developers to bring their Roblox characters to life. This process involves exporting character rigs from Roblox, importing them into Blender, and utilizing Blender\"s powerful animation and modeling tools to create dynamic character animations and models. The goal is to enhance your Roblox games with custom animations and models, providing a unique gaming experience for players.
- Start by ensuring you have the latest version of Blender installed, as it provides the necessary support for importing Roblox rigs.
- Use the Roblox Studio to select and export your character rig. This usually involves a simple plugin that enables the export of Roblox models in a format Blender can read.
- Import the exported rig into Blender. This step typically requires navigating to Blender\"s import options and selecting the file format used by the Roblox export.
- Once imported, the rig can be customized and animated using Blender\"s tools. This includes modifying the mesh, creating new animations, and even adding new textures.
- Finally, animations can be exported back to Roblox, allowing you to integrate your custom animations into your games.
This process not only enhances the visual appeal of Roblox games but also allows developers to craft unique gameplay experiences. By mastering Roblox rigging in Blender, creators can push the boundaries of what\"s possible in Roblox, making games that stand out in the crowded Roblox marketplace.
Step-by-Step Guide to Importing Roblox Rigs into Blender
Importing Roblox rigs into Blender allows creators to animate and customize their characters with more detail and flexibility. Follow this step-by-step guide to bring your Roblox characters into the world of Blender animation.
- Preparation in Roblox Studio: Start by selecting the character rig you wish to export in Roblox Studio. Use the Roblox rig exporter plugin to export your character\"s rig. Save the .obj file on your computer.
- Setting Up Blender: Ensure you have the latest version of Blender installed. Open Blender and prepare for importing the Roblox rig by setting up a new project.
- Importing the Rig: In Blender, go to File > Import and select Wavefront (.obj) from the list of file formats. Navigate to where you saved your .obj file, select it, and click \"Import OBJ\".
- Adjusting the Imported Rig: Once imported, you may need to adjust the scale, rotation, or position of the rig to fit your project needs. This can be done using Blender\"s transform tools.
- Customization and Animation: With the rig now in Blender, you can begin the process of customization and animation. Use Blender\"s vast array of tools to modify the mesh, create animations, and add textures.
- Exporting Animations back to Roblox: After completing your animations, you can export them back into Roblox Studio to see your character come to life in your game. This usually involves using a specific Blender plugin or script that formats the animation data for Roblox.
This guide provides a foundational understanding of how to bring Roblox rigs into Blender, opening up a world of animation possibilities. With practice, you can create custom animations that enhance your Roblox games and stories.
Customizing Your Roblox Rig in Blender
Once you have successfully imported your Roblox rig into Blender, the next step is customization. This process allows you to personalize the rig, making it perfect for your specific project requirements. Here\"s how to customize your Roblox rig in Blender:
- Adjusting the Mesh: Start by selecting the mesh of your imported rig. You can adjust the mesh to change the character\"s appearance, such as modifying body proportions or adding new elements.
- Adding Textures: Blender allows you to apply textures to your rig, enhancing its visual appeal. Import your textures and apply them to the appropriate parts of the mesh using the shading tab.
- Editing Bones for Animation: In the armature tab, you can edit the bones of your rig. This step is crucial for animation as it defines how your character moves. Adjust bone sizes, positions, and parent-child relationships to fit your animation needs.
- Attaching Accessories: Blender enables you to attach accessories or clothing to your rig. Use the parenting feature to attach objects to specific bones, ensuring they move correctly with your character\"s animations.
- Creating Facial Expressions: For rigs with facial bones, you can create facial expressions by manipulating these bones. This feature is essential for adding emotions and reactions to your character animations.
- Exporting for Roblox: After customizing your rig, you\"ll need to export it in a format compatible with Roblox. Use the Blender rig exporter to convert your animations and models for use in your Roblox games.
Customizing your Roblox rig in Blender opens up endless possibilities for creativity. By following these steps, you can create unique characters that stand out in the Roblox universe.
Animating Your Roblox Character in Blender
Animating your Roblox character in Blender involves several key steps to bring your character to life with custom animations. These animations can enhance your Roblox games, making your characters more dynamic and engaging.
- Preparing Your Character: Before animating, ensure your Roblox character model is imported into Blender. This may involve exporting your character from Roblox Studio as an .obj file and then importing it into Blender.
- Rigging Your Character: Rigging is the process of adding bones to your character model so it can be animated. In Blender, you can use the armature system to create a rig that matches your character\"s structure.
- Creating Keyframes: Animation in Blender is achieved by creating keyframes, which are specific points in time where you define the position, rotation, and scale of your character\"s bones. By setting these keyframes at different times along the timeline, you can create motion.
- Using the Timeline and Dope Sheet: Blender\"s Timeline and Dope Sheet are essential tools for animation. They allow you to see all your keyframes and control the timing and sequence of your animation.
- Animating with IK Constraints: For more natural movements, you can use Inverse Kinematics (IK) constraints in Blender. This allows for more intuitive control over limb movement, such as arms and legs.
- Exporting Animations: Once your animation is complete, you can export it from Blender into a format that Roblox supports. This involves using the animation exporter feature in Blender, ensuring the animation is compatible with Roblox\"s system.
Throughout the animation process, it\"s crucial to frequently preview your animations within Blender to ensure movements look natural and to make adjustments as needed. Blender offers powerful animation tools that, with practice, can help you create professional-quality animations for your Roblox games.
Remember, animating characters is an iterative process that involves rigging, keyframing, and fine-tuning animations to achieve the desired results. With patience and creativity, you can bring your Roblox characters to life in Blender.
_HOOK_
Exporting Your Blender Animations to Roblox
Exporting animations from Blender to Roblox involves a series of steps that allow you to bring your custom animations into your Roblox games, enhancing the gaming experience. Here\"s a comprehensive guide to help you through the process:
- Finish Your Animation: Complete your animation in Blender. Ensure all movements and sequences are finalized.
- Use the Roblox Blender Plugin: Utilize the Roblox Blender Plugin, a tool that facilitates the direct transfer of 3D models and animations from Blender to Roblox Studio, bypassing the need for manual file exports and imports. This plugin is an open-source implementation of Roblox\"s Open Cloud API.
- Export Animation: In Blender, once your animation is ready, use the plugin to export your animation. This might involve selecting the animation and using the export function provided by the plugin.
- Import to Roblox: Open Roblox Studio and use the plugin to import the animation you\"ve just exported. The process involves navigating through the plugin\"s interface in Roblox Studio and locating the import option for animations.
- Animation ID: After importing your animation into Roblox, an animation ID will be generated. This ID is crucial as it is used to reference and play the animation within your Roblox games.
- Troubleshooting: If you encounter issues during the import process, such as animations not loading, consider checking your Studio settings. Disabling Team Create has been noted to resolve some of these issues.
Using these steps, you can successfully export animations from Blender and import them into Roblox, allowing you to customize your games with unique animations. Ensure that you have the latest version of the Roblox Blender Plugin and follow the guidelines for a smooth transition of animations from Blender to Roblox.
Common Issues and Solutions When Working with Roblox Rigs in Blender
Working with Roblox rigs in Blender can sometimes present challenges, from importing and rigging to animation and exporting. Below are some common issues encountered and their solutions:
- Importing FBX Animation Data: Ensure the FBX file contains one rig/armature with animation data. Use the \"Import FBX\" button in Blender to load and map this data to the generated armature.
- Mapping Arbitrary Armatures: When importing animations made in other tools, use utility scripts to map bones from one armature to another based on bone names. This is crucial for maintaining metadata and ensuring animations play correctly.
- Generating IK Constraints: Use Blender\"s tools to generate IK constraints for more natural movements. This may involve selecting bones and adjusting constraint parameters for the best results.
- Rig and Model Parenting: To ensure your rig works properly, select both the rig and model, press Control P, and choose \"With Automatic Weights\" for correct weighting and movement.
- Fixing Separated Parts: If importing a rig causes parts to separate or distort, consider remaking the rig or adjusting the weights manually in Blender\"s Weight Paint mode.
- Plugin Errors: Errors with Blender plugins can prevent proper export or function of rigs. Ensure you are using the latest versions of plugins and consult their documentation for troubleshooting.
- Blender Crashes with Rig: Blender crashing upon opening a rig can indicate file size issues or compatibility problems with the Blender version. Try reducing the rig\"s complexity or updating Blender.
Each issue with Roblox rigs in Blender can typically be resolved with careful attention to the importing and rigging process, the use of correct tools and plugins, and ensuring compatibility between Roblox and Blender versions. For complex problems, community forums and tutorials can offer additional guidance and solutions.
Advanced Tips and Tricks for Blender Roblox Rigging
Maximizing the potential of Blender for Roblox rigging requires diving into more advanced techniques. Here are some sophisticated tips and tricks to enhance your rigging and animation workflow:
- Utilizing the Robloxian 2.0 Rig: Start by opening the \"Faceless\" file to begin working with the rig. Ensure you\"re familiar with Blender and GFX basics to effectively import textures, pose the rig, and apply various shaders and materials for a more detailed and personalized result.
- Preparations and Texture Importing: Switch to viewport shading view to see textures clearly. Add a Shading tab or a node editor to your workspace for easy access to texture settings. Import textures for the rig, adjusting materials and shaders as needed to achieve the desired appearance.
- Posing the Rig: Posing is simplified in Blender, with each bone having specific controls for movement and rotation. Understanding the function of upper arm, lower arm, hand, and torso bones is crucial for natural posing. Additionally, leg positioning requires attention to detail to ensure correct movement and placement.
- Mirror Modifiers for Symmetry: Apply a Mirror Modifier for symmetrical rig adjustments. This is especially useful when working on limbs, ensuring consistent modifications across the rig.
- Optimizing the Mesh: Use Blender\"s tools like \"Merge by Distance\" and \"Convert Tris to Quads\" to clean up and optimize your mesh for a smoother model.
- Cleaning Up Artifacts: Examine your rig for any mesh artifacts, using deletion and face creation tools to refine the model. This step is vital for achieving a professional-grade rig suited for detailed animations.
These advanced techniques leverage Blender\"s comprehensive toolset to create detailed and highly customizable Roblox rigs. Remember, mastering these skills requires practice and experimentation. Happy rigging and animating!
READ MORE:
Resources for Learning More About Blender and Roblox Integration
Integrating Blender and Roblox opens up vast possibilities for game developers and artists alike. Here are some invaluable resources to deepen your understanding and enhance your skills in this area:
- Developer Forum Tutorials: The Roblox Developer Forum is a treasure trove of community tutorials covering everything from basic rig exporting and importing to advanced animation techniques. For starters, check out the Blender rig exporter/animation importer guide for a comprehensive walkthrough of the process.
- Official Roblox Documentation: Roblox\"s Creator Hub provides detailed documentation on rigging simple meshes, which is essential for beginners looking to understand the basics of Blender to Studio integration.
- YouTube Tutorials: YouTube is filled with tutorials for all skill levels, from basic rigging and texturing to creating complex animations and GFX scenes. Look for tutorials that specifically mention Blender versions compatible with Roblox to ensure smooth integration.
- Community Resources: The Developer Forum and platforms like Gumroad host downloadable content like the Roblox Starter Rigs for Blender, offering pre-made rigs that can be customized and used for your projects.
- Blender Add-ons and Plugins: Enhance your workflow with Blender add-ons designed for Roblox, such as the Roblox Blender Plugin, which simplifies the process of transferring 3D models between Blender and Roblox Studio.
- Online Courses and Guides: Websites like RenderGuide offer step-by-step instructions on specific tasks like importing your Roblox character into Blender, which can be particularly helpful for visual learners.
- GitHub Repositories: For those looking to dive deeper into customization and tool development, GitHub hosts repositories like RBX_Toolbox, offering tools to assist and simplify the workflow for Roblox modeling in Blender.
Utilizing these resources effectively will not only streamline your workflow but also open up new creative possibilities for your Roblox games and characters. Whether you\"re a beginner or an experienced developer, continuous learning and experimentation are key to mastering Blender and Roblox integration.
Embarking on your journey to integrate Blender and Roblox opens up endless creative avenues. With the right resources and dedication, you can transform your visions into reality, enhancing your Roblox games with captivating characters and animations.