Topic how to import blender animations into roblox: Discover the seamless process of importing Blender animations into Roblox with our easy-to-follow guide, enhancing your gaming experience and bringing your creative visions to life.
Table of Content
- How do I import Blender animations into Roblox?
- Preparation in Blender
- Using Roblox Studio
- Finalizing and Testing
- Tips for a Smooth Import Process
- Conclusion
- Using Roblox Studio
- Finalizing and Testing
- Tips for a Smooth Import Process
- Conclusion
- YOUTUBE: Creating Your First Blender Animation for Roblox Beginners
- Finalizing and Testing
- Tips for a Smooth Import Process
- Conclusion
- Tips for a Smooth Import Process
- Conclusion
- Conclusion
- Introduction to Importing Blender Animations into Roblox
- Understanding Blender and Roblox Compatibility
- Step-by-Step Guide to Exporting Animations from Blender
- Importing Animations into Roblox Studio
- Adjusting and Configuring Animations in Roblox Studio
- Testing and Troubleshooting Common Issues
- Optimizing Animations for Roblox Performance
- Advanced Techniques and Tips for Seamless Integration
- Common Mistakes to Avoid During the Import Process
- Conclusion and Best Practices for Future Projects
How do I import Blender animations into Roblox?
To import Blender animations into Roblox, you can follow the steps below:
- Export the animation from Blender as an FBX file. Make sure that your animation is set up correctly and ready for export.
- Open Roblox Studio and make sure you have the necessary permissions to import custom assets.
- Go to the \"Plugins\" tab in Roblox Studio and use the \"Avatar Importer\" plugin to import your FBX file as a custom avatar.
- Follow the on-screen instructions to adjust the settings and import your animation into Roblox.
- Test your imported animation in Roblox Studio to ensure that it works correctly and looks as intended.
READ MORE:
Preparation in Blender
- Ensure your animation is ready and fully tested within Blender.
- Export your Blender rig using a Roblox-compatible format, typically FBX or OBJ.
Using Roblox Studio
- Open Roblox Studio and navigate to the workspace where you wish to import your animation.
- Import the FBX or OBJ file exported from Blender into Roblox Studio.
Configuring the Animation
- After importing, adjust the animation settings in Roblox Studio to match your project\"s requirements.
- Use the Animation Editor in Roblox Studio to fine-tune any aspects of the animation as needed.
Finalizing and Testing
Once the animation has been imported and configured, test it thoroughly within your Roblox project to ensure everything works as expected. Adjust any settings as necessary for optimal performance.

Tips for a Smooth Import Process
- Ensure your Blender models are appropriately rigged and compatible with Roblox\"s requirements.
- Verify the animation\"s frame rate and duration match what is supported by Roblox Studio.
- Use the latest versions of Blender and Roblox Studio to avoid compatibility issues.

_HOOK_
Conclusion
By following these steps, you can successfully import Blender animations into Roblox, enhancing your game\"s visuals and user experience. Always remember to test your animations thoroughly to ensure they meet your project\"s standards and perform as intended within the Roblox environment.

Using Roblox Studio
- Open Roblox Studio and navigate to the workspace where you wish to import your animation.
- Import the FBX or OBJ file exported from Blender into Roblox Studio.
Configuring the Animation
- After importing, adjust the animation settings in Roblox Studio to match your project\"s requirements.
- Use the Animation Editor in Roblox Studio to fine-tune any aspects of the animation as needed.

Finalizing and Testing
Once the animation has been imported and configured, test it thoroughly within your Roblox project to ensure everything works as expected. Adjust any settings as necessary for optimal performance.

Tips for a Smooth Import Process
- Ensure your Blender models are appropriately rigged and compatible with Roblox\"s requirements.
- Verify the animation\"s frame rate and duration match what is supported by Roblox Studio.
- Use the latest versions of Blender and Roblox Studio to avoid compatibility issues.

Conclusion
By following these steps, you can successfully import Blender animations into Roblox, enhancing your game\"s visuals and user experience. Always remember to test your animations thoroughly to ensure they meet your project\"s standards and perform as intended within the Roblox environment.

_HOOK_
Creating Your First Blender Animation for Roblox Beginners
Dive into the magical world of animation with our captivating video! Join us as we explore the artistry and creativity behind bringing characters and stories to life through mesmerizing visuals and compelling storytelling.
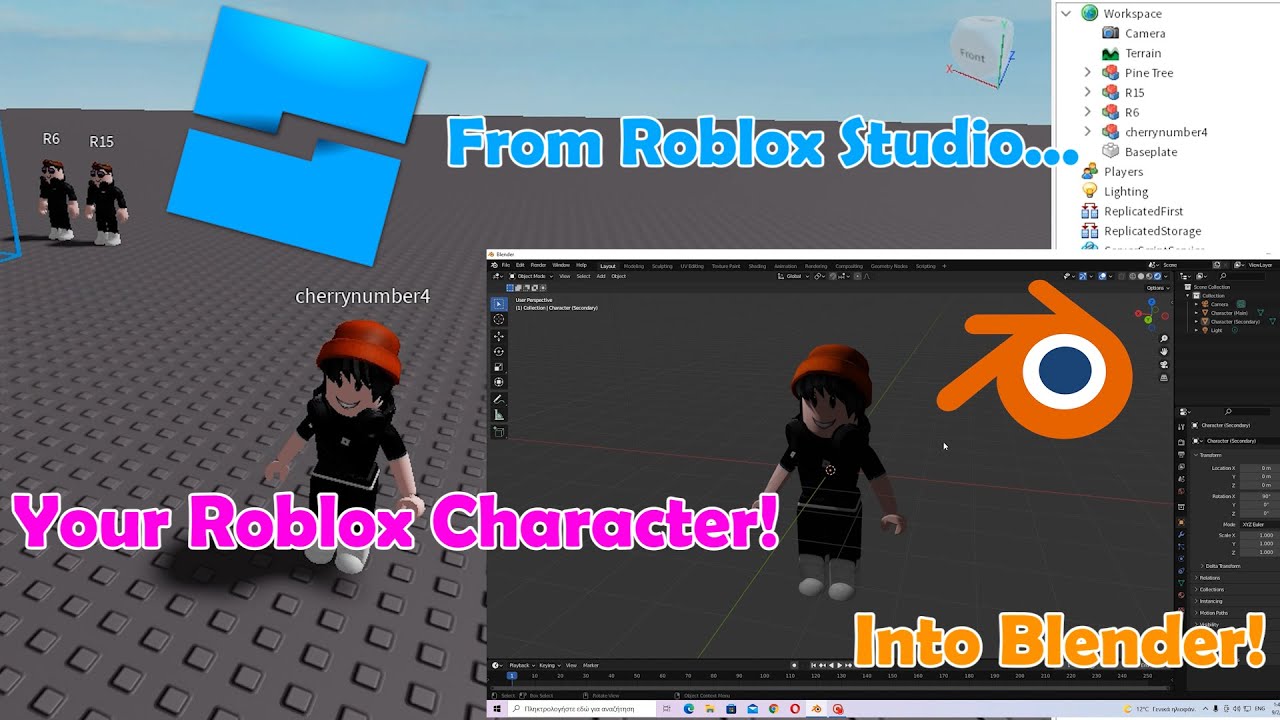
Roblox Blender Animation Tutorial with Roblox Studio and Blender
Ready to enhance your skills and knowledge? Our tutorial video is here to guide you step by step through a fun and educational journey. Learn new techniques, tricks, and tips to help you master the topic effortlessly.
Finalizing and Testing
Once the animation has been imported and configured, test it thoroughly within your Roblox project to ensure everything works as expected. Adjust any settings as necessary for optimal performance.
Tips for a Smooth Import Process
- Ensure your Blender models are appropriately rigged and compatible with Roblox\"s requirements.
- Verify the animation\"s frame rate and duration match what is supported by Roblox Studio.
- Use the latest versions of Blender and Roblox Studio to avoid compatibility issues.
Conclusion
By following these steps, you can successfully import Blender animations into Roblox, enhancing your game\"s visuals and user experience. Always remember to test your animations thoroughly to ensure they meet your project\"s standards and perform as intended within the Roblox environment.
_HOOK_
Conclusion
By following these steps, you can successfully import Blender animations into Roblox, enhancing your game\"s visuals and user experience. Always remember to test your animations thoroughly to ensure they meet your project\"s standards and perform as intended within the Roblox environment.
Introduction to Importing Blender Animations into Roblox
Bringing your Blender animations into Roblox can significantly enhance your game\"s visual appeal and immersive experience. This process involves exporting animations from Blender and importing them into Roblox, a pathway that bridges two powerful creative platforms. Whether you\"re a seasoned animator or a beginner, understanding the foundational steps can streamline your workflow and elevate your Roblox projects.
- Start with a Rigged Model: Ensure your character or object is properly rigged in Blender. Rigging is the process of creating a skeleton structure that animations will move.
- Exporting from Blender: Once your animation is ready, export it using a compatible format. The most common format for Roblox is the FBX file, which supports complex animations.
- Importing into Roblox Studio: Within Roblox Studio, use the animation editor to import your FBX file. This step might require tweaking settings to ensure your animation plays correctly in Roblox.
- Testing and Refinement: After importing, test your animation within the game environment. This is crucial for identifying and fixing any issues that might not have been evident in Blender.
By following these steps, you\"ll be able to bring your creative visions to life in Roblox, adding dynamic and engaging animations to your games. The process not only enhances the player\"s experience but also allows for a deeper level of creative expression.
Understanding Blender and Roblox Compatibility
Blender and Roblox offer distinct capabilities for animators and game developers. Understanding the compatibility between these two platforms is crucial for efficiently importing animations. This section highlights key considerations and requirements to ensure a smooth transition of animations from Blender to Roblox, covering file formats, rigging, and animation specifics.
- Supported File Formats: Roblox primarily supports the FBX format for importing animations. Ensure your Blender animations are exported in this format for compatibility.
- Rigging Requirements: Rigging in Blender must be compatible with Roblox\"s system. This often means using a simplified bone structure that matches Roblox characters.
- Animation Constraints: Roblox has specific requirements for animations, such as limitations on the number of bones and animation length. It\"s important to design your Blender animations within these constraints.
- Texture and Material Compatibility: While importing animations, also consider how textures and materials from Blender will translate into Roblox. Some adjustments may be necessary to maintain visual fidelity.
- Utilizing Plugins: Several Blender plugins are designed to facilitate the export and import process, ensuring that animations are correctly formatted and ready for Roblox.
By keeping these compatibility considerations in mind, animators and developers can ensure a successful integration of Blender animations into their Roblox games, enhancing the gaming experience with high-quality, custom animations.
Step-by-Step Guide to Exporting Animations from Blender
Exporting animations from Blender for use in Roblox requires attention to detail and adherence to specific steps. This guide walks you through the process from preparing your animation in Blender to ensuring it\"s ready for import into Roblox.
- Finalize Your Animation: Before exporting, ensure your animation is complete and plays as expected in Blender.
- Choose the Correct Export Format: Roblox supports the FBX format for animations. In Blender, go to File > Export and select \"FBX\" (.fbx) as your format.
- Configure Export Settings: In the export window, adjust the settings to include only what\"s necessary for your animation. This typically means selecting options like \"Armature\" and \"Mesh\" and ensuring \"Bake Animation\" is checked.
- Set the Right Scale: Roblox and Blender use different scales. Set the scale value under the FBX export options to ensure your animation imports at the correct size.
- Export the Animation: With your settings configured, click \"Export FBX\". Save the file in an accessible location.
Following these steps will create an FBX file of your Blender animation, ready to be imported into Roblox Studio for use in your games and projects. Ensuring your export settings are correctly adjusted is crucial for a smooth import process into Roblox.
Importing Animations into Roblox Studio
After exporting your animations from Blender, the next step is to import them into Roblox Studio. This process transforms your animations into playable content within your Roblox games. Follow these detailed steps to ensure a smooth import process.
- Prepare Your Roblox Studio: Open Roblox Studio and select or create the game project where you want to import your animation.
- Access the Animation Editor: In Roblox Studio, go to the \"Plugins\" tab and open the \"Animation Editor\". This tool is essential for importing and editing animations.
- Import Your FBX File: Within the Animation Editor, find the option to import an animation. Select the FBX file you exported from Blender. Make sure the animation is properly mapped to your Roblox character or object.
- Adjust Animation Settings: After importing, you may need to adjust settings such as the animation\"s speed, loop settings, and name. This ensures the animation works as intended within your game.
- Testing the Animation: Before finalizing, test the animation within Roblox Studio to check for any issues or necessary adjustments. This step is crucial for ensuring the quality of your game\"s animations.
- Save and Share Your Animation: Once satisfied, save your animation. You can then share it or use it in your Roblox games. Roblox Studio allows you to save animations for use in multiple projects.
Importing animations into Roblox Studio might seem complex, but following these steps will make the process more manageable. This integration enhances your games, providing players with a richer, more engaging experience.
_HOOK_
Adjusting and Configuring Animations in Roblox Studio
Once you\"ve successfully imported your Blender animations into Roblox Studio, fine-tuning and configuring them is essential for seamless gameplay. These steps guide you through adjusting your animations to work perfectly in your Roblox games.
- Open the Animation Editor: Navigate to the \"Plugins\" tab in Roblox Studio and open the Animation Editor to start adjusting your imported animation.
- Adjust Animation Properties: Within the Animation Editor, you can modify properties such as frame rate, loop settings, and priority to match your game\"s needs.
- Refine Animation Keyframes: Review and adjust keyframes for smooth transitions and movements. Ensure each keyframe aligns with your animation\"s intended action.
- Preview and Iterate: Use the preview function in the Animation Editor to watch your animation play. Make necessary adjustments based on how it looks and feels in the preview.
- Set Animation Priority: If your game uses multiple animations simultaneously, setting the animation priority ensures the correct animations play when overlapping actions occur.
- Optimize for Performance: Consider the performance impact of your animations, especially for games on mobile devices. Simplify animations where possible to improve game performance.
- Apply and Test in-game: After configuring, apply your animations to the appropriate game characters or objects and conduct thorough in-game testing to ensure they behave as expected.
Adjusting and configuring animations in Roblox Studio is a critical step in the development process, enabling you to create engaging and dynamic game experiences. Careful attention to these details will enhance the overall quality of your Roblox game.
Testing and Troubleshooting Common Issues
Testing your Blender animations in Roblox is a critical step to ensure they work as intended. This section covers how to effectively test your animations and troubleshoot common issues that may arise during the import process.
- Test Animations in Roblox Studio: After importing, use Roblox Studio\"s playtesting features to see how your animations perform in a live environment. This helps identify any playback issues or discrepancies.
- Check Animation Playback: Ensure your animation plays back smoothly in Roblox Studio. Issues like skipping frames or unexpected behavior may indicate problems with the export or import settings.
- Verify Bone and Rig Mapping: Misaligned bones or incorrect rig mappings are common issues. Double-check that your Blender rig matches Roblox\"s requirements and that all bones are correctly mapped.
- Adjust Animation Settings: If animations don\"t play as expected, revisit the animation settings in Roblox Studio. Tweaking parameters like loop settings or priority may resolve playback issues.
- Use Debugging Tools: Roblox Studio offers debugging tools to help identify and fix issues. Utilize the output window and script analysis to catch and resolve errors.
- Consult Roblox Developer Forums: The Roblox developer community is a valuable resource. If you encounter persistent issues, seek advice or solutions on the forums where many common problems have been discussed and solved.
By methodically testing and troubleshooting, you can ensure your Blender animations integrate seamlessly into your Roblox projects, providing a smooth and engaging experience for players.
Optimizing Animations for Roblox Performance
Optimizing your Blender animations for Roblox is crucial for ensuring smooth gameplay and enhancing the overall user experience. Follow these steps to optimize animations effectively, focusing on performance without sacrificing quality.
- Simplify Your Models: Use Blender\"s decimate function or manually reduce the complexity of your models. Fewer vertices and faces will lead to better performance in Roblox.
- Optimize Animation Length: Keep animations concise. Longer animations can consume more resources, affecting game performance. Aim for the essential motion sequences.
- Reduce Keyframes: Minimize the number of keyframes in your animations. More keyframes mean more data for Roblox to process, which can slow down performance.
- Use LoDs (Level of Detail): Implement different levels of detail for models based on the camera distance. This technique reduces the rendering load on farther objects, improving performance.
- Texture Optimization: Optimize textures before importing into Roblox. Use compressed texture formats and ensure texture sizes are as low as possible while maintaining visual fidelity.
- Animation Prioritization: Prioritize critical animations for gameplay. Non-essential animations should be simplified or removed to maintain performance.
- Testing on Multiple Devices: Test your animations across different devices to ensure they perform well on both high and low-end systems. Adjust optimizations based on feedback.
By implementing these optimization techniques, you can ensure your Blender animations run smoothly in Roblox, providing an enjoyable experience for all players.
Advanced Techniques and Tips for Seamless Integration
Integrating Blender animations into Roblox with higher efficiency and creativity requires understanding advanced techniques and tips. This section delves into expert advice for achieving seamless integration, enhancing the quality of your animations, and streamlining the development process.
- Utilizing Roblox Blender Plugins: Leverage plugins specifically designed for Blender to Roblox workflows. These tools facilitate direct export/import capabilities, reducing compatibility issues and saving time.
- Custom Rigging for Enhanced Control: Create custom rigs in Blender that closely mimic Roblox’s default character rigs. This ensures animations transfer more accurately and with fewer adjustments needed.
- Animation Layering and Blending: Master the use of animation layers and blending in Roblox Studio to create more dynamic and complex animations. This technique allows for smoother transitions and interactions.
- Optimizing with Animation Cycles: Utilize animation cycles for repetitive actions to save time and resources. By creating loops of basic movements, you can efficiently animate complex sequences.
- Scripting for Dynamic Animations: Incorporate Lua scripting in Roblox to control animations dynamically. Scripts can trigger animations based on game events, player interactions, or other conditions, adding a layer of interactivity.
- Feedback Loop Between Blender and Roblox: Establish a feedback loop where you iteratively export animations, test them in Roblox, and then refine them in Blender. This process ensures animations meet your exact requirements.
- Community Resources and Collaboration: Engage with the Roblox development community for insights, plugins, and scripts that can enhance your animation workflow. Collaboration and shared resources can significantly improve the integration process.
By applying these advanced techniques and tips, developers can achieve a more seamless and efficient workflow between Blender and Roblox, leading to higher quality animations and more engaging game experiences.
Common Mistakes to Avoid During the Import Process
Successfully importing Blender animations into Roblox involves navigating through a complex process, where certain pitfalls can hinder your progress. Awareness and avoidance of these common mistakes can ensure a smoother workflow and enhance the quality of your game\"s animations.
- Incorrect Export Format: Always export animations from Blender in the FBX format, as Roblox does not support all formats equally. Ensuring the correct format is crucial for compatibility.
- Overlooking Rigging Specifications: Blender rigs must comply with Roblox\"s rigging structure. Failing to match bone names and structures can lead to import errors or animations not playing correctly.
- Ignoring Scale Issues: Blender and Roblox use different scales. Not adjusting the scale of your model and animations during export can result in disproportionately sized assets in Roblox.
- Neglecting Animation Details: Every detail in your Blender animation, from keyframes to bone hierarchy, impacts the final outcome in Roblox. Overlooking these details can cause unexpected results.
- Forgetting to Test Animations: Always test animations in Roblox Studio after importing. What looks good in Blender may behave differently in Roblox, requiring adjustments.
- Improper Use of Plugins: While plugins can streamline the import process, improper use or reliance on outdated plugins can introduce errors. Ensure you are using the latest, most compatible plugins.
- Lack of Optimization: Failing to optimize animations for Roblox can impact game performance. Ensure animations are as efficient as possible without unnecessary complexity.
By avoiding these common mistakes, you can enhance the integration process of Blender animations into Roblox, ensuring a more efficient development cycle and a better gaming experience for your audience.
_HOOK_
READ MORE:
Conclusion and Best Practices for Future Projects
Successfully importing Blender animations into Roblox can dramatically enhance your game\"s visuals and player engagement. As we conclude this guide, let\"s highlight best practices to ensure your future projects benefit from smooth and effective animation integration.
- Stay Updated: Always keep both your Blender and Roblox Studio versions up to date to take advantage of the latest features and compatibility improvements.
- Master the Tools: Invest time in learning both Blender and Roblox Studio\"s intricacies. Proficiency in these tools can significantly streamline your animation workflow.
- Plan Your Animations: Before starting, plan your animations carefully. Consider the limitations and requirements of Roblox to ensure your animations are both feasible and optimized for the platform.
- Test Thoroughly: Extensive testing in Roblox Studio is crucial. Testing not only reveals issues early but also ensures that your animations integrate seamlessly within your game environment.
- Seek Community Feedback: The Roblox developer community is a valuable resource for feedback, tips, and tricks. Don\"t hesitate to share your work and learn from others\" experiences.
- Continuous Learning: The field of animation and game development is always evolving. Stay curious, experiment with new techniques, and continuously seek to improve your skills.
By adhering to these best practices, you\"re well on your way to creating dynamic and compelling animations for your Roblox games. The journey from Blender to Roblox is one of creativity, learning, and innovation, enabling you to bring your unique visions to the vibrant world of Roblox gaming.
Embrace the power of Blender animations in your Roblox games to unlock a world of creativity and engagement. Follow our guide to seamlessly integrate stunning animations, enhancing your game\"s appeal and player experience.