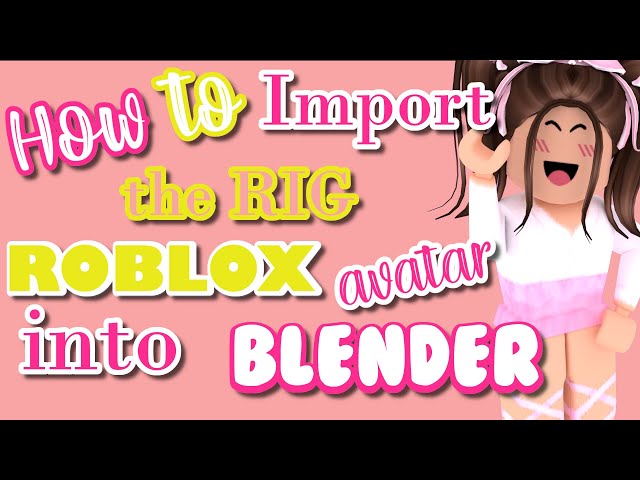
Topic how to import roblox avatar into blender: Discover the seamless process of importing your Roblox avatar into Blender with our comprehensive guide, designed to enhance your 3D modeling skills and bring your virtual creations to life.
Table of Content
- How can I import my Roblox avatar into Blender efficiently?
- Step-by-Step Guide
- Alternative Methods
- YOUTUBE: How to Import Models into Blender from Roblox Studio
- Alternative Methods
- Introduction to Importing Roblox Avatars into Blender
- Understanding the Basics of Blender and Roblox Models
- Step-by-Step Guide to Exporting Roblox Models
- Importing Your Roblox Avatar into Blender
- Navigating Blender\"s Interface with Roblox Models
- Adjusting and Customizing Avatars in Blender
- Alternative Methods for Importing Models
- Common Issues and Troubleshooting Tips
- Enhancing Your Avatars with Advanced Blender Features
- Resources and Communities for Further Learning
- Conclusion and Next Steps in Blender 3D Modeling
How can I import my Roblox avatar into Blender efficiently?
To import your Roblox avatar into Blender efficiently, you can follow these steps:
- Open ROBLOX Studio and select the character you want to import.
- Right-click on the character in the explorer panel.
- Choose \'Export Selection\' to save the character as an OBJ file.
- Open Blender on your computer.
- Click on \'File\' in the top menu of Blender.
- Select \'Import\' and then choose \'Wavefront (.obj)\'.
- Navigate to the location where you saved the exported OBJ file from ROBLOX Studio and select it.
- Adjust the import settings as needed and click \'Import\' to bring your Roblox avatar into Blender.
- You can now work on customizing and editing your Roblox avatar in Blender as desired.
READ MORE:
Step-by-Step Guide
- Right-click the model in Roblox you wish to work on and select Export. Export it as an .obj file.
- Launch Blender and navigate to File > Import in the top menu.
- Select the .obj file you exported from Roblox to import it into Blender.

Alternative Methods
- For FBX files, go to File > Import > FBX in Blender and select your character file.
- Use the Roblox Blender Plugin to directly transfer models from Blender to Roblox Studio, streamlining the workflow.
Importing Tips
Ensure your Blender version is compatible with the models and formats exported from Roblox. Some versions may require specific plugins or settings adjustments for optimal import.
| Recommended Blender Versions for Roblox Models | |
| Blender Version | Roblox Model Compatibility |
| 2.8 - 2.93 | High compatibility with most models |
| 3.0+ | Best for latest Roblox models with advanced features |
For detailed tutorials and additional information on customizing your avatar in Blender, consider exploring Blender\"s official documentation and community forums.

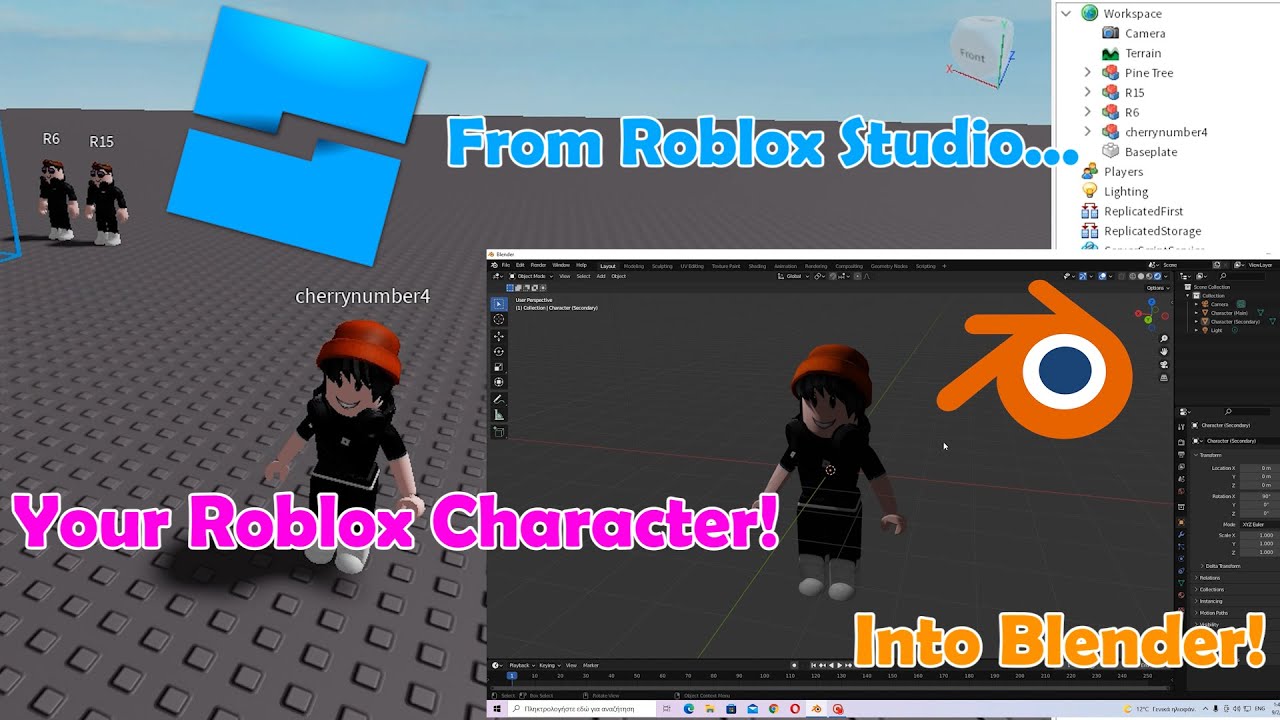
How to Import Models into Blender from Roblox Studio
Modeling: Explore the fascinating world of modeling in this video as it showcases the creativity, artistry, and dedication behind creating stunning designs. Witness the transformation of ideas into beautiful pieces of art! Exporting: Join us on a journey of discovery as we delve into the world of exporting in this video. Learn about the opportunities, challenges, and benefits of expanding your business on a global scale.
How to Export Your Roblox Avatar from Roblox Studio to Blender
In this tutorial, I teach you how to export your roblox avatar from roblox studio to blender without using any addons and how to fix ...
Alternative Methods
- For FBX files, go to File > Import > FBX in Blender and select your character file.
- Use the Roblox Blender Plugin to directly transfer models from Blender to Roblox Studio, streamlining the workflow.
Importing Tips
Ensure your Blender version is compatible with the models and formats exported from Roblox. Some versions may require specific plugins or settings adjustments for optimal import.
For detailed tutorials and additional information on customizing your avatar in Blender, consider exploring Blender\"s official documentation and community forums.
Introduction to Importing Roblox Avatars into Blender
Importing your Roblox avatar into Blender opens up a world of creativity and customization. Blender, a powerful open-source 3D modeling and animation software, can be used to create detailed characters, animations, and scenes. This guide will walk you through the basic steps to bring your Roblox avatar into Blender, allowing you to enhance and customize your avatar in ways that are not possible within Roblox itself.
- Start by identifying the Roblox model or avatar you wish to import into Blender.
- Export the model from Roblox as an .obj file, ensuring you have the right to use and modify the model.
- Open Blender and select \"File\" > \"Import\" to choose the .obj file you exported from Roblox.
- Adjust your model within Blender using its robust toolset for modeling, texturing, and animation.
It\"s important to familiarize yourself with Blender\"s interface and the specific requirements for importing Roblox models. This includes understanding the file formats supported by Blender, how to navigate its interface, and how to apply textures and materials to your Roblox models. Additionally, Blender offers a variety of advanced features, such as rigging and animation tools, which can further enhance your Roblox avatars and models.
- Ensure you have the latest version of Blender installed to avoid compatibility issues.
- Consider using Blender plugins designed to facilitate the import process from Roblox.
- Explore online tutorials and resources to learn more about 3D modeling and animation in Blender.
This introduction aims to get you started on a journey of creativity and exploration, blending the worlds of Roblox and Blender to create something truly unique. Whether you\"re aiming to create custom animations, enhance your avatar, or develop unique assets for your Roblox games, the possibilities are endless.

_HOOK_
Understanding the Basics of Blender and Roblox Models
Blender and Roblox utilize fundamentally different systems for their models, making the process of importing Roblox avatars into Blender a unique challenge. Understanding the basics of both platforms is essential for a smooth transition. Blender is a comprehensive 3D modeling and animation software that supports a wide range of 3D work including modeling, rigging, animation, simulation, rendering, compositing, and motion tracking. Roblox models, on the other hand, are designed within the Roblox Studio environment, tailored for ease of use in game development and characterized by their blocky, customizable avatars and objects.
To begin with, Roblox models are typically constructed with a focus on simplicity and modularity, allowing users to easily create and customize characters and environments without extensive 3D modeling knowledge. These models are built using parts and are often animated with predefined actions within the Roblox environment. Blender, however, offers more advanced tools for detailed modeling, texturing, and animation, requiring a deeper understanding of 3D modeling concepts and techniques.
When preparing to import a Roblox avatar into Blender, it\"s important to first export the model from Roblox Studio. This is typically done by exporting the model as an OBJ or FBX file, which are formats that Blender can import. The process involves selecting the model in Roblox Studio, exporting it, and then using Blender\"s import function to bring the model into the Blender workspace.
- Understand the file formats: Blender supports various 3D file formats for import, but when dealing with Roblox models, the most common formats used are OBJ and FBX. Knowing how to handle these formats is crucial for a successful import.
- Adjusting scale and orientation: Roblox models may not match Blender\"s default scale and orientation. After importing, adjustments might be needed to ensure the model\"s size and rotation align with Blender\"s grid and world space.
- Texturing and materials: Roblox models come with their own textures and materials, which may not always import seamlessly into Blender. Familiarizing yourself with Blender\"s material and texturing systems will help you recreate or refine the appearance of your Roblox models in Blender.
By bridging the gap between Roblox\"s user-friendly design and Blender\"s sophisticated toolset, creators can bring their Roblox avatars and models to life with advanced animations, rendering, and customization not possible within Roblox Studio alone. This understanding forms the foundation for successfully integrating Roblox models into Blender\"s versatile 3D environment.
Step-by-Step Guide to Exporting Roblox Models
Exporting Roblox models for use in Blender involves several steps, primarily focused on converting your creations into a format that can be easily imported into Blender. Follow this guide to ensure a smooth transition of your Roblox models into Blender\"s 3D workspace.
- Open Roblox Studio: Start by opening Roblox Studio, the development environment used for creating games and experiences in Roblox. Ensure you have the necessary permissions to edit the game or model you wish to export.
- Select the Model: In Roblox Studio, navigate to the workspace and select the model or avatar you wish to export. You can do this by clicking on the model in the Explorer window.
- Export Model: With your model selected, go to the \"File\" menu, then choose \"Export Selection.\" This option allows you to export your model as an .OBJ or .FBX file, both of which are compatible with Blender.
- Choose File Format: In the export window, select the file format you prefer (OBJ or FBX). FBX files are recommended for their ability to store more complex data, such as textures and animations, but OBJ files can also work for simpler models.
- Save the File: Choose a location on your computer to save the exported file. Make sure to note where you save it, as you will need to locate this file when importing into Blender.
- Check for Textures: If your model uses textures, ensure that the texture files are also saved in the same directory as your exported model. Blender will need these files to properly display the model\"s textures.
After completing these steps, your Roblox model will be saved in a format that can be imported into Blender. The next phase involves opening Blender and importing the model, where you can begin to utilize Blender\"s advanced tools for modeling, animation, and rendering to enhance your Roblox creations.

Importing Your Roblox Avatar into Blender
Once you have exported your Roblox avatar or model as an OBJ or FBX file, the next step is to import it into Blender. This process allows you to further customize and animate your avatar using Blender\"s comprehensive suite of tools. Follow these detailed steps to successfully import your Roblox avatar into Blender.
- Open Blender: Launch Blender on your computer. If you don’t have Blender installed, you can download it for free from the official Blender website.
- Start a New Project: Create a new project in Blender by selecting \"File\" > \"New\" > \"General\" from the top menu. This provides you with a fresh workspace.
- Remove Default Objects: Blender projects start with a default cube, camera, and light. Select these objects by clicking on them while holding the Shift key, then press the Delete key to remove them, clearing the workspace for your Roblox model.
- Import Your Model: Go to \"File\" > \"Import\" and select the file type of your exported Roblox model (either .OBJ or .FBX). Navigate to where you saved your exported model, select it, and click \"Import OBJ/FBX.\"
- Adjust the Model Scale and Orientation: Roblox models may not match the scale and orientation of Blender\"s default settings. You can adjust the scale, rotation, and position of your model from the properties panel or by using the transform tools (G for move, R for rotate, S for scale).
- Check Textures and Materials: If your model included textures, ensure they are correctly applied in Blender. You may need to manually assign textures to the model by accessing the \"Shader Editor\" and creating new material nodes for each texture.
- Save Your Blender Project: Don’t forget to save your Blender project by going to \"File\" > \"Save As\" and choosing a location on your computer. This will allow you to return to your project and continue working on it later.
By following these steps, your Roblox avatar will now be imported into Blender, ready for further editing, animation, and rendering. This process opens up new possibilities for enhancing your Roblox creations with Blender\"s powerful 3D modeling and animation tools.

Navigating Blender\"s Interface with Roblox Models
Navigating Blender\"s interface can initially seem daunting, especially when working with imported Roblox models. However, understanding the layout and tools available can greatly enhance your 3D modeling and animation workflow. This section will guide you through the basics of Blender\"s interface and how to effectively manage Roblox models within it.
- Understanding Blender\"s Layout: Blender\"s interface is divided into several areas including the 3D viewport, timeline, outliner, and properties panel. The 3D viewport is where you\"ll spend most of your time, as it\"s where you can view and interact with your model. The timeline at the bottom is useful for animation, the outliner displays a hierarchical list of all objects in the scene, and the properties panel allows you to adjust details of the selected object or material.
- Zoom, Pan, and Rotate: In the 3D viewport, you can zoom in and out with the mouse scroll wheel, pan the view by holding Shift and dragging the middle mouse button, and rotate the view by dragging the middle mouse button without holding Shift.
- Selecting and Moving Objects: Click on an object to select it. Once selected, you can move it by pressing G (grab), rotate it with R, and scale it with S. You can also use the manipulator widget in the viewport for a more visual method of transforming objects.
- Editing Mode: To edit the geometry of your Roblox model, switch from Object Mode to Edit Mode by selecting the model, then pressing Tab. In Edit Mode, you can select vertices, edges, or faces to move, scale, or extrude.
- Applying Textures and Materials: The properties panel on the right side of the interface allows you to add materials and textures to your model. By selecting the material properties tab (shaped like a little sphere), you can create new materials or assign existing ones, and adjust their properties such as color, reflectivity, and texture.
- Using the Outliner: The outliner is crucial for managing complex scenes. It allows you to select, hide, lock, or organize objects into collections, making it easier to work on specific parts of your model without interference from other elements.
- Rendering Your Scene: Once you\"re satisfied with your model, you can render it by going to the Render menu and selecting \"Render Image\" or \"Render Animation\" for stills or animations, respectively. The properties panel lets you adjust render settings like resolution, samples, and output format.
By familiarizing yourself with these key aspects of Blender\"s interface, you\"ll find it much easier to navigate and utilize its powerful features for enhancing your Roblox models. Practice and experimentation are the best ways to become more comfortable and efficient in using Blender.

Adjusting and Customizing Avatars in Blender
Blender offers a wide range of tools and features for adjusting and customizing your Roblox avatars, allowing you to enhance and personalize them beyond the initial import. Here\"s a step-by-step guide to help you make the most out of your avatars in Blender.
- Switch to Edit Mode: With your imported Roblox avatar selected in the 3D viewport, press Tab to switch from Object Mode to Edit Mode. This mode allows you to modify the geometry of your avatar.
- Select Vertices, Edges, or Faces: In Edit Mode, you can select individual vertices, edges, or faces to move, scale, or rotate them. Use the mouse to select and the G (grab), R (rotate), and S (scale) keys to manipulate your selection.
- Use Proportional Editing: For smoother transformations, enable Proportional Editing by pressing O. This allows you to affect a broader area around your selection for more natural adjustments. Scroll the mouse wheel to adjust the influence radius.
- Modify Materials and Textures: Go to the Material Properties section in the properties panel to adjust or add new materials to your avatar. You can customize colors, add textures, and tweak other material properties like specular highlights and transparency.
- Add Custom Meshes: You can further customize your avatar by adding new meshes (such as clothing or accessories) using the Add menu in the 3D viewport. Position, scale, and attach these new meshes to your avatar as desired.
- Use Armatures for Rigging: For more advanced customization, you can create or import an armature (skeleton) and parent your avatar to it for posing or animation. Select your avatar, shift-select the armature, then press Ctrl+P and choose a parenting method, like \"With Automatic Weights\" for automatic skinning.
- Animate Your Avatar: With your avatar rigged, switch to Pose Mode by selecting the armature and pressing Ctrl+Tab. You can now pose your avatar by selecting bones and using the transform tools. To animate, insert keyframes for bone positions at different points on the timeline.
By following these steps, you can adjust and customize your Roblox avatars in Blender, taking advantage of the software\"s powerful modeling, texturing, and animation tools. Whether you\"re refining shapes, adding custom elements, or preparing your avatar for animation, Blender provides the flexibility to bring your creative visions to life.
_HOOK_
Alternative Methods for Importing Models
While the standard method of exporting and importing models as OBJ or FBX files is widely used, there are alternative methods that can be employed to bring Roblox models into Blender. These alternatives can be useful in scenarios where direct export and import do not meet your specific needs or when looking for a workflow that suits your project better.
- Using Third-Party Tools: There are several third-party applications and plugins designed to facilitate the transfer of models from Roblox to Blender. These tools often offer additional features such as batch exporting or enhanced texture handling. Be sure to use reputable sources and check for compatibility with your versions of Roblox Studio and Blender.
- Blender Add-ons: The Blender community has developed numerous add-ons that can import various file formats or even directly interact with other software. Search for add-ons that specifically mention compatibility with Roblox models or the file formats that Roblox exports to.
- Manual Reconstruction: In cases where direct import is not possible, or the model requires significant modifications, manually reconstructing the model in Blender based on the Roblox original can be a viable option. This method allows for greater control over the final appearance and topology of the model but is more time-consuming.
- Scripted Import: For those with programming knowledge, Blender\"s Python API allows for the creation of scripts that can automate the import process. This can include converting file formats, applying transformations, or setting up materials and textures automatically.
- Conversion through Intermediate Software: Sometimes, converting a Roblox model into an intermediary format using another piece of software before importing it into Blender can solve compatibility issues. Software like Unity or Unreal Engine can import certain formats that Blender might struggle with, and then re-export them in a more Blender-friendly format.
Each of these alternative methods has its own set of advantages and challenges. Depending on the complexity of your Roblox model, the level of detail you wish to preserve, and your personal proficiency with different software tools, you may find one of these alternatives to be more suited to your project\"s needs. Experimentation and research into the specifics of each method will help you determine the best approach for importing your Roblox models into Blender.

Common Issues and Troubleshooting Tips
Importing Roblox avatars into Blender can sometimes present challenges, but most issues encountered by users are common and can be resolved with a few troubleshooting steps. Here\"s a list of frequent problems and how to address them:
- Textures Not Appearing: If your model\"s textures don\"t appear in Blender, ensure that you\"ve correctly imported the texture files along with the model. You may need to manually assign these textures in Blender\"s Shader Editor by linking them to the appropriate material nodes.
- Model Scale Is Incorrect: Roblox models might import into Blender at an unexpected scale. To fix this, select your model in the 3D viewport, press S (scale), and adjust the size. Use Blender\"s grid as a reference to get the scale right, or manually enter the scale dimensions in the properties panel.
- Model Orientation Is Off: If your model is not oriented correctly, select it, press R (rotate), and adjust the rotation manually. You can also enter specific rotation values in the properties panel for precise adjustments.
- Missing Parts: Sometimes, parts of your model may not import correctly. This could be due to issues during the export process from Roblox Studio. Double-check the export settings and ensure all parts of the model are selected and included in the export file.
- File Import Errors: If Blender fails to import your file, verify that you\"re using a supported file format (OBJ or FBX). Also, check for any corruption in the file by trying to re-export the model from Roblox Studio.
- Animation Data Not Importing: Blender may not automatically import animation data with the model. This often requires a separate process or the use of specific import options that support animations. Ensure that the FBX import settings are configured to include animations.
- Performance Issues with High-Poly Models: Large or complex Roblox models can cause performance slowdowns in Blender. To improve performance, consider simplifying the model in Roblox Studio before export, or use Blender\"s decimate modifier to reduce polygon count while preserving the model\"s overall shape.
By addressing these common issues with the provided troubleshooting tips, you can overcome most obstacles encountered when importing Roblox avatars into Blender. Remember, patience and experimentation are key to resolving technical challenges in 3D modeling and animation workflows.
Enhancing Your Avatars with Advanced Blender Features
After successfully importing your Roblox avatar into Blender, you can leverage Blender\"s advanced features to enhance and elevate your avatar\"s appearance and functionality. These features allow for detailed customization, realistic animations, and high-quality renders. Here are some ways to utilize Blender\"s capabilities to their fullest:
- Sculpting for Detailed Customization: Blender\"s sculpting tools enable you to add intricate details to your avatar that aren\"t possible in Roblox. Access Sculpt Mode from the mode menu, and use brushes to refine your avatar\"s features or add new elements like clothing folds, facial expressions, and textures.
- Materials and Texturing for Realism: Enhance your avatar\"s realism with advanced materials and textures. Use Blender\"s Shader Editor to create complex materials with nodes. Incorporate PBR (Physically Based Rendering) textures for realistic metal, skin, cloth, and other surfaces.
- Rigging and Weight Painting for Animation: Improve your avatar\"s animation by creating custom rigs or enhancing existing ones. Use weight painting to ensure mesh deformations are natural during movement. Blender\"s rigging tools allow for sophisticated skeletal structures, enabling more dynamic and expressive animations.
- Particle Systems for Effects: Add particle effects like hair, fur, or clothing details to your avatars. Blender\"s particle system can simulate complex effects, making your avatar stand out with dynamic elements that respond realistically to movement and environmental factors.
- Advanced Lighting and Rendering: Utilize Blender\"s rendering engines (Cycles or Eevee) for high-quality visuals. Experiment with advanced lighting techniques, such as HDR lighting and volumetric effects, to achieve professional-grade renders of your avatar in various environments.
- Compositing for Final Touches: In Blender\"s Compositing tab, you can add post-processing effects to your rendered images or animations. Use it to adjust colors, add filters, or incorporate visual effects that enhance the overall look of your avatar.
- Animation Tools for Lifelike Motion: Beyond basic animation, Blender offers advanced tools like the Non-Linear Animation (NLA) editor and the Graph Editor for fine-tuning motions. Create complex animation sequences that bring your avatar to life with realistic gestures and movements.
By tapping into these advanced features, you can transform your Roblox avatars into highly detailed, animated characters suitable for professional-quality projects. Whether you\"re aiming for photorealism or stylized animation, Blender provides the tools necessary to achieve your vision.
Resources and Communities for Further Learning
The journey of mastering Blender and integrating Roblox avatars into your 3D projects is ongoing. Fortunately, there\"s a wealth of resources and vibrant communities available to support your learning and development. Whether you\"re a beginner or looking to refine your skills, these resources can provide guidance, inspiration, and support.
- Blender Tutorials: Official Blender tutorials and user-created video tutorials on platforms like YouTube offer step-by-step instructions on everything from the basics to advanced techniques.
- Online Forums and Communities: Join forums such as Blender Artists, the Blender subreddit, and Roblox developer forums. These communities are great for asking questions, sharing projects, and receiving feedback from experienced users.
- Blender Documentation: The official Blender manual is an exhaustive resource covering all aspects of the software. It\"s constantly updated to reflect the latest features and how to use them.
- Books and E-books: There are numerous books and e-books available that cater to learning Blender. These range from introductory guides to in-depth analyses of specific Blender functionalities.
- Workshops and Online Courses: Platforms like Udemy, Coursera, and Skillshare offer courses on Blender and game development, including specific tutorials on character design and animation.
- Blender Add-ons and Tools: Explore the Blender Market or Gumroad for add-ons that can simplify tasks, automate processes, or add new capabilities to your workflow.
- Meetups and Conferences: Participate in Blender meetups, conferences, and online webinars to connect with other enthusiasts and professionals. These events are opportunities to learn directly from experts in the field.
By engaging with these resources and communities, you\"ll not only improve your technical skills but also gain insights into creative approaches and industry trends. Remember, the process of learning and improvement is continuous, and being part of a community can make it more enriching and enjoyable.
READ MORE:
Conclusion and Next Steps in Blender 3D Modeling
Importing your Roblox avatar into Blender opens a realm of creative possibilities, from detailed customization to intricate animation. This guide has walked you through the essential steps to bring your Roblox characters into Blender, adjust and customize them, and even solve common issues you might face during the process. But the journey doesn\"t end here. The world of 3D modeling and animation is vast, and continuous learning and experimentation are key to mastering it.
As you move forward, consider these next steps to enhance your skills and creations:
- Practice Regularly: The best way to improve is by doing. Set aside regular time to explore Blender\"s features and apply what you\"ve learned to new projects.
- Take on Challenges: Participate in online challenges or personal projects that push your boundaries. This can be a great way to learn new techniques and problem-solving strategies.
- Learn from the Community: Engage with the Blender and Roblox communities. Feedback from other creators can provide invaluable insights that help you grow.
- Explore Advanced Features: As you become more comfortable with Blender, start experimenting with its more advanced features, such as physics simulations, particle systems, and node-based compositing.
- Contribute to Projects: Collaborating with others on projects can enhance your skills, expand your portfolio, and even open up professional opportunities.
Remember, the journey in 3D modeling and animation is unique for everyone. There\"s always something new to learn, whether it\"s a technique, a tool, or a way of thinking about your projects. Keep exploring, stay curious, and let your creativity lead the way. Happy modeling!
Embark on a journey to bring your Roblox avatars to life in Blender, unlocking endless possibilities for creativity and customization. Follow our comprehensive guide to transform your 3D modeling skills and unleash the potential of your virtual creations.
_HOOK_