Topic blender roblox animation: Discover the exciting world of Blender Roblox animation with our comprehensive guide, designed to take you from novice to expert through easy-to-follow steps and insider tips for creating stunning animations for your Roblox games.
Table of Content
- What is the process of importing Blender animations into Roblox?
- Getting Started with Blender and Roblox
- Exporting and Importing Models
- Using Roblox Blender Plugin
- Creating Animations in Blender for Roblox
- Additional Resources and Tutorials
- Exporting and Importing Models
- Using Roblox Blender Plugin
- Creating Animations in Blender for Roblox
- YOUTUBE: Roblox Blender Animation Tutorial | Roblox Studio Blender
- Additional Resources and Tutorials
- Using Roblox Blender Plugin
- Creating Animations in Blender for Roblox
- Additional Resources and Tutorials
- Creating Animations in Blender for Roblox
- Additional Resources and Tutorials
- Additional Resources and Tutorials
- Introduction to Blender for Roblox Animations
- Step-by-Step Guide: Creating Your First Animation
- Exporting Models from Blender to Roblox Studio
- Optimizing Blender Models for Roblox Games
- Advanced Animation Techniques in Blender for Roblox
- Using the Roblox Blender Plugin for Efficient Workflow
- Common Pitfalls and How to Avoid Them
- Resources for Learning and Mastering Blender Animations
- Community Insights: Success Stories and Tips
- Future Trends in Blender and Roblox Development
What is the process of importing Blender animations into Roblox?
To import Blender animations into Roblox, follow these steps:
- First, create your animation in Blender. Make sure to rig and animate your character in Blender according to your desired movements.
- Export your animation from Blender using the appropriate format supported by Roblox. One common format is FBX.
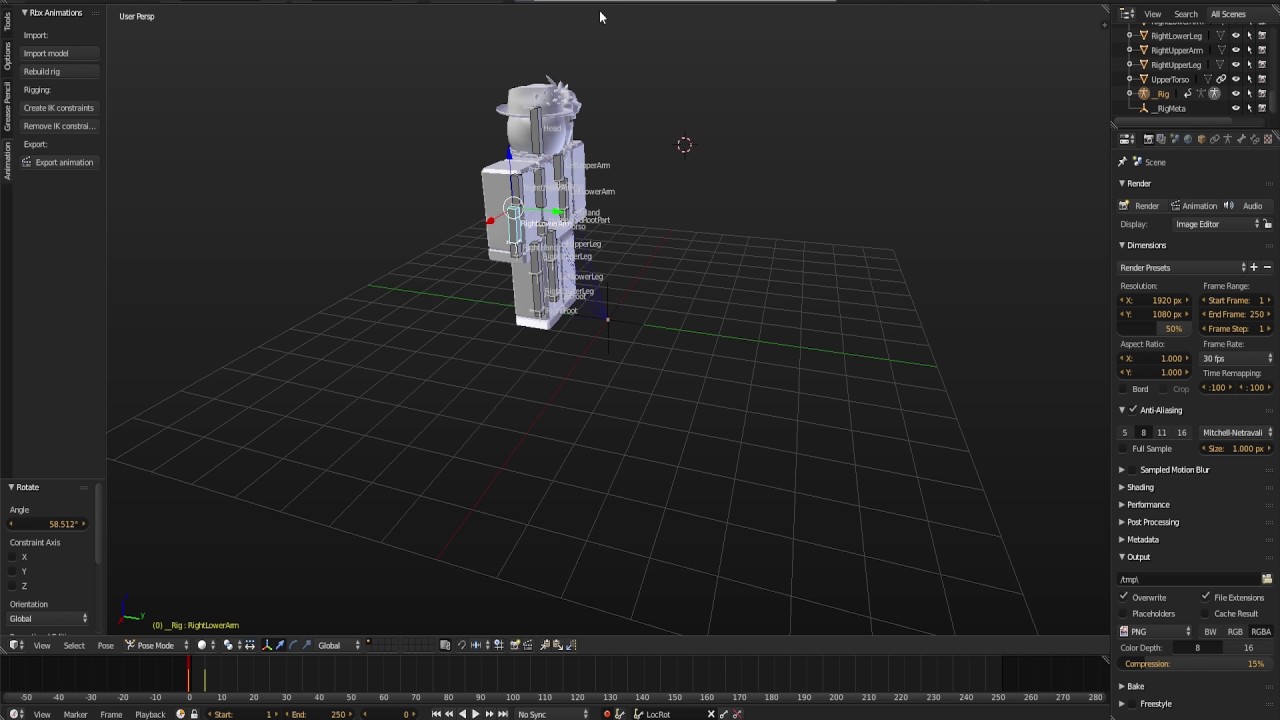
- In Roblox Studio, go to the \"Plugins\" tab and enable the \"Blender rig exporter/animation importer\" plugin.
- Click on the Rig of your character in Roblox Studio to select it.
- With the Rig selected, go to the \"Plugins\" menu and choose the option to import the animation. Select the exported animation file from Blender.
- If successful, the imported animation will now be applied to your character in Roblox.
READ MORE:
Getting Started with Blender and Roblox
- Download and install the latest version of Blender.
- Ensure you have the Roblox Studio installed and set up for importing animations.

Exporting and Importing Models
- Use Blender to create your 3D model or animation.
- Export your model from Blender in the .obj file format.
- Import the .obj file into Roblox Studio to use in your game.

Using Roblox Blender Plugin
The Roblox Blender Plugin simplifies the process of transferring models and animations between Blender and Roblox Studio.
- Link your Roblox account with Blender.
- Directly upload 3D models to Roblox without leaving Blender.
- Reduce errors and save time with efficient workflow integration.

Creating Animations in Blender for Roblox
Design animations in Blender and export them for use in Roblox:
- Create your animation using Blender\"s powerful animation tools.
- Export the animation and import it into Roblox Studio.
- Use the Animation Editor in Roblox Studio to fine-tune and implement the animation in your game.
_HOOK_
Additional Resources and Tutorials
For more detailed instructions and tutorials, consider the following resources:
- Online forums and communities dedicated to Roblox development.
- YouTube tutorials covering the entire process from modeling to animation in Blender for Roblox.
- Official Roblox and Blender documentation for up-to-date guides and best practices.
By following these guidelines and utilizing available resources, you can create dynamic and custom animations for your Roblox games using Blender.

Exporting and Importing Models
- Use Blender to create your 3D model or animation.
- Export your model from Blender in the .obj file format.
- Import the .obj file into Roblox Studio to use in your game.
Using Roblox Blender Plugin
The Roblox Blender Plugin simplifies the process of transferring models and animations between Blender and Roblox Studio.
- Link your Roblox account with Blender.
- Directly upload 3D models to Roblox without leaving Blender.
- Reduce errors and save time with efficient workflow integration.

Creating Animations in Blender for Roblox
Design animations in Blender and export them for use in Roblox:
- Create your animation using Blender\"s powerful animation tools.
- Export the animation and import it into Roblox Studio.
- Use the Animation Editor in Roblox Studio to fine-tune and implement the animation in your game.

Roblox Blender Animation Tutorial | Roblox Studio Blender
Tutorial: Explore this engaging tutorial video that simplifies complex concepts with clear explanations and helpful visuals. Learn new skills and techniques in a fun and easy-to-follow format that will leave you feeling confident and inspired. Magician: Step into the mesmerizing world of magic with this captivating video featuring a talented magician performing mind-blowing tricks and illusions. Be prepared to be amazed and entertained by the magic of sleight of hand and mystery.
The Failed Magician Blender Animation
And for my next trick... I will make YOU disappear! Join the Discord: https://discord.gg/zsajrfyamH Twitter: ...
Additional Resources and Tutorials
For more detailed instructions and tutorials, consider the following resources:
- Online forums and communities dedicated to Roblox development.
- YouTube tutorials covering the entire process from modeling to animation in Blender for Roblox.
- Official Roblox and Blender documentation for up-to-date guides and best practices.
By following these guidelines and utilizing available resources, you can create dynamic and custom animations for your Roblox games using Blender.

_HOOK_
Using Roblox Blender Plugin
The Roblox Blender Plugin simplifies the process of transferring models and animations between Blender and Roblox Studio.
- Link your Roblox account with Blender.
- Directly upload 3D models to Roblox without leaving Blender.
- Reduce errors and save time with efficient workflow integration.
Creating Animations in Blender for Roblox
Design animations in Blender and export them for use in Roblox:
- Create your animation using Blender\"s powerful animation tools.
- Export the animation and import it into Roblox Studio.
- Use the Animation Editor in Roblox Studio to fine-tune and implement the animation in your game.
Additional Resources and Tutorials
For more detailed instructions and tutorials, consider the following resources:
- Online forums and communities dedicated to Roblox development.
- YouTube tutorials covering the entire process from modeling to animation in Blender for Roblox.
- Official Roblox and Blender documentation for up-to-date guides and best practices.
By following these guidelines and utilizing available resources, you can create dynamic and custom animations for your Roblox games using Blender.
_HOOK_
Additional Resources and Tutorials
For more detailed instructions and tutorials, consider the following resources:
- Online forums and communities dedicated to Roblox development.
- YouTube tutorials covering the entire process from modeling to animation in Blender for Roblox.
- Official Roblox and Blender documentation for up-to-date guides and best practices.
By following these guidelines and utilizing available resources, you can create dynamic and custom animations for your Roblox games using Blender.
Introduction to Blender for Roblox Animations
Blender is a powerful, free, and open-source 3D creation suite that offers extensive capabilities for creating animated models and scenes. When combined with Roblox, a global platform where millions of people gather to create, share, and play games, Blender becomes an invaluable tool for developing custom animations and models. This introduction will guide you through the basics of using Blender for Roblox animations, highlighting how to leverage its features to enhance your Roblox games.
Starting with Blender for Roblox animations involves understanding the interface, modeling basics, and the animation process. Blender\"s interface may initially seem daunting, but it\"s designed for efficient workflow once you become familiar with it. The software supports everything from modeling, rigging, and animation to rendering, compositing, and motion tracking, making it ideal for creating detailed characters and dynamic animations for Roblox.
- Getting Started: Download and install Blender, then familiarize yourself with its interface. Learn about the 3D viewport, object mode, edit mode, and the properties panel.
- Modeling for Roblox: Begin by modeling simple objects and gradually move to more complex structures. Pay attention to Roblox\"s performance guidelines to ensure your models are optimized for gameplay.
- Rigging and Animation: Rigging is the process of creating a skeleton for your model so it can move. After rigging, use Blender\"s animation tools to bring your characters to life with custom animations.
- Exporting to Roblox: Once your models and animations are ready, export them using the appropriate format supported by Roblox. This often involves using a plugin to streamline the process.
Blender\"s versatility allows for the creation of intricate animations that can be directly imported into Roblox, enhancing the visual appeal and interactivity of your games. Whether you\"re aiming to create simple character movements or complex cinematic sequences, Blender offers the tools necessary to achieve your creative vision. Embrace the learning curve, and you\"ll soon unlock the full potential of combining Blender\"s robust features with the limitless possibilities of Roblox development.
Step-by-Step Guide: Creating Your First Animation
Creating your first animation in Blender for Roblox can seem daunting, but with the right guidance, it becomes an exciting journey into the world of 3D animation. This step-by-step guide will walk you through the process, from setting up your Blender environment to exporting your animation for use in Roblox. Follow these steps to create a basic animation and bring your Roblox characters and objects to life.
- Install Blender: Ensure you have the latest version of Blender installed on your computer. Blender is free and available for download from the official Blender website.
- Open Blender and Set Up Your Scene: Start by opening Blender and setting up a new scene. Familiarize yourself with the interface if you\"re a first-time user.
- Import Your Roblox Model: Use the Roblox Studio to export your model as an FBX file, then import this file into Blender. Make sure your model is optimized for Blender to handle efficiently.
- Create a Rig: For character animations, you\"ll need to create a rig or skeleton. This can be done manually in Blender or by using automatic rigging tools available within Blender or through third-party addons.
- Position Your Model: Before animating, position your model in the starting pose. Use Blender\"s 3D viewport to adjust the position and orientation of your model.
- Animate Your Model: With your model rigged and in place, start animating by creating keyframes. Move to a different point in the timeline, adjust your model\"s pose, and insert another keyframe. Blender will interpolate the movement between these keyframes, creating animation.
- Refine Your Animation: Use the timeline and graph editor in Blender to refine your animation. You can adjust the timing, smooth out movements, and add more keyframes for complex animations.
- Preview Your Animation: Regularly preview your animation within Blender to ensure it looks as intended. Adjust as necessary until you\"re satisfied with the result.
- Export Your Animation: Once your animation is complete, export it from Blender in a format compatible with Roblox, typically as an FBX file. This file will include both the model and the animation data.
- Import Into Roblox: Finally, import your FBX file into Roblox Studio. You may need to adjust settings or use specific plugins to ensure the animation plays correctly within Roblox.
By following these steps, you\"ll create a basic animation that can add life and interactivity to your Roblox games. Remember, practice and experimentation are key to mastering Blender\"s animation tools and creating more complex and dynamic animations.
Exporting Models from Blender to Roblox Studio
Exporting models from Blender to Roblox Studio is a pivotal step in integrating custom 3D designs into your Roblox games. This guide provides a straightforward process to ensure your Blender models transition smoothly into Roblox Studio, ready for game development.
- Finalize Your Model in Blender: Before exporting, ensure your model is complete and optimized for Roblox. This includes applying any textures, reducing polygon count for performance, and confirming the scale.
- Choose the Right Export Format: Roblox Studio primarily supports the FBX format for importing models. Ensure your model is selected and go to File > Export > FBX (.fbx) in Blender.
- Configure Export Settings: In the export window, adjust the settings for compatibility with Roblox. This typically involves selecting \"Selected Objects\", setting \"Scale\" to 1.00, and under \"Geometry\", enabling \"Apply Modifiers\". Ensure \"Armatures\" and \"Mesh\" are included if your model has rigging or animation.
- Export Textures Properly: If your model uses textures, ensure they are packed with the model by selecting \"Path Mode\" as \"Copy\" and clicking on \"Embed Textures\" in the FBX export options. This step is crucial for the textures to appear correctly in Roblox.
- Importing into Roblox Studio: With your FBX file ready, open Roblox Studio and navigate to the Toolbox. Use the \"Import\" feature to upload your FBX file. You may need to adjust the import settings to match your model\"s scale and orientation.
- Adjusting the Model in Roblox Studio: Once imported, you might need to make further adjustments to the model\"s position, scale, or collision settings to ensure it works as intended within your game environment.
- Testing Your Model: After importing and adjusting your model, test it within Roblox Studio to check for any issues with scaling, textures, or animations and make any necessary corrections.
By following these steps, you can seamlessly export models from Blender to Roblox Studio, bringing your custom creations into the vast world of Roblox game development. Remember, attention to detail during the export process can significantly impact how your models appear and perform in-game.
Optimizing Blender Models for Roblox Games
Optimizing your Blender models for Roblox games is crucial for ensuring smooth gameplay and enhancing the player experience. This process involves reducing file sizes, simplifying geometries, and ensuring textures are efficiently used. Follow these steps to optimize your models effectively.
- Reduce Polygon Count: High polygon counts can significantly impact game performance. Use Blender\"s decimate modifier to reduce the number of polygons in your model without drastically altering its appearance.
- Simplify Textures: Large, high-resolution textures can slow down your game. Optimize textures by reducing their resolution or using UV mapping to create efficient texture layouts that maintain visual quality at lower resolutions.
- Limit the Use of Materials: Each unique material adds to the processing load. Try to use as few materials as possible by combining similar textures and using texture atlases where feasible.
- Apply Modifiers: Before exporting, apply any modifiers to your model. This reduces the complexity of the model and ensures compatibility with Roblox Studio.
- Check Model Scale: Incorrect scaling can lead to unexpected results in Roblox. Ensure your model\"s scale is set correctly in Blender before exporting to avoid scaling issues in Roblox Studio.
- Use Baked Textures: Baking textures allows you to simulate high-detail effects on low-polygon models. This technique is especially useful for static objects in your scene.
- Optimize Animations: If your model includes animations, ensure they are optimized by removing unnecessary keyframes and simplifying movements.
- Preview and Test: Utilize Blender\"s performance tools to preview your model\"s impact on performance. Check the model in Roblox Studio after importing to ensure it behaves as expected.
By following these optimization strategies, you can create Blender models that not only look great but also perform well in Roblox games. Effective optimization helps maintain a high frame rate, ensuring a smooth and enjoyable gaming experience for all players.
_HOOK_
Advanced Animation Techniques in Blender for Roblox
Advancing your animation skills in Blender for Roblox games can significantly enhance the quality and interactivity of your game environments and characters. This section delves into more sophisticated animation techniques that can help bring your Roblox creations to life with greater realism and dynamism.
- Utilizing NLA Editor for Complex Animations: The Non-Linear Animation (NLA) Editor in Blender allows for the layering and blending of different animation actions. This tool is perfect for creating complex sequences where multiple actions need to occur simultaneously or smoothly transition between each other.
- Implementing Rigging with Inverse Kinematics: For more natural movement of characters, use Inverse Kinematics (IK) in your rigging process. IK simplifies the animation of articulated structures by allowing for jointed limbs to be positioned using the end effector, making the animation of walking, running, or interacting with the environment more intuitive.
- Shape Keys for Facial Expressions: Shape keys in Blender can be used to animate facial expressions and mouth movements for speaking characters. This technique allows for precise control over facial features and can be combined with audio files in Roblox to create synchronized voiceovers or reactions.
- Custom Animation Drivers for Automated Movements: Drivers in Blender can automate the animation process for repetitive or physics-based movements. For example, drivers can be used to create bouncing effects, automate walk cycles, or simulate environmental interactions without manually keyframing each movement.
- Advanced Texturing and Material Animations: Beyond model animation, Blender allows for the animation of textures and materials. This can be used to create effects such as changing weather, transitions from day to night, or visual effects like glowing or pulsating objects within Roblox games.
- Physics-Based Simulations for Realistic Movements: Blender\"s physics engine can be used to simulate realistic movements and interactions. While these simulations need to be baked into animations for use in Roblox, they can add a level of realism to environmental effects like cloth movement, hair dynamics, or the scattering of objects.
- Baking Animations for Performance: To ensure smooth performance in Roblox, complex animations should be baked. This process converts the animations into a format that is easier for Roblox to process, ensuring that intricate animations do not negatively impact game performance.
Mastering these advanced techniques requires practice and experimentation, but they offer the potential to significantly elevate the quality of your animations in Roblox games. By integrating these skills into your workflow, you can create more engaging and immersive experiences for players.
Using the Roblox Blender Plugin for Efficient Workflow
Integrating Blender and Roblox Studio can streamline your 3D modeling and animation workflow, significantly reducing the time spent on exporting and importing files. The Roblox Blender Plugin is a powerful tool designed to facilitate this integration, allowing for a more efficient process when creating and updating models and animations for Roblox games.
- Installation: Begin by installing the Roblox Blender Plugin. This can usually be done by downloading the plugin from a trusted source and installing it within Blender\"s add-on section found in the preferences menu.
- Linking Your Roblox Account: Once installed, you will need to link your Roblox account to the plugin. This step is crucial for enabling the direct upload of assets from Blender to Roblox Studio.
- Preparing Your Model or Animation: Before using the plugin, ensure your model or animation is ready for export. This includes applying any necessary textures, making sure the model is properly rigged, and ensuring animations are correctly set up.
- Exporting Assets: With your model or animation ready, use the plugin to export your assets directly to Roblox Studio. The plugin should provide options for selecting which assets to export and where they should be uploaded within your Roblox account.
- Setting Up in Roblox Studio: After uploading, open Roblox Studio to find your assets. You may need to configure them within Studio, such as setting up collision properties, ensuring textures are correctly applied, and linking animations to models.
- Testing and Iteration: Test your models and animations within Roblox Studio to ensure they work as expected. The plugin allows for easy updates and iterations, so you can quickly make changes in Blender and re-export to Roblox Studio as needed.
By leveraging the Roblox Blender Plugin, developers can enjoy a seamless workflow between Blender and Roblox Studio, enhancing productivity and allowing for more time to be spent on creative aspects of game development. This efficient workflow is invaluable for both novice and experienced developers aiming to elevate the quality of their Roblox games.
Common Pitfalls and How to Avoid Them
When creating animations and models in Blender for Roblox games, there are several common pitfalls that can hinder the quality and efficiency of your workflow. Being aware of these pitfalls and knowing how to avoid them can save you time and improve the quality of your Roblox projects.
- Ignoring Roblox\"s Performance Guidelines: Always keep Roblox\"s performance and optimization guidelines in mind. Overly complex models and high-resolution textures can cause lag in your game. Aim to simplify models and use lower resolution textures where possible.
- Incorrect Scaling: Models imported from Blender can appear too large or too small in Roblox Studio. To avoid this, always check and adjust the scale of your models in Blender before exporting. Use the Roblox Studio\"s scale reference to ensure compatibility.
- Not Using the Correct Export Settings: When exporting models from Blender to Roblox, using the incorrect format or settings can lead to issues. Ensure you export models in the FBX format and double-check that all necessary options (like including textures) are selected.
- Overlooking Rigging Issues: Improperly rigged models can result in unnatural movements. Pay close attention to your rigging process, ensuring that bones are correctly placed and weighted. Utilize Blender\"s weight painting tools to fine-tune the rig.
- Forgetting to Apply Modifiers: Before exporting your model, remember to apply all modifiers. Unapplied modifiers will not be transferred to Roblox Studio, which could result in missing details or deformations.
- Not Optimizing Animations: Complex animations with unnecessary keyframes can increase file size and reduce game performance. Simplify your animations by removing extraneous keyframes and ensuring they are as efficient as possible.
- Lack of Testing: Always import and test your models and animations in Roblox Studio before finalizing your game. This allows you to catch and correct any issues that may not be evident in Blender.
By avoiding these common pitfalls, you can streamline your Blender to Roblox workflow, ensuring your models and animations are both high-quality and game-ready.
Resources for Learning and Mastering Blender Animations
Gaining proficiency in Blender for Roblox animations requires access to quality learning resources. Whether you\"re a beginner or looking to refine your skills, numerous tutorials, guides, and communities are available to assist your journey. Here\"s a compilation of resources to help you learn and master Blender animations for Roblox.
- Blender Official Tutorials: Start with the basics by exploring the tutorials available on Blender\"s official website. These cover everything from introductory concepts to advanced animation techniques.
- Roblox Developer Hub: The Roblox Developer Hub offers guides and tutorials specifically tailored to integrating Blender models and animations into Roblox games, including how to use the Roblox Blender plugin efficiently.
- YouTube Tutorials: YouTube is a goldmine for learning Blender animation, with countless tutorials ranging from beginner to advanced levels. Channels like Blender Guru, CG Geek, and Ducky 3D provide valuable insights and step-by-step guides.
- Udemy and Coursera Courses: For more structured learning, consider enrolling in online courses available on platforms like Udemy and Coursera. These courses often cover Blender animations in depth and can range from free to paid options.
- Blender Community Forums: Joining the Blender community forums can provide support, feedback, and answers to specific questions you may encounter. Engaging with the community can also offer inspiration and new techniques to try.
- Blender Stack Exchange: For troubleshooting and technical questions, Blender Stack Exchange is a valuable resource where you can ask questions and receive answers from experienced Blender users.
- Books and E-Books: There are several comprehensive books and e-books on Blender that cover a wide range of topics, including animation. Titles like \"Blender For Dummies\" and \"The Complete Guide to Blender Graphics\" are great for beginners and intermediate users alike.
- Practice and Personal Projects: Finally, the best way to learn is by doing. Apply what you\"ve learned through tutorials and courses by working on personal projects. This hands-on experience is invaluable in mastering Blender animations.
With dedication and the right resources, you can develop the skills needed to create captivating animations for your Roblox games using Blender. Remember, learning is a continuous process, so stay curious and keep exploring new techniques and tools.
Community Insights: Success Stories and Tips
The Roblox and Blender communities are rich sources of inspiration and practical advice for animators and game developers. Learning from the experiences of others can accelerate your learning curve and inspire your creative projects. Here are some success stories and tips gleaned from the community.
- Start Small: Many successful Roblox game developers emphasize the importance of starting with small, manageable projects. This approach allows you to learn the basics of Blender animation and Roblox game development without becoming overwhelmed.
- Utilize Community Tutorials: The Roblox Developer Forum and Blender community websites are treasure troves of tutorials and guides. These resources range from beginner to advanced levels, covering everything from basic modeling techniques to complex animation workflows.
- Experiment with Plugins: Both Roblox and Blender support plugins that can streamline your workflow. The Roblox Blender plugin, for example, simplifies the process of importing and exporting models and animations. Experimenting with these tools can significantly enhance your efficiency.
- Join Community Challenges: Participating in community challenges and contests is a great way to push your skills to new levels. These events not only motivate you to complete projects but also provide an opportunity to receive feedback from peers.
- Learn from Others\" Projects: Analyzing and deconstructing other developers\" games and animations can provide valuable insights into effective design and animation techniques. Many creators are open to sharing their processes and learning materials.
- Share Your Work: Don\"t hesitate to share your projects with the community. Receiving constructive feedback is crucial for improvement. Moreover, sharing your success stories and tips can help others on their creative journeys.
Engaging with the community can be incredibly rewarding, offering both support and inspiration. Whether you\"re seeking advice on overcoming a specific challenge or looking for new ideas, the collective wisdom of the Roblox and Blender communities is an invaluable resource.
_HOOK_
READ MORE:
Future Trends in Blender and Roblox Development
As the worlds of Blender and Roblox development continue to evolve, several future trends are emerging that promise to shape the creation and integration of 3D content. These trends reflect advancements in technology, community collaboration, and the increasing demand for immersive and interactive digital experiences.
- Increased Integration: With Roblox joining the Blender Development Fund, expect deeper integration between Blender and Roblox. This collaboration could lead to more streamlined workflows, enhanced tools for creators, and perhaps even dedicated features within Blender tailored for Roblox developers.
- Advanced Animation Techniques: As Blender continues to evolve, new animation features and techniques will become available. These advancements will allow Roblox developers to create more complex and lifelike animations, enhancing the visual appeal and engagement of games.
- Improved Real-time Rendering: The development of EEVEE, Blender\"s real-time render engine, and its integration with Roblox could significantly reduce the time it takes to preview and iterate on 3D models and animations, making the development process faster and more efficient.
- More Robust Plugin Support: The future will likely bring more robust support for plugins that bridge Blender and Roblox, simplifying the export and import process of models, textures, and animations and enabling a more seamless transition between creation and game implementation.
- Community-driven Development: Both Blender and Roblox have vibrant communities that drive innovation through shared resources, tutorials, and plugins. As these communities grow, expect to see a surge in user-generated content and tools that enhance the capabilities of both platforms.
- Focus on Optimization: As games become more complex, optimization will become increasingly important. Future trends may include more sophisticated tools and techniques in Blender for optimizing models and animations for Roblox, ensuring smoother gameplay and lower resource consumption.
- Virtual and Augmented Reality: With the growing interest in VR and AR, future developments in Blender and Roblox may focus on creating more immersive experiences. This could involve new tools and features for developing VR and AR content directly within Blender for use in Roblox games.
These trends highlight the dynamic and evolving relationship between Blender and Roblox development. By staying informed and adapting to these changes, creators can leverage the strengths of both platforms to produce innovative and captivating gaming experiences.
Embark on a creative journey with Blender and Roblox to bring your imaginative worlds to life. With dedication and the right resources, you can master the art of animation and game development, transforming your vision into reality.