Topic how to make roblox accessories in blender: Discover the exciting world of custom accessory creation in Roblox with Blender, where creativity meets functionality. This guide will empower you to bring your unique visions to life, enhancing your gaming experience.
Table of Content
- What are the steps for making Roblox accessories in Blender?
- Getting Started
- Modeling Your Accessory
- Texturing and Coloring
- Exporting and Importing to Roblox
- Finalizing Your Accessory
- Tips and Best Practices
- Modeling Your Accessory
- Texturing and Coloring
- YOUTUBE: How to Make Roblox UGC Hats and Earn Robux: Simple Mesh Texture Guide for Blender Beginners
- Exporting and Importing to Roblox
- Finalizing Your Accessory
- Tips and Best Practices
- Texturing and Coloring
- Exporting and Importing to Roblox
- Finalizing Your Accessory
- Tips and Best Practices
- Exporting and Importing to Roblox
- Finalizing Your Accessory
- Tips and Best Practices
- Finalizing Your Accessory
- Tips and Best Practices
- Tips and Best Practices
- Introduction to Creating Roblox Accessories with Blender
- Essential Tools and Software Requirements
- Understanding Blender\"s Interface for Roblox Accessory Design
- Step-by-Step Guide to Modeling Accessories in Blender
- Texturing and Coloring Your Roblox Accessories
- Exporting Your Model from Blender to Roblox
- Importing and Configuring Accessories in Roblox Studio
- Testing and Optimizing Your Accessory for Roblox
- Navigating Roblox\"s UGC Guidelines for Accessory Submission
- Advanced Tips and Tricks for Professional Quality Accessories
- Common Pitfalls to Avoid When Designing Accessories
- Community Resources and Support for Blender Creators
What are the steps for making Roblox accessories in Blender?
To make Roblox accessories in Blender, you can follow these steps:
- Download and install Blender from the official website: Blender Download.
- Learn the basics of Blender if you are new to the software. There are many tutorials available online to help you get started.
- Create your accessory design in Blender by using 3D modeling tools and techniques.
- Make sure to create the accessory within the size and design guidelines provided by Roblox for accessories.
- Once your accessory design is ready, export the model in a compatible format like .OBJ or .FBX.
- Import the exported model into Roblox Studio to test and adjust the accessory\'s position and scale.
- Use the Roblox Asset Creator tool to upload your accessory design to Roblox.
- Fill in the necessary details and information for your accessory, such as name, description, and pricing.
- Publish your accessory to make it available for purchase or use in Roblox games.
READ MORE:
Getting Started
- Ensure you have Blender and Roblox Studio installed on your computer.
- Download the Roblox Studio plugin for Blender to streamline the workflow.
Modeling Your Accessory
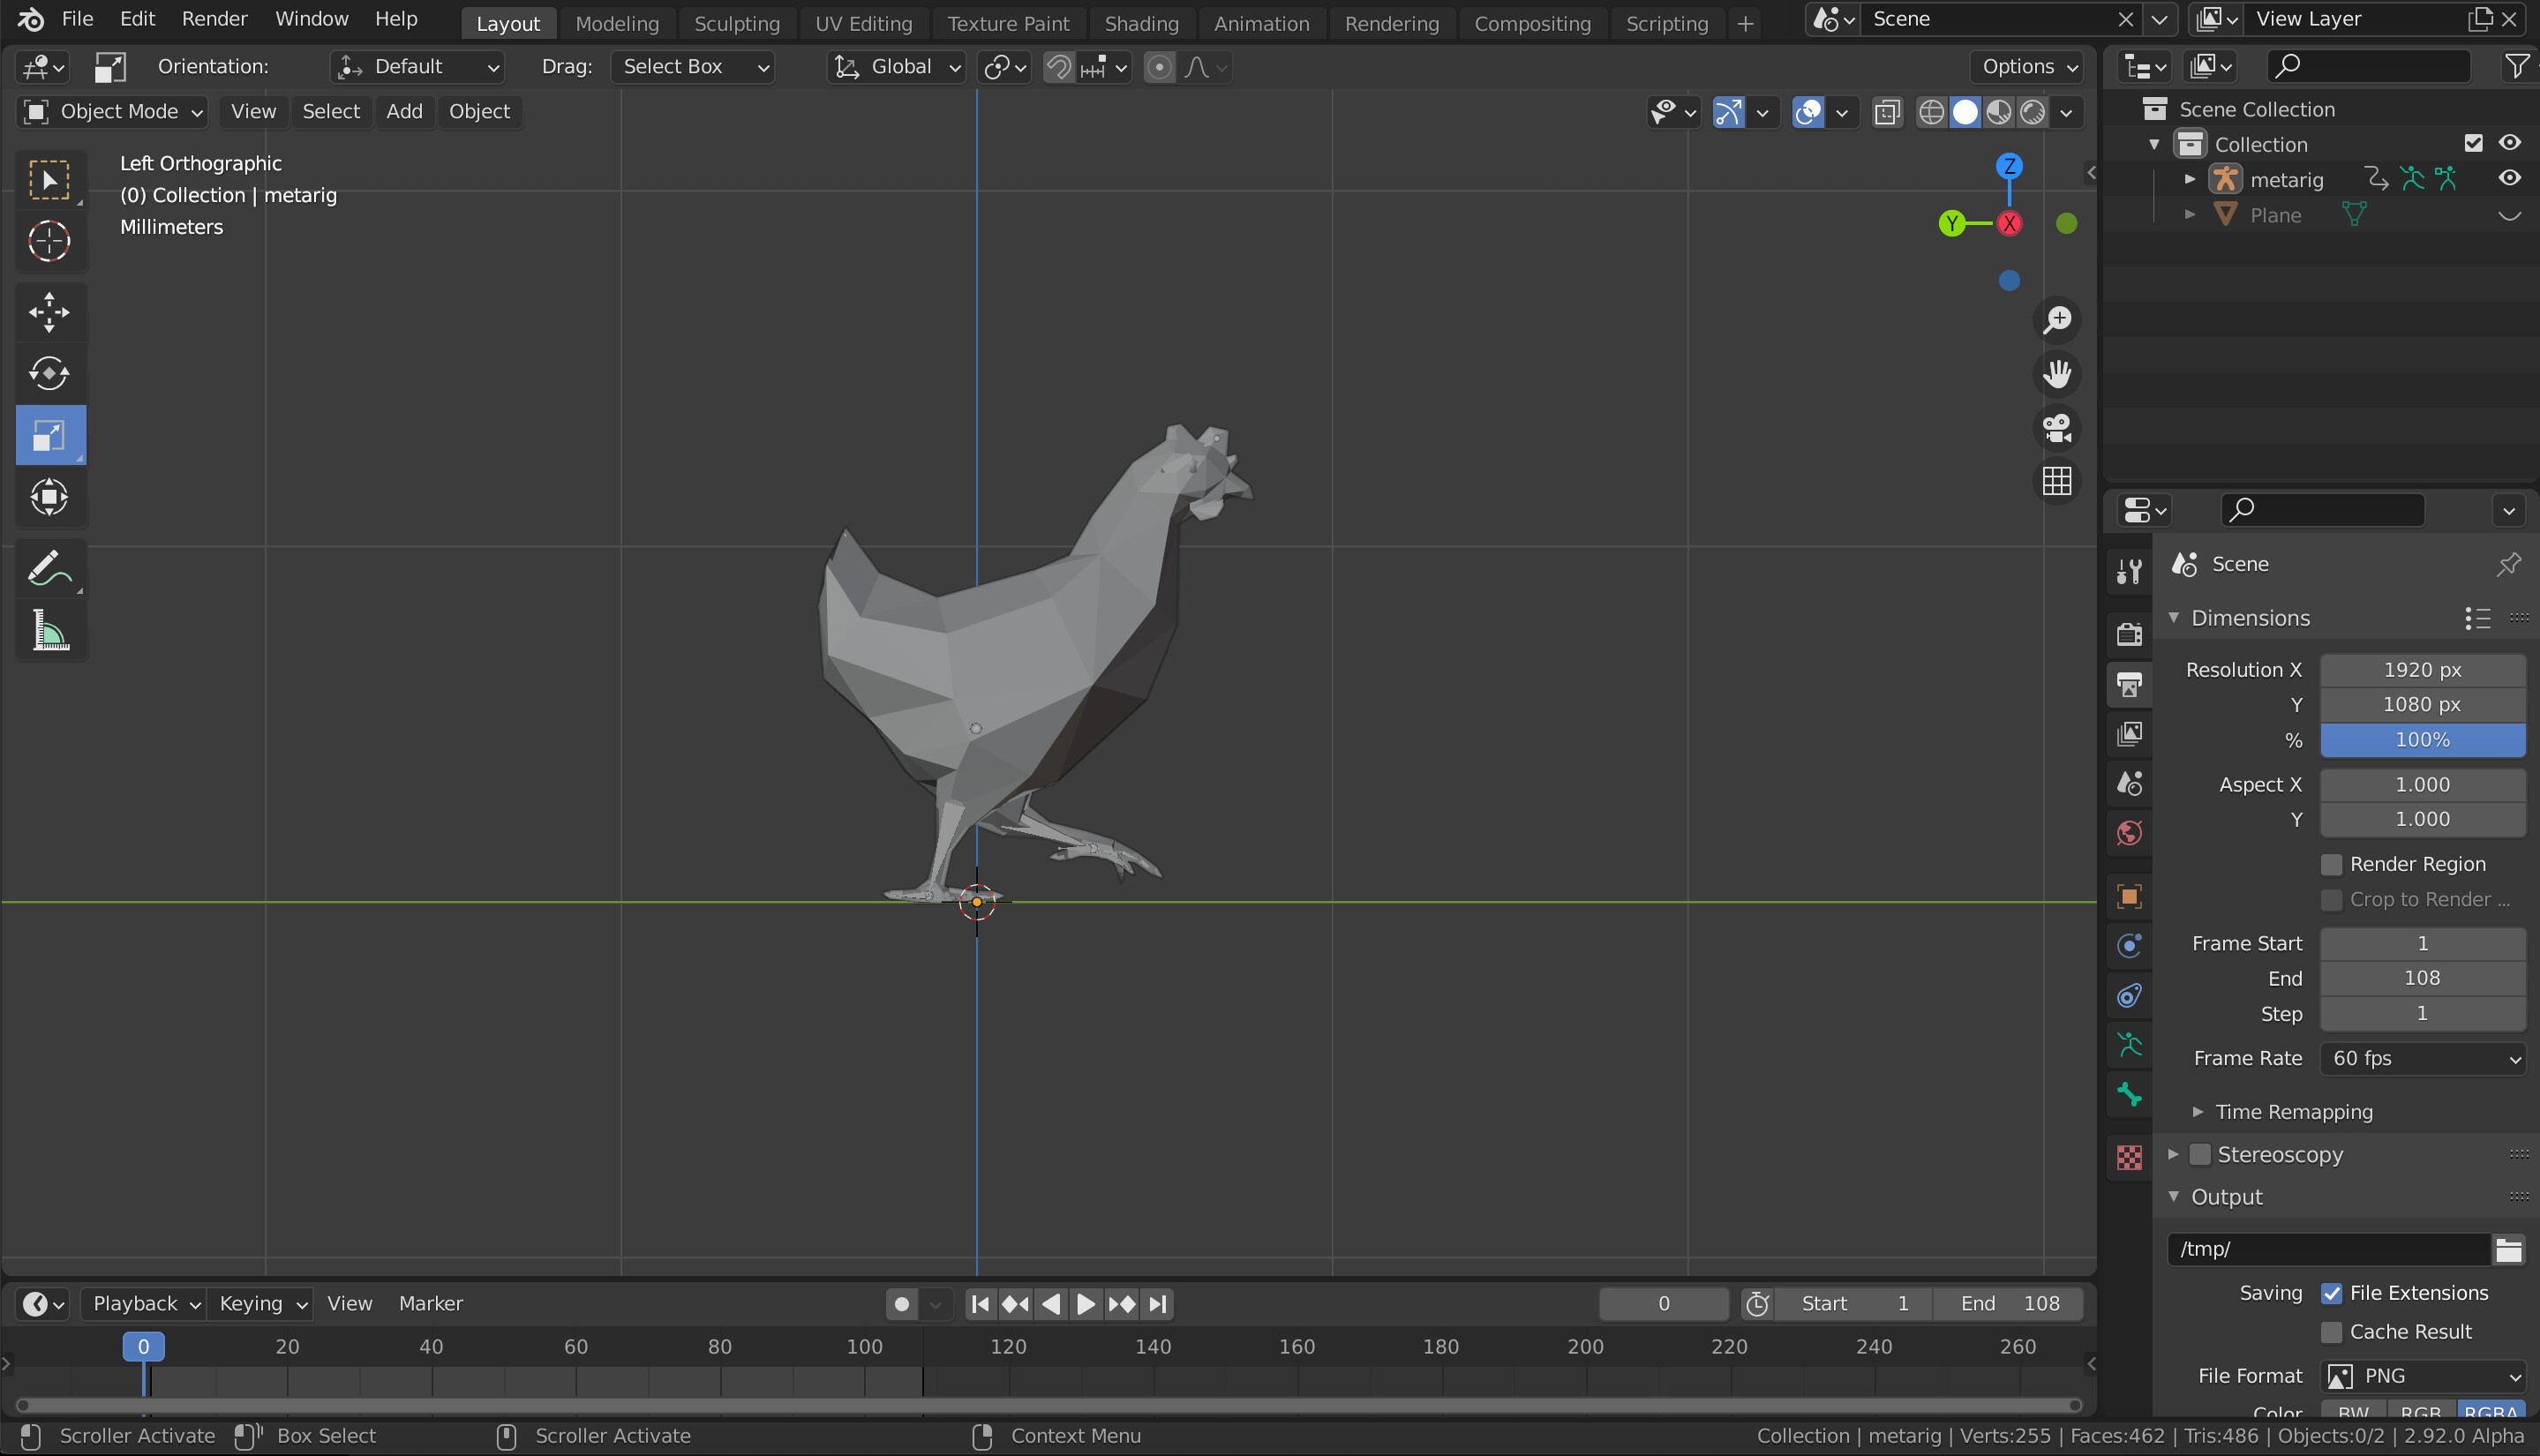
Open Blender and start a new project.
- Press A to select all default objects and press X to delete them.
- Use the import function to bring in any reference models if needed.
- Model your accessory, paying close attention to the scale and detail to ensure it fits the Roblox avatar correctly.
Texturing and Coloring
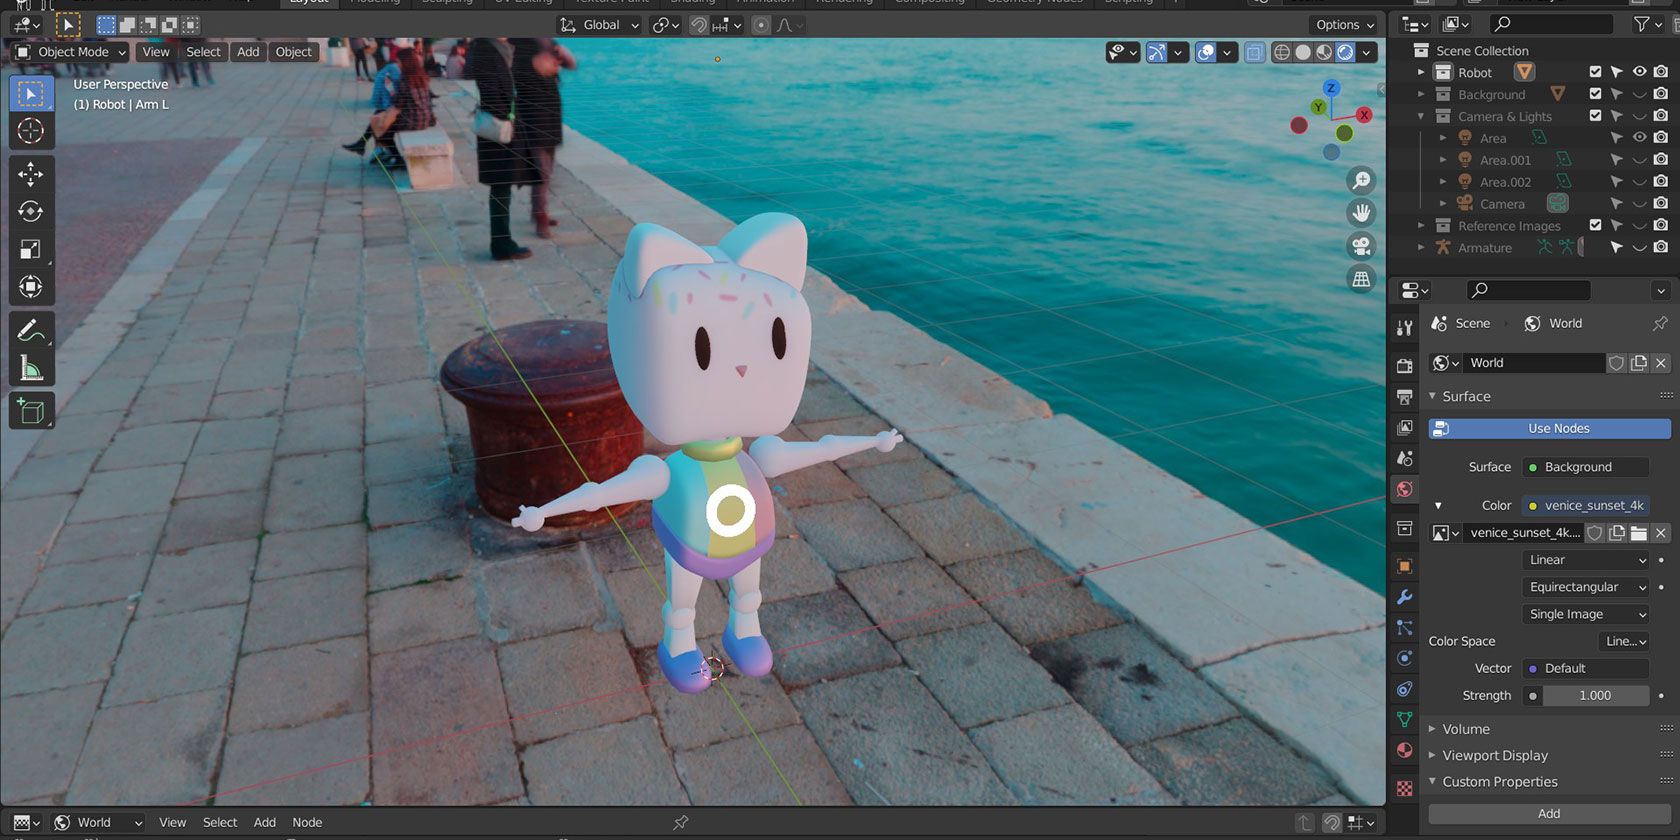
Once your model is complete, you can add textures and colors to it.
- Switch to the Texture Paint mode to paint your model directly in Blender.
- Alternatively, you can use image textures for more complex designs.

Exporting and Importing to Roblox
After finishing your model and applying textures:
- Export your model from Blender in the FBX format.
- In Roblox Studio, use the imported model and adjust its properties to fit your needs.

_HOOK_
Finalizing Your Accessory
Before publishing your accessory, ensure it meets Roblox\"s accessory requirements and guidelines.
- Check the accessory\"s scale, orientation, and attachment points.
- Submit your accessory for review through the Roblox UGC (User Generated Content) program, if applicable.

Tips and Best Practices
- Keep your models optimized to ensure they do not exceed Roblox\"s polygon count limits.
- Test your accessory on different avatars to ensure compatibility.
- Stay creative and experiment with different designs and functionalities.
With practice and patience, you\"ll be able to create unique and exciting accessories for the Roblox platform. Happy designing!

Modeling Your Accessory
Open Blender and start a new project.
- Press A to select all default objects and press X to delete them.
- Use the import function to bring in any reference models if needed.
- Model your accessory, paying close attention to the scale and detail to ensure it fits the Roblox avatar correctly.

Texturing and Coloring
Once your model is complete, you can add textures and colors to it.
- Switch to the Texture Paint mode to paint your model directly in Blender.
- Alternatively, you can use image textures for more complex designs.
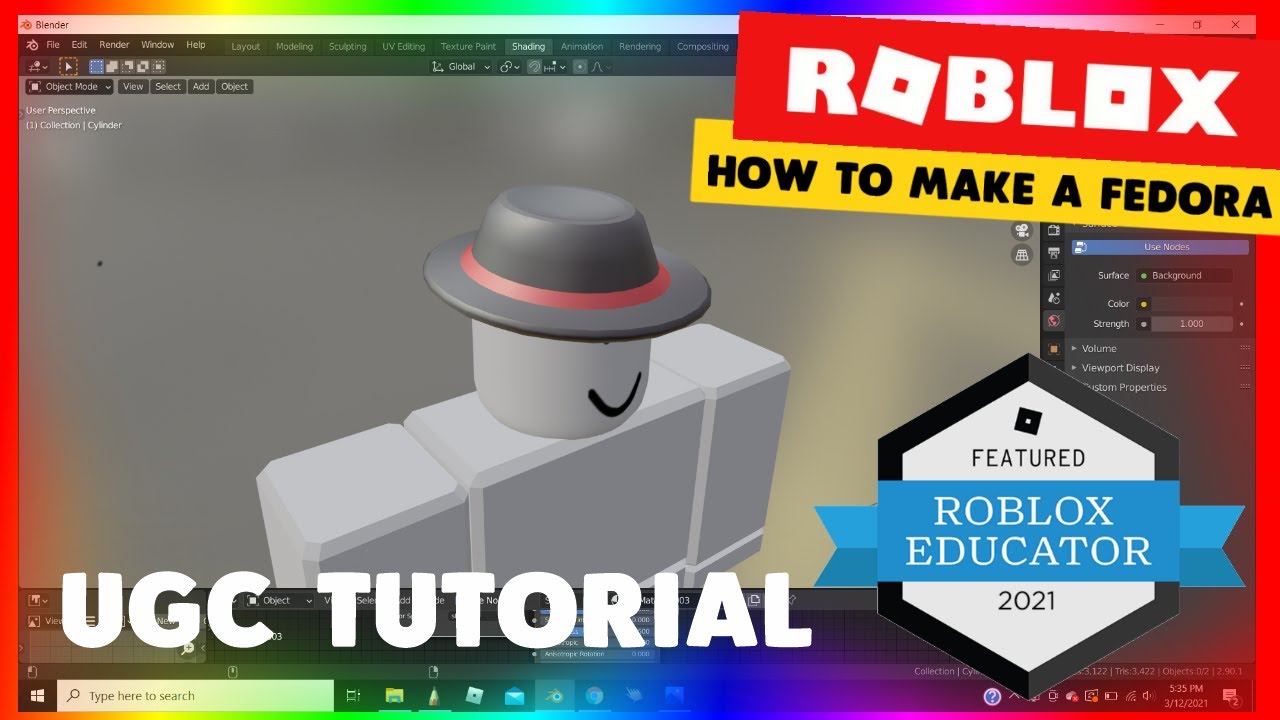
How to Make Roblox UGC Hats and Earn Robux: Simple Mesh Texture Guide for Blender Beginners
Tutorial: Dive into our engaging and informative tutorial video that will guide you step by step to master the art of creating stunning visual projects. Learn useful techniques and enhance your skills today! Blender: Join us in exploring the incredible world of Blender in our captivating video. Unleash your creativity as we showcase the endless possibilities of this powerful software for 3D modeling and animation.
How to Make Roblox Accessories in Blender UGC
Cheers RoBuilder. I\'ll buy you a coffee if this video does well.
Exporting and Importing to Roblox
After finishing your model and applying textures:
- Export your model from Blender in the FBX format.
- In Roblox Studio, use the imported model and adjust its properties to fit your needs.
_HOOK_
Finalizing Your Accessory
Before publishing your accessory, ensure it meets Roblox\"s accessory requirements and guidelines.
- Check the accessory\"s scale, orientation, and attachment points.
- Submit your accessory for review through the Roblox UGC (User Generated Content) program, if applicable.
Tips and Best Practices
- Keep your models optimized to ensure they do not exceed Roblox\"s polygon count limits.
- Test your accessory on different avatars to ensure compatibility.
- Stay creative and experiment with different designs and functionalities.
With practice and patience, you\"ll be able to create unique and exciting accessories for the Roblox platform. Happy designing!
Texturing and Coloring
Once your model is complete, you can add textures and colors to it.
- Switch to the Texture Paint mode to paint your model directly in Blender.
- Alternatively, you can use image textures for more complex designs.
Exporting and Importing to Roblox
After finishing your model and applying textures:
- Export your model from Blender in the FBX format.
- In Roblox Studio, use the imported model and adjust its properties to fit your needs.
Finalizing Your Accessory
Before publishing your accessory, ensure it meets Roblox\"s accessory requirements and guidelines.
- Check the accessory\"s scale, orientation, and attachment points.
- Submit your accessory for review through the Roblox UGC (User Generated Content) program, if applicable.
_HOOK_
Tips and Best Practices
- Keep your models optimized to ensure they do not exceed Roblox\"s polygon count limits.
- Test your accessory on different avatars to ensure compatibility.
- Stay creative and experiment with different designs and functionalities.
With practice and patience, you\"ll be able to create unique and exciting accessories for the Roblox platform. Happy designing!
Exporting and Importing to Roblox
After finishing your model and applying textures:
- Export your model from Blender in the FBX format.
- In Roblox Studio, use the imported model and adjust its properties to fit your needs.
Finalizing Your Accessory
Before publishing your accessory, ensure it meets Roblox\"s accessory requirements and guidelines.
- Check the accessory\"s scale, orientation, and attachment points.
- Submit your accessory for review through the Roblox UGC (User Generated Content) program, if applicable.
Tips and Best Practices
- Keep your models optimized to ensure they do not exceed Roblox\"s polygon count limits.
- Test your accessory on different avatars to ensure compatibility.
- Stay creative and experiment with different designs and functionalities.
With practice and patience, you\"ll be able to create unique and exciting accessories for the Roblox platform. Happy designing!
Finalizing Your Accessory
Before publishing your accessory, ensure it meets Roblox\"s accessory requirements and guidelines.
- Check the accessory\"s scale, orientation, and attachment points.
- Submit your accessory for review through the Roblox UGC (User Generated Content) program, if applicable.
_HOOK_
Tips and Best Practices
- Keep your models optimized to ensure they do not exceed Roblox\"s polygon count limits.
- Test your accessory on different avatars to ensure compatibility.
- Stay creative and experiment with different designs and functionalities.
With practice and patience, you\"ll be able to create unique and exciting accessories for the Roblox platform. Happy designing!
Introduction to Creating Roblox Accessories with Blender
Blender is a powerful free and open-source 3D modeling software that provides Roblox creators with the tools they need to design custom accessories. This introductory guide will cover the basics of creating Roblox accessories using Blender, from setting up your workspace to importing your designs into Roblox Studio.
- Understanding Roblox Accessories: Accessories in Roblox can range from hats and glasses to backpacks and swords. They are 3D objects that players can equip on their avatars to personalize their appearance in-game.
- Getting Started with Blender: Before diving into accessory creation, familiarize yourself with Blender’s interface and tools. Blender offers comprehensive functionalities for modeling, texturing, and animating your designs.
- Modeling Your Accessory: Begin by sketching out your accessory idea. Then, use Blender\"s modeling tools to bring your concept to life. Pay attention to the scale and proportions to ensure it fits the Roblox avatar correctly.
- Texturing and Coloring: After modeling your accessory, the next step is to add textures and colors. Blender allows you to paint directly onto your model or apply image textures for more detailed designs.
- Exporting for Roblox: Once your accessory is complete, you’ll need to export it in a format compatible with Roblox Studio. The most commonly used format is FBX, which preserves your model\"s textures and details.
- Importing into Roblox Studio: The final step is to import your accessory into Roblox Studio. Here, you can adjust its properties, set the attachment points, and prepare it for publishing on the Roblox platform.
This process opens up endless possibilities for creativity and customization in Roblox, allowing you to craft unique items that stand out in the game. Whether you’re a seasoned Blender user or new to 3D modeling, following these steps will help you start creating custom Roblox accessories.
Essential Tools and Software Requirements
Creating Roblox accessories in Blender requires specific tools and software to ensure a smooth and efficient workflow. Here\"s what you\"ll need to get started:
- Blender: The primary 3D modeling software used for designing the accessories. Ensure you have the latest version installed to take advantage of all features.
- Roblox Studio: Essential for importing and configuring your accessories within Roblox. It\"s where you\"ll upload your creations to the platform.
- Roblox Blender Plugin: This add-on streamlines the process of transferring models from Blender to Roblox Studio, saving time and reducing errors.
- FBX Exporter: Blender\"s built-in exporter is used to save your models in a format that Roblox Studio can import.
- Image Editing Software: For creating and editing textures. Software like Adobe Photoshop or GIMP works well, but any program that can output PNG or JPEG files is suitable.
- Internet Connection: Required for accessing Roblox Studio, downloading necessary plugins, and uploading your final accessories.
Before starting your project, ensure that Blender is configured correctly for Roblox accessory creation. This includes setting up the unit scale to match Roblox\"s dimensions and familiarizing yourself with exporting models in the FBX format. With these tools and preparations, you\"re well-equipped to begin crafting unique accessories for the Roblox community.
Understanding Blender\"s Interface for Roblox Accessory Design
Blender\"s interface may initially seem daunting, but it\"s designed to streamline the 3D modeling process for projects like Roblox accessories. Familiarizing yourself with its layout and tools is the first step towards creating custom items. Here are key areas to focus on:
- 3D Viewport: The main area where you\"ll spend most of your time modeling and texturing your accessory. It provides a real-time view of your objects from any angle.
- Properties Panel: This section contains various tabs for adjusting the properties of your scene and objects, including materials, modifiers, and world settings.
- Outliner: A hierarchical list of all the objects in your scene, making it easy to select and manage multiple objects or groups.
- Timeline: Located at the bottom of the default layout, the timeline is essential for animation but can also be used to review your model from different frames.
- Tool Shelf and Modes: Blender offers different modes for specific tasks, such as Edit Mode for adjusting vertices, edges, and faces, and Sculpt Mode for more organic modeling. The tool shelf provides quick access to tools relevant to the active mode.
- Texture and Shading: Understanding how to apply and manage textures and shaders is crucial for creating visually appealing accessories. Blender\"s Node Editor allows for complex material setups.
Start by customizing Blender\"s interface to suit your workflow. You can rearrange panels, save layouts, and create shortcuts for frequently used tools. As you become more familiar with Blender\"s environment, you\"ll find it easier to bring your Roblox accessory ideas to life.
_HOOK_
Step-by-Step Guide to Modeling Accessories in Blender
Modeling Roblox accessories in Blender is an engaging process that allows for high levels of customization and creativity. Follow this detailed guide to create your first accessory:
- Setting Up Your Blender Project: Begin by opening Blender and setting up a new project. Clear the default objects to start with a clean workspace.
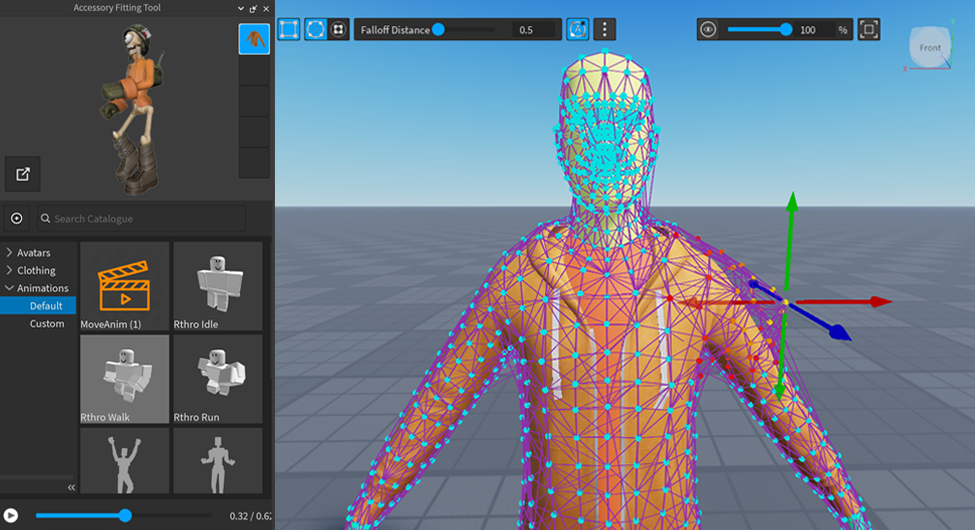
- Importing Roblox Avatar Reference: To ensure accurate sizing, import a Roblox avatar reference model. This will serve as a guide for scaling your accessory correctly.
- Sketching Your Design: Before modeling, sketch out your accessory idea. This step helps in visualizing the final product and planning the modeling process.
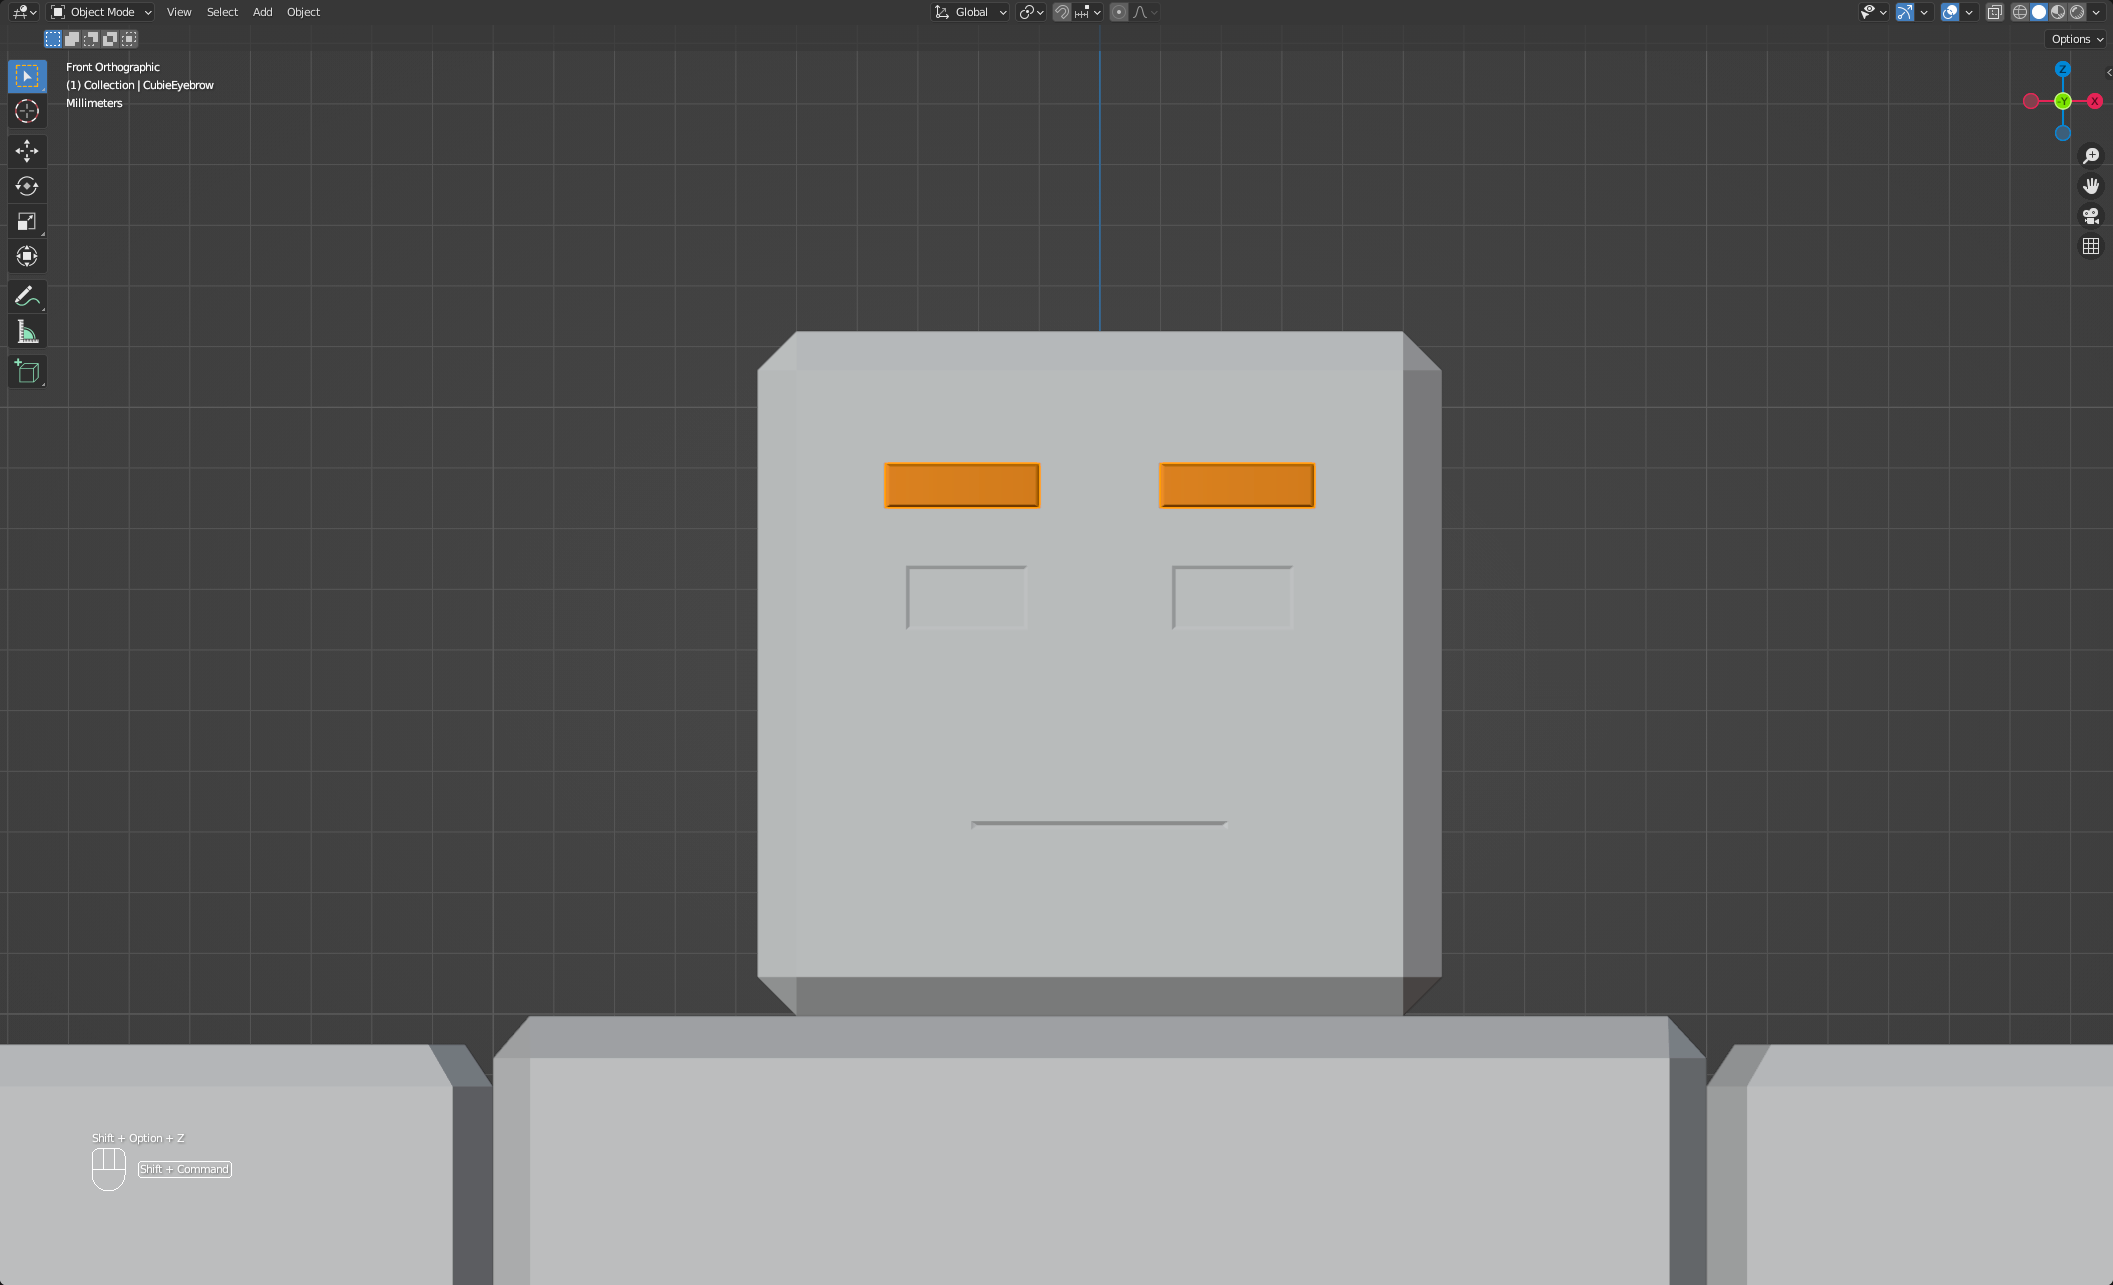
- Modeling the Accessory: Use Blender\"s modeling tools to create your accessory. Focus on the basic shape first, then add details. Pay close attention to vertices, edges, and faces for precision.
- Checking Proportions: Regularly compare your model to the reference avatar to ensure correct proportions and fit.
- Adding Details and Textures: Once the basic shape is modeled, add finer details and apply textures. Blender\"s sculpting tools and texture painting options can enhance your accessory\"s appearance.
- Optimizing Your Model: Keep the polygon count within Roblox\"s limits for accessories. Use modifiers like Decimate to reduce complexity without significantly altering the model\"s appearance.
- Exporting Your Accessory: After completing your model, export it as an FBX file. This format is compatible with Roblox Studio and retains the model\"s textures and details.
Through these steps, you\"ll learn the fundamentals of 3D modeling for Roblox accessories in Blender. Each project offers an opportunity to refine your skills and experiment with new ideas.
Texturing and Coloring Your Roblox Accessories
After modeling your Roblox accessory in Blender, the next crucial step is texturing and coloring to bring your creation to life. This section covers how to apply textures and colors to your accessories effectively.
- Preparing Your Model for Texturing: Ensure your model is UV unwrapped. UV unwrapping is the process of projecting a 3D model onto a 2D plane to allow for accurate texture mapping.
- Choosing Textures: Decide whether you want to use image textures or create procedural textures within Blender. Image textures can be photos or artwork you create or find, while procedural textures are generated within Blender and can offer more flexibility.
- Applying Textures: Use Blender\"s Shader Editor to connect your textures to the material nodes of your accessory. This process allows you to fine-tune how the textures appear on your model.
- Coloring Your Accessory: You can add color by editing the base color in the material properties. For more detailed color work, paint directly onto the model in Texture Paint mode or apply vertex colors for simple color variations.
- Testing Textures: Regularly preview your accessory in different lighting conditions within Blender to ensure the textures and colors look as intended under various in-game scenarios.
- Optimizing Textures: Keep an eye on texture resolution and file size to ensure your accessory doesn\"t negatively impact game performance. Roblox has specific limits on texture sizes, so it\"s crucial to optimize accordingly.
Texturing and coloring are where your accessory truly starts to stand out. Experiment with different techniques and tools within Blender to achieve the desired look for your Roblox accessories.
Exporting Your Model from Blender to Roblox
Once you\"ve completed your Roblox accessory in Blender, exporting and importing it into Roblox Studio is the next crucial step. This process transforms your creative work into playable content within Roblox. Follow these detailed steps to ensure a smooth transition:
- Finalizing Your Model: Before exporting, double-check your model for any remaining issues. Ensure it\"s properly textured, the polygon count is within Roblox\"s limits, and it\"s appropriately scaled.
- Choosing the Right Export Format: Roblox Studio supports the FBX format for 3D models. In Blender, go to File > Export > FBX (.fbx) to prepare your model.
- Setting Export Options: In the FBX export options, select \"Mesh\" and \"Armature\" if your accessory includes bones for animation. Make sure to apply scale and set the forward direction to \"-Z Forward\" and the up direction to \"Y Up\" for compatibility with Roblox Studio.
- Exporting Your Accessory: After adjusting the export settings, choose a location to save your FBX file and click \"Export FBX\".
- Importing into Roblox Studio: Open Roblox Studio and the game where you want to add the accessory. In the toolbar, go to the \"View\" tab and open the \"Toolbox\". Select \"My Models\" and click on \"Import\". Find and select your exported FBX file.
- Adjusting Your Accessory in Roblox Studio: Once imported, you may need to adjust the size, position, and orientation of your accessory to fit the Roblox avatar correctly. Use the properties panel in Roblox Studio to make these adjustments.
Exporting and importing your Blender models into Roblox Studio might seem complex at first, but following these steps will help streamline the process. With practice, it will become a seamless part of your Roblox accessory creation workflow.
Importing and Configuring Accessories in Roblox Studio
After successfully exporting your accessory from Blender, the next phase is importing it into Roblox Studio and configuring it for use within the game. This process involves several critical steps to ensure your accessory is ready for Roblox players to enjoy. Follow this guide for a smooth transition:
- Opening Roblox Studio: Start by launching Roblox Studio and opening the project where you intend to add your new accessory.
- Importing the Model: Navigate to the \"View\" tab and select \"Toolbox\", followed by \"My Models\". Click \"Import\", and then select your FBX file exported from Blender.
- Adjusting the Accessory\"s Position: Once imported, your accessory might not be correctly positioned. Use the move and rotate tools in Roblox Studio to align it properly with the avatar\"s body.
- Setting Attachment Points: For the accessory to attach correctly to the avatar, define its attachment point. This ensures that hats sit on heads, glasses on faces, etc., properly.
- Configuring Properties: Adjust the accessory\"s properties, such as its name, description, and whether it\"s wearable by avatars. This step is crucial for identification and usability within Roblox.
- Testing Your Accessory: It\"s important to test your accessory on different avatars to ensure it looks and functions as expected. Pay attention to scale and positioning across various avatar shapes and sizes.
Following these steps will help you effectively import and configure your Blender-made accessories in Roblox Studio, making them ready for publication and use in the vast world of Roblox.
Testing and Optimizing Your Accessory for Roblox
Ensuring your accessory performs well and looks good in Roblox is crucial. This section outlines how to test and optimize your Blender creations for the best player experience.
- Testing in Roblox Studio: Import your accessory into Roblox Studio and attach it to a model. Check for any clipping issues, proper alignment, and general aesthetics. It\"s vital to see how your accessory interacts with various avatar actions and animations.
- Performance Optimization: High-poly models can cause lag. Use Blender\"s decimate modifier to reduce the polygon count without significantly altering the model\"s appearance. Aim for a balance between detail and performance.
- Texture Optimization: Similarly, large textures can impact game performance. Ensure your textures are appropriately sized for Roblox—typically no larger than 1024x1024 pixels for most accessories, and smaller if possible.
- Collision Testing: Roblox automatically generates collision for accessories. Test your accessory in-game to ensure players can move freely without unexpected collisions or getting stuck.
- User Feedback: Once your accessory is functional, consider releasing it to a small group of players for feedback. They can provide valuable insights into its usability, appearance, and any bugs you might have missed.
- Iterative Improvements: Use the feedback and your own observations to make necessary adjustments. This might involve going back to Blender for model adjustments or tweaking textures and then re-importing to Roblox Studio for further testing.
Through careful testing and optimization, you can ensure your accessory not only looks great but also enhances the gameplay experience for Roblox users.
_HOOK_
Navigating Roblox\"s UGC Guidelines for Accessory Submission
Submitting your custom Blender-made accessories to Roblox\"s User-Generated Content (UGC) program involves adhering to specific guidelines to ensure your creations are eligible for publication. Understanding and following these guidelines is crucial for successful submission:
- Adhering to Roblox Community Standards: Your accessory must comply with Roblox\"s community standards, including restrictions on offensive content, copyright infringement, and ensuring a safe environment for all users.
- Technical Specifications: Ensure your accessory meets the technical requirements, such as polygon count limits, file size restrictions, and appropriate use of textures to maintain performance and quality on the platform.
- Originality and Creativity: Roblox encourages unique and creative designs that add value to the community. Your accessory should be your original work and not a direct copy of existing items.
- Proper Use of Tags and Descriptions: Accurately tag and describe your accessory to ensure it\"s easily discoverable and understood by users. Misleading tags or descriptions can lead to rejection.
- Testing for Compatibility: Test your accessory on various avatar models to ensure it works well across different body types and doesn\"t cause clipping or other visual issues.
- Submission Process: Follow the submission process carefully, including filling out any required forms and providing necessary documentation or asset files as requested by Roblox.
By closely adhering to these guidelines, you can increase your chances of having your accessory approved and available for the Roblox community to enjoy.
Advanced Tips and Tricks for Professional Quality Accessories
To elevate your Roblox accessories created in Blender to a professional level, incorporating advanced techniques and attention to detail is key. These tips and tricks will help refine your designs, ensuring they stand out in the Roblox universe.
- Focus on Detail: Adding intricate details can significantly enhance the appearance of your accessories. Consider using Blender\"s sculpting tools to add texture and depth to your models.
- Optimize Your Models: While details are important, optimizing your models to meet Roblox\"s performance standards is crucial. Use modifiers like Decimate to reduce polygon count without compromising the design.
- Realistic Texturing: Employ advanced texturing techniques, such as PBR (Physically Based Rendering) textures, to give your accessories a more realistic look and feel within Roblox\"s environment.
- Efficient UV Mapping: Ensure your UV maps are efficiently laid out to make the most of your textures, reducing seams and maximizing detail.
- Animation and Rigging: If your accessory includes moving parts, learning rigging and animation in Blender can add dynamic elements to your creations, making them more interactive and engaging.
- Lighting and Rendering Previews: Utilize Blender\"s rendering capabilities to create high-quality previews of your accessories. This can help in visualizing the final product and in marketing your designs.
- Continuous Learning: Blender and Roblox are constantly evolving. Stay updated with the latest features and community tips by participating in forums and tutorials.
By integrating these advanced techniques into your workflow, you can create professional-quality Roblox accessories that capture the attention of players and set new standards within the community.
Common Pitfalls to Avoid When Designing Accessories
Designing accessories for Roblox in Blender is an exciting but challenging process. To ensure your creations meet the standards of Roblox and appeal to the community, be mindful of these common pitfalls:
- Ignoring Roblox\"s Technical Specifications: Every accessory must adhere to specific guidelines, including polygon count and texture size. Overlooking these can lead to rejection or poor performance in-game.
- Overlooking Avatar Compatibility: Accessories should be designed to fit all types of Roblox avatars. Failure to test your accessory on different avatar models can result in clipping issues or misalignment.
- Using Copyrighted Material: Incorporating copyrighted designs without permission can lead to legal issues and removal from the Roblox platform. Always create original content or use royalty-free assets.
- Forgetting to Optimize Models: High-detail models can cause lag in-game. Optimize your accessories to balance detail with performance, ensuring a smooth experience for users.
- Neglecting User Feedback: Feedback from the Roblox community can provide valuable insights into how your accessory is received. Ignoring constructive criticism may limit your accessory\"s success.
- Overcomplicating Designs: While detail is important, overly complex designs can detract from an accessory\"s appeal. Keep designs visually clear and easily recognizable for the best user experience.
Avoiding these pitfalls will enhance the quality of your Roblox accessories, making them more likely to be embraced by the community and succeed on the platform.
READ MORE:
Community Resources and Support for Blender Creators
The Blender and Roblox communities are vibrant and supportive, offering a wide range of resources to help creators design and implement their accessories. Utilizing these resources can significantly enhance your skills and streamline your workflow.
- Roblox Developer Forum: A wealth of knowledge and a place to connect with fellow developers. You can find tutorials, feedback on your projects, and solutions to common issues.
- Blender Tutorials on YouTube: YouTube hosts an extensive library of Blender tutorials, covering everything from basic modeling to advanced texturing and rigging techniques specific to Roblox accessory creation.
- Roblox Blender Plugins: Plugins like RBX Blender simplify the process of exporting models from Blender to Roblox, ensuring compatibility and reducing manual work.
- Online Courses and Workshops: Various platforms offer courses on 3D modeling with Blender, many of which are tailored to creating content for games like Roblox.
- Community Templates and Assets: Leverage community-shared templates and assets to speed up your design process. These can serve as a foundation or inspiration for your creations.
- Feedback and Collaboration Groups: Joining groups on social media or Discord servers dedicated to Roblox development can provide feedback, collaboration opportunities, and support from experienced creators.
By tapping into these resources, you can stay updated on the latest techniques, overcome technical challenges, and connect with a community that shares your passion for creating Roblox accessories.
Embark on a creative journey with Blender to design unique Roblox accessories, enhancing your skills and contributing to a vibrant community. Embrace this guide as your starting point to unleash your imagination and create remarkable experiences.