Topic blender roblox rig: Discover how to elevate your Roblox games with custom animations by mastering Blender Roblox rigging, an essential skill for game developers and animators alike.
Table of Content
- What is the process for exporting Roblox rigs into Blender for animation purposes?
- Guide to Rigging and Animating Roblox Characters in Blender
- Introduction to Blender Roblox Rigging
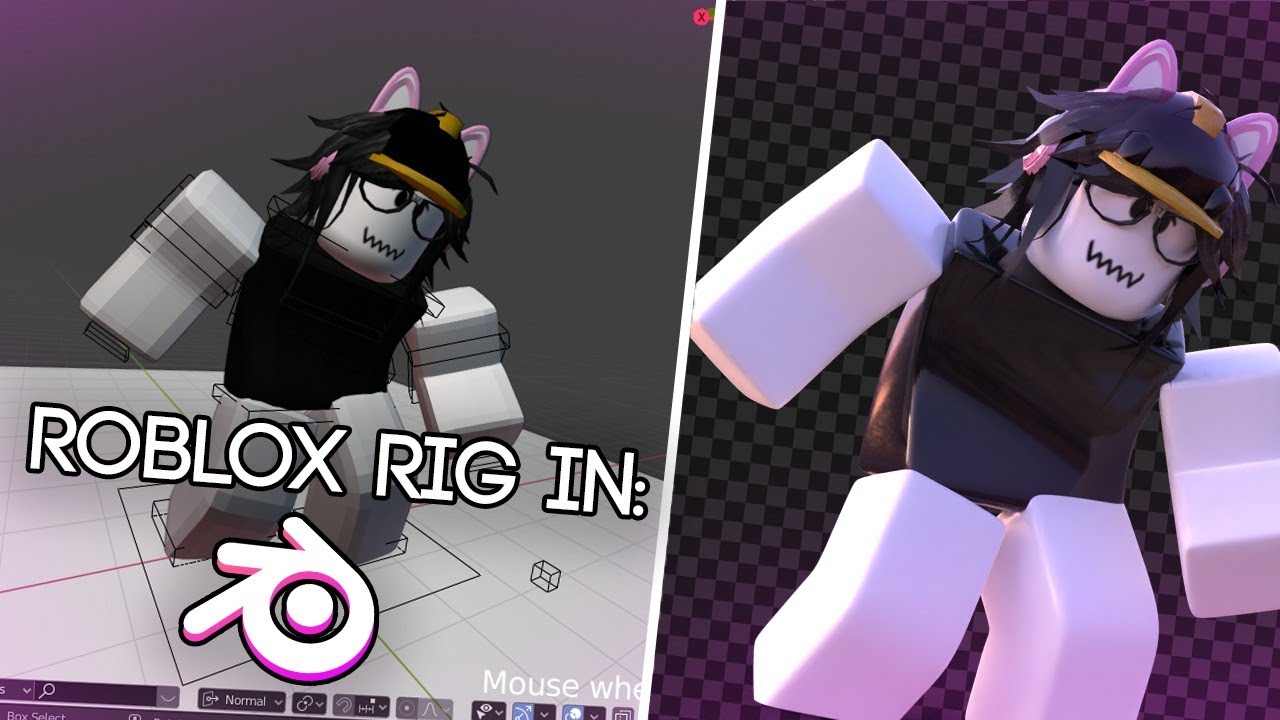
- YOUTUBE: How To Make GFX in 2023 - New FREE Rig
- Why Rig with Blender for Roblox?
- Getting Started: Blender and Roblox Setup
- Step-by-Step Guide to Exporting Roblox Models to Blender
- Comprehensive Rigging Techniques in Blender
- Animating Your Roblox Character in Blender
- Exporting Animations back to Roblox
- Tips for Efficient Workflow and Common Pitfalls to Avoid
- Advanced Rigging and Animation Techniques
- Resources for Learning More and Community Forums
What is the process for exporting Roblox rigs into Blender for animation purposes?
To export Roblox rigs into Blender for animation purposes, follow these steps:
- Download and install Den_S\'s Blender rig exporter/animation importer plugin from a trusted source.
- Launch Blender and open the plugin within the software.
- Locate the Roblox rig you want to export for animation within your Roblox project files.
- Use the plugin to import the Roblox rig into Blender.
- You can now manipulate and animate the Roblox rig within Blender to create your desired animations.
- Export the animations or the completed project from Blender to use it within your Roblox projects.
READ MORE:
Guide to Rigging and Animating Roblox Characters in Blender
This comprehensive guide provides step-by-step instructions on how to use Blender for rigging and animating Roblox characters. Whether you are a beginner or an experienced developer, this guide will help you enhance your Roblox games with custom animations and models.
Getting Started with Blender and Roblox
- Download and install Blender, a free and open-source 3D creation suite.
- Ensure you have the Roblox Studio installed to export models and rigs.
Exporting Roblox Models to Blender
- Open Roblox Studio and select the model or character rig you wish to export.
- Use the built-in export feature to save your model as an .obj file.
- Open Blender and import the .obj file into your project.
Rigging Your Model in Blender
Rigging is the process of creating a skeleton for your model so that it can be animated. Follow these steps to rig your Roblox model in Blender:
- Set up Blender to match Roblox Studio\"s scene units for a seamless import.
- Create bones and position them inside your model to act as joints.
- Parent your model\"s mesh to the armature to bind the skeleton to the mesh.
- Assign vertices to bones to define how each part of the model moves with the rig.
Animating Your Rigged Model
Once your model is rigged, you can start animating:
- Use Blender\"s animation tools to pose your model and create animations.
- Export your animations from Blender and import them into Roblox Studio.
- Apply your animations to the model in Roblox Studio to see them in action.
Additional Resources
- Explore Blender tutorials and documentation for advanced rigging and animation techniques.
- Join the Roblox development community forums for tips, tricks, and feedback from other developers.
With practice and patience, you can create dynamic and engaging animations for your Roblox games using Blender. Start experimenting today to bring your game characters to life!
Introduction to Blender Roblox Rigging
Blender Roblox Rigging is an essential skill for game developers and animators who want to create custom characters and animations for Roblox games. This process involves using Blender, a powerful open-source 3D modeling and animation tool, to create and animate models that can be imported into Roblox. Rigging in Blender allows for detailed control over character movements, providing a foundation for more dynamic and engaging gameplay experiences.
- Rigging is the process of creating a skeletal structure for 3D models, allowing them to move in realistic ways.
- Blender offers a comprehensive set of tools for rigging and animating characters, making it a popular choice among Roblox game developers.
- Understanding the basics of Blender and Roblox Studio is crucial for successfully exporting and importing models between the two platforms.
Starting with Blender Roblox rigging involves several steps, including setting up your Blender environment to match Roblox\"s requirements, exporting character models from Roblox Studio, and importing them into Blender for rigging and animation. Once rigged, these models can be animated within Blender, using its robust animation tools to bring characters to life.
- Set up Blender: Configure Blender settings to ensure compatibility with Roblox\"s 3D models.
- Export Models from Roblox Studio: Use Roblox Studio\"s export feature to prepare models for rigging in Blender.
- Import into Blender: Bring your Roblox models into Blender and prepare them for the rigging process.
- Rigging in Blender: Create a skeleton for your model and define how it moves.
- Animating Your Model: Utilize Blender\"s animation tools to create movements for your rigged character.
- Exporting Back to Roblox: Once your animations are complete, export them back into Roblox Studio for use in your game.
Through this process, developers can create unique and custom animations for their Roblox games, enhancing the gaming experience for players. Blender\"s versatility and power make it an ideal tool for Roblox developers looking to push the boundaries of game design and character animation.

How To Make GFX in 2023 - New FREE Rig
Tutorial: Discover an easy-to-follow tutorial that will revolutionize your cooking skills! Learn new techniques, useful tips, and delicious recipes all in one video. Get ready to impress your friends and family with your culinary expertise. Characters: Dive into a world full of colorful and intriguing characters in this captivating video. Join them on their thrilling adventures, heartwarming moments, and exciting challenges. Get to know each character and uncover the secrets that make them unique.
Why Rig with Blender for Roblox?
Choosing Blender for Roblox rigging brings a suite of advantages for game developers and animators looking to create custom, dynamic characters for their games. Blender is not only free and open-source, but it also offers a powerful set of tools for 3D modeling, rigging, and animation, making it an ideal choice for Roblox content creation.
- Cost-Effective Solution: Blender is completely free, reducing the entry barrier for independent developers and hobbyists.
- Advanced Rigging Tools: Blender provides a comprehensive rigging system, allowing for intricate control over character movements and animations.
- Seamless Integration with Roblox: With the help of plugins and tutorials, Blender models can be easily exported to Roblox, making the workflow smooth and efficient.
- Large Community and Resources: Blender has a vast community of users and an extensive range of learning resources, making it easier to learn and solve problems.
- Continual Updates: Being open-source, Blender is regularly updated with new features and improvements, keeping your rigging and animation capabilities up to date.
Using Blender for Roblox rigging not only enhances the visual quality of your games but also provides a platform to experiment and develop unique animations. Whether you\"re working on a personal project or a commercial game, Blender\"s robust features and supportive community make it a top choice for bringing your Roblox characters to life.
How to 3D Model Roblox Characters in Blender Tutorial
If you\'re struggling to make the rig, the model is available for purchase here: ...
Getting Started: Blender and Roblox Setup
To begin creating custom characters and animations for Roblox using Blender, a proper setup is essential. This setup ensures a seamless workflow from model creation to animation and finally, implementation within Roblox. Follow these detailed steps to set up both Blender and Roblox for rigging and animation.
- Install Blender: Download and install the latest version of Blender. Ensure your computer meets the software\"s system requirements for optimal performance.
- Install Roblox Studio: If not already installed, download Roblox Studio. This platform is where you\"ll import and test your Blender creations.
- Download Roblox Blender Plugins: Search for and install Blender plugins designed for Roblox. These plugins facilitate exporting models from Blender to Roblox and importing Roblox models into Blender.
- Configure Blender for Roblox: Adjust Blender\"s settings to match Roblox\"s scale and unit preferences. This step is crucial for ensuring that models and animations function correctly in Roblox.
- Learn Basic Blender Operations: Familiarize yourself with Blender\"s interface, key tools, and features for 3D modeling, rigging, and animation. Online tutorials and community forums can be invaluable resources.
- Export a Test Model from Roblox Studio: Use Roblox Studio to export a simple model. This practice helps you understand the process and prepares you for more complex projects.
- Import Test Model into Blender: Import the model you exported from Roblox Studio into Blender. This step verifies that your setup is correctly configured for subsequent rigging and animation work.
With these steps completed, you\"re ready to start the exciting process of bringing your Roblox game characters to life with custom animations created in Blender. This setup phase is foundational, ensuring a smooth transition between Blender and Roblox and paving the way for creative exploration.

_HOOK_
Step-by-Step Guide to Exporting Roblox Models to Blender
Exporting Roblox models to Blender is a crucial step in the process of rigging and animation for your Roblox games. This guide will walk you through the necessary steps to efficiently transfer your models from Roblox Studio to Blender, ensuring a smooth workflow for your development process.
- Prepare Your Roblox Model: Begin by selecting the model or character in Roblox Studio that you wish to rig in Blender. Make sure it is properly assembled and ready for export.
- Enable Exporting in Roblox Studio: Some models may require you to enable certain exporting options or use specific plugins designed for Blender export. Check the Roblox Studio documentation for detailed instructions on preparing your model for export.
- Export Your Model: Once your model is prepared and the necessary options are enabled, export your model as an .obj file. This is a common 3D file format that Blender can easily import.
- Open Blender: Launch Blender on your computer. Ensure you have the latest version installed to take advantage of all available features and compatibility.
- Import the Model into Blender: In Blender, go to File > Import and select the Wavefront (.obj) option. Navigate to where you saved your .obj file from Roblox Studio and select it for import. Adjust any import settings if necessary to ensure the model loads correctly.
- Verify the Model: Once imported, take a moment to verify that your model has been imported correctly into Blender. Check for any missing parts or abnormalities that could affect the rigging process.
Following these steps will ensure your Roblox model is successfully imported into Blender, ready for the next phase of rigging and animation. Proper preparation and attention to detail during this process are key to a successful transition from Roblox Studio to Blender.

Comprehensive Rigging Techniques in Blender
Rigging in Blender for Roblox characters involves creating a skeleton that your model can use to move in realistic and complex ways. This section covers the comprehensive techniques required to rig your Roblox models effectively in Blender, ensuring they are ready for animation and integration into your games.
- Setting Up the Rig: Start by importing your Roblox model into Blender. Ensure that the scale and orientation match what you need for Roblox.
- Creating Bones: Use Blender\"s armature system to create bones for each part of the model you want to animate. Position these bones accurately within the mesh for realistic movement.
- Parenting Mesh to Armature: Parent your model\"s mesh to the armature to link the geometry with the bones. This step is crucial for the model to deform according to the bone movements.
- Weight Painting: Weight painting is used to control how different parts of the mesh move in relation to the bones. Paint weights carefully to ensure smooth and realistic animations.
- Adding Constraints: For more advanced rigging, you can add constraints to bones for automatic movements, like IK (Inverse Kinematics) for natural motion, especially for limbs.
- Testing the Rig: Before exporting back to Roblox, test your rig in Blender. Pose the armature to check for any issues in the mesh deformation or weight distribution.
These steps form the foundation of rigging for Roblox models in Blender. By following this guide, you can create rigs that offer detailed and realistic movement, enhancing the quality of your Roblox games. Rigging is a skill that requires practice and patience, but mastering it allows for the creation of truly unique and engaging game experiences.

Animating Your Roblox Character in Blender
Animating your Roblox character in Blender is a key step in bringing your game to life. This process allows you to create custom animations that can be imported back into Roblox, enhancing your game\"s interactivity and engagement. Follow these steps to animate your rigged Roblox character in Blender.
- Prepare Your Rigged Character: Start with a character that has already been rigged. Ensure all bones and armatures are correctly set up for animation.
- Understand Blender\"s Animation Tools: Familiarize yourself with Blender\"s animation tools, including the timeline, dope sheet, and graph editor. These tools will help you create smooth and realistic animations.
- Create Keyframes: Begin animating by setting keyframes for your character\"s movements. Move the rig\"s bones to the desired positions and insert keyframes at specific points on the timeline to define movements.
- Refine Animations: Use the dope sheet and graph editor to refine your animations, adjusting the timing and flow of movements. Ensure that animations are smooth and natural-looking.
- Add Details: Incorporate secondary animations, such as facial expressions and finger movements, to add depth and personality to your character.
- Preview and Adjust: Continuously preview your animation within Blender. Make adjustments as needed to improve motion and realism.
- Export Animation: Once satisfied with your animation, export it from Blender in a format compatible with Roblox, such as an FBX file.
- Import into Roblox Studio: Import your animation into Roblox Studio and apply it to your character model to see it in action within your game.
Animating your Roblox character in Blender allows for a high degree of creativity and uniqueness in your game\"s characters. With practice, you can create animations ranging from simple gestures to complex sequences that truly bring your game world to life.
Exporting Animations back to Roblox
Once you have created animations for your Roblox character in Blender, the next step is exporting these animations back to Roblox. This process allows you to implement your custom animations in your games, providing a unique and engaging player experience. Follow this step-by-step guide to ensure a smooth transition of animations from Blender to Roblox.
- Prepare Your Animation: Ensure that your animation is complete and works as intended within Blender. It\"s important to review all animations for any potential issues before exporting.
- Exporting the Animation: In Blender, go to the animation you wish to export and use the Blender export function for FBX files, which is compatible with Roblox. Make sure to select the appropriate options for exporting animations.
- Converting FBX to Roblox Format: Roblox requires animations to be in a specific format. Use the Roblox Animation Editor to import your FBX file and convert it to a Roblox-compatible format.
- Uploading to Roblox: Once your animation is converted, upload it to Roblox. You can do this through the Roblox website by accessing the Create section and selecting the Animations category. Follow the on-screen instructions to complete the upload.
- Implementing Animations in Your Game: After uploading, you can implement your animations into your game using Roblox Studio. Assign the animations to your characters through scripting or the animation editor within Roblox Studio.
Exporting animations from Blender and implementing them into Roblox can significantly enhance your game\"s visual appeal and interactivity. By following these steps, you can ensure your custom animations seamlessly integrate into your Roblox projects.

Tips for Efficient Workflow and Common Pitfalls to Avoid
When working with Blender and Roblox for rigging and animation, an efficient workflow is essential for productivity, and avoiding common pitfalls can save time and frustration. Here are some tips to streamline your process and common issues to be aware of.
- Plan Your Project: Before starting, have a clear plan for your character and animation. Knowing what you aim to achieve helps guide the rigging and animation process efficiently.
- Keep Your Rig Simple: A complex rig can be more difficult to animate and may cause issues when importing into Roblox. Start simple, and add complexity as needed.
- Use Blender Shortcuts: Blender is equipped with numerous shortcuts that can speed up your workflow significantly. Learning these can save you a lot of time in the long run.
- Maintain a Clean Hierarchy: Organize your armature and mesh objects in a way that\"s easy to navigate. A clean hierarchy simplifies the animation process and reduces errors.
- Regularly Save Your Work: Blender and Roblox Studio can be unpredictable. Regular saves prevent the loss of work due to crashes or other unforeseen issues.
- Test Animations Early and Often: Import your animations into Roblox Studio frequently throughout the development process. Early testing can reveal problems that are easier to fix before the animation is fully polished.
- Avoid Overlapping Vertices: When rigging, ensure vertices aren\"t overlapping or causing unexpected deformations. Use weight painting to assign vertices correctly to bones.
By following these tips and being mindful of common pitfalls, you can create a more efficient workflow and produce higher quality rigs and animations for your Roblox games.

_HOOK_
Advanced Rigging and Animation Techniques
Delving into advanced rigging and animation techniques in Blender can significantly enhance the quality and dynamism of your Roblox characters. These methods involve more sophisticated approaches to rigging and animating that can bring your characters to life in more complex and interesting ways.
- Inverse Kinematics (IK) Rigging: IK rigging allows for more natural and intuitive animation of limbs. By setting up IK constraints, you can manipulate character limbs with end-effectors, simplifying the animation process for walking, running, or interacting.
- Facial Rigging and Animation: Create detailed facial rigs using bones or shape keys to animate expressions and lip sync. This adds a new level of personality and engagement to your characters.
- Custom Bone Shapes: Customizing the appearance of bones in your rig can improve the readability of your rig, making it easier to animate. Custom shapes can be anything from simple geometric forms to complex icons representing the function of the bone.
- Animation Layers and Nonlinear Animation (NLA): Use Blender\"s NLA editor to layer different animations and blend them together. This technique allows for more complex animations to be built from simpler actions.
- Rigging with Drivers and Constraints: Drivers and constraints can automate movements within your rig, making it easier to create complex animations such as automated blinking, muscle movements, or secondary motion.
- Morph Targets and Shape Keys: For models that require transformation or morphing, shape keys can be an effective tool. They allow for smooth transitions between different model states, useful for facial expressions or character transformations.
By incorporating these advanced techniques into your Blender rigging and animation workflow, you can create more dynamic, expressive, and engaging characters for your Roblox games. Each technique offers unique advantages and can be combined in various ways to achieve your creative vision.
READ MORE:
Resources for Learning More and Community Forums
To enhance your skills in Blender rigging and animation for Roblox, numerous resources and community forums are available. These platforms offer tutorials, advice, and support to help you improve your craft and solve any challenges you encounter.
- Roblox Developer Forum: A vibrant community where developers share knowledge, tools, and plugins specifically for Roblox game development, including Blender rigging and animation.
- Blender Tutorials: Official Blender documentation and community-contributed video tutorials provide step-by-step guides on rigging, animating, and exporting models for Roblox.
- YouTube: A vast resource of tutorials ranging from beginner to advanced levels, covering everything from basic rigging techniques to complex animation workflows in Blender for Roblox.
- BlenderNation: Offers news, articles, and tutorials that are helpful for Blender users of all skill levels, including those focusing on game development and character animation.
- Sketchfab: An online platform where you can publish, share, and discover 3D content. It can be a great source of inspiration and a way to study rigged models.
- Blender Artists Community: An online forum for Blender artists to discuss techniques, share work, and get feedback, including discussions on rigging and animation for games.
Engaging with these resources and communities can significantly speed up your learning process, helping you to create more sophisticated and engaging animations for your Roblox games. Whether you\"re looking to solve a specific problem or seeking to improve your overall skills, there\"s a wealth of knowledge and a supportive community waiting to help.
Embark on a journey to master Blender Roblox rigging, unlocking endless creative possibilities for your games. Embrace the challenge, and watch as your animations bring joy and excitement to the Roblox community.