Topic how to use blender for roblox: Discover the endless possibilities of using Blender for Roblox to bring your game designs to life. This guide will walk you through the essential steps to create, texture, and import 3D models into Roblox Studio, unlocking your creative potential.
Table of Content
- How can I efficiently use Blender for Roblox?
- Getting Started with Blender
- Exporting Models from Blender
- Importing Models into Roblox Studio
- Additional Tips
- Resources
- Exporting Models from Blender
- Importing Models into Roblox Studio
- Additional Tips
- Resources
- YOUTUBE: Blender to Roblox Studio Full Guide
- Importing Models into Roblox Studio
- Additional Tips
- Resources
- Additional Tips
- Resources
- Resources
- Introduction to Blender for Roblox
- Essential Blender Setup for Roblox Development
- Creating Your First 3D Model in Blender for Roblox
- Texturing and Materials in Blender for Roblox Assets
- Exporting Models from Blender to Roblox
- Importing Blender Models into Roblox Studio
- Optimizing Blender Models for Roblox Performance
- Advanced Modeling Techniques for Roblox Games
- Collaborative Projects: Blender to Roblox Workflow
- Common Issues and Solutions in Blender for Roblox
- Resources and Communities for Blender and Roblox Developers
How can I efficiently use Blender for Roblox?
To efficiently use Blender for Roblox, follow these steps:
- Start by familiarizing yourself with the basic controls in Blender. This may take some time, but it\'s essential for creating models for Roblox.
- Learn how to create custom 3D models in Blender. You can use Blender\'s tools and features to design unique assets for your Roblox games.
- Understand how to UV unwrap your models in Blender. This process is crucial for applying textures correctly in Roblox.
- Export your models from Blender in a file format that Roblox supports, such as .FBX or .OBJ.
- Import your models into Roblox Studio and adjust the scale and position as needed.
- Test your models in Roblox to ensure they work correctly and look good in your game.
READ MORE:
Getting Started with Blender
- Download and install Blender from the official website.
- Familiarize yourself with Blender\"s interface and basic modeling tools.
- Create your 3D model using Blender\"s extensive modeling features.

Exporting Models from Blender
To use your Blender models in Roblox, you need to export them in a format that Roblox supports, such as the .obj format.
- Select the model you want to export.
- Go to File > Export > Wavefront (.obj).
- Choose your export options and location, then click \"Export OBJ\".
Importing Models into Roblox Studio
Once you have your model exported, you can import it into Roblox Studio to use in your game.
- Open Roblox Studio and create a new place or open an existing one.
- Go to the Model tab and click on \"Import\".
- Select your exported .obj file and import it into your game.

Additional Tips
- Always check your model\"s scale before exporting to ensure it fits well within the Roblox environment.
- Use textures and materials in Blender to enhance the appearance of your model, but remember to also import these into Roblox Studio.
- Experiment with different modeling techniques in Blender to create unique assets for your games.
_HOOK_
Resources
For more detailed tutorials and resources, refer to Blender\"s official documentation and the Roblox Developer Hub.

Exporting Models from Blender
To use your Blender models in Roblox, you need to export them in a format that Roblox supports, such as the .obj format.
- Select the model you want to export.
- Go to File > Export > Wavefront (.obj).
- Choose your export options and location, then click \"Export OBJ\".

Importing Models into Roblox Studio
Once you have your model exported, you can import it into Roblox Studio to use in your game.
- Open Roblox Studio and create a new place or open an existing one.
- Go to the Model tab and click on \"Import\".
- Select your exported .obj file and import it into your game.

Additional Tips
- Always check your model\"s scale before exporting to ensure it fits well within the Roblox environment.
- Use textures and materials in Blender to enhance the appearance of your model, but remember to also import these into Roblox Studio.
- Experiment with different modeling techniques in Blender to create unique assets for your games.
Resources
For more detailed tutorials and resources, refer to Blender\"s official documentation and the Roblox Developer Hub.

_HOOK_
Blender to Roblox Studio Full Guide
Come explore the captivating world of modeling in this enchanting video that showcases the glamorous runway shows and photo shoots. Witness the creativity, beauty, and elegance of top models in action!
How to 3D Model Roblox Characters Blender Tutorial
Unlock your creative potential with this informative tutorial video that guides you step-by-step through a fun and engaging project. Learn new skills, gain inspiration, and unleash your artistic abilities with ease.
Importing Models into Roblox Studio
Once you have your model exported, you can import it into Roblox Studio to use in your game.
- Open Roblox Studio and create a new place or open an existing one.
- Go to the Model tab and click on \"Import\".
- Select your exported .obj file and import it into your game.

Additional Tips
- Always check your model\"s scale before exporting to ensure it fits well within the Roblox environment.
- Use textures and materials in Blender to enhance the appearance of your model, but remember to also import these into Roblox Studio.
- Experiment with different modeling techniques in Blender to create unique assets for your games.
Resources
For more detailed tutorials and resources, refer to Blender\"s official documentation and the Roblox Developer Hub.
_HOOK_
Resources
For more detailed tutorials and resources, refer to Blender\"s official documentation and the Roblox Developer Hub.
Introduction to Blender for Roblox
Blender is a versatile and powerful open-source 3D modeling software widely used in the Roblox community for creating and importing detailed game assets. This section provides a foundational understanding of how Blender can be utilized to enhance your Roblox games, offering step-by-step guidance for beginners.
- Understanding Blender\"s Interface: Familiarize yourself with the Blender workspace, including navigation, object manipulation, and the properties panel.
- Creating Basic Models: Learn how to create simple 3D models using Blender’s modeling tools, perfect for beginners looking to make their first game assets.
- Texturing and Materials: Explore how to apply textures and materials to your models, giving them color, depth, and realism for your Roblox projects.
- Exporting Models for Roblox: Master the process of exporting your Blender models in a Roblox-compatible format (.obj), ensuring they\"re ready for import into Roblox Studio.
- Importing to Roblox Studio: Discover how to bring your Blender creations into Roblox Studio, placing them into your game world for players to interact with.
By following this guide, you\"ll gain the skills needed to start creating your own unique assets in Blender for your Roblox games, pushing the boundaries of your creative visions.
- Key Blender Tools for Roblox Developers: A breakdown of the essential Blender tools and features most useful for Roblox game development.
- Optimizing Models for Game Performance: Tips on how to keep your Blender models optimized for Roblox, ensuring smooth gameplay and lower resource usage.
- Collaboration and Sharing: Insights into how Blender and Roblox can be used collaboratively within a development team, including sharing assets and working on projects together.
Embarking on the journey of using Blender for Roblox opens up a world of endless creative possibilities. Whether you\"re creating characters, environments, or intricate game props, Blender provides the tools necessary to bring your imagination to life in the Roblox universe.
Essential Blender Setup for Roblox Development
Setting up Blender for Roblox development involves several key steps to ensure a smooth workflow. This guide will walk you through the essential setup process, from software installation to configuring Blender for Roblox game design.
- Download and Install Blender: Ensure you have the latest version of Blender installed, which is available for free from the Blender Foundation\"s website.
- Configure Blender Settings: Adjust Blender’s preferences for optimal performance with Roblox. This includes setting up the correct unit scale (meters) and ensuring the export settings are compatible with Roblox Studio.
- Install Roblox Studio: Roblox Studio is necessary for importing and testing your models. Download and install it from the Roblox website.
- Understand Roblox\"s Requirements: Familiarize yourself with Roblox\"s asset guidelines, including model size limits, texture requirements, and supported formats (.obj for models).
- Blender Add-ons for Roblox: Install any Blender add-ons specifically designed for Roblox development. These can streamline the export process or add Roblox-specific functionality to Blender.
- Prepare Your Workspace: Set up a dedicated workspace in Blender for Roblox projects. This may include custom templates or starting files that adhere to Roblox’s specifications.
By following these steps, you’ll create a Blender setup that’s optimized for Roblox development, enabling you to efficiently create, export, and import assets into Roblox Studio for your games.
- Tips for Effective Modeling: Keep models low-poly for performance and use simple textures to maintain Roblox’s style.
- Organize Your Projects: Use Blender’s collection system to organize your models and materials for easy export.
- Continuous Learning: Blender and Roblox Studio both receive regular updates. Stay informed about new features and best practices to keep your workflow efficient.
This foundational setup is just the beginning of your journey in using Blender for Roblox development. With these tools and configurations in place, you’re well on your way to creating engaging and immersive game worlds.
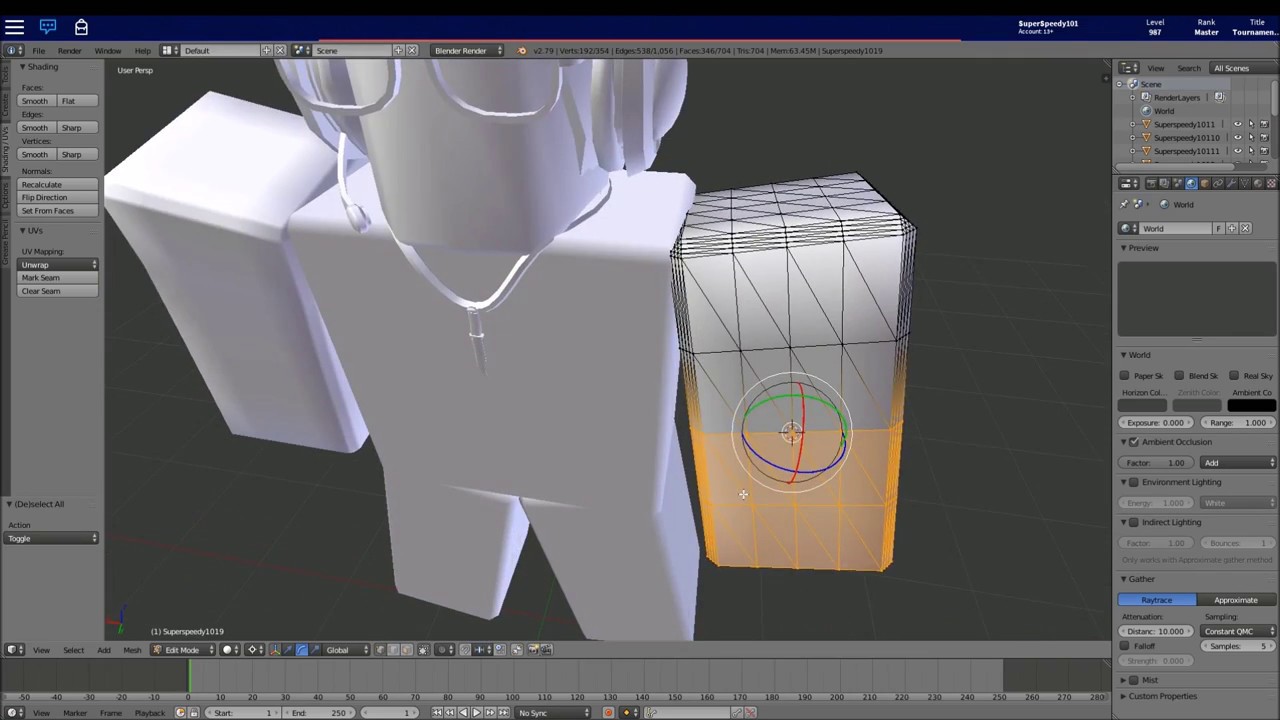
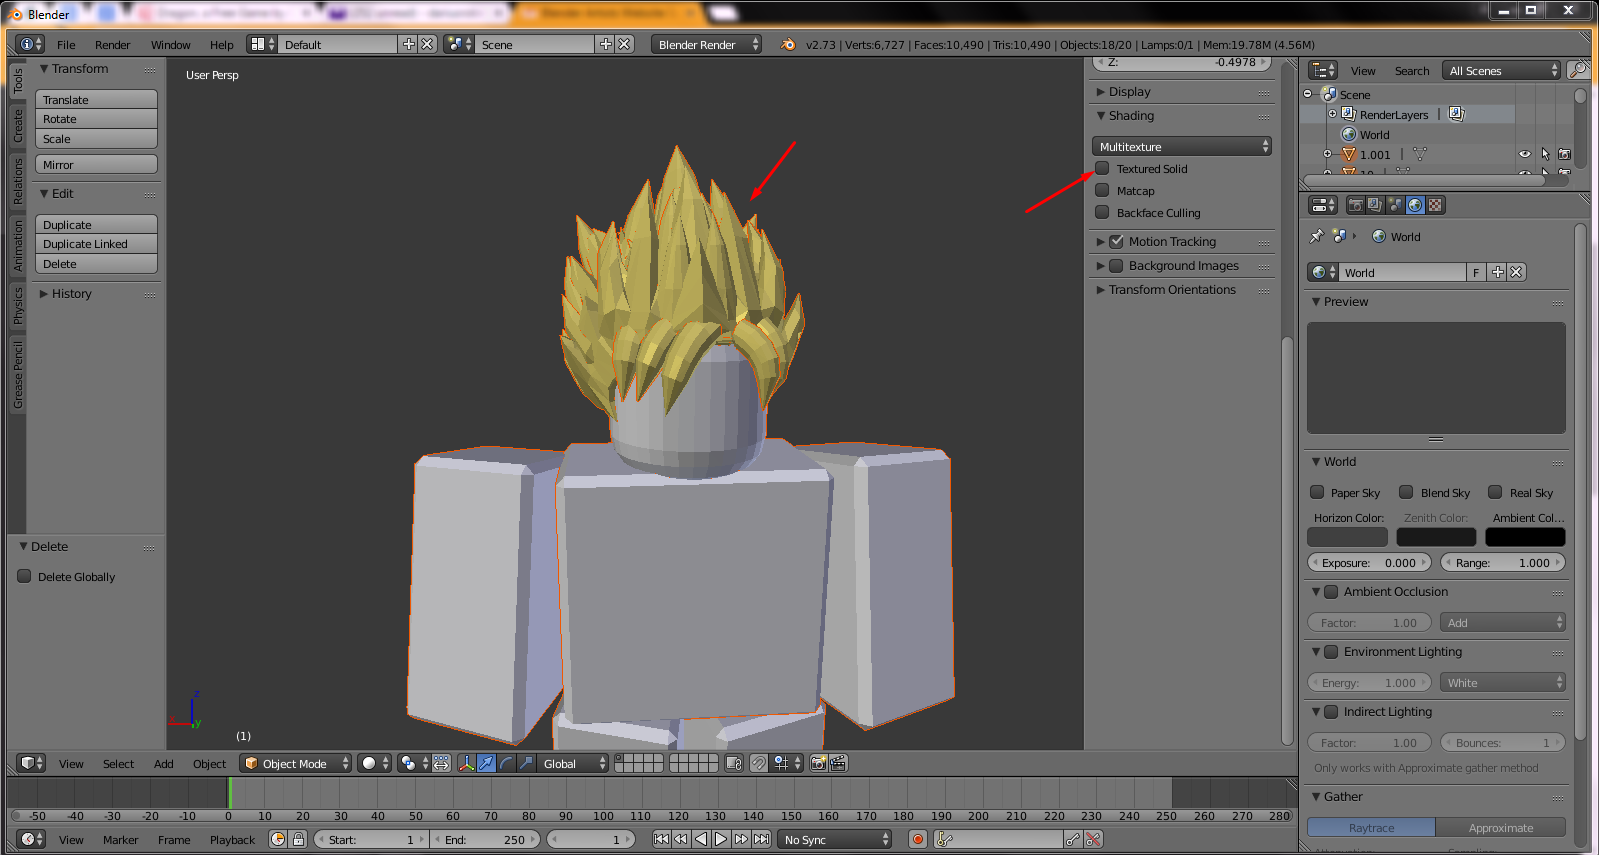
Creating Your First 3D Model in Blender for Roblox
Creating your first 3D model in Blender for use in Roblox is an exciting step towards customizing your game. This section will guide you through the process from conception to importation into Roblox Studio.
- Getting Started in Blender: Open Blender and familiarize yourself with the basic controls and interface. Start a new project and delete the default cube.
- Modeling Basics: Learn to add a mesh object, such as a plane or cube, as the foundation of your model. Use the edit mode to modify your mesh with extrude, scale, and rotate tools.
- Shaping Your Model: Refine your model\"s shape to match your vision. This could be a character, vehicle, or any game asset. Focus on creating a low-poly model to ensure it runs smoothly in Roblox.
- Adding Details: Use Blender\"s sculpting tools for adding details. Remember, more complex models require more resources in Roblox, so keep it simple and efficient.
- Texturing Your Model: Apply textures to your model for a more realistic appearance. UV unwrap your model and apply image textures or use Blender\"s built-in materials.
- Exporting Your Model: Once your model is complete, export it as an .obj file, which is compatible with Roblox. Ensure you export with the correct scale and orientation.
- Importing into Roblox Studio: In Roblox Studio, use the MeshPart object to import your .obj file. Adjust the scale and position as needed to fit your game\"s environment.
This process marks just the beginning of what\"s possible with Blender and Roblox. With practice, you\"ll be able to create increasingly complex and beautiful models that enhance your games.
- Keep models simple and efficient to maintain game performance.
- Explore Blender\"s vast array of tools to find new ways to enhance your models.
- Regularly save your work in Blender to prevent data loss.
By following these steps, you\"ll have created your first 3D model in Blender for Roblox, laying the foundation for further exploration and development in 3D game design.
Texturing and Materials in Blender for Roblox Assets
Texturing and applying materials in Blender can significantly enhance the visual appeal of your Roblox assets. This section delves into the process of creating and applying textures and materials to your 3D models, ensuring they look vibrant and engaging in the Roblox environment.
- Understanding Textures and Materials: Learn the difference between textures, which are images applied to the surface of a model, and materials, which define the surface properties such as color, shininess, and transparency.
- Creating Textures: Explore methods for creating textures, either by using image editing software or Blender\"s procedural texturing capabilities, to create unique surfaces for your models.
- UV Unwrapping: Master the process of UV unwrapping, which involves mapping the 3D surface of your model to a 2D texture. This step is crucial for accurately applying textures to complex models.
- Applying Materials: Learn how to create and apply materials in Blender. Adjust settings such as diffuse color, specular intensity, and roughness to achieve the desired appearance for your Roblox asset.
- Exporting Textures: Understand how to export textures alongside your models. Ensure that textures are properly referenced in your .obj export settings to ensure they appear correctly in Roblox.
- Importing to Roblox: Finally, import your textured models into Roblox Studio. Adjust any necessary settings within Roblox Studio to ensure your textures display correctly in-game.
Texturing and applying materials are key to bringing your Blender models to life in Roblox. With practice, you can create assets that stand out and add depth to your game\"s world.
- Experiment with different texturing techniques to find what works best for your models.
- Consider the game environment when designing textures to ensure they blend well with the overall aesthetic.
- Keep texture resolutions in mind to balance quality with performance in Roblox.
By following these steps, you\"ll enhance your Roblox game\"s visual appeal, creating a more immersive and engaging experience for players.
_HOOK_
Exporting Models from Blender to Roblox
Exporting models from Blender to Roblox is a crucial step in using custom assets in your Roblox games. This process involves preparing your Blender model for export, converting it into a format that Roblox Studio can import, and then bringing it into your game project.
- Prepare Your Model: Ensure your model is ready for export. This includes applying all modifiers, ensuring the model is appropriately scaled for Roblox, and checking that the model\"s geometry is clean and optimized.
- Choose the Right Export Format: Roblox Studio supports the .obj file format for 3D models. In Blender, you will export your model using the Wavefront (.obj) option to ensure compatibility.
- Exporting Your Model: Go to File > Export > Wavefront (.obj) in Blender. Before exporting, check the options to include geometry, materials, and textures if needed. Select the export location and name your file accordingly.
- Importing into Roblox Studio: Open Roblox Studio and navigate to the toolbox. Use the MeshPart object to import your .obj file. Browse for your exported model and select it for import.
- Adjusting the Model in Roblox Studio: Once imported, you may need to adjust the scale, rotation, or position of your model to fit your game\"s environment correctly. Additionally, ensure that any textures or materials are displayed correctly and make adjustments as necessary.
Exporting models from Blender and importing them into Roblox Studio allows for a high degree of customization and creativity in your Roblox games. By following these steps, you can bring your unique 3D models to life within the Roblox platform.
- Always double-check your model\"s scale and orientation before exporting to avoid issues in Roblox Studio.
- Consider the complexity of your model, as higher-polygon models may impact game performance.
- Utilize Blender\"s decimate modifier to reduce polygon count if necessary, without significantly compromising the model\"s appearance.
With these guidelines, you\"re equipped to enhance your Roblox games with custom 3D models, opening up new possibilities for game design and player experience.
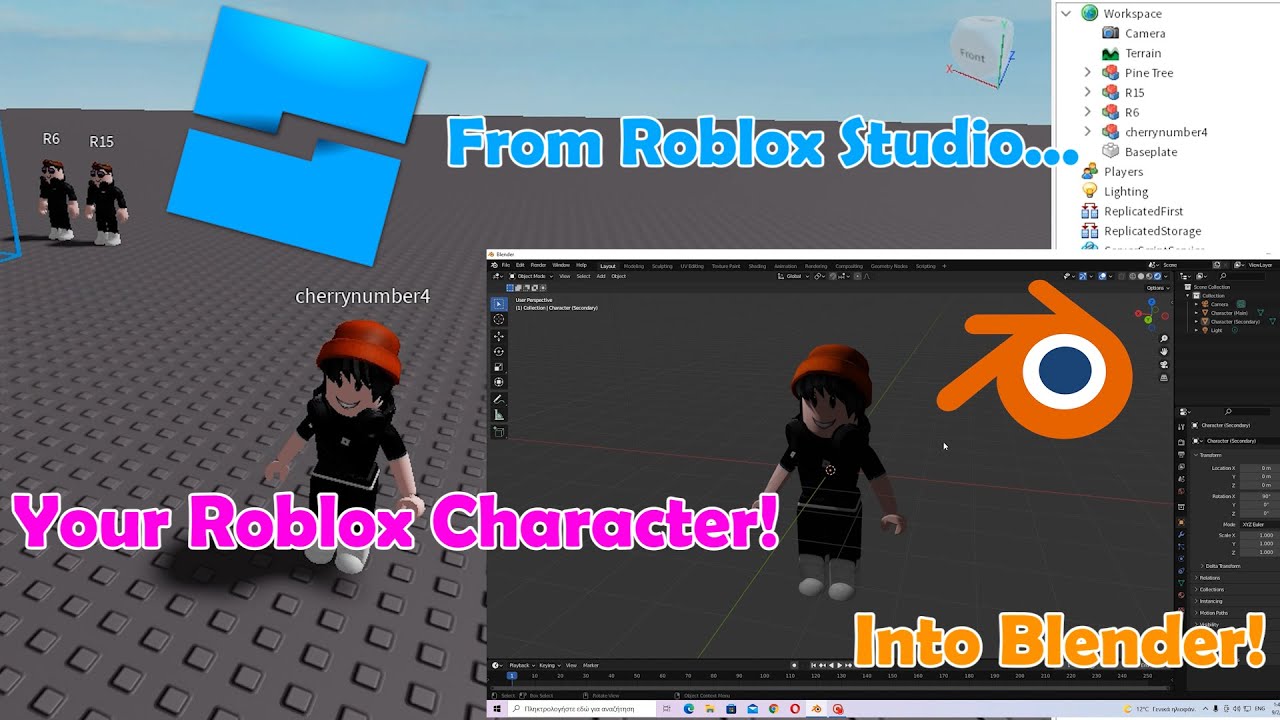
Importing Blender Models into Roblox Studio
Once you\"ve created and exported your model from Blender, the next step is importing it into Roblox Studio to bring your game designs to life. This section guides you through the process, ensuring a seamless transition of your 3D models into Roblox.
- Opening Roblox Studio: Start by opening Roblox Studio and either creating a new project or opening an existing one where you wish to add your model.
- Importing the Model: In Roblox Studio, navigate to the Toolbox, then to the \"Models\" tab, and select \"Import\" to bring up the file selection dialog. Locate and select your exported .obj or .fbx file from Blender.
- Adjusting the Imported Model: After importing, your model will appear in the workspace. You may need to adjust its position, scale, or rotation to fit your game\"s design properly. Use the tools in Roblox Studio to make these adjustments.
- Applying Textures and Materials: If your model was exported with textures, ensure they are correctly applied in Roblox Studio. You might need to manually adjust or reapply textures to match your original design from Blender.
- Testing the Model: It\"s important to test your model within the game environment to ensure it interacts correctly with the world, including collision, scaling, and any scripted behaviors.
Importing models from Blender into Roblox Studio opens up a vast array of possibilities for game development. By following these steps, you ensure that your custom 3D models enhance your Roblox games, providing a unique experience for players.
- Ensure your model\"s polygon count is optimized for Roblox to maintain performance.
- Check that all parts of your model are securely joined in Blender before exporting to avoid issues during import.
- Utilize Roblox Studio\"s features, like collision editing and material properties, to further refine your model within the game.
With these steps, your Blender creations will seamlessly integrate into Roblox Studio, allowing you to customize your games with unique assets and designs.
Optimizing Blender Models for Roblox Performance
Creating Blender models for Roblox requires not just creativity but also a focus on optimization to ensure the best in-game performance. This section outlines key strategies for optimizing your Blender models before importing them into Roblox Studio.
- Reducing Polygon Count: Use Blender\"s decimate modifier to reduce the number of polygons in your model without significantly affecting its appearance. Lower polygon counts lead to better performance in Roblox.
- Limiting Textures Size: High-resolution textures can significantly increase the loading time and decrease the game\"s performance. Opt for smaller texture sizes when possible, and utilize Roblox\"s texture compression features.
- Efficient Use of Materials: Minimize the number of different materials used in your models. Each unique material can increase the processing required, so try to reuse materials across different parts of your model.
- Keeping Meshes Simple: Simplify your models by avoiding unnecessary details that won\"t be noticeable in the game environment. Focus on the overall shape and form rather than intricate details.
- Using LODs (Level of Detail): If your model will be seen from various distances, consider creating multiple versions with varying levels of detail. Roblox can then load the appropriate model based on the player\"s distance, improving performance.
Optimizing your Blender models for Roblox not only enhances the player\"s experience by improving game performance but also allows you to include more complex scenes and interactions in your games.
- Regularly test your models in Roblox Studio to check their impact on performance and make adjustments as needed.
- Use Blender\"s built-in tools, like the \"Clean up\" operation, to remove unnecessary vertices and faces.
- Consider the game\"s target platform, as mobile devices have stricter performance constraints compared to PCs.
By adhering to these optimization practices, you\"ll ensure that your custom Blender models contribute positively to your Roblox games, maintaining smooth gameplay and high-quality visuals.
Advanced Modeling Techniques for Roblox Games
Advancing your Blender modeling skills can significantly enhance the quality and uniqueness of your Roblox games. This section explores sophisticated modeling techniques that can add complexity and realism to your Roblox projects.
- Subdivision Surface Modifier: Learn to use the Subdivision Surface modifier to smooth and refine your models, adding a level of polish that basic models lack.
- Sculpting for Detailed Models: Sculpting allows for intricate detail work on your models. Explore Blender\"s sculpting tools to add realism to characters, terrain, and other game assets.
- Rigging and Animation: Bringing models to life with animation adds a dynamic element to your games. Discover the basics of rigging in Blender to animate characters and objects for Roblox.
- Texture Painting: Texture painting in Blender offers a hands-on approach to creating detailed textures. Learn how to paint directly onto your 3D models for unique and detailed surfaces.
- Environmental Modeling: Create immersive game environments using Blender\"s modeling tools. Techniques such as terrain sculpting, vegetation placement, and architectural modeling can create compelling game worlds.
- Utilizing Blender\"s Physics Simulations: For more dynamic elements in your games, explore how Blender\"s physics simulations can be used to create realistic movements and interactions.
These advanced techniques require patience and practice but can significantly elevate the visual and interactive quality of your Roblox games. By integrating these skills into your workflow, you\"ll be able to create more engaging and visually appealing game experiences for players.
- Practice regularly to improve your proficiency with these advanced techniques.
- Keep up with Blender updates, as new features and tools can enhance your modeling capabilities.
- Join Blender and Roblox development communities for tips, feedback, and collaboration opportunities.
Mastering these advanced modeling techniques in Blender can set your Roblox games apart, attracting a larger audience and providing a richer gaming experience.
Collaborative Projects: Blender to Roblox Workflow
Working on collaborative projects between Blender and Roblox requires a streamlined workflow to efficiently bring creative ideas to life. This section focuses on establishing a smooth transition from Blender modeling to Roblox game development with a team.
- Version Control: Utilize version control systems like GitHub to manage and share Blender files among team members. This ensures everyone has access to the latest versions of assets and can track changes over time.
- Clear Asset Pipeline: Establish a clear asset pipeline. Define steps from modeling in Blender, texturing, rigging (if necessary), exporting, and finally, importing into Roblox Studio. This clarity prevents overlap and ensures efficient progress.
- Consistent Naming Conventions: Agree on consistent naming conventions for files, objects, and textures. This reduces confusion and streamlines the process of asset management and referencing within the team.
- Regular Check-ins and Updates: Schedule regular meetings or updates within the team to discuss progress, challenges, and next steps. Use these meetings to align on the project\"s vision and make necessary adjustments to the workflow.
- Shared Resources and Knowledge Base: Create a shared repository of resources, tutorials, and best practices for both Blender and Roblox. Encourage team members to contribute to this knowledge base, fostering a culture of learning and improvement.
- Feedback Loops: Implement a process for providing constructive feedback on models and assets. Use tools like Discord or Slack for quick communication and sharing screenshots or Blender files for review.
- Testing and Optimization: Regularly import assets into Roblox Studio for testing. This allows the team to see how models perform in the game environment and make necessary optimizations for better performance.
By adopting these practices, teams can effectively collaborate on Blender and Roblox projects, ensuring a cohesive development process that leverages the strengths of each tool and team member. This collaborative approach not only enhances the quality of the game but also the overall development experience.
- Encourage open communication and collaboration to leverage diverse skills within the team.
- Utilize collaborative tools and platforms to streamline the development process.
- Focus on continuous learning and improvement to adapt to new challenges and opportunities.
Embracing a structured workflow for Blender to Roblox projects maximizes efficiency and creativity, leading to successful and innovative game developments.
_HOOK_
Common Issues and Solutions in Blender for Roblox
Navigating the process of using Blender for Roblox development can sometimes be challenging, especially for those new to 3D modeling or the specifics of the Roblox platform. Here, we address some common issues and provide solutions to help streamline your workflow.
- Issue: Models Importing with Incorrect Scale
- Solution: Before exporting from Blender, ensure your model\"s scale is set appropriately for Roblox. Use the metric system in Blender with a scale of 0.01 for the best results.
- Issue: Textures Not Appearing in Roblox
- Solution: When exporting your model, include the texture files and ensure they\"re correctly mapped in Blender. In Roblox Studio, you may need to manually apply the textures to your model.
- Issue: High-Polygon Models Causing Lag
- Solution: Utilize Blender’s decimate modifier to reduce polygon count without significantly altering the model\"s appearance. Aim for a balance between detail and performance.
- Issue: Animation Not Working in Roblox
- Solution: Ensure animations are correctly exported from Blender and that the Roblox Studio supports the animation format. Use the Roblox Animation Editor to make necessary adjustments.
- Issue: Complex Models Breaking Apart in Roblox
- Solution: Verify that your model is a single mesh before exporting. In Blender, join separate parts using the \"Join\" operation (Ctrl+J) to ensure they import as one piece.
These solutions address the most common hurdles faced when transitioning models and animations from Blender to Roblox, ensuring a smoother development process.
- Regularly update both Blender and Roblox Studio to the latest versions to avoid compatibility issues.
- Participate in community forums for additional support and tips from experienced developers.
- Experiment with different export settings in Blender to find what works best for your specific needs in Roblox.
By anticipating and resolving these common issues, you can enhance your efficiency in creating and implementing 3D models and animations for your Roblox games.
READ MORE:
Resources and Communities for Blender and Roblox Developers
Finding the right resources and communities is crucial for Blender and Roblox developers looking to improve their skills, share their work, and connect with like-minded creators. Below is a curated list of valuable resources and active communities to support your development journey.
- Roblox Developer Hub: The official source for Roblox development, including tutorials, documentation, and forums for discussing various aspects of game development.
- Blender Artists Community: An active online forum where Blender users share their work, ask questions, and offer advice on a wide range of Blender-related topics.
- Blender Guru: Offers comprehensive tutorials for Blender users of all skill levels, focusing on modeling, texturing, and lighting techniques.
- Roblox DevForum: A platform for Roblox developers to collaborate, share projects, and learn from each other’s experiences. Access may require meeting certain criteria set by Roblox.
- GitHub - Roblox/Blender Plugin: An open-source Blender plugin for Roblox that enhances the workflow between Blender and Roblox Studio, allowing for direct uploads of assets.
- YouTube Tutorials: Numerous channels dedicated to Blender and Roblox development, offering visual guides ranging from basic introductions to advanced techniques.
- CG Cookie: Provides paid and free Blender tutorials that cover a broad spectrum of 3D design and animation topics, suitable for hobbyists and professionals alike.
- Blender Nation: A news and tutorials website offering the latest on Blender releases, add-ons, artwork, and more, keeping you updated on all things Blender.
Engaging with these resources and communities can significantly enhance your understanding and capabilities within Blender and Roblox. Whether you\"re a beginner looking to learn the basics or an experienced developer seeking to polish your skills, there\"s a wealth of knowledge and support available.
Remember, the journey of learning and development is ongoing. Taking advantage of these resources, asking questions, and participating in communities can open up new possibilities for your projects and career as a Blender and Roblox developer.
Embarking on the journey of using Blender for Roblox opens a world of creativity and innovation. With dedication and the right resources, you can transform your game ideas into reality, captivating players with your unique visions.