Topic how to import roblox character into blender: Discover the seamless process of importing your Roblox character into Blender with our easy-to-follow guide, unlocking endless possibilities for creativity and customization in your 3D projects.
Table of Content
- What are the steps to import a Roblox character into Blender?
- Steps to Import Roblox Characters
- Additional Tips
- Using the Roblox Blender Plugin
- Importing into Blender Cycles
- Additional Tips
- Using the Roblox Blender Plugin
- Importing into Blender Cycles
- Using the Roblox Blender Plugin
- Importing into Blender Cycles
- Importing into Blender Cycles
- Introduction to Importing Roblox Characters into Blender
- YOUTUBE: How to Import Models into Blender Roblox Studio Blender
- Step-by-Step Guide to Exporting Characters from Roblox
- Importing Your Character into Blender
- Adjusting and Editing Your Character in Blender
- Using Plugins and Add-ons for Easier Import
- Troubleshooting Common Import Issues
- Enhancing Your Character with Textures and Materials
- Rigging and Animating Your Character in Blender
- Exporting Your Finished Model for Roblox
- Best Practices for Working with Roblox Characters in Blender
- Conclusion: Unleashing Creativity with Roblox and Blender
What are the steps to import a Roblox character into Blender?
To import a Roblox character into Blender, follow these steps:
- Right-click the Roblox character model you want to work on.
- Select Export and save the model as an .obj file.
- Open Blender on your computer.
- In Blender, click on File located in the top-right corner of the interface.
- Select Import and choose the .obj file you saved earlier.
- The Roblox character model should now be imported into Blender and ready for editing.
READ MORE:
Steps to Import Roblox Characters
- Right-click the model you want to work with in Roblox and select Export, then export as an .obj file.
- Open Blender and click File in the top right-hand corner, then press Import.
- Select the .obj file you exported from Roblox.
- Your Roblox model is now successfully imported into Blender.

Additional Tips
- To view your model, go to the 3D View and select the object in the scene.
- For rendering, go to the Render tab and select the desired render engine.
- To rig and pose your character, ensure your model is saved as an .obj file, import it, select all vertices, press Ctrl+J to join them into a single object, then add an armature for posing.

Using the Roblox Blender Plugin
The Roblox Blender Plugin allows for direct transfer of 3D modeling objects from Blender to your Roblox Studio session, streamlining the workflow.
Importing into Blender Cycles
When importing into Blender Cycles, ensure to follow specific steps to retain textures and utilize the Roblox Studio\"s export features efficiently.

_HOOK_
Additional Tips
- To view your model, go to the 3D View and select the object in the scene.
- For rendering, go to the Render tab and select the desired render engine.
- To rig and pose your character, ensure your model is saved as an .obj file, import it, select all vertices, press Ctrl+J to join them into a single object, then add an armature for posing.
Using the Roblox Blender Plugin
The Roblox Blender Plugin allows for direct transfer of 3D modeling objects from Blender to your Roblox Studio session, streamlining the workflow.

Importing into Blender Cycles
When importing into Blender Cycles, ensure to follow specific steps to retain textures and utilize the Roblox Studio\"s export features efficiently.

_HOOK_
Importing into Blender Cycles
When importing into Blender Cycles, ensure to follow specific steps to retain textures and utilize the Roblox Studio\"s export features efficiently.

Introduction to Importing Roblox Characters into Blender
Importing Roblox characters into Blender opens up a vast array of possibilities for animators, game developers, and 3D artists. This process allows you to bring your favorite Roblox characters into a powerful 3D modeling and animation environment, where you can enhance them with high-quality animations, textures, and renders. Whether you\"re looking to create stunning visuals, animations, or simply explore the potential of 3D modeling, this guide will walk you through the essential steps to get started.
- Begin by selecting the Roblox model you wish to import. Right-click on the model and choose the \"Export\" option, saving it as an .obj file.
- Launch Blender and navigate to \"File\" in the top menu. From there, select \"Import\" and choose the .obj file you exported from Roblox.
- Once imported, you can view your Roblox model within Blender\"s 3D Viewport, ready for editing and animation.
Following these steps, you\"ll have successfully imported your Roblox character into Blender, setting the stage for further customization and creativity. This integration between Roblox and Blender empowers users to push the boundaries of their digital creations, making it an exciting skill for anyone interested in 3D modeling and animation.
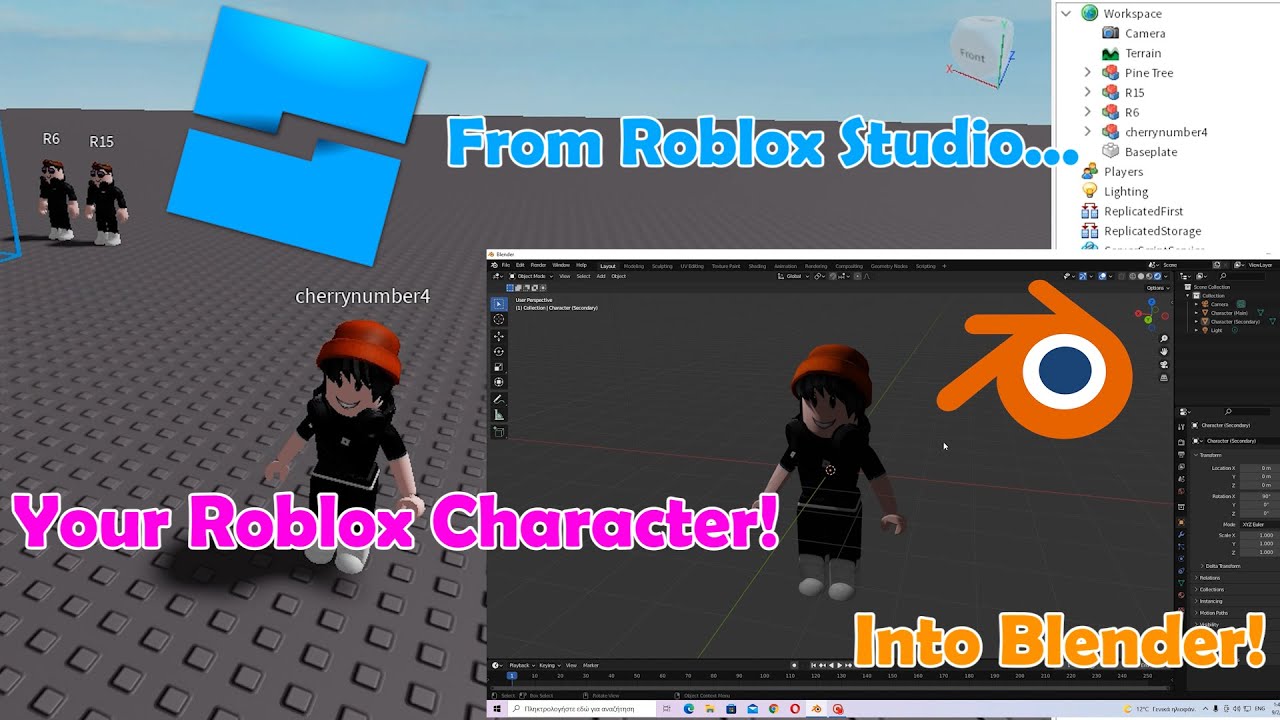
How to Import Models into Blender Roblox Studio Blender
Models: \"Watch this video to witness the stunning beauty and elegance of professional models strutting down the runway in exquisite couture outfits. Experience the glamour and charm that these models bring to the fashion world.\" Character: \"Delve into this captivating video showcasing the evolution of a character through a heartwarming story. Witness the depth and growth of the character, portrayed flawlessly by the talented actors. Join us on this inspirational journey.\"
How to Import Roblox Character into Blender 2.8 2.93
roblox #blender #tutorial ⇢ ˗ˏˋ welcome ࿐ྂ How to IMPORT Roblox Character into BLENDER (2.8 - 2.93) ...
Step-by-Step Guide to Exporting Characters from Roblox
Exporting characters from Roblox is a fundamental step before you can import them into Blender for further editing and animation. This guide will walk you through the process to ensure your characters transfer smoothly and retain their qualities.
- Start by opening Roblox Studio and navigating to the character model you wish to export.
- Select your character by clicking on it, ensuring it is highlighted.
- Go to the top menu, click on File, then hover over Export and select Export to .fbx from the dropdown menu.
- In the export window, set Path Mode to Copy and ensure that the Embed Textures option is enabled to include all textures with your export.
- In the Include section, make sure Custom Properties is checked to retain any customizations made to your character.
- Expand the Armature section and uncheck Add Leaf Bones if it\"s not necessary for your Blender project.
- Lastly, enable Bake Animation if you want to export your character\"s animations.
- Click on the Export FBX button to save your character model to your chosen location.
After following these steps, your Roblox character will be exported as an FBX file, ready to be imported into Blender. This process ensures that your character, along with its textures and, if selected, animations, are preserved and available for further creative exploration in Blender.
Importing Your Character into Blender
Once you\"ve exported your Roblox character as an .obj or .fbx file, the next step is importing it into Blender. This process is straightforward and allows you to utilize Blender\"s robust tools for animation, texturing, and rendering. Follow these steps to bring your Roblox character into the Blender environment for further creative work.
- Open Blender and navigate to File in the upper-left corner of the screen.
- Select Import and then choose the appropriate file type (.obj or .fbx) that corresponds with your exported Roblox character.
- Browse to the location of your saved character file, select it, and click Import OBJ or Import FBX button.
- Your Roblox character will now appear in the Blender viewport, ready for editing and animation.
After importing, you may need to adjust the scale and position of your character within Blender to fit your project\"s requirements. You can also start applying materials, creating textures, and setting up animations to bring your character to life in new and exciting ways.
Adjusting and Editing Your Character in Blender
After successfully importing your Roblox character into Blender, the next phase is adjusting and editing to fine-tune your model for your specific project needs. This section provides guidance on how to optimize your character within Blender, making it ready for animation, rendering, or any other 3D modeling application.
- Scaling and Positioning: First, adjust the scale and position of your character to match the Blender scene. Use the Scale tool (S key) and the Move tool (G key) to place your character appropriately.
- Applying Textures: If your character\"s textures were not imported, you can manually apply them. Navigate to the \"Shading\" workspace, add a new material, and link the texture files you exported from Roblox.
- Rigging Your Character: To animate your character, you may need to create or import a rig. Blender offers automatic rigging tools like Rigify, which can simplify the process.
- Editing Mesh: Use Blender\"s Edit Mode to make any necessary adjustments to your character\"s mesh, such as modifying vertices, edges, and faces for better shape or detail.
- Adding Custom Animations: With your character rigged, you can now animate it. Use the Timeline and Dope Sheet to create custom animations, applying keyframes to control movement.
These steps will help you refine your Roblox character in Blender, making it ready for a wide range of creative projects. With Blender\"s comprehensive set of tools, you can transform your Roblox models into professional-quality 3D art.
_HOOK_
Using Plugins and Add-ons for Easier Import
Blender and Roblox users can significantly benefit from various plugins and add-ons designed to streamline the process of importing characters from Roblox into Blender. These tools not only simplify the workflow but also ensure a smoother transition of models between platforms. Here\"s how to use these enhancements effectively.
- Roblox Blender Plugin: This add-on allows you to directly link your Roblox account to Blender, enabling quick transfers of 3D models into your Blender workspace. It simplifies the import process by eliminating the need for manual file exports and imports.
- Blender Rig Exporter/Animation Importer: Specifically designed for animation workflows, this tool facilitates the export of rigs from Roblox and their import into Blender, making the animation process more efficient.
- Installation: To use these plugins, download them from the official sources and install them into Blender via the Preferences menu under the Add-ons section. Ensure you enable the plugin after installation to activate its features.
- Usage: With the plugin installed, you can access its features through the Blender UI. For the Roblox Blender Plugin, this might involve linking your Roblox account and selecting the models you wish to import directly within Blender.
Utilizing these plugins can drastically reduce the time and effort required to import Roblox characters into Blender, allowing you to focus more on the creative aspects of 3D modeling and animation.
Troubleshooting Common Import Issues
Encountering issues while importing Roblox characters into Blender is common, especially for beginners. This section covers troubleshooting tips for the most frequent challenges you might face during the import process.
- Missing Textures: If your character appears without textures in Blender, ensure you\"ve included texture files in your export from Roblox and correctly linked them in Blender\"s Material Properties.
- Incorrect Scaling: Characters imported into Blender might appear too large or too small. Adjust the scale by selecting your model and pressing S to scale it according to your scene.
- Invisible or Transparent Models: This can occur due to incorrect export settings or issues with alpha channels in textures. Check your export options in Roblox and the material settings in Blender.
- Missing Parts: Sometimes, not all parts of your character might import into Blender. This can be due to errors during the export process or unsupported elements. Verify the integrity of your .fbx or .obj file before importing.
- Animation Problems: If animations don\"t import correctly, ensure that you\"ve exported both the mesh and animations in a compatible format and that Blender\"s import settings match those needs.
By addressing these common issues, you can smooth out the import process and focus on bringing your creative vision to life in Blender.
Enhancing Your Character with Textures and Materials
After importing your Roblox character into Blender, applying textures and materials is a crucial step to bring your model to life with more detail and realism. This process involves mapping textures and adjusting materials to achieve the desired look and feel for your character. Follow these steps to enhance your character\"s appearance in Blender.
- Apply Textures: Start by navigating to the \"Shading\" workspace in Blender. Here, you can create new materials and assign textures to your character. Use the \"Image Texture\" node to import your texture files.
- Adjust Materials: Within the \"Shading\" workspace, use the \"Principled BSDF\" shader to adjust material properties such as color, roughness, and metallic. This shader is versatile and allows for a wide range of material effects.
- UV Mapping: Properly unwrap your character\"s mesh to ensure textures align correctly. In the \"UV Editing\" workspace, you can adjust the UV layout to match your texture maps, ensuring that textures appear correctly on your model.
- Customize Materials: For advanced customization, consider mixing different shaders and textures to create unique effects. Blender\"s node-based material system allows for complex material setups that can include bump mapping, specular highlights, and more.
By carefully applying textures and adjusting materials, you can significantly enhance the visual quality of your Roblox character in Blender. This step is essential for creating high-quality renders or preparing your character for animation.
Rigging and Animating Your Character in Blender
Bringing your Roblox character into Blender opens up a multitude of possibilities for animation. This section will guide you through the process of rigging and animating your character in Blender, transforming it from a static model into a dynamic figure ready for animation.
- Preparing Your Model: Ensure your model is clean and optimized for rigging. This might involve merging separate meshes and removing any unnecessary vertices.
- Rigging Your Character: Use Blender\"s rigging tools to create a skeleton for your character. You can either use the automatic rigging feature such as Rigify for quick results or manually place bones for more control.
- Weight Painting: Assign weights to the mesh to define how the vertices move with the bones. This step is crucial for smooth animations.
- Animating Your Character: With the rig in place, move into Blender\"s Animation workspace. Use keyframes to create movements, adjusting the pose of your character over time.
- Using Animation Tools: Blender provides various tools like the Graph Editor and Dope Sheet to refine your animations, control timing, and smooth out motions.
- Exporting Animations: Once satisfied with your animation, export it in a format compatible with Roblox to see your character come to life in its original environment.
This process not only enhances your character\"s appeal but also allows for more interactive and engaging experiences within Roblox projects.
Exporting Your Finished Model for Roblox
After refining your Roblox character in Blender, exporting it back to Roblox allows you to integrate your enhanced models into your games or share them with the community. This section outlines the steps to export your finished models from Blender to Roblox efficiently.
- Prepare Your Model: Ensure your character is fully textured, rigged (if necessary), and ready for export. Double-check that all parts are correctly positioned and scaled.
- Select Your Model: In Blender, select the model you wish to export by right-clicking on it.
- Export as FBX: Navigate to File > Export > FBX (.fbx). This format is compatible with Roblox and retains textures, rigging, and animation data.
- Adjust Export Settings: In the export options, set Path Mode to Copy and ensure Embed Textures is enabled to include all textures in the FBX file. Check Selected Objects if you\"re only exporting part of the scene.
- Finalize and Export: Review your settings and click Export FBX to save your model. Choose a memorable location on your computer to save the file.
With your model exported, you can now import it into Roblox Studio to see your character come to life in your Roblox projects. This seamless workflow between Blender and Roblox empowers creators to push the boundaries of their creativity and bring more sophisticated designs into their games.
_HOOK_
Best Practices for Working with Roblox Characters in Blender
Working with Roblox characters in Blender can be a rewarding experience, offering endless possibilities for customization and animation. To ensure a smooth workflow and professional-quality results, consider these best practices when importing, editing, and animating your Roblox characters in Blender.
- Keep the Original Scale: When importing your character into Blender, try to maintain the original scale to avoid issues with animation and rigging later on.
- Optimize Your Mesh: Clean up the mesh by removing unnecessary vertices and faces to reduce the complexity of your model, which can improve performance and make rigging easier.
- Use Correct Import/Export Formats: Ensure you\"re using the correct file formats for import and export. FBX is generally preferred for its support of textures, animations, and rigging.
- Apply Textures Properly: If textures don\"t automatically apply, manually re-link them in Blender\"s material properties to ensure your character looks as intended.
- Utilize Blender\"s Rigging Tools: Take advantage of Blender\"s auto-rigging tools like Rigify for efficient rigging, but also understand manual rigging techniques for custom rigs.
- Keep Animations Clean: Use Blender\"s animation tools to create smooth and natural movements. Keep keyframes clean and organized for easier editing and adjustments.
- Stay Organized: Use layers and naming conventions to keep your project organized, especially for complex scenes or characters with multiple assets.
By following these best practices, you can enhance your workflow and create more engaging and dynamic characters for your Roblox games. Whether you\"re a beginner or an experienced Blender user, these tips will help you achieve better results in your 3D projects.
READ MORE:
Conclusion: Unleashing Creativity with Roblox and Blender
Integrating Roblox characters into Blender represents a unique opportunity to expand the boundaries of creativity and innovation within the realm of 3D modeling and game development. This guide has walked you through the essential steps from exporting characters from Roblox, importing them into Blender, to refining and animating them for your projects. Embracing these practices allows creators to bring their visions to life with greater detail, sophistication, and personalization.
Whether you\"re looking to enhance your Roblox games with custom animations, create detailed models for your stories, or simply explore the capabilities of 3D design, the collaboration between Roblox and Blender offers a powerful platform for creative expression. By mastering these tools, you unlock a world of possibilities, empowering you to create immersive, engaging content that stands out in the Roblox community.
As you continue to explore and experiment with Roblox characters in Blender, remember that the journey of learning and creation is ongoing. Each project presents an opportunity to refine your skills, push the envelope of what\"s possible, and make your mark in the world of digital art and game design. So, go forth and unleash your creativity, armed with the knowledge and techniques to transform your imaginative concepts into tangible realities within Roblox and beyond.
Embrace the synergy between Roblox and Blender to elevate your creative projects. This guide unlocks the door to endless possibilities, empowering you to transform imagination into reality with seamless character integration.