UV Unwrapping Blender Tutorial: Master the Art of 3D Texturing

Topic uv unwrapping blender tutorial: Discover the secrets of UV Unwrapping in Blender and transform your 3D models with this essential tutorial, designed to guide beginners and advanced users alike through the art of texturing.

What is the process of UV unwrapping in Blender and where can I find a tutorial to learn it?

To perform UV unwrapping in Blender, follow these steps:

  1. Select the object you want to unwrap in the 3D Viewport.
  2. Switch to Edit Mode by pressing Tab or selecting it from the mode selection menu.
  3. Select the faces you want to unwrap by hovering over them and pressing L to select linked faces or using box select with B.
  4. In the UV Editing workspace or the UV/Image Editor, press U to bring up the UV Mapping menu.
  5. Choose the Unwrap option from the menu to apply the UV unwrap.
  6. You can then adjust and manipulate the UV layout as needed to properly map textures onto the object.

For a detailed tutorial on UV unwrapping in Blender, you can refer to the following resources:

Understanding UV Unwrapping

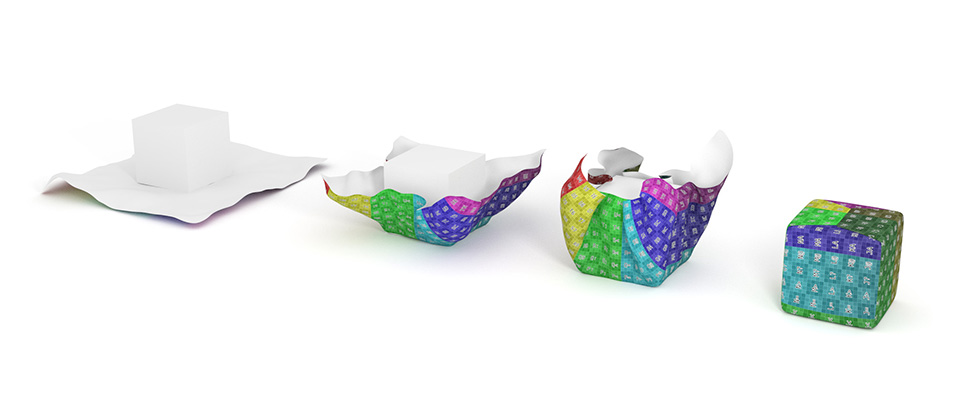
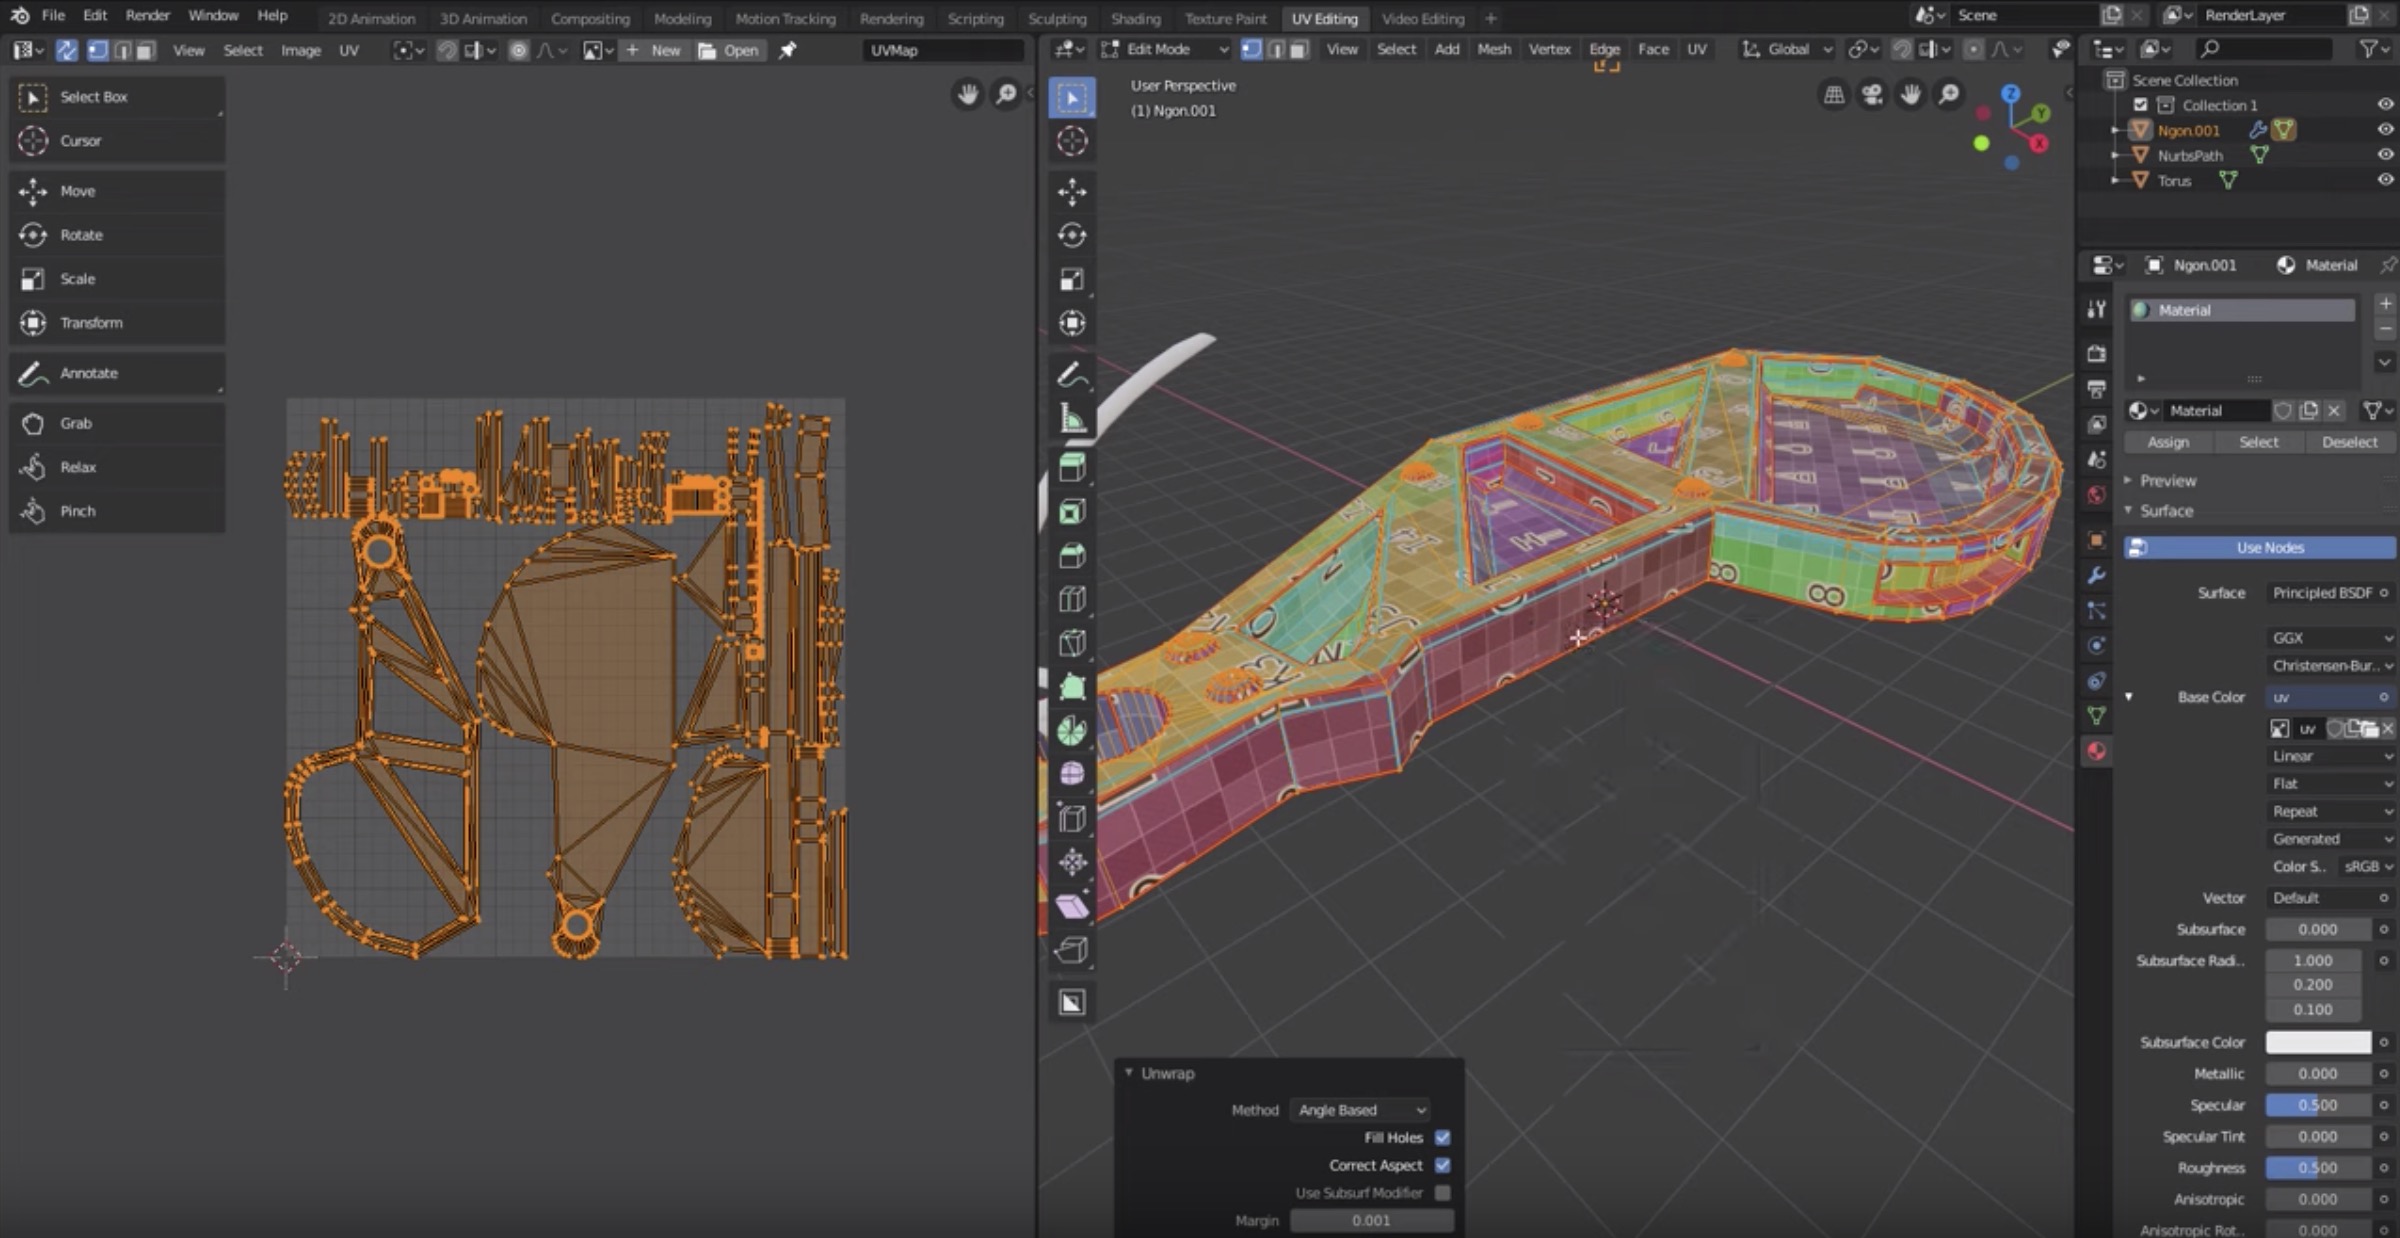
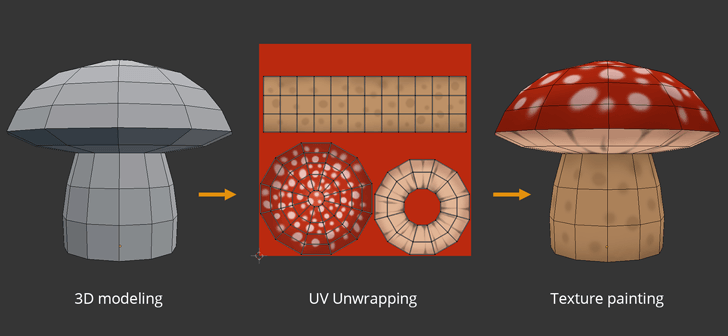
UV unwrapping is the process of projecting a 3D model\"s surface onto a 2D plane to efficiently map textures. This technique is crucial for adding detailed textures to your models, enhancing their realism and visual appeal.

Getting Started with UV Unwrapping

  • Introduction to UV unwrapping and its importance in 3D modeling.
  • Step-by-step instructions on how to unwrap your model in Blender.
  • Tips for selecting and marking seams for optimal unwrapping results.

Advanced UV Unwrapping Techniques

  1. Utilizing Blender\"s unwrap algorithms for complex models.
  2. Strategies for unwrapping challenging shapes and avoiding distortion.
  3. Efficiently organizing and editing UV maps for texture application.

Understanding UV Unwrapping

Optimizing Your Workflow

Learn how to streamline your UV unwrapping workflow in Blender, saving time while achieving better results. Discover the use of add-ons and shortcuts that can make the unwrapping process more efficient and intuitive.

Useful Add-ons and Tools

  • Overview of Blender add-ons like UV Packmaster Pro 2 that enhance UV unwrapping.
  • How to leverage Blender\"s built-in tools for quicker and more precise unwrapping.

Optimizing Your Workflow

Practical Examples and Tutorials

Dive into detailed tutorials that guide you through the UV unwrapping process for various types of models, from simple objects to complex scenes. Each tutorial provides practical examples and insights to help you master UV unwrapping in Blender.

TutorialDescriptionDifficulty Level
Basic UV UnwrappingA beginner-friendly tutorial on unwrapping simple models.Beginner
Unwrapping Complex ModelsAdvanced techniques for unwrapping detailed and complex models.Advanced
Efficient Workflow TipsTips and tricks to enhance your UV unwrapping workflow.Intermediate

Practical Examples and Tutorials

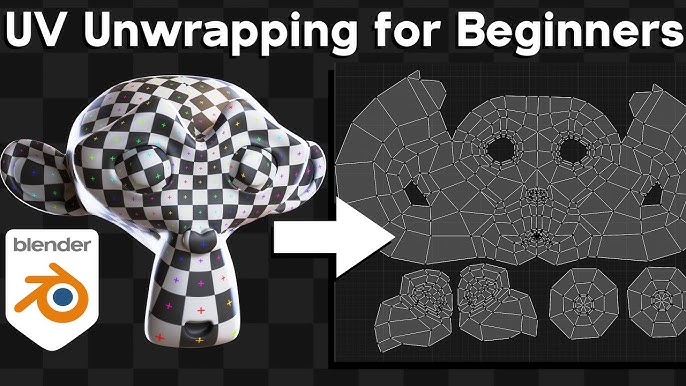
UV Unwrapping Explained for Beginners Blender Tutorial

For beginners: \"Are you new to this hobby? This video is perfect for beginners looking to learn the basics and get started on their journey! Let\'s dive in together and enjoy the learning process.\" For anything: \"Looking for inspiration or entertainment? This video has a little bit of everything! From tips and tricks to fun challenges, there\'s something for everyone. Come explore and experience it all!\"

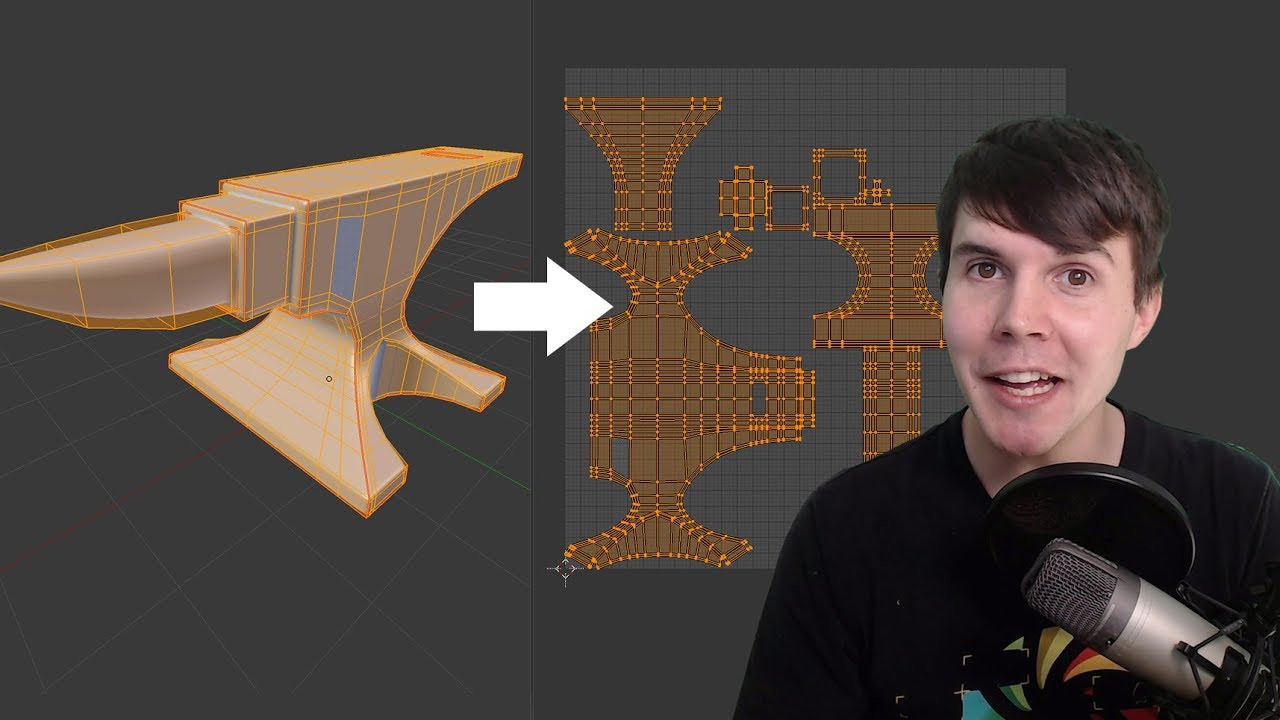
Blender 4.0 How to UV Unwrap Anything

After watching this tutorial, you will learn how to master UV unwrap in Blender 4.0. We are using vanilla Blender with no Add Ons ...

Conclusion

UV unwrapping is a vital skill in 3D modeling, essential for texturing and bringing your models to life. By following this guide and practicing with the tutorials provided, you\"ll be well on your way to becoming proficient in UV unwrapping using Blender.

Conclusion

_HOOK_

Optimizing Your Workflow

Learn how to streamline your UV unwrapping workflow in Blender, saving time while achieving better results. Discover the use of add-ons and shortcuts that can make the unwrapping process more efficient and intuitive.

Useful Add-ons and Tools

  • Overview of Blender add-ons like UV Packmaster Pro 2 that enhance UV unwrapping.
  • How to leverage Blender\"s built-in tools for quicker and more precise unwrapping.

Optimizing Your Workflow

Practical Examples and Tutorials

Dive into detailed tutorials that guide you through the UV unwrapping process for various types of models, from simple objects to complex scenes. Each tutorial provides practical examples and insights to help you master UV unwrapping in Blender.

Practical Examples and Tutorials

Conclusion

UV unwrapping is a vital skill in 3D modeling, essential for texturing and bringing your models to life. By following this guide and practicing with the tutorials provided, you\"ll be well on your way to becoming proficient in UV unwrapping using Blender.

Conclusion

Practical Examples and Tutorials

Dive into detailed tutorials that guide you through the UV unwrapping process for various types of models, from simple objects to complex scenes. Each tutorial provides practical examples and insights to help you master UV unwrapping in Blender.

TutorialDescriptionDifficulty Level
Basic UV UnwrappingA beginner-friendly tutorial on unwrapping simple models.Beginner
Unwrapping Complex ModelsAdvanced techniques for unwrapping detailed and complex models.Advanced
Efficient Workflow TipsTips and tricks to enhance your UV unwrapping workflow.Intermediate

Practical Examples and Tutorials

Conclusion

UV unwrapping is a vital skill in 3D modeling, essential for texturing and bringing your models to life. By following this guide and practicing with the tutorials provided, you\"ll be well on your way to becoming proficient in UV unwrapping using Blender.

Conclusion

_HOOK_

Conclusion

UV unwrapping is a vital skill in 3D modeling, essential for texturing and bringing your models to life. By following this guide and practicing with the tutorials provided, you\"ll be well on your way to becoming proficient in UV unwrapping using Blender.

Conclusion

Introduction to UV Unwrapping in Blender

UV unwrapping in Blender is a critical skill for 3D artists, enabling the application of textures to models with precision and creativity. This section introduces the fundamentals of UV unwrapping, guiding you through the process and tools available in Blender to achieve effective results.

  • Understanding the Basics: UV unwrapping involves projecting a 3D model\"s surface onto a 2D plane, allowing for detailed texturing.
  • Importance of UV Unwrapping: Proper unwrapping is essential for creating realistic textures that align correctly with the 3D geometry of your models.
  • Getting Started with Blender\"s UV Tools: Blender offers a comprehensive set of tools for UV unwrapping, from automatic unwraps to manual adjustments.

Before diving into the technical aspects, it\"s crucial to grasp the significance of UV unwrapping in the 3D modeling and texturing workflow. It not only impacts the visual quality of the model but also the efficiency of the texturing process. By mastering UV unwrapping, you can ensure your models look their best and are ready for animation, gaming, or any other application.

  1. Selecting and Marking Seams: Learn how to choose edges to define where your model unfolds into a flat UV map.
  2. Unwrapping Your Model: Use Blender\"s unwrapping tools to project your 3D model onto a 2D UV map efficiently.
  3. Adjusting and Optimizing UVs: Fine-tune your UV maps for optimal texture alignment and minimal distortion.

This introduction sets the stage for deeper exploration into each of these areas, ensuring you have a solid foundation to build upon as you learn to unwrap various models, from simple objects to complex scenes.

Why UV Unwrapping is Essential for 3D Modeling

UV unwrapping plays a pivotal role in the 3D modeling process, serving as the bridge between three-dimensional shapes and two-dimensional texture maps. This section delves into the core reasons why UV unwrapping is indispensable for anyone involved in 3D design, especially when using Blender.

  • Texture Mapping: UV unwrapping allows for the precise application of textures to a model, ensuring that every detail aligns correctly with the model\"s geometry.
  • Realism and Detail: By accurately mapping textures, UV unwrapping adds depth, realism, and detail to 3D models, making them more lifelike and visually appealing.
  • Control and Flexibility: It offers unparalleled control over how textures wrap around the model, giving artists the flexibility to achieve the desired look and feel.

Understanding the significance of UV unwrapping can transform your approach to 3D modeling, enabling you to create more detailed, realistic, and visually stunning models. It\"s not just about applying textures; it\"s about breathing life into your creations, ensuring they stand out in a digital world full of possibilities.

  1. Improves Texture Resolution and Efficiency: Properly unwrapped models make better use of texture space, allowing for higher resolution textures without wasting resources.
  2. Essential for Game Design and Animation: UV unwrapping is critical in industries where models must be optimized for performance without compromising on detail or quality.
  3. Facilitates Complex Texturing Techniques: Techniques such as baking lighting information or detail maps require efficiently unwrapped UVs to ensure accuracy and quality.

Whether you\"re creating assets for video games, visual effects, architectural visualization, or simply exploring the vast potential of 3D modeling, mastering UV unwrapping is a step towards achieving your creative vision. It\"s an essential skill that enhances not just the visual quality of your models but also their versatility across different media and platforms.

Basic Concepts and Terminology of UV Unwrapping

UV unwrapping is a foundational technique in 3D modeling, crucial for applying textures to models. This section explores the key concepts and terminology to provide a clear understanding of UV unwrapping, especially for those new to Blender.

  • UV Coordinates: Points on a 2D texture map that correspond to vertices on a 3D model.
  • Seams: Edges marked on a 3D model to guide the unwrapping process, determining where the mesh is \"cut\" to lay flat.
  • Islands: Sections of the unwrapped mesh that are isolated from each other on the UV map.

Understanding these terms is crucial for effectively unwrapping models and applying textures. UV unwrapping allows for the precise control over how an image texture wraps around a 3D object, ensuring textures look realistic and are properly aligned with the model\"s features.

  1. Marking Seams: Selecting edges where the mesh will be split during unwrapping.
  2. Unwrapping the Mesh: The process of flattening the 3D model into a 2D representation.
  3. Editing UV Maps: Adjusting the unwrapped mesh on the UV layout to optimize texture placement.

By mastering these basic concepts and terminology, you\"ll be better equipped to tackle the challenges of texturing and bring your 3D creations to life with Blender.

Step-by-Step Guide to UV Unwrapping for Beginners

UV unwrapping in Blender is a fundamental skill for any 3D artist, enabling the application of textures to 3D models. This guide is designed to help beginners navigate through the process of UV unwrapping, from marking seams to the final unwrap.

  1. Open Your Model in Blender: Start by importing or opening your 3D model in Blender.
  2. Select Edit Mode: With your model selected, switch to Edit Mode to access the mesh.
  3. Marking Seams: Identify and select edges where your mesh will be cut for unwrapping. Right-click to select edges, and press Ctrl+E to mark seams.
  4. Unwrapping the Mesh: After marking seams, select all faces of your model (A key) and then press U to unwrap. Choose \"Unwrap\" from the menu.
  5. Adjusting the UV Map: Open the UV/Image Editor window to view and adjust your UV map. Use this space to arrange and scale the UV islands efficiently.
  6. Applying Textures: Once satisfied with the UV map, you can begin applying textures to your model using the Shader Editor.

This basic workflow introduces you to UV unwrapping in Blender, an essential step in texturing 3D models. With practice, you\"ll develop a deeper understanding of how to effectively unwrap various models, enhancing your texturing skills and improving your 3D projects.

_HOOK_

Advanced Techniques for UV Unwrapping Complex Models

Unwrapping complex models in Blender requires advanced techniques to ensure textures look realistic and efficient. This section covers sophisticated strategies for tackling intricate shapes and avoiding common pitfalls in UV unwrapping.

  1. Pinpointing Strategic Seams: For complex models, identifying optimal seam locations can significantly reduce texture distortion. Focus on natural separations and hidden areas.
  2. Utilizing Blender\"s Unwrap Algorithms: Explore Blender\"s various unwrapping algorithms, like Conformal and Angle Based, to see which best suits the geometry of your model.
  3. Live Unwrap Feature: Use Blender\"s Live Unwrap feature to see real-time updates of your UV map as you mark seams or move UV islands, allowing for instant feedback and adjustments.
  4. Minimizing Stretching: Employ the Minimize Stretch tool within the UV Editor to adjust the UVs and reduce texture stretching, ensuring a more natural look.
  5. Managing UV Islands: Efficiently organizing UV islands can make a significant difference in texture resolution and the overall appearance. Tools like UV Packmaster can aid in optimizing space.
  6. Texture Baking: For highly detailed models, texture baking can project detailed textures from a high-poly model to a low-poly counterpart, preserving detail without overwhelming the UV layout.

Advanced UV unwrapping requires patience and practice. By mastering these techniques, you can enhance the realism and detail of your 3D models, making them ready for animation, games, or any visual medium.

Common Challenges and Solutions in UV Unwrapping

UV unwrapping is a complex process that can present numerous challenges, especially when working with intricate models. This section outlines some common issues encountered during UV unwrapping in Blender and provides practical solutions to overcome them.

  • Distorted Textures: One of the most common issues is texture distortion, where textures do not align correctly with the model.
  • Solution: Ensure seams are strategically placed at natural boundaries and use Blender\"s tools like \"Minimize Stretch\" to adjust the UV map.
  • Overlapping UV Islands: Overlapping can occur when UV islands are not properly spread out, leading to texture artifacts.
  • Solution: Utilize the \"UV Packing\" feature to efficiently organize UV islands within the UV space, ensuring they do not overlap.
  • Excessive Seams: Too many seams can complicate the unwrapping process and result in a fragmented UV map.
  • Solution: Minimize the number of seams by only marking them where necessary, and consider using the \"Live Unwrap\" feature to dynamically adjust and see the impact of seam placement.
  • Managing Large or Complex Models: Unwrapping high-poly models or those with complex geometries can be daunting.
  • Solution: Break down the model into manageable parts, unwrap in sections, and consider using projection unwrapping for highly detailed areas.

By understanding these common challenges and their solutions, you can streamline your UV unwrapping workflow in Blender, achieving better results with less frustration. Practice and patience are key, as is experimenting with Blender\"s range of UV tools to find what works best for your specific project needs.

Optimizing Your Workflow with Blender\"s UV Unwrapping Tools

Blender\"s UV unwrapping tools are powerful aids in the texturing process, allowing for efficient and precise mapping of textures to 3D models. This section focuses on optimizing your workflow with these tools, ensuring a smooth and effective UV mapping experience.

  • Mark Seams Wisely: Strategically place seams in less noticeable areas to improve the final appearance of the texture.
  • Use Blender\"s Live Unwrap: This feature automatically updates the UV map as you make changes, saving time and effort.
  • Experiment with Unwrap Methods: Blender offers several unwrapping methods, including Angle Based and Conformal. Each has its advantages, depending on the complexity of your model.
  • Utilize the Pinning Feature: Pin specific vertices in the UV editor to keep parts of your UV map fixed while you adjust others.
  • Employ UV Squares: This Blender addon straightens UV maps and makes them grid-like, ideal for architectural models.

Mastering these tools and techniques will greatly enhance your texturing workflow in Blender. With practice, you can efficiently unwrap any model, from simple objects to complex scenes, and achieve high-quality textures that bring your 3D creations to life.

Utilizing Blender Add-ons to Enhance UV Unwrapping

Blender\"s functionality can be significantly expanded with the use of add-ons, many of which are designed to streamline and enhance the UV unwrapping process. This section highlights some key add-ons that can improve efficiency and results in UV mapping.

  • UV Packmaster: A powerful tool for optimizing UV packing, ensuring that UV islands utilize the texture space as efficiently as possible.
  • TexTools: Offers a comprehensive suite of tools for UV mapping and texture manipulation, including alignment, straightening, and distribution functions.
  • UV Squares: Useful for straightening UV maps and converting them into grid-like patterns, ideal for architectural projects or any application requiring precise alignment.

Integrating these add-ons into your Blender workflow can significantly reduce the time and effort required for UV unwrapping, especially when dealing with complex models or striving for optimal texture space utilization. Each add-on offers unique features that cater to different aspects of UV mapping, from packing efficiency to texture alignment, enhancing your ability to achieve professional-grade results.

Best Practices for Efficient UV Mapping and Texture Application

Efficient UV mapping and texture application are key to creating high-quality 3D models in Blender. This section outlines best practices that help streamline the UV unwrapping process, ensuring textures are applied accurately and effectively.

  • Plan Your Seams: Carefully plan where to place seams for minimal visibility and distortion. Think about how the model will be viewed and place seams in less noticeable areas.
  • Keep UV Islands Proportional: Maintain the proportion of UV islands to their 3D counterparts to avoid texture stretching or squashing.
  • Avoid Overlapping UVs: Ensure that no two UV islands overlap unless intentionally sharing the same texture space for repeating textures.
  • Utilize Texture Space Efficiently: Pack UV islands closely within the UV grid to make the most out of your texture space, increasing texture detail without requiring higher resolution textures.
  • Check for Distortion: Regularly check your model with a checkerboard texture applied to identify and correct any distortion in the UV map.
  • Opt for Higher Resolution Textures When Necessary: While efficient UV packing can help, sometimes using a higher resolution texture is the only way to achieve the desired level of detail.

By adhering to these best practices, you can enhance the visual quality of your 3D models, optimize the texturing workflow, and ensure your textures look as intended on your final model.

_HOOK_

Practical Examples: UV Unwrapping Various Model Types

UV unwrapping techniques can vary significantly depending on the complexity and type of model you are working with. This section provides practical examples of UV unwrapping for different model types, guiding you through the process for each.

  • Simple Objects (Boxes, Cylinders): Learn the basics of unwrapping simple shapes, focusing on seam placement and UV island arrangement.
  • Characters and Organic Shapes: Explore advanced strategies for unwrapping complex, organic models, including the use of pelt mapping and the importance of seam placement for animation.
  • Architectural Models: Discover techniques for efficiently unwrapping buildings and interior spaces, emphasizing the use of straight seams and grid alignment for texture consistency.
  • Vehicles and Machinery: Understand the approach for mechanical objects, balancing between automated unwrapping and manual adjustments for optimal texture fidelity.

Each example highlights the unique challenges presented by different types of models and offers tailored strategies to achieve effective and efficient UV maps. By studying these examples, you will gain a deeper understanding of how to approach UV unwrapping for a wide range of projects in Blender.

Conclusion and Further Resources

UV unwrapping in Blender is a fundamental skill that enhances the realism and detail of your 3D models by allowing precise texture application. This guide has covered everything from basic concepts and terminology, through step-by-step tutorials for beginners, to advanced techniques for complex models, and has also outlined common challenges with solutions, optimization tips, and useful add-ons.

As you continue to explore and master UV unwrapping, remember that practice and experimentation are key. The versatility and power of Blender\"s UV unwrapping tools offer endless possibilities for creativity and improvement in your 3D projects.

  • For further learning, explore Blender\"s official documentation and tutorials available on Blender.org.
  • Join online forums and communities like Blender Artists or the Blender subreddit to share experiences, get advice, and find inspiration from fellow artists.
  • Consider enrolling in online courses or workshops that focus on UV unwrapping and texturing in Blender for more structured learning experiences.

Whether you are a hobbyist or a professional, mastering UV unwrapping will significantly contribute to your skill set, enabling you to bring your creative visions to life with greater precision and beauty.

Embark on a journey to master UV unwrapping in Blender, unlocking the full potential of your 3D models. With practice, this guide will elevate your texturing skills, transforming your creative workflow and bringing your digital creations to life.

FEATURED TOPIC