How to Import Roblox Rig into Blender: A Comprehensive Guide for Game Developers

Topic how to import roblox rig into blender: Discover the essential steps to seamlessly import your Roblox rig into Blender, enhancing your animation and game development projects with this comprehensive guide.

How can I import a Roblox rig into Blender?

To import a Roblox rig into Blender, you can follow these steps:

  1. Right-click the model you want to work on in Roblox.
  2. Select Export from the menu and export the model as an .obj file.
  3. Open Blender on your computer.
  4. Click on File in the top-left corner of the Blender interface.
  5. Choose Import from the dropdown menu.
  6. Select Wavefront (.obj) from the list of import options.
  7. Navigate to the location where you saved the .obj file from Roblox and open it.
  8. Your Roblox rig should now be imported into Blender and ready for you to work on.

Steps to Import Roblox Rig into Blender

  1. Export Rig from Roblox: In Roblox, select the rig you want to export. Use the Roblox Studio\"s export feature to save the rig as an .obj file on your computer.
  2. Prepare Blender: Open Blender and ensure it\"s updated to the latest version compatible with Roblox rigs, ideally Blender 2.80 or newer.
  3. Import Rig into Blender: In Blender, go to File > Import and select the .obj file you exported from Roblox. Adjust import settings if necessary to correctly load the model.
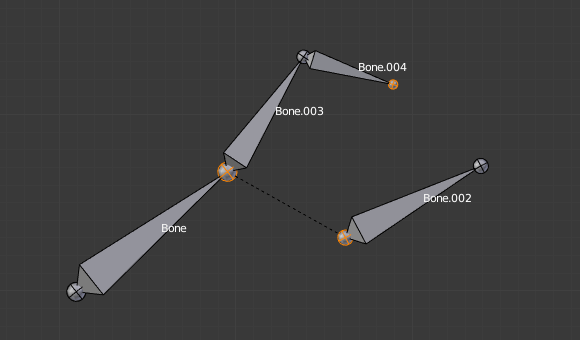
  4. Adjust and Rig: Once imported, you may need to adjust the scale, rotation, and position of the rig. You can also add further rigging and armature adjustments for animation within Blender.

Steps to Import Roblox Rig into Blender

Tips for Successful Import

  • Ensure your Roblox rig is correctly configured and optimized for export to avoid issues during the import process.
  • Check Blender\"s documentation for any specific settings or plugins that might be required for importing Roblox rigs.
  • Experiment with Blender\"s import settings to achieve the best results, particularly with complex rigs.

Tips for Successful Import

Common Issues and Solutions

IssueSolution
Imported rig appears distortedCheck and adjust the rig\"s scale and rotation settings in Blender. Ensure the rig was exported correctly from Roblox.
Missing textures or materialsEnsure all necessary files are included during export from Roblox and correctly linked in Blender.
Animation data not importedVerify that the .obj export includes animation data. Consider using other file formats like FBX for animation.

Following these steps and tips should help you successfully import a Roblox rig into Blender, opening up new possibilities for your Roblox game development and animation projects.

Common Issues and Solutions

How to Import a Roblox Rig into Blender

Tutorial: Learn step-by-step with this engaging tutorial video that will teach you useful skills and tips in an easy-to-follow format. Embark on a learning journey and enhance your knowledge today!

Import Roblox Rig into Blender All Separated Parts

Separated parts: Dive deep into the intricate world of separated parts in this fascinating video. Explore how individual components come together to create a greater whole, unlocking the secrets of craftsmanship and innovation.

Tips for Successful Import

  • Ensure your Roblox rig is correctly configured and optimized for export to avoid issues during the import process.
  • Check Blender\"s documentation for any specific settings or plugins that might be required for importing Roblox rigs.
  • Experiment with Blender\"s import settings to achieve the best results, particularly with complex rigs.

Tips for Successful Import

_HOOK_

Common Issues and Solutions

Following these steps and tips should help you successfully import a Roblox rig into Blender, opening up new possibilities for your Roblox game development and animation projects.

Common Issues and Solutions

Common Issues and Solutions

IssueSolution
Imported rig appears distortedCheck and adjust the rig\"s scale and rotation settings in Blender. Ensure the rig was exported correctly from Roblox.
Missing textures or materialsEnsure all necessary files are included during export from Roblox and correctly linked in Blender.
Animation data not importedVerify that the .obj export includes animation data. Consider using other file formats like FBX for animation.

Following these steps and tips should help you successfully import a Roblox rig into Blender, opening up new possibilities for your Roblox game development and animation projects.

Common Issues and Solutions

Introduction to Roblox Rig Importing

Importing a Roblox rig into Blender is a crucial step for creators looking to elevate their game design and animation projects. This process allows for intricate editing, animation, and customization of Roblox characters within Blender\"s powerful 3D modeling environment. Understanding the workflow and requirements is key to a smooth transition from Roblox to Blender.

  1. Exporting Your Roblox Rig: The first step involves exporting your Roblox character or rig. This is typically done through Roblox Studio, where you can select your character model and export it as an .obj file, which Blender can import.
  2. Preparing Blender: Before importing, ensure Blender is set up correctly. This might include updating Blender to the latest version and configuring settings to accommodate the Roblox rig.
  3. Importing into Blender: With the .obj file exported from Roblox, you can import it into Blender. This step is straightforward but crucial, as it brings your Roblox model into a new environment where it can be rigged, animated, or edited further.
  4. Adjusting and Finalizing: After importing, adjustments such as scaling, positioning, and rigging in Blender might be necessary to ensure your model works as intended for your specific project needs.

Each of these steps plays a vital role in successfully importing Roblox rigs into Blender, setting the stage for advanced 3D modeling and animation tasks. Whether you\"re creating custom animations, designing unique characters, or bringing new life to existing models, understanding this process is the first step towards unlocking the full potential of your Roblox creations in Blender.

Introduction to Roblox Rig Importing

Preparation Steps Before Importing

Before importing a Roblox rig into Blender, there are several essential steps you must follow to ensure a smooth and successful import process. These steps are designed to prepare both your Roblox model and Blender software, laying a solid foundation for your 3D modeling and animation work.

  1. Update Blender: Ensure you have the latest version of Blender installed. This guarantees compatibility with the most recent file formats and import/export features.
  2. Install Necessary Plugins: Some tools or plugins may be required to facilitate the import process. For example, the Roblox Blender Plugin can streamline the transfer of models between Roblox and Blender.
  3. Prepare the Roblox Rig: In Roblox Studio, choose the character or rig you wish to import. Make sure it is properly configured and optimized for export, paying close attention to any potential issues that might affect the import.
  4. Export the Rig from Roblox: Use the export function in Roblox Studio to save your rig as an .obj file or another compatible format for Blender. Ensure that all necessary components, such as textures and meshes, are included in the export.
  5. Organize Your Files: Keep your exported files organized in a dedicated folder. This helps in easily locating and managing your files during the import process in Blender.

By carefully following these preparation steps, you can ensure that your Roblox rig is ready to be imported into Blender, minimizing potential issues and setting the stage for a successful 3D modeling and animation project.

Preparation Steps Before Importing

Detailed Step-by-Step Import Process

To import a Roblox rig into Blender, follow these comprehensive steps, ensuring a smooth transition and setup for further adjustments or animations within Blender.

  1. Begin in Roblox by enabling the necessary plugin and selecting the rig you wish to export. If done correctly, a GUI will appear allowing you to export the rig. Save the .obj file to a known location on your computer.
  2. Open Blender and from the left panel in the 3D view, access the Animation tab under Rbx Animations. Choose \"Import model\" and select the .obj file you\"ve saved.
  3. Once imported, click \"Rebuild rig\" in the left panel. This should make the bones visible within Blender, indicating a successful import.
  4. Select the Armature, switch to Pose mode, and begin manipulating the bones. Create keyframes as needed for animation, ensuring to select the LocRot keying set for location and rotation captures, or enable auto keying for efficiency.
  5. After animating, export the animation by clicking \"Export animation\" in the left panel. This action copies the animation data to your clipboard.
  6. Back in Roblox, use \"Load large animation\" to paste the animation data from your clipboard and load the animation into Roblox. Once loaded, you can upload the animation to Roblox as a new asset.

For models:

  1. Right-click on the model in Roblox and select \"Export\" to save as an .obj file.
  2. In Blender, go to File > Import and select the .obj file you exported from Roblox.

This process ensures a seamless import of Roblox models and rigs into Blender, allowing for extensive customization and animation within a more powerful 3D editing tool.

Detailed Step-by-Step Import Process

_HOOK_

Adjusting and Rigging in Blender

Once you\"ve imported your Roblox rig into Blender, adjusting and rigging it correctly is crucial for animating your characters or models effectively. Here\"s how to do it:

  1. Begin by setting up Blender to match Roblox Studio\"s scene units for accurate scaling.
  2. Import your model into Blender. For humanoid characters, use a reference model to ensure proper scaling and positioning.
  3. Create and position bones within the mesh object to build the skeleton structure. For humanoid models, ensure the bones are symmetrical and aligned with the character\"s anatomy.
  4. Add an armature, the skeleton structure, to your Blender project and position it correctly within your mesh. Use X-Axis Mirror for symmetrical adjustments.
  5. Parent the mesh to the armature using Automatic Weights to bind the skeleton to the mesh, ensuring that the bones control the mesh movements.
  6. Manually assign vertices to specific bones for precise control over which parts of the mesh move with which bones. This step is crucial for detailed rigging.
  7. Test the rig by moving the bones in Pose Mode to ensure the mesh deforms naturally. Adjust the weight painting as needed for smooth animations.

For humanoid models, consider using predefined rigs like the R15 template to expedite the rigging process. This involves importing the character model into a Blender project with an R15 armature, positioning bones to match the character\"s structure, and parenting the mesh to the armature with specific attention to the vertex group assignment.

After rigging, it\"s essential to test your model in different poses and animations to ensure the rig behaves as expected. Adjustments may be necessary to achieve the desired movement and deformation.

Tips for success include maintaining symmetry when placing bones, using Blender\"s bone layer system for organization, and frequently testing the rig during the adjustment process. These steps help create a functional and flexible rig ready for animation within Roblox Studio.

Adjusting and Rigging in Blender

Tips for a Successful Import

Successfully importing a Roblox rig into Blender requires careful preparation and attention to detail. Here are several tips to ensure a smooth import process:

  • Export Correctly from Roblox: Begin by exporting your model as an .obj file from Roblox. Right-click the model you intend to work with, select \"Export,\" and save the file.
  • Prepare Your Blender Environment: Upon opening Blender, delete the default objects and set the unit scale to match Roblox\"s, typically 0.01 with length set to centimeters, to ensure correct scaling of your imported model.
  • Import Using the Correct Format: In Blender, use the import function to select and import the .obj file you exported from Roblox. Ensure you are importing using the FBX format if available, as it is commonly used for 3D models.
  • Adjust Position and Scale: If the imported model appears at an incorrect scale or position, adjust its scale in the Object Properties panel. For precise positioning, consider setting your model\"s location to the origin point (0,0,0) in Roblox before export.
  • Utilize Blender Plugins: Consider using the Roblox Blender Plugin to streamline the transfer of models between Roblox and Blender. This tool allows for direct model transfer, reducing the need for manual file export and import.
  • Clean Up the Model: After import, inspect your model for any unnecessary geometry or artifacts and clean them up. This step is crucial for maintaining a clean and efficient model for animation or further modifications.
  • Test the Rig: Once imported and adjusted, test the rig thoroughly in Blender to ensure that bones and movements align with your expectations. Adjustments may be necessary for optimal animation results.

Following these tips can significantly improve the quality and usability of your imported Roblox rigs in Blender, making your subsequent animation and modeling tasks more efficient and enjoyable.

Common Issues and Their Solutions

Importing a Roblox rig into Blender can sometimes present challenges. Here are some common issues encountered during the import process and their solutions:

  • Parts Disconnected: If the head and legs separate from the torso upon importing, it could be due to improper joint connections or resizing issues. Remaking the rig with careful attention to joint connections and resizing can help. If resizing in Roblox Studio, ensure that the Humanoid Root Part is set back to default size to avoid import issues in Blender.
  • Rig Not Appearing in Blender: If your rig doesn\"t appear after importing, it might be positioned far from the center of the Blender workspace. Ensuring your rig is centered in Roblox Studio before exporting can resolve this. Note that OBJ files may not support rigs, as they\"re typically used for models only.
  • Animation Plugin Issues: Issues with importing rigged models for animation might stem from Blender updates or other unforeseen factors. Ensuring compatibility between the Blender version, the Roblox model, and any plugins used is crucial for a smooth import process.

These solutions address the most common hurdles faced when importing Roblox rigs into Blender. For specific issues, further research or reaching out to community forums for help may provide additional insights.

Advanced Techniques and Best Practices

When importing Roblox rigs into Blender, adopting advanced techniques and best practices can significantly improve the efficiency of your workflow and the quality of your projects. Here are some insights drawn from expert recommendations:

  1. Utilize the Roblox Blender Plugin: This Blender add-on streamlines the transfer of 3D modeling objects directly from Blender to Roblox Studio, helping you save time and reduce errors by avoiding the manual export and import process.
  2. Rigging Best Practices: Before exporting your model for rigging, ensure that Blender\"s scene unit and unit scale properties are adjusted to match Roblox Studio\"s scale. This involves setting the unit scale to 0.01 and the length to centimeters. Such preparation ensures that your model\"s scale aligns correctly within both environments.
  3. Comprehensive Importing with 3D Importer: Roblox Studio\"s 3D Importer supports importing .fbx, .gltf, or .obj 3D models with a wide range of data including basic or PBR textures, rigging and skinning data, and animation. This tool provides a detailed preview and hierarchical selection of model components, allowing for precise control over the imported elements and their settings.

Employing these advanced techniques and adhering to best practices can greatly enhance your ability to create, import, and animate models effectively between Roblox and Blender. Always ensure your tools are up to date and that you\"re familiar with the latest features offered by both platforms to maximize your creative potential.

Resources and Tools for Better Efficiency

To enhance efficiency in importing Roblox rigs into Blender, several resources and tools can be instrumental. Utilizing these can streamline your workflow and improve the quality of your projects:

  • Roblox Blender Plugin: This add-on facilitates the direct transfer of 3D modeling objects from Blender to your Roblox Studio session. It\"s designed to save time and minimize errors by bypassing the traditional export-import process. For detailed installation and usage instructions, refer to the official documentation.
  • Rigging Guide: For those new to rigging or seeking to refine their skills, Roblox provides a comprehensive guide to rigging simple meshes. This guide covers everything from setting up Blender to match Studio\"s scale, creating and positioning bones within your mesh, and testing the rigged mesh for proper positioning and influence.
  • 3D Importer: Roblox Studio\"s 3D Importer tool supports importing a wide array of 3D models into Studio, including those with rigging and skinning data, basic or PBR textures, and animation data. It features a preview panel for examining 3D objects, a hierarchy panel for detailed component selection, and an inspector panel for applying various settings to the imported object.
  • GitHub Repository: The Roblox Blender Plugin is open-source, and its code is available on GitHub. This allows developers to extend and build upon the tool for their projects. The repository also contains the plugin\"s installation guide, a usage guide, and information on contributing to its development.

These tools and resources are vital for anyone looking to efficiently import Roblox rigs into Blender, whether for animation, game development, or other creative projects.

_HOOK_

Conclusion and Further Learning

Importing a Roblox rig into Blender opens up a realm of possibilities for creators, from animation to custom content creation. By leveraging tools like the Roblox Blender Plugin and the comprehensive guides available through Roblox Creator Hub, users can streamline their workflow and enhance the quality of their projects. These resources not only simplify the import process but also provide a foundation for further exploration and mastery of both platforms.

  • The Roblox Blender Plugin is essential for efficiently transferring 3D modeling objects from Blender to Roblox Studio, saving creators significant time and effort.
  • Roblox\"s rigging guides offer step-by-step instructions on preparing models in Blender, ensuring they are ready for animation and integration into Roblox games.
  • The 3D Importer tool within Roblox Studio further facilitates the seamless integration of detailed models, including those with complex textures and animations, enhancing the overall quality and immersion of Roblox experiences.

For creators interested in diving deeper, the open-source nature of the Roblox Blender Plugin encourages community contribution and development, offering a path for those looking to tailor the tool to their specific needs or contribute to its evolution. Engaging with these resources not only improves individual project outcomes but also enriches the broader Roblox and Blender communities.

To continue your journey in 3D modeling and animation, consider exploring additional tutorials, participating in community forums, and experimenting with advanced features in both Roblox Studio and Blender. The collaboration between these platforms provides a robust ecosystem for creators to bring their visions to life.

Embark on a creative journey by seamlessly integrating Roblox rigs into Blender, enhancing your animation and design capabilities. This guide provides essential insights, empowering you to bring your imaginative Roblox creations to life with professional finesse.

FEATURED TOPIC