Topic how to put textures on a model in blender: Discover the secrets to mastering textures in Blender with our comprehensive guide, designed to take your 3D models from bland to breathtaking with easy, step-by-step instructions.
Table of Content
- How do you apply textures to a model in Blender?
- Understanding Blender\"s Texture Application Process
- Preparing Your Model for Texturing
- Creating and Assigning Materials
- Importing and Applying Textures
- Using the Shader Editor for Texture Setup
- UV Mapping Techniques for Better Texture Fit
- YOUTUBE: Blender Tutorial: Adding Texture to an Object
- Adjusting Texture Settings for Realism
- Tips for Managing Complex Textures
- Common Pitfalls and How to Avoid Them
- Advanced Texturing Techniques
- Resources for Finding Free Textures
- Finalizing and Exporting Your Textured Model
How do you apply textures to a model in Blender?
To apply textures to a model in Blender, follow these steps:
- Open Blender and select the object you want to apply the texture to.
- Switch to the \"Shading\" tab located at the top of the screen.
- In the \"Shader Editor\" panel, you should see two windows side by side.
- In the window on the left (typically the 3D view), select the object you want to add the texture to.
- In the window on the right (Shader Editor), click on the New button to create a new material if one doesn\'t exist.
- In the Shader Editor, click on the Principled BSDF node and select Base Color.
- Click on the small circle icon on the right side of the color input box.
- In the pop-up menu, select Image Texture.
- Click on the Open button and navigate to the location of your texture image.
- Select the desired texture image and click on the Open Image button.
- In the Shader Editor, connect the color output of the Image Texture node to the Base Color input of the Principled BSDF node.
- Adjust other parameters (if needed) like roughness, metallic, etc., based on your texture and material requirements.
- Switch back to the 3D view window and you should now see the applied texture on your model.
READ MORE:
Understanding Blender\"s Texture Application Process
Applying textures in Blender involves several crucial steps that blend art and technology. This process enables artists to add depth, realism, and character to their 3D models. Here\"s a step-by-step breakdown to demystify the texture application process in Blender:
- Start with a Model: Ensure your 3D model is ready for texturing. A clean, UV-unwrapped model is crucial for effective texture application.
- Choose Your Texture: Select or create the texture you want to apply. Blender supports various texture types, including image textures, procedural textures, and more.
- UV Mapping: Unwrap your model to create a UV map. This step is vital for accurately mapping the 2D texture onto the 3D model.
- Shader Editor: Use the Shader Editor to connect your texture to the model. Here, you can adjust the texture\"s properties and how it interacts with light.
- Texture Settings: Within the Shader Editor, fine-tune your texture\"s settings, such as scale, rotation, and mapping mode, to achieve the desired effect.
- Preview and Adjust: Use Blender\"s viewport shading mode to preview how the texture looks on your model. Make any necessary adjustments to ensure the texture aligns properly and appears realistic.
- Finalize Your Texture: Once satisfied with the texture application, consider additional steps such as baking the texture for performance optimization or exporting your model for use in other projects or engines.
Understanding this process is fundamental for any Blender artist looking to enhance their 3D models with textures. With practice and exploration, you\"ll be able to apply textures that add incredible depth and realism to your creations.

Preparing Your Model for Texturing
Before diving into the intricate world of texturing, ensuring your model is primed and ready is crucial. This preparation stage lays the foundation for a seamless texturing process. Follow these steps to prepare your model for texturing:
- Clean Your Geometry: Start by cleaning up your model. Remove any unnecessary vertices, edges, or faces that could complicate the texturing process.
- Optimize Topology: Ensure your model\"s topology is optimized for texturing. Uniform, quad-based topology is generally preferred as it makes UV unwrapping easier and more efficient.
- Mark Seams for UV Unwrapping: Identify and mark the seams of your model. Seams are edges where the model will be \"cut\" to lay flat for the UV map. Strategic placement of seams can significantly improve texture alignment.
- UV Unwrapping: With seams marked, proceed to unwrap your model. This step translates the 3D surface into a 2D UV map, where each face of the model is mapped to a corresponding area on the texture.
- Check for Overlapping UVs: Ensure that your UV map is clean, with no overlapping faces unless intentionally done for texture mirroring. Overlapping UVs can lead to texturing errors and inconsistencies.
- Apply a Test Texture: Applying a simple grid or checkerboard texture can help identify issues with the UV map, such as stretching or compression. Adjust your UV map as necessary to correct any issues.
Properly preparing your model for texturing not only streamlines the subsequent steps but also ensures that your textures will align correctly and look their best. With your model prepped, you\"re now ready to embark on the texturing journey.
Creating and Assigning Materials
After preparing your model, the next step in bringing your 3D creation to life is creating and assigning materials. Materials define the surface appearance of your model and serve as the base for texture application. Follow these steps to create and assign materials in Blender:
- Select Your Model: Ensure your model is selected in Object Mode.
- Open the Material Properties: Navigate to the Material Properties tab, located in the Properties panel.
- Create a New Material: Click the \"New\" button to create a new material. This material will be applied to your selected object.
- Configure Material Settings: Adjust the material settings to your liking. You can change the color, specularity, roughness, and more, depending on the look you\"re aiming for.
- Assign Material to Faces: In Edit Mode, you can assign the material to specific faces of your model. Select the faces you wish to apply the material to, then click \"Assign\" in the Material Properties tab.
- Adding Textures: With the material created, you can now add textures. In the Shader Editor, add a Texture node and link it to the material\"s shader. Choose the texture you wish to use and adjust its mapping settings.
- Preview Your Material: Use the viewport shading mode to preview how the material and texture look on your model. Adjust the settings as needed to achieve the desired appearance.
Creating and assigning materials is a crucial step in the texturing process. It gives your model its unique characteristics and prepares it for the final texturing touches. With your materials set, you\"re well on your way to fully texturing your model in Blender.

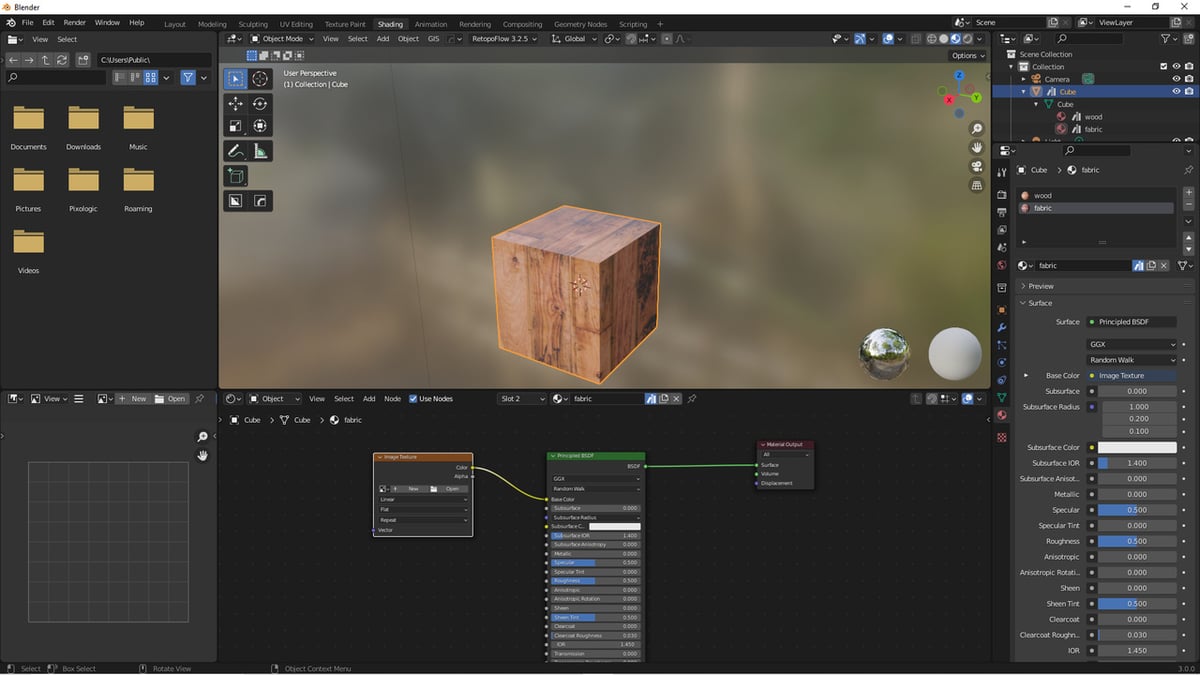
Importing and Applying Textures
Once you have your materials ready, the next pivotal step is to import and apply textures to your model. Textures can dramatically enhance the visual complexity and realism of your models. Follow these detailed steps to import and apply textures in Blender:
- Access the Shader Editor: With your object selected, switch to the Shader Editor. This workspace allows you to build and modify material shaders, including texture nodes.
- Add a Texture Node: In the Shader Editor, use the \"Add\" menu to introduce a Texture node into your material\"s node setup. Choose \"Image Texture\" if you\"re using a bitmap image.
- Load Your Texture: Click \"Open\" on the Image Texture node and navigate to your texture file. Select the file to load it into Blender.
- Connect the Texture Node: Drag a connection from the Color output of the Image Texture node to the Base Color input of the Principled BSDF shader node. This action applies the texture to your material.
- Adjust Texture Mapping: For proper alignment, add a Mapping node and a Texture Coordinate node to your setup. Connect the UV output from the Texture Coordinate node to the Vector input of the Mapping node, then connect it to the Vector input of your Image Texture node.
- Preview and Adjust: Utilize the viewport shading to preview how the texture looks on your model. You may need to adjust the mapping coordinates or the texture settings for the best fit.
- Refine Your Texture: Experiment with additional settings like scale, rotation, and projection to refine how your texture maps onto the model. Use the Mapping node for these adjustments.
Importing and applying textures in Blender is a creative process that allows you to bring depth and life to your 3D models. By following these steps, you can achieve realistic textures that enhance your digital creations.
_HOOK_
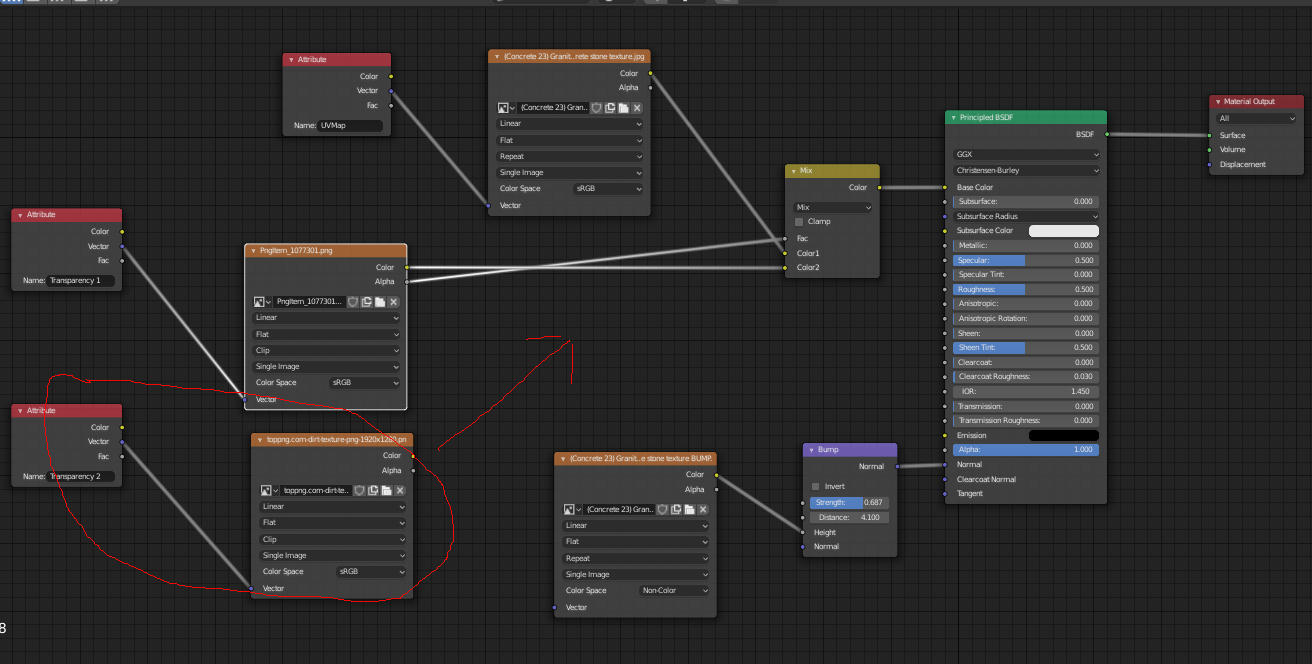
Using the Shader Editor for Texture Setup
The Shader Editor in Blender is a powerful tool for creating complex material and texture setups. It allows for a high degree of control and customization over how textures are applied and how they interact with materials. Here\"s how to use the Shader Editor to set up your textures effectively:
- Open the Shader Editor: With your model selected, switch to the Shader Editor from the drop-down menu at the top of the screen.
- Create a New Material: If your model doesn\"t already have a material, create one by clicking \"New\" in the Material Properties tab.
- Add Texture Nodes: In the Shader Editor, use the \"Add\" menu to insert texture nodes. You can add an \"Image Texture\" node for bitmap textures or a \"Noise Texture\" node for procedural textures.
- Connect Nodes: Drag from the output of your texture node to an input on the \"Principled BSDF\" shader node. For image textures, this is typically the \"Base Color\" input.
- Adjust the Texture Settings: Select your texture node to adjust its properties, such as the image file, mapping coordinates, and projection method.
- Utilize Mapping Nodes: For more control over the placement of your texture, add a \"Mapping\" node and a \"Texture Coordinate\" node. Connect the \"UV\" output of the Texture Coordinate node to the \"Vector\" input of the Mapping node, and then to your texture node.
- Preview Your Work: Use the \"Viewport Shading\" mode to preview how the texture and material appear on your model. Adjust the nodes as necessary to achieve your desired result.
- Experiment with Node Combinations: The Shader Editor allows for complex setups involving multiple textures and shader nodes. Experiment with combining different nodes to create unique material effects.
Using the Shader Editor for texture setup in Blender opens up a world of creative possibilities. By mastering node-based material and texture creation, you can achieve highly detailed and realistic results in your 3D projects.

UV Mapping Techniques for Better Texture Fit
UV mapping is a crucial step in texturing that involves projecting a 2D image onto a 3D model. Proper UV mapping ensures that textures fit correctly and look realistic. Here are some techniques to improve your UV mapping in Blender for a better texture fit:
- Understand UV Mapping Basics: Familiarize yourself with the UV mapping process. UV maps are the bridge between your 3D model and its 2D textures, allowing you to dictate how textures wrap around the model.
- Mark Seams for Easier Unwrapping: Use the Mark Seam feature to define edges where the mesh will be \"cut\" for unwrapping. Strategic seam placement can greatly improve how textures lay on the model.
- Utilize Blender\"s Unwrap Options: Blender offers several unwrap methods, such as Unwrap, Smart UV Project, and Project From View. Experiment with these to find the best fit for your model\"s geometry.
- Adjust UV Islands: After unwrapping, you can manually adjust the UV islands in the UV Editor. This allows for precise control over texture placement and scaling.
- Minimize Stretching: Use the UV Editor\"s tools to identify and minimize stretching in your UV map. The Correct Face Attributes or Minimize Stretch options can help adjust the UVs for a more uniform texture distribution.
- Employ Texture Painting for Corrections: If certain areas of your model require adjustments, texture painting can be used to directly paint or clone textures onto those spots, allowing for localized texture fitting.
- Optimize UV Space: Efficiently use the available UV space by packing UV islands closely together, ensuring that textures have the maximum resolution and detail possible.
Mastering UV mapping techniques is key to achieving a professional and realistic look in your textured models. With practice and attention to detail, you can greatly enhance the visual appeal of your 3D projects in Blender.

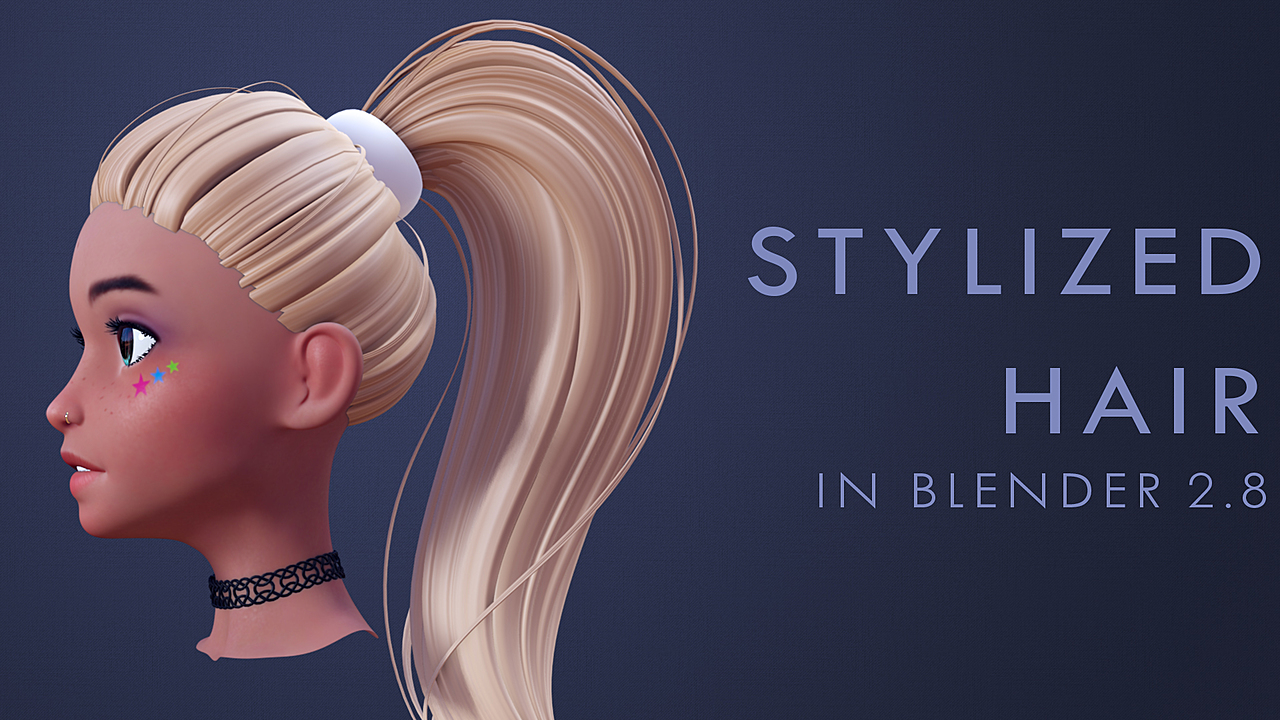
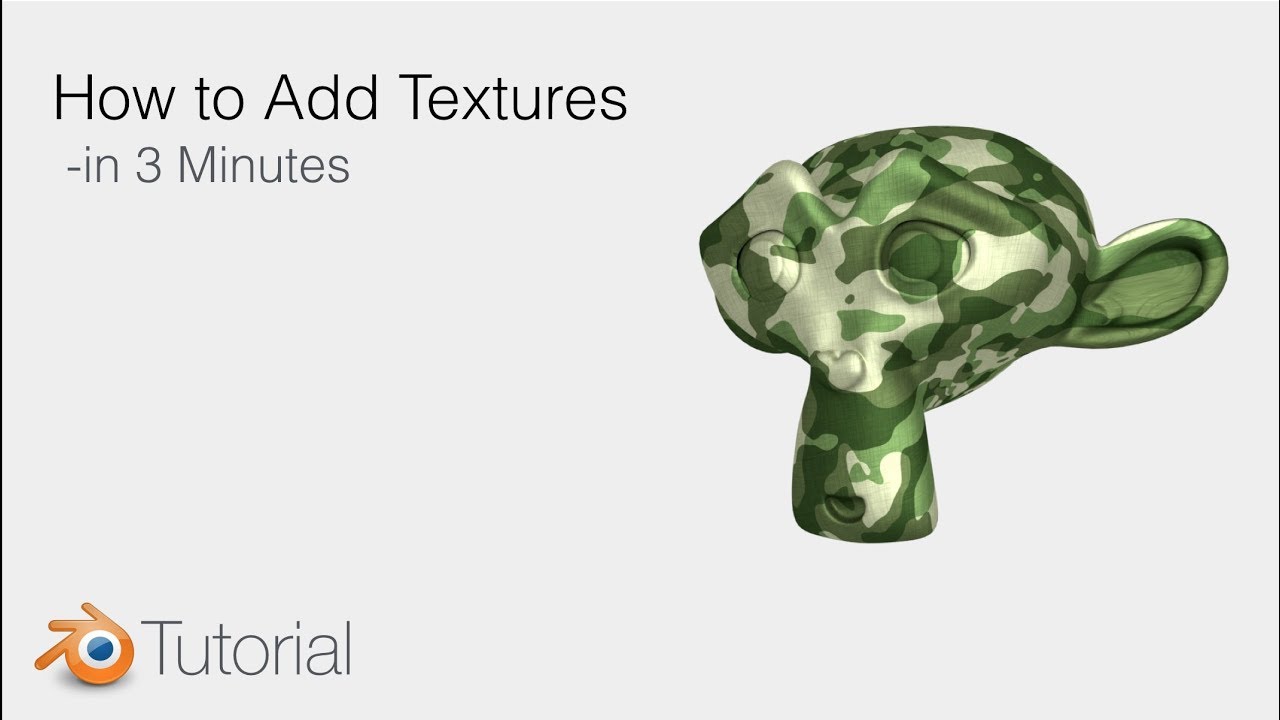
Blender Tutorial: Adding Texture to an Object
Step into the world of 3D animation with Blender, the powerful and versatile software that has revolutionized the industry. Discover how to unleash your creativity and bring your imagination to life with this incredible tool, as this video guides you through the mesmerizing capabilities of Blender. Don\'t miss out on the opportunity to become a digital artist extraordinaire!
Adjusting Texture Settings for Realism
Adjusting texture settings in Blender is crucial for achieving a high level of realism in your 3D models. The following steps and tips will guide you through the process of fine-tuning your textures for the most life-like results possible.
- Understanding Texture Influence: Begin by comprehending the various settings that influence texture appearance. This includes scale, rotation, mapping, and more. Adjust these settings to ensure your texture fits the model accurately and looks natural.
- Using the Shader Editor: Open the Shader Editor to access and modify the nodes that control your material\"s appearance. Here, you can adjust the color, roughness, and metallic properties of your texture, among others, to simulate real-world materials.
- Detail Enhancement with Bump and Normal Maps: Utilize bump and normal maps to add depth and detail to your textures. These maps simulate the small imperfections found in real-world surfaces, such as bumps, grooves, and scratches, enhancing realism.
- Adjusting Specularity and Roughness: Specularity controls the shininess and reflective properties of a surface, while roughness affects how diffused the reflection appears. Adjust these settings based on the material you are trying to replicate. For instance, a glossy surface will have high specularity and low roughness.
- Employing Subsurface Scattering: For materials like skin, wax, or leaves, where light penetrates slightly before reflecting, subsurface scattering (SSS) is essential. Adjusting the SSS settings can add a layer of realism to these types of materials by simulating light diffusion within them.
- Lighting and Environment Setup: The realism of your texture also heavily depends on the lighting and environment. Use HDRI maps for realistic lighting and reflections, and adjust the light sources in your scene to complement the texture and material properties.
- Experiment with Displacement Maps: For a more dynamic and detailed texture, consider using displacement maps. These maps physically displace the mesh to which they\"re applied, based on the texture information, adding a new level of realism with actual geometric variation.
- Texture Blending for Complexity: In some cases, layering multiple textures and using masks to blend them can achieve more complex and realistic surfaces. This technique is especially useful for creating ground surfaces, like roads, where you might blend gravel, dirt, and asphalt textures.
Remember, realism in texturing is not just about the visual quality but also about how accurately the textures represent their real-world counterparts. Continuously refer back to real-life examples for comparison, and don\"t hesitate to iterate and experiment with different settings and techniques. With practice and attention to detail, you can achieve stunningly realistic textures in Blender.
Tips for Managing Complex Textures
When working with complex textures in Blender, the task can quickly become overwhelming, especially for intricate models. However, with the right strategies and tools, you can streamline the texturing process, ensuring your projects remain manageable and your results professional. Here are several tips to help you efficiently manage complex textures:
- Organize Your Texture Files: Keep your textures organized in folders, categorizing them by type, usage, or model. This makes it easier to find and apply them, especially in large projects with numerous assets.
- Use Naming Conventions: Implement a consistent naming convention for your texture files. This could include the material type, texture resolution, and any other pertinent information. It helps in quickly identifying the right texture for the job.
- Optimize Texture Resolution: High-resolution textures can significantly increase file size and render times. Use the highest resolution necessary for your project, but consider scaling down where you can, especially for background objects.
- Leverage Blender\"s Texture Libraries: Blender allows you to create and access libraries of materials and textures. Build your own library of commonly used textures to speed up the texturing process in future projects.
- Employ Texture Atlases: For models that share similar materials or are part of the same scene, consider combining multiple textures into a single texture atlas. This can reduce the number of textures Blender has to manage, improving performance.
- Utilize UV Mapping Efficiently: Proper UV mapping is essential for applying textures accurately. For complex models, consider breaking them down into simpler parts for easier UV unwrapping and texture application.
- Batch Processing: When possible, use batch processing tools or scripts to apply changes to multiple textures or materials at once. This can save a significant amount of time, especially when making global adjustments.
- Experiment with Procedural Textures: Blender\"s procedural textures offer infinite variations and can be controlled without the need for UV mapping. They\"re particularly useful for complex or organic surfaces, where traditional texturing methods may fall short.
- Monitor Performance: Keep an eye on Blender\"s performance as you work with complex textures. If you notice lag or long render times, consider optimizing your textures or adjusting your viewport settings.
- Stay Up to Date: Blender is continually being updated with new features and improvements. Regularly updating to the latest version can provide access to more efficient ways of managing textures.
By implementing these tips, you can more effectively manage complex textures in Blender, making your workflow smoother and your projects more successful. Remember, the key to managing complexity is a combination of organization, optimization, and making use of Blender\"s powerful texturing tools.

Common Pitfalls and How to Avoid Them
Texturing in Blender is a skill that improves with experience. However, beginners and even seasoned artists can sometimes fall into common traps that can affect the quality of their work. Understanding these pitfalls and knowing how to avoid them can save you time and frustration. Here are some common issues and tips for avoiding them:
- Ignoring Scale and Realism: Applying textures without considering the scale can result in unrealistic appearances. To avoid this, always reference real-world dimensions and adjust your texture\"s scale accordingly to ensure it looks appropriate on your model.
- Poor UV Unwrapping: Improper UV unwrapping can lead to stretched or misaligned textures. Spend time learning UV mapping techniques and use Blender\"s UV editing tools to unwrap your model efficiently. Properly unwrapped models ensure textures are applied correctly.
- Overlooking Normal Map Usage: Neglecting normal maps can result in flat and unconvincing textures. Use normal maps to add detail and depth to your textures, especially when simulating bumps and irregularities on surfaces.
- Not Utilizing Non-Destructive Techniques: Applying direct modifications to textures or models can hinder later adjustments. Use non-destructive methods like layering textures in the Shader Editor, allowing you to make changes without starting over.
- Ignoring Lighting Effects: Textures can look different under various lighting conditions. Always test your textures under multiple light sources to ensure they maintain their appearance and realism in different environments.
- Using Low-Quality Texture Images: Utilizing low-resolution or poor-quality texture images can significantly affect the final look. Always source high-quality, high-resolution textures, especially for close-up or high-detail areas.
- Failing to Optimize Textures for Performance: Using too many high-resolution textures can impact Blender\"s performance and render times. Optimize your textures by scaling down where possible and using texture compression techniques.
- Overcomplicating the Shader Network: While complex shaders can offer more control, they can also make adjustments more difficult and affect performance. Keep your shader networks as simple as possible, combining only the necessary nodes for your material.
- Lack of Organization: A disorganized project can lead to inefficiency and errors. Keep your textures, materials, and shaders well-organized with clear naming conventions and grouping where appropriate.
- Not Testing on Multiple Devices: Textures might look different on various screens or devices. If your project will be viewed on multiple platforms, test your textures across them to ensure consistency in appearance.
Avoiding these common pitfalls will help improve the quality of your texturing work in Blender, making your models look more realistic and your workflow more efficient. Always be willing to learn and adapt your techniques as you gain more experience.
_HOOK_
Advanced Texturing Techniques
As you become more familiar with Blender, you\"ll want to explore advanced texturing techniques to elevate the realism and detail of your models. These methods can help you create more intricate and lifelike textures, leveraging Blender\"s robust toolset. Here are some advanced techniques to consider incorporating into your texturing workflow:
- Layered Textures: Combine multiple texture layers using Blender\"s Shader Editor. This technique allows for the creation of complex surfaces by overlaying different textures, such as combining a base color map with a dirt map, scratch map, and wear-and-tear map for added realism.
- Procedural Texturing: Utilize Blender\"s procedural textures to create patterns and details that don\"t require image textures. These are generated mathematically and can be infinitely customized for unique effects like wood grain, marble, or abstract designs.
- Microdisplacement: For ultra-realistic surface details, use microdisplacement in the Cycles render engine. This technique subdivides the surface at render time, allowing for highly detailed textures that simulate complex geometries.
- Subsurface Scattering (SSS): Perfect for materials like skin, wax, or leaves, SSS simulates light passing through a translucent object. Adjusting SSS settings can add depth and life-like qualities to organic materials.
- Particle Systems for Texture Distribution: Use Blender\"s particle system to distribute small objects or textures across surfaces. This is ideal for creating randomized, natural textures like grass on a lawn or leaves on a forest floor.
- Anisotropic Shading: This technique simulates surfaces that reflect light asymmetrically, such as brushed metal. Anisotropic shading can add a realistic sheen to metal objects, enhancing their realism.
- Texture Baking: Bake complex shaders or lighting into simpler textures to reduce render times while maintaining visual quality. This is particularly useful for game assets or when needing to simplify scenes for faster performance.
- Environment Texturing: Create immersive backgrounds and environments by applying HDRI images for realistic lighting and reflections. This technique can dramatically enhance the sense of presence and realism in your scenes.
- UV Sculpting: For precise control over texture mapping, use UV sculpting tools to stretch, compress, or manipulate UV maps. This can help eliminate texture distortion and ensure textures fit your models perfectly.
- Shader Nodes for Weather Effects: Simulate environmental effects like rain, snow, or aging by creating custom shader nodes. These can add dynamic and interactive textures that respond to scene conditions or time.
Mastering these advanced texturing techniques in Blender can significantly enhance the visual quality of your projects. They allow for a greater depth of realism and detail, pushing the boundaries of what\"s possible in 3D modeling and rendering. Experimentation and practice are key to leveraging these techniques effectively, so don\"t hesitate to explore and integrate them into your texturing workflow.
Resources for Finding Free Textures
Finding high-quality, free textures is essential for 3D artists working on a budget. Fortunately, there are numerous resources available online where you can find a vast array of textures for your Blender projects. These textures can range from simple basics to complex surfaces, suitable for various types of models and scenes. Below is a list of reliable sources for free textures:
- Textures.com: A comprehensive library of textures that includes everything from fabrics to building materials. You get a certain amount of free credits daily to download high-quality textures.
- CC0 Textures: Offers a wide range of textures under the CC0 license, meaning they\"re completely free to use for any purpose without the need for attribution.
- HDRI Haven: The perfect place for finding high-dynamic-range imaging for realistic lighting and reflections, all available under a CC0 license.
- Unsplash: Although primarily a stock photo site, Unsplash offers high-resolution images that can be creatively used as textures. All photos are free to use under the Unsplash license.
- Poliigon: Provides a selection of free textures alongside their premium offerings. These free textures come with all necessary maps for detailed rendering.
- Texture Haven: Another great source for CC0 licensed textures, offering high quality and resolution textures with all the relevant maps for 3D work.
- 3DTextures.me: A collection of textures with PBR (Physically Based Rendering) materials, available for free with new textures added regularly.
- CGBookcase: Offers a wide variety of free textures, including some unique options, all designed for PBR rendering.
- ShareTextures: A project providing free textures with PBR maps, with a focus on supporting the open-source community.
- Sketchfab: While known for 3D models, Sketchfab also hosts a selection of textures available for free download, often provided by the 3D artist community.
When using free textures, always check the license to ensure they can be used for your intended purpose, especially if your project is commercial. These resources can be invaluable for enhancing your Blender projects, allowing you to create more detailed, realistic, and engaging 3D art without incurring additional costs.
READ MORE:
Finalizing and Exporting Your Textured Model
After investing time in texturing your model in Blender, the final step is to finalize and export it for use in other projects, applications, or for sharing with others. This process ensures that your model retains its quality and textures appear as intended in other environments. Follow these steps to successfully finalize and export your textured model:
- Check Texture Assignments: Ensure all textures are correctly assigned to their respective materials. Double-check that all UV maps are properly unwrapped and aligned.
- Apply Modifiers: Before exporting, apply any modifiers that affect the geometry of your model. This step is crucial for maintaining the intended shape and details in the exported file.
- Review Material Settings: Verify that all material settings are correct and that they look as expected in Blender\"s viewport. Adjust any settings if necessary to achieve the desired appearance.
- Optimize Your Model: Check your model for unnecessary vertices, faces, or textures that could increase file size or affect performance. Use Blender\"s decimate modifier or manual editing to optimize the geometry without sacrificing too much detail.
- Set Up Export Settings: When exporting, choose a format that supports textures and materials, such as FBX or OBJ. In the export settings, make sure to include textures and, if applicable, select options that ensure materials are exported correctly.
- Pack External Data: Use Blender\"s \"File > External Data > Pack All into .blend\" feature to embed external textures into the Blender file. This step is important if you\"re sharing the Blender file directly with others.
- Export Your Model: With all settings adjusted and data packed, export your model. Choose the appropriate file format based on your needs or the requirements of the platform you\"re using.
- Test the Exported Model: Import your exported model into the target application or engine to ensure everything looks as expected. Check the textures, materials, and overall geometry. Make any necessary adjustments back in Blender and re-export if needed.
Finalizing and exporting your textured model is a critical step in the 3D modeling workflow. By following these guidelines, you can ensure that your work maintains its integrity and appears as intended, no matter where it\"s used. Remember, the key to a successful export is in the details, so take the time to review your model thoroughly before sharing it.
Mastering texturing in Blender opens up a world of creativity and realism for your 3D models. Follow our comprehensive guide to enhance your skills, from basic applications to advanced techniques, and bring your artistic visions to life with stunning detail and realism.