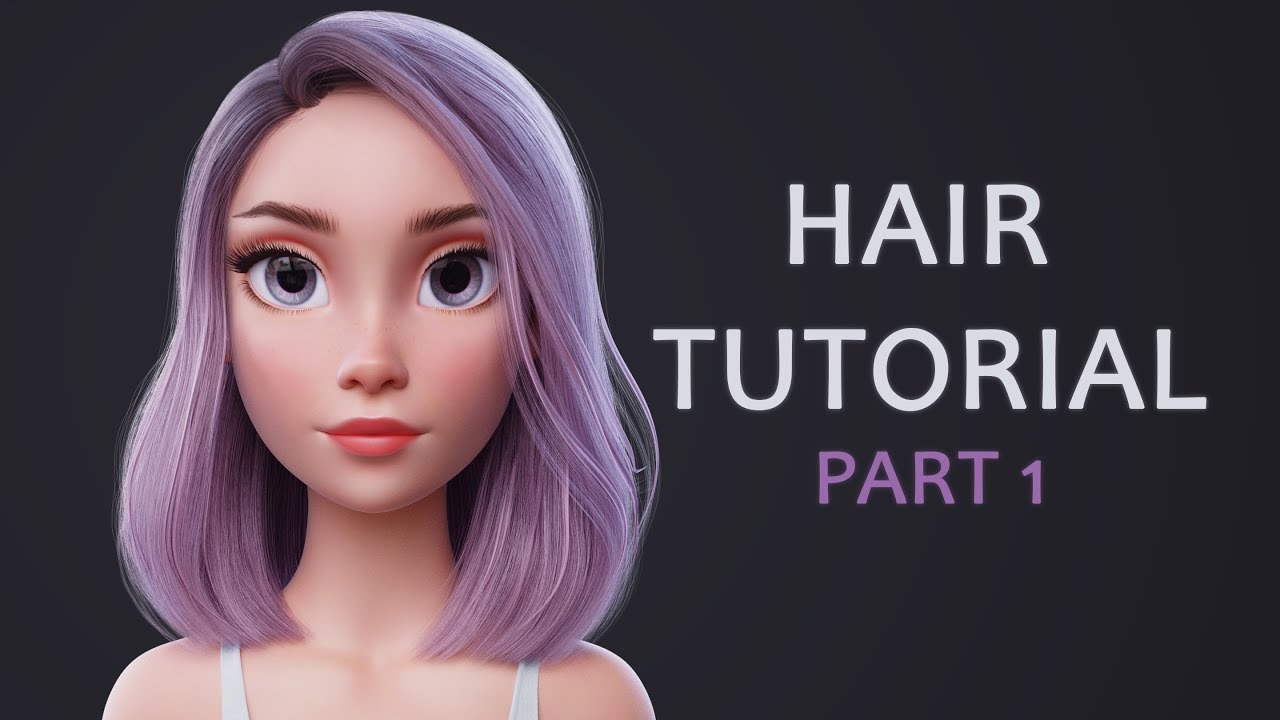
Topic how to model hair in blender: Discover the secrets to mastering hair modeling in Blender, ensuring your 3D characters come to life with realistic, beautifully styled hair. This guide covers everything from basic techniques to advanced styling tips.
Table of Content
- How to make hair in Blender 2.8 with curves?
- Understanding Blender\"s Hair Particle System
- Preparing the Base Mesh for Hair Modeling
- Using Particle Edit Mode for Detailed Styling
- Creating Particle Hair from Mesh Objects
- Utilizing Curves for Complex Hair Shapes
- Texturing and Material Setup for Realistic Hair
- YOUTUBE: Easiest Way To Create Hair in Blender - 5 Minute Tutorial
- Weight Painting for Hair Particle Distribution
- Advanced Techniques: Braids, Curls, and Afros
- Optimizing Hair for Animation and Rendering
- Common Pitfalls and How to Avoid Them
How to make hair in Blender 2.8 with curves?
To model hair in Blender 2.8 using curves, follow these steps:
- Create a new object: Go to Add > Curve > Bezier Curve.
- Shape the curve: In Edit mode, select a control point and move it to create the desired shape of the hair strand.
- Add more control points: Select a control point and press E to extrude and create new control points. Place these points to define the shape of the hair strands.
- Adjust the handles: Select a control point and press V to switch to handle manipulation mode. Adjust the handles to control the curvature of the hair strand.
- Create multiple strands: Duplicate the hair strand curve and reshape it to create additional strands. Modify each strand to add variation.
- Comb the hair: In Particle Edit mode, select the object with the hair curves. Use the comb and smooth tools to adjust the flow and appearance of the hair strands.
- Add materials: Assign a hair material to the hair strands to make them look realistic. Adjust the color, transparency, and glossiness as desired.
By following these steps, you can easily create hair in Blender 2.8 using curves. Experiment with different shapes, lengths, and styles to achieve the desired look for your 3D models.
READ MORE:
Understanding Blender\"s Hair Particle System
Blender\"s Hair Particle System is a sophisticated feature designed to simulate realistic hair, fur, and grass. It uses particles to generate individual strands, offering artists the flexibility to create complex hairstyles and fur patterns. This section will guide you through the essentials of leveraging this system to enhance your 3D models.
- Getting Started: Access the Hair Particle System by adding a new particle system to your object and selecting \"Hair\" as the type. This action will immediately generate hair strands on your object.
- Adjusting Hair Length and Density: Customize the length and number of hair strands using the \"Length\" and \"Emission\" settings, providing control over the hairstyle\"s overall appearance.
- Styling and Shaping: Utilize tools like comb, smooth, add, and cut in Particle Edit mode to style the hair. This mode allows for intuitive shaping and detailing of the hair to match your vision.
- Using Hair Dynamics: For animations, enable Hair Dynamics to simulate natural hair movement. Adjust settings like stiffness, damping, and gravity to achieve realistic behavior.
- Children Particles: Create finer, more detailed hair by adding children particles. These can be interpolated or simple, multiplying the amount of hair without increasing system load significantly.
- Material and Texturing: Assign materials to the hair particles for color, shine, and texture. Utilizing Blender\"s node system, you can create complex materials that mimic real hair.
- Rendering: Choose between different rendering methods like Path, Object, and Group for different effects. Path rendering is commonly used for realistic hair.
By mastering the Hair Particle System in Blender, you can bring your characters to life with dynamic, realistic hair that moves and behaves naturally.
Preparing the Base Mesh for Hair Modeling
Before adding hair to your character in Blender, it\"s crucial to prepare the base mesh correctly. This foundation is key for achieving realistic and manageable hair simulations. Follow these steps to ensure your base mesh is ready for hair modeling:
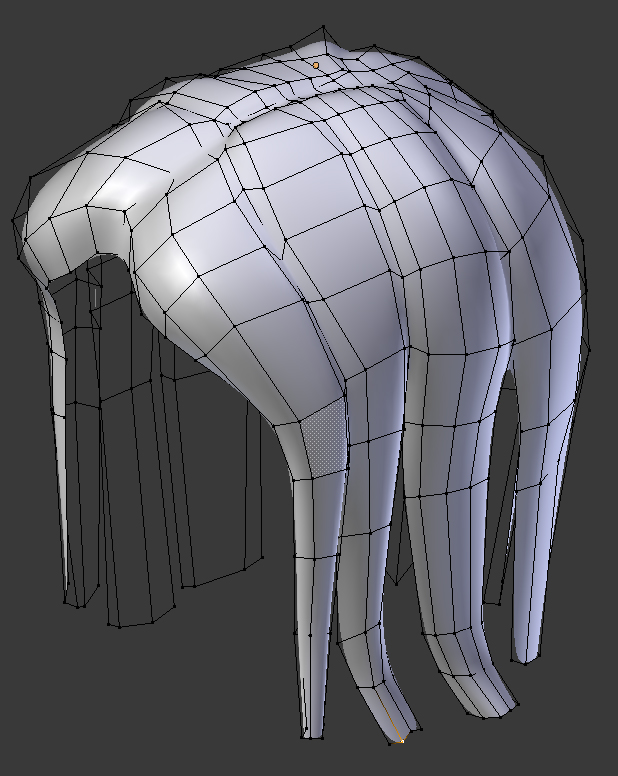
- Create a Clean Topology: Ensure your character\"s head has a clean, quad-based topology. This simplifies the hair particle system\"s attachment and allows for smoother simulations.
- Separate the Scalp: Select the area of the mesh where hair will be grown and separate it into a new object. This allows for easier manipulation and editing of the hair system without affecting the rest of the model.
- Refine the Scalp Mesh: Adjust the scalp mesh to slightly overlap the head mesh. This prevents gaps and ensures hair particles start from under the surface, creating a more natural hairline.
- Apply Necessary Modifiers: Before adding hair, make sure to apply any necessary modifiers to the base mesh. This prevents potential issues when simulating hair.
- Assign a Material: While not strictly necessary for modeling, assigning a basic material to the scalp can help visualize the final look and ensure the hair particles inherit the correct material settings.
With these steps, your base mesh will be optimally prepared for detailed and realistic hair modeling in Blender, setting a solid foundation for further styling and simulation.
Using Particle Edit Mode for Detailed Styling
Particle Edit Mode in Blender is a powerful tool for detailed styling and grooming of hair. This mode allows for precise control over individual hair strands, enabling artists to achieve the desired look and feel for their characters\" hair. Here’s how to utilize Particle Edit Mode for detailed hair styling:
- Entering Particle Edit Mode: With your hair particle system selected, switch from Object Mode to Particle Edit Mode. This mode offers tools specifically for editing hair particles.
- Understanding the Tools: Familiarize yourself with the different brushes available, such as comb, smooth, add, lengthen, shorten, cut, and puff. Each brush serves a specific purpose in shaping and styling the hair.
- Combing Hair: Use the comb tool to direct the flow of hair strands. This tool is essential for creating natural-looking hair that lays correctly according to your character\"s posture and style.
- Adding and Removing Hair: The add and cut tools allow you to respectively increase or decrease the number of hair strands, offering flexibility in hair density and style adjustments.
- Adjusting Length: The lengthen and shorten tools enable precise control over the length of hair strands, vital for achieving uniform or varied hair lengths as desired.
- Defining Hair Volume: The puff tool adds volume to the hair by pushing strands away from the scalp, creating a fuller look.
- Smoothing Hair: The smooth tool is used to refine and soften the appearance of hair, eliminating harsh angles or stray strands for a more polished look.
- Locking and Freezing: You can lock certain parts of the hair to prevent them from being edited, focusing your styling efforts on specific areas without affecting the rest.
By leveraging Particle Edit Mode\"s array of tools, you can sculpt and style hair with unparalleled detail and creativity, from subtle adjustments to dramatic transformations.

Creating Particle Hair from Mesh Objects
Creating particle hair from mesh objects in Blender allows for detailed and customizable hair styles on characters and models. This method transforms mesh objects into hair strands, enabling complex hair dynamics and styles. Follow these steps to create particle hair from mesh objects:
- Start with a Base Mesh: Create or select a mesh that will act as the emitter for the hair particles. This could be a scalp mesh separated from your character model.
- Add a Particle System: With the mesh selected, go to the Particle Properties panel and add a new particle system. Set the type to \"Hair\" to generate hair strands.
- Customize Hair Length and Density: Adjust the length and number of hair particles using the \"Emission\" settings to achieve the desired density and length of hair.
- Convert Mesh to Hair Strands: To convert a specific mesh shape into hair strands, use the \"Render\" settings in the Particle Properties panel. Set \"Render As\" to \"Path\" for hair-like strands, or use \"Object\" and select a mesh object to duplicate as hair.
- Style and Shape the Hair: Use Particle Edit Mode to comb, cut, lengthen, or shorten the hair strands for detailed styling. This allows for personalized adjustments to match your character’s appearance.
- Apply Hair Dynamics: For animated characters, enable Hair Dynamics in the particle settings for realistic hair movement. Tweak the physical properties to suit the animation requirements.
- Final Adjustments: Refine the hair\"s material and texture settings to enhance realism. Utilize Blender\"s shader nodes to create complex hair materials that respond realistically to lighting.
This method of creating hair from mesh objects provides a robust foundation for crafting detailed, realistic hairstyles in Blender, offering extensive control over every aspect of hair simulation and styling.

_HOOK_
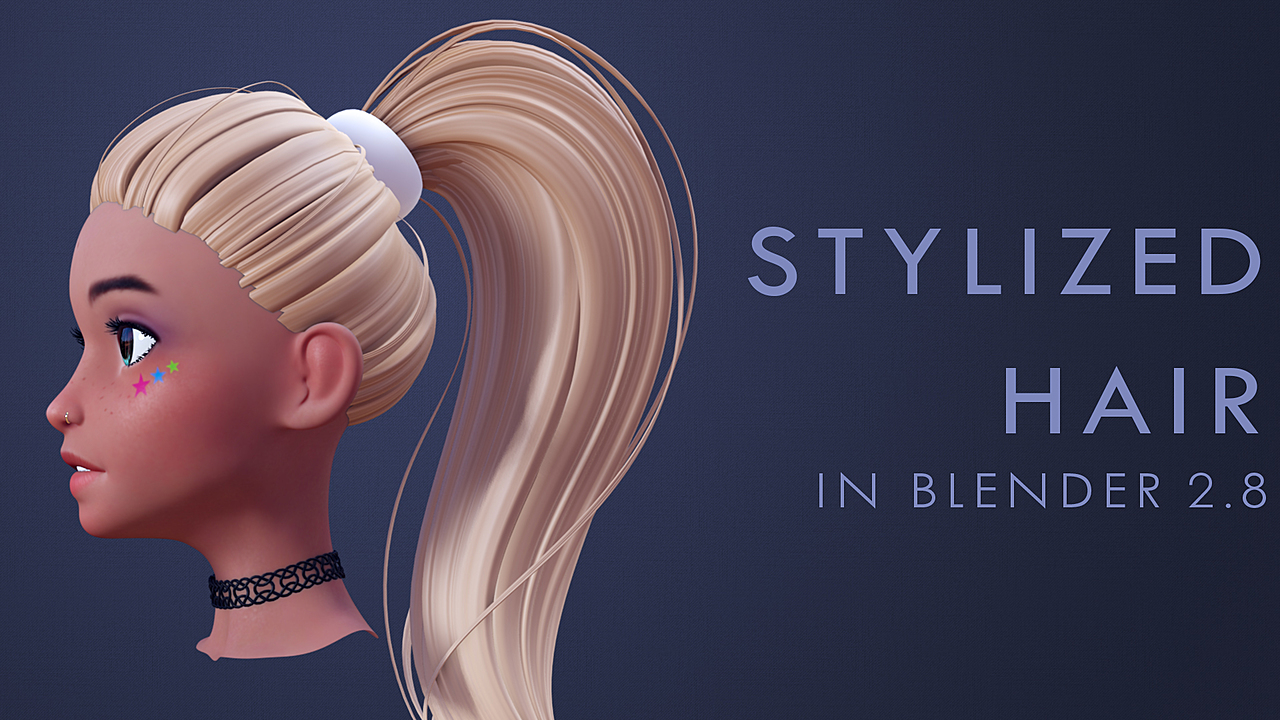
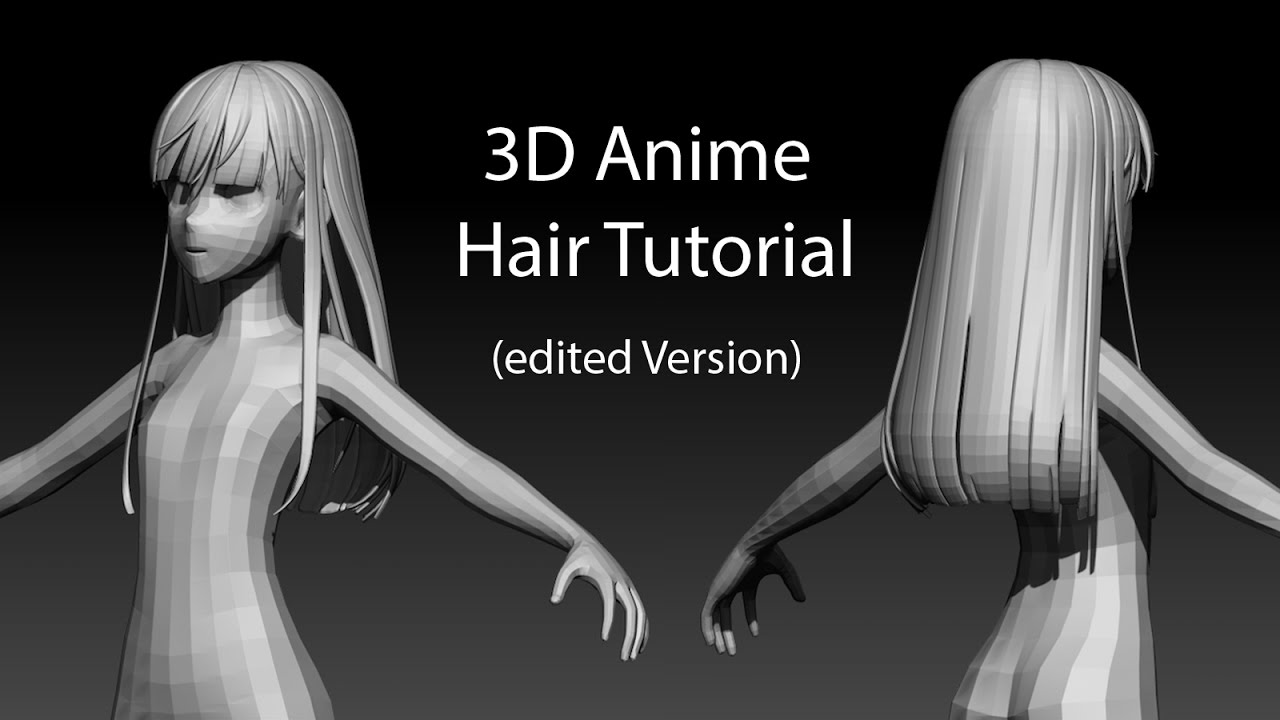
Utilizing Curves for Complex Hair Shapes
Blender\"s curve tools offer a unique and powerful method for creating complex hair shapes, allowing for precise control over the flow and style of hair. This approach is especially useful for stylized or non-traditional hair designs. Follow these steps to utilize curves for crafting complex hair shapes:
- Creating the Basic Shape: Start by adding a Bezier or NURBS curve to your scene. This curve will act as the foundation of your hair strand or lock.
- Shaping the Curve: Edit the curve\"s points to match the desired hair flow and shape. Use the handles to adjust the curvature and create dynamic hair movements.
- Converting Curves to Hair: Once your curve is shaped, you can convert it into a mesh by using the \"Convert\" function in the Object menu. This mesh can then be used as a guide for particle hair or as a base for further sculpting and texturing.
- Duplicating and Modifying for Variation: Duplicate your initial curve to create more hair strands. Modify each duplicate slightly to add natural variation and fullness to the hair.
- Adding Thickness: Use the curve\"s geometry settings to add depth and thickness. Adjust the bevel depth to create the desired thickness of the hair strand.
- Material and Texturing: Apply materials to the curves to simulate hair color and texture. Utilize Blender\"s shader system to create lifelike or stylized hair materials.
- Integrating with Particle Hair: For more complex hairstyles, combine curve-based strands with particle hair systems. Use the curves to define key locks or strands, and fill in the rest with particle hair for a balanced, realistic effect.
This method allows for the creation of highly detailed, customizable hair styles that can enhance the visual appeal of your 3D models. Whether you\"re creating intricate braids, flowing locks, or sculpted hairstyles, curves offer a level of control that can significantly elevate your hair modeling work in Blender.

Texturing and Material Setup for Realistic Hair
Creating realistic hair in Blender involves more than just modeling; texturing and material setup play crucial roles in achieving lifelike results. Here\"s a detailed guide on how to texture and set up materials for your hair models:
- Selecting the Right Shader: Start by choosing the Principled BSDF shader for the hair material. This shader offers a wide range of parameters suitable for simulating the complex properties of real hair.
- Adjusting Shader Parameters: Tweak the shader\"s parameters, such as melanin, roughness, and specular, to mimic the hair\"s natural color, sheen, and texture. Consider the hair type and lighting conditions to achieve the best results.
- Adding Hair Texture: For added realism, apply a hair texture map to the material. This can enhance the appearance of individual strands and give the hair depth and variation.
- Utilizing Anisotropic Reflections: Hair reflects light in a unique way due to its cylindrical shape. Adjust the Anisotropic settings in the shader to simulate this effect and add a natural gloss to the hair.
- Color Variation: Real hair isn\"t uniform in color. Use a ColorRamp node to introduce subtle variations in hue and brightness along the length of the hair strands.
- Transparency and Alpha Mapping: To simulate finer hair and soft edges, consider using alpha maps. This can be particularly effective for creating realistic edges and flyaway hairs.
- Testing and Tweaking: Regularly render your work to test the hair\"s appearance under different lighting conditions. Make adjustments as necessary to refine the hair\"s realism.
By carefully texturing and setting up materials for your hair models, you can significantly enhance the realism of your Blender projects, making your characters and scenes come to life.

Easiest Way To Create Hair in Blender - 5 Minute Tutorial
\"Calling all fashion enthusiasts! Get an exclusive behind-the-scenes look at the mesmerizing world of hair modeling. Watch in awe as skilled professionals create jaw-dropping hairstyles that push the boundaries of creativity and style.\"
Weight Painting for Hair Particle Distribution
Weight painting in Blender is a crucial technique for controlling the distribution and density of hair particles on a character\"s mesh. This method allows for precise control over where hair grows and how thick or thin it appears. Here\"s how to use weight painting for hair particle distribution:
- Accessing Weight Paint Mode: Select your character\"s mesh and switch to Weight Paint mode. This mode highlights the mesh in blue, indicating areas with no weight and transitions through green, yellow, and red as weight increases.
- Creating Vertex Groups: In the Object Data properties panel, create a new vertex group. This group will be used to define the distribution of hair particles.
- Applying Weights: Use the weight paint brush to paint over the mesh. Areas painted red will have the highest density of hair particles, while blue areas will have none. Adjust the brush size and weight for finer control.
- Assigning the Vertex Group to Particles: In the Particle Settings, locate the Vertex Groups section and assign your newly created group to the Density field. This tells Blender to use the weight-painted areas to control hair particle distribution.
- Adjusting Particle Settings: Experiment with the hair particle settings, such as length and thickness, to achieve the desired look. The weight-painted vertex group will maintain the distribution according to your painting.
- Refining Hair Distribution: Return to Weight Paint mode as needed to adjust the distribution. You can add or reduce weight in areas to fine-tune the appearance of the hair.
Using weight painting for hair particle distribution allows for dynamic and realistic hair growth patterns on your characters, providing an essential level of control for professional-quality results in Blender.
Advanced Techniques: Braids, Curls, and Afros
Modeling advanced hair types like braids, curls, and afros in Blender involves specialized techniques to capture their unique textures and shapes. These styles require a combination of Blender\"s hair particle system, sculpting tools, and sometimes manual modeling to achieve realistic results. Here’s how to create these complex hair types:
- Modeling Braids:
- Start by creating a curve for the base shape of the braid. Adjust the curve to match the desired braid style.
- Use the array and curve modifiers to duplicate the strand along the curve, creating the braid\"s structure.
- For detailed braids, consider sculpting individual strands for a more realistic appearance.
- Creating Curls:
- Utilize the particle system to create the base hair. Adjust the kink settings to \"Curl\" to automatically generate curls.
- Manually adjust curls using Particle Edit mode for specific styling and placement.
- For tight curls or afro textures, increasing the particle count and using children particles for volume can be effective.
- Styling Afros:
- Create a dense particle system to serve as the afro\"s base. Use a high number of parent and children particles.
- Adjust the hair shape and volume in Particle Edit mode, fluffing and shaping the afro to desired fullness.
- Apply weight painting to control the density and distribution of the afro, allowing for natural variation.
- Texturing and Material Tips: For all advanced hairstyles, applying accurate textures and materials is crucial. Use hair shader nodes to simulate realistic hair colors, specular highlights, and the unique way light interacts with these hair types.
By mastering these advanced techniques in Blender, you can create diverse and realistic hairstyles that add depth and character to your 3D models.
Optimizing Hair for Animation and Rendering
Optimizing hair for animation and rendering in Blender is crucial for creating visually stunning and performance-friendly scenes. Proper optimization techniques ensure that hair looks realistic while keeping render times reasonable. Follow these strategies to optimize hair in your projects:
- Simplifying Geometry: Use as few vertices as necessary for the base mesh of your hair. This reduces the computational load during simulation and rendering.
- Level of Detail (LOD): Implement different levels of detail for your hair depending on the camera distance. Use higher detail models for close-up shots and simpler models for distant shots.
- Particle System Optimization: Adjust the number of hair particles to find a balance between visual quality and performance. Use children particles to add volume without significantly increasing the render load.
- Material and Shader Efficiency: Optimize hair materials and shaders to be as lightweight as possible. Avoid overly complex node setups and utilize Blender’s hair shader for efficient rendering.
- Rendering Settings: Explore Blender’s rendering settings to optimize hair rendering. Use settings like B-spline interpolation for smoother curves with fewer segments and enable hair BVH for faster ray tracing.
- Cache Dynamics: For animated hair, bake the dynamics into a cache file to avoid recalculating hair movement for every frame, speeding up both preview and final rendering.
- Transparency and Alpha Maps: Use transparency and alpha maps to create the illusion of fine hair without the need for additional geometry, particularly effective for fur and short hair.
- Viewport Display Optimization: When working in the viewport, reduce the display amount of hair particles to ensure a smoother workflow without compromising on the final output quality.
By applying these optimization techniques, you can achieve high-quality hair animations and renderings in Blender, ensuring your projects are both beautiful and efficient.

_HOOK_
READ MORE:
Common Pitfalls and How to Avoid Them
Modeling hair in Blender can be challenging, and there are several common pitfalls that artists might encounter. By being aware of these and knowing how to avoid them, you can ensure a smoother workflow and more realistic results:
- Ignoring Hair Particle Settings: Not adjusting the hair particle settings to suit your model can result in unnatural-looking hair. Experiment with different settings to find what works best for your project.
- Overlooking Scalp Preparation: Failing to properly prepare the scalp mesh can lead to hair particles not distributing evenly. Ensure your scalp mesh is clean and well-defined.
- Forgetting Weight Painting: Skipping weight painting can result in uneven hair density. Use weight painting to control where hair grows and its thickness.
- Neglecting Hair Dynamics: Not utilizing hair dynamics for animated models can make hair look static and unrealistic. Enable and configure hair dynamics to add natural movement.
- Overcomplicating Materials: Creating overly complex hair materials can increase render times without significantly improving visuals. Stick to simpler, optimized material setups.
- Not Testing Renders: Failing to conduct test renders can lead to surprises in the final output. Regularly render your work to check the hair\"s appearance under different lighting conditions and from various angles.
- Avoiding Reference Images: Not using reference images can make it harder to achieve realistic results. Use real hair photos as a guide for styling and texturing.
By avoiding these common pitfalls, you can create more realistic and efficient hair models in Blender, improving both the look of your projects and your workflow.
Mastering hair modeling in Blender opens a world of creative possibilities, transforming your 3D characters with lifelike detail. Embrace these techniques to elevate your work, captivating audiences with stunning, realistic hair animations and renderings.