Topic blender for 3d printing tutorial: Unlock the potential of 3D printing with our Blender tutorial, guiding you through the essential techniques and tips to bring your creations to life with precision and creativity.
Table of Content
- What are the basics of bringing a file into and out of Blender for 3D printing?
- 1. Introduction to Blender for 3D Printing
- 2. Setting Up Blender for 3D Printing
- 3. Basic Modeling Techniques in Blender
- 4. Advanced Modeling Techniques for 3D Printing
- YOUTUBE: Learn Blender for 3D Printing - Complete Quick and Easy Guide
- 5. Preparing Your Model for 3D Printing
- 6. Exporting Models from Blender for 3D Printing
- 7. Common Issues and How to Solve Them
- 8. Tips for Optimizing 3D Print Quality
- 9. Case Studies: Real-World Examples
- 10. Additional Resources and Learning Tools
What are the basics of bringing a file into and out of Blender for 3D printing?
To bring a file into and out of Blender for 3D printing, follow these basic steps:
- Open Blender: Launch the Blender software on your computer.
- Importing a File:
- Select \'File\' from the menu at the top of the Blender window.
- Choose \'Import\' and then the file format of the 3D model you want to work with (e.g., .STL, .OBJ).
- Navigate to the location of the file on your computer and select it.
- Click \'Import\' to bring the file into Blender.
- Editing the Model:
- Once the model is imported, you can make any necessary adjustments or modifications to prepare it for 3D printing.
- Use Blender\'s tools to scale, rotate, or modify the geometry of the model as needed.
- Exporting a File:
- Once you have finalized the model for 3D printing, it needs to be exported in a format compatible with your 3D printer.
- Select \'File\' from the menu at the top of the Blender window.
- Choose \'Export\' and then the file format suitable for 3D printing (e.g., .STL).
- Specify the export settings if required and save the file to your desired location on your computer.
- Printing the Model:
- Transfer the exported file to your 3D printer or the software that controls your 3D printer.
- Follow the instructions provided by your 3D printer manufacturer or software to initiate the printing process.
- Ensure that all settings such as scale, orientation, and support structures are configured correctly for successful 3D printing.
READ MORE:
1. Introduction to Blender for 3D Printing
Blender, a powerful open-source software, offers comprehensive tools for creating detailed 3D models that can be printed using a 3D printer. This section introduces you to the fundamental concepts of using Blender for 3D printing, ensuring a smooth transition from digital design to physical object.
3D printing, a form of additive manufacturing, allows for the creation of complex and detailed physical objects from digital models. Blender supports this innovation by providing a versatile platform for designing, editing, and preparing models for 3D printing.
- Understanding Blender\"s Interface: Familiarize yourself with Blender\"s user interface, including the 3D viewport, modeling tools, and object manipulation techniques.
- Modeling Basics: Learn the essential modeling skills needed to create 3D objects, from simple shapes to more complex structures.
- Preparing Models for Printing: Discover how to ensure your models are ready for 3D printing by checking for common issues such as non-manifold edges, incorrect scaling, and other printability concerns.
- Exporting for 3D Printing: Understand the process of exporting your Blender models in formats compatible with 3D printers, such as STL or OBJ files.
By the end of this section, you\"ll have a solid foundation in using Blender for 3D printing, enabling you to start bringing your digital creations to life in the physical world.

2. Setting Up Blender for 3D Printing
Properly setting up Blender is a crucial first step to ensure your 3D models are optimized for printing. This section walks you through configuring Blender to streamline your workflow for 3D printing projects, from installing necessary add-ons to adjusting unit settings.
- Install the 3D Print Toolbox: This Blender add-on provides essential tools for analyzing and preparing models for 3D printing. It helps identify and fix common issues such as non-manifold edges, overhangs, and thin walls.
- Set Your Units: Configure Blender\"s unit system to match the real-world dimensions of your intended print. This often means setting the units to millimeters or inches, depending on your preference and the specifications of your 3D printer.
- Adjust Scale: Ensure your model\"s scale is set correctly to avoid size discrepancies when printing. The scale can be adjusted in Blender\"s Scene properties panel.
- Mesh Analysis: Utilize Blender\"s mesh analysis feature to detect potential problems in your model, such as non-manifold edges or faces that might affect the printability.
- Optimize the Model\"s Orientation: Adjust the orientation of your model to minimize the need for support structures, reduce printing time, and improve the overall quality of the print.
Following these setup steps will help ensure that your Blender environment is optimized for creating 3D printable models, saving you time and improving the success rate of your prints.
- For more detailed instructions on installing the 3D Print Toolbox, refer to Blender\"s official documentation or the add-on\"s installation guide.
- Experiment with different mesh analysis tools within Blender to understand how they can help improve your model\"s printability.
By taking the time to properly set up Blender for 3D printing, you\"ll create a more efficient workflow that enhances the quality of your prints and reduces the likelihood of printing errors.
3. Basic Modeling Techniques in Blender
Mastering the basic modeling techniques in Blender is essential for creating models ready for 3D printing. This section covers the foundational skills needed to start building your 3D models, from simple objects to more complex designs.
- Starting with Basic Shapes: Learn how to create and manipulate basic shapes such as cubes, spheres, and cylinders, which are the building blocks of more complex models.
- Modifying Objects with Modifiers: Discover how modifiers can simplify the modeling process by adding complexity to objects without the need for detailed sculpting.
- Extrusion and Loop Cuts: Understand how to use extrusion to extend surfaces and create new geometry, and how loop cuts can add detail and control the shape of your models.
- Understanding Topology: Gain insights into the importance of clean topology, which is crucial for a model to deform correctly and for the 3D printer to interpret the model accurately.
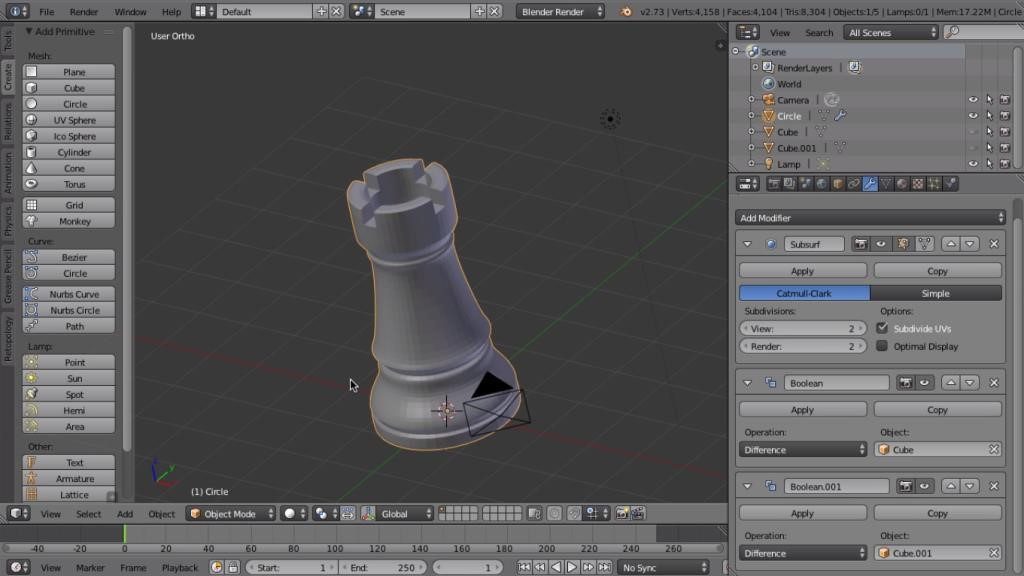
- Boolean Operations: Learn how to use boolean operations to combine or subtract shapes, creating complex forms from simpler ones.
These basic techniques are your first step towards becoming proficient in 3D modeling for printing. Practice these skills to build a solid foundation, enabling you to tackle more advanced projects with confidence.
- Practice regularly to improve your speed and efficiency with these tools.
- Experiment with different techniques to find the best approach for each project.
By mastering these basic modeling techniques, you\"ll be well on your way to creating high-quality 3D models suitable for printing.

4. Advanced Modeling Techniques for 3D Printing
Once you have mastered the basics of Blender modeling, you can elevate your skills with advanced techniques tailored for 3D printing. This section delves into sophisticated methods that allow for the creation of intricate designs and details in your 3D models.
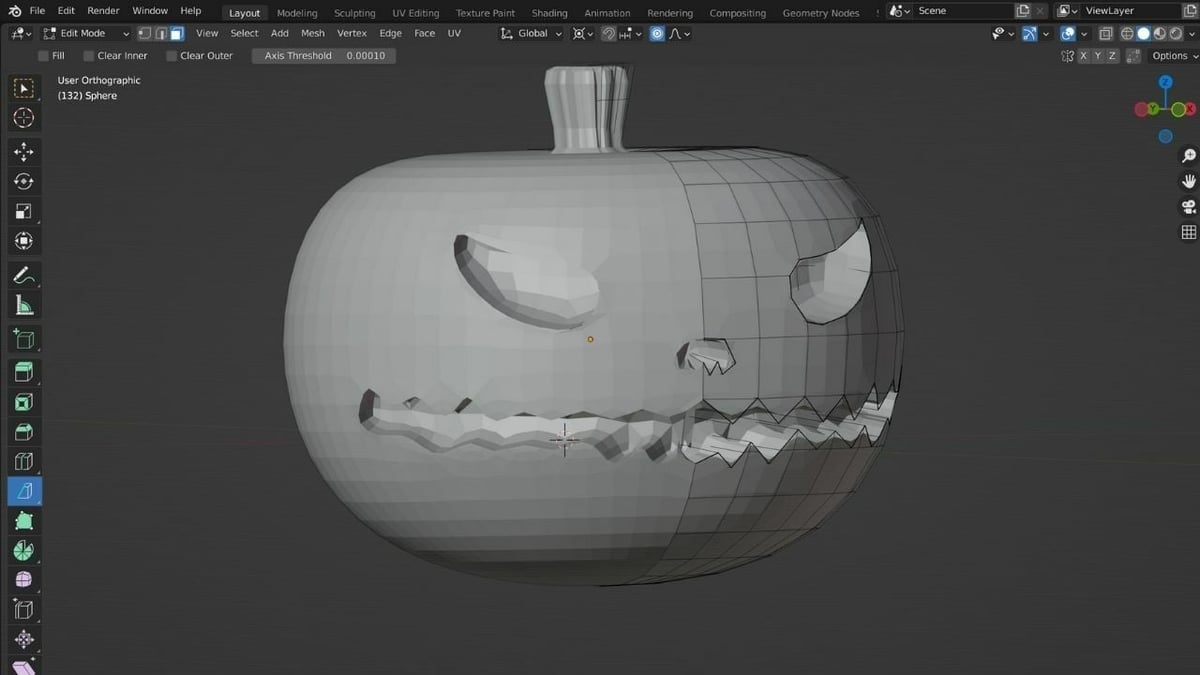
- Sculpting for Detail: Discover how Blender’s sculpting tools can be used to add fine details to your models, perfect for creating textures and complex shapes that stand out in a print.
- Topology Refinement: Learn the importance of optimizing topology for 3D printing, ensuring that your models are not only visually appealing but also structurally sound when printed.
- Supports and Overhangs: Understand the strategies for designing models with overhangs and supports in mind, minimizing post-processing work and reducing the risk of printing failures.
- Advanced Boolean Operations: Master the use of boolean modifiers for creating complex interlocking parts or subtracting intricate details from your models.
- Efficient Material Use: Explore techniques for hollowing out models to save on material costs without compromising the structural integrity of your prints.
These advanced techniques not only improve the aesthetic quality of your models but also address common 3D printing challenges, such as material usage and structural integrity. Implementing these methods will take your 3D printing projects to the next level.
- Experiment with different sculpting brushes to achieve desired textures and details.
- Regularly check your model\"s topology with Blender’s analysis tools to ensure printability.
Advancing your Blender skills with these techniques will enable you to tackle more complex and challenging 3D printing projects, pushing the boundaries of what you can create.
_HOOK_
Learn Blender for 3D Printing - Complete Quick and Easy Guide
Tutorial: Learn step-by-step how to master a new skill with our easy-to-follow tutorial. From beginners to advanced learners, this video will guide you through every part of the process. Watch now and unleash your full potential. Basics: If you\'re looking to build a strong foundation in a subject, this video covering the basics is perfect for you. Clear, concise explanations will help you grasp key concepts and set you on the path to success.
How to Use Blender for 3D Printing - The Basics Tutorial
UPDATED VERSION OF THIS VIDEO: https://youtu.be/9EF2VryBAq4 A detailed guide of the basics of bringing a file into and out ...
5. Preparing Your Model for 3D Printing
Proper preparation of your Blender model is crucial for a successful 3D print. This section outlines the essential steps to ensure your model is ready for printing, covering everything from ensuring the model\"s integrity to optimizing its orientation and structure for the printing process.
- Check for Manifold Errors: Use Blender\"s 3D Print Toolbox to identify and fix non-manifold edges or faces, ensuring your model is watertight and ready for printing.
- Scale and Dimensions: Verify the scale and dimensions of your model to match the physical world. Adjusting the size in Blender ensures that your print matches your expectations in terms of scale.
- Wall Thickness: Ensure your model\"s walls are thick enough to be printed. The 3D Print Toolbox can help identify areas that may be too thin to print reliably.
- Optimize Overhangs: Minimize overhangs to reduce the need for support structures, which can save material and reduce post-processing time.
- Hollowing Out Models: For models that do not need to be solid, hollowing out your model can significantly reduce the amount of printing material needed, lowering costs and print time.
- Exporting the Model: Once your model is prepared, export it in a format compatible with your 3D printer, typically STL or OBJ. Ensure to check the export settings for any additional options that might affect the print.
Following these steps will help ensure that your Blender models are properly prepared for 3D printing, reducing the likelihood of print failures and ensuring the highest quality output.
- Regularly save your work and create backups before making significant changes.
- Use Blender\"s community forums and resources for specific questions or troubleshooting issues during the preparation process.
Preparing your model for 3D printing might seem daunting at first, but with practice, these steps will become an integral part of your modeling workflow, leading to successful prints.
_qYYgrmi.jpg)
6. Exporting Models from Blender for 3D Printing
Successfully exporting your model from Blender for 3D printing is a critical step in bringing your digital creation to life. This section guides you through the process, ensuring your model is correctly formatted and ready for your 3D printer.
- Choosing the Right Format: Most 3D printers require models to be in STL or OBJ formats. Blender supports exporting to these formats, which are widely used in the 3D printing industry.
- Finalizing Your Model: Before exporting, ensure your model is ready by checking for any final errors, applying all modifications, and ensuring the model is solid and manifold.
- Exporting Your Model: Go to File > Export and select the appropriate format for your 3D printer (STL or OBJ). In the export settings, you can adjust the scale and specify other options that affect the final output.
- Export Settings: Pay attention to the export settings such as scale, orientation, and whether to apply modifiers before export. These settings can significantly impact the printability of your model.
- Post-Export Check: After exporting, it\"s advisable to use a 3D printing preparation software to check the file for any issues that could affect printing. Software like Ultimaker Cura or Simplify3D can help identify and repair problems with the exported model.
Exporting your model correctly is crucial for a successful print. By following these steps, you can ensure that your Blender models are well-prepared and compatible with your 3D printer\"s requirements.
- Always double-check the scale and orientation of your model before exporting.
- Consider using Blender\"s 3D Print Toolbox for a final analysis before export.
With these guidelines, exporting models from Blender for 3D printing becomes a streamlined process, bridging the gap between digital design and physical realization.
7. Common Issues and How to Solve Them
When preparing models for 3D printing with Blender, users may encounter a range of common issues. This section addresses these challenges and provides solutions to ensure successful prints.
- Non-Manifold Geometry: Non-manifold edges or vertices can cause printing errors. Solution: Use Blender\"s 3D Print Toolbox to identify and repair non-manifold issues.
- Inverted Normals: Inverted normals can lead to surfaces being printed inside out. Solution: Recalculate normals by selecting all faces in Edit Mode and using the Recalculate Normals option.
- Thin Walls: Walls too thin for the printer\"s resolution can lead to weak structures or failed prints. Solution: Increase wall thickness in Blender or use the Solidify Modifier to add thickness uniformly.
- Overhangs Without Support: Overhangs exceeding a certain angle can collapse during printing. Solution: Design models with overhangs in mind or use automatic support generation in your slicer software.
- Incorrect Scale: A model\"s scale might not match the physical world, leading to prints that are too small or too large. Solution: Verify and adjust the scale in Blender\"s Scene properties to match the real-world dimensions.
Addressing these issues before exporting your model can greatly enhance the quality of your 3D prints and reduce the time spent on post-processing.
- Regularly check your model with Blender’s 3D Print Toolbox during the modeling process to catch and resolve issues early.
- Consider printing a small test piece to verify the printability of complex models before committing to a full print.
By anticipating and solving these common issues, you can streamline your workflow and increase the success rate of your 3D printing projects with Blender.
8. Tips for Optimizing 3D Print Quality
Optimizing your model in Blender for 3D printing is crucial for achieving high-quality prints. This section offers tips to enhance the print quality of your models, focusing on Blender\"s capabilities and general 3D printing best practices.
- Ensure Adequate Wall Thickness: Adequate wall thickness is vital for the structural integrity of your print. Use the Solidify Modifier in Blender to uniformly increase the thickness of your model\"s walls.
- Optimize Model Orientation: Orient your model in a way that minimizes the need for support structures, which can reduce surface quality where they contact the model.
- Smooth Surfaces: For models that require smooth surfaces, use Blender\"s Subdivision Surface Modifier to increase the mesh density, making the print appear smoother.
- Reduce and Optimize Mesh Complexity: Simplify your model without losing essential details to decrease printing time and potential errors. Blender’s Decimate Modifier can help reduce the polygon count.
- Use Correct Export Settings: When exporting, ensure that the resolution and format settings are optimized for your printer\"s capabilities to avoid loss of detail.
- Implement Design Considerations for 3D Printing: Design with 3D printing constraints in mind, such as avoiding floating or extremely thin elements that could fail during printing.
By applying these tips, you can significantly improve the quality of your 3D prints from Blender models, ensuring that the final product closely matches your vision and design intentions.
- Experiment with different print settings on a small scale to find the optimal configuration for your specific printer and material.
- Stay updated with Blender and 3D printing community forums and tutorials for the latest tips and techniques.
Optimizing print quality requires a balance between model complexity, printer capabilities, and the chosen material. With practice and attention to detail, you can produce exceptional 3D printed objects using Blender.
9. Case Studies: Real-World Examples
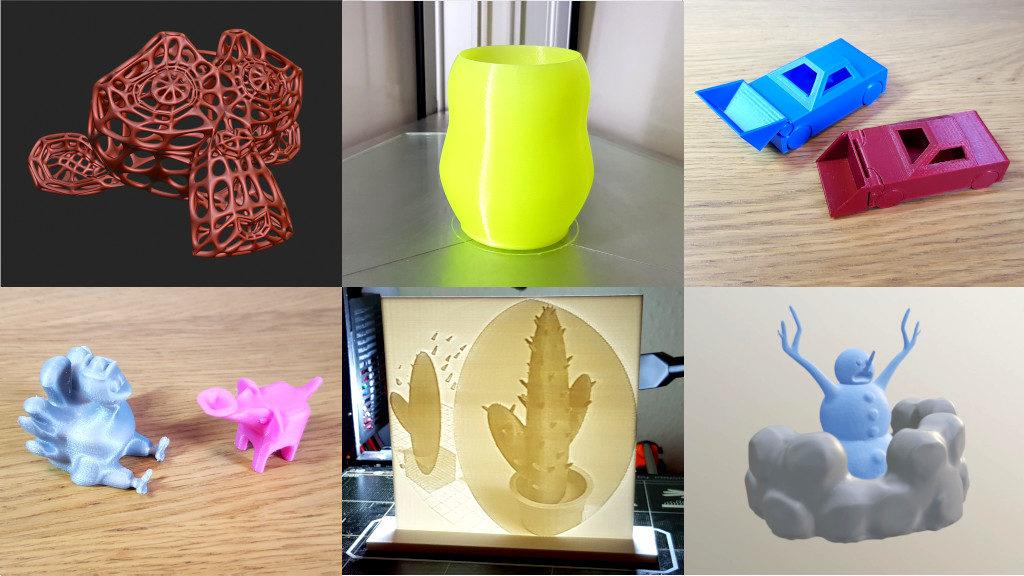
Exploring real-world examples is a great way to understand the potential of Blender in 3D printing projects. This section showcases various case studies where Blender was used to design, model, and prepare objects for 3D printing, highlighting the diverse applications and innovative solutions provided by this powerful tool.
- Custom Jewelry Design: An independent designer uses Blender to create intricate jewelry designs, showcasing how precise modeling techniques can be applied to small-scale, detailed prints.
- Architectural Models: An architecture firm employs Blender to produce detailed models of buildings for client presentations, demonstrating Blender\"s capability in handling complex structures and landscapes.
- Prosthetic Limbs: A medical technology startup utilizes Blender for designing custom-fit prosthetic limbs, highlighting the tool\"s role in creating functional, life-improving products.
- Educational Tools and Models: Educators incorporate Blender into their curriculum to create detailed anatomical models for classroom use, facilitating interactive learning experiences.
- Custom Vehicle Parts: A hobbyist uses Blender to design and print custom parts for automotive restoration projects, showing Blender\"s utility in producing durable, functional components.
These case studies exemplify the versatility and power of Blender in various industries, from fashion and education to healthcare and engineering. By leveraging Blender\"s comprehensive toolset, individuals and organizations alike can bring innovative ideas to life through 3D printing.
Engaging with real-world projects provides valuable insights into the practical applications of 3D modeling and printing, encouraging users to explore the limits of their creativity and technical skills with Blender.
_HOOK_
READ MORE:
10. Additional Resources and Learning Tools
Expanding your knowledge and skills in Blender for 3D printing is an ongoing process. Here are some recommended resources and learning tools to further explore and master Blender\"s capabilities for 3D modeling and printing.
- Blender Official Tutorials: The Blender Foundation offers comprehensive guides and tutorials covering all aspects of 3D modeling and printing.
- Online Courses: Platforms like Udemy, Coursera, and Lynda provide in-depth courses on Blender for all skill levels, from beginners to advanced users.
- YouTube Channels: Numerous experts share their knowledge on YouTube, offering tutorials, tips, and project walkthroughs for 3D modeling and printing with Blender.
- Blender Communities: Join forums and online communities such as Blender Artists and Reddit’s r/blender for advice, feedback, and support from fellow Blender enthusiasts.
- Books and eBooks: There are several comprehensive guides and reference books available for learning Blender, catering to both beginners and advanced users.
Utilizing these resources can significantly enhance your learning curve and help you stay updated with the latest trends and techniques in 3D modeling and printing with Blender.
Remember, the key to mastering Blender is practice and experimentation. Leverage these resources to explore new possibilities and refine your skills.
Embark on your Blender journey to transform imagination into reality through 3D printing. This guide has armed you with the essentials to explore, create, and innovate. Continue learning, experimenting, and sharing your creations with the world.


