Topic editing videos in blender: Discover the transformative power of editing videos in Blender, an all-encompassing platform that blends advanced video editing capabilities with 3D animation, offering endless creative possibilities for filmmakers and content creators alike.
Table of Content
- What are the basic video editing capabilities available in Blender\'s built-in video sequence editor?
- Why Choose Blender for Video Editing?
- Getting Started: Installation and Interface Overview
- Blender Video Editing Basics: From Setup to Essential Functions
- YOUTUBE: Video Editing with Blender for Complete Beginners Part 1
- Advanced Techniques: Color Grading, Effects, and Speed Control
- Special Effects: Blurring Faces, Adding Text, and More
- Workflow Enhancements: Keyboard Shortcuts and Rendering Tips
- Resource Compilation: Best Tutorials and Learning Resources
What are the basic video editing capabilities available in Blender\'s built-in video sequence editor?
Blender\'s built-in video sequence editor offers several basic video editing capabilities that can be used to edit videos directly within the software. Some of the key features include:
- Video cuts: Users can easily cut video clips to remove unwanted sections or trim the footage.
- Splicing: Blender allows users to splice together different video clips to create a seamless video sequence.
- Adding effects: Users can apply various effects such as transitions, filters, and color corrections to enhance the visual appeal of the video.
- Audio editing: The video sequence editor also supports audio editing, enabling users to adjust audio levels, add music, or include voiceovers.
- Text and titles: Users can insert text overlays, titles, and annotations to provide context or information within the video.
READ MORE:
Why Choose Blender for Video Editing?
Blender is not just a 3D animation suite but also a comprehensive tool for video editing, offering a unique combination of features that cater to both beginners and professionals. Its open-source nature ensures it is entirely free, providing a robust alternative to costly video editing software without compromising on functionality.
- Integrated Video Sequence Editor: Allows for complex non-linear editing, live preview, chroma vectorscope, and histogram displays.
- Comprehensive Toolset: Includes features for cutting, splicing, video masking, and color grading, alongside advanced capabilities like 3D animation integration for stunning effects.
- Customization and Flexibility: Highly customizable interface and functionality through Python scripting, making it adaptable to any workflow.
- Active Community Support: A vast community of users and developers contribute tutorials, plugins, and support, facilitating a learning environment that grows with you.
- Multi-Platform Support: Available on Windows, macOS, and Linux, ensuring accessibility for users across different operating systems.
- Regular Updates: Continuous improvements and new features added regularly by the Blender Foundation and community contributors.
Choosing Blender for video editing means investing in a tool that grows with you, offering a range of features from basic editing to complex visual effects, all under a free and open-source license. Whether you\"re creating short films, YouTube videos, or complex visual projects, Blender provides a solid foundation to bring your ideas to life.

Getting Started: Installation and Interface Overview
Blender is a powerful, free, and open-source 3D computer graphics software toolset used for video editing, visual effects, animated films, 3D modeling, and more. This comprehensive guide will help you start your journey in video editing with Blender, covering everything from installation to familiarizing yourself with the interface.
Installation
- Visit the official Blender website (blender.org) and navigate to the Download section.
- Select the version suitable for your operating system. Blender supports Windows, macOS, and Linux.
- Follow the installation instructions provided on the website to install Blender on your computer.
Understanding Blender\"s Interface
Upon launching Blender, you\"ll be greeted with its default interface, which is highly customizable and divided into several editor types. For video editing, you\"ll primarily use the Video Sequence Editor (VSE).
Video Sequence Editor (VSE)
- The VSE allows for basic actions like video cuts and splicing, as well as more complex tasks like video masking or color grading.
- Features include live preview, luma waveform, chroma vectorscope, histogram displays, audio mixing, syncing, scrubbing, and waveform visualization.
- It supports up to 32 slots for adding video, images, audio, scenes, masks, and effects, along with speed control, adjustment layers, transitions, keyframes, filters, and more.
Getting Started with Your First Project
- To begin editing, switch to the Video Editing workspace by selecting it from the top menu or use the shortcut by selecting \"Video Editing\" from the splash screen when you open Blender.
- Import your media files using the \"Add\" menu in the VSE. You can add videos, images, and audio files to your project.
- Utilize the preview area to view your edits in real-time, and explore the different editing tools available in the VSE for cutting, trimming, and arranging your clips.
Learning Resources
Blender\"s official documentation and community forums are excellent resources for beginners. Additionally, numerous tutorials and video series are available online to guide you through the basics and advanced features of video editing in Blender.
Remember, the key to mastering video editing in Blender is practice and exploration. Start with simple projects, experiment with different features, and gradually build your skills.

Blender Video Editing Basics: From Setup to Essential Functions
Embarking on your video editing journey with Blender begins with understanding its fundamental aspects. This section aims to guide you through the initial setup and introduce you to the essential functions necessary for video editing in Blender. Whether you\"re a novice or transitioning from another software, these steps will help establish a solid foundation.
Initial Setup
- Open Blender and choose the \"Video Editing\" layout from the top menu to access the Video Sequence Editor (VSE).
- In the VSE, familiarize yourself with the three main areas: the Preview window, the Sequencer, and the Graph Editor.
- Adjust the layout as needed by dragging the borders between the sections to customize your workspace.
Importing Media
- To add video, images, or audio files to your project, use the \"Add\" menu in the Sequencer. Select the type of media you wish to import and navigate to the file location.
- Arrange your media on the timeline by dragging and dropping the strips. You can also cut and trim the strips to adjust their duration.
Basic Editing Tools
Blender\"s VSE offers a variety of tools for basic video editing, including:
- Cut and Trim: Use the \"K\" key to cut strips at the playhead\"s position, and trim by selecting the ends of strips and dragging.
- Adding Transitions: Right-click between two strips and choose \"Add Transition\" to smoothly blend between clips.
- Adjusting Audio: Adjust volume and sync audio using the properties panel on the right side of the VSE.
Previewing Your Work
To preview your edits, use the timeline controls below the Preview window. Play, pause, and scrub through your project to review changes in real time.
Rendering Your Project
- Access the rendering settings in the Properties panel on the right side of the screen.
- Set your output properties, including file format, resolution, and frame rate.
- Click \"Render\" > \"Render Animation\" to export your final video project.
Blender\"s Video Editing mode is a robust toolset designed for a wide range of tasks, from simple cuts to complex compositions. While this guide covers the basics, exploring Blender\"s comprehensive features and experimenting with your projects will enhance your editing skills. Remember, practice and patience are key to mastering video editing in Blender.
Video Editing with Blender for Complete Beginners Part 1
Beginners: \"Are you new to this hobby? This video is perfect for beginners looking to learn the basics and get started on their journey. Let\'s embark on this exciting adventure together!\" Quality: \"Looking for top-notch content? Look no further! This video is tailored to provide you with high-quality information and visuals you won\'t find anywhere else. Dive into a world of excellence!\"
Blender As A Video Editor It\'s Actually Really Good
Blender, which is free and open source software, is one of the best programs for creating professional-quality 3D animations.
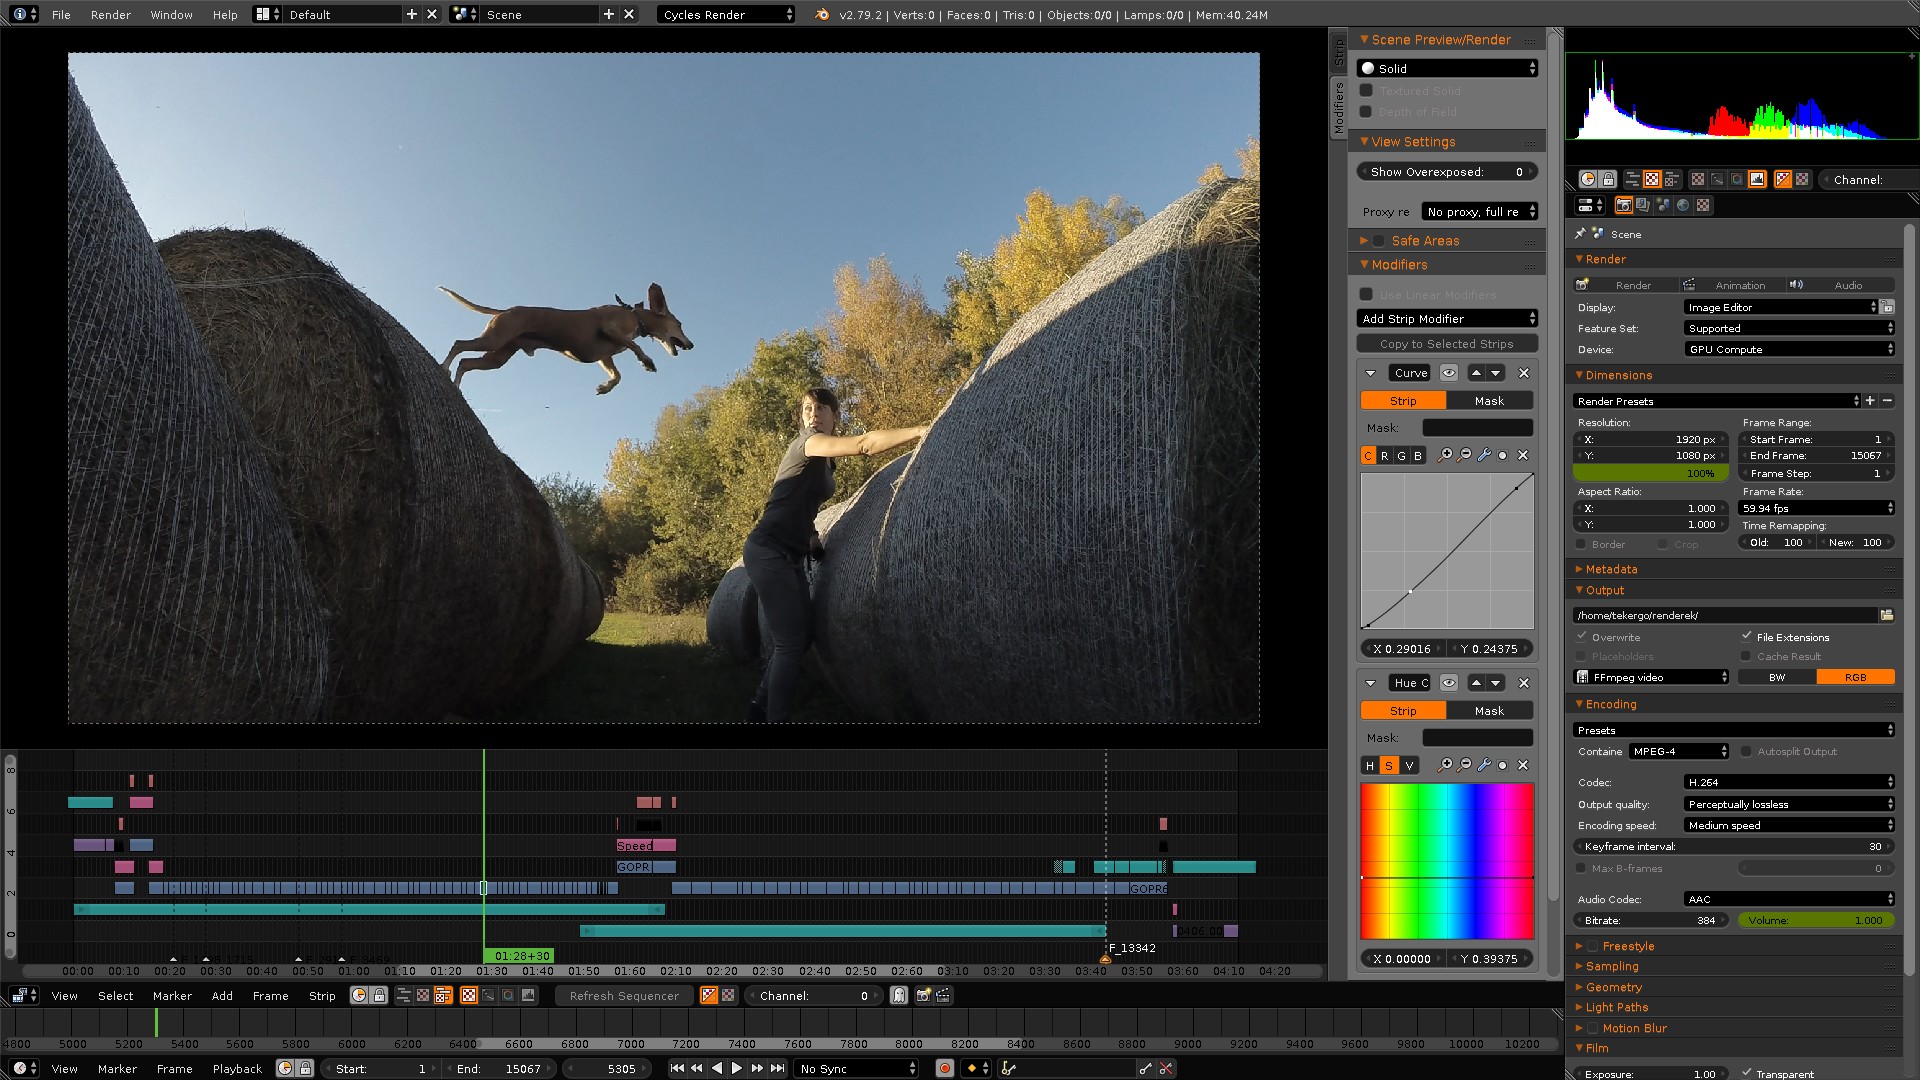
Advanced Techniques: Color Grading, Effects, and Speed Control
Once you\"ve mastered the basics of video editing in Blender, it\"s time to elevate your projects with advanced techniques. This section delves into color grading, adding effects, and controlling the speed of your video clips. These skills will help you enhance the visual appeal and storytelling impact of your projects.
Color Grading
Color grading is essential for setting the mood and improving the visual consistency of your video. Blender offers powerful color correction tools within the VSE and the Node Editor for more complex grading.
- Navigate to the \"Color\" section in the VSE to adjust basic color settings like brightness, contrast, and saturation.
- For advanced color grading, switch to the Compositor workspace and use the Node Editor. Here, you can add a \"Color Balance\" node to fine-tune the colors using shadows, midtones, and highlights.
- Experiment with other color nodes like \"Hue/Saturation\" and \"RGB Curves\" to achieve your desired look.
Adding Effects
Blender\"s VSE allows you to add various effects to enhance your video, including transitions, video filters, and more.
- Use the \"Add\" menu in the VSE to insert effects strips such as \"Gaussian Blur\", \"Glow\", or \"Color Correction\".
- Adjust the properties of each effect in the strip\"s properties panel to customize the intensity and appearance.
- Combine multiple effects to create unique visual styles or to emphasize certain aspects of your video.
Speed Control
Manipulating the speed of your video clips can add dramatic effect or align clips with the desired timing.
- Add a \"Speed Control\" effect strip to your video strip to adjust its playback speed. This can be found under the \"Effect Strip\" menu in the VSE.
- In the strip\"s properties, set the speed factor to slow down or speed up the clip. You can also use the \"Multiply Speed\" option for more precise control.
- For advanced speed adjustments, keyframe the speed factor to create speed ramps or to gradually change the speed over time.
Mastering these advanced techniques in Blender can significantly enhance the quality and impact of your video projects. Practice applying these methods to various projects to develop your skills and creative vision. As you become more familiar with Blender\"s extensive toolkit, you\"ll discover even more ways to bring your ideas to life.

_HOOK_
Special Effects: Blurring Faces, Adding Text, and More
Blender is not only powerful for 3D modeling and animation but also offers a robust set of features for video editing, including special effects like blurring faces, adding text overlays, and more. Below, we outline step-by-step processes to help you enhance your video projects.
- Blurring Faces
- Open your video in Blender\"s Video Sequence Editor.
- Go to the \"Add\" menu, select \"Effect Strip\", and then choose \"Mask\". Create a new mask and name it.
- In the Movie Clip Editor, open the video clip you\"re editing. Use the mask tool to draw around the face you want to blur.
- Adjust the mask\"s properties to ensure it moves with the face throughout the clip by setting keyframes for the mask\"s position.
- Back in the Video Sequence Editor, add an \"Adjustment Layer\" above the clip needing the blur effect.
- With the adjustment layer selected, go to the \"Effect Strip\" tab, and under the \"Modifiers\" section, add a \"Mask\" modifier. Select the mask you created.
- Add a \"Gaussian Blur\" effect by selecting \"Add\" > \"Effect Strip\" > \"Gaussian Blur\". Adjust the blur radius to your liking.
- Adding Text Overlays
- Switch to the \"Video Editing\" layout from the top menu.
- Press \"Shift+A\" to add a new strip, select \"Text\" to add text.
- Type your desired text in the \"Text\" box under the \"Effect Strip\" properties.
- Customize the font size, color, and position to fit your video\"s theme and style.
- To animate the text, insert keyframes for the location, opacity, and other properties at different points on the timeline.
- Applying Additional Special Effects
- Color Grading: Use the \"Color Balance\" and \"Curves\" tools to adjust the mood and tone of your video.
- Transitions: Blend clips together using transitions like crossfade or wipe by placing two clips on consecutive tracks and adding a \"Gamma Cross\" or \"Wipe\" effect strip.
- Speed Control: Adjust the playback speed of your clips with the \"Speed Control\" effect strip, perfect for slow-motion or time-lapse effects.
By mastering these tools in Blender, you can significantly enhance your video projects, making them more engaging and professional-looking. Whether it\"s for personal projects or professional work, these effects can help bring your vision to life.

Workflow Enhancements: Keyboard Shortcuts and Rendering Tips
Enhancing your workflow in Blender can save you time and make your video editing process more efficient. Mastering keyboard shortcuts and understanding rendering tips are crucial for any editor looking to speed up their work and improve productivity. Below, we\"ve compiled essential shortcuts and tips to help you navigate through Blender\"s Video Sequence Editor more effectively and render your projects with optimal settings.
- Essential Keyboard Shortcuts
- Shift + A: Add menu for strips, effects, and transitions.
- G: Grab to move selected strips.
- S: Scale to adjust the duration of a strip.
- K: Cut tool to split strips at the playhead position.
- Ctrl + Space: Maximize the active window; useful for focusing on the timeline or preview.
- Right Arrow / Left Arrow: Move the playhead one frame right or left.
- Alt + A: Play or pause the video preview.
- Rendering Tips
- Choose the Right Output Format: Select a format that suits your end-use, whether it\"s for web, broadcast, or archival purposes. Formats like H.264 in an MP4 container are widely used for their balance of quality and file size.
- Set the Proper Resolution and Frame Rate: Ensure your project settings match your source footage to avoid unnecessary scaling or frame rate conversion issues.
- Configure Output Settings: Utilize Blender\"s \"Output Properties\" tab to configure your rendering settings, including file path, file format, and encoding options.
- Optimize Rendering Performance: Adjust the \"Performance\" settings in the \"Output Properties\" tab to match your hardware capabilities, such as setting higher values for \"Tiles\" when using a powerful GPU.
- Use Proxies for High-Resolution Footage: If working with 4K or higher resolution footage, create proxies to improve playback performance during editing. Set the proxy resolution in the \"Proxy & Cache\" settings of your video strips.
By integrating these keyboard shortcuts and rendering tips into your workflow, you\"ll find that editing videos in Blender becomes a smoother, more enjoyable process. These enhancements not only speed up your work but also allow for greater creative exploration as you spend less time wrestling with the software and more time bringing your creative vision to life.

READ MORE:
Resource Compilation: Best Tutorials and Learning Resources
Finding high-quality tutorials and resources is key to mastering video editing in Blender. Whether you are a beginner looking to get started or an experienced editor aiming to refine your skills, the right resources can make all the difference. Below, we\"ve compiled a list of essential tutorials and learning resources that cover various aspects of video editing in Blender, from basic editing techniques to advanced special effects and workflow optimizations.
- Blender Official Tutorials: The Blender Foundation offers comprehensive tutorials on their official website and YouTube channel, covering everything from introductory lessons to advanced features specific to video editing.
- Blender Guru: Known for high-quality, in-depth tutorials, Blender Guru provides a range of tutorials that include video editing alongside 3D modeling and animation, perfect for those looking to harness the full power of Blender.
- CG Cookie: Offering a mix of free and premium content, CG Cookie is an excellent resource for learning Blender. Their video editing tutorials are well-structured, catering to both beginners and advanced users.
- Blender Artists Community: The Blender Artists forum is a great place to seek advice, share your work, and learn from other Blender users. The community is helpful and covers a wide range of topics, including video editing.
- Blender Stack Exchange: For troubleshooting and specific questions, Blender Stack Exchange provides a Q&A platform where you can find answers to technical issues and how-to queries related to video editing in Blender.
- YouTube Tutorials: YouTube hosts a wealth of tutorials from various creators. Channels like BornCG, Darrin Lile, and Jayanam offer excellent Blender tutorials, including video editing techniques, effects, and workflow tips.
Utilizing these resources, you can steadily build your skills and confidence in video editing with Blender. Remember, practice and experimentation are key to mastering any software, so don\"t hesitate to apply what you learn and explore different techniques and tools within Blender.
Embark on your Blender video editing journey with confidence, leveraging the power of its comprehensive toolset. From special effects to workflow enhancements, our guide ensures a smooth path to mastering your creative projects. Start exploring today!


