Topic blender edit videos: Discover the power of Blender for video editing, a free tool that transforms your video projects with professional-grade features and intuitive workflows for creators at any skill level.
Table of Content
- What features does Blender offer for editing videos?
- Understanding Blender\"s Video Editing Capabilities
- Getting Started with Blender for Video Editing
- Step-by-Step Tutorials for Beginners
- Advanced Video Editing Techniques in Blender
- Key Features: Live Preview, Audio Mixing, and Effects
- YOUTUBE: Blender As A Video Editor It\'s Actually Really Good
- Blender Video Editing Workflows and Best Practices
- How to Enhance Your Videos with Blender\"s VFX
- Common Video Editing Tasks Simplified with Blender
- Exporting and Sharing Your Edited Videos
- Community Resources for Blender Video Editors
What features does Blender offer for editing videos?
Blender offers a variety of features for editing videos, making it a powerful tool for video editing. Some of the key features include:
- Video Sequence Editor: Blender comes with a built-in video sequence editor that allows users to perform basic video editing tasks such as cuts, splicing, and transitions.
- Color Correction: Users can adjust the color, brightness, and contrast of their videos to enhance the overall look and feel.
- Keyframes and Animation: Blender allows for the creation of keyframe animations, enabling users to animate elements within their videos.
- Effects and Filters: Users can apply various effects and filters to their videos to add creative visual enhancements.
- Audio Editing: Blender supports audio editing capabilities, allowing users to adjust audio levels, add music, and sync sound with video.
- Rendering: Users can render their edited videos in various formats and resolutions, catering to different output requirements.
READ MORE:
Understanding Blender\"s Video Editing Capabilities
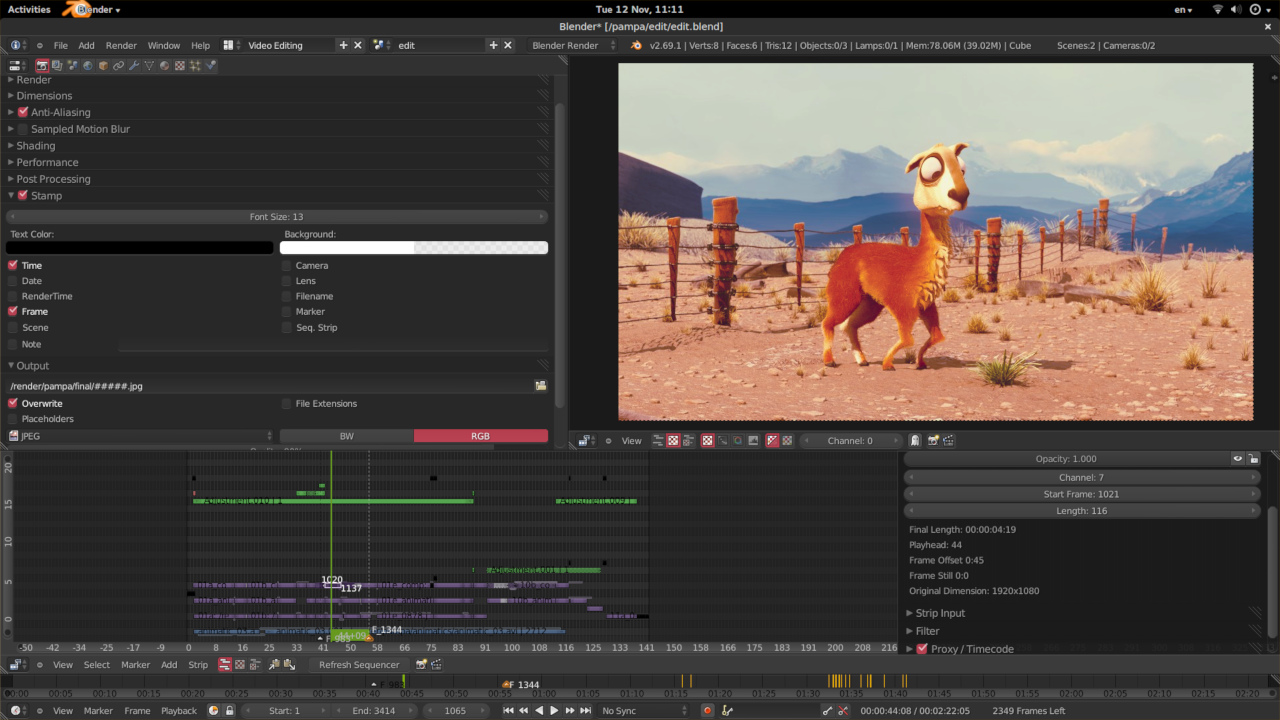
Blender is not just for 3D animation but also a powerful video editing software that caters to beginners and professionals alike. Its video sequence editor allows for a range of editing tasks, from simple cuts to complex compositions with 3D effects.
- Live preview, luma waveform, chroma vectorscope, and histogram displays for precise editing.
- Audio mixing, syncing, scrubbing, and waveform visualization to enhance the auditory aspects of your projects.
- Up to 32 slots for adding video clips, images, audio, scenes, masks, and effects for comprehensive project management.
- Speed control, adjustment layers, transitions, keyframes, filters, and more for creative video effects and editing.
Blender\"s video editor is designed to be both versatile and powerful, offering tools for basic video editing tasks like splicing and cutting, as well as advanced features such as video masking and color grading. This makes it a suitable option for projects of all sizes, from quick edits to complex video productions.
- Getting Started: Import your footage and navigate Blender\"s interface with ease.
- Editing Techniques: Learn how to cut, splice, layer, and transition your videos.
- Advanced Features: Dive into color correction, masking, and adding 3D elements to your videos.
- Exporting Your Project: Understand the output settings for optimal video quality and file size.
Whether you\"re a hobbyist looking to edit personal videos or a professional seeking to integrate 3D elements into your projects, Blender offers a comprehensive suite of tools to bring your vision to life.

Getting Started with Blender for Video Editing
Embarking on video editing with Blender is an exciting journey, offering extensive tools for creating professional-quality videos. This section guides you through the initial steps, ensuring a smooth start.
- Download and Install Blender: Ensure you have the latest version of Blender installed on your computer for access to the newest features and improvements in video editing.
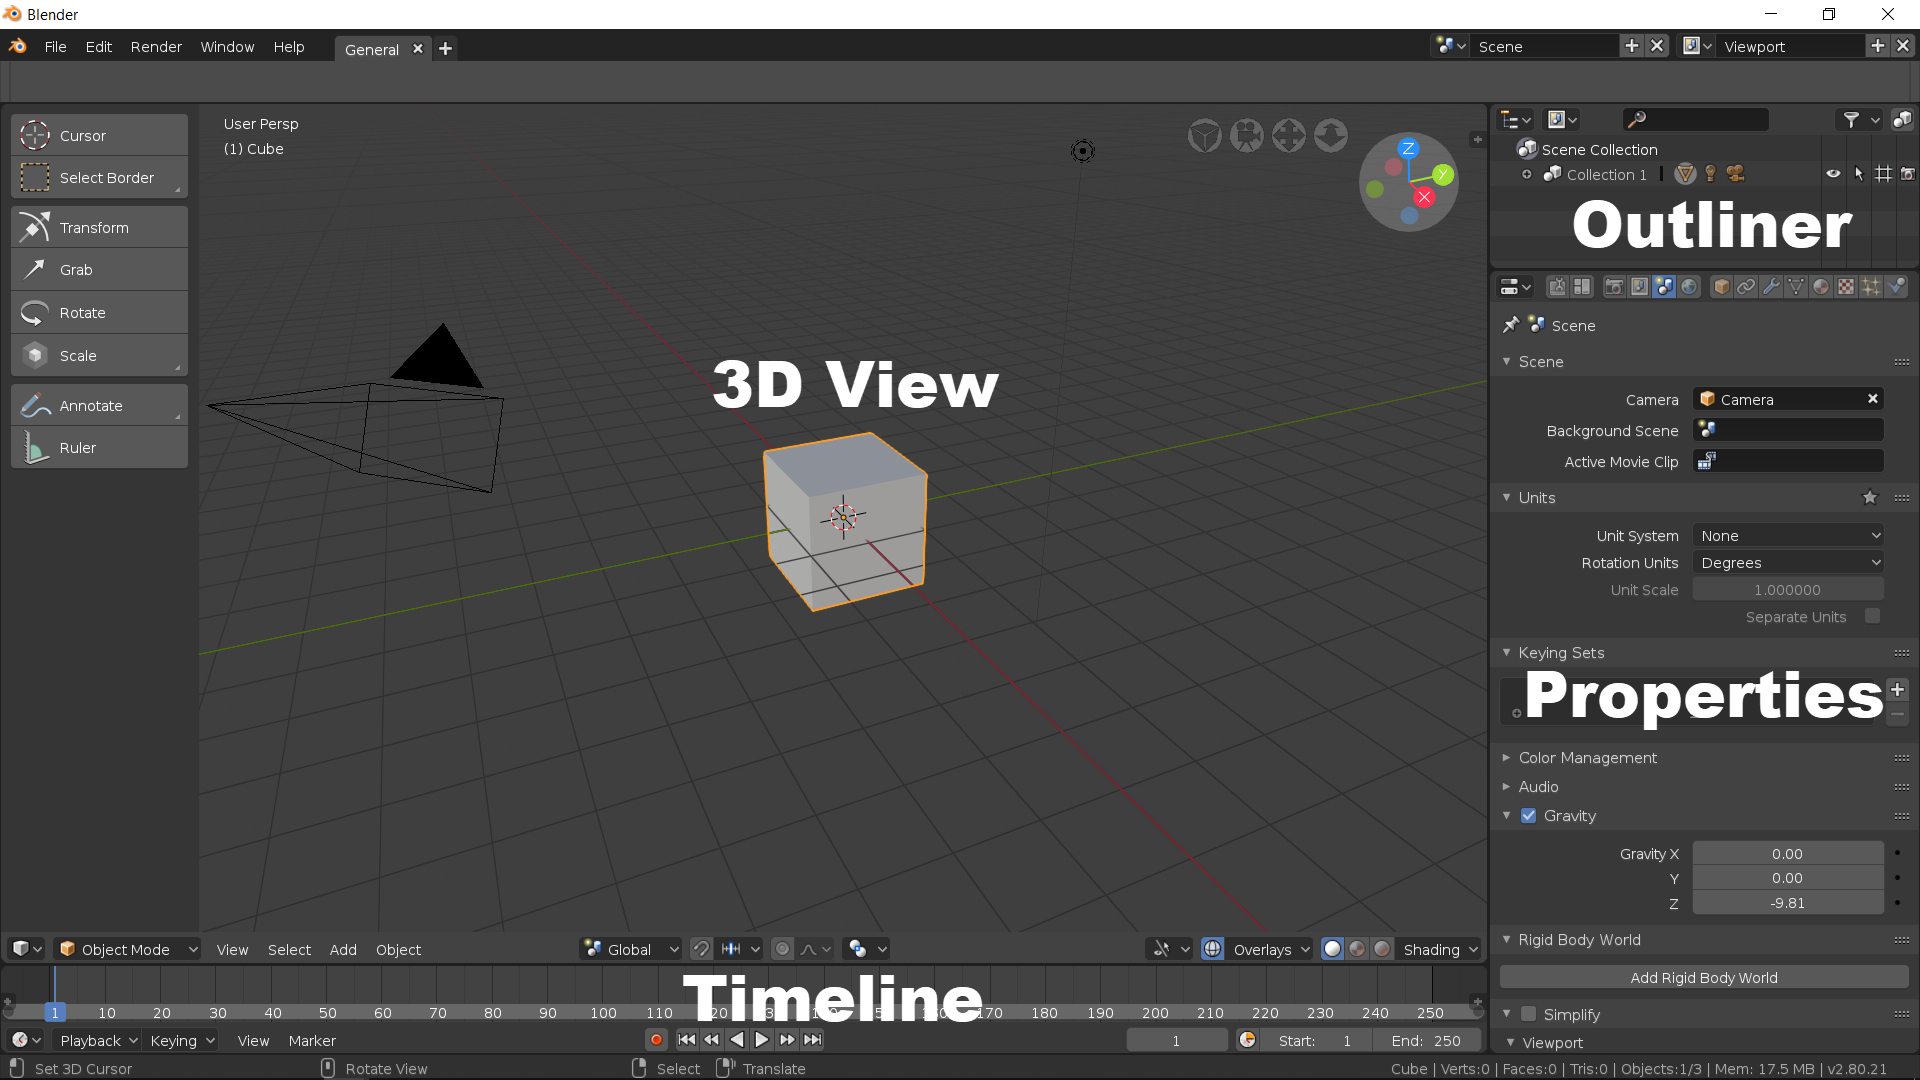
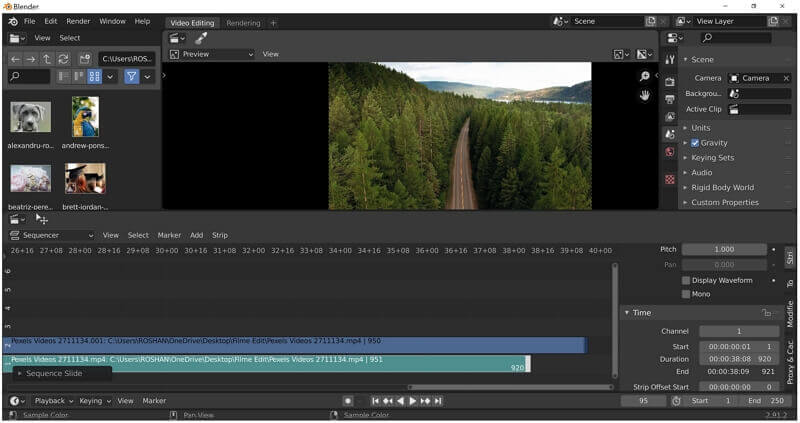
- Familiarize with the Interface: Explore Blender\"s layout, focusing on the Video Sequence Editor (VSE), where you will spend most of your editing time.
- Import Your Media: Learn how to add video clips, images, and audio files to your project. Blender supports a wide range of file formats, offering flexibility in your editing process.
- Basic Editing Functions: Get to know the basic editing tools such as cutting, trimming, and joining clips to start shaping your video project.
- Add Effects and Transitions: Blender includes various effects and transitions to enhance your video. Experiment with these to add polish to your edits.
- Audio Editing: Discover how to adjust audio levels, sync audio with video, and add sound effects within Blender for a complete audio-visual experience.
- Rendering and Exporting: Finally, learn about rendering settings and how to export your edited video in the desired format and quality.
This beginner-friendly guide aims to equip you with the knowledge needed to start editing videos in Blender confidently. Whether you\"re creating short clips or full-length films, Blender\"s comprehensive video editing suite is a powerful ally in your creative arsenal.

Step-by-Step Tutorials for Beginners
Embarking on your video editing journey with Blender can be both exciting and daunting. This section is dedicated to guiding beginners through easy-to-follow tutorials, ensuring a solid foundation in Blender\"s video editing capabilities.
- Introduction to Blender\"s Interface: Begin by familiarizing yourself with Blender\"s interface, focusing on the Video Sequence Editor (VSE) where your editing process will take place.
- Importing Your Media: Learn the steps to import your video, image, and audio files into Blender, setting the stage for your editing workflow.
- Basic Editing Techniques: This tutorial will cover cutting, trimming, and joining clips, as well as arranging your timeline effectively.
- Adding Transitions and Effects: Discover how to enhance your videos with transitions between clips and apply effects to add visual interest.
- Working with Audio: A guide to adding and editing audio within your videos, including syncing audio with video clips and adjusting volume levels.
- Advanced Editing Features: As you become more comfortable, explore more advanced features like color grading, masking, and adding text overlays.
- Rendering and Exporting: Conclude your project by learning how to render your video, adjusting settings for optimal quality, and exporting it in the desired format.
These tutorials are designed to build your skills progressively, turning complex editing tasks into manageable, step-by-step processes. With practice, you\"ll be able to unlock the full potential of Blender for your video editing projects.

Advanced Video Editing Techniques in Blender
Blender offers a suite of advanced video editing techniques that allow users to create professional-quality videos. These techniques leverage Blender\"s powerful tools to enhance storytelling, improve visual appeal, and add complexity to video projects. Here are some advanced techniques to elevate your video editing in Blender:
- Color Grading: Use Blender\"s color correction tools to set the mood and atmosphere of your video. Adjust the shadows, midtones, and highlights to achieve the desired look.
- Compositing: Combine multiple elements into a single scene using Blender\"s node-based compositor. This technique is perfect for adding visual effects, integrating 3D elements into video footage, or creating unique transitions.
- Masking and Rotoscoping: Create masks to isolate and manipulate specific parts of your footage. This is useful for color correction, adding effects to specific areas, or removing unwanted objects.
- Green Screen/Chroma Keying: Remove green screen backgrounds and seamlessly integrate your subjects into new environments. Blender\"s Keying node in the compositor makes this process straightforward.
- Speed Control: Dynamically adjust the speed of your video clips for slow-motion or fast-forward effects. Blender allows for frame-by-frame control, enabling precise speed adjustments.
- Advanced Transitions: Move beyond simple cuts with Blender\"s transition effects, such as wipes, fades, and custom animated transitions created with the VSE or compositor.
- 3D Titles and Text Animation: Incorporate 3D text into your videos for dynamic titles or annotations. Customize fonts, materials, and animations to fit the theme of your video.
- Particle Systems for Effects: Use Blender\"s particle system to add effects like smoke, fire, or rain to your videos, enhancing the realism or adding fantastical elements.
- Tracking and Stabilization: Stabilize shaky footage or track objects within your video to add 3D elements or effects that follow the motion of the camera or subjects.
- Audio Editing and Synchronization: Blender\"s VSE includes tools for precise audio editing and synchronization. Add sound effects, music, and dialogue, then adjust the timing to match your visuals perfectly.
Mastering these advanced techniques requires practice and exploration of Blender\"s extensive features. However, the effort pays off with the ability to produce stunning, high-quality video content.

_HOOK_
Key Features: Live Preview, Audio Mixing, and Effects
Blender\"s video editing capabilities are enhanced by several key features that make it a versatile tool for creators. Among these, Live Preview, Audio Mixing, and Effects stand out for their contribution to an efficient and creative editing process. These features enable editors to craft their videos with precision and artistic flair. Here\"s an overview of how each feature contributes to the video editing workflow in Blender:
- Live Preview:
- Blender\"s Live Preview feature allows editors to view their edits in real-time. This instant feedback is crucial for making quick decisions about cuts, transitions, and effects. Live Preview ensures that editors can experiment with different elements without waiting for lengthy renders, making the editing process faster and more intuitive.
- Audio Mixing:
- Audio is a critical component of video production, and Blender offers robust tools for audio mixing within the Video Sequence Editor (VSE). Editors can adjust levels, balance soundtracks, and synchronize audio with visual elements. Blender supports multiple audio tracks, enabling complex audio landscapes with music, dialogue, and sound effects layered together for a rich auditory experience.
- Effects:
- Blender provides a wide array of effects to enhance video content. These include transitions, color grading, and filters that can be applied directly within the VSE. Additionally, Blender\"s node-based compositor offers advanced effects like chroma keying, blurring, and glare. These effects can be customized extensively to achieve the desired look and feel, allowing for creative expression and storytelling.
These key features of Blender not only simplify the video editing process but also open up a world of creative possibilities. Live Preview offers a seamless editing experience, Audio Mixing brings depth to the auditory elements, and the extensive range of Effects empowers creators to bring their vision to life with professional polish and flair.

Blender As A Video Editor It\'s Actually Really Good
\"Versatile\": Explore the endless possibilities with this versatile product in our video. From fashion to home decor, discover how it can enhance every aspect of your life in creative ways. \"Tutorial\": Ready to learn something new? Our step-by-step tutorial video will guide you through the process effortlessly. Whether you\'re a beginner or an expert, you\'ll pick up valuable skills to enhance your knowledge.
Blender 3D Beginner Video Editing Tutorial FREE Video Editor
Get 50% OFF your first bag of coffee with Trade Coffee when you click here http://cen.yt/TradeSouthernShotty and enter code ...
Blender Video Editing Workflows and Best Practices
Adopting efficient workflows and best practices is essential for leveraging Blender\"s video editing capabilities to their fullest. These guidelines help ensure a smooth editing process, leading to higher quality videos and a more enjoyable creation experience. Here are key workflows and best practices for video editing in Blender:
- Organize Your Project:
- Start by organizing your assets, including video clips, images, and audio files. Use Blender\"s built-in file management system to categorize and access your materials easily. Keeping your project organized from the outset can save time and prevent complications later in the editing process.
- Use Proxies for High-Resolution Footage:
- Editing high-resolution video can be resource-intensive. To alleviate this, use Blender\"s proxy feature to create lower-resolution versions of your clips for editing. This speeds up the Live Preview and ensures a smoother editing process, allowing you to switch back to the original high-resolution files for the final render.
- Customize the Interface for Editing:
- Blender\"s interface is highly customizable. Arrange your workspace to prioritize video editing tools, such as the Video Sequence Editor (VSE), the Preview window, and the Properties panel. A tailored workspace can enhance your efficiency and make tools more accessible.
- Leverage Blender\"s Editing Tools:
- Get familiar with Blender\"s range of editing tools, including cuts, transitions, and effects. Use keyboard shortcuts to speed up your workflow. Blender\"s non-linear editing system allows for non-destructive edits, so experiment with different techniques to achieve the desired outcome.
- Experiment with Color Grading and Effects:
- Blender\"s color grading and effects capabilities are powerful. Use these features to enhance the visual appeal of your video. The node-based compositor offers advanced options for color correction, visual effects, and blending modes.
- Optimize Audio Editing:
- Don\"t overlook the importance of audio. Use Blender\"s audio mixing tools to balance levels, clean up noise, and ensure your video\"s sound is clear and impactful. Syncing audio with visual elements is crucial for storytelling and engagement.
- Regularly Save and Backup Your Work:
- Video editing can be complex, and losing progress is frustrating. Regularly save your project and consider setting up Blender\"s auto-save feature. Additionally, keep backups of your project files in multiple locations to prevent data loss.
- Render and Review:
- Before finalizing your video, render previews at lower resolutions to check for any issues. Pay attention to transitions, effects, and audio synchronization. Make necessary adjustments before rendering the final high-quality video.
Following these workflows and best practices can significantly enhance your video editing experience in Blender. With discipline and creativity, you can produce professional-quality videos that stand out.

How to Enhance Your Videos with Blender\"s VFX
Blender\"s Visual Effects (VFX) capabilities are a powerful tool for filmmakers and video creators looking to add a professional touch to their projects. With Blender, you can create stunning VFX that elevate the storytelling and visual impact of your videos. Here\"s a step-by-step guide on how to enhance your videos using Blender\"s VFX features:
- Plan Your VFX:
- Before diving into Blender, plan your VFX shots. Sketch or list the effects you want to achieve, such as explosions, magical effects, or environmental enhancements. Planning helps streamline the creation process and ensures that your VFX align with your video\"s narrative.
- Shoot with VFX in Mind:
- If you\"re shooting new footage, do so with your planned VFX in mind. Use a green screen for scenes requiring background replacement, and consider the lighting and camera angles that will best suit the addition of VFX.
- Import Your Footage:
- Import your video footage into Blender. Use the Video Sequence Editor (VSE) to align your clips on the timeline, setting the foundation for adding VFX.
- Use Blender\"s Compositor:
- Blender\"s node-based compositor is where you\"ll create most of your VFX. Start by adding a new scene specifically for compositing. Use nodes to add effects, color correction, and to composite CG elements with live-action footage.
- Integrate 3D Elements:
- Blender excels at 3D modeling and animation. Create or import 3D models to add to your video, such as characters, vehicles, or environmental elements. Animate these elements as needed and render them to integrate with your live-action footage.
- Apply Color Grading:
- Use Blender\"s color grading tools to match the colors between your live-action footage and CG elements. This step is crucial for making your VFX look seamless and part of the original footage.
- Add Special Effects:
- Enhance your videos with special effects like particle systems for smoke, fire, or magic spells. Blender\"s physics simulations can add realistic motion to these elements, integrating them convincingly into your scenes.
- Finalize with Rendering:
- Once you\"re satisfied with your VFX, render your scenes. Blender allows for rendering in various formats and resolutions. Ensure you render in a format compatible with your video editing workflow.
- Review and Adjust:
- After rendering, review your VFX shots in the context of your entire video. Make adjustments as necessary, re-rendering any scenes until you achieve the desired outcome.
By following these steps and utilizing Blender\"s comprehensive VFX toolkit, you can significantly enhance the visual appeal and storytelling depth of your videos. With practice, you can create effects that captivate your audience and bring your creative visions to life.
Common Video Editing Tasks Simplified with Blender
Blender, while renowned for its 3D modeling and animation capabilities, also offers a comprehensive suite for video editing. Its Video Sequence Editor (VSE) provides a robust platform for accomplishing common video editing tasks efficiently. Here are some of the tasks you can simplify using Blender:
- Cutting and Trimming Clips:
- Blender allows you to easily cut and trim your video clips. Simply select your clip in the timeline, use the cut tool (K) to slice it at the desired point, and delete or move the sections as needed. This is ideal for removing unwanted parts or fine-tuning the length of your clips.
- Merging and Arranging Clips:
- Drag and drop clips in the VSE to arrange them in your preferred order. Blender enables seamless merging of clips, allowing you to create a cohesive video narrative from multiple sources.
- Adding Transitions:
- Transitions between clips can be easily added in Blender. Whether you\"re looking for a simple crossfade or a more complex wipe, Blender\"s VSE supports various transitions to enhance the flow of your video.
- Color Correction and Grading:
- Adjust the colors in your video using Blender\"s built-in color correction and grading tools. You can enhance the overall look of your video by adjusting the brightness, contrast, saturation, and more, either on individual clips or the entire project.
- Audio Editing:
- Blender is not just for visuals; it also supports audio editing. You can synchronize audio with your video clips, adjust volume levels, and mix multiple audio tracks to create a rich sound landscape for your video.
- Adding Text and Titles:
- Create text overlays and titles directly within Blender. Customize the font, size, color, and animation to add informative or decorative text to your videos.
- Exporting Your Final Video:
- Once your editing is complete, Blender makes it easy to export your video in various formats and resolutions. You can adjust the encoding settings to optimize your video for different platforms, ensuring your work is ready to share with the world.
Blender\"s VSE simplifies these common video editing tasks, making it an accessible tool for video editors of all skill levels. Whether you\"re working on a personal project or a professional assignment, Blender provides a comprehensive toolkit to bring your vision to life.

Exporting and Sharing Your Edited Videos
After investing time in editing your video in Blender, the next steps are exporting your project and sharing it with your audience. Blender offers flexible options for rendering and exporting videos, catering to various formats and platforms. Here’s a comprehensive guide to exporting and sharing your edited videos:
- Finalize Your Edit:
- Before exporting, ensure all edits are finalized. Check for any unresolved transitions, unsynchronized audio, or unfinished color grading. This is also a good time to render a low-resolution preview to review your project one last time for any corrections.
- Choose the Right Output Settings:
- In Blender\"s Render Properties panel, select the output settings that best fit your needs. You can choose the file format (e.g., MPEG, AVI, MOV), resolution, and frame rate. Consider the platform where your video will be viewed to determine the optimal settings. For instance, YouTube has different recommended settings than Instagram or Vimeo.
- Configure Encoding Options:
- Adjust the encoding options to control the video\"s quality and file size. Blender allows you to tweak the bitrate, codec (H.264 is widely used for its balance of quality and file size), and audio codec. Higher bitrates and quality settings will result in larger files but better viewing experiences.
- Render and Export:
- With your settings configured, it’s time to render and export your video. Click the Render button and select \"Render Animation\" or press Ctrl+F12. Blender will process each frame, which can take some time depending on the length and complexity of your video, as well as your computer\"s capabilities.
- Review the Exported Video:
- Once rendering is complete, review the exported video to ensure it meets your expectations. Check for any issues with video quality, audio synchronization, or rendering errors.
- Sharing Your Video:
- For sharing, you can upload your video to platforms like YouTube, Vimeo, or social media. Each platform has specific requirements for video formats and dimensions, so adjust your export settings in Blender accordingly. Remember to add a compelling title, description, and tags to help your video reach its intended audience.
- Archiving Your Project:
- After exporting and sharing your video, it\"s wise to archive your Blender project file along with all the assets used. This makes it easier to revisit or revise the project in the future if needed.
Exporting and sharing videos from Blender can be a rewarding process, allowing you to showcase your creative work to the world. By following these steps, you can ensure that your videos are presented in the best possible quality and reach your desired audience effectively.
_HOOK_
READ MORE:
Community Resources for Blender Video Editors
The Blender community is an expansive network of users ranging from hobbyists to professionals, all contributing to a pool of resources that can significantly enhance the video editing experience. Whether you\"re seeking tutorials, templates, or support, there\"s an abundance of community resources available for Blender video editors. Here\"s a guide to some of the most valuable resources:
- Blender Forums:
- Blender\"s official forums are a goldmine for advice, feedback, and solutions to specific editing challenges. Engaging with the community can provide insights not readily found in tutorials or manuals.
- Tutorial Websites and YouTube Channels:
- There are countless tutorial websites and YouTube channels dedicated to Blender. These resources range from beginner guides to advanced VFX techniques. Channels like Blender Guru, CG Geek, and Blender Foundation’s own channel offer high-quality, free tutorials that cover various aspects of video editing and 3D modeling.
- Blender Stack Exchange:
- A Q&A site where you can ask questions and receive answers from the community on everything from troubleshooting to best practices in Blender video editing.
- Blender Cloud:
- Blender Cloud offers paid access to training, assets, and production files from Blender Foundation’s projects. It\"s a great way to learn from professional-grade materials and support the development of Blender.
- Blender Market:
- For those looking to speed up their workflow, Blender Market provides access to a vast array of add-ons, models, and video editing assets created by the community. Purchasing these assets can save time and add a professional polish to your projects.
- Social Media Groups:
- Facebook, Reddit, and LinkedIn host active Blender communities where users share their work, offer feedback, and participate in challenges. These groups are excellent for networking and staying updated on the latest Blender developments.
- Meetups and Conferences:
- Participating in Blender meetups and conferences, either online or in-person, can provide networking opportunities, insights into the industry, and inspiration from fellow video editors and 3D artists.
Leveraging these community resources can greatly enhance your Blender video editing skills, provide inspiration for your projects, and help you connect with like-minded individuals. The Blender community is known for its willingness to help and share knowledge, making it an invaluable resource for editors of all levels.
Embark on a journey to unlock your creative potential with Blender for video editing. From novice to expert, Blender\"s comprehensive tools and supportive community resources empower you to bring your visionary projects to life. Start editing today!