Topic how to edit videos using blender: Discover the power of Blender for video editing with our comprehensive guide, perfect for beginners looking to create stunning videos with this free, open-source software.
Table of Content
- What are the basic steps to edit videos using Blender?
- Getting Started
- Basic Editing Tools
- Advanced Features
- Exporting Your Video
- Basic Editing Tools
- Advanced Features
- Exporting Your Video
- YOUTUBE: Blender As A Video Editor: It\'s Actually Really Good!
- Advanced Features
- Exporting Your Video
- Exporting Your Video
- Introduction to Video Editing with Blender
- Getting Started with Blender for Video Editing
- Understanding Blender\"s Video Editing Interface
- Importing and Organizing Your Media
- Basic Video Editing Techniques in Blender
- Advanced Video Editing Features
- Adding Effects and Transitions
- Working with Audio in Blender
- Color Grading and Correction
- Exporting Your Final Video
- Tips and Best Practices for Efficient Editing
- Resources for Further Learning and Support
What are the basic steps to edit videos using Blender?
To edit videos using Blender, follow these basic steps:
- Open Blender\'s video editor.
- Import your video file into Blender.
- Arrange and edit your video clips on the timeline.
- Add transitions, effects, and animations as needed.
- Edit audio tracks if necessary.
- Preview your edited video to make sure it looks as desired.
- Export the edited video in your desired format.
READ MORE:
Getting Started
- Open Blender and select File > New > Video Editing to open the video editor.
- Import your video files by using the Add menu or pressing Shift + A in the sequencer to add movie clips.

Basic Editing Tools
- Cutting and Splicing: Use the cut tool to trim clips or split them into multiple parts.
- Adding Transitions: Enhance your video by adding transitions between clips.
- Color Grading: Adjust the colors of your video to correct the balance or create a specific mood.

Advanced Features
Blender also offers advanced video editing features, including:
- Video masking for creating effects or hiding elements.
- Luma waveform, chroma vectorscope, and histogram displays for professional color grading.
- Audio mixing, syncing, scrubbing, and waveform visualization for precise sound editing.

Exporting Your Video
Once your video editing is complete, you can export your project by going to Render > Render Animation. Choose your preferred format and settings, then click Render to output your video.
Tips for Success
- Start with simple projects to familiarize yourself with Blender\"s interface and features.
- Experiment with different effects and transitions to enhance your video.
- Regularly save your project to avoid losing progress.
With practice and exploration, Blender can be a powerful tool in your video editing arsenal, offering a wide range of features from basic cuts to complex visual effects.

_HOOK_
Basic Editing Tools
- Cutting and Splicing: Use the cut tool to trim clips or split them into multiple parts.
- Adding Transitions: Enhance your video by adding transitions between clips.
- Color Grading: Adjust the colors of your video to correct the balance or create a specific mood.

Advanced Features
Blender also offers advanced video editing features, including:
- Video masking for creating effects or hiding elements.
- Luma waveform, chroma vectorscope, and histogram displays for professional color grading.
- Audio mixing, syncing, scrubbing, and waveform visualization for precise sound editing.

Exporting Your Video
Once your video editing is complete, you can export your project by going to Render > Render Animation. Choose your preferred format and settings, then click Render to output your video.
Tips for Success
- Start with simple projects to familiarize yourself with Blender\"s interface and features.
- Experiment with different effects and transitions to enhance your video.
- Regularly save your project to avoid losing progress.
With practice and exploration, Blender can be a powerful tool in your video editing arsenal, offering a wide range of features from basic cuts to complex visual effects.
Blender As A Video Editor: It\'s Actually Really Good!
Dive into the fascinating world of video editing and unlock your creativity! Learn the art of storytelling through visuals, sound, and effects. Discover how to bring your footage to life with professional editing techniques in this exciting video.
How To Edit Video with Blender 2.90 - Basics Walkthrough for Beginners
Ready to master the powerful and versatile software Blender? Join this in-depth tutorial and unleash your design skills with 3D modeling, animation, and more. Let\'s explore the endless possibilities of Blender together and create stunning visuals.
Advanced Features
Blender also offers advanced video editing features, including:
- Video masking for creating effects or hiding elements.
- Luma waveform, chroma vectorscope, and histogram displays for professional color grading.
- Audio mixing, syncing, scrubbing, and waveform visualization for precise sound editing.

Exporting Your Video
Once your video editing is complete, you can export your project by going to Render > Render Animation. Choose your preferred format and settings, then click Render to output your video.
Tips for Success
- Start with simple projects to familiarize yourself with Blender\"s interface and features.
- Experiment with different effects and transitions to enhance your video.
- Regularly save your project to avoid losing progress.
With practice and exploration, Blender can be a powerful tool in your video editing arsenal, offering a wide range of features from basic cuts to complex visual effects.

_HOOK_
Exporting Your Video
Once your video editing is complete, you can export your project by going to Render > Render Animation. Choose your preferred format and settings, then click Render to output your video.
Tips for Success
- Start with simple projects to familiarize yourself with Blender\"s interface and features.
- Experiment with different effects and transitions to enhance your video.
- Regularly save your project to avoid losing progress.
With practice and exploration, Blender can be a powerful tool in your video editing arsenal, offering a wide range of features from basic cuts to complex visual effects.

Introduction to Video Editing with Blender
Blender is not only a powerful tool for 3D modeling and animation but also offers a comprehensive suite for video editing. This section introduces you to video editing with Blender, highlighting its capabilities, and how to get started with your first video editing project.
Starting with Blender for video editing involves understanding its interface and features designed specifically for video projects. The built-in Video Sequence Editor (VSE) allows for a range of editing tasks from simple cuts and splices to more complex functions like video masking and color grading.
- Open Blender and initiate a new project by selecting Video Editing from the File menu to access the VSE.
- Import your media files using the Add menu or the shortcut Shift + A, choosing Movie to add video clips.
- Explore the basic editing tools, such as cutting and splicing clips, adding transitions, and applying effects.
- Delve into advanced editing features, including color grading, audio mixing, and syncing, to enhance your video\"s visual and auditory appeal.
The VSE interface is designed to provide a live preview, luma waveform, chroma vectorscope, and histogram displays for a professional editing experience. It supports a wide array of video formats and codecs, ensuring compatibility with most media types.
Blender\"s video editing capabilities are complemented by its audio editing features. The software offers audio mixing, syncing, scrubbing, and waveform visualization to achieve perfect audio alignment and quality.
Concluding this introduction, Blender stands out as a versatile tool that can meet the needs of both novice and experienced video editors. Its comprehensive feature set allows for the creation of high-quality video content, making it a valuable addition to your digital content creation toolkit.
Getting Started with Blender for Video Editing
Embarking on your journey with Blender for video editing begins with setting up your environment for a video project. This powerful tool is capable of transforming your raw footage into polished content through its Video Sequence Editor (VSE). Follow these steps to get started:
- Download and Install Blender: Ensure you have the latest version of Blender installed on your computer for access to all the latest video editing features.
- Open Video Editing Layout: Launch Blender and select Video Editing from the options available. This layout presents all the tools you\"ll need for video editing.
- Import Your Media: Use the Add menu or press Shift + A to import your video clips, images, and audio files into the sequencer.
- Familiarize Yourself with the Interface: Spend some time understanding the sequencer, preview window, and other panels essential for editing.
- Basic Editing Functions: Learn how to perform basic edits like cutting, trimming, and joining clips. These are fundamental skills you\"ll frequently use.
- Explore Advanced Features: Blender also offers advanced editing capabilities such as color grading, video masking, and effect strips. Experiment with these as you become more comfortable with the basics.
Remember, the key to mastering video editing in Blender is practice and exploration. Start with simple projects to build your skills gradually. As you become more familiar with Blender\"s interface and features, you\"ll discover the full extent of its capabilities for creating engaging video content.
Understanding Blender\"s Video Editing Interface
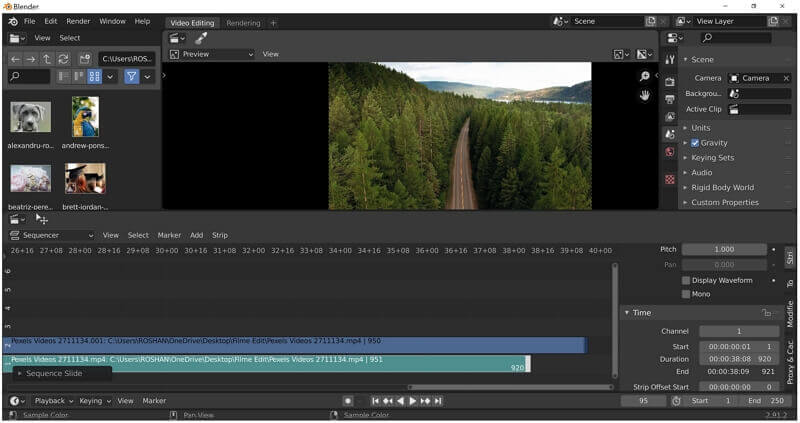
Blender\"s Video Editing Interface, specifically the Video Sequence Editor (VSE), is designed to facilitate an efficient and productive editing workflow. This section will guide you through understanding the interface\"s key components and how they can be utilized for video editing.
- Timeline: At the bottom, the timeline is where you can arrange and edit your video and audio clips. It allows for easy navigation through your project.
- Preview Window: This window displays the current frame of the video you are editing, allowing for immediate visual feedback on your edits.
- Sequencer: The sequencer is the main area where you add, cut, and arrange your clips. It supports various types of strips including video, audio, images, and effects.
- Properties Panel: On the right, this panel provides detailed settings for the active strip or effect, allowing for precise control over properties like opacity, volume, and modifiers.
- Toolbar: The toolbar contains tools for cutting, moving, and applying effects to strips in the sequencer. It\"s customizable to fit your workflow.
Getting familiar with these components is crucial for efficient video editing in Blender. Each plays a specific role in the editing process, from organizing your media files to refining the final output. The interface is designed to be both powerful and flexible, catering to the needs of beginners and advanced users alike. By mastering the VSE, you\"ll unlock the full potential of Blender for your video editing projects.
Importing and Organizing Your Media
Effective video editing in Blender starts with properly importing and organizing your media files. This process ensures a smooth editing workflow, allowing you to focus on the creative aspects of your project. Follow these steps to efficiently manage your media in Blender:
- Accessing the Video Sequence Editor: Begin by selecting Video Editing mode from the screen layout options when you start Blender. This mode provides you with the necessary tools for video editing.
- Importing Media: To import video, audio, or image files, use the Add menu in the Sequencer. You can also press Shift + A to open the add menu and select the type of media you want to import.
- File Browser: Navigate to your media files using the File Browser. You can preview your files here before importing them into your project.
- Organizing Your Clips: Once imported, your media will appear as strips in the Sequencer. You can organize these by dragging and dropping them into position. Use channels to layer your media and manage complex compositions.
- Renaming Strips: For better organization, rename your strips by double-clicking on their name in the Sequencer. This is especially helpful for large projects with many elements.
- Using Meta Strips: Group related strips into a meta strip for simplified editing and organization. Select the strips you wish to group, then press Ctrl + G. You can ungroup them with Ctrl + Alt + G.
- Previewing Edits: Use the Preview window to review your edits in real-time. This feature helps in making precise adjustments to your media.
By following these steps, you\"ll create a solid foundation for your video editing project in Blender. Proper organization is key to a seamless editing process, allowing you to efficiently edit and refine your video content.
_HOOK_
Basic Video Editing Techniques in Blender
Blender offers a multitude of basic video editing techniques that can help transform your raw footage into polished videos. Mastering these basic techniques is essential for any aspiring video editor. Follow these step-by-step instructions to learn the foundational skills of video editing in Blender:
- Setting Up Your Project: Start by selecting the Video Editing layout when you open Blender. This provides you with a tailored workspace for video editing.
- Importing Media: Use the Add menu or press Shift + A to import your video, audio, and image files into the sequencer.
- Cutting and Trimming Clips: Select a clip in the sequencer, then use the cut tool (press K) to split it into sections or remove unwanted parts.
- Moving and Aligning Clips: Drag clips to rearrange them on the timeline. Use snapping (press Shift + Tab) to align clips with each other or markers.
- Adding Transitions: Blender allows for simple transitions between clips. Place two clips adjacent to each other and use the effects strip to add a crossfade or wipe.
- Adjusting Audio: Import your audio files and align them with your video clips. Use the properties panel to adjust volume levels and apply fades.
- Adding Text: Create titles or captions by adding a text strip. Customize the font, size, and position to fit your video\"s aesthetic.
- Rendering Your Project: Once your edit is complete, go to the Render menu, choose your output settings, and render your video to create the final product.
These basic editing techniques are just the beginning of what Blender can do. As you become more comfortable with these skills, you\"ll be ready to explore more advanced editing features and effects available in Blender.
Advanced Video Editing Features
Once you\"re comfortable with the basics of Blender\"s Video Sequence Editor (VSE), it\"s time to explore its advanced video editing features. These tools allow for more sophisticated editing techniques, giving you greater creative control over your projects. Dive into the following advanced features to elevate your video editing skills:
- Color Grading: Utilize Blender\"s color grading tools to enhance the visual appeal of your videos. Adjust colors, contrast, and brightness to achieve the desired mood and tone.
- Video Masking: Create complex visual effects with video masking. This feature allows you to hide or reveal parts of a video, combine different footage, or create unique transitions.
- Speed Control: Manipulate the playback speed of your clips directly in the timeline. Speed up or slow down footage to create dynamic effects or emphasize moments.
- Animation and Keyframes: Integrate animation into your video projects. Use keyframes to animate properties like position, scale, and rotation over time, adding motion to static elements or text.
- Chroma Keying (Green Screen): Remove green screen backgrounds and composite videos seamlessly. Blender\"s chroma keying tools allow for precise adjustments, ensuring a natural blend between your footage and new backgrounds.
- Audio Mixing and Filtering: Enhance your video\"s auditory experience with advanced audio editing features. Mix multiple audio tracks, adjust volumes, and apply filters to achieve clear and balanced sound.
- Effects and Transitions: Beyond basic cuts and fades, Blender offers a variety of effects and transitions. Experiment with wipes, slides, and custom animation effects to add professionalism to your edits.
These advanced features in Blender open up a world of possibilities for video editors, from creating visually stunning effects to achieving professional-grade color correction. With practice, you can harness the full potential of Blender\"s video editing capabilities to bring your creative visions to life.
Adding Effects and Transitions
Enhancing your video projects in Blender with effects and transitions can significantly improve their visual appeal and narrative flow. This section provides a step-by-step guide to incorporating these elements into your edits, making your videos more engaging and professional-looking.
- Accessing Effects: In the Video Sequence Editor (VSE), you can add effects by selecting your clip and then using the Add menu or pressing Shift + A. Choose Effect Strip to see a list of available effects.
- Adding Transitions: For transitions between clips, place them next to each other on the timeline. Select the clips, then add a transition effect such as a Crossfade or Wipe from the Effect Strip options.
- Customizing Effects: Once an effect is added, you can customize its properties in the Properties panel to achieve the desired impact. Parameters such as duration, intensity, and others can be adjusted here.
- Color Grading: Enhance your video\"s look with color correction and grading tools. Access these from the Color menu in the Properties panel, where you can adjust contrast, brightness, saturation, and more.
- Adding Text Overlays: Create text overlays for titles, captions, or other textual elements by adding a text strip. Customize the font, size, color, and position to match your video\"s style.
- Using Green Screen Techniques: For more advanced effects like chroma keying, use the Chroma Key effect to remove green screen backgrounds and composite different footage seamlessly.
By mastering effects and transitions in Blender, you can take your video projects to the next level, creating content that captivates your audience. Experiment with different effects to discover new creative possibilities.
Working with Audio in Blender
Blender\"s Video Sequence Editor (VSE) not only excels in video editing but also provides comprehensive tools for audio editing, making it possible to produce videos with high-quality sound directly within the software. Follow these steps to effectively work with audio in your Blender projects:
- Importing Audio Files: Similar to video files, you can import audio files into the VSE using the Add menu or the shortcut Shift + A, then selecting Sound to choose your audio file.
- Syncing Audio with Video: Once imported, you can move your audio strips to align them with your video clips. Use the waveform displayed on the audio strip to match audio cues with visual elements.
- Adjusting Audio Levels: Select an audio strip and open the Properties panel to adjust volume, mute sounds, or apply fade in and fade out effects to your audio tracks.
- Audio Mixing: For projects with multiple audio tracks, Blender allows you to mix these tracks effectively. Use the VSE\"s Preview window to listen to the audio mix and adjust levels accordingly.
- Adding Effects: Blender supports various audio effects such as high-pass, low-pass filters, and more. These can be added from the Effects strip after selecting an audio strip.
- Exporting Audio: When rendering your final video, ensure that the audio codec is set correctly in the Output properties to include audio in your exported file.
By mastering these audio editing capabilities, you can enhance the overall impact of your video projects, ensuring that your visuals are perfectly complemented by high-quality sound.
Color Grading and Correction
Color grading and correction are essential steps in video editing that enhance the visual impact of your footage. Blender provides powerful tools to achieve professional color grading and correction, allowing you to adjust the mood, atmosphere, and overall look of your videos. Here\"s how to utilize these features in Blender:
- Accessing Color Tools: Within Blender\"s Video Sequence Editor, select your video clip and open the Properties panel to find color grading tools under the Strip tab.
- Basic Corrections: Start with basic corrections such as adjusting brightness, contrast, and saturation to fix any color imbalances and enhance the overall appearance of your footage.
- Using Curves: For more detailed control, use the RGB curves to fine-tune the colors. Adjusting the curves can help you increase the dynamic range and make precise color adjustments.
- Color Grading: Explore the color grading options to create a specific mood or style. You can use color grading to warm up your footage, create a cool tone, or apply a cinematic look.
- Look-Up Tables (LUTs): Blender allows you to apply LUTs, which are pre-defined color profiles, to your footage for quick and professional color grading.
- Previewing Adjustments: Utilize Blender\"s live preview feature to see how your color adjustments affect the footage in real-time, ensuring you achieve the desired outcome.
By mastering color grading and correction in Blender, you can significantly improve the visual quality of your videos, making them more engaging and visually appealing to your audience.
_HOOK_
Exporting Your Final Video
After completing your video project in Blender, the final step is exporting your video so it can be shared or published. Blender offers flexible exporting options to accommodate various formats and settings. Here\"s how to export your final video:
- Choose the Output Settings: Go to the Properties panel, navigate to the Output properties tab, and select your desired file format and codec. Common formats include MPEG, AVI, and QuickTime.
- Set the Resolution and Frame Rate: In the same tab, specify the resolution and frame rate of your final video. Ensure these settings match your project requirements for optimal playback quality.
- Configure Audio Settings: If your project includes audio, ensure the audio codec is set up correctly in the Encoding section to include sound in your exported video.
- Determine the Output Location: Choose where your final video file will be saved. Click on the folder icon next to the Output field to select the destination on your computer.
- Render Your Video: Once all settings are configured, click on the Render menu at the top and select Render Animation or press Ctrl + F12. Blender will begin the rendering process, exporting your video to the specified location.
Exporting your video is a critical step in the video editing process, allowing you to share your creations with the world. By following these steps, you can ensure your video is exported with the highest quality and compatibility for your audience.
Tips and Best Practices for Efficient Editing
Efficient video editing not only saves time but also enhances the quality of your final product. Here are some tips and best practices to help you edit videos more effectively in Blender:
- Organize Your Workspace: Customize Blender\"s layout to suit your editing workflow. Use different windows for the sequencer, preview, and properties for easy access to tools.
- Use Shortcuts: Familiarize yourself with Blender\"s keyboard shortcuts for editing tasks like cutting (K), snapping (Shift + Tab), and adding strips (Shift + A). This speeds up your workflow significantly.
- Proxy Editing: For high-resolution footage, use proxy editing to improve playback performance. Set up proxies in the properties panel under the strip\"s settings.
- Color Labeling: Use color labels for your strips to keep your project organized, especially when working with multiple layers of video and audio.
- Batch Processing: For repetitive tasks, consider using Blender\"s Python scripting to automate processes like rendering or applying effects to multiple clips.
- Regularly Save Your Work: Blender\"s autosave feature is handy, but manually saving versions of your project prevents data loss and allows you to return to previous states.
- Render Previews: Regularly render preview segments of your project to check the output quality and ensure effects are applied as intended.
By adopting these practices, you\"ll not only streamline your editing process but also unlock the full potential of Blender\"s video editing capabilities, leading to more creative and high-quality video projects.
READ MORE:
Resources for Further Learning and Support
Enhancing your skills in video editing with Blender is a continuous process. Here are some invaluable resources for further learning and support:
- Official Blender Tutorials: The Blender Foundation offers comprehensive tutorials covering all aspects of Blender, including video editing.
- BlenderNation: A community-driven website that provides tutorials, articles, and news about Blender, including video editing tips and techniques.
- YouTube: A wealth of video tutorials ranging from beginner to advanced levels. Channels like Blender Guru, CG Cookie, and Blender Foundation itself are great places to start.
- Blender Artists Community: An online forum where you can ask questions, share your work, and get feedback from fellow Blender users.
- Blender Stack Exchange: A Q&A site for people who use Blender to create 3D graphics, animations, or films. A great place to find answers to technical questions.
- Online Courses: Platforms like Udemy and Coursera offer structured courses on Blender, including video editing, often with more in-depth coverage and project-based learning.
Utilizing these resources can significantly accelerate your learning curve and improve your video editing capabilities in Blender. Engage with the community, practice regularly, and continue exploring the extensive features Blender offers.
Embark on your journey to mastering video editing with Blender, where endless creativity meets powerful tools. Dive into this guide, enhance your skills, and transform your visions into captivating video content today.