Topic blender editor video: "Explore the vast capabilities of Blender Video Editor, a powerhouse for creators seeking to blend, edit, and transform video content into captivating visuals. Unlock your creative potential with this comprehensive guide."
Table of Content
- What are the features of Blender\'s video sequence editor?
- Why Choose Blender for Video Editing
- Key Features of Blender Video Editor
- Getting Started with Blender Video Editing
- Basic Video Editing Techniques in Blender
- Advanced Video Editing Features
- Speed Control in Video Editing
- YOUTUBE: Blender as a Video Editor: It\'s Actually Really Good!
- Community and Learning Resources
- Blender\"s Compatibility and System Requirements
- Real User Reviews and Feedback
What are the features of Blender\'s video sequence editor?
Blender\'s video sequence editor offers a variety of powerful features that cater to the needs of video editors. Here are some of the key features:
- Basic video editing functions such as cutting, splicing, and trimming.
- Support for a wide range of video formats and codecs.
- Audio mixing and editing capabilities.
- Keyframe animation for creating complex animations and effects.
- Color correction and grading tools to enhance the visual quality of your videos.
- Transitions and effects for adding flair to your video projects.
- Support for multiple layers and compositing for creating complex scenes.
- Customizable workspace with flexible layout options.
Overall, Blender\'s video sequence editor provides a comprehensive set of tools and features that enable users to create professional-looking videos with ease.
READ MORE:
Why Choose Blender for Video Editing
Blender Video Editor offers a unique combination of features that cater to both novice and professional video editors. Its open-source nature means it is continuously improved by a community of developers, ensuring it stays at the forefront of video editing technology.
- Free and Open Source: Blender is completely free to use for any purpose, making it accessible to everyone.
- Comprehensive Toolset: Offers a wide range of video editing tools, including cutting, splicing, video effects, and color grading.
- Integrated with 3D Creation: Unique to Blender, video editing is integrated with powerful 3D creation tools, allowing for the creation of stunning visual effects and animations.
- Customizable Interface: Blender\"s interface can be customized to suit the needs of individual users, enhancing workflow and productivity.
- Community Support: A vast community of users and developers provides support, tutorials, and add-ons to enhance the video editing experience.
- Versatile File Format Support: Blender supports a wide range of video and audio file formats, ensuring compatibility with various media types.
- Regular Updates: Being open-source, Blender receives regular updates that add new features and improve existing ones.
Whether you\"re a hobbyist or a professional, Blender\"s comprehensive suite of video editing tools, combined with its no-cost entry point, makes it a compelling choice for anyone looking to produce high-quality video content.

Key Features of Blender Video Editor
Blender Video Editor is a comprehensive toolset designed for both beginners and professionals in the video editing domain. It offers a wide range of features that facilitate the creation of high-quality video content. Below are the key features that make Blender Video Editor a preferred choice for video editing:
- Live Preview: Allows users to view their edits in real-time, enhancing the editing process by providing immediate feedback on changes.
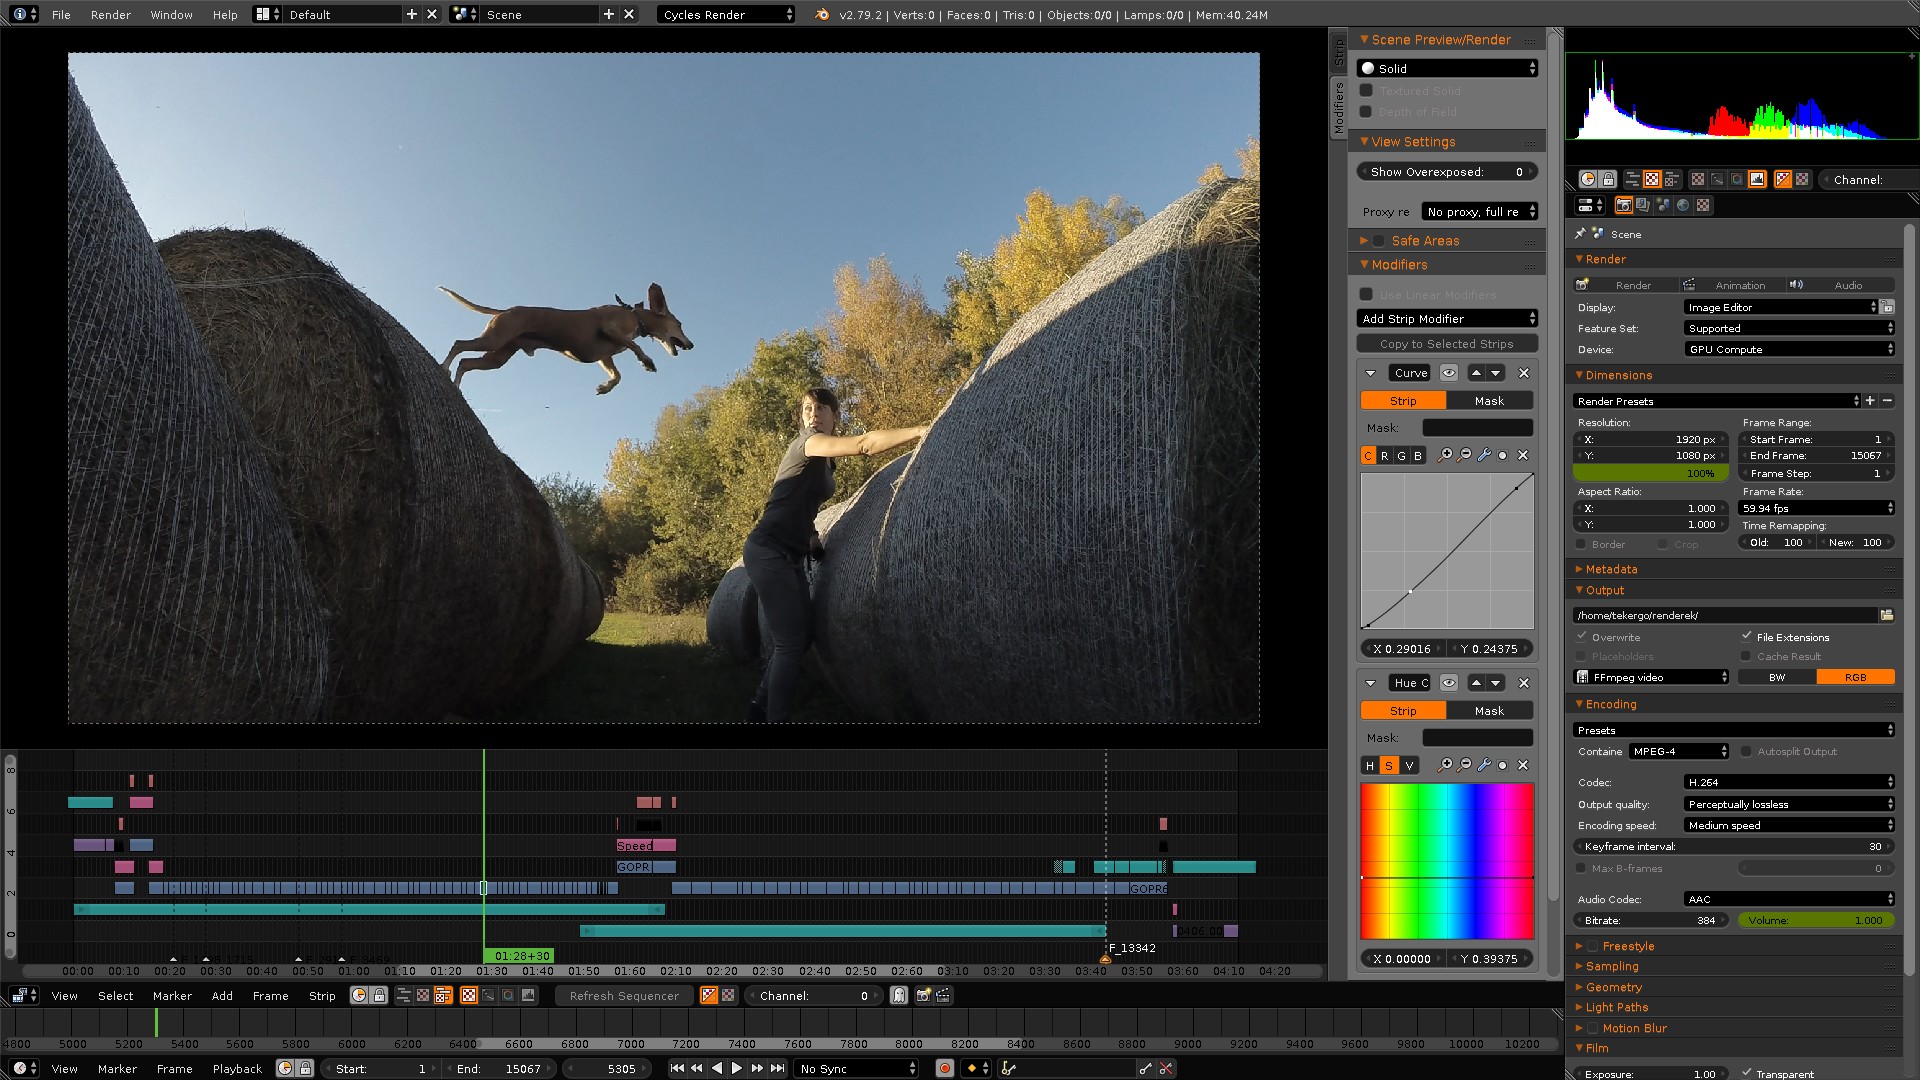
- Luma Waveform, Chroma Vectorscope, and Histogram Displays: These tools help in color correction and grading by providing detailed information about the video\"s luminance and color distribution.
- Audio Mixing, Syncing, Scrubbing, and Waveform Visualization: Offers comprehensive audio editing tools, making it easy to synchronize audio with video, mix soundtracks, and visualize audio waveforms for precise editing.
- Up to 32 Slots for Adding Video, Images, Audio, Scenes, Masks, and Effects: Provides ample space for layering various media types and effects, allowing for complex video compositions.
- Speed Control: Enables the adjustment of video playback speed, useful for creating slow-motion or time-lapse effects.
- Adjustment Layers, Transitions, Keyframes, Filters, and More: Offers a wide array of tools for refining video appearance, adding dynamic transitions, and customizing animations through keyframes.
- Extensive Support for Add-ons: Blender\"s functionality can be extended with various add-ons, catering to specific video editing needs and enhancing workflow efficiency.
- Comprehensive File Format Support: Compatible with a wide range of video, audio, and image file formats, facilitating easy import and export of media.
- GPU and CPU Rendering Support: Ensures fast rendering times by leveraging the power of both GPU and CPU, speeding up the video production process.
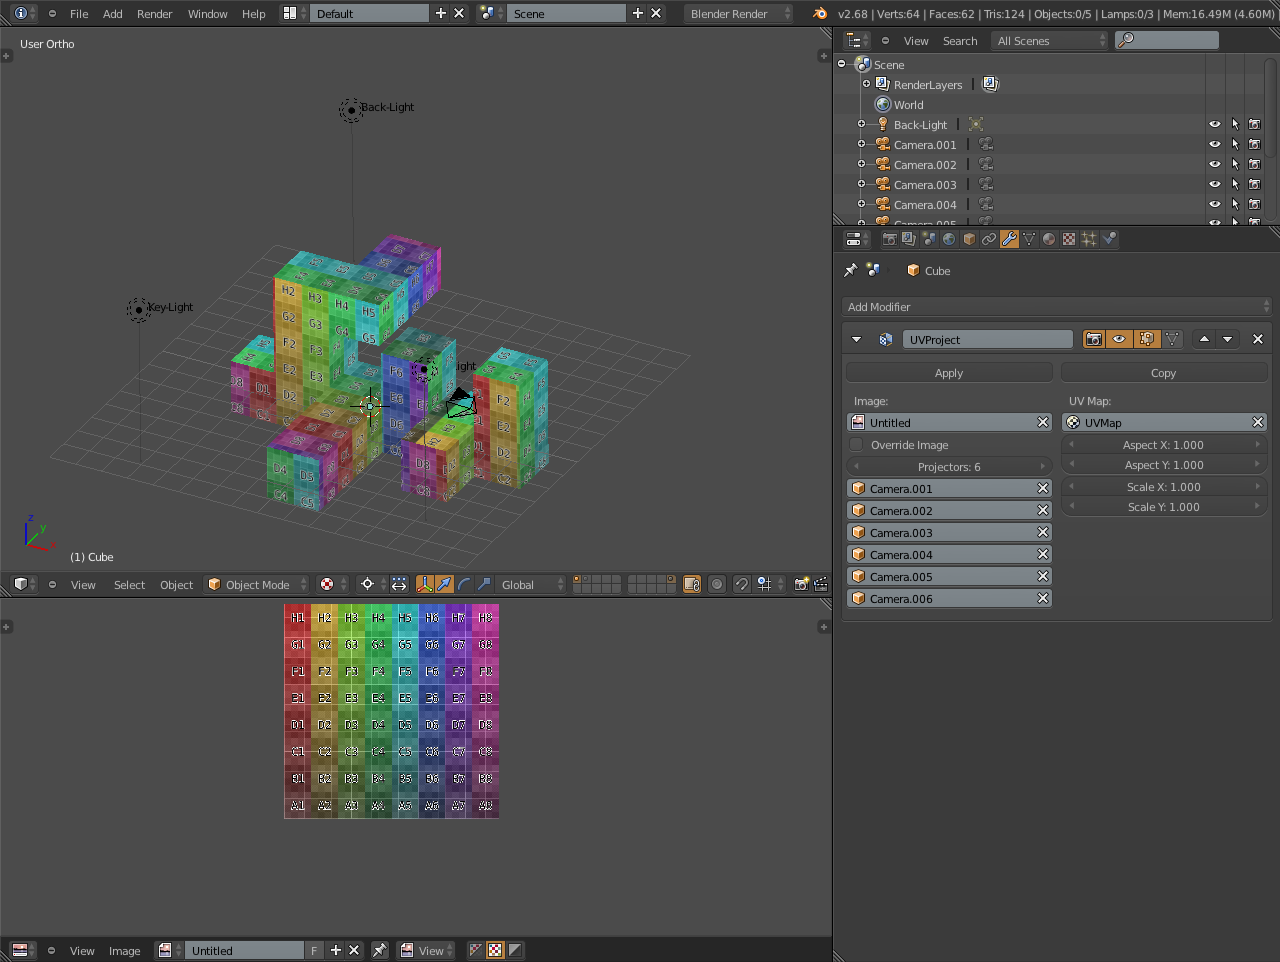
- 3D Integration: Unique to Blender, this feature allows the integration of 3D elements into video projects, opening up creative possibilities for visual effects and animation.
These features, combined with Blender\"s user-friendly interface and robust community support, make it an excellent choice for anyone looking to dive into video editing or enhance their video production workflow.

Getting Started with Blender Video Editing
Embarking on your video editing journey with Blender Video Editor is an exciting process. This section will guide you through the initial steps, ensuring a smooth start. Follow these steps to get started with Blender Video Editing:
- Download and Install Blender: First, visit Blender\"s official website to download the latest version of Blender. Ensure your computer meets the system requirements, then proceed with the installation.
- Familiarize Yourself with the Interface: Upon launching Blender, take some time to familiarize yourself with the interface. Blender offers a customizable layout, so explore the different areas like the 3D viewport, timeline, and properties panel.
- Switch to Video Editing Layout: Blender includes various layouts tailored to different tasks. Switch to the Video Editing layout by selecting it from the top menu. This layout provides a sequencer, preview window, and a list of editing tools.
- Import Your Media: To start editing, you need to import your video clips, images, and audio files. Use the \"Add\" menu in the sequencer to import your media. Blender supports a wide range of file formats, making it easy to work with your existing media files.
- Learn Basic Operations: Begin by learning how to perform basic operations like cutting clips, rearranging segments, and adjusting clip properties. Practice using the strip cut tool to split clips and the grab tool to move them around the timeline.
- Explore Effects and Transitions: Blender offers a variety of effects and transitions to enhance your video. Experiment with adding transitions between clips and applying effects to improve the visual appeal of your project.
- Add Audio to Your Project: Good video content also requires good audio. Import your audio files and use Blender\"s audio tools to sync the audio with your video, adjust levels, and mix soundtracks effectively.
- Render Your Project: Once you\"re satisfied with your editing, it\"s time to render your project. Choose your output settings carefully, considering factors like format, resolution, and codec. Then, render your project to create the final video file.
- Explore and Learn Continuously: Blender is a powerful tool with extensive capabilities. Continue exploring its features, experimenting with different techniques, and utilizing the vast resources available online, including tutorials, forums, and user communities.
By following these steps, you\"ll lay a strong foundation for your video editing projects with Blender. Remember, practice and experimentation are key to mastering Blender Video Editor.
Basic Video Editing Techniques in Blender
Mastering basic video editing techniques in Blender sets a solid foundation for more complex projects. Here are essential skills and steps to get you started with video editing in Blender:
- Setting Up Your Project:
- Open Blender and switch to the Video Editing layout.
- Adjust your project settings, including resolution, frame rate, and aspect ratio, to match your source footage.
- Importing Media:
- Use the \"Add\" menu in the sequencer to import video clips, images, and audio files.
- Arrange your imported media on the timeline to start building your project.
- Basic Editing Tools:
- Learn to use the cut tool (K) to trim and split clips as needed.
- Use the grab tool (G) to reposition clips on the timeline.
- Adding Transitions:
- Place two clips close to each other on the timeline.
- Right-click between them and choose \"Add Transition\" to insert a transition effect.
- Working with Audio:
- Import your audio files and align them with your video clips.
- Use the waveform display to match audio visually with video events.
- Adding Text and Titles:
- Use the \"Add\" menu to create text strips for titles, captions, or credits.
- Customize the font size, color, and position to fit your video\"s theme.
- Color Correction and Grading:
- Adjust the color balance and contrast of your video clips using the properties panel.
- Experiment with different looks to enhance the visual appeal of your project.
- Exporting Your Video:
- Once you\"re satisfied with your edit, choose your desired output format and settings.
- Render your project to create the final video file, ready for sharing or further processing.
These basic techniques will help you navigate Blender\"s video editing capabilities. With practice, you\"ll be able to turn your raw footage into polished videos, ready for any audience.

_HOOK_
Advanced Video Editing Features
Blender Video Editor is not just for basic video editing; it also offers advanced features that allow for the creation of professional-level video content. Here\"s an overview of some of the advanced video editing capabilities available in Blender:
- Compositing: Blender\"s powerful compositing tools enable the combination of video footage, images, and effects layers to create complex visual effects. Utilize nodes to control and mix different elements seamlessly.
- Color Grading: Go beyond basic color correction with advanced color grading tools. Adjust the mood and tone of your videos with fine control over colors, highlights, shadows, and mid-tones using Blender\"s color grading nodes.
- Masking: Create detailed masks to isolate and manipulate specific parts of your footage. This feature is particularly useful for effects such as color correction on a specific area, removing objects, or creating unique transitions.
- 3D Visual Effects: Incorporate 3D elements into your video projects. Blender allows you to create and animate 3D models, integrate them into video footage, and apply realistic textures and lighting effects.
- Tracking and Stabilization: Use Blender\"s motion tracking tools to track objects or camera movement within your footage. This can be used for adding 3D elements to moving footage or stabilizing shaky video.
- Audio Mixing and Filtering: Advanced audio features include multi-track mixing, sound effects, and filtering. Create professional-quality soundscapes by adjusting levels, applying filters, and using the sequencer to precisely sync audio with video.
- Video Effects and Filters: Apply a wide range of video effects and filters to enhance your footage. From stylized looks to practical corrections, Blender provides the tools to bring your creative vision to life.
- Animation: Create dynamic animations using keyframes for video elements, including text, images, and even video clips themselves. Blender\"s animation tools offer granular control over timing, easing, and interpolation.
- Python Scripting: For those who want to automate tasks or create custom editing tools, Blender supports Python scripting. This allows for endless customization and automation possibilities within your video editing workflow.
These advanced features make Blender a versatile and powerful tool for video editors looking to push the boundaries of their creative projects. With practice and exploration, you can leverage these capabilities to produce visually stunning and technically sophisticated video content.

Speed Control in Video Editing
Speed control is a dynamic editing technique that can dramatically alter the mood, timing, and narrative flow of your video projects. Blender Video Editor provides versatile tools for adjusting the speed of your video clips. Here\"s how to effectively use speed control in your video editing workflow:
- Selecting Your Clip: Begin by choosing the clip you want to adjust. Place it on the timeline where you can easily access it for speed manipulation.
- Applying the Speed Control Effect:
- With your clip selected, navigate to the Add menu within the Sequencer.
- Choose \"Effect Strip\" and then \"Speed Control\" to apply the effect to your selected clip.
- Adjusting Speed:
- In the effect strip properties, you\"ll find options to adjust the speed of the clip. You can either increase or decrease the speed using a multiplier or set a specific frame rate.
- For precise control, use the \"Speed Factor\" to adjust the playback speed by a percentage. 100% is normal speed, above 100% speeds up the clip, and below 100% slows it down.
- Creating Speed Ramps:
- Speed ramps smoothly transition from one speed to another, adding dramatic effect. Keyframe the speed control at different points along your clip to create a speed ramp.
- Position the playhead where you want the speed change to begin or end, and insert a keyframe for the speed factor.
- Preview and Adjust: After applying speed changes, preview your clip in the timeline to ensure the desired effect is achieved. Adjust as necessary for optimal timing and effect.
- Render and Review: Once satisfied, render your project to review the final outcome of your speed adjustments. Ensure the speed changes contribute positively to the overall video narrative and flow.
Mastering speed control in Blender can add a professional touch to your video projects, enabling you to create engaging content with varied pacing and dynamism. Experiment with different speed settings and ramps to discover the best ways to enhance your videos.

Blender as a Video Editor: It\'s Actually Really Good!
Quality: Discover a world of exceptional craftsmanship and top-tier performance in this video showcasing the unparalleled quality of our products. Watch to witness the precision, durability, and sophistication that sets us apart. Tutorial: Dive into a step-by-step tutorial that will guide you through mastering a new skill or technique with ease. Whether you\'re a beginner or an experienced enthusiast, this video will empower you to expand your knowledge and expertise.
Blender Tutorial: How to Cut and Join Video in Blender Video Editor
Learn here How to Cut and Join Video in Blender Video Editor If you like this short video check out my other tutorials: ▻ DaVinci ...
Community and Learning Resources
The Blender community is vast and supportive, offering a wealth of resources for both beginners and advanced users. Whether you\"re looking to improve your video editing skills, troubleshoot issues, or share your work, there\"s a place for you. Here are some of the top community and learning resources to help you on your journey with Blender Video Editor:
- Blender Official Website: The first stop for anyone serious about learning Blender. It hosts official tutorials, a user manual, and forums for discussion.
- Blender Artists Community: An online forum where Blender users from around the world share their work, ask questions, and offer advice on a wide range of topics related to Blender.
- BlenderNation: A central hub for Blender news, including tutorials, art, development updates, and more. It\"s a great place to stay updated on what\"s happening in the Blender world.
- YouTube: YouTube hosts countless Blender tutorials for all skill levels. Channels like Blender Guru, CG Geek, and Ducky 3D specialize in comprehensive tutorials that cover everything from basic to advanced techniques.
- Blender Stack Exchange: A question and answer site for people who use Blender to create 3D graphics, animations, or films. It\"s a great place to find solutions to specific problems or challenges you might encounter.
- Blender Conference: An annual event that gathers Blender enthusiasts, developers, and artists from around the globe. It\"s an excellent opportunity to learn from workshops, presentations, and networking with other Blender users.
- Blender Cloud: A subscription service offering access to training videos, assets, and production files. It\"s a valuable resource for those looking to deepen their understanding of Blender and support its development.
- Online Courses and Workshops: Many online platforms offer structured Blender courses and workshops, ranging from beginner to advanced levels. These can provide a more formal education pathway for those looking to systematically improve their skills.
Engaging with the Blender community and utilizing these resources can significantly enhance your learning experience and video editing skills. The community is known for its willingness to help, so don\"t hesitate to reach out with questions or share your progress.

Blender\"s Compatibility and System Requirements
To ensure a smooth and efficient video editing experience with Blender, it\"s essential to understand the compatibility and system requirements needed for optimal performance. Blender is designed to be versatile, supporting a wide range of hardware and operating systems. Here are the key requirements you should be aware of:
- Operating System: Blender is compatible with Windows, macOS, and Linux. Specific version requirements are regularly updated on the Blender website, so check there for the latest information.
- CPU: A multi-core 64-bit CPU is recommended for the best performance. Blender can benefit from higher core counts in tasks like rendering and simulation.
- Memory: At least 8 GB of RAM is recommended, with more memory often resulting in better performance, especially for complex projects.
- Graphics Card:
- OpenGL 3.3 compatible GPU with at least 2 GB of video RAM is the minimum requirement.
- For GPU rendering, Blender works best with NVIDIA CUDA, AMD OpenCL, or Apple Metal compatible graphics cards.
- Display: A 1280×768 display is the minimum requirement, but a full HD display or larger is recommended for a more comfortable editing experience.
- Input Devices: A three-button mouse or pen+tablet is recommended for ease of navigation and use within Blender\"s interface.
- Storage: SSDs are recommended for faster file access and overall system responsiveness, especially when working with large files.
It\"s also worth noting that Blender\"s performance can greatly benefit from a hardware setup that exceeds these minimum requirements, especially for users looking to undertake more complex or resource-intensive projects.
Before installation, ensure your system meets these requirements to enjoy the full range of Blender\"s video editing capabilities. Additionally, consider checking for any specific hardware compatibility issues or recommendations for your particular use case on the Blender forums or support documentation.

READ MORE:
Real User Reviews and Feedback
Gathering insights from real users of Blender Video Editor provides valuable perspectives on its performance, usability, and effectiveness in various video editing projects. Below is a summary of common themes found in user reviews and feedback:
- Positive Aspects:
- Comprehensive Feature Set: Many users praise Blender for its wide range of video editing and 3D animation tools, highlighting its capability to handle complex projects that require both video editing and 3D modeling.
- Cost-Effectiveness: The fact that Blender is free and open-source is frequently mentioned as a major advantage, making professional-grade video editing accessible to everyone.
- Flexibility and Customization: Advanced users appreciate the ability to customize the interface and functionality through scripting, as well as the software\"s adaptability to various workflows.
- Active Community Support: The robust and helpful community around Blender is often cited as a valuable resource for learning and troubleshooting.
- Areas for Improvement:
- Steep Learning Curve: New users frequently mention the steep learning curve associated with Blender\"s complex interface and multitude of features.
- Performance with Low-End Hardware: Some users note that performance can be sluggish on older or less powerful hardware, especially when dealing with high-resolution video or complex 3D scenes.
- Documentation and Tutorials: While there is a wealth of learning materials available, some users feel that more structured or up-to-date official documentation could improve the learning experience.
Overall, the feedback on Blender Video Editor is highly positive, with many users recommending it for its powerful capabilities and cost-effectiveness. However, potential users should be prepared for the initial learning phase and consider hardware requirements for optimal performance.
Whether you\"re a beginner or a seasoned pro, Blender Video Editor offers an unmatched suite of tools for creating stunning videos. Dive into the world of professional video editing with Blender and unleash your creative potential.

_HOOK_