Topic video editing in blender: Discover the power of "Video Editing in Blender," a comprehensive guide to mastering professional-grade video editing with this free, open-source software. Transform your visual stories today.
Table of Content
- What are the key features of video editing in Blender that make it suitable for video editors?
- Why Choose Blender for Video Editing
- Getting Started with Blender: Installation and Setup
- Understanding Blender\"s Interface for Video Editing
- Basic Video Editing Techniques in Blender
- Advanced Video Editing Features in Blender
- Adding Effects and Transitions
- YOUTUBE: Blender As A Video Editor - It\'s Actually Really Good!
- Audio Editing and Synchronization in Blender
- Color Correction and Grading
- Utilizing Blender\"s Video Sequence Editor (VSE)
- Rendering and Exporting Your Video
- Resources for Learning Blender Video Editing
- Community and Support for Blender Video Editors
What are the key features of video editing in Blender that make it suitable for video editors?
Blender offers a range of key features that make it suitable for video editors:
- Built-in Video Sequence Editor: Blender has a built-in video sequence editor that allows for basic video editing tasks like cuts, splicing, and transitions.
- Integration with 3D Animation: Blender\'s integration with 3D animation capabilities allows for combining video editing with complex 3D effects.
- Compositing: Blender provides powerful compositing features that enable video editors to create advanced visual effects and overlays.
- Keyframes and Animation: Video editors can utilize Blender\'s keyframe and animation tools to create dynamic and engaging video sequences.
- Free and Open Source: Blender is a free and open-source software, making it accessible to video editors of all levels without any cost barriers.
While Blender may be considered clunky for general purposes compared to some dedicated editing software, its unique features and flexibility cater well to the needs of video editors looking to experiment with 3D effects and advanced compositing.
READ MORE:
Why Choose Blender for Video Editing
Blender stands out as a versatile and powerful tool for video editing, offering a unique blend of features that cater to both beginners and seasoned professionals. Its appeal lies not just in its price tag (free), but also in its comprehensive suite of video editing tools that rival even the most expensive software.
- Free and Open Source: Blender is completely free, making high-quality video editing accessible to everyone. Its open-source nature also means a continuous improvement by a global community.
- Comprehensive Editing Suite: Offers everything from basic cutting and splicing to advanced effects like video masking and color grading.
- 3D Integration: Unique among video editors, Blender includes full 3D modeling and animation capabilities, allowing for the creation of complex visual effects and animations directly within the editor.
- Customizable Interface: Blender\"s interface can be extensively customized to suit your workflow, making it easier to work efficiently on projects of any scale.
- Robust Community and Support: A large and active community provides extensive tutorials, forums, and resources for learning and troubleshooting.
- Regular Updates: Being open-source, Blender is regularly updated with new features, improvements, and bug fixes, ensuring it remains at the cutting edge of video editing technology.
Whether you\"re a hobbyist looking to edit home videos or a professional seeking to incorporate 3D elements into your projects, Blender offers a one-stop solution for all your video editing needs.

Getting Started with Blender: Installation and Setup
Embarking on your video editing journey with Blender begins with a simple installation and setup process. This section will guide you through the necessary steps to get Blender up and running on your computer, ensuring you\"re ready to start creating your video projects without delay.
- Download Blender: Visit the official Blender website to download the latest version. Blender is available for Windows, macOS, and Linux, catering to a wide range of users.
- Install Blender: Once downloaded, run the installer and follow the on-screen instructions. The setup is straightforward, allowing you to select the installation directory and create shortcuts.
- Launch Blender: After installation, open Blender. You\"ll be greeted with the default screen, showcasing Blender\"s versatile interface.
- Configure Preferences: Before diving into video editing, it\"s advisable to explore Blender\"s preferences. You can adjust themes, input settings, and add-on functionalities to suit your editing style.
- Familiarize Yourself with the Interface: Blender\"s interface might seem daunting at first, but it\"s designed for efficiency. Spend some time getting to know the layout, including the 3D viewport, timeline, and properties panel.
- Import Your Media: Blender supports various media formats. Use the Video Sequence Editor (VSE) to import your video clips, images, and audio files to start editing.
- Explore Tutorials: Blender has a steep learning curve, but there\"s an abundance of tutorials available online. From official documentation to community-generated content, make use of these resources to get a solid foundation in Blender\"s video editing capabilities.
With Blender installed and your workspace configured, you\"re now ready to dive into the creative process of video editing. Remember, practice and exploration are key to mastering Blender\"s extensive features.

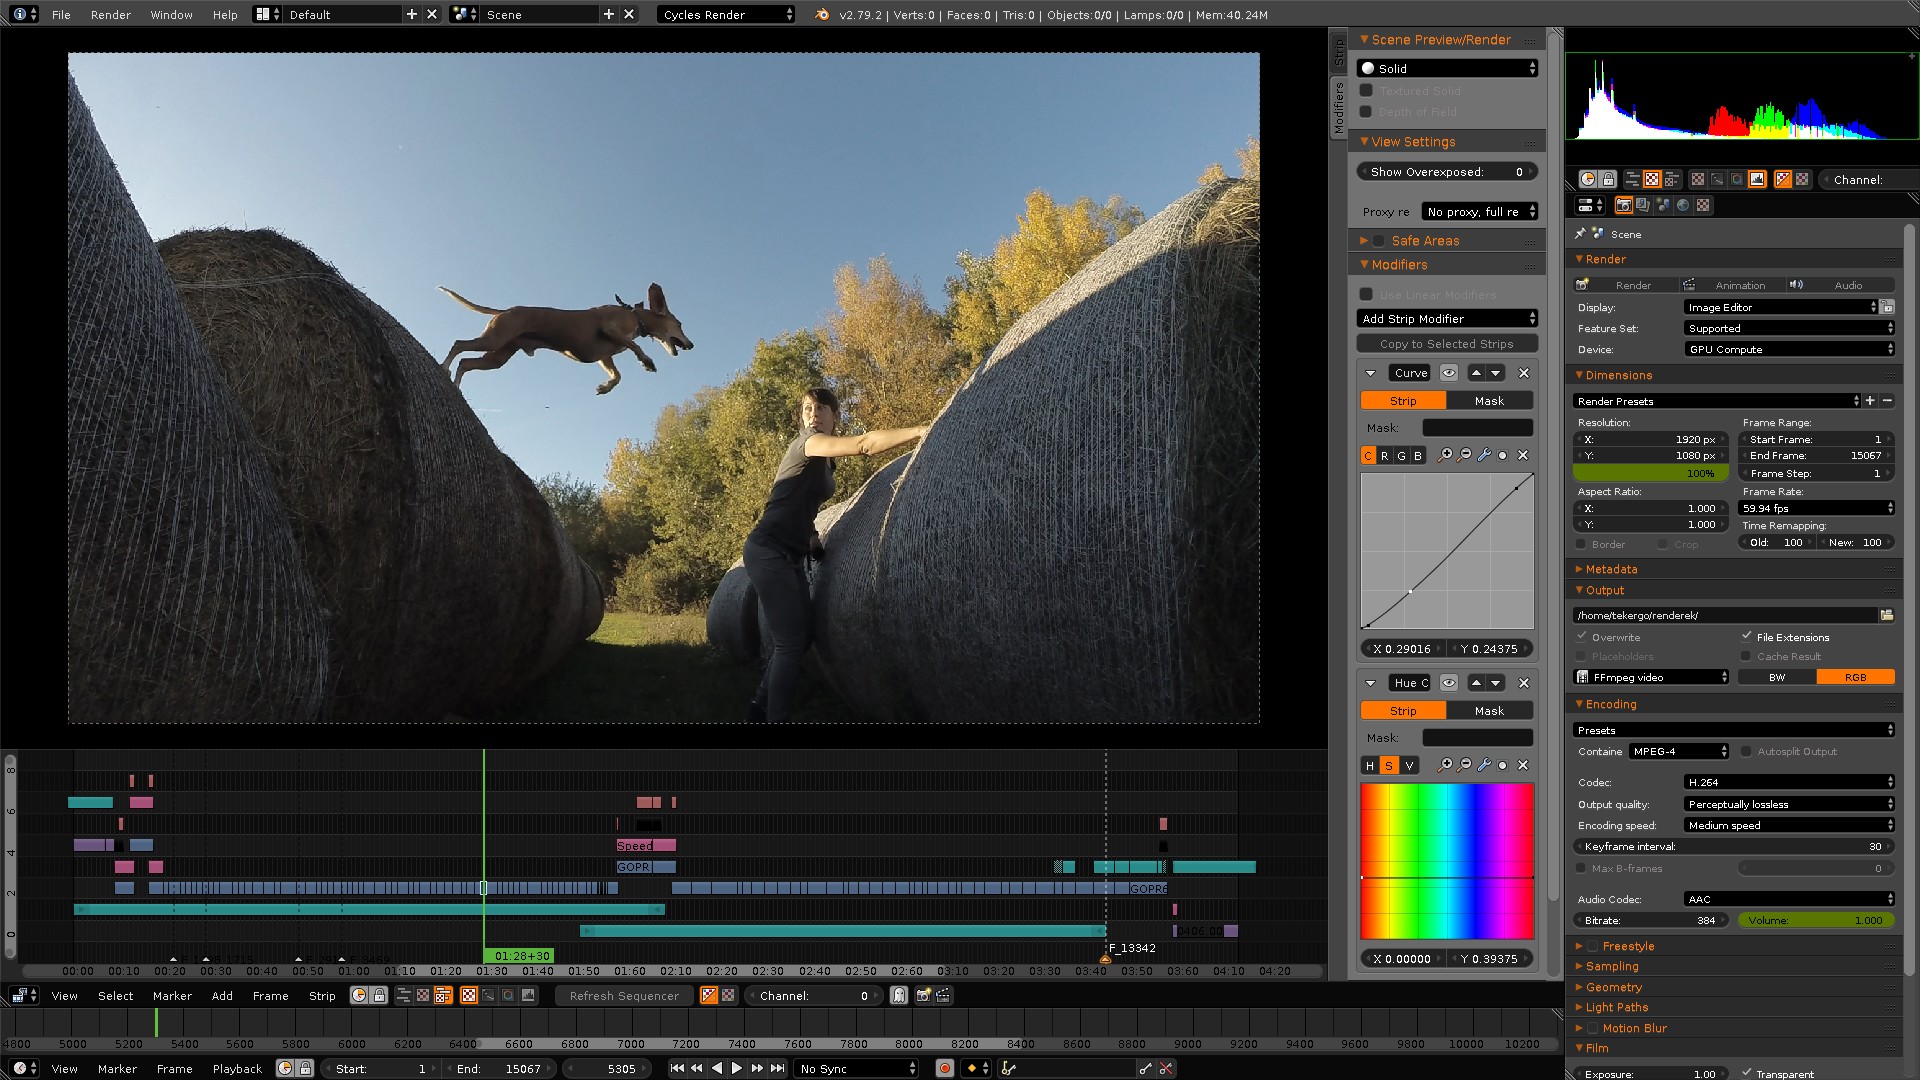
Understanding Blender\"s Interface for Video Editing
Blender\"s interface is designed to accommodate the complexity and diversity of all 3D creation, including video editing. It\"s modular, customizable, and packed with tools that make it a powerful suite for video editors. Understanding its interface is the first step towards unleashing its full potential.
- Layout: The default layout is divided into several areas such as the 3D Viewport, Timeline, Graph Editor, Dope Sheet, and Properties. For video editing, you\"ll primarily use the Video Sequence Editor (VSE).
- Video Sequence Editor (VSE): The VSE is where you\"ll spend most of your video editing time. It allows for arranging video clips, adding transitions, and applying effects. It includes a preview window, a sequencer for arranging clips, and an array of editing tools.
- Properties Panel: This panel provides access to video editing properties, including render settings, scene settings, and object properties. Adjust your output settings here to match your project requirements.
- Timeline: The timeline at the bottom of the interface is crucial for managing the timing of your video clips, animations, and effects. It allows for keyframe insertion and scrubbing through your video.
- Tool Shelf and Properties: The tool shelf (T) and properties (N) regions in the VSE offer quick access to tools and properties related to the selected items in your sequence.
- Customization: Blender allows you to customize the layout to suit your video editing workflow. You can create new windows, rearrange them, and save layouts for different tasks.
For new users, Blender\"s interface might seem overwhelming, but taking the time to learn its layout and tools will greatly enhance your video editing capabilities. Utilize the wealth of tutorials available to familiarize yourself with the interface and discover the powerful features Blender offers for video editing.
Basic Video Editing Techniques in Blender
Mastering basic video editing techniques in Blender sets a solid foundation for creating engaging video content. Blender\"s Video Sequence Editor (VSE) is a comprehensive tool for performing various editing tasks. Let\"s explore some fundamental techniques that every video editor should know.
- Adding and Arranging Clips: Start by importing your video, audio, and image files into the VSE. You can add clips to the sequencer by simply dragging and dropping them into the timeline.
- Trimming and Splitting Clips: Use the cut tool (K) to split clips at the desired points, allowing you to remove unwanted sections or reorganize parts of your video.
- Adding Transitions: Blender allows for easy addition of transitions between clips. Use the cross-fade or wipe transitions to blend clips smoothly.
- Adjusting Playback Speed: Change the speed of your clips directly in the VSE by altering the playback speed in the strip properties.
- Adding Titles and Text: Utilize Blender\"s 3D view to create dynamic titles and text overlays, which can then be integrated into your video project in the VSE.
- Color Correction: Basic color correction can be applied to clips using the strip properties. Adjust contrast, brightness, saturation, and more to enhance the visual appeal of your footage.
- Exporting Your Video: Once your editing is complete, export your project by setting the desired output properties and clicking on the render button to produce your final video.
These basic techniques are just the beginning of what you can achieve with Blender\"s video editing capabilities. Practice these skills to build a strong foundation, and explore more advanced features as you gain confidence.

_HOOK_
Advanced Video Editing Features in Blender
Blender is not just for basic video editing; it offers a suite of advanced features that can elevate your projects to a professional level. These features allow for greater control and creativity, enabling you to produce high-quality, compelling video content.
- Video Masking and Compositing: Blender allows for intricate masking, enabling you to blend or composite different elements seamlessly within your scenes. This feature is crucial for creating effects such as text behind moving objects or integrating CGI with live footage.
- Color Grading: Go beyond basic color correction with Blender\"s sophisticated color grading tools. Utilize the node editor for detailed adjustments to color and light, enhancing the mood and atmosphere of your video.
- Animation and Motion Graphics: Leverage Blender\"s powerful animation tools to add motion graphics to your video. From simple logo animations to complex sequences, Blender provides the tools to bring your ideas to life.
- 3D Visual Effects: Incorporate 3D models and scenes into your video with Blender\"s seamless integration of video editing and 3D graphics. This feature is perfect for adding depth and interest to your projects through visual effects.
- Audio Mixing and Sound Design: Blender includes audio mixing capabilities, allowing you to edit and mix sound directly within the video editor. Add sound effects, adjust levels, and synchronize audio to your video for a complete production.
- Custom Transitions and Effects: Create your custom transitions and effects using Blender\"s node-based compositor. This allows for unique and personalized touches that can make your video stand out.
- Advanced Rendering Options: Blender offers advanced rendering options, including the ability to render in different formats and resolutions, giving you the flexibility to meet the demands of various distribution channels.
These advanced features showcase Blender\"s capability as a comprehensive tool for video editing and production. With practice and exploration, you can harness these tools to create visually stunning and creatively rich video content.

Adding Effects and Transitions
Blender\"s Video Sequence Editor (VSE) offers an extensive range of effects and transitions that can enhance the visual appeal and storytelling power of your video projects. Incorporating these elements effectively can significantly impact your audience\"s viewing experience. Let\"s dive into how to add and customize effects and transitions in Blender.
- Accessing Effects and Transitions: In the VSE, effects and transitions can be added from the Add menu. This menu includes options for color effects, transformations, wipes, and more.
- Adding Transitions: To add a transition between two clips, place them adjacent to each other. Select both clips, then choose a transition type (e.g., Cross, Wipe) from the Add menu. Adjust the duration and properties of the transition in the effect strip settings.
- Using Effects Strips: Blender allows you to apply effects such as Gaussian Blur, Glow, or Color Balance. Select your clip and add an effect strip from the Add menu. Modify the effect parameters in the properties panel to achieve the desired outcome.
- Customizing Wipes: When adding wipe transitions, you can customize the direction and feathering. This is particularly useful for creating dynamic scene changes or highlighting action sequences.
- Animating Effects: Most effects and transitions in Blender can be animated over time using keyframes. This allows for dynamic changes in effects, such as a gradually intensifying blur or transitioning color grades.
- Previewing and Adjusting: Use the preview window in the VSE to review and fine-tune your effects and transitions. Ensure the changes align with your video\"s pacing and narrative flow.
Adding effects and transitions in Blender is a straightforward process that can dramatically enhance the visual storytelling of your projects. Experiment with different effects and transitions to discover creative combinations that elevate your video content.

Blender As A Video Editor - It\'s Actually Really Good!
Efficiency: \"Discover the key to maximizing your productivity and streamlining your tasks in this insightful video on efficiency. Learn time-saving hacks and proven strategies to work smarter, not harder!\" Techniques: \"Uncover a variety of innovative and effective techniques to enhance your skills and achieve success in this engaging video on techniques. From expert tips to practical advice, this video is a must-watch for anyone looking to improve their craft.\"
5 Blender Skills Video Editors Should Know
My Digital Asset Store: https://mediamonopoly.co Coaching / Project Consultation w/ Max: ...
Audio Editing and Synchronization in Blender
Blender is not just a powerful tool for 3D modeling and animation but also offers robust features for audio editing and synchronization within your video projects. This section will guide you through the essential steps and tips to effectively manage audio in Blender, ensuring your videos have the perfect sound to match the visuals.
Importing Audio Files
To start editing audio in Blender, you first need to import your audio files into the Video Sequence Editor (VSE). Blender supports a variety of audio formats, including WAV, MP3, and AAC. Simply go to the \"Add\" menu in the VSE, select \"Sound\", and navigate to the audio file you wish to import.
Synchronizing Audio with Video
After importing your audio, the next step is to synchronize it with your video clips. This can be done by dragging the audio strip to match the video strip in the VSE timeline. Zoom in on the timeline for precise alignment, and use the waveform displayed on the audio strip as a visual guide for synchronization.
Editing Audio Clips
- Cutting and Trimming: Use the \"Cut\" tool (K) to split audio clips, allowing you to remove unwanted sections or to reorganize clips. To trim, simply select an audio strip\"s end and drag it to the desired length.
- Adjusting Volume: Adjust the volume of your audio clips directly in the VSE by selecting the strip and accessing the strip\"s properties. Here, you can find the volume control to increase or decrease the audio level.
- Fading In and Out: Create smooth audio transitions by adding fade in and fade out effects. This can be achieved by keyframing the volume of the audio strip at the start and end points.
Adding Effects and Filters
Blender also allows you to enhance your audio with various effects and filters. Navigate to the Properties panel, and under the Sound tab, you\"ll find options to apply effects like reverb, high-pass, and low-pass filters. Experiment with these effects to achieve the desired audio quality and feel for your project.
Audio Synchronization Tips
- Use Blender\"s waveform display to visually match the audio peaks with the video frames for precise synchronization.
- Enable scrubbing to hear the audio as you move the playhead over the timeline, which helps in accurately aligning audio with video cues.
- Consider using markers to highlight significant audio and video points for easier alignment and editing.
Exporting Your Project
Once you\"ve completed your audio editing and synchronization, it\"s important to properly export your project. Ensure you select the correct audio codec and container format in the output settings to maintain the quality of your audio throughout the export process.
By following these steps and utilizing Blender\"s comprehensive audio editing tools, you can significantly enhance the auditory experience of your video projects, creating a more engaging and immersive viewing experience for your audience.

Color Correction and Grading
Color correction and grading are pivotal in video editing, allowing creators to set the mood, enhance realism, or correct inconsistencies in their footage. Blender, with its comprehensive suite of tools, provides an efficient workflow for color grading and correction. This section delves into the steps and techniques to achieve professional-quality color work in Blender.
Accessing Color Correction Tools in Blender
To begin color grading in Blender, navigate to the Compositor. Here, you can add nodes to adjust colors, contrast, brightness, and more. Use the \"Color Balance\" and \"Curves\" nodes for primary adjustments, affecting the overall look of your scene.
Steps for Basic Color Correction
- White Balance: Use the \"Color Balance\" node to adjust the white balance, correcting any color casts and ensuring that whites appear white.
- Exposure and Contrast: Adjust the exposure and contrast to make your image pop. This can be done with the \"Brightness/Contrast\" node.
- Saturation: Modify the saturation to enhance or mute colors. The \"Hue Saturation Value\" node is perfect for this task.
Advanced Color Grading Techniques
- Using the RGB Curves Node: For more control over color grading, the \"RGB Curves\" node allows you to adjust the intensity of red, green, and blue channels individually, enabling precise color adjustments.
- Look Up Tables (LUTs): Blender supports LUTs, which are preset color profiles that can quickly give your footage a specific look or feel. Apply a LUT using the \"Color Lookup Table\" node.
- Color Grading with Layers: For complex projects, you may grade different elements separately by using Blender\"s layer system. This approach allows for detailed control over the color grading process.
Tips for Effective Color Grading
Color grading can be subjective, but a few guidelines can help achieve a more professional result:
- Always start with color correction to ensure a neutral base before applying creative grading.
- Use scopes like the waveform and vectorscope in Blender to accurately assess color and brightness levels.
- Keep your project\"s mood and tone in mind when choosing color grades, ensuring consistency throughout your footage.
- Experiment with different nodes and settings to discover unique looks that enhance your video\"s storytelling.
Rendering Your Color-Graded Video
After completing the color correction and grading process, make sure to render your project using the appropriate output settings to preserve the quality of your color work. Blender allows you to select from various formats and codecs, ensuring compatibility and optimal playback quality.
With practice and creativity, Blender\"s color correction and grading tools can significantly elevate the visual impact of your videos, bringing your creative vision to life.

Utilizing Blender\"s Video Sequence Editor (VSE)
Blender\"s Video Sequence Editor (VSE) is a powerful, non-linear editing tool for video and audio files. It allows for complex editing tasks, from basic cuts to intricate compositions with multiple layers of video and audio. Whether you\"re a beginner or an experienced video editor, the VSE can be an invaluable component of your production workflow. Here\"s how to make the most of it.
Getting Started with the VSE
- Accessing the VSE: Open Blender and switch to the Video Editing workspace. This will display the VSE along with a preview window and a properties panel.
- Adding Media: To add video, audio, or images, use the \"Add\" menu in the sequencer. You can select files from your computer to include them in your project.
- Arranging Sequences: Drag and drop your media strips in the timeline to arrange them. You can cut, duplicate, and move strips as needed to build your video sequence.
Basic Editing Techniques
- Cutting and Splitting: Use the cut tool (shortcut: K) to split media strips at the playhead\"s position, allowing you to remove or rearrange sections of your video.
- Adjusting Strip Length: Click and drag the ends of a strip to trim it, adjusting the start or end point without altering the original media file.
- Fading In and Out: Apply fade-in and fade-out effects directly on the strip using the properties panel, enhancing your video\"s professional feel.
Advanced Features
The VSE isn\"t just for simple edits; it also supports more advanced features that can bring your video projects to the next level.
- Effects Strips: Add effects like cross-fades, color grading, and transformations by using the \"Add\" menu. These can be layered over your video strips to create dynamic visual effects.
- Animation: Keyframe properties like opacity, volume, and position to animate them over time. This can add motion to still images or create dynamic transitions.
- Proxy Rendering: For high-resolution footage that is slow to edit, use proxy rendering to speed up the workflow. This creates lower-resolution copies of your clips for smoother editing, while still rendering the final video in full quality.
Tips for Efficient Video Editing in Blender\"s VSE
- Organize your media with meta strips, which group multiple strips into a single block. This simplifies your timeline and makes complex sequences easier to manage.
- Utilize Blender\"s built-in presets for rendering settings to ensure your video exports with the optimal balance of quality and file size.
- Explore Blender\"s Python API for automating repetitive tasks in the VSE, saving time in your editing process.
Conclusion
The Video Sequence Editor in Blender is a versatile tool that, when mastered, can significantly enhance your video editing capabilities. By integrating the VSE into your workflow, you\"ll be able to produce high-quality videos with the flexibility and precision that Blender is known for. Start experimenting with the VSE\"s features to discover how it can transform your video projects.

_HOOK_
Rendering and Exporting Your Video
Once you\"ve completed your video project in Blender, the final step is to render and export your creation so it can be shared or published. Rendering is the process where Blender converts your edits into a standard video file. This guide will walk you through the steps to ensure your video renders smoothly and is exported with the best possible quality.
Setting Up Your Render Options
- Choose the Output Format: In the Output properties tab, select your desired file format. Blender supports a range of formats including AVI, MPEG, and QuickTime, as well as image sequences.
- Resolution and Frame Rate: Ensure the resolution and frame rate match your project\"s settings. This is crucial for maintaining the quality and timing of your video.
- Output Location: Specify the directory where your rendered video will be saved. Make sure it\"s easily accessible for later use.
Audio Settings
Don\"t forget to configure your audio settings before rendering. Select the appropriate codec under the Encoding section to ensure your video\"s sound is clear and synced correctly.
Rendering Your Video
- Render Animation: With your settings configured, click on \"Render\" and then \"Render Animation\" or press Ctrl+F12 to start the rendering process. A progress bar will indicate how the render is proceeding.
- Previewing Frames: You can preview frames as they are rendered in the Image Editor. This can be helpful for spotting any last-minute issues.
- Dealing with Rendering Issues: If you encounter problems during rendering, consider adjusting your settings. Reducing resolution or simplifying your project can help with rendering times and stability.
Exporting Your Rendered Video
Once rendering is complete, Blender will automatically save the final video to the location you specified. You can now view the video with any standard media player, share it online, or import it into other editing software for further processing.
Tips for Efficient Rendering
- Use Blender\"s Render Regions: If you\"re making minor changes and don\"t need to re-render the entire project, use render regions to render only parts of your frame.
- Optimize Your Scenes: Simplifying objects, reducing particle effects, and optimizing your settings can significantly decrease render times.
- Consider Using External Render Farms: For very complex projects, external render farms can provide the additional computing power needed to render your video more quickly.
Conclusion
Rendering and exporting are the final steps in bringing your video project from Blender to the world. By carefully setting up your render options and following best practices, you can ensure your video looks as good as possible. Remember, rendering can be time-consuming, but the result is a high-quality video ready for any audience.

Resources for Learning Blender Video Editing
Embarking on the journey of video editing in Blender can be both exciting and challenging. Fortunately, there\"s a wealth of resources available to help you master this powerful software. From tutorials to forums, here are some of the best resources to enhance your Blender video editing skills.
Official Blender Tutorials
- Blender Foundation: The official Blender website offers a comprehensive set of tutorials tailored for beginners to advanced users, covering all aspects of video editing.
- Blender Cloud: For a subscription, Blender Cloud provides access to training from Blender Foundation experts, project files, and exclusive content to deepen your understanding.
Online Learning Platforms
- Udemy: Offers a range of Blender courses focusing on specific areas like video editing, animation, and 3D modeling, suitable for all skill levels.
- Lynda/LinkedIn Learning: Features professional courses that cover Blender in depth, including video editing workflows, effects, and rendering.
YouTube Channels
- Blender Guru: Known for high-quality tutorials that are both informative and entertaining, covering everything from basics to advanced topics.
- CG Geek: Offers detailed tutorials and project-based learning to help you understand complex concepts in an engaging way.
- Blender Diplom: Focuses on tutorials for special effects and video editing techniques in Blender.
Forums and Community Groups
- Blender Artists Community: A forum where you can ask questions, share your work, and get feedback from Blender enthusiasts around the world.
- Reddit r/blender: A subreddit dedicated to Blender, where users share their projects, tips, and tutorials.
- Blender Stack Exchange: A Q&A site for people who use Blender to create 3D graphics, animations, or videos. It\"s a great place to find answers to technical questions.
Books and eBooks
- \"Blender 3D Cookbook\" by Enrico Valenza: Offers a collection of recipes for solving common Blender problems, including video editing challenges.
- \"Learning Blender: A Hands-On Guide to Creating 3D Animated Characters\" by Oliver Villar: While focused on 3D animation, this book also touches on the basics of video editing within Blender.
Conclusion
Whether you prefer online tutorials, engaging with community forums, or diving into books, there are plenty of resources to support your learning journey in Blender video editing. Start exploring these resources, practice consistently, and don\"t be afraid to experiment with your projects. With time and dedication, you\"ll be able to unleash the full potential of Blender in your video editing projects.
READ MORE:
Community and Support for Blender Video Editors
The Blender community is an expansive and welcoming network of users ranging from hobbyists to professional artists and video editors. Engaging with the community not only helps in resolving technical issues but also in inspiring creativity and improving skills. Here’s how you can connect with the community and find support for your Blender video editing projects.
Online Forums and Communities
- Blender Artists Forum: One of the largest and most active Blender communities online. Here, you can find answers, share your work, and participate in discussions about Blender video editing.
- Blender Network: The official Blender networking platform, where professionals and enthusiasts connect. It\"s a great place to find collaborators or hire talent for your projects.
- Reddit r/blender: A subreddit dedicated to all things Blender. It\"s an excellent source for tips, tutorials, and showcasing your video editing projects.
Blender User Groups (BUGs)
Blender User Groups are local or regional communities that meet regularly to share knowledge, work on projects together, and network. These groups are perfect for face-to-face interactions and learning from others in your area.
Social Media and Hashtags
Platforms like Twitter, Instagram, and Facebook have active Blender communities. Use hashtags like #b3d, #Blender3D, and #BlenderCommunity to find and share content related to Blender video editing.
Blender Conferences and Meetups
- Blender Conference: An annual event held in Amsterdam, bringing together Blender enthusiasts from around the world. It’s a great opportunity to learn from workshops, presentations, and networking.
- Local and Regional Blender Meetups: Many regions host regular meetups for Blender users. These gatherings range from informal meetings to structured workshops and presentations.
Online Courses and Tutorials
There are countless online platforms offering courses and tutorials specifically for Blender. These can be a great way to learn new techniques and stay updated on the latest features relevant to video editing.
Blender Help and Documentation
The official Blender documentation is an invaluable resource for understanding all aspects of Blender, including video editing. It’s regularly updated and can help answer many technical questions.
Volunteering and Contributing
Getting involved in the Blender community by volunteering or contributing to projects can also be a great way to learn and grow as a video editor. Whether it’s helping with community events or contributing to open-source projects, there are many ways to engage.
Conclusion
The Blender community is a rich resource for anyone interested in video editing with Blender. By engaging with the community through forums, social media, and events, you can enhance your skills, find inspiration, and connect with like-minded individuals. Remember, no matter your skill level, there’s always something new to learn and someone willing to help in the Blender community.
Embark on a creative journey with Blender for video editing, where limitless possibilities await. From basic cuts to advanced effects, Blender empowers you to bring your visual stories to life. Start exploring today and unleash your creative potential!

