Topic edit text in adobe illustrator: Unleash your creativity and refine your designs by mastering how to edit text in Adobe Illustrator, the essential tool for graphic artists and designers.
Table of Content
- How to change text colors and fonts in Adobe Illustrator?
- Understanding and Using the Character Panel
- Enhancing Text with the Paragraph Panel
- Color and Style Adjustments for Text
- Exploring and Applying Glyphs
- Creating and Editing Outlines for Text
- Working with Type Objects and Text Wrapping
- YOUTUBE: Edit Text in Illustrator
- Control Panel Usage for Font Adjustments
How to change text colors and fonts in Adobe Illustrator?
To change text colors and fonts in Adobe Illustrator, you can follow these steps:
- Select the text that you want to change.
- Go to the \"Properties\" panel.
- In the \"Character\" tab, you will find various options to modify the text.
- To change the text color, click on the color swatch next to the \"Fill\" option and select a new color from the color picker.
- To change the font, click on the drop-down menu next to the \"Font\" option and choose a different font from the list.
- You can also adjust other properties like font size, tracking, leading, etc., to customize the text according to your preferences.
Once you have made the desired changes, the text will be updated with the new colors and fonts.

READ MORE:
Understanding and Using the Character Panel
The Character panel in Adobe Illustrator is a powerful tool for fine-tuning the appearance of your text. It offers a range of options that let you manipulate not just the font and size, but also the nuanced spacing between characters and lines, providing a high level of control over your text\"s readability and aesthetic appeal.
- Accessing the Character Panel: You can open the Character panel by navigating to Window > Type > Character. This panel can also be accessed through the Control panel by clicking on the word ‘Character’.
- Font Selection: Choose the perfect font for your project from a vast library. You can even activate more fonts from Adobe Fonts using the ‘Find More’ option in the panel.
- Adjusting Font Style and Size: Easily modify the font style and size to match your design\"s requirements. Options like bold, italic, and various font weights are available for most font families.
- Kerning and Tracking: Adjust the spacing between specific pairs of characters using kerning, or alter the overall spacing between all characters in a block of text with tracking.
- Leading: Control the vertical space between lines of text to improve readability or fit more text in a given space.
- Other Tweaks: Experiment with other character adjustments like horizontal and vertical scale, baseline shift, character rotation, and more to add a unique touch to your typography.
Remember, while the Character panel offers extensive text customization options, it\"s important to use these features thoughtfully to maintain readability and ensure that your text complements the overall design. By mastering the Character panel, you can significantly enhance the visual impact of your text in Illustrator.

Enhancing Text with the Paragraph Panel
The Paragraph Panel in Adobe Illustrator is a versatile tool that allows you to manipulate the layout of your text for a clean and structured appearance. This panel enables you to adjust alignment, indentation, and spacing to ensure your text not only looks professional but also aligns perfectly with your design\"s overall aesthetic.
- Accessing the Paragraph Panel: You can open the Paragraph Panel by going to Window > Type > Paragraph. This panel can also be conveniently accessed from the Control panel at the top of your workspace by simply clicking on the word ‘Paragraph’.
- Adjusting Text Alignment: The Paragraph Panel offers options for aligning your text to the left, center, right, or justifying it. Proper alignment plays a crucial role in the readability and balance of your design.
- Indentation Settings: Control the indentation of your text for both the first line and the rest of the paragraph. This feature is particularly useful for creating neatly formatted bulleted or numbered lists.
- Spacing Before and After Paragraphs: Adjust the amount of space before and after each paragraph to create a visually pleasing separation between blocks of text.
- Hyphenation Control: The Paragraph Panel allows you to manage hyphenation, ensuring that your text breaks in the most visually appealing manner.
Mastering the use of the Paragraph Panel will elevate the professionalism of your documents, providing clear, well-structured text that enhances your overall design. As with any design tool, thoughtful use of these features will ensure your text is both beautiful and functional within your creative project.
Color and Style Adjustments for Text
Adding color and style to your text in Adobe Illustrator can transform your design, making it visually striking and memorable. The process is intuitive, offering a plethora of options for customization. Whether you\"re looking to apply a solid fill, a gradient, or adjust stroke settings, Illustrator provides the tools to fine-tune your text\"s appearance while keeping it fully editable.
- Applying Fill Color: Choose from a vast spectrum of colors in the Color panel, Color Guide panel, or Swatches panel. For a more dynamic look, you can even fill your text with a gradient, adding depth and dimension to your design.
- Adjusting Stroke Color and Options: Highlight your text with strokes. First, select the Stroke icon, then choose your color. Fine-tune your stroke appearance in the Stroke panel, adjusting settings like weight and style to match your design\"s needs.
- Text Effects: Add flair to your text by utilizing the Effects panel. Apply drop shadows, gradients, or bevel & emboss effects to make your text pop. These effects enhance the visual hierarchy, drawing attention to your message.
- Underline or Strike Through: Emphasize or denote text by underlining important information or striking through content to indicate deletion or change, adding a layer of meaning to your visual communication.
Mastering these color and style adjustments in Adobe Illustrator can elevate your design, ensuring that your text not only conveys your message but also captures the essence of your creative vision in a visually compelling manner.

Exploring and Applying Glyphs
Adding unique characters or symbols, known as glyphs, to your text in Adobe Illustrator can significantly enhance the visual appeal of your typography. Glyphs provide a wealth of creative possibilities, from stylized ampersands to ornamental swashes. Understanding how to access and incorporate these special characters can add a layer of sophistication and customization to your designs.
- Accessing the Glyphs Panel: Navigate to Window > Type > Glyphs to open the Glyphs panel. This panel displays all the glyphs available in the font you are using, allowing you to browse and select the perfect glyph for your project.
- Selecting and Inserting Glyphs: Click on a glyph to select it, then double-click to insert it into your text at the cursor\"s position. You can also drag and drop the glyph directly into your text.
- Exploring Glyph Variants: Some glyphs have alternate versions, providing different stylistic options. If a glyph has alternatives, you\"ll notice a small arrow in the bottom right corner. Click and hold the glyph to view and select from the available variants.
- Customizing with Glyphs: Utilize glyphs to add decorative elements, create unique logos, or enhance the readability of your text. Experiment with different combinations and placements to find the perfect balance for your design.
Mastering the use of glyphs in Adobe Illustrator can take your typographic designs to the next level. Whether you\"re creating a logo, invitation, or poster, the thoughtful integration of glyphs can make your work stand out with a signature style.
_HOOK_
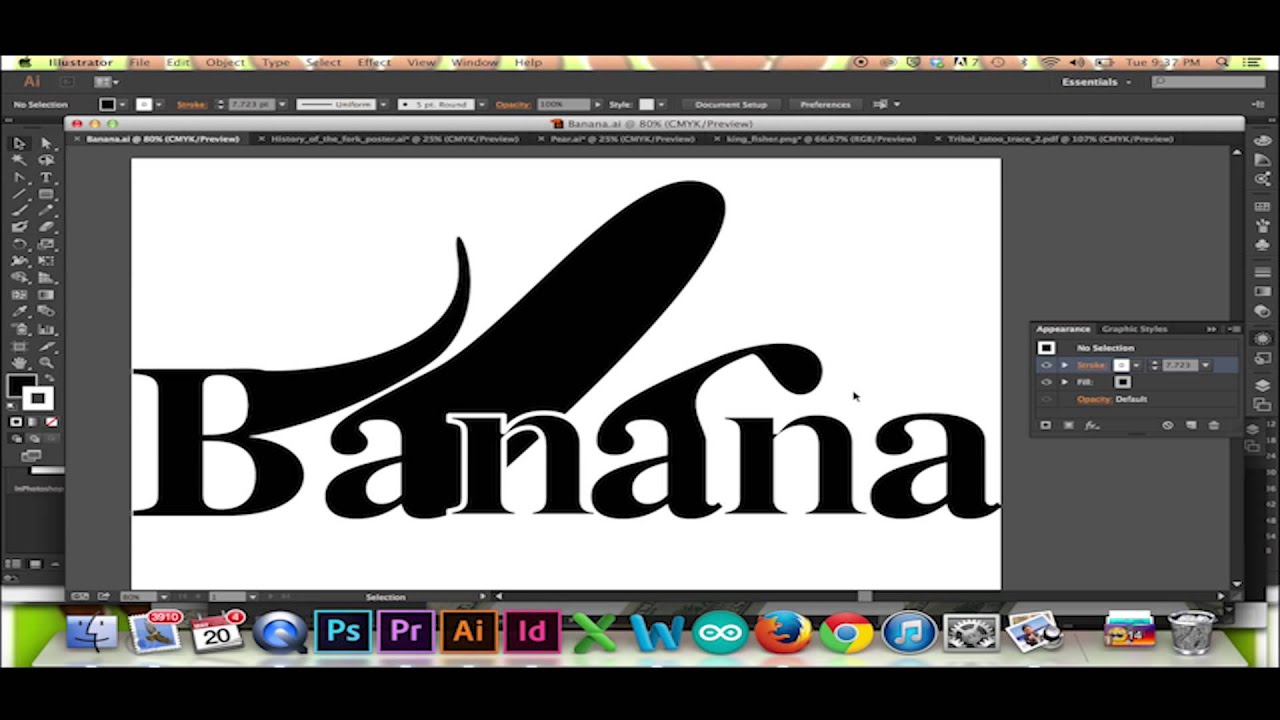
Creating and Editing Outlines for Text
Creating outlines for text in Adobe Illustrator is a crucial technique for graphic designers, allowing for more flexibility in manipulating and customizing text as a graphic element. This process converts text into its constituent vector paths, giving you the ability to apply complex transformations and effects that are not possible with standard text editing tools. Here\"s a step-by-step guide on how to create and edit outlines for text in Adobe Illustrator.
- Converting Text to Outlines: Select the text you want to convert, then go to Type > Create Outlines or use the shortcut Ctrl/Cmd + Shift + O. This turns your text into a series of editable paths, making each letter an individual shape.
- Duplicating Text Before Outlining: Before converting your text to outlines, it\"s wise to duplicate the text layer. This preserves the original text in case you need to revert or make changes later. You can duplicate the layer by dragging it to the \"Create New Layer\" icon in the Layers panel.
- Ungrouping and Individual Editing: After creating outlines, your letters may be grouped. To edit them individually, right-click and choose \"Ungroup\" or use the shortcut Ctrl/Cmd + Shift + G. You can then select and manipulate each letter separately.
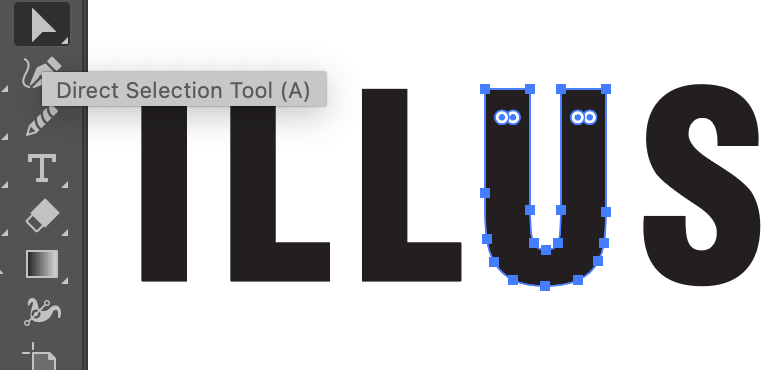
- Customizing Letter Shapes: With individual letters ungrouped, you can use the Direct Selection Tool (A) to adjust anchor points and modify the shape of each letter, giving you complete control over the appearance of your text.
- Adding Creative Effects: Once your text is outlined, you can apply various effects and transformations. Use tools like the Pathfinder to merge letters creatively or add stylistic touches that make your typography unique.
Outlining text transforms your typography into versatile graphic elements, unlocking a new realm of creative possibilities. While the outlined text is no longer editable as text, this technique empowers you to manipulate letters as shapes, providing a powerful means to customize and stylize your textual content in Adobe Illustrator.

Working with Type Objects and Text Wrapping
Manipulating type objects and mastering text wrapping in Adobe Illustrator is essential for creating visually appealing designs. Understanding these elements allows you to integrate text seamlessly into your graphic compositions, ensuring readability and enhancing the overall design.
- Understanding Type Objects: Type objects in Illustrator are flexible and can be manipulated in numerous ways. You can easily resize, rotate, and style your text to fit your design needs.
- Creating Point and Area Type: Use the Type Tool (T) for point type, creating individual lines of text, or click and drag to create area type, defining a text box for your content.
- Text Wrapping: Wrap text around objects by using the Text Wrap options. You can make your text flow around shapes, enhancing the visual relationship between text and other design elements.
- Adjusting Text Flow: Fine-tune the wrap by adjusting the offset to control the distance between the text and the object it wraps around. This ensures your text is not too close or too far from the design elements.
Effectively working with type objects and mastering text wrapping in Illustrator allows you to create dynamic, integrated designs where text and imagery coexist in harmony.
Edit Text in Illustrator
Learn how to bring your artistic visions to life with Illustrator! This powerful software allows you to create stunning illustrations and designs with ease. Watch our video tutorial and master the art of digital artistry today!
Fun and Easy Tricks to Edit Text in Illustrator
Looking to polish your text like a pro? Our video tutorial on how to edit text will show you all the tips and tricks you need to make your written content shine. Enhance readability, correct errors, and create professional-looking documents with ease. Watch now and become a text-editing expert!
READ MORE:
Control Panel Usage for Font Adjustments
The Control Panel in Adobe Illustrator is a versatile and user-friendly interface for making quick adjustments to your font and text properties. It provides easy access to essential typography settings, allowing you to efficiently fine-tune your text directly on the artboard without navigating through multiple menus or panels.
- Accessing the Control Panel: The Control Panel is located at the top of the Illustrator workspace and dynamically updates to display relevant options based on your current selection.
- Adjusting Font Family and Style: Directly select and change the font family and style for your selected text. The Control Panel offers a dropdown list of all available fonts and styles, making it quick and easy to switch between different typographic looks.
- Modifying Font Size and Leading: Adjust the font size and leading (line spacing) with precision. The Control Panel provides input fields where you can type specific values or use the increment arrows for fine adjustments.
- Setting Alignment and Spacing: Control the alignment of your text and manage the spacing between characters (kerning) and words (tracking). These settings ensure your text is perfectly positioned and spaced according to your design requirements.
Understanding and utilizing the Control Panel for font adjustments in Adobe Illustrator can significantly speed up your design workflow, allowing you to make fast and effective typographic changes directly on your artboard.
Embrace the full potential of Adobe Illustrator in text editing and transform your designs into captivating artworks that speak volumes and engage your audience with creativity and precision.