Topic adobe illustrator wrap text: Discover the art of text wrapping in Adobe Illustrator, a transformative skill set for graphic designers. This guide illuminates the pathway to create visually stunning designs by seamlessly integrating text with your creative concepts.
Table of Content
- How to wrap text around an object in Adobe Illustrator?
- Understanding the Basics of Text Wrapping in Illustrator
- Step-by-Step Guide to Wrapping Text Around Objects
- Advanced Techniques: Wrap Text Inside Shapes
- Creating Custom Text Wraps with Pen and Shape Tools
- Common Challenges and Solutions in Text Wrapping
- Integrating Text Wrap with Other Illustrator Features
- YOUTUBE: Wrap Text Around a Circle with Adobe Illustrator Beginner Tutorial
- Real-World Applications: Text Wrapping in Design Projects
- Tips and Tricks for Efficient Text Wrapping
- Exploring Creative Uses of Text Wraps in Graphic Design
- Resources and Tutorials for Further Learning
How to wrap text around an object in Adobe Illustrator?
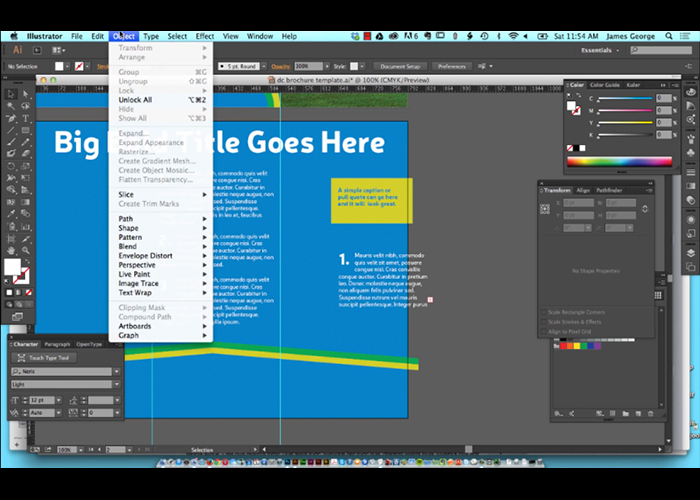
To wrap text around an object in Adobe Illustrator, you can follow these steps:
- Select the object or objects around which you want to wrap the text.
- Go to the \"Object\" menu at the top and choose \"Text Wrap\" and then \"Make.\" This will enable the text wrap feature for the selected object(s).
After following these steps, your text should wrap around the chosen object(s) in Adobe Illustrator.

READ MORE:
Understanding the Basics of Text Wrapping in Illustrator
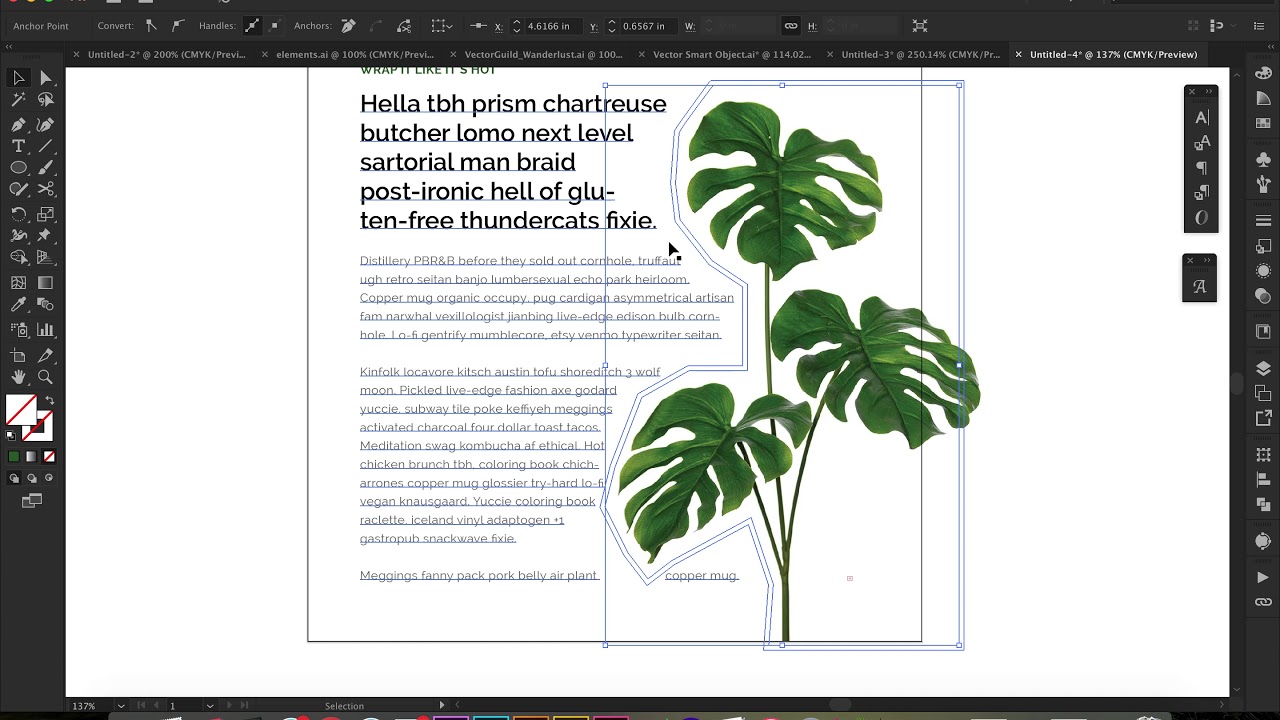
Text wrapping in Adobe Illustrator is an essential skill for graphic designers, offering the ability to blend text creatively with images and shapes. This feature enhances visual appeal and readability in various design projects, including custom T-shirt designs, logos, and promotional materials. To start, understanding the primary tools and methods for text wrapping in Illustrator is vital.
- Begin with selecting the text tool and create your text. Illustrator offers various formatting options to customize your text\"s appearance.
- Next, create or select the object around which you want the text to wrap. This could be a shape, image, or any other element in your design.
- Use the \"Wrap Options\" to define how text will interact with the object. Options include wrapping around the object’s outline or within it, and adjusting the wrap distance.
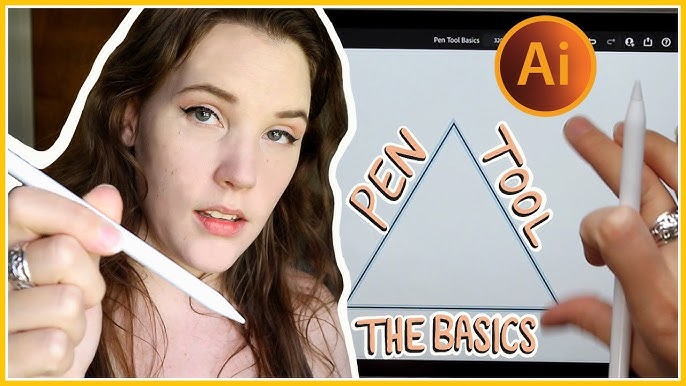
- For more complex designs, the Pen Tool can be used to create custom wrap shapes, offering greater control over how text flows around objects.
- It\"s also essential to learn how to adjust text alignment and flow to ensure that your design is both visually appealing and functionally readable.
- Practical applications include designing eye-catching T-shirts, where text is wrapped around graphics or within specific shapes to create unique and compelling designs.
Mastering text wrapping in Illustrator opens up a world of creative possibilities, allowing designers to merge text and imagery in innovative and engaging ways.

Step-by-Step Guide to Wrapping Text Around Objects
Wrapping text around objects in Adobe Illustrator is a versatile skill that enhances design aesthetics. This step-by-step guide will walk you through the process, ensuring you can apply this technique effectively in your projects, such as T-shirt designing or logo creation.
- Start with a Blank Canvas: Open Adobe Illustrator and create a new document, setting your desired dimensions.
- Create Your Text: Select the Text Tool and click on your canvas to start typing. You can adjust font type, size, and color as needed.
- Insert or Draw the Object: Place the object around which you want to wrap your text. This can be an existing image or a shape you draw using Illustrator\"s tools.
- Position the Text and Object: Adjust the placement of your text and the object. Make sure they are correctly aligned for the wrap effect you desire.
- Apply the Wrap: Select the text, then go to the \"Object\" menu, choose \"Text Wrap\", and then \"Make\". This will wrap your text around the object.
- Adjust the Wrap Options: Fine-tune the wrap by going back to \"Text Wrap\" and selecting \"Text Wrap Options\". Here, you can control the wrap distance and the way text flows around the object.
- Final Adjustments: You may need to tweak the text or object to perfect your design. Use the Direct Selection tool for precise adjustments.
By following these steps, you can create dynamic designs where text and imagery coexist harmoniously, adding depth and interest to your work.
Advanced Techniques: Wrap Text Inside Shapes
Wrapping text inside shapes in Adobe Illustrator is an advanced technique that can add a creative touch to your designs. This method is particularly useful in projects like T-shirt design or logo creation, where text needs to conform to non-standard shapes.
- Create Your Shape: Start by drawing the shape you want to wrap your text around. This can be anything from a simple circle to more complex custom shapes.
- Add Your Text: Use the Text Tool to type your text. You may want to adjust the font, size, and color to fit the design.
- Convert Text to Outlines: Right-click on your text and select \"Create Outlines\" to convert your text into a shape. This allows more flexibility in manipulating the text.
- Position Text Inside the Shape: Drag your outlined text and position it over the shape. Resize and adjust as necessary to make the text fit within the shape.
- Use Pathfinder Tool: Select both the text and the shape, then use the \"Minus Front\" option in the Pathfinder panel. This will cut the text shape out of your primary shape, creating a wrap effect.
- Final Adjustments: You may need to make some final adjustments to ensure that the text is legible and aesthetically pleasing within the shape.
This technique allows for creative and visually appealing designs where text and shape work together harmoniously, enhancing the overall impact of your design.

Creating Custom Text Wraps with Pen and Shape Tools
Adobe Illustrator\"s Pen and Shape tools offer creative flexibility for custom text wraps, essential for unique and engaging designs. This detailed guide will help you master custom text wrapping, a skill that elevates designs in projects like T-shirt graphics, logos, and digital art.
- Draw Your Custom Shape: Begin by creating a custom shape using the Pen Tool. This shape will serve as the boundary for your text wrap.
- Add Text: Select the Text Tool and type your desired text. Adjust the font, size, and other properties to suit your design needs.
- Convert Text to Outlines: Right-click on the text and choose \"Create Outlines\" to turn the text into a vector shape, allowing for more intricate manipulation.
- Text Arrangement: Arrange the outlined text around or inside your custom shape. This might require resizing and rotating the text to fit the shape properly.
- Use Clipping Masks: To wrap the text within the shape, select both the text and the shape, then go to \"Object\" > \"Clipping Mask\" > \"Make\". This will clip the text to the boundaries of the shape.
- Final Adjustments: Make any necessary adjustments to ensure that the text is aesthetically pleasing and legible, maintaining the integrity of your custom shape.
This technique, blending text with custom shapes, allows for the creation of visually striking designs that stand out in any medium, from print to digital.
_HOOK_
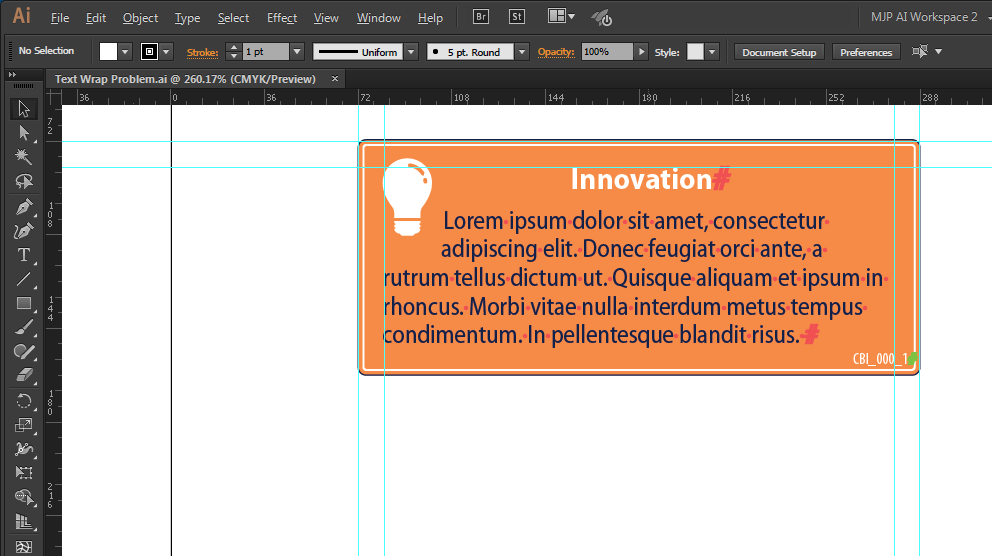
Common Challenges and Solutions in Text Wrapping
Text wrapping in Adobe Illustrator can present several challenges, especially for those new to the software or graphic design. Understanding these common issues and their solutions can streamline your design process and improve your workflow.
- Challenge: Text Distortion
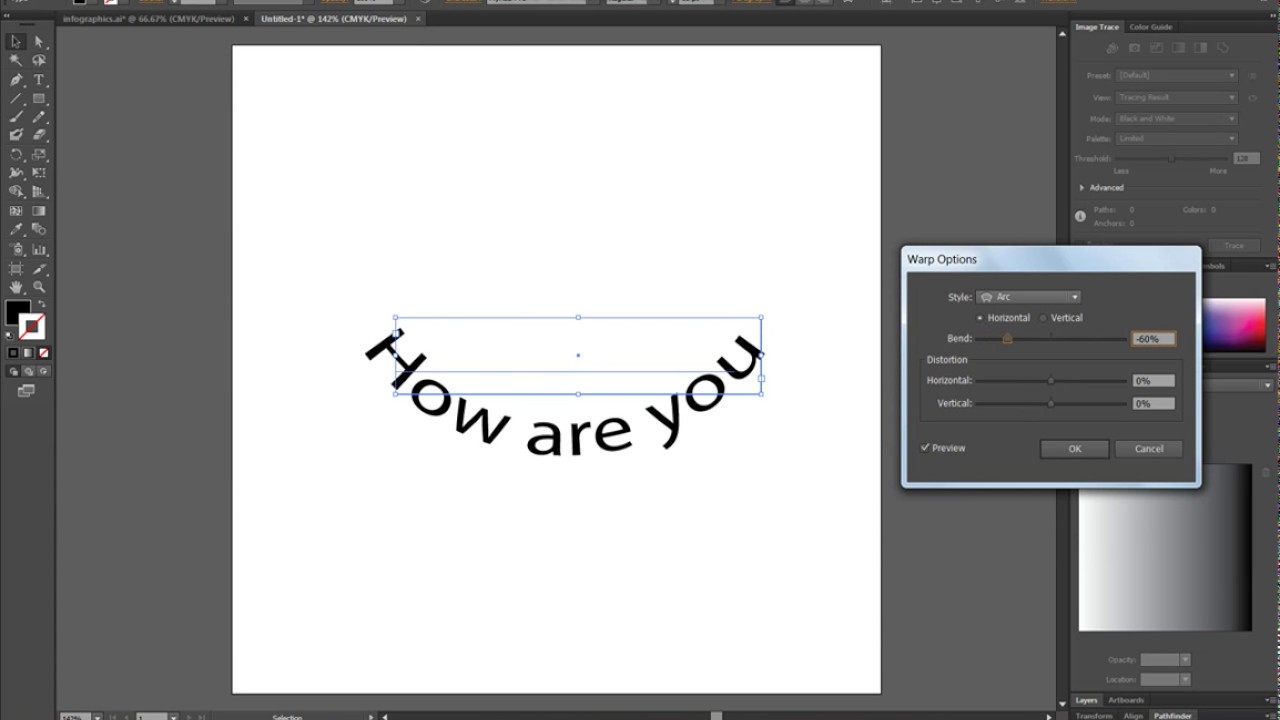
- Solution: Maintain the integrity of your text by using \"Envelope Distort\" with \"Make with Top Object\" for a non-destructive approach that preserves the original text.
- Challenge: Uneven Text Wrapping
- Solution: Adjust the wrap options by changing the offset value or manually editing the wrap path for a more balanced appearance.
- Challenge: Text Clipping
- Solution: Ensure the text is within the boundaries of your wrap object. Use \"Clipping Masks\" sparingly and prefer \"Text Wrap\" options for better control.
- Challenge: Difficulty in Wrapping Around Complex Shapes
- Solution: Simplify the shape or use the Pen Tool to create a custom path that closely follows the contours of the complex shape.
- Challenge: Editing Text After Wrapping
- Solution: Keep your text editable by using text wrap options instead of converting the text to outlines. This allows for easy modifications later.
By anticipating and addressing these common challenges, you can utilize Illustrator\"s text wrapping features to their fullest potential, creating dynamic and visually appealing designs.

Integrating Text Wrap with Other Illustrator Features
Adobe Illustrator\"s text wrapping feature can be seamlessly integrated with other tools and functions for enhanced design capabilities. This integration allows for creative and efficient use of Illustrator\"s full suite of features.
- Layering with Objects: Combine text wrap with layering to create depth. Place text behind or in front of images for a dynamic composition.
- Using Pathfinder: Integrate text wrap with the Pathfinder tool for complex shapes and designs. This is ideal for creating logos or intricate graphic elements.
- Opacity and Blending Modes: Adjust the opacity of your wrapped text or use blending modes to create interesting visual effects, especially useful in creating web graphics or digital art.
- Pattern Creation: Use text wrap in conjunction with pattern tools to create unique, repeating patterns, ideal for textile design or decorative backgrounds.
- Brushes and Effects: Apply Illustrator’s vast array of brushes and effects to wrapped text for artistic stylization, enhancing the visual appeal of posters or advertisements.
By integrating text wrap with these features, Adobe Illustrator opens up endless possibilities for creative expression and professional design.
Wrap Text Around a Circle with Adobe Illustrator Beginner Tutorial
Tutorial: Are you eager to learn a new skill or enhance your knowledge? Our tutorial video will guide you step-by-step, making it easy and enjoyable to acquire valuable insights and become an expert in no time!
Warp Text into Shapes with Illustrator
Shapes: Discover the fascinating world of shapes through our captivating video! Dive into the realm of geometry and explore the endless possibilities of creating beautiful and intricate designs using various shapes. Get ready to be inspired!
Real-World Applications: Text Wrapping in Design Projects
Text wrapping in Adobe Illustrator is a versatile tool used in various design projects across different industries. Its ability to integrate text aesthetically with graphical elements makes it invaluable in professional design work.
- Graphic Design and Advertising: Creating eye-catching advertisements where text flows around product images or design elements, enhancing visual appeal and message clarity.
- Web Design: Using text wrap for website headers and banners, where text needs to complement web graphics and layouts effectively.
- Editorial Design: Implementing text wrapping in magazines and brochures, allowing text to flow around images and pull quotes, thereby improving readability and layout dynamics.
- Logo Creation: Integrating text with logos where letters wrap around symbols or shapes, adding uniqueness to brand identity designs.
- Merchandise Design: Utilizing text wrapping in designing T-shirts, mugs, and other merchandise, where text needs to fit aesthetically with the product\"s shape and style.
These real-world applications highlight the importance of text wrapping in creating designs that are both visually striking and functionally effective.

Tips and Tricks for Efficient Text Wrapping
Text wrapping in Adobe Illustrator can be made more efficient with the right tips and tricks. These techniques can help streamline your workflow and enhance the overall quality of your designs.
- Understand Text Flow: Experiment with different text flow options to find the best fit for your design. Understanding how text interacts with objects is key to effective wrapping.
- Use Shortcuts: Familiarize yourself with Illustrator’s shortcuts for text and object selection to speed up the design process.
- Manipulate Anchor Points: Use the Direct Selection Tool to adjust anchor points for precise control over how text wraps around an object.
- Employ Clipping Masks: For complex shapes, use clipping masks to wrap text. This allows for more creative and controlled text wrapping.
- Experiment with Text Wrap Options: Explore the ‘Text Wrap’ panel’s different settings to achieve the desired effect, such as offsetting text from an object.
- Layering and Grouping: Utilize layers and grouping to manage text and objects, making it easier to edit and adjust wrapped text.
- Use Outline View: Switch to Outline View (Ctrl/Cmd + Y) to see how text wraps around objects without the distraction of colors and fills.
Applying these tips will not only make text wrapping more efficient but also open up new creative possibilities in your design projects.
Exploring Creative Uses of Text Wraps in Graphic Design
Text wrapping in graphic design is a versatile technique, offering numerous creative applications. Its ability to blend text with visual elements elevates design aesthetics in various fields.
- Advertising Campaigns: Use text wrap to blend slogans with product imagery, creating engaging and memorable ads.
- Website Graphics: Incorporate text wrap in web banners and headers for dynamic and interactive web designs.
- Editorial Layouts: Employ text wrapping in magazine or brochure layouts to enhance visual storytelling and readability.
- Brand Identity: Wrap text around logos or brand elements for unique and impactful branding materials.
- Merchandise Design: Apply text wrap in designing apparel, posters, or other merchandise for stylistic and thematic emphasis.
These applications highlight the dynamic nature of text wrapping in enhancing both the aesthetic and functional aspects of design projects.
_HOOK_
READ MORE:
Resources and Tutorials for Further Learning
To enhance your skills in text wrapping using Adobe Illustrator, a variety of resources and tutorials are available. These learning materials cater to both beginners and advanced users, helping to expand your creative toolkit.
- Adobe\"s Official Tutorials: Adobe offers comprehensive guides and tutorials on their website, ideal for beginners to understand the basics of text wrapping.
- Online Courses: Platforms like Udemy, Coursera, and Skillshare provide in-depth Illustrator courses, covering text wrapping and other advanced techniques.
- YouTube Tutorials: YouTube is a valuable resource with numerous free tutorials from experienced designers, offering practical tips and project-based learning.
- Design Blogs and Websites: Websites like Behance, Dribbble, and Tuts+ offer tutorials, tips, and inspiration for creative text wrapping projects.
- Community Forums: Join Illustrator communities on Reddit, Adobe forums, or LinkedIn groups to get tips, feedback, and solutions to specific challenges.
- Books and eBooks: Several books and eBooks are dedicated to mastering Illustrator, with chapters and sections specifically on text wrapping techniques.
These resources provide a wealth of knowledge and practical insights, enabling you to master text wrapping in Adobe Illustrator and apply it creatively in your projects.
Embrace the art of text wrapping in Adobe Illustrator to transform your designs. With these insights and techniques, you\"re now equipped to create visually captivating and professionally polished graphics that truly stand out.