Topic 3d text adobe illustrator: Discover the art of creating stunning 3D text in Adobe Illustrator, a tool that transforms simple typography into captivating visual masterpieces, perfect for designers and creatives looking to elevate their digital artistry.
Table of Content
- How to create 3D text in Adobe Illustrator?
- Creating Basic 3D Text
- Applying 3D Effects
- Adjusting Perspective and Depth
- Enhancing with Bevel and Surface Texture
- Optimizing Lighting and Shading
- Using Pre-Made 3D Text Templates
- YOUTUBE: Adobe Illustrator 3D Text Effect Tutorial
- Integrating with Other Adobe Tools
- Advanced Techniques: Isometric and Ray Tracing
- Practical Applications: Posters, Logos, and More
- Tips for Exporting and Printing 3D Text
How to create 3D text in Adobe Illustrator?
To create 3D text in Adobe Illustrator, you can follow these steps:
- Open Adobe Illustrator and create a new document.
- Create a text object by selecting the Type tool (shortcut T) and clicking on the artboard to start typing.
- Customize the text font, size, and other attributes from the Character panel.
- With the text selected, go to the Effect menu, hover over 3D, and choose Extrude & Bevel.
- In the Extrude & Bevel Options window, you can adjust the extrusion depth and other parameters to create the desired 3D effect. Click OK when done.
- To further customize the appearance, you can apply additional effects or styles to the 3D text object.
- If you want to have more control over the 3D text, you can use the Blend tool. First, create two text objects: one with the front text and another with the back text.
- Select both text objects and go to the Object menu, hover over Blend, and choose Make.
- To adjust the blending steps, go to Object > Blend > Blend Options and set the desired number.
- Now, you have a 3D text object in Adobe Illustrator that you can further edit and manipulate.

READ MORE:
Creating Basic 3D Text
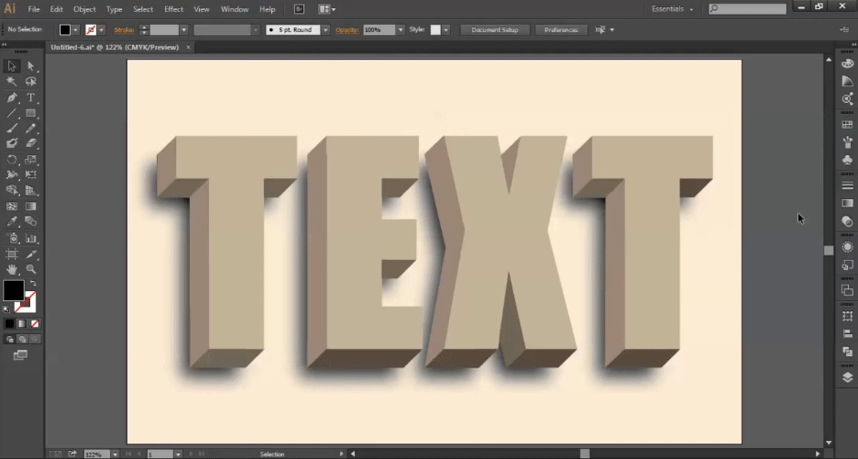
Start your journey in 3D text creation in Adobe Illustrator with these easy-to-follow steps, ideal for both beginners and seasoned designers. Transform ordinary text into eye-catching 3D masterpieces.
- Setting Up Your Document: Begin by creating a new document in Illustrator. Choose dimensions and resolution that suit your project needs.
- Adding Text: Use the Type Tool to add your desired text. You can select from a wide range of fonts and colors to make your text stand out.
- Converting Text to Paths: To manipulate the text freely, convert your text to paths. This allows for more flexible 3D transformations.
- Applying 3D Extrude & Bevel: Navigate to the \"Effect\" menu, select \"3D,\" and then \"Extrude & Bevel.\" Here, you can adjust the depth and perspective of your text to give it a three-dimensional look.
- Adjusting Perspective: Change the perspective to give the illusion of depth. This makes the text appear as if it\"s extending outwards or inwards from the screen.
- Customizing Bevel and Surface: Experiment with different bevel options to add unique contours to your text. Adjust the surface texture to enhance its 3D appearance.
- Lighting Adjustments: Fine-tune the lighting to add depth and shadows, enhancing the 3D effect. Illustrator allows for precise control over the intensity and direction of the lighting.
- Final Touches: Add shadows and other stylizations to give your text a polished and professional look. Utilize the Appearance panel for these refinements.
With these steps, you\"ll be able to create impressive 3D text that stands out in any design project, from posters to digital art pieces.
Applying 3D Effects
Unleash the full potential of your text by applying 3D effects in Adobe Illustrator. This section guides you through the process, from basic 3D transformations to advanced material and lighting effects.
- Accessing 3D Tools: In Illustrator, find the 3D and Materials panel under the Window menu. This panel is your gateway to various 3D effects.
- Choosing a 3D Effect: Illustrator offers several 3D options like Extrude, Rotate, and Inflate. Each option provides a unique 3D transformation to your text.
- Adjusting Depth and Perspective: Modify the depth of your text with Extrude settings and tweak the perspective to achieve the desired angle and dimensionality.
- Applying Materials: Explore different material options to give your text a realistic texture. Options range from plastic to metallic finishes, adding depth and realism to your design.
- Lighting Effects: Good lighting can bring your text to life. Adjust the lighting intensity, direction, and color to highlight the best features of your 3D text.
- Rendering Your Artwork: Once you\"re satisfied with the settings, render your artwork to see the full effect of the 3D transformations.
With these steps, you can transform flat text into vibrant 3D graphics, suitable for a variety of creative projects.
Adjusting Perspective and Depth
Mastering perspective and depth in 3D text can dramatically elevate your design. This section guides you through the essential steps to manipulate these elements in Adobe Illustrator for more dynamic and engaging text.
- Setting Up Perspective Grid: Use the Perspective Grid tool in Illustrator to set up a grid that will guide your text adjustments. This tool helps in accurately aligning text in a 3D space.
- Applying Text to the Grid: With the Perspective Selection Tool, add your text to the grid. You can use this tool to position and scale your text according to the perspective grid, ensuring that it aligns perfectly with your chosen perspective.
- Manipulating Text in 3D Space: Utilize the 3D Extrude & Bevel options to give your text depth. You can adjust the extrude depth to control how far the text appears to come out from or go into the screen.
- Adjusting Perspective: Modify the perspective angle to create the illusion of depth. This step is crucial in making the text appear as though it\"s receding into or popping out of the page.
- Refining with Bevel and Cap: Experiment with different bevel styles and caps to add unique contours and finishes to your 3D text, enhancing its three-dimensional appearance.
- Finalizing with Lighting and Shadow: Proper lighting and shadow effects can add realism to your 3D text. Adjust lighting settings to highlight the text’s edges and create depth-enhancing shadows.
By mastering these steps, you\"ll be able to create text that not only stands out but also interacts harmoniously with your overall design in terms of perspective and depth.

Enhancing with Bevel and Surface Texture
Enhancing your 3D text with bevel and surface texture adds depth and realism. This section walks you through the steps to create visually compelling text effects in Adobe Illustrator.
- Applying Bevel Effects: Start by selecting your text, then navigate to Effect > 3D > Extrude & Bevel. In the dialog box, experiment with different bevel styles like Classic Bevel. Adjust the height to achieve the desired effect.
- Using the Appearance Panel: The Appearance panel is a powerful tool for creating emboss effects. Disable the fill and create new fills, applying different colors and blending modes like Screen and Multiply to achieve a layered emboss effect.
- Adding Surface Textures: Surface textures can be added to give your text a unique look. Experiment with different materials in the 3D effect options, such as Plastic Shading, for a smooth surface, or try other effects for more distinctive textures.
- Refining with Gradients: Gradients can add depth and dimension to your text. Apply linear gradients to the flat parts of your letters and shadows, adjusting the angles and colors to enhance the 3D appearance.
- Finalizing the Effect: After applying the bevel and surface textures, use the Direct Selection Tool to make any necessary adjustments. You can also use the Pathfinder tool to clean up and unite shapes for a cohesive look.
With these techniques, your 3D text will have enhanced depth, realistic bevels, and intriguing surface textures, making it stand out in any design.
_HOOK_
Optimizing Lighting and Shading
Optimizing lighting and shading in your 3D text can greatly enhance its realism and visual impact. This section provides detailed steps to effectively use lighting and shading techniques in Adobe Illustrator.
- Choosing the Right Color: Begin by selecting a mid-value color for your text. This choice is crucial as it affects how the light and shadow play on the text\"s surface.
- Applying 3D Effects: Use the Effect > 3D > Extrude & Bevel option to apply 3D effects to your text. This step is where you start shaping the text into a three-dimensional form.
- Adjusting Lighting: In the 3D Extrude & Bevel options, adjust the lighting settings. You can experiment with the intensity and position of the light sources to highlight the text\"s edges and create dynamic shadows.
- Creating Shadows and Highlights: Use the Offset Path and Pathfinder tools to create layers of shadows and highlights. This helps in giving depth to your text and making it pop.
- Refining Shading Effects: For a more detailed shading effect, duplicate layers of your text and apply different shades. Lighter shades can act as highlights, while darker ones can represent shadows.
- Final Touches: Adjust the position and angle of the shadows and highlights to match the light source in your design. This step is crucial for maintaining consistency and realism in your text.
By following these steps, you can create 3D text in Illustrator that boasts a professional and realistic look with well-optimized lighting and shading.
Using Pre-Made 3D Text Templates
Pre-made 3D text templates in Adobe Illustrator are a quick and efficient way to create professional-looking 3D text designs. They are especially useful for those who may not be familiar with all the nuances of 3D design in Illustrator. Here\"s how you can use these templates:
- Selecting a Suitable Template: Choose a template that aligns with the theme of your project. There are a variety of styles available, such as comic book, retro, cartoon, and more.
- Customization: Once you have chosen a template, you can customize it by adding your own text and modifying the color scheme to fit your design needs.
- Editing and Scaling: These templates are typically fully editable and scalable. You can adjust the size and other aspects of the text without losing quality.
- Application in Projects: Pre-made 3D text templates can be used for various applications, including poster titles, logos, social media graphics, and more.
- Compatibility: Ensure that the template is compatible with your version of Illustrator. Most templates can be easily opened and edited in the software.
- Exploring Different Styles: Don\"t hesitate to experiment with different template styles. This can help you discover unique design perspectives and enhance your creative skills.
By leveraging pre-made 3D text templates, you can significantly reduce design time while still achieving high-quality, creative results.

Adobe Illustrator 3D Text Effect Tutorial
Learn a new skill with our step-by-step tutorial video! Whether you\'re a beginner or a pro, our easy-to-follow instructions will have you mastering the topic in no time. Don\'t miss out on this opportunity to expand your knowledge and become an expert!
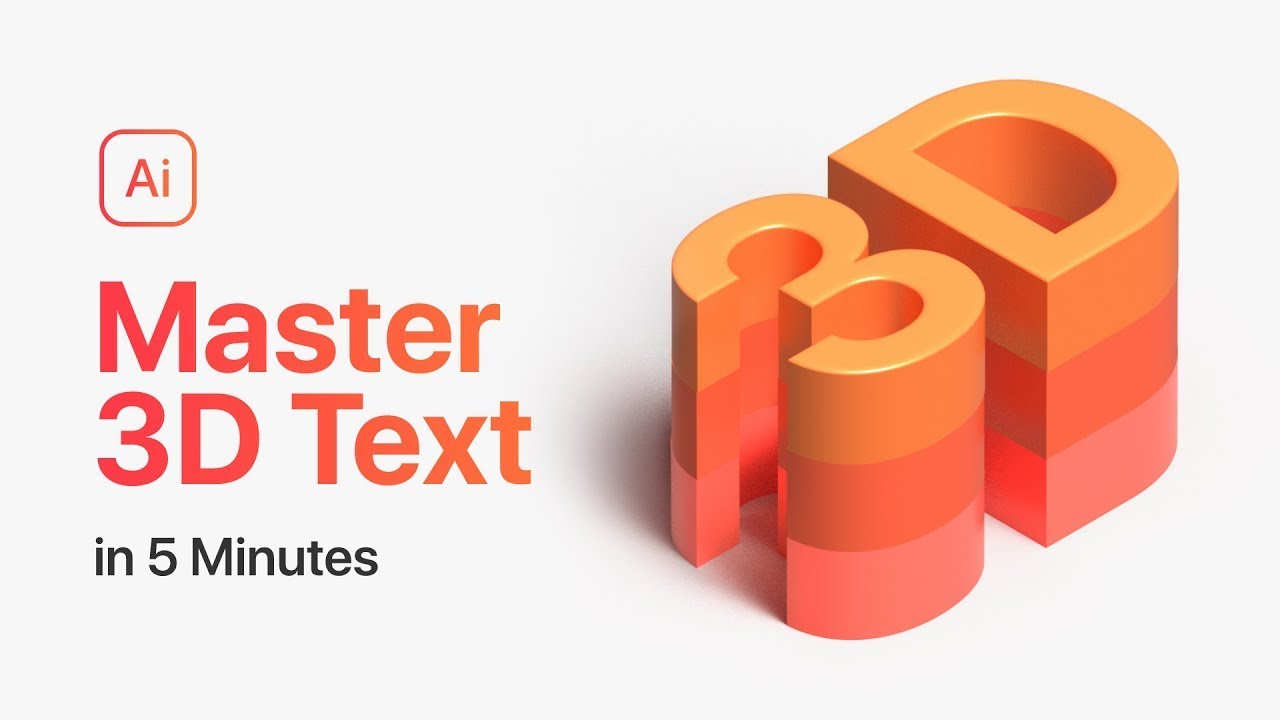
Master 3D Text in Illustrator in 5 Minutes!
Unlock your full potential and become a master in your craft. Our exclusive video reveals the secret techniques used by the masters themselves. Prepare to be inspired and take your skills to the next level. Don\'t wait any longer, watch now and elevate your expertise!
Integrating with Other Adobe Tools
Integrating 3D text from Illustrator into other Adobe tools enhances creative workflows and allows for diverse applications. Here’s how you can achieve seamless integration:
- Exporting to Photoshop: You can export your 3D text as a vector object to Photoshop for further editing, adding effects, or compositing with other images.
- Using with After Effects: For motion graphics or video projects, import your 3D text into After Effects. This allows for dynamic animations or adding the text into video content.
- InDesign Integration: When creating layouts or print materials, you can bring your 3D text into InDesign, preserving its quality and allowing for further layout adjustments.
- Adobe Animate Compatibility: For web or animation projects, Adobe Animate can incorporate your 3D text, providing an avenue for interactive or web-based design.
- Adjustable and Scalable: As vector objects, the 3D text remains editable and scalable across Adobe tools, ensuring consistency in your design projects.
This integration streamlines the design process, making it easy to use 3D text across various media and platforms.
Advanced Techniques: Isometric and Ray Tracing
Delve into the advanced techniques of creating isometric and ray-traced 3D text in Adobe Illustrator. These methods elevate the visual depth and realism of your designs.
- Creating Isometric 3D Text: Begin by choosing your text and font style. Apply the \"3D Extrude & Bevel\" effect, selecting an isometric preset like \"Isometric Right\". Adjust the extrude depth to add dimension.
- Customizing Isometric Settings: Modify the light source and shading in the 3D Extrude & Bevel options to enhance the isometric effect. This step is crucial for adding depth and realism to the text.
- Applying Ray Tracing: For a more refined and realistic look, use the \"Render with Ray Tracing\" feature. This will enhance the 3D text with improved lighting and shadow effects.
- Adjusting Materials and Lighting: In the 3D panel, experiment with different materials and lighting settings to achieve the desired texture and appearance of your 3D text.
- Saving and Reusing Styles: Once you have perfected your isometric text, save the style in the Graphic Styles panel for easy application to other text or objects.
Mastering these techniques in Illustrator allows for the creation of sophisticated 3D text that stands out in any design project.
Practical Applications: Posters, Logos, and More
3D text created in Adobe Illustrator has diverse practical applications across various design fields. Here\"s how you can apply these techniques:
- Logos: Implement 3D text in logo design to add depth and modernity, especially effective for tech, gaming, or entertainment industries.
- Posters and Flyers: Use 3D text for eye-catching event posters, promotional flyers, and advertising materials, enhancing visual appeal and message delivery.
- Branding and Product Labels: Incorporate 3D text into branding projects, including product labels, to make them stand out with an added dimension.
- Social Media: Create engaging social media content using 3D text for covers, posts, and advertisements, enhancing digital presence.
- Custom Merchandise: Apply 3D text designs on merchandise such as T-shirts, mugs, and banners, offering a unique branding opportunity.
- Website Banners and Digital Ads: Utilize 3D text in digital spaces like website banners and online ads to grab viewers\" attention instantly.
- Professional Projects: For a more refined look, 3D text can be customized to suit professional projects such as product badges, signage, or business presentations.
These applications showcase the versatility of 3D text in various design scenarios, from playful and creative to sophisticated and professional.

_HOOK_
READ MORE:
Tips for Exporting and Printing 3D Text
Exporting and printing 3D text in Adobe Illustrator requires careful preparation to ensure the final output looks as intended. Here are some steps and tips to help you through the process:
- Preparation: Adjust the appearance of your 3D text using gradients, bevels, and lighting effects to your satisfaction.
- Printing a Composite: Choose \"File > Print\" and select your printer or choose to print to a file. Ensure the Mode is set to \"Composite\" in the Output settings.
- Handling Multiple Artboards: If you have multiple artboards, decide whether to print them on one page or as individual pages. Adjust the settings in the Print dialog box accordingly.
- Adjusting Print Settings: Use the Print dialog box to set page size, orientation, color separations, and other specifics. Make sure to adjust the perspective and lighting settings if necessary.
- Customizing Artwork Position: In the Print dialog box, adjust the position of the artwork on the page as needed. You can drag the artwork in the preview image or use the Placement icon.
- Auto-Rotate for Printing: Enable the Auto-Rotate option in the Print dialog box to automatically adjust the orientation of artboards for printing.
- Exporting to Other Formats: Remember that Illustrator allows copying and pasting text as a vector object into other Adobe Creative Suite software for further editing or scaling without quality loss.
By following these steps, your 3D text will maintain its quality and design integrity whether it is printed or used in digital formats.
Master the art of 3D text in Adobe Illustrator and bring your designs to life with depth, realism, and creativity. Explore these techniques to elevate your graphic projects to the next level!