Topic adobe illustrator examples: Explore Adobe Illustrator Examples and unlock the world of high-end design, where creativity meets precision in every vector and curve.
Table of Content
- What are some examples of Adobe Illustrator projects or designs?
- Introduction to Adobe Illustrator\"s Versatile Tools
- Essential Illustrator Tools: Pen, Brush, and Shapes
- Advanced Techniques: 3D Effects and Text Manipulation
- Creating Vector Art: From Basic Shapes to Complex Illustrations
- Text Effects in Illustrator: Warp, Curve, and Custom Fonts
- YOUTUBE: Adobe Illustrator Orange Tutorial - Beginner\'s 1 Minute Tutorial
- Design Mastery: Creating Logos, Icons, and Line Art
- Character and Portrait Design in Illustrator
- Typography and Styling: Transforming Text into Art
- Mastering Color and Gradient for Vibrant Illustrations
- Exporting and Sharing Your Illustrator Projects
What are some examples of Adobe Illustrator projects or designs?
Some examples of Adobe Illustrator projects or designs are:
- Logo designs
- Illustrations
- Infographics
- Poster designs
- Typography designs
- Vector art
In these projects, Adobe Illustrator is used to create and manipulate vector graphics. Here\'s a step-by-step process for creating a logo design using Adobe Illustrator:
- Start by brainstorming and sketching out ideas for your logo.
- Open Adobe Illustrator and create a new document.
- Use the shape tools and pen tool to create the basic shapes and elements of your logo.
- Experiment with different colors and gradients to add depth and visual interest to your design.
- Add text to your logo using the type tool. Customize the font, size, and spacing to achieve the desired look.
- Apply any special effects or filters to further enhance your logo design.
- Save your completed logo as a vector file format, such as AI or EPS, for versatility and scalability.
These are just a few examples of the projects you can create using Adobe Illustrator. The software offers a wide range of tools and features that allow for endless possibilities in design and illustration.

READ MORE:
Introduction to Adobe Illustrator\"s Versatile Tools
Adobe Illustrator offers a plethora of tools that are instrumental in creating stunning graphics and illustrations. From the basic Rectangle Tool, often used in conjunction with Pathfinder for creating complex shapes, to the Direct Selection Tool for fine-tuning details, Illustrator equips designers with everything needed to bring their creative visions to life. Tutorials covering character art emphasize control over vector paths, ensuring smooth angles and meticulously planned stages, from sketch to final vector form. These tutorials highlight color adjustments, depth, and composition, ensuring a comprehensive understanding of the design process.
Diving deeper, Illustrator allows for the creation of dynamic visual elements like vector smoke using gradient meshes, the Transparency panel, and the Warp Tool. These tools provide an easy-to-grasp approach for beginners while still demanding dedication for refined results. Additionally, Illustrator\"s pencil pattern brush tutorial introduces users to basic tools and shapes, teaching them how to save patterns and create unique text effects with custom brushes.
For those looking to add a more organic touch to their digital artwork, tutorials on creating retro isometric artwork and lush, glossy vector images are invaluable. They guide you through the process of giving clean, precise shapes a more natural, textured appearance without compromising the geometrical accuracy that vector art is known for. These tutorials also cover essential techniques like modifying shapes to fit an isometric projection and using basic color palettes alongside blur effects to create depth and character in your illustrations.
Illustrator\"s capabilities extend to designing specific items like ice skates, creating retro text effects reminiscent of vintage packaging, and even making complex timeline infographics. These tutorials not only introduce the tools and features of Illustrator but also dive into practical applications, providing step-by-step guidance to master the software\"s capabilities fully.
Whether you\"re a beginner looking to grasp the basics or an experienced designer aiming to refine your skills, Adobe Illustrator\"s versatile tools and comprehensive tutorials offer all you need to explore the realms of your creativity and bring your most ambitious design projects to fruition.

Essential Illustrator Tools: Pen, Brush, and Shapes
Adobe Illustrator is renowned for its precision and versatility, largely due to its core tools: the Pen, Brush, and Shape tools. Each tool plays a pivotal role in vector graphic creation, allowing designers to turn simple ideas into intricate designs.
- Pen Tool: Known for its precision, the Pen Tool is indispensable for creating complex paths with its anchor points and handles. It allows for the drawing of straight lines and curves, enabling designers to construct detailed and scalable vector shapes. The Pen Tool is integral for tracing artworks, outlining shapes, and designing intricate illustrations.
- Brush Tool: Illustrator\"s Brush Tool offers a more freeform approach to drawing, simulating a natural hand-drawn feel. It provides various brush types — Calligraphic, Scatter, Art, Pattern, and Bristle — each with its unique effect, allowing for a range of textures and styles. Designers utilize the Brush Tool for creating organic shapes, sketch-like lines, and adding artistic touches to their work.
- Shape Tools: The Shape Tools are the foundation of vector design in Illustrator. They provide simple geometric shapes — rectangles, ellipses, polygons, and stars — that can be combined and modified to form complex designs. With these tools, designers can quickly construct icons, logos, and other vector graphics. The ability to adjust corners, convert shapes to paths, and combine them using the Pathfinder panel makes the Shape Tools incredibly powerful and flexible.
Mastering these tools is crucial for any designer aspiring to excel in Illustrator. The Pen Tool\"s precision, the Brush Tool\"s organic feel, and the versatility of the Shape Tools together form the bedrock of vector graphic design, allowing for endless creativity and sophisticated artworks.

Advanced Techniques: 3D Effects and Text Manipulation
Adobe Illustrator is not just about flat designs. With its advanced 3D tools and text manipulation capabilities, it opens up a new dimension of creativity. The comprehensive suite of tools allows designers to add depth and perspective to their artwork, transforming simple 2D shapes into realistic 3D objects.
- 3D Tools: Illustrator\"s 3D tools like Extrude & Bevel, Revolve, and Rotate provide a robust set of options for adding depth and dimension to your designs. From creating simple 3D shapes to complex scenes with perspective, these tools make it possible to turn any 2D shape into a detailed 3D illustration. You can adjust depth, apply bevels, or create intricate rotations, controlling the lighting and shading to add a layer of realism to your artwork.
- Text Effects: Illustrator\"s text manipulation capabilities are equally powerful. You can curve, warp, or apply various effects to text, creating visually compelling typographic artwork. The tutorials available guide you through the process of putting text on a path, warping it to fit certain shapes, or creating intricate text effects using the Blend Tool. These tools and techniques enable designers to integrate text seamlessly into their designs, making it an integral part of the artwork rather than just an add-on.
Mastering these advanced techniques in Adobe Illustrator can significantly elevate your design capabilities. From giving flat designs a 3D facelift to integrating text into your illustrations in creative ways, these skills are essential for any designer looking to push the boundaries of vector graphics and create truly engaging and dynamic artworks.

Creating Vector Art: From Basic Shapes to Complex Illustrations
The journey of creating vector art in Adobe Illustrator begins with understanding the fundamental building blocks: basic shapes. These shapes serve as the foundation for intricate illustrations, allowing designers to craft everything from simple icons to detailed artwork.
- Starting with Basic Shapes: Illustrator\"s arsenal of shapes, including rectangles, circles, polygons, and stars, are the starting points for any vector art. Using these basic shapes, designers can manipulate, combine, and transform them into more complex forms using tools like Pathfinder, Align, and Arrange.
- Pathfinder for Complexity: To create more sophisticated graphics, designers utilize the Pathfinder tool. This tool allows for combining multiple shapes in ways that create new, complex forms. Whether it\"s uniting shapes for a seamless object or subtracting one shape from another to create a hollow space, Pathfinder is integral to evolving basic shapes into intricate designs.
- Adding Details with Brushes and Effects: Once the foundational shapes are set, details are added using Illustrator\"s versatile brushes and effects. Brushes can simulate various textures and strokes, adding depth and character to the artwork. Effects like gradients, shadows, and glows can bring illustrations to life, giving them a three-dimensional feel even within the two-dimensional space of vector art.
- Refining with Anchor Points and Handles: Precision is key in vector illustration. Illustrator\"s direct selection tool allows designers to tweak and refine their artwork by adjusting anchor points and handles. This enables the creation of smooth curves, sharp corners, and precise alignments, ensuring every element of the illustration is perfectly placed.
Through a blend of basic shapes, intricate Pathfinder operations, detailed brushwork, and precise anchor point adjustments, Adobe Illustrator empowers designers to transform simple concepts into complex, compelling vector artwork. The transition from basic shapes to complex illustrations is not just a process but an artistic journey, enabling designers to bring their most vivid imaginations to life in a vector format.
_HOOK_
Text Effects in Illustrator: Warp, Curve, and Custom Fonts
Adobe Illustrator is a powerful tool for creating dynamic text effects that can elevate any design. Whether you’re designing a logo, banner, or custom artwork, Illustrator’s text tools allow for a wide range of artistic expressions.
- Warp Text: The Warp Text feature in Illustrator provides a set of predefined warp shapes like arcs, bulges, shells, and more. This feature allows designers to bend and stretch text to fit into different shapes and forms, enabling the creation of dynamic and eye-catching typography that stands out.
- Curve Text with Paths: Illustrator allows text to be laid on any custom path, be it a circle, curve, or a free-form line. This feature is particularly useful for logo design and artistic compositions where text needs to follow a specific trajectory or shape, providing a seamless blend of text and design elements.
- Creating Custom Fonts: Beyond manipulating existing fonts, Illustrator gives the power to create custom fonts. Designers can start with a basic letterform and then use Illustrator’s vast array of tools to add unique touches, transforming standard fonts into personalized works of art.
- Typographical Embellishments: With Illustrator, the possibilities for embellishing text are limitless. From gradient fills and pattern strokes to shadow effects and stroke adjustments, each tool offers a way to make text pop and resonate with the artwork’s overall aesthetic.
Whether it\"s through warping, curving, or customizing fonts, Illustrator’s text effects are indispensable for designers looking to make a statement with typography. With these tools, text transcends its basic form, becoming an integral and compelling part of the visual narrative.
Adobe Illustrator Orange Tutorial - Beginner\'s 1 Minute Tutorial
Tutorial - Unlock your potential with this comprehensive tutorial! Whether you\'re a beginner or looking to improve your skills, this step-by-step guide will take you from novice to expert in no time. Don\'t miss out on this chance to level up your knowledge and become a pro in no time!
5 Essential Illustrator Tips You MUST Know! - With Examples
Tips - Get ready for success with these game-changing tips! Packed with invaluable advice and strategies, this video will revolutionize the way you approach any task. From productivity hacks to life-changing shortcuts, this is your ultimate guide to achieving your goals faster and smarter. Don\'t miss out on these life-changing tips that will supercharge your progress!
Design Mastery: Creating Logos, Icons, and Line Art
Adobe Illustrator is a premier tool for designers aiming to craft memorable logos, distinctive icons, and intricate line art. This section unveils the process and creative techniques behind transforming simple ideas into impactful visual identities.
- Logo Design: Illustrator offers an array of tools for logo creation, enabling designers to construct logos that are not only visually appealing but also conceptually strong. Starting with a basic concept, designers can use shape tools, the pen tool, and custom typography to craft logos that effectively represent a brand’s identity. Attention to details such as color theory, scalability, and simplicity ensures that logos are versatile across various mediums.
- Icon Creation: Icons are pivotal in user interface design, and Illustrator provides the precision required to create clean, readable icons. Utilizing grid systems, designers can ensure consistency across a set of icons. Tools like the shape builder and align panels assist in creating icons that are both aesthetically pleasing and functionally clear.
- Line Art Mastery: Line art in Illustrator is about balancing simplicity with complexity. Whether it’s through the use of the pen tool for crisp, vector lines or the brush tool for more organic strokes, Illustrator offers the flexibility to create line art that ranges from minimalist to intricate. Mastery in line art involves understanding line weight variations, stroke consistency, and the effective use of negative space.
Achieving design mastery in Illustrator for logos, icons, and line art requires a blend of creativity, technical skill, and an understanding of design principles. These elements, when combined, allow designers to create visual elements that are not only visually captivating but also deeply resonant with their intended audience.

Character and Portrait Design in Illustrator
Character and portrait design in Adobe Illustrator is a journey of bringing personalities to life through vector art. This meticulous process involves understanding the nuances of character features and translating them into digital illustrations with depth and emotion.
- Starting with a Sketch: The design process often begins with a simple sketch. This rough draft serves as the blueprint for your character or portrait. It’s where you decide on the pose, expression, and overall mood of your character, setting the stage for the detailed work to come.
- Building the Base: Using Illustrator’s shape tools, you start by building the basic forms of your character. This could involve creating the head, body, limbs, and other elemental parts using circles, rectangles, and other shapes, providing a solid foundation for more intricate details.
- Adding Details and Personality: Once the base is set, it’s time to infuse your character with personality. This involves adding facial features, clothing, and accessories. Using the pen tool and custom brushes, you can add the finer details that make your character unique and relatable.
- Refining with Color and Shading: The right color palette and shading bring your character to life. Selecting harmonious colors and applying gradients and shadows add depth and dimension to your illustration, making it more dynamic and vibrant.
- Final Touches: The final step involves revisiting every part of the illustration for any refinements. Adjusting curves, smoothing out lines, and perhaps adding a few final details ensure that your character or portrait is polished and ready to make an impact.
Whether you’re crafting a whimsical cartoon character or a realistic portrait, Illustrator’s tools and features provide the flexibility and precision needed for character and portrait design. Each step in the process, from the initial sketch to the final touches, is a crucial part of creating a compelling and memorable illustration.

Typography and Styling: Transforming Text into Art
In Adobe Illustrator, typography goes beyond mere text; it\"s an art form in itself. This section explores how Illustrator transforms mundane strings of text into captivating artistic expressions, using a variety of tools and techniques.
- Exploring Fonts and Typefaces: The journey begins with choosing the right font or typeface that resonates with the design\"s overall mood. Illustrator’s vast library allows designers to experiment with countless options, ensuring the text not only conveys a message but also complements the visual aesthetics of the artwork.
- Artistic Text Effects: Illustrator provides an array of tools to apply artistic effects to text. Designers can warp, stretch, and mold text into various shapes using the Warp Text tool, or create custom paths for text to follow, making it an integral part of the design’s composition.
- Typographic Embellishments: Attention to detail can elevate text from simple to sophisticated. This can include adding drop shadows, strokes, or gradient fills, allowing each letter to stand out and contribute to the artwork’s depth and texture.
- Creating Custom Typography: For those looking to take their designs a step further, Illustrator offers the ability to create custom typography. Designers can manipulate anchor points and paths to reshape letters, introducing a unique, custom-crafted feel to their typography.
Adobe Illustrator turns typography into a playground for designers. By blending creativity with the software\"s robust capabilities, text transcends its traditional role, becoming a central, dynamic element in any artistic composition.
Mastering Color and Gradient for Vibrant Illustrations
Color and gradient are essential elements in creating vibrant illustrations in Adobe Illustrator. Mastering their use can transform a flat design into a rich, multi-dimensional artwork that catches the eye and communicates emotions effectively.
- Understanding Color Theory: The first step in mastering color is understanding color theory. Knowledge of color harmony, contrasts, and color psychology helps in choosing palettes that evoke the desired response from the viewer. Illustrator\"s Color Guide panel can be a powerful tool in this process, offering color scheme suggestions based on your chosen base color.
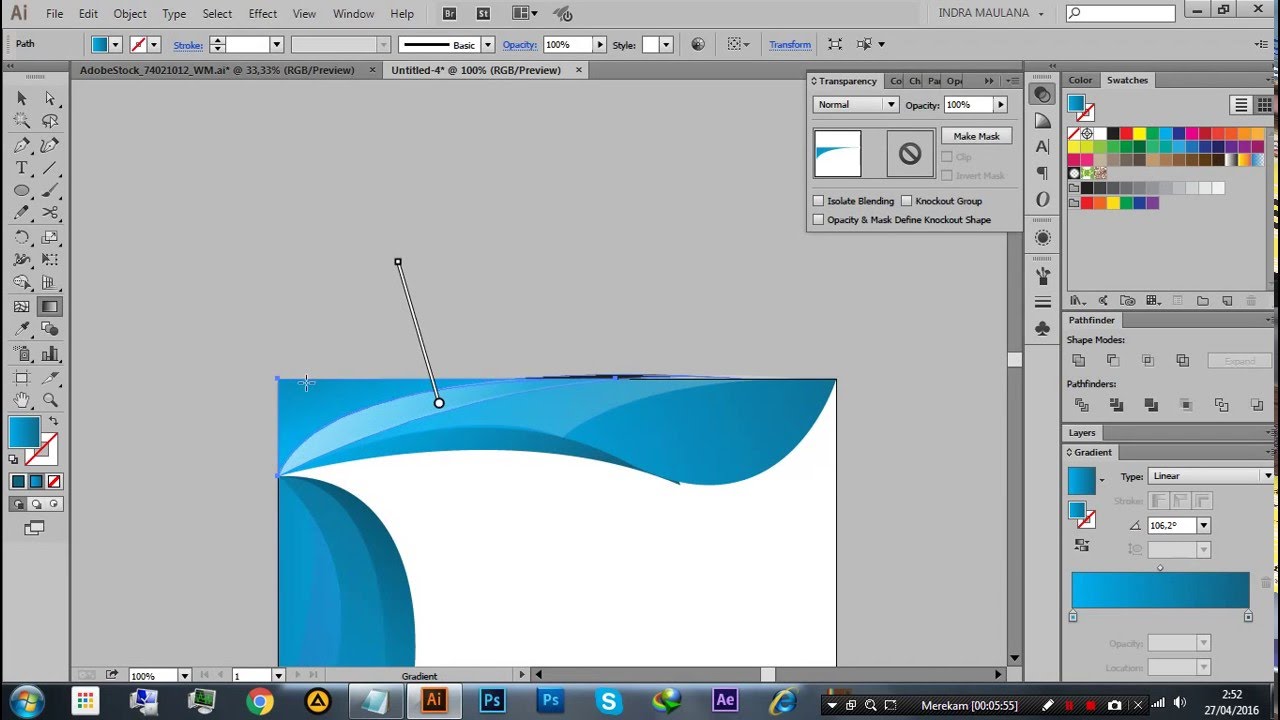
- Creating and Applying Gradients: Gradients can add depth, volume, and energy to illustrations. Illustrator\"s Gradient Tool allows for smooth transitions between colors, creating a sense of realism or adding a dynamic, abstract quality to your designs. Understanding how to control gradient type, angle, and color stops is key to creating effective gradient fills.
- Using Global Colors for Consistency: For complex illustrations involving multiple elements and layers, maintaining color consistency is crucial. Illustrator\"s Global Colors feature allows any color change to be applied throughout the entire artwork, ensuring a cohesive look even when the color scheme is adjusted.
- Experimenting with Blending Modes: Blending modes in Illustrator offer another level of depth to your illustrations. They allow for complex color interactions between layers, adding texture, shadows, highlights, and nuanced color blending that can make your illustrations stand out.
Whether you are creating a minimalistic design or a complex, layered illustration, understanding and applying color and gradient principles in Illustrator can dramatically enhance the visual appeal of your artwork, turning it into a compelling visual story.

_HOOK_
READ MORE:
Exporting and Sharing Your Illustrator Projects
Completing a project in Adobe Illustrator is only half the battle. The final step is to share your masterpiece with the world. Whether it’s for print, web, or other media, understanding the exporting and sharing process is crucial to ensure your artwork is seen in its best light.
- Choosing the Right Format: Illustrator supports a variety of file formats. The choice depends on how the artwork will be used. Formats like AI (native Illustrator format), PDF, and EPS are perfect for print, while PNG, JPG, and SVG are more suited for web and digital platforms. Each format has its own benefits and settings that can be adjusted to match your project\"s needs.
- Optimizing for Web and Screen: When preparing artwork for the web or digital screens, it\"s essential to consider file size and resolution. Tools like \"Save for Web\" in Illustrator help you balance quality and file size, ensuring fast loading times without compromising the visual quality.
- Preparing for Print: Print projects require high resolution and specific color settings (like CMYK). Utilize Illustrator’s capability to work in different color modes and its precision in setting document bleeds and margins to ensure that the final print matches your vision.
- Sharing for Collaboration: Sometimes, projects are collaborative. Illustrator\"s integration with cloud services like Adobe Creative Cloud allows you to share your projects with team members or clients, making feedback and iterations a seamless process.
Exporting and sharing your Illustrator projects effectively means understanding the requirements of the medium where your artwork will be displayed. Whether it\"s ensuring crystal-clear print quality or optimizing for the web, Illustrator provides the tools you need to finish and share your projects confidently.
Embark on your creative journey with Adobe Illustrator, where every tool and feature brings you closer to mastering the art of vector illustrations. Let these examples inspire and guide you towards crafting your own vivid, unforgettable designs.