Topic adobe illustrator guide: Welcome to the ultimate Adobe Illustrator Guide, where creativity meets skill. This comprehensive journey will unlock the secrets of Illustrator, transforming beginners into design mavens in the vibrant world of digital art.
Table of Content
- How to get started with Adobe Illustrator and find a user guide?
- Getting Started with Adobe Illustrator
- Understanding the Illustrator Interface
- Basic Tools and Their Uses in Illustrator
- Creating and Managing Artboards
- Working with Shapes and Paths
- Mastering the Pen Tool
- Using Color and Gradients Effectively
- YOUTUBE: Adobe Illustrator for Beginners: Get Started in 10 Minutes
- Applying and Modifying Text
- Layer Management in Illustrator
- Advanced Techniques: Masking and Compound Paths
- Integrating Illustrator with Other Adobe Applications
- Best Practices for Exporting and Saving Files
- Exploring Creative Projects and Tutorials
- Resources for Continued Learning and Support
How to get started with Adobe Illustrator and find a user guide?
To get started with Adobe Illustrator and find a user guide, follow these steps:
- Open your preferred web browser and go to the Adobe Illustrator website.
- Click on the \"Help Center\" option.
- Scroll down on the page and look for the \"User Guide\" section.
- Click on the \"User Guide\" link to access the detailed documentation.
- In the user guide, you will find a wealth of information and resources to help you understand Illustrator\'s features and functionality.
- You can navigate through the user guide using the table of contents or search for specific topics using the search bar.
- Make use of the tutorials provided to learn and master different techniques and tools in Adobe Illustrator.

READ MORE:
Getting Started with Adobe Illustrator
Embark on your Adobe Illustrator journey with these initial steps, guiding you from setup to creating your first artwork.
- Understanding the Workspace:
- Get acquainted with the Illustrator interface, including the toolbars, panels, and workspace. Learn how to navigate and customize the workspace for your comfort and efficiency.
- Setting Up a New Document:
- Learn how to create a new document. Understand document settings like size, color mode, and resolution, which are crucial for your project\"s purpose, whether it\"s for print or digital.
- Basic Tools and Techniques:
- Explore essential tools such as the Selection tool, Pen tool, Shape tools, and Text tool. Discover how to create basic shapes, lines, and text, forming the foundation of your designs.
- Working with Color:
- Understand color modes and how to apply colors using swatches. Experiment with different color panels and gradients to bring vibrancy to your artwork.
- Layers and Organization:
- Organize your artwork efficiently using layers. Learn to create, hide, lock, and manage layers, which is key to handling complex designs.
- Basic Shapes and Paths:
- Start creating with basic shapes and paths. Understand how to combine, align, and transform these elements to form more complex designs.
- Exporting Your Work:
- Learn the various formats for exporting your artwork. Understand when to use formats like JPEG, PNG, SVG, and PDF based on the needs of your project.
- Additional Resources and Tutorials:
- Access additional online resources and tutorials for continuous learning. These resources can provide further insights and project ideas to enhance your skills.
Understanding the Illustrator Interface
Mastering Adobe Illustrator begins with a thorough understanding of its interface. This section breaks down key components and functionalities to help you navigate and utilize Illustrator efficiently.
- Workspace Overview:
- Learn about the main areas of the Illustrator workspace, including the toolbar, menu bar, panels, and artboard. Familiarize yourself with the default workspace and how to customize it according to your workflow.
- Toolbars and Tools:
- Explore the various tools available in Illustrator, such as the Selection tool, Pen tool, Shape tools, and more. Understand the functionality of each tool and how they contribute to different aspects of design.
- Using Panels:
- Discover how to work with panels like Layers, Color, Paths, and Appearance, which are essential for managing and modifying elements within your artwork.
- Navigating Artboards:
- Understand how to create, manage, and navigate multiple artboards within a single document. Learn how artboards can be used for different pages or design variations.
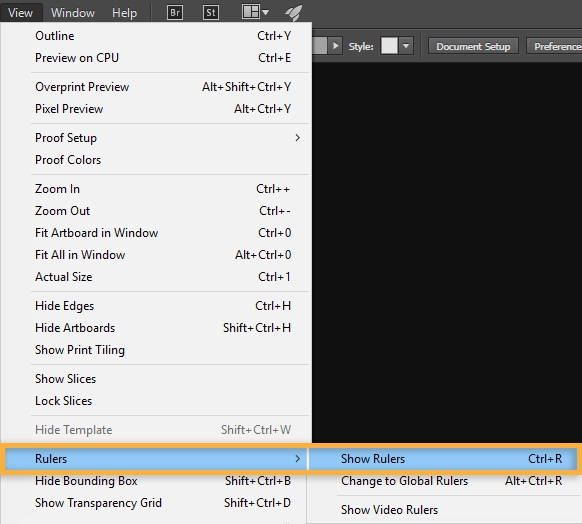
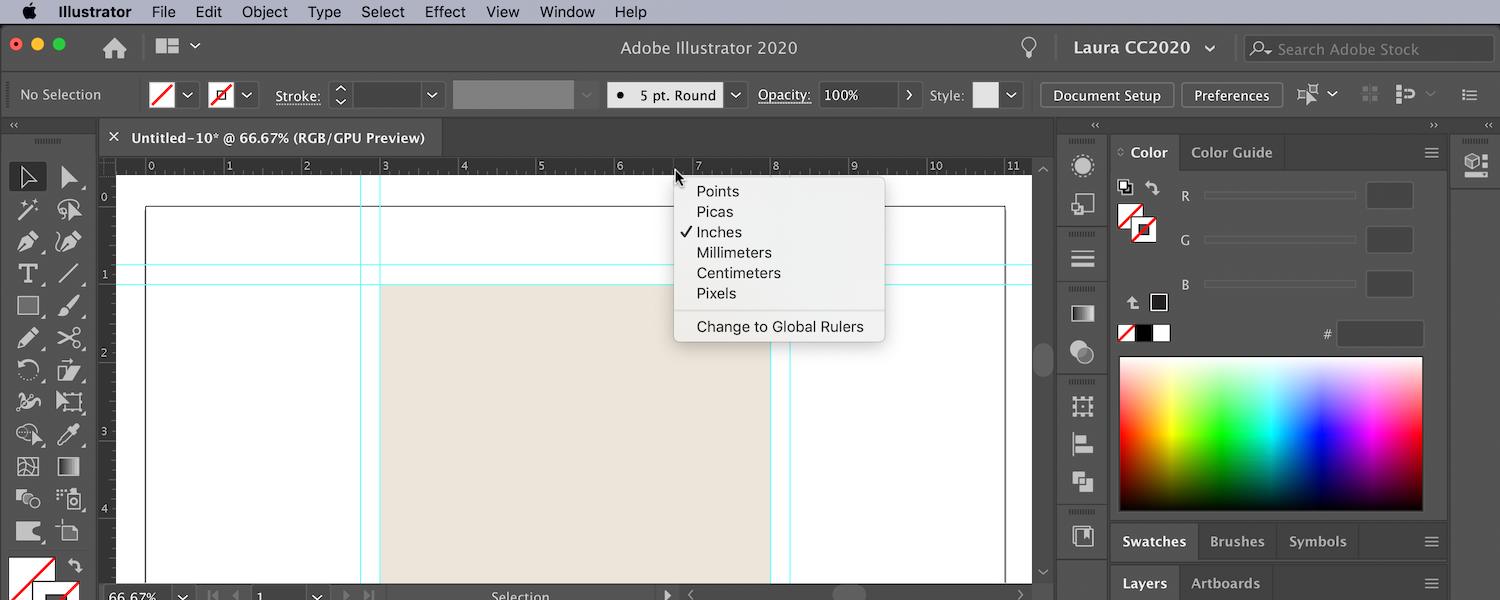
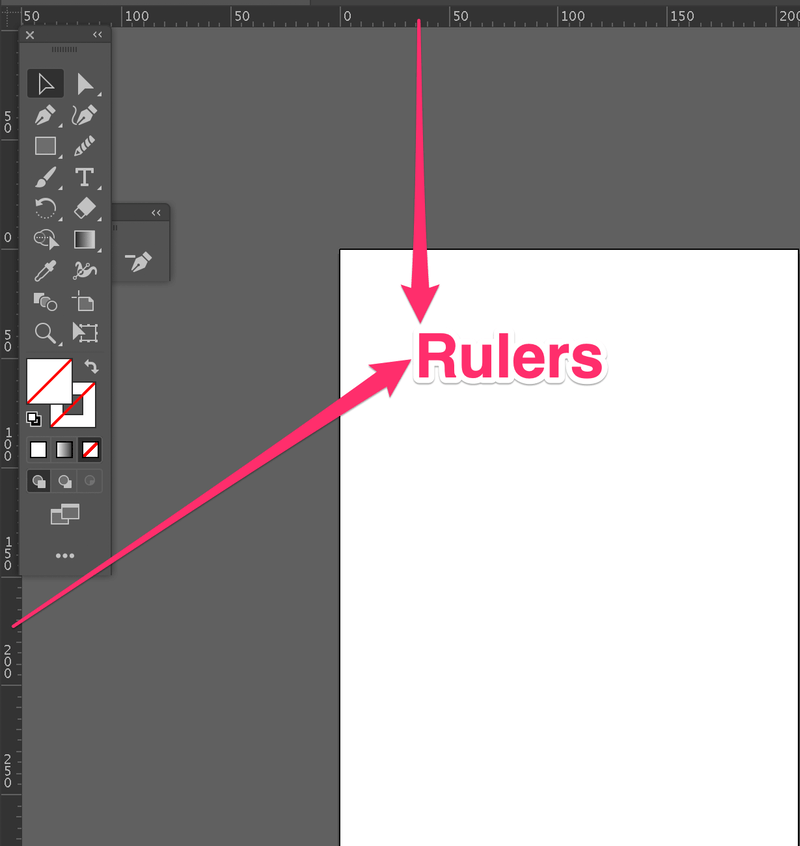
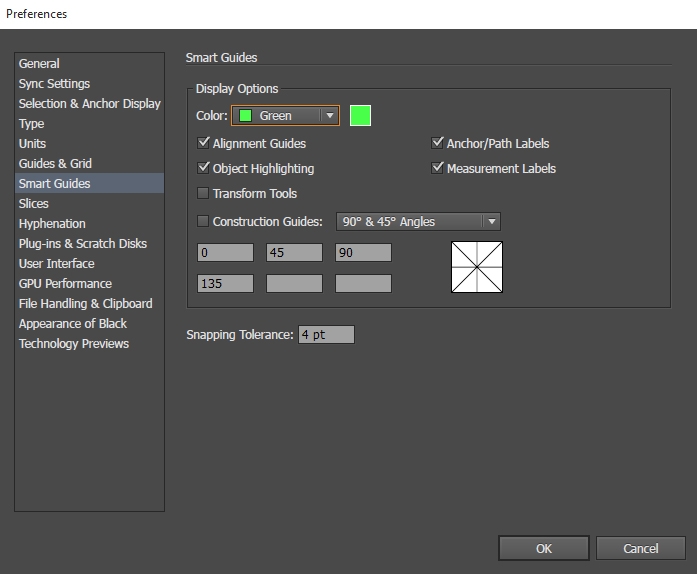
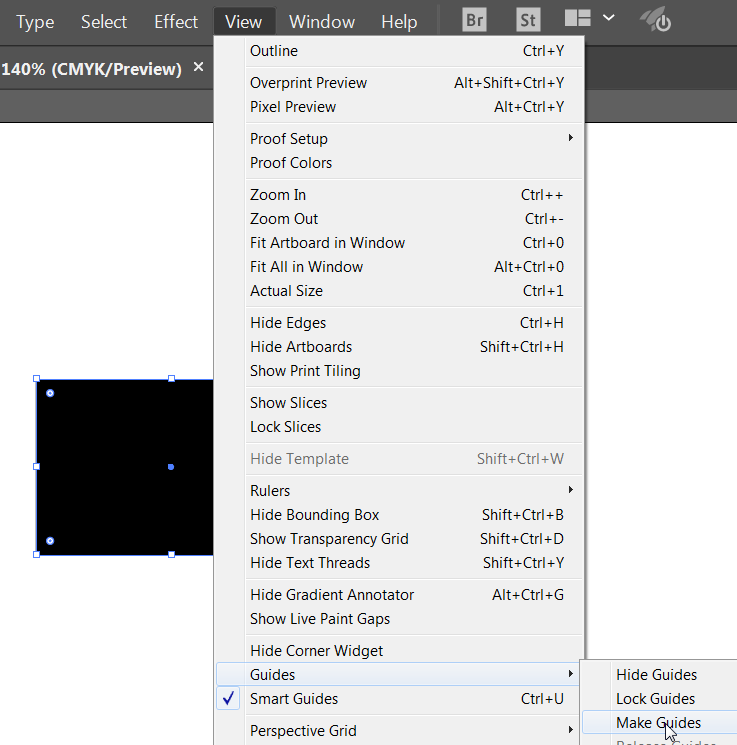
- Working with Rulers, Guides, and Grids:
- Learn how to use rulers for precise measurements, guides for accurate alignment, and grids for balanced compositions. Understand how to toggle these elements on and off and customize them to suit your design needs.
- Customizing the Interface:
- Find out how to customize the Illustrator interface to streamline your workflow. This includes rearranging panels, creating custom toolbars, and saving your workspace settings for future use.
- Keyboard Shortcuts:
- Keyboard shortcuts are vital for efficient work in Illustrator. Get to know commonly used shortcuts to speed up your design process.
Basic Tools and Their Uses in Illustrator
Adobe Illustrator is equipped with a variety of tools to help you create detailed and complex designs. Here\"s an overview of some basic tools and how they can be used effectively:
- Selection Tool (V):
- Used for selecting and moving objects on your artboard. You can also use it to resize and rotate elements.
- Direct Selection Tool (A):
- This tool allows you to select and manipulate individual anchor points and paths, giving you precise control over your shapes.
- Pen Tool (P):
- Essential for drawing precise paths and curves. It\"s used for creating custom shapes and intricate designs.
- Shape Tools:
- Includes Rectangle, Ellipse, Polygon, and Star tools, which are used for creating basic geometric shapes quickly and easily.
- Type Tool (T):
- Allows you to add and edit text. It\"s versatile for creating various text effects, such as text on a path or within a shape.
- Brush Tool (B):
- Used for freehand drawing, creating calligraphic, scatter, art, and pattern brushes to bring artwork to life.
- Gradient Tool (G):
- Enables you to create and modify gradients, blending colors smoothly for backgrounds, shapes, and other elements.
- Artboard Tool:
- Allows you to create multiple artboards within a single document, ideal for multi-page documents and different versions of a design.
- Zoom Tool:
- Used to zoom in and out of your artwork, aiding in detailed work and overall view of the project.

Creating and Managing Artboards
Artboards in Adobe Illustrator are essential for organizing your designs, especially when working on projects with multiple pages or elements. Understanding how to effectively create and manage artboards will streamline your design process.
- Creating a New Artboard:
- Start by opening a new document. You can choose from a variety of presets or define custom dimensions. Once your document is open, use the Artboard Tool to create additional artboards. You can specify the size and orientation for each artboard.
- Adjusting Artboard Size:
- Select the Artboard Tool and click on an artboard. Drag the edges to resize or enter specific dimensions in the control panel. This allows precise control over the layout and size of your design space.
- Organizing Multiple Artboards:
- For projects with multiple artboards, organizing them is key. Align and distribute artboards using the Align panel for a tidy workspace. Remember, each artboard can represent a different page, section, or variant of your design.
- Navigating Between Artboards:
- Use the Artboards panel to quickly navigate between different artboards. This panel lists all artboards in your document and allows you to rename and reorder them as needed.
- Exporting Artboards:
- When your design is complete, you can export artboards as individual files or as a series. Choose the appropriate format and settings for your final output, whether it’s for print, web, or other mediums.
By mastering artboards, you can effectively manage complex projects, ensuring an organized and efficient design process.
_HOOK_
Working with Shapes and Paths
Shapes and paths are foundational elements in Adobe Illustrator, used to create everything from simple graphics to complex illustrations. Here\"s a guide to understanding and utilizing these tools effectively:
- Creating Basic Shapes:
- Illustrator offers a variety of shape tools like Rectangle, Ellipse, and Polygon. These can be accessed from the toolbar and used to draw basic shapes on your artboard. You can modify these shapes by changing their size, color, and other properties.
- Using the Pen Tool:
- The Pen Tool is a powerful feature for drawing custom paths and shapes. It allows you to create straight lines or curves by placing anchor points. You can adjust these points to modify the shape of your path.
- Combining Shapes:
- Illustrator allows you to combine multiple shapes in various ways using the Pathfinder panel. You can unite, subtract, intersect, and exclude shapes to create complex designs.
- Working with the Stroke Panel:
- When you create paths, the Stroke panel provides options to adjust the width, style, and alignment of the path\"s stroke. This is essential for defining the look and feel of your lines and shapes.
- Converting Shapes to Paths:
- You can convert shapes to paths for more detailed editing. This allows you to manipulate individual anchor points and segments for precise control over your design.
- Using Layers for Organization:
- As your design becomes more complex, using layers can help organize your shapes and paths. This makes editing specific elements of your design more manageable.
Understanding shapes and paths is crucial for creating detailed and intricate designs in Illustrator. With practice, these tools offer endless possibilities for creativity.
Mastering the Pen Tool
The Pen Tool is a cornerstone of Adobe Illustrator, known for its versatility in creating precise and detailed paths. Mastering it is crucial for any Illustrator user. Here’s how you can make the most of the Pen Tool:
- Understanding Anchor Points and Paths:
- Begin by learning how to create straight and curved paths. Click to add anchor points and drag to shape curves. Each click creates a new segment of your path.
- Creating Straight Lines:
- Click on the artboard to create the start point and then click again where you want the line to end. For perfectly horizontal or vertical lines, hold down the Shift key while clicking.
- Drawing Curves:
- Click and drag to create a curve. The length and angle of the drag determine the shape of the curve. Practice creating ‘S’ and ‘C’ shaped curves to understand the behavior of bezier handles.
- Modifying Anchor Points:
- Use the Direct Selection Tool to adjust existing anchor points and handles. This is key to refining your paths and achieving the exact shape you want.
- Closing Paths:
- To close a path, bring the Pen Tool back to the starting anchor point. A small circle appears next to the Pen Tool cursor indicating that the path will be closed.
- Combining Paths:
- Once you\"ve created multiple paths, you can combine them to create complex shapes. Use the Pathfinder tool to merge, subtract, intersect, or exclude paths.
- Practicing with Basic Shapes:
- Begin by tracing simple shapes to get comfortable with the Pen Tool. Gradually move to more complex forms as your skill improves.
Practice is key to mastering the Pen Tool. With time and experience, you’ll be able to create intricate designs and artwork in Illustrator with ease.

Using Color and Gradients Effectively
Colors and gradients play a vital role in Adobe Illustrator to enhance the visual appeal of designs. Understanding how to use them effectively can significantly impact your artwork.
- Choosing Colors:
- Start by selecting colors that align with your design\"s purpose. Use the Color Picker or Color Panel to choose colors. For brand consistency, use exact color codes like RGB, CMYK, or HEX.
- Using Color Swatches:
- Save frequently used colors to Swatches for easy access. This is particularly useful for maintaining color consistency across your designs.
- Creating Color Harmonies:
- Use Adobe Color or the Color Guide panel to create and experiment with color harmonies and themes, which can help in establishing a cohesive color palette.
- Applying Gradients:
- Gradients can add depth and dimension to your work. Use the Gradient Tool to apply linear or radial gradients, and adjust the colors and positions of the gradient stops for the desired effect.
- Customizing Gradients:
- Beyond basic gradients, explore options like creating freeform gradients, which allow for more complex and nuanced color transitions within your designs.
- Using the Color Guide for Inspiration:
- If you’re seeking color inspiration, the Color Guide panel can suggest harmonious color combinations based on your current selection.
Effective use of colors and gradients can bring your Illustrator projects to life, making them more engaging and professional.

Adobe Illustrator for Beginners: Get Started in 10 Minutes
Calling all beginners! If you\'ve always dreamt of diving into the world of art and design but didn\'t know where to start, this video is perfect for you. Discover the fundamentals of illustration in an easy-to-understand manner, as we break down the basics and provide you with step-by-step guidance. Get ready to embark on your artistic journey today!
Applying and Modifying Text
Text is a crucial component in design, and Adobe Illustrator offers robust tools to apply and modify text for impactful visual communication. Here’s a guide to effectively using text in your Illustrator projects:
- Adding Text:
- Use the Type Tool to add text to your artwork. You can create point text for headlines or click and drag to create area text for paragraphs.
- Formatting Text:
- Adjust the font, size, alignment, and color of your text using the Character panel. For paragraph text, use the Paragraph panel to adjust alignment, indentation, and spacing.
- Working with Type on a Path:
- Create dynamic text effects by typing along a path. Use the Type on a Path Tool to make your text follow the outline of any shape or path.
- Creating Text Styles:
- For consistent formatting across your document, use Character Styles and Paragraph Styles. This allows you to quickly apply the same text attributes to different text objects.
- Outlining Text:
- To convert text into a vector shape, right-click the text and select \"Create Outlines\". This is useful for logos or designs that require scalable text without losing quality.
- Advanced Text Effects:
- Explore effects like drop shadows, warps, and 3D effects to add depth and dimension to your text. These effects can be found under the Effect menu.
By mastering these text tools and techniques in Illustrator, you can enhance the readability and aesthetic appeal of your designs.

Layer Management in Illustrator
Effective layer management in Adobe Illustrator is essential for organizing complex designs and streamlining your workflow. Here’s how you can master layer management:
- Understanding Layers:
- Layers in Illustrator are like transparent sheets stacked on top of each other. Each layer can hold multiple objects, and you can manipulate each layer independently.
- Creating and Organizing Layers:
- Use the Layers panel to create new layers, reorder them, and organize objects. Dragging an object to a new layer or using the panel\"s options menu can reposition it in the stack.
- Naming Layers:
- For better organization, name your layers according to their content. This practice is especially useful when working with multiple layers.
- Locking and Hiding Layers:
- To prevent accidental edits, you can lock layers. Hiding layers can simplify your view when working on complex designs.
- Using Sublayers:
- Sublayers allow you to manage related objects within a single layer. This is useful for grouping similar elements without creating separate layers for each.
- Blending Modes and Opacity:
- Adjust blending modes and opacity in the Layers panel for creative effects, like making a layer semi-transparent or blending it with layers below.
Mastering layer management will greatly enhance your ability to handle complex designs and make your Illustrator workflow more efficient.

_HOOK_
Advanced Techniques: Masking and Compound Paths
Mastering advanced techniques like masking and compound paths in Adobe Illustrator can significantly elevate your design skills. These techniques allow for more complex and nuanced illustrations.
- Understanding Clipping Masks:
- A clipping mask is used to show only a part of an object or group of objects. Create a shape (the mask) over the objects you want to reveal, select both the shape and the objects, and then apply the mask.
- Using Compound Paths:
- Compound paths combine multiple shapes to create complex forms. Select the shapes you want to combine and use the ‘Make Compound Path’ option. This is useful for creating cut-out effects and complex overlays.
- Editing Masks and Paths:
- Once a mask or compound path is created, you can still edit it. Double-click on a mask to enter isolation mode and make changes, or use the Direct Selection tool for compound paths.
- Applying Effects to Masks:
- Masks can also have effects applied to them. This can create interesting visual styles, especially when combined with transparency and blending modes.
- Experimenting with Text and Masks:
- Text can also be used as a mask or be part of a compound path. This opens up creative possibilities for typographic designs and logos.
Exploring these advanced techniques in Illustrator can significantly enhance the versatility and creativity of your designs.
Integrating Illustrator with Other Adobe Applications
Adobe Illustrator seamlessly integrates with other Adobe applications, enhancing your creative workflow and allowing for more versatile design projects. Here’s how you can leverage this integration:
- Photoshop Integration:
- Move designs between Illustrator and Photoshop with ease. Vector artwork from Illustrator can be brought into Photoshop for raster-based editing, while maintaining the quality and editability of the vectors.
- InDesign Collaboration:
- For layout design, Illustrator graphics can be imported into InDesign. This is particularly useful for creating complex layouts for print media, where Illustrator’s vector capabilities complement InDesign’s layout strengths.
- After Effects Dynamic Link:
- Bring your Illustrator designs to life in motion graphics and animation projects with After Effects. The Dynamic Link ensures that changes made in Illustrator are automatically updated in After Effects.
- Adobe XD Integration:
- Illustrator’s vector art can be used in Adobe XD for designing user interfaces and experiences, ensuring high-quality visuals and scalability for different screen sizes.
- Adobe Animate Compatibility:
- For web animations and interactive designs, Illustrator graphics can be imported into Adobe Animate, preserving the vector quality for scalable animations.
Understanding these integration capabilities can significantly enhance your design workflow across different Adobe applications.
Best Practices for Exporting and Saving Files
Properly exporting and saving files in Adobe Illustrator is crucial for ensuring the quality and compatibility of your designs across different platforms and uses. Follow these best practices for optimal results:
- Choosing the Right Format:
- Understand the purpose of your design to select the appropriate file format. Use AI for editable files within Illustrator, JPEG or PNG for web graphics, and PDF for print-ready files.
- Considering Resolution:
- For web graphics, a resolution of 72 dpi is typically sufficient, while print designs require 300 dpi or higher for clarity and detail.
- Using Artboards Effectively:
- Artboards can be used to organize different elements or versions of a design. When exporting, you can choose to export all artboards or select specific ones.
- Managing File Size:
- Large file sizes can be cumbersome. Optimize your files by merging layers, flattening artwork, and using linked images instead of embedding them to reduce file size without losing quality.
- Preserving Editability:
- When saving files for further editing, preserve layers, text editability, and other dynamic elements by choosing the AI or EPS format.
- Color Management:
- Ensure color consistency across different devices and print processes by using the correct color profiles, such as RGB for web and CMYK for print.
- Previewing Before Export:
- Use the Preview feature to check for any errors or unintended changes before the final export. This is crucial for spotting issues that might not be visible in the Illustrator interface.
Adhering to these best practices can greatly improve the quality and efficiency of your workflow when exporting and saving files in Adobe Illustrator.
Exploring Creative Projects and Tutorials
Diving into creative projects and tutorials is an excellent way to enhance your skills in Adobe Illustrator. Whether you\"re a beginner or an experienced user, there\"s always something new to learn. Here are some ideas and resources to explore:
- Beginner\"s Guides:
- Start with beginner-friendly tutorials available on platforms like YouTube, which offer comprehensive guides to get you familiar with the basics of Illustrator.
- Specialized Projects:
- Explore project-based tutorials that focus on specific skills such as creating logos, icons, or typography designs. These tutorials are often available through Adobe\"s own resources or creative websites like Envato Tuts+ and Creative Bloq.
- Advanced Techniques:
- For advanced users, delve into complex techniques like 3D illustrations, infographics, and blending modes. These can be found in detailed guides on Adobe’s website or through in-depth video tutorials.
- Community Resources:
- Join Adobe’s community forums to ask questions, share your work, and get feedback. Engaging with other Illustrator users can provide valuable insights and tips.
- Scripting and Automation:
- If you\"re interested in automating tasks in Illustrator, explore resources on scripting to streamline your workflow, available in Adobe\"s Illustrator Scripting Guide.
Continuously exploring and practicing with new projects and tutorials is key to mastering Adobe Illustrator and expanding your creative capabilities.
READ MORE:
Resources for Continued Learning and Support
Adobe Illustrator offers a vast array of learning resources and support to help you grow your skills. Whether you\"re a beginner or an experienced user, these resources are invaluable for your development:
- User Guides and Tutorials:
- Adobe\"s official website provides a comprehensive user guide and tutorials covering a wide range of topics, from basic features to advanced techniques.
- YouTube Courses:
- Platforms like YouTube offer free courses and tutorials, ideal for both beginners and advanced users, providing step-by-step instructions on various Illustrator techniques.
- Online Communities:
- Joining Adobe\"s community forums can be a great way to connect with other users, share experiences, and get answers to your questions from experts.
- Scripting Guides:
- For those interested in automating tasks in Illustrator, the Adobe Illustrator Scripting Guide offers insights into scripting, which can streamline your workflow.
- Specialized Blogs and Websites:
- Websites like GraphicMama and Gareth David Studio offer detailed tutorials and guides, catering to both specific project-based learning and general skill enhancement.
Leveraging these resources will aid in enhancing your Illustrator skills, keeping you updated with new features, and providing support whenever needed.
Embark on your Adobe Illustrator journey with confidence, armed with the insights from this comprehensive guide. Let your creativity flourish and your skills soar as you explore the endless possibilities of Illustrator\"s dynamic world.
_HOOK_