Topic how to make lego animations in blender: Discover the exciting world of LEGO animations with Blender and unleash your creativity. This guide will walk you through every step to bring your LEGO stories to life, from basic setups to advanced animation techniques.
Table of Content
- How to make LEGO animations in Blender?
- Understanding the Basics of Blender for LEGO Animation
- Choosing the Right LEGO Models and Assets
- Importing LEGO Models into Blender
- Modeling Custom LEGO Pieces in Blender
- Texturing and Coloring LEGO Models
- Rigging LEGO Characters for Animation
- YOUTUBE: How to Make a Lego Animation in Blender 2023 | Part 1 - Models
- Creating Realistic Environments for LEGO Scenes
- Animating LEGO Characters and Objects
- Using Blender\"s Physics for Dynamic LEGO Animations
- Lighting and Rendering LEGO Animations
- Post-Production Tips for Enhancing LEGO Animations
- Exporting Your LEGO Animation for Sharing
How to make LEGO animations in Blender?
To create LEGO animations in Blender, you can follow the following steps:
- First, make sure you have Blender installed on your computer. You can download it from the official Blender website and install it.
- Once Blender is installed, launch the software and familiarize yourself with the interface.
- Import LEGO models or create your own using Blender\'s modeling tools. You can find LEGO models online or design them yourself using Blender\'s various modeling techniques.
- Set up the scene by adding a ground plane and any additional objects or props you want in your animation.
- Position the LEGO models in the scene to create the desired animation setup.
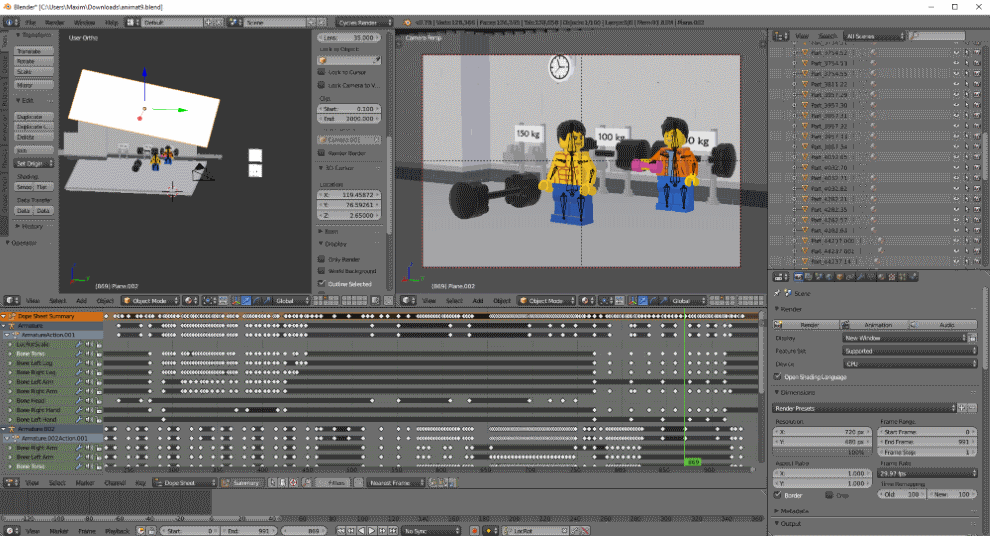
- To create smooth animations, use keyframes. Select the object you want to animate and navigate to the timeline at the bottom of the Blender interface.
- Choose a frame where you want the animation to start and press the \"I\" key on your keyboard. This will insert a keyframe for the object\'s initial position.
- Move to a different frame in the timeline and adjust the object\'s position or rotation to create the desired animation effect.
- Press the \"I\" key again to insert another keyframe for the object\'s new position.
- Repeat the previous two steps to create additional keyframes and build your animation.
- Preview your animation by playing it back in Blender\'s timeline.
- Adjust the timing and interpolation of the keyframes as needed to refine the animation.
- Once you are satisfied with your LEGO animation, render it out to a video file format of your choice.
By following these steps, you can create LEGO animations using Blender\'s powerful features and tools.
READ MORE:
Understanding the Basics of Blender for LEGO Animation
Before diving into LEGO animation, familiarizing yourself with Blender\"s interface and capabilities is essential. Blender is a powerful open-source 3D modeling and animation software used by professionals and hobbyists alike.
- Download and Install Blender: Ensure you have the latest version of Blender installed from the official website to access all features necessary for LEGO animation.
- Navigate the Interface: Spend some time understanding the layout, including the 3D viewport, timeline, and editor types. Blender\"s flexibility allows for customization of the workspace to suit your animation workflow.
- Basic Modeling Concepts: Learn the basics of 3D modeling in Blender, such as adding and modifying meshes, using modifiers, and understanding the principles of topology. This knowledge is crucial for creating or editing LEGO models.
- Materials and Texturing: Discover how to apply colors and textures to your LEGO models to make them look realistic or stylized according to your preference.
- Lighting and Rendering: Explore how different lighting setups can affect the mood and realism of your LEGO scenes. Learn the basics of rendering to produce the final image or animation sequence.
- Animation Principles: Get acquainted with keyframe animation, rigging, and the graph editor. Understanding these concepts is vital for creating dynamic and engaging LEGO animations.
Mastering these fundamentals will provide a solid foundation for your LEGO animation projects in Blender, allowing you to bring your imaginative LEGO stories to life with professional-quality visuals.

Choosing the Right LEGO Models and Assets
Selecting appropriate LEGO models and assets is a critical step in creating captivating animations. The right pieces not only bring your vision to life but also streamline the animation process.
- Identify Your Animation Theme: Determine the story or theme of your animation. This decision will guide your choice of LEGO models and environments, ensuring they align with your narrative.
- Source LEGO Models: Utilize official LEGO digital designing tools or online libraries to find models. Websites like Rebrickable or Mecabricks offer a wide range of LEGO models that can be imported into Blender.
- Custom Models for Unique Needs: If existing models don\"t meet your requirements, consider creating custom LEGO pieces within Blender. This allows for unique creations that fit your animation perfectly.
- Opt for Modularity: Choose models that are modular, allowing for easy customization and reconfiguration. This flexibility is valuable for creating dynamic scenes and enhancing storytelling.
- Pay Attention to Detail: Select models with a level of detail that matches your animation\"s scale and complexity. Highly detailed models enhance realism but may require more processing power.
- Consider Compatibility: Ensure the models you select are compatible with Blender\"s features, such as rigging and animation tools. This facilitates a smoother workflow and more dynamic animations.
By carefully selecting LEGO models and assets, you set a strong foundation for your animation project, enabling you to focus on bringing your creative vision to life with Blender.
Importing LEGO Models into Blender
After selecting the right LEGO models for your animation, the next step is importing them into Blender. This process transforms your chosen pieces into editable 3D objects within Blender\"s environment.
- Choose the Correct File Format: Ensure your LEGO model is in a format compatible with Blender, such as .obj or .dae. These formats preserve model details and allow for seamless importation.
- Using Blender\"s Import Function: Navigate to File > Import and select the appropriate file type. Browse to your model file, select it, and click \"Import\" to add it to your Blender project.
- Adjusting Scale and Orientation: LEGO models may not import at the correct scale or orientation. Use the scale and rotate tools in Blender to adjust the model to fit your scene accurately.
- Organize Your Scene: After importing, organize your models using Blender\"s collection system. This helps manage multiple LEGO pieces and assets, simplifying the animation process.
- Check for Missing Parts: Inspect the imported models for any missing pieces or errors. You may need to manually adjust or re-import certain parts to ensure your model is complete.
- Prepare for Rigging and Animation: Once your LEGO models are correctly imported and organized, they\"re ready to be rigged for animation. This involves setting up bones and controls that move the models.
Successfully importing your LEGO models into Blender is a critical step in the animation process, laying the groundwork for creating your envisioned LEGO scenes and stories.

Modeling Custom LEGO Pieces in Blender
Creating custom LEGO pieces in Blender allows for unique and personalized animations. This section guides you through the steps to model your own LEGO bricks and elements.
- Understanding LEGO Dimensions: Familiarize yourself with the standard dimensions of LEGO bricks. Use these measurements as a guide to maintain compatibility with existing pieces.
- Starting with Basic Shapes: Begin by adding a cube to your Blender scene and resize it according to the LEGO brick dimensions. This will serve as the base for your custom piece.
- Modifying the Shape: Use Blender\"s editing tools to extrude, inset, and modify the cube to match your desired LEGO piece design. Pay attention to maintaining clean geometry for easy animation.
- Adding LEGO Nubs: For the characteristic LEGO top nubs, duplicate small cylinders and position them on top of the base shape. Ensure they are properly aligned and spaced according to LEGO standards.
- Applying Materials and Textures: Once your model is complete, apply materials to mimic the plastic look of LEGO pieces. You can also add custom textures or decals for additional detail.
- Exporting for Use: After modeling, export your custom LEGO piece in a format that\"s compatible for re-import into Blender scenes, such as .obj or .blend, for use in your animations.
Modeling custom LEGO pieces in Blender can significantly enhance your animations, allowing for unique creations that stand out. With practice, you can expand your LEGO universe with personalized bricks and elements.
_HOOK_
Texturing and Coloring LEGO Models
Texturing and coloring are crucial for bringing your LEGO models to life in Blender. These steps add realism and visual interest to your animations. Follow this guide to effectively apply textures and colors to your LEGO creations.
- Selecting Materials: Begin by selecting your model and going to the Materials tab. Create a new material that will serve as the base color of your LEGO piece.
- Choosing Colors: LEGO pieces come in a variety of colors. Use the color picker to select a vibrant color that matches traditional LEGO colors or choose a custom color for unique pieces.
- Adding Textures: For added realism, consider applying a subtle texture to simulate the plastic feel of LEGO bricks. This can be done by adding a noise or bump map in the Shader Editor.
- Simulating Wear and Tear: To add character to your models, you might want to include slight wear and tear. This can be achieved by layering textures with slight scratches or smudges.
- Applying Decals: Custom decals can be applied to create faces, patterns, or logos on your LEGO pieces. Use Blender\"s UV Mapping tools to accurately place decals on your models.
- Previewing and Adjusting: Regularly preview your work in the 3D viewport with the rendered view mode. Adjust the textures and colors as needed to achieve the desired look.
By carefully texturing and coloring your LEGO models, you can achieve animations that are visually engaging and true to the iconic LEGO aesthetic.
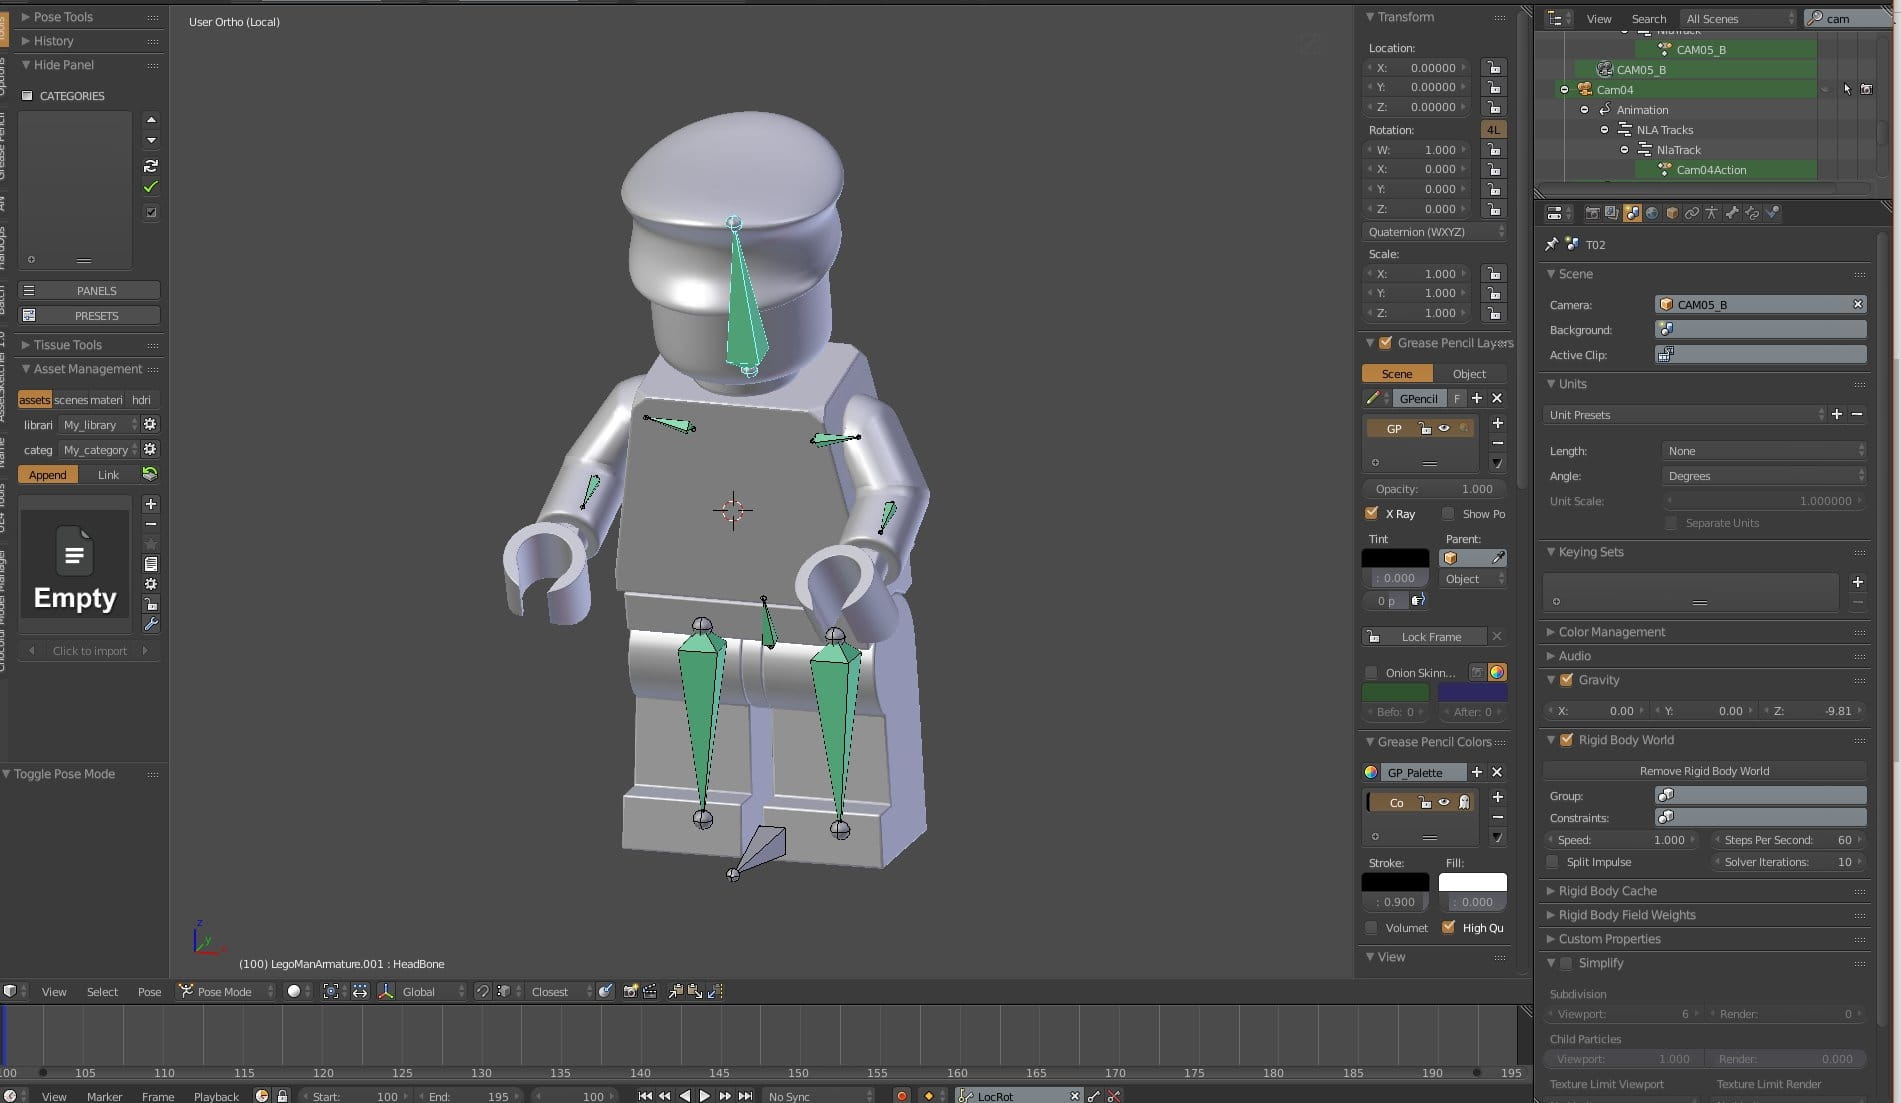
Rigging LEGO Characters for Animation
Rigging is the process of creating a skeleton for a model so that it can be animated. Rigging LEGO characters in Blender allows for dynamic and expressive animations. Follow these steps to rig your LEGO characters effectively.
- Create the Armature: Start by adding an armature object to your scene. This serves as the skeleton. Place bones in key areas like limbs, head, and torso, matching the character\"s structure.
- Adjusting Bone Size and Position: Edit the bones to fit inside your LEGO character model precisely. Ensure each bone aligns with corresponding parts of the model for accurate movement.
- Name Your Bones: For easier animation and rigging, name each bone according to the body part it controls, such as \"LeftArm,\" \"RightLeg,\" etc.
- Parenting Model to Armature: With the armature complete, select your LEGO character model, then shift-select the armature and use Ctrl+P to parent the model to the armature. Choose \"With Automatic Weights\" for initial skinning.
- Weight Painting: Go into Weight Paint mode to fine-tune how the mesh deforms with the bones. Areas painted red will move more with the corresponding bone, while blue areas will move less.
- Adding Constraints: Use bone constraints for more complex movements, such as IK (Inverse Kinematics) for natural limb movements and to simplify animation controls.
- Testing the Rig: Before proceeding to animation, pose your character using the armature to ensure movements look natural and correct any weighting or rigging issues.
With your LEGO character now rigged in Blender, you’re ready to bring them to life through animation, creating scenes limited only by your imagination.
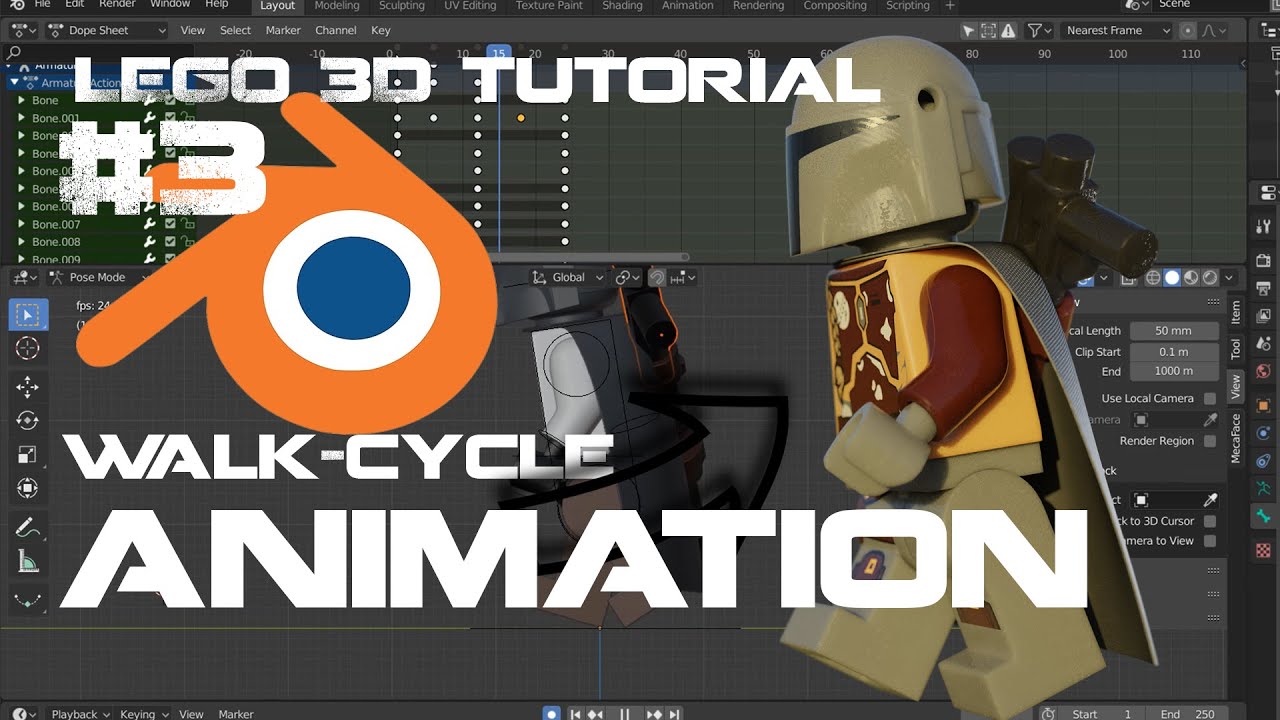
How to Make a Lego Animation in Blender 2023 | Part 1 - Models
Step into a magical world full of vibrant characters and captivating stories with this stunning animation video. Let yourself be immersed in the beauty of hand-drawn art and get ready for an unforgettable visual experience!
Lego Animation in Blender: Easier Than You Think!
Tackle your daily tasks with ease and efficiency by learning simple tricks and hacks in this informative and entertaining video. Discover the secrets to making your life easier and find inspiration to embrace a new level of productivity.
Creating Realistic Environments for LEGO Scenes
Realistic environments enhance the immersion of LEGO animations, grounding your characters in believable settings. Here\"s how to create engaging scenes within Blender.
- Planning Your Scene: Start with a clear vision of the environment you want to create. Consider the setting, time of day, and atmosphere that best complements your LEGO animation\"s narrative.
- Modeling the Environment: Use Blender\"s modeling tools to construct the scene. Start with large shapes for terrain and buildings, then add details like trees, furniture, and other elements that fit your theme.
- Utilizing Textures: Apply textures to give surfaces a realistic appearance. Use high-resolution images for ground, walls, and other significant elements. Blender\"s node editor allows for complex material creation that can enhance realism.
- Incorporating Lighting: Lighting is key to realism. Use Blender\"s lighting tools to simulate natural light, or create a mood with artificial lighting. Consider the direction and color of light to match the time of day and setting.
- Adding Atmospheric Effects: Use Blender\"s particle system and volumetrics to add fog, dust, or weather effects. These can greatly enhance the realism and mood of your LEGO scene.
- Implementing LEGO Scale: Ensure all elements are to scale with your LEGO characters and models. This consistency is crucial for maintaining immersion and believability in your animation.
- Preview and Adjust: Continuously preview your scene in rendered view to assess the realism and make necessary adjustments. Pay attention to composition, lighting, and material interactions.
Creating realistic environments for your LEGO scenes in Blender adds depth and context to your animations, making them more engaging and enjoyable to watch.

Animating LEGO Characters and Objects
Animating LEGO characters and objects in Blender brings your creations to life. This section covers the basics of animation, from simple movements to complex scenes.
- Setting Up Your Timeline: Before animating, familiarize yourself with Blender\"s timeline and keyframe system. Set your frame rate to match the desired animation speed, typically 24 or 30 frames per second for smooth motion.
- Inserting Keyframes: Position your LEGO character or object at the start point of the animation. Insert a keyframe (press I) for the desired properties (location, rotation, scale). Move to another frame, change the position or pose, and insert another keyframe.
- Animating Movements: Use the rigging bones to animate LEGO characters. For objects, animate directly through their position, rotation, and scale. Ensure movements are realistic and consistent with LEGO\"s physical capabilities.
- Adding Secondary Actions: Enhance animations with secondary actions like facial expressions (if applicable), accessory movements, or environmental interactions to create more dynamic scenes.
- Using Blender\"s Graph Editor: For more control over the animation, use Blender\"s Graph Editor to adjust the velocity and timing of movements. This can help smooth out animations and make them more lifelike.
- Implementing Physics: For complex object interactions, consider using Blender\"s physics simulations, such as rigid body dynamics for collisions or particle systems for effects like fire, water, or explosions.
- Previewing and Refining: Regularly preview your animation in Blender\"s playback mode. Adjust timings, movements, and keyframes as necessary to refine the animation and achieve the desired result.
By following these steps, you can animate LEGO characters and objects in Blender, creating engaging stories and dynamic scenes that capture the imagination.

Using Blender\"s Physics for Dynamic LEGO Animations
Incorporating Blender\"s physics simulations can add realism and complexity to your LEGO animations. This section explores how to use physics to create dynamic scenes.
- Rigid Body Simulation: Use rigid body physics to simulate realistic collisions and interactions between LEGO bricks. Apply rigid body properties to your LEGO objects and adjust mass, friction, and bounce to mimic real-world behaviors.
- Particle Systems: For scenes requiring elements like water, smoke, or debris, utilize Blender\"s particle system. This can create effects such as LEGO bricks shattering or building up realistically.
- Cloth Simulation: To animate elements like flags or capes, apply cloth physics to 2D planes. Adjust properties like stiffness, damping, and air resistance to achieve the desired motion.
- Soft Body Dynamics: For flexible LEGO elements or characters that need to appear soft and malleable, soft body physics can simulate squishy or bouncing effects.
- Forces and Wind: Incorporate forces such as wind or turbulence to add movement to your scene. This can simulate environmental effects on LEGO characters and objects.
- Combining Physics with Animation: Blend physics simulations with traditional keyframe animation for complex scenes. This approach allows for controlled animations with elements of unpredictability and realism.
- Previewing and Adjusting Simulations: Regularly preview your physics simulations and adjust settings as necessary. Fine-tuning ensures that the physics behave as intended and enhance the animation without overpowering it.
Utilizing Blender\"s physics simulations enriches your LEGO animations with dynamic and engaging elements, bringing a new level of realism and excitement to your creations.

_HOOK_
Lighting and Rendering LEGO Animations
Effective lighting and rendering are crucial for bringing your LEGO animations to life. This section will guide you through creating visually appealing and realistic animations in Blender.
- Understanding Blender\"s Lighting: Familiarize yourself with the different types of lights in Blender, such as point, sun, spot, and area lights. Each offers unique effects and can simulate various lighting conditions.
- Setting Up Your Lighting: Position your lights strategically around the scene to highlight key elements, create depth, and enhance the mood. Consider using three-point lighting for characters to achieve a professional look.
- Adjusting Light Properties: Modify the color, strength, and falloff of your lights to match the scene\"s atmosphere. Warmer colors can simulate sunlight, while cooler colors can create a nighttime or futuristic feel.
- Using HDRI for Environment Lighting: HDRI images can provide realistic environmental lighting and reflections. Import an HDRI as the world background to add depth and realism to outdoor scenes.
- Applying Materials and Textures: Ensure your LEGO models have appropriate materials and textures for the best rendering results. Use Blender\"s Shader Editor to create or modify materials.
- Rendering Settings: Choose the right rendering engine (Cycles or Eevee) based on your needs. Cycles offers more realism through ray tracing, while Eevee is faster but uses approximation methods.
- Optimizing Render Settings: Adjust render settings such as resolution, sampling, and denoising to balance quality and rendering time. Higher samples improve quality but increase render times.
- Post-Processing: Use Blender\"s Compositor for post-processing effects like color grading, adding glow, or sharpening to enhance the final animation.
By carefully lighting and rendering your LEGO animations in Blender, you can achieve stunning visuals that captivate your audience and bring your creative vision to life.

Post-Production Tips for Enhancing LEGO Animations
Post-production is a critical phase where you refine and enhance your LEGO animations to achieve the final look. These tips will help you utilize Blender\"s post-production tools effectively.
- Color Correction: Use Blender\"s Color Management tools to adjust the brightness, contrast, saturation, and color balance of your animation. This can dramatically change the mood and visual appeal.
- Adding Visual Effects: Incorporate visual effects like blurs, glows, and lens flares to emphasize key moments or elements in your animation. Blender\"s Compositor offers a range of nodes for creating effects.
- Improving Render Quality: Use the Compositor to apply denoising, which can clean up noise in your renders without increasing render times significantly.
- Editing and Cutting: Blender\"s Video Sequence Editor allows you to cut and arrange your animation clips, add transitions, and even incorporate additional audio tracks for music or sound effects.
- Adding Text and Titles: Use the 3D Viewport or the Video Sequence Editor to create and animate text elements. This can be useful for titles, credits, or narrative text within your animation.
- Sound Design: Sound effects and music are crucial for bringing your LEGO animation to life. Import your audio files into Blender and synchronize them with your animation for maximum impact.
- Rendering the Final Animation: Once all post-production work is complete, render your animation to a video format. Consider rendering in a high-quality format and then compressing for distribution if necessary.
Effective post-production enhances your LEGO animation, adding polish and professionalism. With these tips, you can elevate your project from good to great, capturing your audience\"s attention and imagination.
READ MORE:
Exporting Your LEGO Animation for Sharing
Once you\"ve completed your LEGO animation in Blender, the final step is exporting it for sharing. This process allows you to distribute your animation so others can enjoy your creative work.
- Choosing the Right Format: Determine the best format for your animation based on where you plan to share it. Formats like MP4 are widely compatible and recommended for social media and YouTube.
- Setting Export Options: In Blender\"s Output Properties, set your file format to your chosen type. Adjust encoding settings such as bitrate and codec (H.264 is a good standard) to balance quality and file size.
- Resolution and Frame Rate: Ensure your export settings match your project\"s resolution and frame rate. HD (1080p) is generally a good choice for clear visuals without excessively large files.
- Audio Export: If your animation includes sound, check the audio codec settings and ensure they are set to export. AAC is a commonly used audio codec that provides good quality.
- Rendering and Exporting: Once all settings are configured, use Blender\"s Render Animation feature to render and export your animation. This process may take some time depending on the complexity of your animation and your computer\"s capabilities.
- Reviewing the Final Product: After exporting, watch your animation to ensure everything looks and sounds as expected. Look for any issues in video or audio quality.
- Sharing Your Animation: With your animation exported, share it on your chosen platforms. Consider social media, animation forums, or video sharing sites to reach a wide audience.
Exporting your LEGO animation is the culmination of your hard work. By following these steps, you can ensure your animation is ready to be shared and appreciated by viewers around the world.
Embark on a creative journey with Blender to bring your LEGO stories to life. Whether you\"re a beginner or an experienced animator, these steps will guide you to create stunning LEGO animations that captivate and inspire.


