Topic how to make 3d character models in blender: Embark on a creative journey to master 3D character modeling in Blender, unlocking the secrets to bringing your imaginative characters to life with this comprehensive guide.
Table of Content
- How can I create 3D character models in Blender?
- Understanding Blender\"s Interface and Setup
- Getting Started with Basic Shapes and Sculpting
- Advanced Sculpting Techniques for Character Modeling
- Retopology for a Cleaner Mesh
- UV Unwrapping and Texture Painting
- Rigging Your Character for Animation
- YOUTUBE: Making a Character in Blender: My Full Process in 10 Minutes
- Adding Materials and Textures for Realism
- Lighting and Rendering Your 3D Character
- Exporting Models for Games or Other Media
- Tips and Tricks for Efficient Workflow
How can I create 3D character models in Blender?
To create 3D character models in Blender, you can follow these steps:
- Start by understanding the character you want to model. Collect reference images and sketches to have a clear idea of the character\'s appearance and details.
- Open Blender and select the default cube, then press \"X\" and select \"Delete\" to remove it.
- Switch to the \"Layout\" workspace by selecting it from the dropdown menu at the top of the window.
- Click on \"Add\" in the top toolbar and choose \"Mesh\" to add a new mesh object. Then select \"Cube\" to add a cube as the base mesh for your character.
- Enter \"Edit Mode\" by pressing \"Tab,\" and use the various editing tools and techniques to shape the cube into the basic form of your character\'s body.
- Use the \"Extrude\" tool (press \"E\") to add more geometry and sculpt the shape of different body parts, like the head, limbs, and torso.
- Refine the details of your character model using sculpting tools. You can switch between different brushes and adjust their settings in the \"Sculpt\" mode.
- For facial features, create separate mesh objects for the eyes, nose, mouth, etc., and position them onto the head using the transformation tools.
- Texture and paint your character using Blender\'s painting tools or import pre-made textures.
- Once you have modeled and textured your character, you can rig it by creating an armature and assigning bones to different body parts. This will allow you to pose and animate the character.
- Finally, you can render your character model using Blender\'s rendering engine, adjusting lighting, materials, and camera settings to achieve the desired result.
Remember that character modeling in Blender requires practice and patience. There are many tutorials available online that can guide you through each step in more detail, helping you improve your skills and achieve better results.
READ MORE:
Understanding Blender\"s Interface and Setup
Mastering Blender begins with familiarizing yourself with its interface and settings. This section will guide you through the essential aspects to get you started on your 3D character modeling journey.
- Launching Blender: Upon opening Blender, you\"re greeted with the default screen, which includes the 3D viewport, timeline, and outliner.
- Customizing the Interface: Blender\"s interface is highly customizable. You can adjust the layout by dragging the borders between panels or by opening new windows with your preferred views and tools.
- Navigating the 3D Viewport: Learning to navigate the 3D viewport is crucial. Use the middle mouse button to orbit, scroll to zoom, and shift + middle mouse button to pan your view.
- Object Mode and Edit Mode: Understanding the difference between these modes is key. Object mode is for moving, scaling, and rotating objects, while Edit mode allows you to modify the vertices, edges, and faces of your model.
- Using the Toolbar: The toolbar, located on the left side of the viewport, contains tools for creating, editing, and manipulating objects. Familiarize yourself with tools like the move, rotate, and scale for basic modeling tasks.
- Properties Panel: The properties panel on the right side provides access to object properties, material settings, modifiers, and scene settings. It\"s where you will spend a lot of time fine-tuning your models and scenes.
- Adding Meshes: Start by adding basic mesh objects to your scene. Use the add menu (Shift + A) to insert primitive shapes like cubes, spheres, or planes, which can be the building blocks of your character model.
- Setting Up Reference Images: For character modeling, setting up reference images can be incredibly helpful. Load reference images into the background of your 3D viewport to guide your modeling process.
Getting comfortable with Blender\"s interface and understanding its setup are the first steps towards creating stunning 3D character models. Practice navigating and utilizing these features to become proficient in Blender.

Getting Started with Basic Shapes and Sculpting
Creating a 3D character model in Blender starts with basic shapes and progresses to detailed sculpting. This section will guide you through the process of turning simple shapes into complex character models.
- Choosing the Right Primitive Shape: Begin by selecting a primitive shape that closely matches the basic silhouette of your character. A sphere or cube can be a good starting point for many characters.
- Blocking Out Basic Forms: Use the selected primitive shape to block out your character\"s basic forms. Focus on major elements like the head, torso, and limbs. Don\"t worry about details at this stage.
- Adjusting Proportions: With the basic forms in place, adjust the proportions to match your character\"s design. Use the scale and move tools to tweak the shape of each part.
- Introduction to Sculpting: Once you have the basic shape and proportions, switch to Sculpt Mode. This mode allows for more detailed shaping and is ideal for adding character features and muscle definition.
- Sculpting Brushes: Familiarize yourself with various sculpting brushes in Blender. The Grab, Clay, Smooth, and Inflate brushes are essential for adding and refining details on your character model.
- Dynamic Topology: Enable Dynamic Topology for a more flexible sculpting experience. This feature automatically adjusts the mesh density as you sculpt, allowing for intricate details without the need for manual topology adjustments.
- Refining Details: As you sculpt, gradually move to smaller brushes to add finer details like facial features, hair, and clothing textures. Remember to frequently switch between different brushes to achieve the desired effects.
- Symmetry Mode: Use Symmetry Mode to ensure that details added to one side of the model are mirrored to the other. This is particularly useful for facial features and body parts that are symmetrical.
Starting with basic shapes and progressing through detailed sculpting is a foundational skill in character modeling. With practice, you\"ll be able to transform simple meshes into detailed and expressive 3D characters.
Advanced Sculpting Techniques for Character Modeling
After mastering basic sculpting, advancing your skills with more sophisticated techniques is essential for creating lifelike and dynamic 3D character models. This section delves into advanced sculpting strategies to elevate your Blender creations.
- Layered Sculpting Approach: Work in layers, starting with large forms and gradually moving to finer details. This allows for greater control over the sculpting process and makes it easier to adjust or redo certain aspects without affecting the entire model.
- Using Masks: Masks are invaluable for isolating areas of your model to work on specific features without affecting surrounding areas. Use masks to sculpt complex areas like facial expressions or intricate clothing patterns.
- Custom Brushes: Blender allows you to create custom brushes or import them. Experiment with different brush textures and shapes to add unique details and textures to your character\"s skin, clothing, and accessories.
- Sculpting with Alphas: Alphas are grayscale images used as brush textures that add fine details, such as wrinkles, scales, or fabric textures, with a single stroke. Utilizing alphas can significantly speed up the detailing process.
- Multiresolution Modifier: The Multiresolution modifier lets you sculpt at various levels of detail. Start sculpting at a lower resolution for broad shapes, then increase the resolution for finer details, preserving the model\"s overall form.
- Topology Considerations: While dynamic topology is useful for adding detail, it can create dense meshes. Use the remesh modifier or manual retopology techniques to maintain a manageable polygon count while preserving details.
- Hard Surface Sculpting: For characters with armor or mechanical parts, hard surface sculpting techniques are crucial. Utilize crisp edges and planar surfaces to model non-organic components, combining sculpting with traditional modeling methods.
- Stylized Sculpting Techniques: For stylized characters, emphasize exaggerated proportions and simplified forms. Study various art styles to understand how to convey character personality and emotion through shape and form.
By incorporating these advanced sculpting techniques into your workflow, you can push the boundaries of what\"s possible in character modeling. Each method offers unique advantages, enabling you to bring your most ambitious character designs to life with Blender.

Retopology for a Cleaner Mesh
Retopology is a crucial step in the character modeling process, transforming high-detail sculpts into meshes that are easier to animate and texture. This section outlines how to perform retopology in Blender, ensuring your models are both beautiful and functional.
- Understanding the Importance of Retopology: Retopology converts a dense, sculpted mesh into a more efficient, lower-polygon mesh. This is essential for animation and game engines, where performance is key.
- Starting with Retopology: Begin by creating a new mesh layer over your sculpted model. This will be your retopology mesh, where you manually trace the major forms of your character with fewer polygons.
- Using the Shrinkwrap Modifier: The Shrinkwrap modifier helps your new mesh conform to the surface of your sculpt. It\"s a critical tool for retopology, ensuring your low-poly mesh closely matches the high-poly original.
- Topology Flow: Focus on creating a topology flow that mimics natural muscle and fabric movements. Use quads (four-sided polygons) as much as possible, as they deform more predictably during animation.
- Edge Loops for Animation: Place edge loops around joints and other areas that will move a lot. This facilitates smoother animations and deformations.
- Reducing Polygons in Less Detailed Areas: Identify areas that require less detail and reduce the polygon count. This optimization helps maintain performance without compromising on visual quality.
- Maintaining Uniform Polygon Size: Strive for a uniform polygon size across your model. Uniformity helps in the even distribution of textures and effects, improving the final appearance.
- Finalizing and Checking Your Mesh: Once retopology is complete, review your mesh for any missed areas or irregularities. Use the sculpting tools to fine-tune the surface as needed.
Mastering retopology is a significant milestone in character modeling. By following these steps, you ensure your 3D models are optimized for animation and performance, ready for texturing and rigging.

_HOOK_
UV Unwrapping and Texture Painting
UV Unwrapping and Texture Painting are essential steps in bringing your 3D character models to life with colors and details. This section covers the process of preparing your model for texturing and applying those textures in Blender.
- Understanding UV Unwrapping: UV Unwrapping is the process of projecting your 3D model onto a 2D plane to apply textures accurately. It\"s crucial for ensuring textures look correct on the model.
- Marking Seams: Begin by selecting edges to mark as seams. Seams define where the mesh will be split when unwrapped. Place seams in less noticeable areas or where natural separations occur.
- Unwrapping the Model: With seams marked, select all faces and unwrap the model (U key). Blender will lay out the mesh in a 2D view based on your seams, creating the UV map.
- Adjusting the UV Map: In the UV Editor, adjust the layout to maximize space efficiency and minimize stretching. Ensure that the UV islands correspond well with the texture details you plan to apply.
- Texture Painting Basics: Switch to Texture Paint mode to begin painting directly onto your model. You can use various brushes, colors, and settings to add details, colors, and textures.
- Using Textures: You can also apply existing images as textures. Import your texture images and project them onto the model using the UV map as a guide.
- Detailing with Stencils: Use stencils for precise texture application. Stencils allow you to overlay an image on your 3D view and paint through it, perfect for complex patterns or detailed designs.
- Exporting Textures: Once your texture painting is complete, you can export the textures for use in other projects or engines. Ensure to save your work in a format compatible with your intended use.
UV Unwrapping and Texture Painting are crucial for adding realism and personality to your 3D character models. By following these steps, you can achieve detailed and accurately textured models in Blender.
Rigging Your Character for Animation
Rigging is the process of creating a skeleton for your character model so it can be animated. This section walks through the basics of setting up a rig in Blender and preparing your character for animation.
- Understanding Armatures: Armatures are the bones of your rig. They define how your character moves. Start by adding an armature object and placing bones to match the major joints of your character.
- Editing Bone Structure: In Edit Mode, adjust the bones to fit inside your character model accurately. Ensure each bone aligns with corresponding body parts (e.g., arms, legs, spine).
- Parenting Mesh to Armature: With your armature in place, parent the character mesh to the armature using Automatic Weights. This allows Blender to calculate how the mesh deforms with bone movements.
- Weight Painting: Weight painting fine-tunes how each part of the mesh moves with the bones. Areas painted red move fully with the bone, while blue areas move little or not at all.
- Adding Inverse Kinematics (IK): IK simplifies animation by allowing you to move a chain of bones with a single controller. Set up IK constraints on limbs for more natural movements.
- Creating Control Rigs: Control rigs add user-friendly controls to your armature. Custom shapes can be assigned to controllers for easier selection and manipulation during animation.
- Testing the Rig: Before animating, test the rig thoroughly. Pose your character in various positions to ensure the mesh deforms correctly and the controls are intuitive.
- Locking and Limiting: Lock or limit the movement of certain bones to prevent unnatural deformation. This step is crucial for maintaining the realism of your animations.
Rigging your character properly is essential for animation. A well-rigged character can be posed and animated in a lifelike and convincing manner, bringing your Blender creations to life.
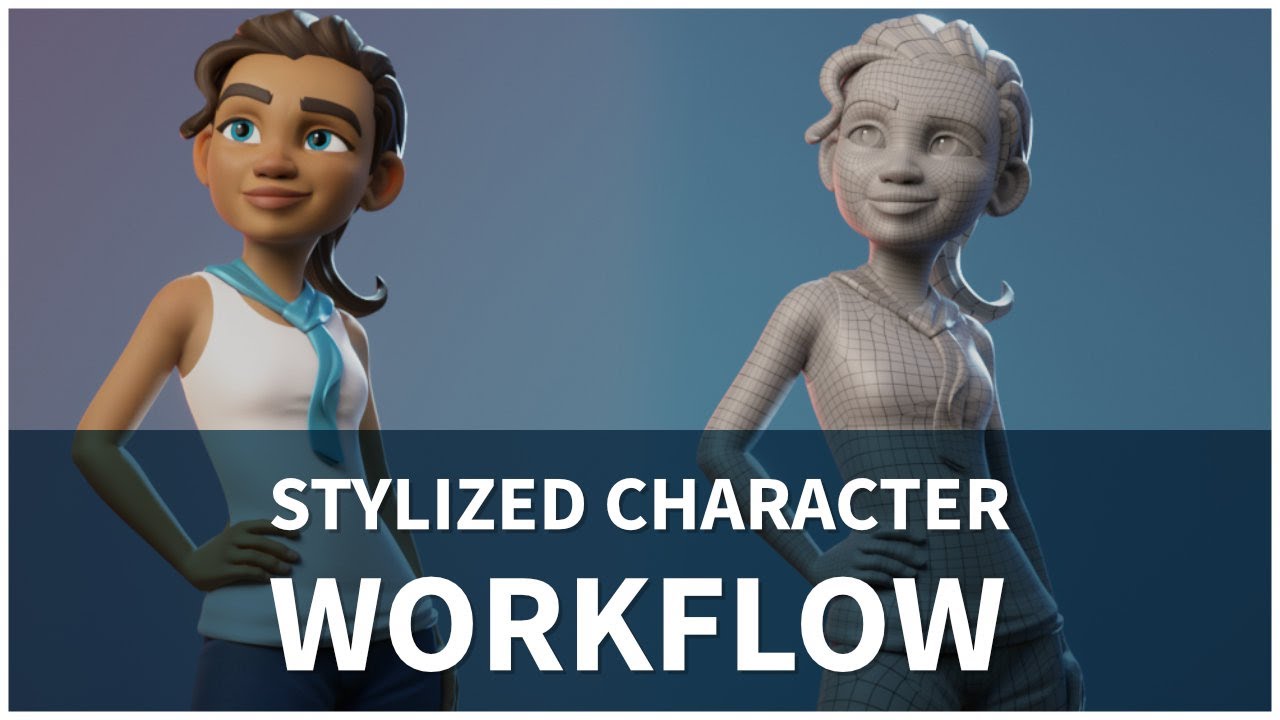
Making a Character in Blender: My Full Process in 10 Minutes
Get ready to dive into the captivating world of Blender! Watch our video to discover the limitless possibilities of this powerful 3D software. Unlock your creativity and showcase your imagination like never before. Don\'t miss out on the chance to master Blender and bring your designs to life!
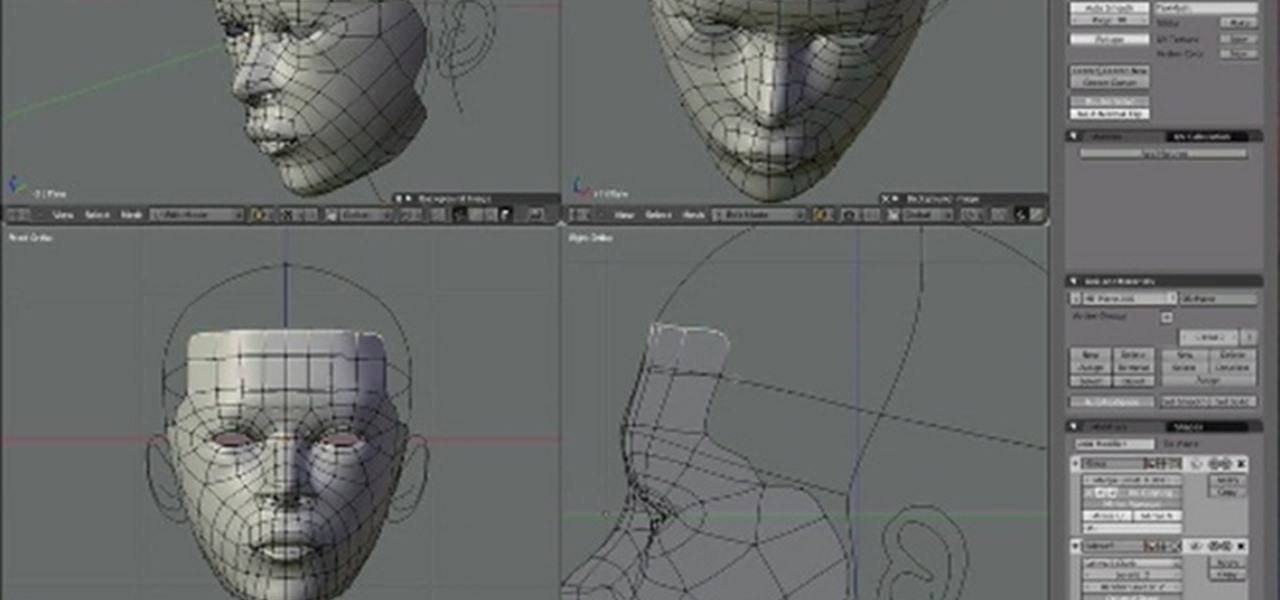
Blender Character Modeling Tutorial for Absolute Beginners: Part 1
Are you ready to bring characters to life with your modeling skills? Join us in our character modeling video tutorial to learn the secrets of creating stunning, realistic characters. From sculpting the perfect facial features to crafting intricate details, this video will take your character modeling skills to new heights. Unleash your artistic potential and become a master of character modeling today!
Adding Materials and Textures for Realism
Materials and textures are crucial for giving your 3D character models a touch of realism. This section explains how to apply and tweak materials and textures in Blender to enhance the visual appeal of your characters.
- Understanding Materials: Materials define the color, shininess, transparency, and texture of your model. Begin by creating a new material in the Material Properties tab for different parts of your character.
- Applying Textures: Textures can be applied to materials to add detail such as skin, cloth patterns, or metal finishes. Use the Shader Editor to connect texture nodes to your material for more complex effects.
- Using PBR Textures: Physically Based Rendering (PBR) textures offer more realistic results by simulating how light interacts with surfaces. These textures usually include base color, roughness, metallic, and normal maps.
- Adjusting Shader Parameters: Fine-tune the appearance of your materials by adjusting shader parameters such as roughness, specularity, and subsurface scattering, especially for skin materials to achieve a lifelike look.
- Normal and Bump Mapping: Use normal or bump maps to add surface detail without increasing the mesh complexity. These maps simulate the appearance of bumps and dents, adding depth to your character\"s skin or clothing.
- UV Mapping for Accuracy: Ensure your UV maps are accurately laid out before applying textures. Proper UV mapping is essential for textures to appear correctly aligned on the model.
- Layering Textures: For more detailed characters, layer multiple textures using Blender\"s node system. This can add complexity and depth to materials, such as dirt on clothing or age effects on skin.
- Testing in Different Lighting: Finally, test your materials and textures under different lighting conditions. This ensures that your character looks good in both bright and dim environments, maintaining realism across various scenes.
By carefully applying and adjusting materials and textures, you can significantly enhance the realism of your 3D character models, making them stand out in any digital environment.

Lighting and Rendering Your 3D Character
Proper lighting and rendering are essential to showcase your 3D character models in their best light. This section provides tips on setting up lighting and rendering settings in Blender to achieve stunning visuals.
- Choosing a Lighting Setup: Begin with a three-point lighting setup to highlight your character’s form. This includes a key light, fill light, and backlight, each positioned strategically to add depth and dimension.
- Adjusting Light Properties: Experiment with the properties of each light source, such as color, intensity, and size. Warm or cool light can dramatically affect the mood of your scene.
- Using HDRI for Environmental Lighting: HDRI images can provide realistic environmental lighting. They simulate the light from a real-world scene, offering natural reflections and illumination.
- Setting up Cameras: Position your camera to capture your character from the best angles. Consider the rule of thirds for composition to make your renders more visually appealing.
- Material Preview and Shading: Use the Material Preview mode to quickly check how materials and lights work together. Adjust shaders as needed for the best appearance under your lighting setup.
- Rendering Settings: In the Render Properties tab, select your render engine (Cycles or Eevee) and adjust settings such as samples, resolution, and color management for optimal results.
- Post-Processing Effects: Utilize Blender’s Compositor for post-processing effects like color grading, bloom, and glare to enhance your final image or animation.
- Testing and Iterating: Render multiple test images at lower resolutions to quickly iterate on lighting, camera angles, and materials. Once satisfied, render at full resolution for the final output.
With careful attention to lighting and rendering, you can create compelling and lifelike representations of your 3D characters, showcasing your skills and bringing your digital creations to life.
Exporting Models for Games or Other Media
Once your 3D character model is complete, exporting it for use in games or other media is the next step. This section guides you through the process of preparing and exporting your models from Blender to various formats.
- Finalizing Your Model: Ensure your model is fully textured, rigged, and tested within Blender. Make any necessary adjustments to ensure it meets the requirements of the platform you\"re exporting to.
- Choosing the Right Format: Blender supports several export formats, including FBX, OBJ, and glTF. FBX is widely used for game engines like Unity and Unreal Engine, while OBJ is suitable for static models in various applications.
- Applying Transforms: Before exporting, apply all transformations (location, rotation, scale) to ensure the model\"s position and size are consistent across platforms.
- Setting Export Options: When exporting, adjust the settings for your chosen format. For example, include armatures and animations if exporting an animated character for a game.
- Optimizing for Performance: Consider the target platform\"s limitations. Reduce polygon count and texture sizes for mobile or web applications to ensure optimal performance.
- Exporting Textures: Some formats require textures to be exported separately. Package your textures and ensure they\"re correctly mapped to the model in the target application.
- Testing in the Target Environment: Import your exported model into the target software (e.g., a game engine) to test functionality. Ensure animations play correctly, and textures appear as expected.
- Iterating Based on Feedback: Adjustments may be necessary after testing your model in its intended environment. Be prepared to iterate on your model, re-export, and test as needed.
Exporting your 3D character models correctly is crucial for their use in games and other media. By following these steps, you can ensure your creations are ready for the next stage of development.
_HOOK_
READ MORE:
Tips and Tricks for Efficient Workflow
Maximizing efficiency in Blender can save you time and improve the quality of your 3D character models. Here are some tips and tricks to streamline your workflow and enhance productivity.
- Use Keyboard Shortcuts: Familiarize yourself with Blender\"s keyboard shortcuts. Speed up your workflow significantly by learning shortcuts for common actions like scaling (S), rotating (R), and moving (G).
- Customize Your Interface: Arrange Blender\"s layout to suit your workflow. You can customize the interface to have all the tools you need accessible, reducing the time spent switching between tabs and panels.
- Implement Add-ons: Blender supports numerous add-ons that can automate tasks or add functionality. Explore add-ons for sculpting, retopology, and texturing to enhance your workflow.
- Create Asset Libraries: Build libraries of reusable assets such as materials, meshes, and textures. This can save you time on future projects, allowing you to drag and drop pre-made elements.
- Use Layers and Collections: Organize your project into layers and collections. This makes managing complex scenes easier, allowing you to focus on one part of the model at a time.
- Keep a Clean Topology: Maintain a clean, quad-based topology as you model. This simplifies the texturing, rigging, and animation processes, and makes your models more versatile.
- Regularly Save Iterations: Save different versions of your project as you progress. This practice safeguards against data loss and allows you to revisit earlier versions if needed.
- Utilize Procedural Textures: Procedural textures can be a powerful way to add complexity and detail without manual painting. They\"re also infinitely scalable and customizable.
By adopting these tips and tricks, you can create an efficient and effective workflow in Blender, making the process of 3D character modeling more enjoyable and productive.
Embarking on your journey to create 3D character models in Blender can be a thrilling adventure. With patience and practice, you\"ll unlock your creative potential and bring your most imaginative characters to life.