Topic how to import 3d models in blender: Unlock the full potential of Blender by mastering the art of importing 3D models. This guide provides essential tips and step-by-step instructions to seamlessly integrate models into your projects, enhancing creativity and efficiency.
Table of Content
- How do I import 3D models into Blender?
- Understanding File Formats and Compatibility
- Step-by-Step Guide to Importing FBX and OBJ Files
- Adjusting Import Settings for FBX Files
- Importing and Adjusting OBJ Files in Your Project
- Scaling, Positioning, and Rotating Your 3D Model
- YOUTUBE: How to Import 3D Models in Blender
- Tips for Importing Models with Textures and Materials
- Navigating and Manipulating Objects in the 3D View
- Adding Materials and Textures to Your Model
- Finalizing and Rendering Your 3D Model
- Importing 3D Warehouse Models into Blender
- Advanced Import Options and Troubleshooting
- Working with CAD Models in Blender
How do I import 3D models into Blender?
To import 3D models into Blender, follow these steps:
- Open Blender on your computer.
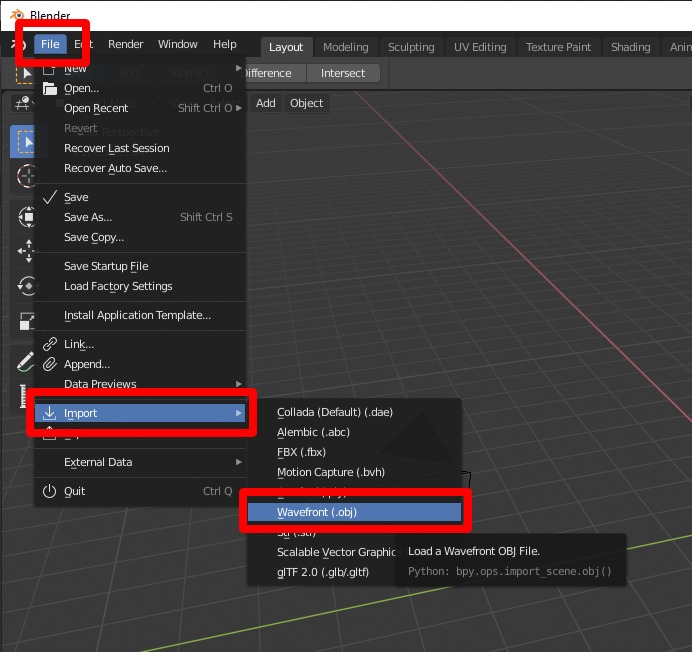
- In the top menu bar, click on \"File\" and select \"Import\".
- From the list of import options, choose the appropriate file format for your 3D model. For example, you can select \".obj\" for Wavefront OBJ files or \".fbx\" for Autodesk FBX files.
- A file explorer window will appear. Locate and select the 3D model file you want to import.
- Click the \"Import\" button to import the selected 3D model.
- Depending on the complexity of the model, it may take a few moments for it to appear in the Blender interface.
- Once imported, you can manipulate, modify, and animate the 3D model using Blender\'s tools and features.
Note that different file formats may require specific settings or additional steps for successful import. Make sure your 3D model file is compatible with Blender and consult the Blender documentation or community forums for any specific requirements or troubleshooting.
READ MORE:
Understanding File Formats and Compatibility
Importing 3D models into Blender is a straightforward process, but knowing the right file formats and their compatibility is crucial. Blender supports a variety of 3D file formats, each with its unique characteristics and uses. Understanding these formats ensures smooth integration of 3D models from various sources into your Blender projects.
- FBX: A versatile file format widely used in the gaming and animation industries for modeling, animation, and material definition. Ideal for complex models with animations.
- OBJ: A common format that supports geometry, UV maps, and materials. Preferred for static models or those without animation.
- STL: Primarily used for 3D printing, focusing on the model\"s geometry without color or texture information.
- Collada (DAE): An interchange file format that supports geometry, materials, textures, and animations. Suitable for transferring models between different software.
- 3DS: Originating from 3D Studio DOS, this format supports basic models with textures and simple animations.
- PLY: Often used in 3D scanning, supporting vertex color data, making it ideal for detailed scans.
Before importing a model, ensure it\"s saved in a file format compatible with Blender. If necessary, convert the model using a third-party tool or software that originally created it. Compatibility extends beyond file formats, as elements like textures, materials, and animations may require adjustments or reapplication within Blender for optimal results.

Step-by-Step Guide to Importing FBX and OBJ Files
Importing FBX and OBJ files into Blender enhances your projects with external models. Follow this comprehensive guide to smoothly integrate these files into your Blender workflow.
- Prepare Your Model: Ensure your FBX or OBJ file is ready for import. Check the model for any compatibility issues and ensure it\"s correctly saved in the respective format.
- Open Blender: Launch Blender and open your project or start a new one where you want to import the 3D model.
- Go to File > Import: In the Blender top menu, navigate to File > Import and select either FBX (.fbx) or Wavefront (.obj) depending on your file format.
- Select Your File: Browse to the location of your FBX or OBJ file. Select it and click Import FBX or Import OBJ.
- Adjust Import Settings: Before finalizing the import, adjust any settings specific to the file format. For FBX files, you may adjust the scale, rotation, or import specific elements like animations. For OBJ files, ensure that materials and textures are correctly mapped.
- Finalize the Import: After adjusting settings, click on the import button to bring your model into Blender. Your model will appear in the 3D viewport.
- Post-Import Adjustments: Once imported, you may need to make further adjustments to the model within Blender. This can include scaling, positioning, and applying textures or materials if they were not imported correctly.
Importing FBX and OBJ files can initially seem daunting, but by following these steps, you can efficiently integrate diverse models into your Blender projects, expanding your creative possibilities.

Adjusting Import Settings for FBX Files
Importing FBX files into Blender can significantly enhance your 3D modeling and animation projects by allowing you to utilize models created in other software. To ensure a smooth import process and optimal compatibility, adjusting the FBX import settings in Blender is crucial. Follow these detailed steps to fine-tune your import settings for FBX files:
- Open the Import Dialog: Start Blender and go to File > Import > FBX (.fbx). This opens the FBX Import dialog window where you can select your FBX file.
- Select Your FBX File: Navigate to the location of the FBX file you wish to import, select it, and click the Import FBX button. Before clicking, notice the import options on the left side of the dialog.
- Adjust Import Options: Before importing, you can adjust several settings to control how your FBX file is imported into Blender:
- Scale: Adjust the scale factor to match the Blender scene. This is essential for ensuring that the model\"s size corresponds accurately with your project.
- Forward/Up: Set the correct orientation for the model by adjusting the \"Forward\" and \"Up\" axes. This ensures that your model aligns correctly with Blender\"s coordinate system.
- Armature: If your FBX file includes an armature (skeleton), you may need to tweak the armature import settings, such as automatic bone orientation, to ensure that animations and poses work correctly in Blender.
- Import Animations: Enable this option if your FBX file contains animations that you want to import along with the model.
- Import Units: If the FBX file was created with specific units, enabling this option will attempt to match those units within Blender, maintaining the model\"s intended size and proportions.
- Finalizing the Import: After adjusting the settings according to your needs, click on the Import FBX button again to finalize the import process. Your FBX model will now be loaded into Blender with the specified settings.
After importing, it\"s always a good idea to review the model in the 3D viewport. Check for any issues with scaling, orientation, or animations and make necessary adjustments using Blender\"s tools. Properly adjusting the import settings for FBX files can save time and ensure that your models integrate seamlessly into your Blender projects.
Importing and Adjusting OBJ Files in Your Project
Importing OBJ files into Blender is a straightforward process that allows you to bring in models from various sources. OBJ files are widely used and supported due to their simplicity and ability to include both geometry and textures. Here\"s how to import and adjust OBJ files in your Blender project:
- Open the Import Dialog: In Blender, navigate to File > Import > Wavefront (.obj) to open the import dialog specific to OBJ files.
- Select the OBJ File: Browse to the location of the OBJ file you wish to import, select it, and then click the Import OBJ button. Before importing, you\"ll see options for adjusting the import settings.
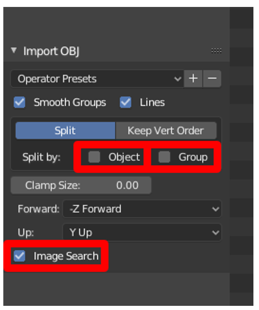
- Adjust Import Settings: You can modify several settings before finalizing the import to ensure the model fits well within your project:
- Scale: Adjust the scale to ensure the model\"s size is appropriate for your scene. This is crucial for maintaining proportionality between the imported model and existing elements.
- Forward/Up: Blender and the software that was used to create the OBJ file may have different coordinate systems. Adjusting the \"Forward\" and \"Up\" settings will ensure that the model is oriented correctly in your scene.
- Split by: This option allows you to control how the geometry is divided upon import. For example, splitting by \"Object\" can keep separate parts manageable, while \"Group\" can be used if the OBJ was organized into groups.
- Importing the File: After setting the import options to your preference, click on the Import OBJ button to add the model to your Blender scene.
Once imported, you may need to adjust the model further to integrate it seamlessly into your project. This could include scaling, positioning, and rotating the model using Blender\"s tools. Additionally, if the OBJ file included textures, you might need to ensure they are correctly mapped to the model. This can be done in the Shader Editor, where you can connect texture files to the appropriate material nodes.
Importing and adjusting OBJ files in Blender opens up a wide range of possibilities for your 3D projects, enabling you to utilize models from various sources and adapt them to fit your creative vision.

_HOOK_
Scaling, Positioning, and Rotating Your 3D Model
Once you have imported your 3D model into Blender, the next steps are crucial for integrating it perfectly into your scene. Scaling, positioning, and rotating your model are fundamental techniques to ensure that it fits your creative vision and interacts correctly with other elements in your project. Here\"s how to effectively manipulate your model in Blender:
- Select Your Model: Left-click on the model in the 3D viewport to select it. Ensure that the model is active by checking for an orange outline around it.
- Scaling Your Model: To scale your model, press the S key. You can then move your mouse to adjust the size. For more precise scaling, type in a number after pressing S to scale the model by that factor. To scale uniformly, just move the mouse. To scale along a specific axis (X, Y, or Z), press S followed by the axis key (X, Y, or Z).
- Positioning Your Model: To move your model, press the G key, then move your mouse to position the model. For precise movements, you can also press G followed by an axis key (X, Y, or Z) to move the model along that specific axis. Typing a number after pressing G moves the model by that amount in Blender units along the chosen axis.
- Rotating Your Model: To rotate your model, press the R key. Move your mouse to adjust the rotation. For axis-specific rotation, press R, then the axis key (X, Y, or Z) you wish to rotate around. Typing a number after pressing R will rotate the model by that degree amount.
- Using the Transform Panel: For more precise control, you can use the Transform panel in the Properties sidebar (press N to toggle). Here, you can manually enter values for location, rotation, and scale.
These basic manipulations are essential for preparing your model for further detailing, animation, or rendering. Remember, you can always undo actions by pressing Ctrl + Z if you make a mistake. Experimenting with different positions, scales, and orientations can help you find the perfect setup for your model within your Blender scene.
How to Import 3D Models in Blender
Experience the magic of Blender, a powerful 3D animation and modeling software that will bring your wildest imaginations to life on the screen. Dive into the world of limitless creativity and learn how to create stunning visuals with this incredible tool.
Tips for Importing Models with Textures and Materials
When importing models into Blender that include textures and materials, ensuring these elements transfer correctly is key to maintaining the visual fidelity of your model. Here are some tips to help you successfully import models with their textures and materials intact:
- Check File Formats: Ensure your model\"s file format supports textures and materials. Formats like FBX and OBJ can include this information, but ensure they are correctly exported from the original software.
- Preserve File Paths: When importing a model, Blender looks for texture files based on the paths saved within the model file. Keep texture files in the same relative paths as when they were originally linked or embedded to avoid missing textures.
- Use the Correct Import Options: When importing, make sure to enable options that import textures and materials. For example, in the FBX or OBJ import settings, look for options related to materials and textures and ensure they are checked.
- Manually Re-link Textures: If textures do not appear correctly, you may need to manually re-link them in the Shader Editor. Open the Shader Editor, select the material, and then connect the texture nodes to the appropriate shader inputs using the image textures that came with your model.
- Adjust Material Settings: Imported materials may require adjustments to look correct in Blender\"s rendering engine. This can involve changing shader types, tweaking specular and roughness settings, or adjusting transparency and emission values.
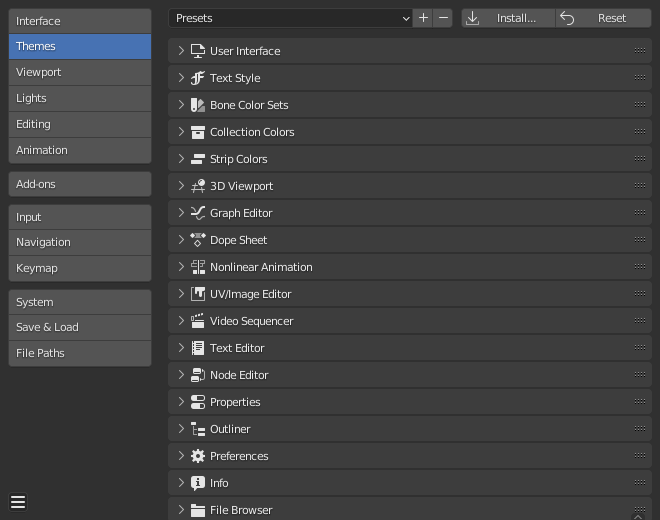
- Utilize Blender\"s Node Wrangler: The Node Wrangler addon, included with Blender, can simplify the process of connecting textures to materials. Enable it in the Preferences, and use its shortcuts in the Shader Editor for quicker texture setup.
- Check for Embedded Textures: Some file formats may embed textures directly within the model file. Ensure Blender is set to import these embedded textures by checking the relevant option in the import settings.
By following these tips, you can ensure that your imported models appear in Blender as they were intended, with all textures and materials correctly applied. This will save you time and effort in retexturing and allow you to focus on the creative aspects of your project.

How to Import Models With Textures in Blender
Transform your designs with the mesmerizing world of textures. Discover the secrets to adding depth, detail, and realism to your artworks with this captivating video. Unleash your creativity as you explore the endless possibilities that textures can bring to your projects.
Navigating and Manipulating Objects in the 3D View
Navigating the 3D View in Blender is essential for efficiently working with your models and scenes. Understanding how to manipulate objects and navigate the viewport will enhance your modeling, texturing, and animation workflows. Here are key techniques for navigating and manipulating objects in Blender\"s 3D View:
- Orbiting the View: Hold down the Middle Mouse Button (MMB) and move the mouse to orbit around the scene. This allows you to view your model from different angles.
- Panning the View: To pan the view, hold Shift and then the MMB while moving the mouse. This shifts your view horizontally or vertically.
- Zooming in and Out: Scroll the MMB wheel to zoom in and out of the scene. Alternatively, you can hold Ctrl and the MMB while moving the mouse forward or backward to zoom.
- Selecting Objects: Left-click on an object to select it. The object will be highlighted, indicating it is active. For multiple selections, hold Shift and left-click on additional objects.
- Moving Objects: With an object selected, press G to grab (move) it. You can then move your mouse to position the object. Press Enter or left-click to confirm the position.
- Rotating Objects: Press R to rotate the selected object. Move the mouse to adjust the rotation angle. Similar to moving, press Enter or left-click to confirm the rotation.
- Scaling Objects: Press S to scale the selected object. Moving the mouse away or towards you will scale the object up or down. Confirm by pressing Enter or left-clicking.
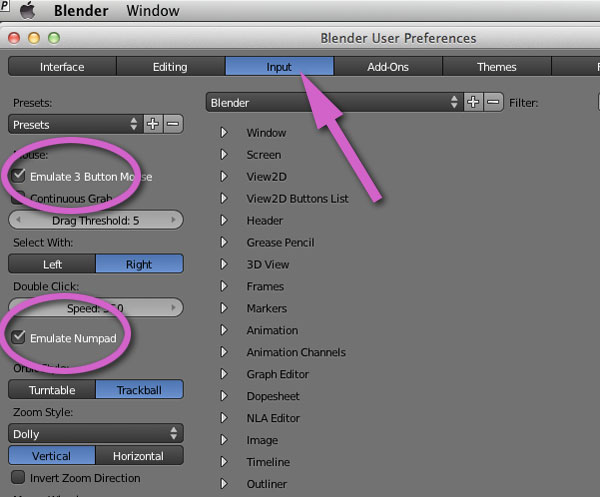
- Using the Numpad for View Control: The numpad keys can be used for quick views. For example, Numpad 1 for front view, Numpad 3 for right view, and Numpad 7 for top view. Numpad 5 toggles between perspective and orthographic view.
- Focusing on an Object: Select an object and press Numpad . (period) to focus the view on that object, centering it in the viewport.
Mastering these navigation and manipulation techniques will make your work in Blender more efficient and enjoyable. Practice these controls to become more fluent in 3D modeling and scene building.
Adding Materials and Textures to Your Model
Adding materials and textures is a crucial step in bringing your 3D models to life in Blender. This process involves assigning colors, textures, and shaders to your model to create realistic or stylized surfaces. Follow these steps to add materials and textures to your model:
- Select Your Model: Click on your model in the 3D Viewport to select it. Ensure it is the active object.
- Open the Shader Editor: Split your view and change one of the windows to the Shader Editor. This workspace allows you to create and edit materials and textures.
- Create a New Material: With your model selected, go to the Material Properties tab (the red sphere icon) and click New to create a new material. This adds a default material to your selected object.
- Adjust Material Settings: In the Material Properties tab, you can change the color, specularity, roughness, and other properties of the material to achieve the desired look.
- Add Textures: In the Shader Editor, add a texture by pressing Shift + A, selecting Texture, and then choosing the type of texture you want (e.g., Image Texture). Connect the texture node to the Base Color input of the Principled BSDF shader node to apply the texture to the material.
- Load the Texture Image: In the Image Texture node, click Open and navigate to the image file you want to use as a texture. Select the file and click Open Image to apply it to your material.
- Adjust Texture Mapping: To correctly map the texture onto your model, you may need to adjust the texture coordinates. Add a Texture Coordinate node and a Mapping node (Shift + A > Vector) to control how the texture is projected onto the model.
- Preview Your Material: Use the 3D Viewport\"s shading mode to preview how the material and texture appear on your model. You can switch to Material Preview or Rendered mode for a more accurate representation.
Experiment with different material and texture settings to achieve the desired effect. You can create multiple materials for different parts of your model and assign them accordingly. Adding materials and textures is a powerful way to enhance the visual quality of your models in Blender.

Finalizing and Rendering Your 3D Model
Finalizing and rendering your 3D model in Blender is the last step to bring your project to completion and showcase your work. Rendering transforms your 3D scene into a 2D image or animation, applying all the textures, materials, lighting, and camera effects. Here\"s how to finalize and render your 3D model:
- Review Your Model: Ensure your model is fully textured, materials are correctly applied, and the scene is set up with appropriate lighting and cameras. Make any necessary adjustments to the model, materials, or scene setup.
- Set up the Camera: Position the camera to frame your model the way you want it to appear in the final render. You can do this by selecting the camera, pressing N to open the side panel in the 3D Viewport, and using the View controls under View Lock to lock the camera to your current view.
- Adjust Lighting: Good lighting is crucial for a high-quality render. Add or adjust lights in your scene to highlight your model\"s features and create the desired mood or atmosphere.
- Choose Render Settings: Go to the Render Properties panel and choose your render engine (e.g., Eevee or Cycles). Adjust the render settings, such as resolution, samples (for Cycles), and any other settings that affect the quality and speed of the render.
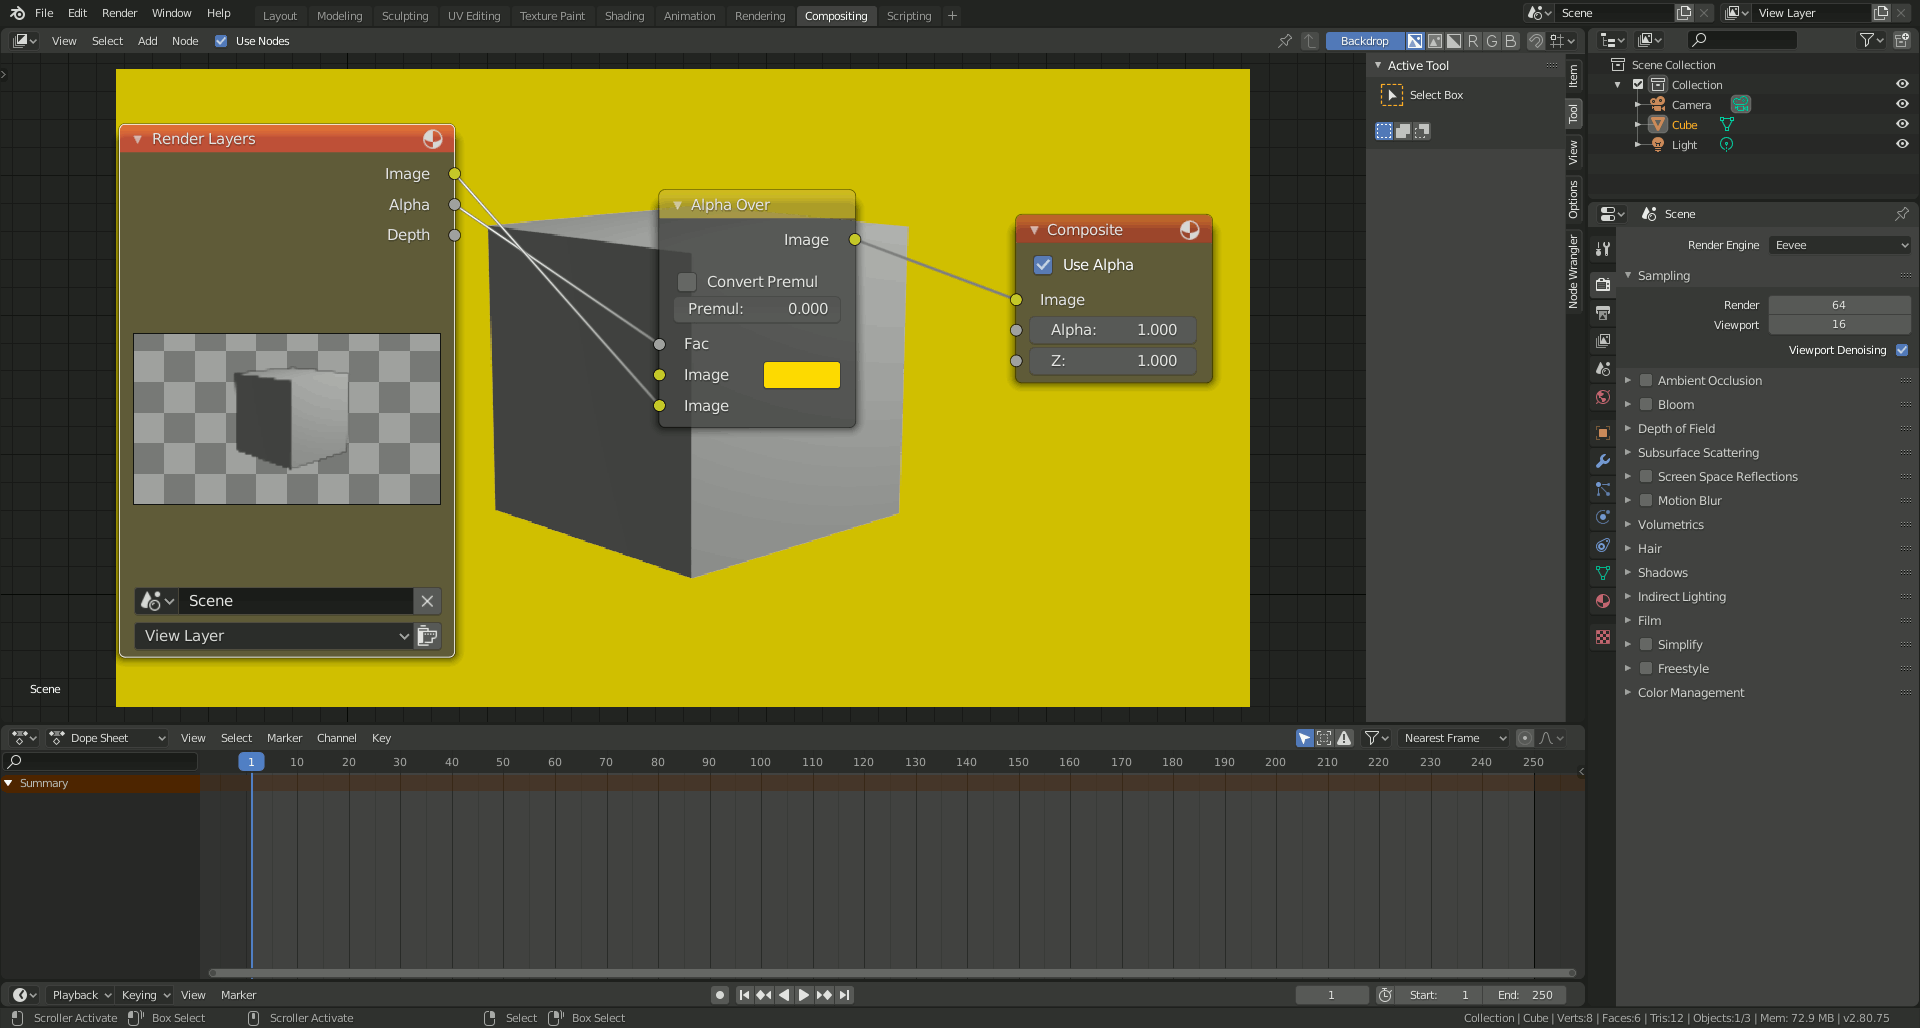
- Apply Post-Processing Effects: If desired, use the Compositor in Blender to add post-processing effects like color grading, glare, or blur to enhance your final image.
- Render the Image: Once satisfied with your setup, go to Render > Render Image (or press F12) to start rendering your scene. For animations, go to Render > Render Animation (or press Ctrl + F12).
- Save Your Render: After rendering, don\"t forget to save your image or animation. Go to Image > Save As in the Image Editor for still renders, or ensure your output path is set in the Render Properties panel for animations.
Rendering is a compute-intensive process, so the time it takes can vary greatly depending on the complexity of your scene and the quality settings. Experiment with different settings to find the right balance between quality and rendering time for your project.
_HOOK_
Importing 3D Warehouse Models into Blender
3D Warehouse offers a vast library of models that can be a great resource for Blender users. Importing these models into Blender, however, requires a few steps since they are often in SketchUp format (.skp). Here\"s how to import 3D Warehouse models into Blender:
- Download the Model: First, visit the 3D Warehouse website, search for the model you need, and download it. Choose a version that is compatible with the software you have available for converting the file to a format Blender can import, such as .dae (Collada).
- Convert the File (if necessary): Blender does not natively support the .skp file format. You may need to convert the file to a Blender-compatible format like .dae or .obj. You can use SketchUp (there is a free version, SketchUp Free) or another conversion tool to open the .skp file and export it to a compatible format.
- Import the Model into Blender: Once you have the model in a compatible format, open Blender and go to File > Import, then select the appropriate format (.dae for Collada, .obj for Wavefront, etc.). Navigate to where you saved the converted model, select it, and click Import.
- Adjust the Imported Model: After importing, you may need to adjust the scale, rotation, or position of the model to fit your scene. Use the techniques described in previous sections for manipulating objects in Blender.
- Check Textures and Materials: Imported models might not always carry over textures and materials perfectly. Check the model\"s materials in the Shader Editor and reapply or adjust textures as needed.
- Save Your Blender Project: Don’t forget to save your Blender project after importing the model to avoid losing any work.
While importing models from 3D Warehouse adds steps to your workflow, it opens up a broad range of assets for use in your Blender projects. With a bit of practice, integrating these models into your scenes can become a seamless part of your Blender toolkit.
Advanced Import Options and Troubleshooting
Importing 3D models into Blender can sometimes present challenges, especially with complex scenes or formats not natively supported by Blender. Understanding advanced import options and common troubleshooting techniques can help ensure a smooth process. Here are some advanced tips and solutions to common problems:
- Using Custom Import Scripts: For formats not supported by Blender\"s default import options, look for custom import scripts or addons. The Blender community often develops scripts for importing various file formats. Install these addons through Blender\"s Preferences menu.
- Adjusting Import Settings: Many importers come with a range of settings that can be adjusted before importing. These can include scaling options, axis corrections, and selection of what parts of the file to import (such as cameras, lights, or just geometry).
- Handling Large Models: Large models can cause performance issues. Consider breaking down large models into smaller parts if possible, or use Blender\"s decimate modifier to reduce polygon count after import.
- Fixing Missing Textures: If textures are missing after import, it could be due to incorrect paths or missing files. Use Blender\"s File > External Data menu to automatically pack into .blend or find missing files, and manually re-link textures in the Shader Editor.
- Correcting Normals and Shading: Imported models might display shading issues. Use Blender\"s Edit Mode to recalculate normals (Mesh > Normals > Recalculate Outside) or adjust shading settings in the Object Data Properties panel.
- Converting Between Units: If the imported model\"s scale is off, adjust the scale in the import settings or use Blender\"s Scale tool to resize the model to fit your scene. Blender\"s Scene Properties panel allows you to set the unit scale for accurate measurements.
- Importing Animations: For importing models with animations, ensure that the import settings enable animation data. You may need to adjust the animation settings or manually link armatures and meshes if they don\"t import correctly.
- Debugging Import Errors: If you encounter errors during import, check Blender\"s console (Window > Toggle System Console) for error messages that can provide clues on what went wrong. Searching online forums and communities can also offer solutions.
Advanced import options and troubleshooting techniques are invaluable for working with a wide range of 3D models in Blender. Familiarizing yourself with these methods can greatly enhance your productivity and expand the scope of your projects.
READ MORE:
Working with CAD Models in Blender
Blender is a versatile tool that, while primarily known for its strengths in animation and rendering, can also be adapted for use with CAD (Computer-Aided Design) models. Working with CAD models in Blender allows for the creation of detailed architectural or mechanical visualizations and animations. Here’s how to effectively work with CAD models in Blender:
- Convert CAD Files to a Compatible Format: Blender cannot natively import most CAD file formats. Convert your CAD files into a format Blender supports, such as STL, OBJ, or FBX. Use CAD software or a dedicated conversion tool to perform this step.
- Importing the Model: Once you have a compatible file, import it into Blender using the File > Import option and selecting the appropriate file type. Adjust any import settings as necessary, paying attention to scale and orientation.
- Cleaning Up the Model: CAD models can come with high vertex counts or non-manifold edges that may complicate editing and rendering. Use Blender\"s editing tools, such as Limited Dissolve and the Decimate modifier, to simplify the geometry without losing significant detail.
- Adjusting Scale and Units: CAD models are typically created with precise dimensions. Ensure the scale and units in Blender match those of the CAD model by adjusting the Scene Properties. This ensures accuracy in the model\"s dimensions and textures.
- Applying Materials and Textures: CAD models imported into Blender may not include materials or textures. You can apply new materials and textures using Blender\"s material properties and the Shader Editor, adding realism or stylistic effects as needed.
- Setting Up Lighting and Camera: For visualization, properly set up lighting and camera angles to highlight the model\"s features. Use three-point lighting for a balanced scene and adjust camera settings to frame your model correctly.
- Rendering the Model: With the model, materials, and scene setup complete, you’re ready to render. Choose your render engine (Eevee for speed, Cycles for realism), adjust your render settings, and render your scene to produce the final image or animation.
Working with CAD models in Blender can bridge the gap between technical design and creative visualization, offering a unique platform to present and animate your designs. With practice, you can integrate Blender into your CAD workflow for impressive results.
Embark on a journey to master Blender by learning how to import, adjust, and enhance 3D models for your creative projects. Follow our comprehensive guide to unlock the full potential of your designs in the dynamic world of 3D modeling.