Topic how to model with blender: Discover the world of 3D modeling with Blender, the comprehensive guide designed to transform beginners into skilled artists. Start your creative journey today!
Table of Content
- How to model objects in Blender?
- Getting Started with Blender
- Understanding Blender\"s Interface
- Basic Modeling Techniques
- Advanced Modeling Tools and Techniques
- YOUTUBE: Blender Modelling Tutorial for Absolute Beginners - Simple Human
- Texturing and Materials
- Lighting and Rendering
- Animation Basics
- Exporting and Sharing Your Models
- Tips and Tricks for Efficient Modeling
- Resources for Further Learning
How to model objects in Blender?
Here is a step-by-step guide on how to model objects in Blender:
- Open Blender and create a new project.
- Click on \"Add\" at the top menu, then select \"Mesh\" to add a basic shape.
- Choose the shape you want to add from the options available.
- Click on the shape to select it.
- Use the \"Move,\" \"Rotate,\" and \"Scale\" tools to position and resize the shape as desired.
- If you need more advanced modeling techniques, you can explore options like sculpting, retopology, and curves in Blender\'s extensive modeling toolset.
- For precise measurements, you may need to rely on the eyeballing method as Blender is primarily designed as an artist\'s tool.
Remember to experiment, practice, and explore the various features and tools Blender offers to create more complex and detailed models.
READ MORE:
Getting Started with Blender
Embarking on your Blender journey begins with understanding its powerful features and user-friendly interface. Follow these steps to set a solid foundation for your 3D modeling projects.
- Download and Install Blender: Visit the official Blender website to download the latest version compatible with your operating system. Installation is straightforward, follow the on-screen instructions.
- Familiarize Yourself with the Interface: Blender\"s interface can be overwhelming at first. Spend some time learning the layout, including the 3D viewport, timeline, and editor types.
- Learn Basic Navigation: Master the basics of navigating around the 3D viewport. Practice zooming, panning, and rotating the view using your mouse and keyboard shortcuts.
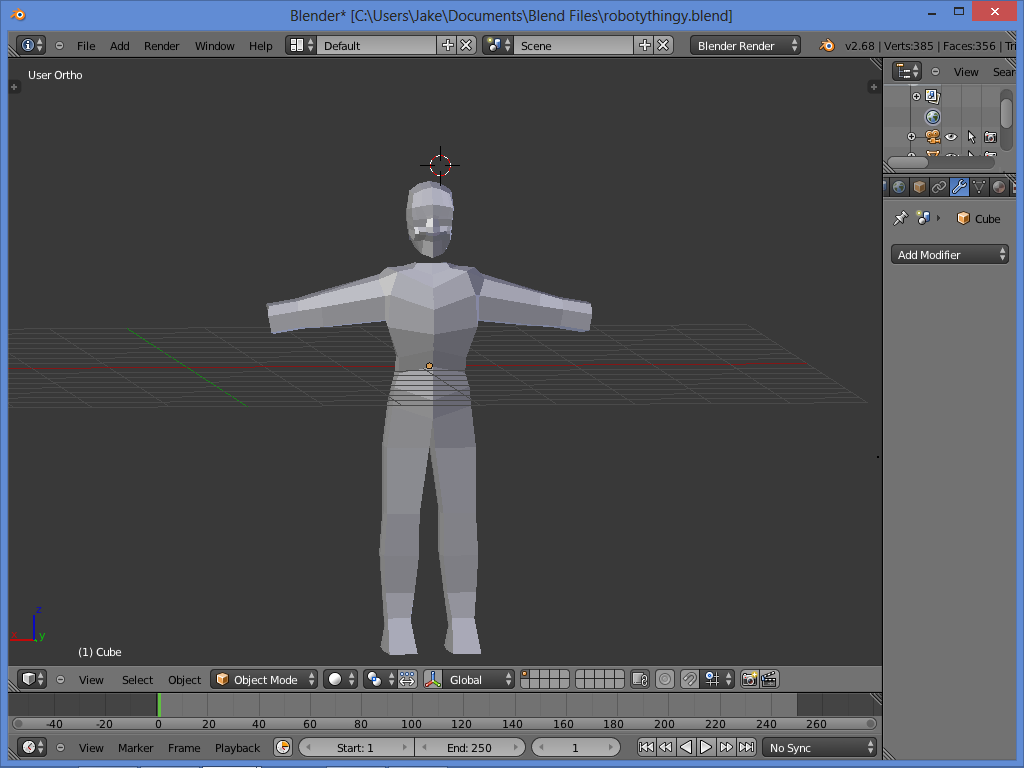
- Understand Object and Edit Modes: Blender has different modes for various tasks. Start by understanding the difference between Object mode (for moving, scaling, and rotating objects) and Edit mode (for modifying the geometry of your object).
- Experiment with Adding Meshes: Learn how to add basic shapes (meshes) to your scene. This is the building block of 3D modeling in Blender.
- Master Basic Transformations: Get comfortable with the basic transformations - moving, scaling, and rotating objects. These are crucial for positioning your models in the scene.
Once you\"re comfortable with these basics, you\"ll be well on your way to creating your own 3D models. Remember, practice and exploration are key to mastering Blender.

Understanding Blender\"s Interface
Navigating Blender\"s interface efficiently is crucial for a smooth modeling experience. This section breaks down the main components to help you get acquainted quickly.
- 3D Viewport: The heart of Blender, where you\"ll spend most of your time. This is where you can view and interact with your models.
- Properties Panel: Located to the right of the 3D Viewport, this panel houses various settings for your scene, objects, materials, and more.
- Outliner: A hierarchical list of all objects in your scene, located in the top right corner. It helps you organize and select different elements quickly.
- Timeline: At the bottom of the screen, the timeline allows you to manage animations, keyframes, and playback.
- Tool Shelf and Properties Shelf: Accessible by pressing T and N in the 3D Viewport. These shelves offer quick access to tools and object properties.
- Editor Types: Blender\"s interface is highly customizable through different editors like the Node Editor, UV/Image Editor, and Graph Editor. You can switch views based on your task.
Understanding these components is your first step towards mastering Blender. Experiment with the interface, customize it to your workflow, and explore the extensive documentation available for deeper insights.

Basic Modeling Techniques
Navigating Blender\"s interface efficiently is crucial for a smooth modeling experience. This section breaks down the main components to help you get acquainted quickly.
- 3D Viewport: The heart of Blender, where you\"ll spend most of your time. This is where you can view and interact with your models.
- Properties Panel: Located to the right of the 3D Viewport, this panel houses various settings for your scene, objects, materials, and more.
- Outliner: A hierarchical list of all objects in your scene, located in the top right corner. It helps you organize and select different elements quickly.
- Timeline: At the bottom of the screen, the timeline allows you to manage animations, keyframes, and playback.
- Tool Shelf and Properties Shelf: Accessible by pressing T and N in the 3D Viewport. These shelves offer quick access to tools and object properties.
- Editor Types: Blender\"s interface is highly customizable through different editors like the Node Editor, UV/Image Editor, and Graph Editor. You can switch views based on your task.
Understanding these components is your first step towards mastering Blender. Experiment with the interface, customize it to your workflow, and explore the extensive documentation available for deeper insights.

Advanced Modeling Tools and Techniques
As you progress beyond basic modeling in Blender, mastering advanced tools and techniques will elevate your 3D modeling skills. This section delves into sophisticated methods that can help create intricate and detailed models efficiently.
Modifiers
Modifiers in Blender are essential for non-destructive modeling. They allow you to manipulate your mesh with operations like Subdivision Surface for smoothness, Boolean for complex cuts and joins, and Mirror for symmetrical modeling without permanently altering the base geometry. Understanding how to stack and apply modifiers can significantly speed up your workflow.
Sculpting
Blender\"s sculpting mode offers a hands-on approach to model shaping, akin to working with digital clay. Utilize brushes like Grab, Crease, and Smooth to add fine details or make broad modifications. Dynamic topology (Dyntopo) can dynamically adjust mesh resolution as you sculpt, essential for high-detail models.
Retopology
For models intended for animation or game assets, retopology is vital. Blender\"s retopology tools, such as the Shrinkwrap modifier and the Poly Build tool, help create a low-poly version of your high-poly sculpts, optimizing them for real-time rendering.
Hard Surface Modeling
Advanced hard surface techniques involve using modifiers and precision modeling tools for creating non-organic models like vehicles and machinery. The Bevel and Boolean modifiers are particularly useful here, along with custom bevel profiles for edges.
Shader Nodes for Procedural Textures
Blender’s node-based material system allows for the creation of complex, procedural textures that can make your models stand out. By combining different nodes, you can create materials with depth, wear, and variation that react realistically to light.
Lighting and Rendering
Advanced lighting techniques, including HDR lighting and the use of Blender\"s Cycles or Eevee render engines, can bring your models to life. Understanding how to set up three-point lighting, ambient occlusion, and depth of field will enhance the realism of your renders.
Animation and Rigging
For models that require movement, learning advanced rigging and animation techniques is crucial. Blender offers a comprehensive set of tools for rigging models with bones, automatic weights, and inverse kinematics, allowing for realistic animations.
Simulation
Blender’s physics engine enables the simulation of real-world behaviors, including cloth, fluid, soft body, and smoke effects. These simulations can add a layer of realism and dynamic interaction to your models.
By embracing these advanced modeling tools and techniques, you can push the boundaries of what\"s possible in Blender, creating more detailed, realistic, and complex models. Practice and experimentation are key to mastering these advanced skills.

_HOOK_
Blender Modelling Tutorial for Absolute Beginners - Simple Human
\"Looking to learn Blender modelling but don\'t know where to start? Our absolute beginners tutorial is perfect for you! In just a few easy steps, we\'ll guide you through the process of creating stunning 3D models. Get ready to unlock your creative potential!\"
Character Creation in Blender - My Full Process in 10 Minutes
\"Curious about character creation in Blender? Look no further! In just 10 minutes, we\'ll walk you through our full process, from start to finish. Discover the secrets behind bringing your characters to life and watch as your imagination takes shape. Don\'t miss out on this quick and captivating tutorial!\"
Texturing and Materials
Texturing and applying materials in Blender transforms your 3D models from simple shapes to lifelike objects. This section guides you through the process of applying textures and creating materials to add realism and depth to your models.
Creating and Applying Materials
Start by selecting your object and switching to the Material Properties tab. Click the ‘New’ button to create a new material. From here, you can adjust the base color, specular intensity, and other properties to define the basic appearance of your object.
Adding Textures
To add a texture, you need to first ensure your object has a material. With the material set up, move to the Texture Properties tab and click ‘New’. You can choose from various texture types, such as Image or Movie, to use an external image, or procedural textures like Noise for generated patterns.
UV Mapping
UV mapping is crucial for accurately applying images to your model. In Edit mode, unwrap your model by selecting all vertices and choosing a method of unwrapping (e.g., Smart UV Project or Unwrap). Adjust the UV layout in the UV/Image Editor to match your texture.
Shaders and Node Editor
Blender’s powerful node-based material system allows for complex material creation. Access the Shader Editor to combine different nodes, such as textures, shaders, and math operations, to create unique material effects. Experiment with nodes like Principled BSDF for physically based materials.
Texture Painting
Texture painting lets you directly paint on your 3D model in Blender. Switch to Texture Paint mode, select your brush and colors, and begin painting. You can also use stencils or projection painting for more detailed textures.
Bump and Normal Maps
For added realism, use bump and normal maps to simulate surface irregularities without increasing geometry. Apply these maps in the Shader Editor to affect the material’s normal input, giving the illusion of depth and detail on the surface.
Environmental Textures
Add environmental textures for realistic reflections and lighting. HDRIs (High Dynamic Range Images) can be used as environment textures in the World settings to simulate realistic lighting and reflections in your scene.
By mastering these texturing and material techniques in Blender, you can create visually stunning and lifelike models. Practice and experimentation are key to understanding how different textures and materials can enhance your 3D projects.

Lighting and Rendering
Lighting and rendering are crucial steps in the 3D modeling process, transforming your models into visually striking images or animations with depth, mood, and realism. This section provides insights into effective lighting setups and rendering techniques in Blender.
Understanding Blender\"s Lighting
Blender offers various light types, including Point, Sun, Spot, and Area lights, each with unique properties and uses. Experimenting with these lights can help you achieve the desired atmosphere and emphasis in your scenes. Additionally, using the Eevee and Cycles render engines can dramatically affect the outcome, with Eevee offering real-time rendering and Cycles providing a more physically accurate result.
Setting Up Basic Lighting
A three-point lighting setup is a fundamental technique that involves a key light, fill light, and back light to create depth and minimize harsh shadows. This setup can be adjusted for mood and complexity depending on your scene\"s requirements.
Using HDRI for Environmental Lighting
HDRI (High Dynamic Range Imaging) maps are panoramic images that capture a wide range of light intensities. Using HDRI in Blender for environmental lighting can add realism to your scenes by simulating real-world lighting conditions.
Materials and Textures
Materials and textures play a significant role in rendering. They define the surface appearance of your models, including color, transparency, and texture. Blender\"s Shader Editor allows for detailed material and texture creation using a node-based interface.
Rendering with Eevee and Cycles
Eevee is Blender\"s real-time render engine, ideal for quick previews and less computationally intensive renders. Cycles, on the other hand, is a ray-traced render engine that calculates light bounces for more realistic results but requires more processing power.
Render Settings and Optimization
Adjusting render settings is key to achieving the best balance between quality and render time. This includes settings for resolution, sampling, and light bounces. Optimization techniques, such as simplifying geometry, reducing samples, and using denoising, can significantly decrease render times without substantially affecting quality.
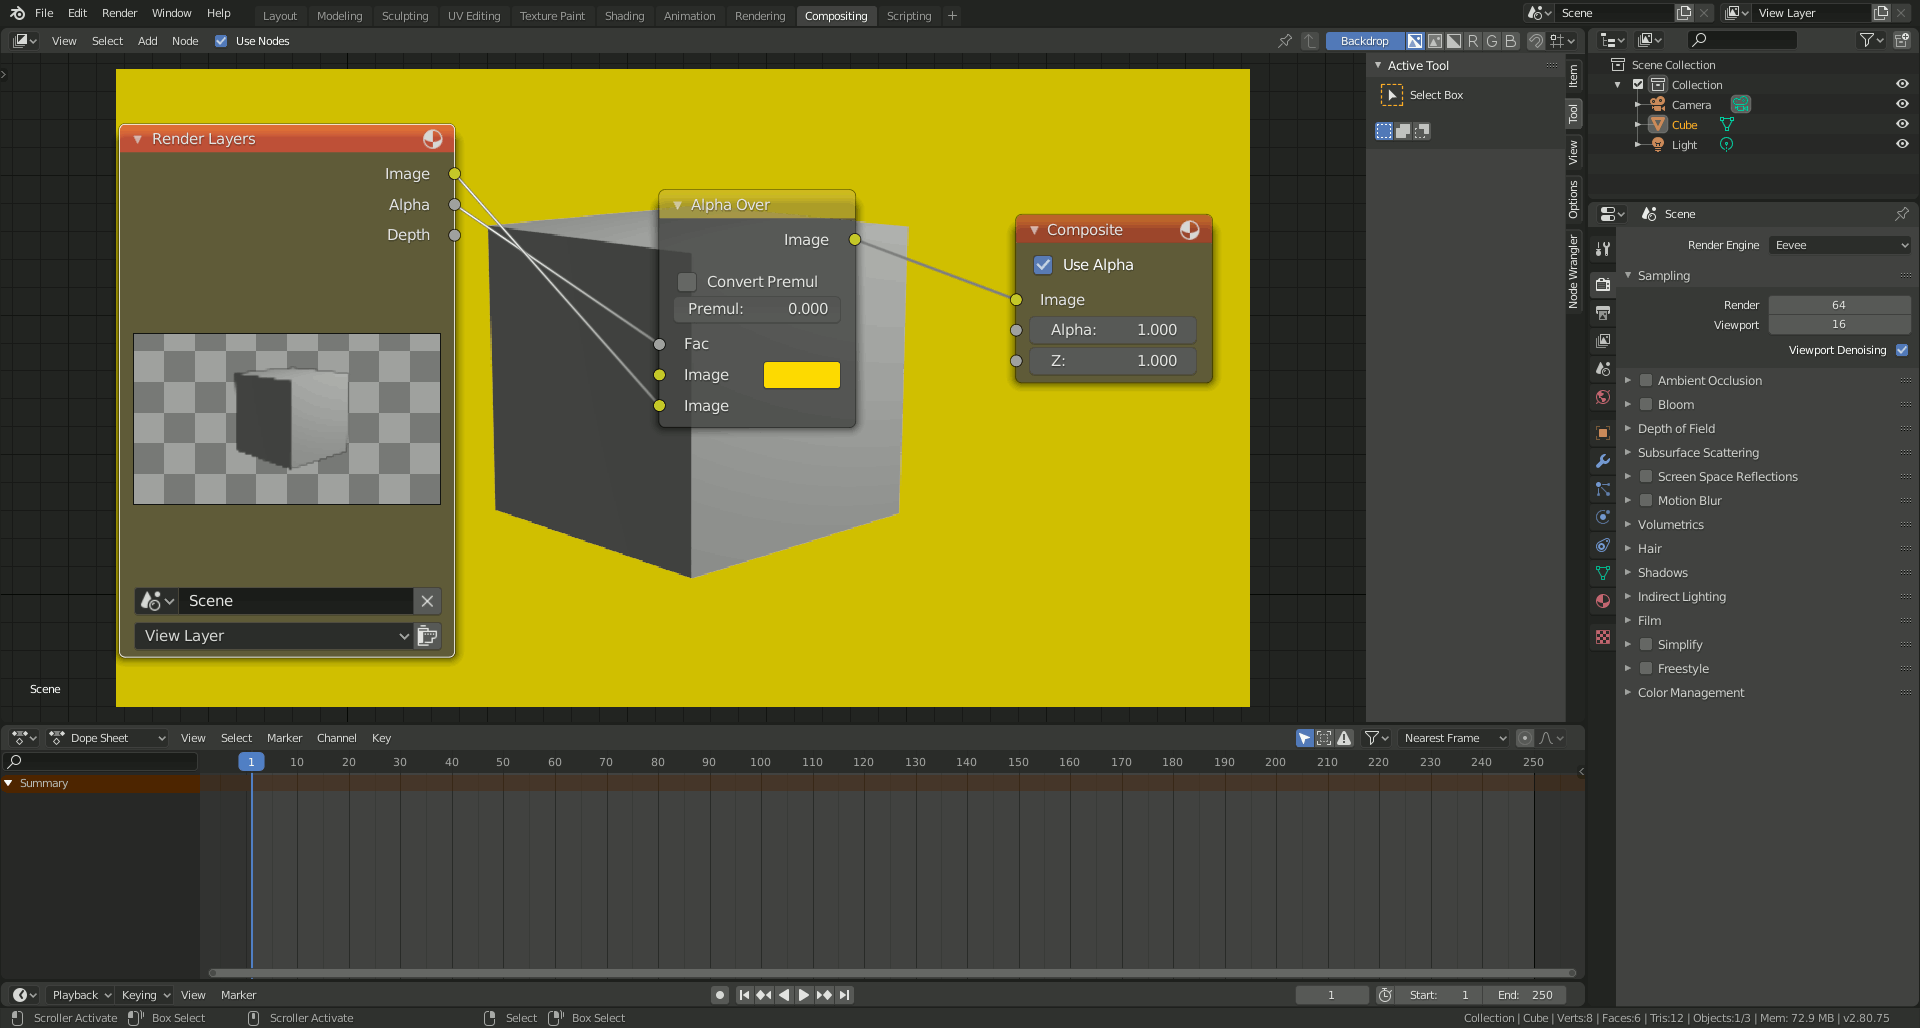
Post-Processing and Compositing
Blender\"s Compositor allows for post-processing effects, such as color grading, adding blur, or compositing multiple layers to enhance the final image or animation. Utilizing these tools can elevate the visual quality of your renders.
By mastering lighting and rendering techniques, you can bring your Blender models to life, creating compelling and visually rich scenes. Practice, experimentation, and understanding the capabilities of Blender\"s rendering engines are essential to developing your skills in 3D visualization.

Animation Basics
Animation in Blender brings your models to life by adding movement and interactivity. This section covers the fundamentals of animating in Blender, guiding you through creating your first animation step by step.
Introduction to Keyframes
Keyframes are the cornerstone of animation in Blender. They define the start and end points of any animation. To create a keyframe, simply position your object at the start of the animation, select it, and press I to insert a keyframe. Choose the attribute you wish to animate, such as location, rotation, or scale. Move your object to the end position and insert another keyframe.
Using the Timeline
The Timeline editor at the bottom of the Blender window allows you to scrub through your animation. Here, you can adjust the timing of keyframes, set the start and end points of your animation, and play back your animation to review it.
Dope Sheet and Graph Editor
For more detailed control over your animation, use the Dope Sheet and Graph Editor. The Dope Sheet gives an overview of all keyframes in your scene, while the Graph Editor allows you to fine-tune the interpolation and timing of those keyframes.
Animation Principles
Understanding basic animation principles, such as anticipation, timing, squash and stretch, and ease in/out, will significantly improve the quality of your animations. These principles help to create more natural and appealing motion.
Animating with Armatures
For character animation, armatures (skeletons) are used to rig your model. Rigging is the process of creating a bone structure for a 3D model so it can move. After creating an armature, you can pose your model by moving its bones and keyframing these positions.
Automatic Keyframe Insertion
To streamline your animation workflow, Blender offers an automatic keyframe insertion feature. With this enabled, any transformation you make to an object will automatically create a keyframe at the current frame in the timeline.
Animating Materials and Effects
Animation in Blender is not limited to objects and characters. You can also animate materials, lighting, and even camera movements. This is done in the same way as animating objects, by keyframing properties like material color, light intensity, or camera location and rotation.
With practice and exploration of Blender\"s rich set of animation tools, you\"ll be able to bring your creations to life with dynamic and engaging animations. Remember, animation is an art that requires both technical skills and creative storytelling.
Exporting and Sharing Your Models
Once you\"ve completed your 3D model in Blender, exporting and sharing it is the next step. This process allows you to use your model in other software, games, or share it online. Here\"s how to efficiently export and share your Blender models.
Choosing the Right File Format
Different platforms and uses require different file formats. Common formats include:
- OBJ: Widely supported and includes geometry and textures.
- FBX: Good for complex models, supporting animation, geometry, and textures.
- STL: Used for 3D printing, contains only geometric data.
- GLB/GLTF: Ideal for web-based applications, supporting a wide range of features like animation, materials, and more.
Exporting Your Model
To export your model, follow these steps:
- Go to File > Export and choose your desired format based on your needs.
- Adjust the export settings. Each format has different options, such as scale, texture inclusion, and axis orientation.
- Choose the location to save your file and click Export.
Optimizing Your Model for Export
Before exporting, consider optimizing your model to ensure compatibility and performance:
- Reduce polygon count if the model is intended for real-time applications.
- Apply all modifiers to avoid unexpected results in other software.
- Ensure textures are properly packed or linked for external use.
- Check the model\"s scale and orientation to match the target environment.
Sharing Your Models
There are various platforms to share your 3D models, including:
- Sketchfab: A platform to publish, share, and embed interactive 3D models online.
- Blender Artists Community: Share your work for feedback from the Blender community.
- 3D Printing Services: Upload your STL files to services like Shapeways or Thingiverse if your model is designed for 3D printing.
Exporting and sharing your models is a crucial part of the 3D modeling process. It not only allows you to showcase your work but also to collaborate with others and use your models across different platforms and applications. Following these steps will ensure your models are ready for any environment.

Tips and Tricks for Efficient Modeling
Efficient modeling in Blender not only saves time but also enhances the quality of your work. Below are essential tips and tricks to streamline your 3D modeling process.
Use Keyboard Shortcuts
Memorize and use keyboard shortcuts for common actions. For instance, G to grab/move, S to scale, and R to rotate objects. These shortcuts significantly speed up your workflow.
Master Modifier Stack
Modifiers like Mirror, Subdivision Surface, and Boolean can drastically improve your modeling efficiency. Learn how to stack and combine them effectively to achieve complex shapes with minimal effort.
Implement Loop Cuts for Detailing
Use loop cuts (Ctrl + R) to add geometry for detailed modeling. It\"s a quick way to introduce edge loops for controlling shape and adding detail where needed.
Optimize Your Mesh
Keep your geometry clean and optimized. Use tools like Merge (M), Limited Dissolve, and Clean up options to reduce vertices and keep your mesh manageable.
Embrace Proportional Editing
Proportional editing (O key) allows for smooth transitions and adjustments to your model by affecting nearby vertices while transforming a selected vertex, edge, or face.
Save Frequently and Use Versioning
Blender\"s autosave feature is a lifesaver, but manual saving with incremental versioning can prevent loss of work and allow you to revert to previous states easily.
Use Collections and Layers
Organize your scene with collections and layers. This not only helps in managing complex scenes but also in rendering and editing specific parts of your model efficiently.
Customize Your Interface
Arrange and customize Blender\"s interface to suit your workflow. Docking editors, customizing toolbars, and setting up quick access menus can make your modeling process more intuitive.
Learn Sculpting for Organic Models
For organic models like characters and creatures, sculpting tools offer greater flexibility and detail. Familiarize yourself with dynamic topology and sculpting brushes to enhance your organic modeling skills.
Experiment with Add-ons
Blender\"s functionality can be greatly expanded with add-ons. Explore and integrate useful add-ons into your workflow for tasks like tree generation, cloth simulation, and more.
By incorporating these tips and tricks into your Blender modeling workflow, you can significantly enhance your productivity and creativity. Remember, the key to mastering Blender is practice and continual learning.

_HOOK_
READ MORE:
Resources for Further Learning
Mastering Blender is an ongoing journey that requires time, practice, and the right resources. Below is a curated list of resources to help you continue learning and improving your Blender skills.
Official Blender Tutorials
The Blender Foundation offers comprehensive tutorials for users of all levels on their official website. These tutorials cover everything from the basics to advanced topics in 3D modeling, animation, and rendering.
Online Courses
Platforms like Udemy, CG Cookie, and Blender Cloud provide in-depth courses that cater to both beginners and advanced users. These courses often include project-based learning to help you build a portfolio of work.
YouTube Channels
YouTube is a treasure trove of free tutorials. Channels such as Blender Guru, CG Geek, and Darrin Lile offer tutorials on a wide range of topics, from creating realistic landscapes to character modeling.
Books and E-Books
For those who prefer written material, books like \"Blender 3D: Noob to Pro\" and \"The Complete Guide to Blender Graphics\" are excellent resources. E-books can often be found online and are a handy reference for specific topics.
Forums and Community Websites
Joining the Blender community can provide support, feedback, and inspiration. Websites like Blender Artists and BlenderNation host forums where users share their work, ask questions, and exchange tips.
Practice Projects
Engage in practice projects that challenge your current skill level. Websites like Blender Cloud offer open projects where you can contribute to real-world Blender projects and learn from experienced professionals.
Blender Add-Ons and Tools
Exploring add-ons and tools can enhance your Blender experience. The Blender Market and Gumroad offer plugins that can automate tasks, add new functionalities, or provide you with advanced modeling tools.
By utilizing these resources, you can continuously grow your Blender skills and keep up with the latest in 3D modeling, animation, and rendering technologies. Remember, the key to mastery is consistent practice and staying engaged with the Blender community.
Embark on your Blender journey with confidence, equipped with these comprehensive guides. Whether you\"re sculpting dreams into reality or animating the inanimate, Blender opens a world of creative possibilities. Start modeling today and transform your visions into visual masterpieces.