Topic how to make blender animations: Dive into the world of 3D animation with our comprehensive guide on how to make Blender animations, empowering you to bring your creative visions to life effortlessly.
Table of Content
- How to make blender animations?
- Understanding Blender\"s Interface and Basics
- Getting Started with Your First Animation
- Modeling for Animation in Blender
- Rigging Characters for Animation
- Creating Realistic Animations with Physics and Particles
- Advanced Animation Techniques and Tips
- YOUTUBE: Blender Tutorial: Animation for Beginners
- Rendering and Exporting Your Animations
- Community and Resources for Further Learning
How to make blender animations?
Creating animations in Blender involves a combination of keyframing and utilizing Blender\'s animation toolset. Here is a step-by-step guide on how to make blender animations:
- Create a new project in Blender and set up your scene by adding objects, characters, or any elements you want to animate.
- Select the object you want to animate by clicking on it in the 3D viewport.
- To start creating keyframes, go to the \"Timeline\" editor and make sure you are in the \"Animation\" workspace.
- Move the timeline scrubber to the frame where you want to set the first keyframe.
- In the 3D viewport, adjust the position, rotation, or scale of the object to the desired state for that frame.
- To create a keyframe, press I on your keyboard and select the type of keyframe you want to create (Location, Rotation, or Scale).
- Move the timeline scrubber to another frame in the timeline.
- Modify the object\'s properties again to create a new keyframe for that frame by pressing I and selecting the keyframe type.
- Repeat steps 6-8 to add more keyframes at different frames to create an animation sequence.
- Play back your animation using the play controls in the Timeline editor to preview the animation.
- Adjust the timing and properties of the keyframes as needed to refine the animation.
- Render your animation by going to the render settings, setting the desired output format, and clicking the render button.
- Save your animation project for future edits or export your animation into a suitable format for sharing or further processing.
With these steps, you can start creating your own blender animations. Remember to experiment, practice, and explore Blender\'s animation toolset to unleash your creativity.
READ MORE:
Understanding Blender\"s Interface and Basics
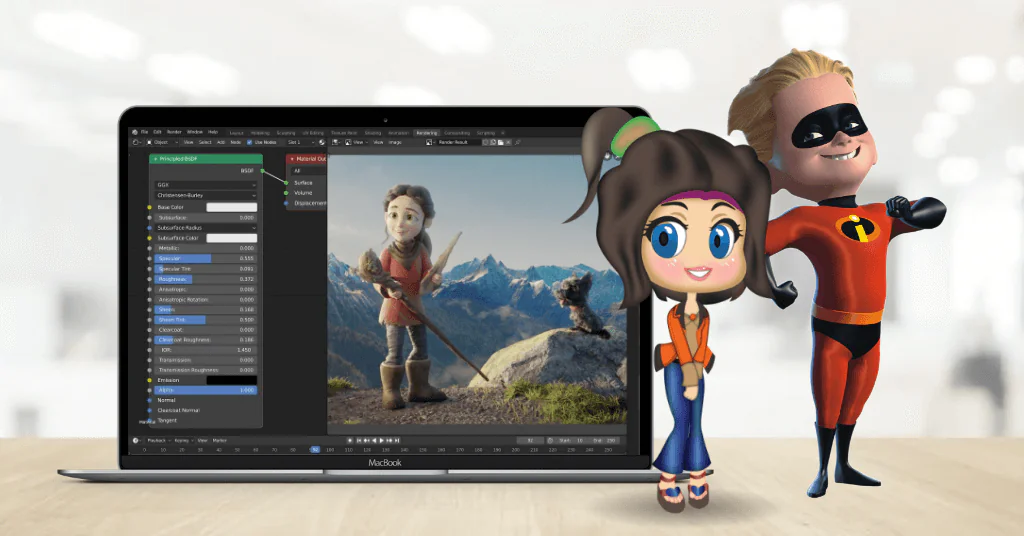
Blender\"s interface may seem daunting at first, but it\"s designed to streamline the animation process. Let\"s break it down:
- 3D Viewport: The heart of Blender, where you can view and interact with your 3D scene.
- Timeline: Located at the bottom, it allows you to control the animation frame by frame.
- Outliner: A hierarchical list of all objects in your scene, making it easy to select and manage them.
- Properties Panel: Here you can adjust object properties, including modifiers, materials, and physics settings.
- Toolbar and Tool Settings: Accessible on the left, these provide quick access to Blender\"s various tools and their settings.
Starting with these basics, practice navigating the interface. Experiment with adding objects using the \"Add\" menu, moving them around in the 3D viewport, and using the timeline to set keyframes for simple animations. Remember, familiarity with these elements is your first step towards mastering Blender animations.

Getting Started with Your First Animation
Creating your first animation in Blender is an exciting step towards bringing your digital creations to life. Follow these steps to start animating:
- Open Blender and Set Up Your Scene: Start by opening Blender and using the default cube, or create a simple object to animate.
- Add Keyframes: With your object selected, move to the frame where you want your animation to start. Press I to insert a keyframe, choosing the type of animation (e.g., Location, Rotation).
- Move the Timeline: Drag the timeline to a new frame. Move or rotate your object to its next position and insert another keyframe.
- Play Your Animation: Use the play button in the timeline to see your object move. Adjust the keyframes as needed for smoother animation.
- Experiment with Easing and Interpolation: In the Graph Editor, you can adjust the interpolation between keyframes to make the motion faster or slower.
- Add More Complexity: Once comfortable, start experimenting with more complex scenes, adding more objects, and using the principles of animation to enhance your work.
Remember, animation is both an art and a science. Patience and practice are key to developing your skills. Start with simple movements to build your understanding and confidence.

Modeling for Animation in Blender
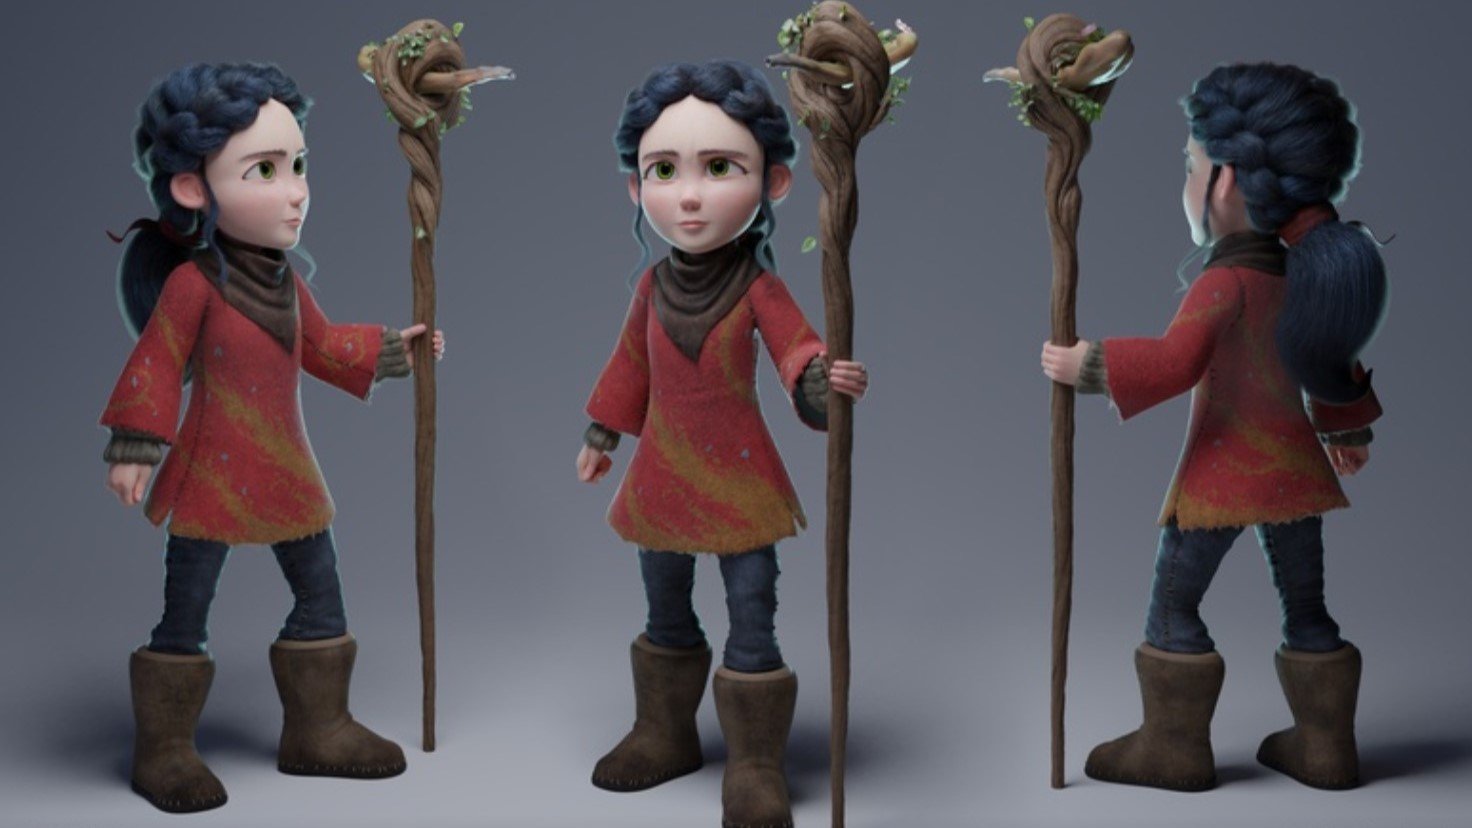
Modeling is the first step in the animation process where you create the characters and objects that will be animated. In Blender, modeling for animation requires attention to geometry and topology to ensure your models move realistically.
- Start with Basic Shapes: Use Blender’s modeling tools to start shaping your object or character from basic meshes like cubes, spheres, or cylinders.
- Refine Your Model: Add more detail to your model by subdividing surfaces, extruding faces, and using the sculpting tools for organic shapes.
- Consider Topology: For characters, a good topology is crucial for deformation. Use loop cuts to add edge loops that follow the muscle structure and facial expressions for smooth animations.
- Use Modifiers: Blender’s modifier stack can simplify the modeling process. The mirror modifier, for example, can help create symmetrical models efficiently.
- Optimize Your Model: Keep your model’s polygon count as low as possible without sacrificing detail. This will make animation easier and less resource-intensive.
- Prepare for Rigging: If your model is a character, ensure that it is in a neutral pose, which will make rigging and skinning easier.
Remember, the goal of modeling for animation is to create a model that looks good and moves naturally. By paying attention to the structure and flow of your model, you’ll set a solid foundation for the subsequent steps in the animation process.
Rigging Characters for Animation
Rigging is the process of creating a bone structure for a 3D model so it can be animated. In Blender, rigging is a critical step to bring characters to life. Follow these steps for effective rigging:
- Create the Armature: Start by adding an armature object to your scene. This serves as the skeleton for your character.
- Position Bones: Place bones within the mesh of your character. Ensure bones align with limbs and body parts for natural movement.
- Edit Bone Relationships: Use parent-child relationships to establish how bones influence each other. This helps in creating a hierarchical structure for the armature.
- Adjust Bone Weights: Weight painting allows you to control how much influence a bone has on different parts of the mesh. This is crucial for smooth deformations during animation.
- Test the Rig: Pose your character by selecting bones and rotating them. Adjust the rig as needed to ensure natural movement.
- Use Inverse Kinematics (IK): IK simplifies the animation process by allowing for more intuitive control over limb movement.
- Finalize and Save: Once satisfied with the rig, save your work. Your character is now ready for animation.
Rigging is a detailed process that requires patience and practice. A well-rigged character can significantly enhance the animation, making your scenes more dynamic and believable.
_HOOK_
Creating Realistic Animations with Physics and Particles
Blender’s physics and particle systems are powerful tools for adding realism to your animations. From simulating natural forces to creating complex particle effects, these features can bring your scenes to life. Here\"s how to get started:
- Understanding Physics in Blender: Familiarize yourself with Blender\"s physics engine, which includes rigid body dynamics, soft body physics, cloth simulation, smoke, fire, and fluid dynamics.
- Applying Rigid Body Physics: For animations involving collisions or falling objects, use the Rigid Body physics type. This simulates Newtonian physics for objects in your scene.
- Creating Fluid Simulations: Use the Fluid simulation system to create realistic water, blood, or other liquid animations. This involves setting up a domain and defining fluid sources.
- Simulating Cloth and Soft Bodies: For animations with flags, curtains, or soft, deformable objects, explore the Cloth and Soft Body physics types.
- Working with Particle Systems: Particle systems in Blender can create effects like rain, snow, fire, or smoke. Define an emitter and adjust settings like size, speed, and lifespan to achieve the desired effect.
- Combining Physics and Particles for Effects: Advanced effects can be achieved by combining different physics and particle systems, such as smoke interacting with a moving object.
- Rendering Physics and Particle Simulations: Understand the settings for rendering your simulations, including baking the physics for smooth playback and adjusting the render settings for quality.
By mastering these tools, you can add depth and realism to your Blender animations, making them more engaging and lifelike. Experimentation and practice are key to harnessing the full potential of Blender\"s physics and particle systems.

Advanced Animation Techniques and Tips
As you delve deeper into Blender animations, exploring advanced techniques can significantly enhance your projects. Here are some expert tips and strategies:
- Nonlinear Animation (NLA) Editor: Use the NLA Editor for more complex animations, allowing you to blend and layer different actions.
- Graph Editor Tweaks: Fine-tune animations with the Graph Editor, adjusting interpolation and easing for smoother transitions between keyframes.
- Shape Keys for Facial Expressions: Utilize shape keys to create detailed facial animations. This technique is essential for conveying emotions and speech.
- Constraints for Controlled Movements: Implement constraints to automate movements and achieve realistic interactions between objects.
- Python Scripting for Custom Effects: Blender’s Python API allows for scripting custom animation effects, giving you unparalleled control and flexibility.
- Dynamic Paint for Interaction: Explore Dynamic Paint to simulate interaction between objects, like footprints on sand or objects disturbing water.
- Camera Techniques for Dramatic Effect: Experiment with camera movements and angles to add depth and drama to your animations.
Mastering these advanced techniques requires patience and practice but can dramatically improve the quality and realism of your animations. Always keep learning and experimenting to discover new ways to bring your ideas to life.
Blender Tutorial: Animation for Beginners
Animation: Discover the magical world of animation as we take you on an enchanting journey filled with colorful characters, breathtaking landscapes, and heartwarming stories. Get ready to be captivated by the artistry and creativity of animation at its finest!
BLENDER Tutorial: How to Rig and Animate
Rigging or Animate: Unleash your creativity and bring your ideas to life with the power of rigging and animation. Learn the secrets behind creating fluid movements, realistic characters, and captivating storytelling through this mesmerizing video. Dive into the world of animation and watch as your imagination takes flight!
Rendering and Exporting Your Animations
Rendering and exporting are the final steps in the Blender animation process, turning your project into a viewable format. Here’s how to successfully render and export your animations:
- Choose the Right Render Engine: Blender offers several render engines like Eevee and Cycles. Select one based on your needs for speed or photorealism.
- Set Up Render Settings: Configure your render settings, including resolution, frame rate, and sample rate, to ensure high-quality output.
- Apply Lighting and Materials: Verify that all materials and lighting are correctly set up to achieve the desired effects in your final animation.
- Preview Render: Perform a preview render to check for any issues in animation, lighting, or materials before the final render.
- Render Animation: Use the Render Animation feature to process each frame of your animation. This can be time-consuming but is crucial for the final quality.
- Choose Output Format: Decide on an output format for your animation. Blender supports various video and image formats, so select one that suits your distribution plan.
- Export Your Animation: Once rendered, export your animation. If you rendered to an image sequence, consider using Blender’s Video Sequence Editor to compile the images into a video file.
Rendering and exporting can be resource-intensive processes. Ensure your computer has sufficient hardware capabilities to handle the task efficiently. With these steps, you\"re ready to share your Blender animations with the world.
READ MORE:
Community and Resources for Further Learning
The journey into Blender animation is an exciting one, and the community and resources available for learning and growth are vast and welcoming. Whether you are a beginner or looking to refine your skills, there are numerous platforms, forums, and educational resources designed to support your development in animation.
Online Forums and Communities
- Blender Artists Community: A vibrant forum where users share their work, ask questions, and provide feedback to others. It\"s a great place to find inspiration and advice on overcoming technical challenges.
- Reddit - r/blender: Reddit’s Blender community is a dynamic space for sharing projects, news, and tutorials. Engage with other Blender enthusiasts and participate in themed challenges.
- BlenderNation: Stay updated with the latest Blender news, tutorials, and art. BlenderNation also features daily roundups of the best Blender art and developments.
Learning Platforms and Tutorials
- Blender Guru: Renowned for the \"Donut\" tutorial, Blender Guru offers in-depth tutorials for beginners and advanced users looking to hone their skills in modeling, texturing, and animation.
- CG Cookie: This platform offers a wide range of tutorials and courses, from the basics of Blender to more complex subjects like character animation and game asset creation.
- Blender Cloud: Access official training and resources from the Blender Foundation. Blender Cloud also hosts a wealth of project files and assets to practice with.
Books and E-Books
For those who prefer self-paced learning through reading, there are several detailed books and e-books on Blender:
- \"Blender For Dummies\" by Jason van Gumster: An excellent start for beginners to understand the fundamentals of Blender.
- \"Blender 3D Cookbook\" by Enrico Valenza: For intermediate users, this book offers step-by-step instructions on various Blender techniques.
- \"Learning Blender: A Hands-On Guide to Creating 3D Animated Characters\" by Oliver Villar: Focuses on character creation, from modeling to animation.
Workshops and Conferences
Attending Blender workshops and conferences can provide invaluable learning experiences and networking opportunities:
- Blender Conference: An annual event where Blender enthusiasts from around the world gather to share knowledge, showcase work, and meet the developers.
- Blender Workshops: Look out for workshops hosted by experienced Blender artists and educators. These can often be found advertised on community forums and social media platforms.
As you explore Blender and develop your animation skills, remember that patience and practice are key. The Blender community is known for its supportive and collaborative spirit, so don’t hesitate to reach out for help or advice. Happy animating!
Embarking on your Blender animation journey opens a world of creativity and possibility. With the right resources and a vibrant community to support you, mastering Blender animations is within reach. Start animating today and bring your visions to life!