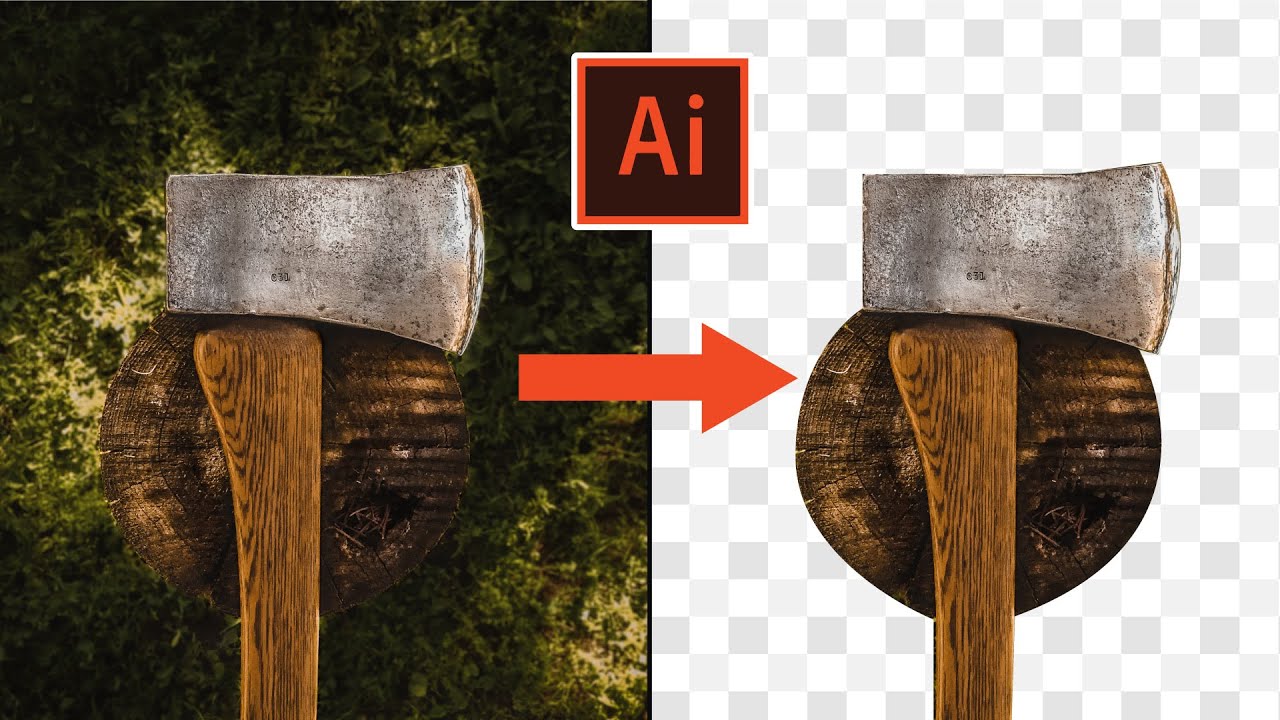
Topic adobe illustrator remove background: Discover the secrets of Adobe Illustrator and master the art of removing backgrounds effortlessly. This guide offers step-by-step instructions, tips, and advanced techniques to enhance your image editing skills and creativity.
Table of Content
- How can I remove the background in Adobe Illustrator?
- Understanding Background Removal in Adobe Illustrator
- Step-by-Step Guide to Removing Backgrounds
- Using the Pen Tool for Precise Background Removal
- Leveraging Layers for Effective Background Erasure
- YOUTUBE: Remove White Background in Adobe Illustrator - Make Image Part Transparent
- Applying the Magic Wand Tool for Quick Edits
- Tips for Handling Complex Backgrounds
- Integrating with Other Adobe Tools
- Common Mistakes and How to Avoid Them
- Advanced Techniques for Professional Results
- Resources and Further Learning
How can I remove the background in Adobe Illustrator?
To remove the background in Adobe Illustrator, you can follow these steps:
- Select the image or artwork you want to remove the background from. You can use the Selection Tool (V) from the toolbar to do this.
- Once the image is selected, click on the \"Window\" menu and choose \"Transparency\" to open the Transparency panel.
- Within the Transparency panel, click on the \"Make Mask\" button.
- The image will now have a mask applied to it, represented by a white square icon in the Layers panel. The mask preview thumbnail will also show a white outline around the artwork.
- Select the mask thumbnail in the Layers panel, and you\'ll notice that the image becomes editable in isolation mode.
- Using the Eraser Tool (Shift+E) or any other appropriate tools, erase or modify the areas of the image that you want to remove.
- If needed, you can also use the Pen Tool (P) to create a shape that covers the background area you wish to delete. Then, select both the shape and the artwork, right-click, and choose \"Make Clipping Mask\". This will hide any parts of the artwork outside the shape.
- Finally, click on the \"Escape\" key or click the \"Exit Isolation Mode\" button at the top-left corner of the window to exit the isolation mode and see the updated image with the background removed.
By following these steps, you should be able to remove the background from your image or artwork in Adobe Illustrator.

READ MORE:
Understanding Background Removal in Adobe Illustrator
Removing backgrounds in Adobe Illustrator is a fundamental skill for graphic designers and digital artists. It involves separating the main subject from its background, enhancing focus and composition. This process can be achieved through various tools and techniques within Illustrator.
- Understanding Layers: Layers play a crucial role in background removal. They allow you to separate different elements of your artwork for easier editing.
- Using the Pen Tool: The Pen Tool is essential for creating precise paths around the subject you want to isolate.
- Employing the Magic Wand: For simpler backgrounds, the Magic Wand tool can quickly select areas of similar color for removal.
- Lasso Tools: The Lasso tools offer more freeform selection capabilities, useful for irregular shapes.
- Clipping Masks: Clipping masks are another method to hide unwanted parts of an image without actually removing them.
Each tool and technique has its own set of advantages and is suitable for different types of backgrounds and design needs. Mastery of these tools allows for creative flexibility and professional-quality results in your projects.
Step-by-Step Guide to Removing Backgrounds
Removing the background from an image in Adobe Illustrator is a vital skill for graphic design. This step-by-step guide will walk you through the process, ensuring you can achieve clean, professional results.
- Open Your Image: Start by opening the image from which you want to remove the background in Adobe Illustrator.
- Unlock the Layer: If the image is on a locked layer, unlock it by clicking the lock icon in the Layers panel.
- Select the Image: Use the Selection Tool (V) to select the image.
- Choose the Right Tool for Selection: For simple backgrounds, use the Magic Wand Tool (Y). For more complex backgrounds, use the Pen Tool (P) to draw a path around the subject.
- Isolate the Subject: Once you have made your selection, isolate the subject by either creating a clipping mask or by inverting the selection and deleting the background.
- Refine Edges: If necessary, refine the edges of your selection for a smoother look. This can be done using the Direct Selection Tool (A).
- Save Your Work: After successfully removing the background, save your file in the desired format.
This guide provides a clear path to efficiently removing backgrounds in Adobe Illustrator, enhancing your design work with precision and ease.
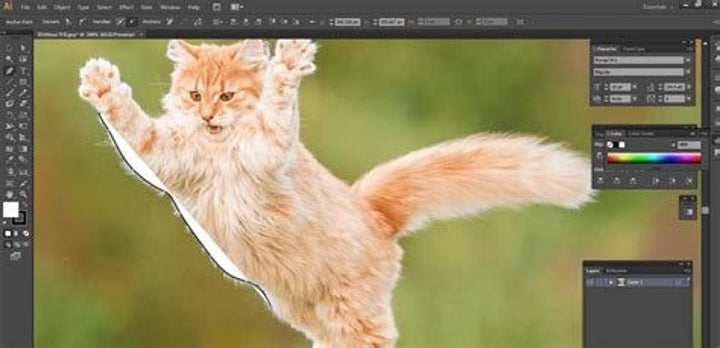
Using the Pen Tool for Precise Background Removal
The Pen Tool in Adobe Illustrator is a powerful feature for achieving precise background removal. This tool allows for exact control and fine adjustments, making it ideal for complex images with intricate details.
- Selection of the Pen Tool: Select the Pen Tool (P) from the toolbar.
- Creating Anchor Points: Click around the edges of the object you want to isolate to create anchor points. These points define the path that will separate the object from the background.
- Drawing the Path: Connect the anchor points to form a closed path. Use the handles on each anchor point to adjust the curvature of the path for a more natural outline.
- Completing the Path: Once the path fully encloses the object, right-click and select \"Make Clipping Mask\" to hide the background outside the path.
- Refining Edges: If needed, you can further refine the path by adding or removing anchor points and adjusting their handles to fit the object precisely.
- Final Adjustments: After the background is removed, you may make additional adjustments to the isolated object, such as changing its position or applying effects.
This detailed approach with the Pen Tool ensures high accuracy in background removal, especially for images requiring detailed attention around the edges of the subject.
Leveraging Layers for Effective Background Erasure
Removing backgrounds in Adobe Illustrator can be a complex task, but using layers effectively can streamline the process. Here are some steps and tips to help you achieve the best results:
Creating and Managing Layers
- Start by opening your image in Illustrator and go to the Layers panel.
- Create a new layer to work on, keeping the original image intact on a separate layer for reference.
- Lock the original image layer to prevent accidental edits.
Using Clipping Masks
- With the Pen Tool, draw a precise outline around the object or area you want to keep.
- Once the outline is complete, select both the outline and the image layer.
- Right-click and choose \"Make Clipping Mask\" to hide everything outside the outline.
Adjusting the Mask
- Use the Direct Selection tool or the Pen Tool to add or remove anchor points, refining the mask.
- Toggle the visibility of layers to compare the masked area with the original image.
Finalizing the Image
- Once satisfied with the mask, unlock all layers.
- Select the clipped image and export it as a PNG or EPS file, ensuring the \"Background Transparent\" option is checked.
Remember, the quality of your background removal will greatly depend on the precision of your mask. Take your time with the Pen Tool to ensure a clean and professional result. Additionally, understanding how layers interact in Illustrator can significantly enhance your ability to manipulate images effectively.
_HOOK_
Remove White Background in Adobe Illustrator - Make Image Part Transparent
\"Discover the magic of transparent images with our captivating video! Watch as stunning visuals come to life, transforming ordinary pictures into captivating works of art. Unlock the power of transparency and let your creativity soar!\"
Remove Background in Illustrator
\"Unleash your inner artist with our Illustrator background removal tutorial! Join us on an exciting journey where we guide you through the process of seamlessly removing backgrounds, creating professional-looking images that will WOW your audience. Don\'t miss out on this empowering video!\"
Applying the Magic Wand Tool for Quick Edits
The Magic Wand tool in Adobe Illustrator is a powerful feature for quickly removing backgrounds, especially when dealing with images that have solid or consistent color ranges. This tool is particularly effective for vector files such as EPS, SVG, or AI formats. Here\"s a step-by-step guide to using the Magic Wand tool:
- Open the Image: Begin by opening your image in Illustrator. For transparency visibility, go to \"View\" on the menu bar and select \"Show Transparency Grid\".
- Select the Magic Wand Tool: From the toolbar, select the Magic Wand tool.
- Click to Select: Click on the background or the objects you wish to remove. The tool will automatically select regions with similar colors.
- Adjust Selection: To add to your selection, hold down the Shift key and click on additional areas. To remove from your selection, press Alt (Windows) or Option (macOS) and click.
- Customize Settings: You can adjust the tool\"s settings, such as color, opacity, or weight, to fine-tune your selection.
- Delete Background: Once satisfied with the selection, press \"Delete\" to remove the background. Double-check your selection before deleting.
- Export File: After removing the background, export your file in PNG or AI format for the best results.
This method is ideal for quickly editing images where the background has a uniform color. It\"s a simple yet effective way to clean up your images in Illustrator.
Tips for Handling Complex Backgrounds
Working with complex backgrounds in Adobe Illustrator can be challenging, but with the right techniques, it\"s manageable. Here are some tips to help you effectively handle complex backgrounds:
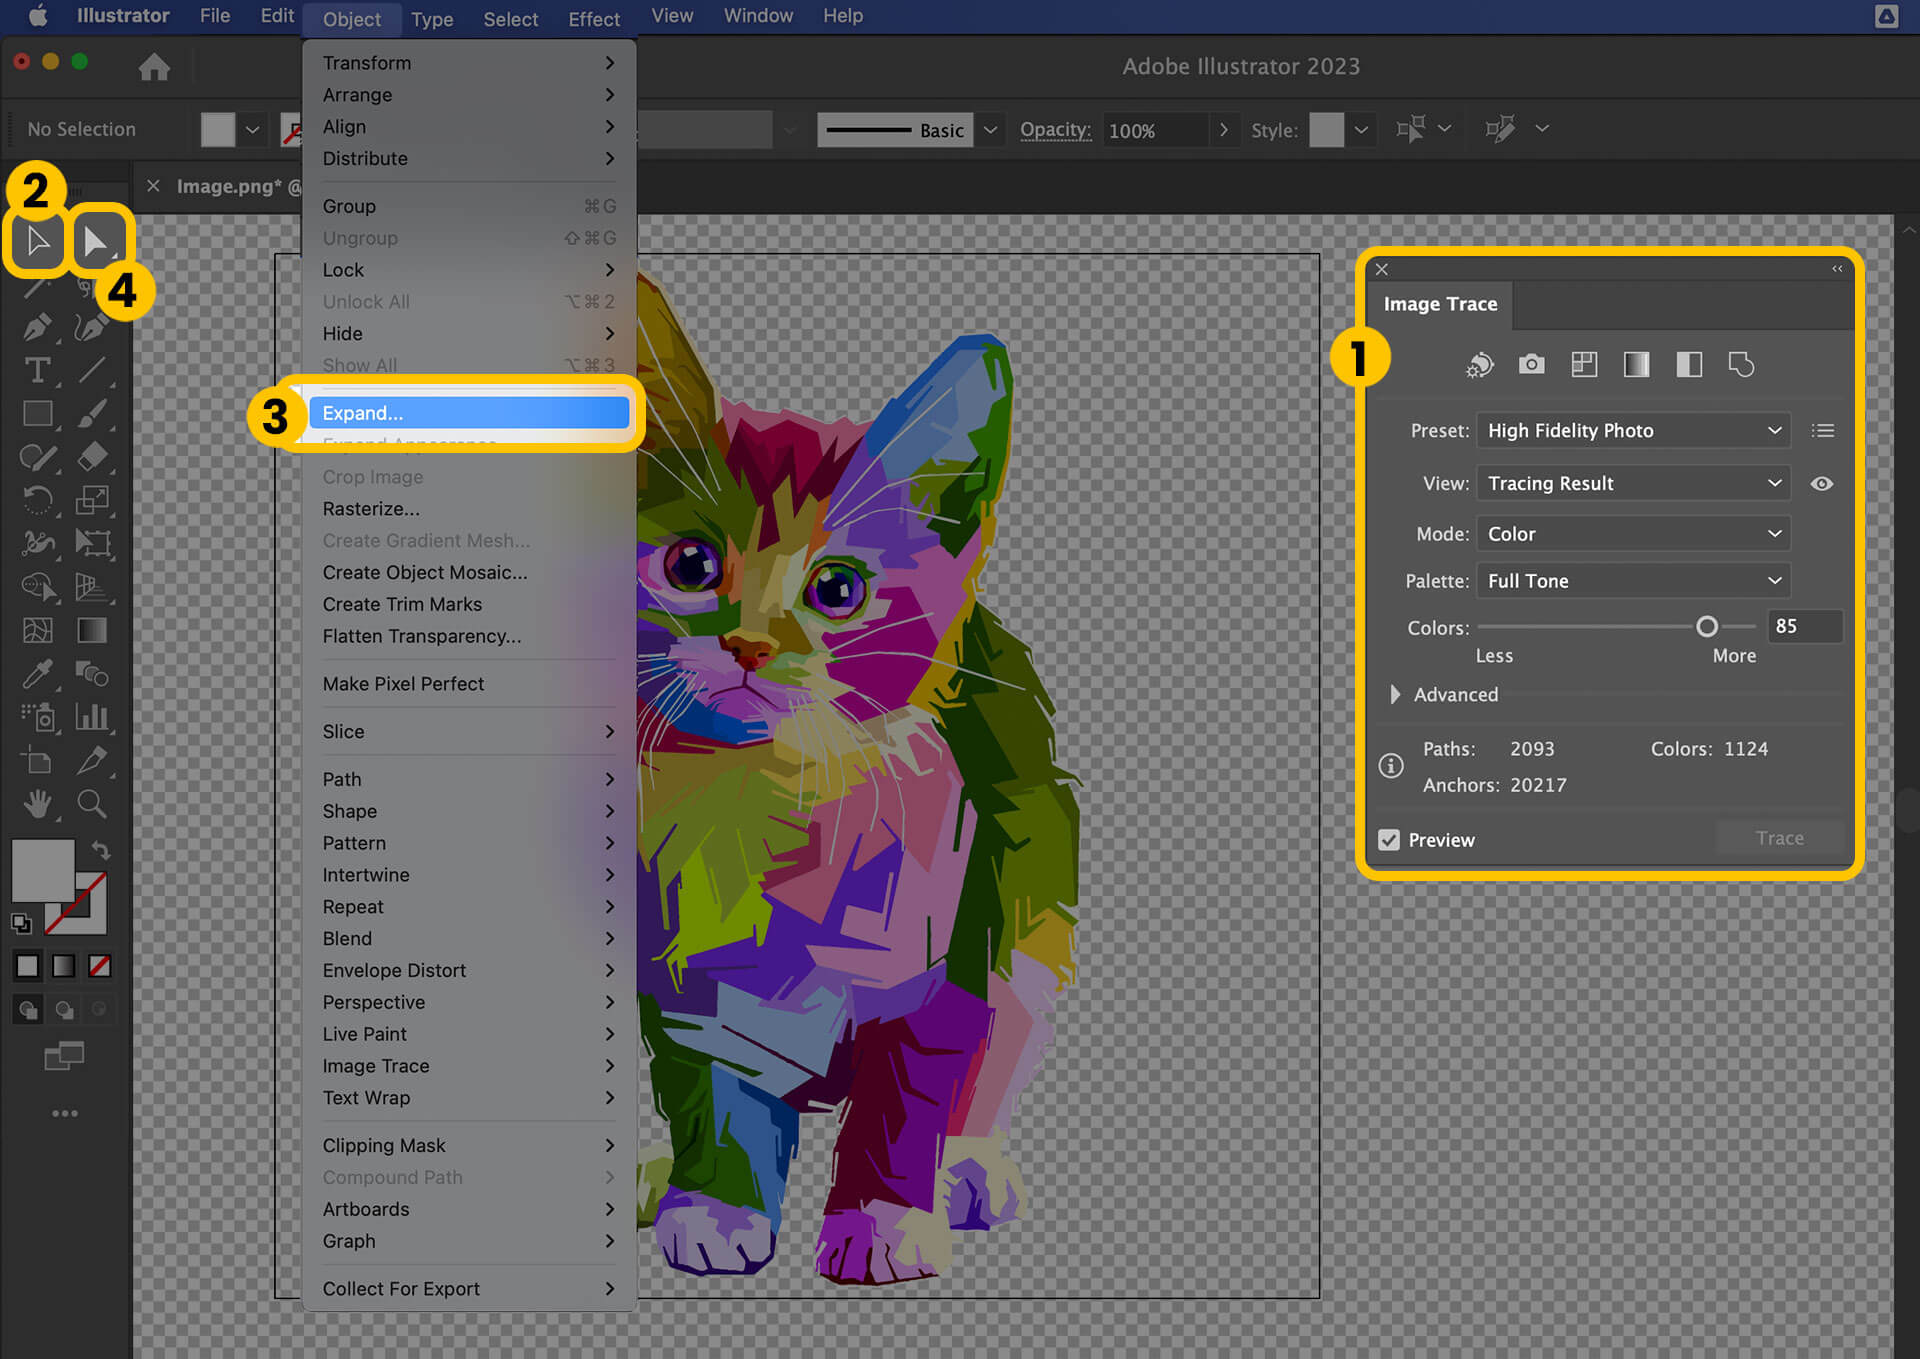
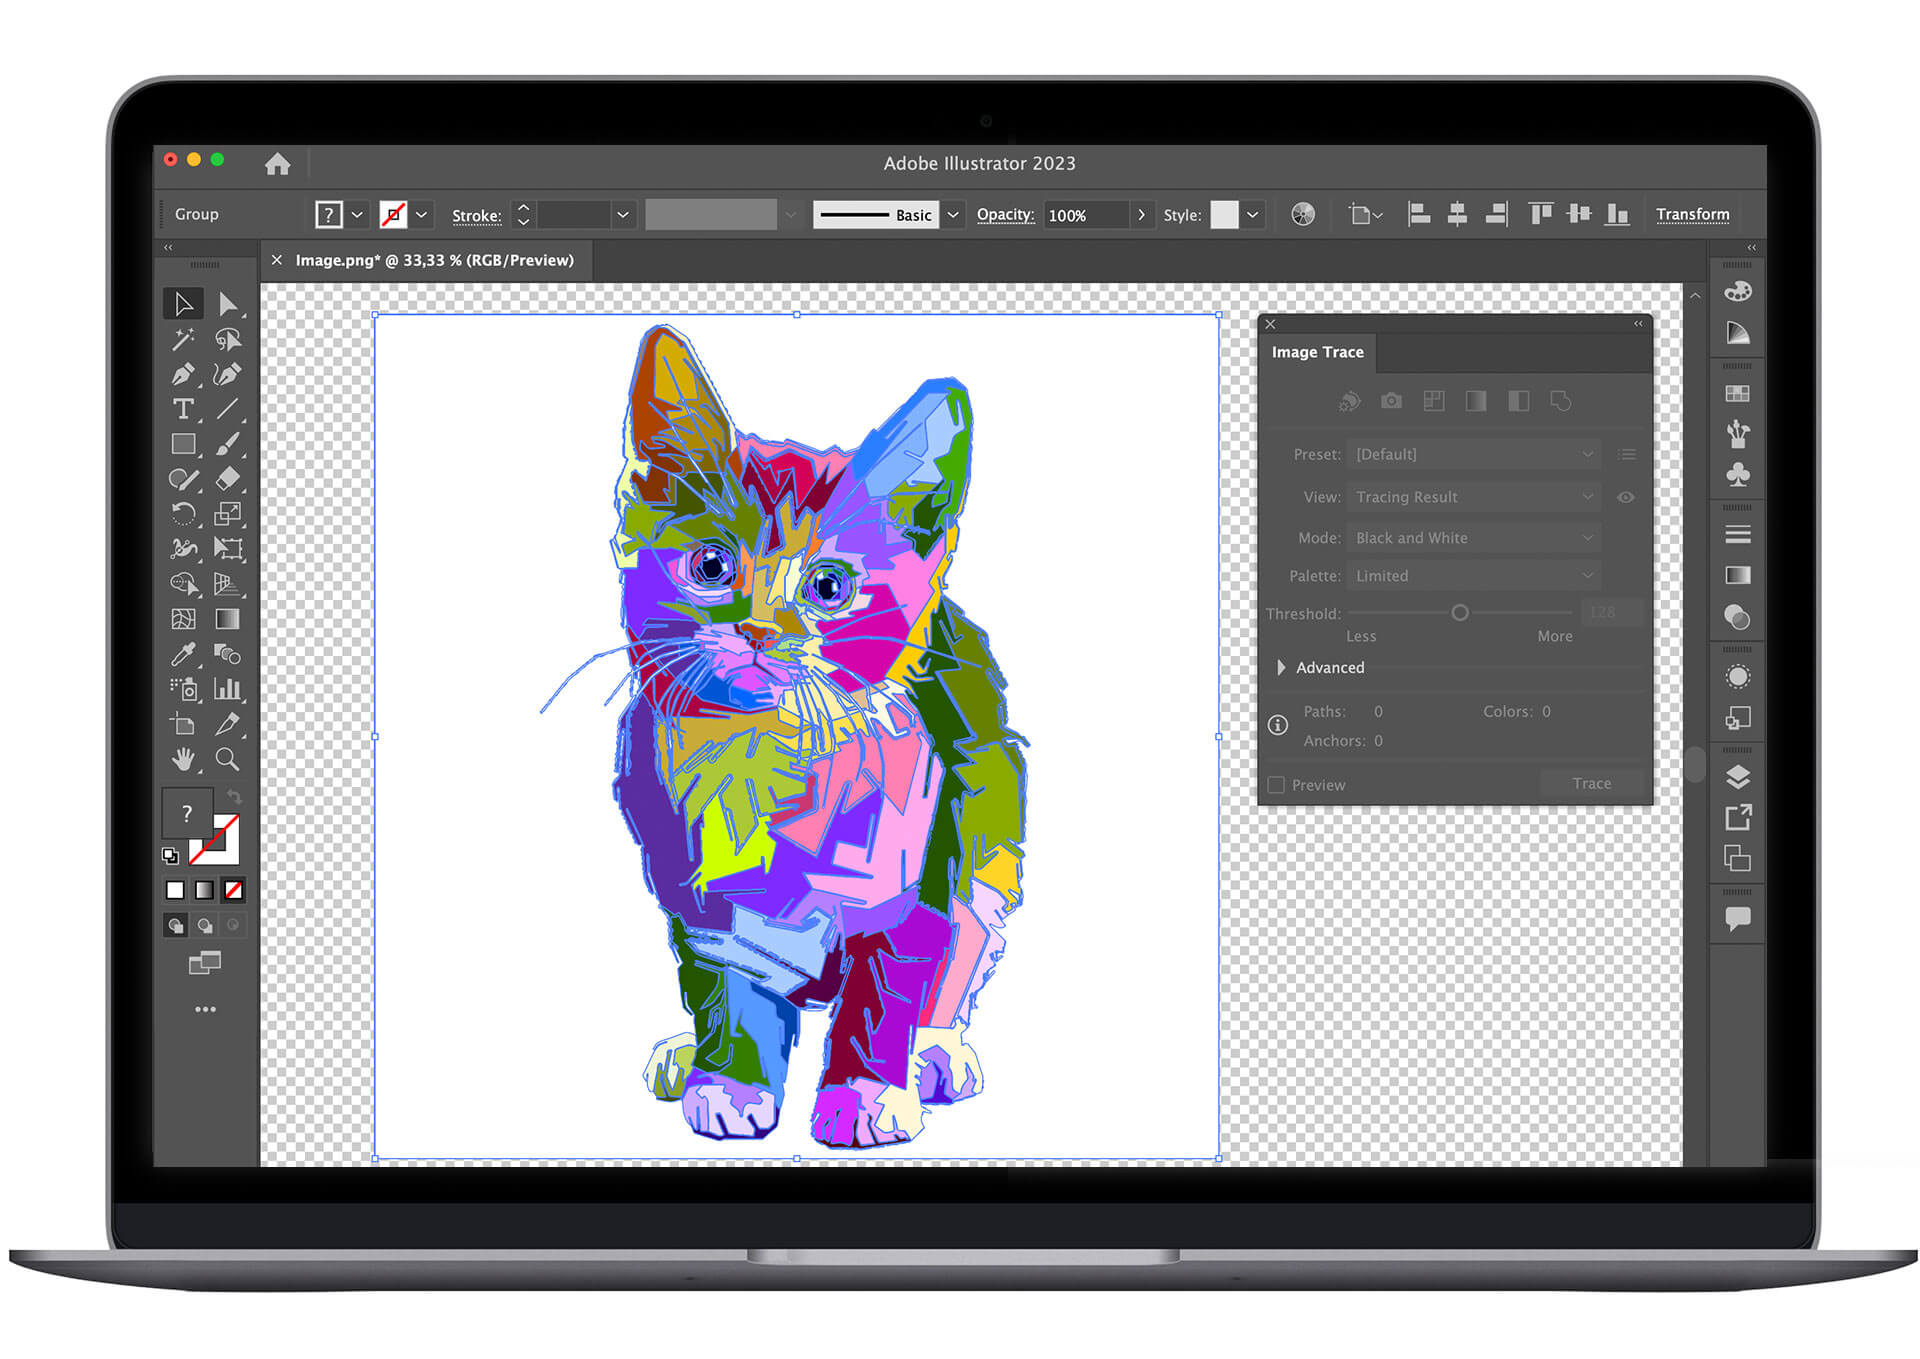
1. Utilizing the Image Trace Tool
- Open your image and activate the \"Show Transparency Grid\" under the \"View\" menu to see transparent areas.
- Select the image using the Selection tool, then access the Image Trace panel from the \"Window\" menu.
- Choose a suitable preset, like \"High Fidelity Photo\", and adjust the settings for optimal tracing.
- After tracing, use \"Expand\" under the \"Object\" menu to convert the image into a vector format.
- Select and delete unwanted background parts with the Direct Selection tool.
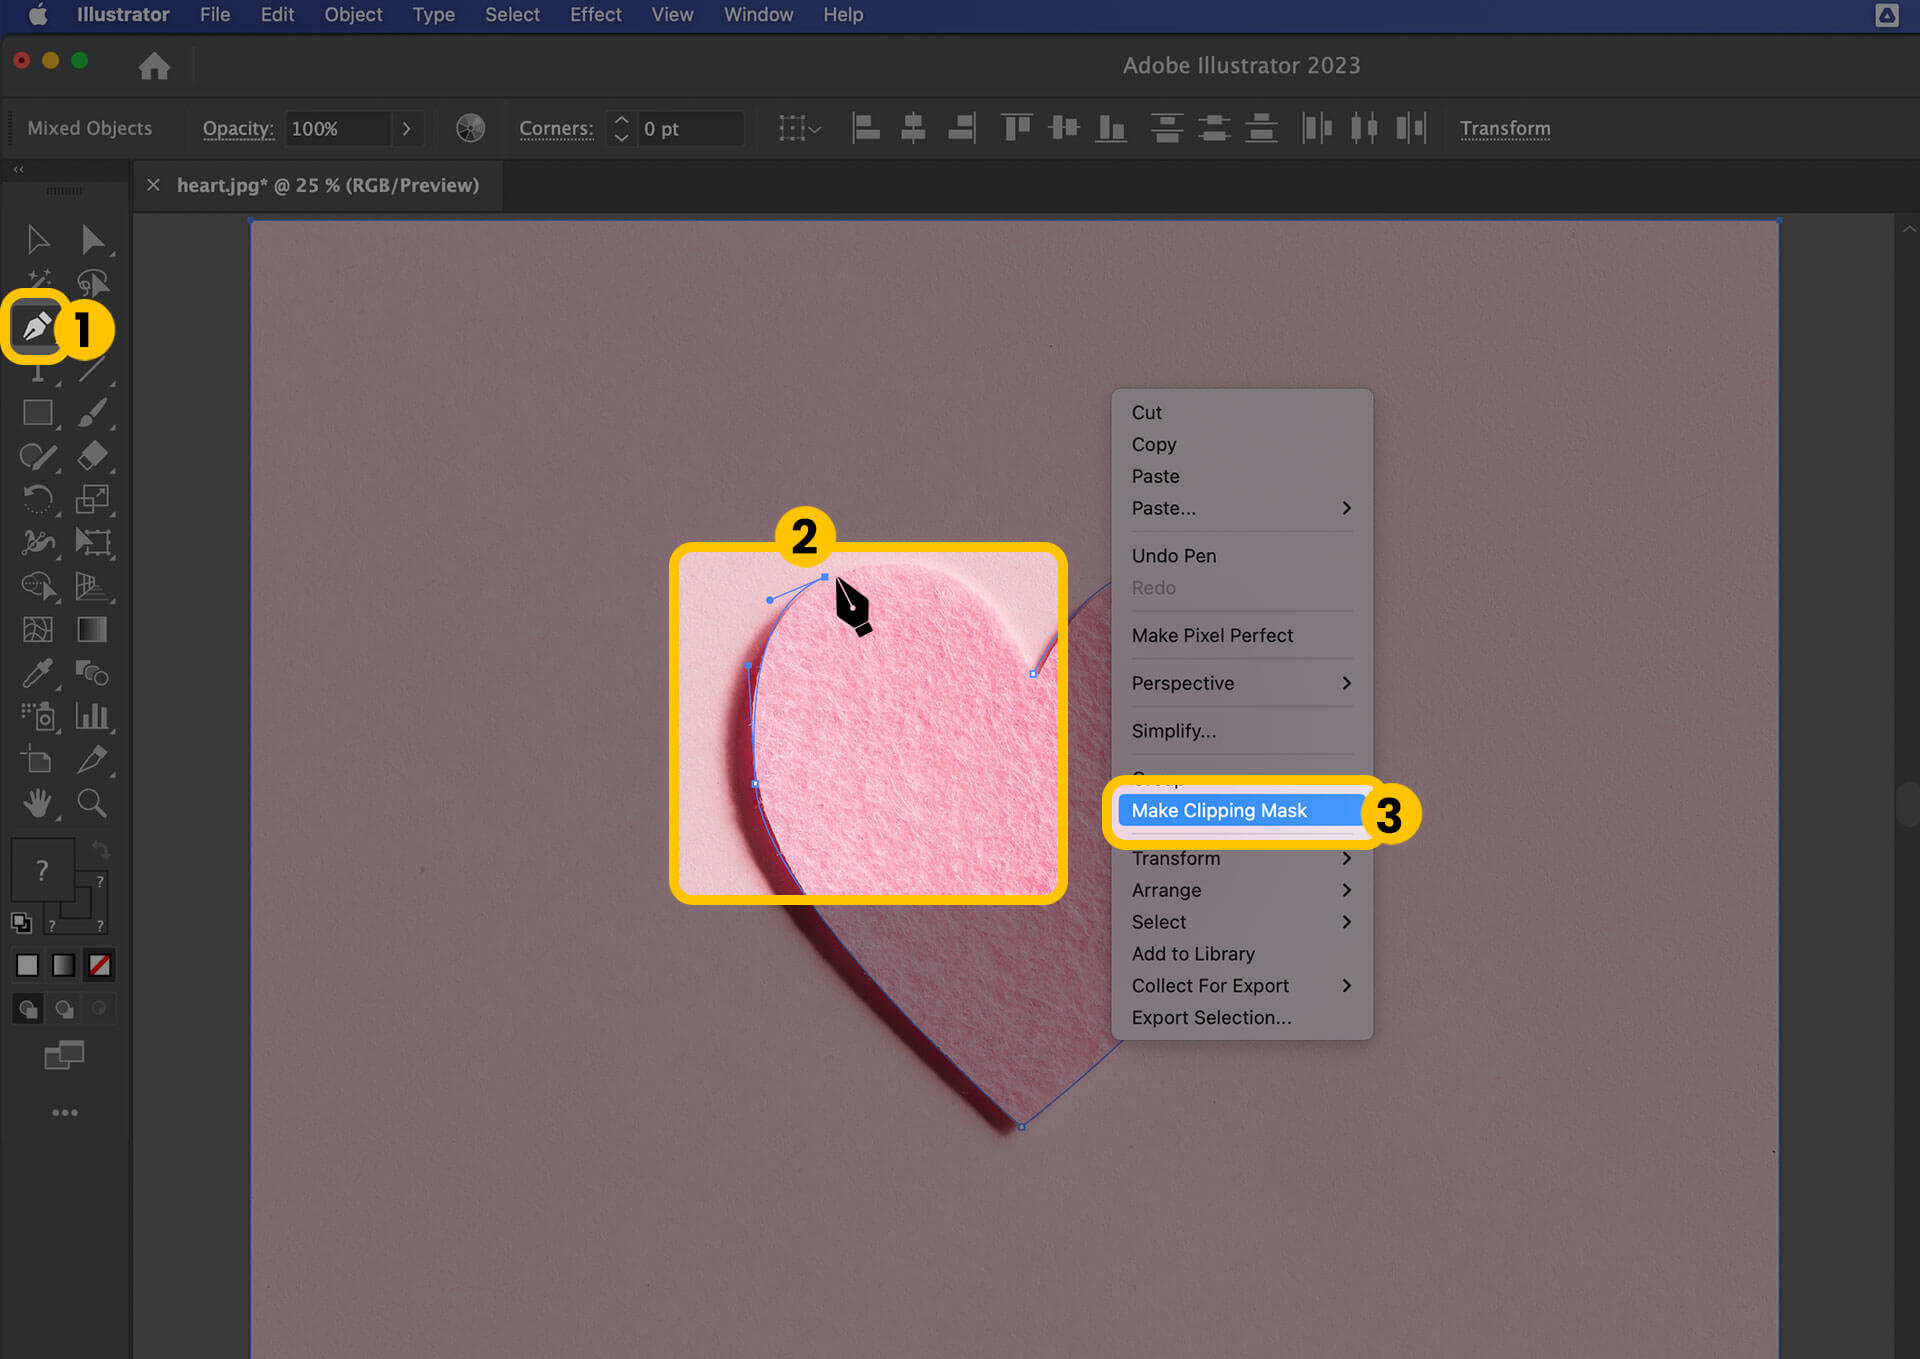
2. Using the Pen Tool for Precision
- For images with detailed edges, use the Pen Tool to trace around the subject accurately.
- Zoom in for a closer view and create an outline with anchor points around the object.
- Once the path is complete, use it to create a clipping mask, which will hide everything outside the path.
- Make necessary adjustments to the mask for a perfect fit.
3. Magic Wand for Similar Color Selection
- Use the Magic Wand tool to select areas of the background with similar colors.
- Customize the tool’s settings for precise selection based on color, opacity, or stroke weight.
- Delete the selected areas and adjust your selection as needed.
4. Exporting as EPS for Transparency
When saving your work, exporting as an EPS file can automatically result in a transparent background, which is especially useful for logos and scalable designs.
These tips provide a comprehensive approach to tackling complex backgrounds in Illustrator, ensuring that your final image maintains its quality and meets your design needs.

Integrating with Other Adobe Tools
Adobe Illustrator\"s power is significantly enhanced when integrated with other Adobe tools. This section explains how to synergize Illustrator with other Adobe software to optimize background removal and graphic editing workflows.
Combining Illustrator and Photoshop
- Start with Illustrator for vector-based background removal using tools like the Pen and Magic Wand.
- Transfer the image to Photoshop for detailed raster image editing, particularly useful for complex textures and gradients.
Using Adobe Lightroom for Enhanced Image Quality
- Before removing backgrounds in Illustrator, use Lightroom to adjust the image\"s color balance and clarity, making it easier to distinguish the background from the subject.
Adobe XD for UI Design
- After background removal in Illustrator, import your graphics into Adobe XD for designing and prototyping user interfaces with seamless integration.
Each Adobe tool offers unique features and capabilities. By combining these tools, you can create a more efficient and powerful workflow for all your design needs.
Common Mistakes and How to Avoid Them
When working with background removal in Adobe Illustrator, several common mistakes can hinder the process. Here are some key errors to avoid and tips to ensure optimal results:
1. Not Using the Right Tool for Specific Tasks
- Avoid using the same tool for all types of images. The Pen Tool is ideal for detailed work, while the Magic Wand is better for images with solid color backgrounds.
2. Ignoring Image Quality and Resolution
- High-quality images yield better results. Low-resolution images can become pixelated, making it difficult to remove backgrounds cleanly.
3. Overlooking the Importance of Layers
- Working without layers can lead to irreversible changes. Always duplicate layers before making edits to preserve the original image.
4. Misusing the Image Trace Feature
- Image Trace is effective for simple backgrounds but can be less effective for detailed images. Use it judiciously, depending on your image’s complexity.
5. Not Fine-Tuning the Magic Wand Tool
- Adjust the Magic Wand\"s tolerance settings to accurately select the desired area, especially in images with nuanced color variations.
6. Inaccurate Use of the Pen Tool
- Take your time with the Pen Tool for precision. Rushing this step can lead to inaccurate outlines and poor background removal.
By avoiding these common mistakes and applying these tips, you can achieve cleaner, more professional background removal in Adobe Illustrator.

Advanced Techniques for Professional Results
Adobe Illustrator offers several advanced techniques for professional background removal, ensuring high-quality and precise results. Here are some sophisticated methods:
1. Utilizing the Image Trace Feature
- Image Trace is ideal for images with less detail like logos or cartoons. It converts the image to a vector, allowing you to isolate and remove the background.
- Select \"Window > Image Trace\", then choose \"High Fidelity Photo\" under Preset for detailed tracing.
- Once traced, use \"Object > Expand\" and the Direct Selection tool to remove the background.
2. Creating Clipping Masks with the Pen Tool
- For complex images, use the Pen Tool to create a precise outline around the subject.
- Select both the image and the outline, then right-click and choose \"Make Clipping Mask\" to isolate the subject.
3. Using the Magic Wand Tool for Solid Color Backgrounds
- When dealing with solid color backgrounds, the Magic Wand tool can quickly select and remove these areas.
- Adjust the tool’s settings for accuracy and select the background to delete it.
4. Exporting as EPS for Transparent Backgrounds
- For logos and graphics, saving your file as an EPS (Encapsulated PostScript) ensures the background is transparent and maintains high quality.
These advanced techniques in Adobe Illustrator cater to a range of background complexities, ensuring that your final image is of the highest quality and suitable for professional use.
_HOOK_
Resources and Further Learning
To enhance your skills in removing backgrounds in Adobe Illustrator, here are some valuable resources:
1. Online Tutorials
- YouTube tutorials offer step-by-step guides, such as the one on \"How To Remove A White Background In Illustrator CC\".
2. Adobe\"s Official Resources
- Explore Adobe\"s own tutorials and guides for in-depth learning of Illustrator’s features.
3. Online Courses
- Platforms like Udemy, Skillshare, and Coursera offer comprehensive courses on Illustrator.
4. Illustrator Communities
- Join forums and communities on Reddit, Adobe\"s support forums, and other design platforms for tips and peer support.
Utilizing these resources can significantly improve your proficiency in background removal and overall Illustrator expertise.
Master the art of background removal in Adobe Illustrator with our comprehensive guide, unlocking a world of creative possibilities and professional quality. Elevate your design skills and bring your visions to life with precision and ease.