Topic using blender as a video editor: Discover the untapped potential of using Blender as a video editor, a comprehensive tool that transforms your creative ideas into stunning visual stories with ease and efficiency.
Table of Content
- What are the basic and complex tasks that can be performed using Blender as a video editor?
- Understanding Blender\"s Video Editing Capabilities
- Getting Started with Blender for Video Editing
- Blender Video Editing Basics: From Setup to Advanced Features
- YOUTUBE: Blender as a Video Editor - It\'s Actually Really Good!
- Step-by-Step Guides and Tutorials for Video Editing in Blender
- Advanced Video Editing Techniques in Blender
- Audio Editing and Synchronization in Blender
- Rendering and Exporting Your Video Projects in Blender
- Leveraging Blender\"s VFX for Video Editing
- Common Issues and Troubleshooting in Blender Video Editing
- Comparative Analysis: Blender vs. Other Video Editing Software
What are the basic and complex tasks that can be performed using Blender as a video editor?
Blender\'s built-in video sequence editor can handle a variety of basic and complex tasks when it comes to video editing.
- Basic tasks that can be performed using Blender as a video editor include:
- Video cuts: Trimming and cutting video clips to the desired length.
- Splicing: Combining multiple video clips together in a sequence.
- Adding audio: Importing and syncing audio tracks with video.
- Basic transitions: Applying simple transitions between video clips.
- Basic effects: Adding basic effects like color correction and filters.
- Complex tasks that can be performed using Blender as a video editor include:
- Advanced transitions: Creating custom and intricate transitions between video clips.
- Text animation: Designing and animating text overlays and titles within the video.
- Keyframe animation: Animating properties of video clips over time using keyframes.
- 3D effects: Incorporating 3D elements and animations into the video editing process.
- Compositing: Overlaying multiple video layers with blending modes for a professional look.
READ MORE:
Understanding Blender\"s Video Editing Capabilities
Blender is not just for 3D modeling and animation; it\"s also a powerful video editing software that offers a wide range of capabilities for filmmakers and video enthusiasts alike. From basic video cuts and splicing to more complex tasks like video masking and color grading, Blender\"s Video Sequence Editor (VSE) provides a comprehensive suite of tools for creative video projects.
- Non-Linear Editing: Blender allows for non-linear editing, meaning you can arrange video clips and assets in any order without destructing the original files.
- Effects and Transitions: It offers a variety of video effects, transitions, speed control, and more to enhance your video production.
- Audio Mixing and Syncing: With Blender, you can mix and synchronize audio tracks with your video, including waveform visualization for precise editing.
- Advanced Features: Utilize features like chroma keying, color grading, and mask editor for advanced video editing projects.
- Animation Integration: Easily integrate 3D animations or models into your video projects, making it ideal for motion graphics and visual effects.
Whether you\"re a beginner or an experienced video editor, Blender offers an accessible and powerful platform for realizing your creative visions in video editing. Its open-source nature also means a continuous addition of new features and improvements by the community.

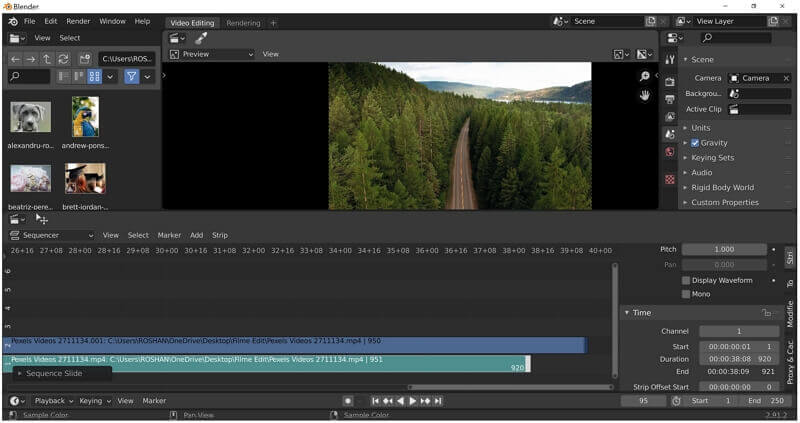
Getting Started with Blender for Video Editing
Embarking on your video editing journey with Blender begins with understanding its interface and capabilities. Follow these steps to set up your video editing project in Blender.
- Download and Install Blender: Ensure you have the latest version of Blender installed on your computer. Visit the official Blender website to download it for free.
- Launch Blender and Choose the Video Editing Layout: When you open Blender, select the \"Video Editing\" layout from the top menu. This layout provides all the tools you need for video editing.
- Import Your Media: Use the \"Add\" menu in the sequencer to import your video clips, images, and audio files into Blender. You can drag and drop files directly into the timeline.
- Explore the Sequencer: Get familiar with the sequencer, where you\"ll do most of your editing. This includes cutting clips, rearranging sequences, and adding transitions.
- Learn Basic Editing Tools: Start with basic edits such as cutting, moving, and aligning clips. Use the preview window to monitor your edits in real-time.
- Add Effects and Transitions: Blender offers a variety of effects and transitions to enhance your video. Explore the \"Add Effect Strip\" menu to see what\"s available.
- Adjust Audio Levels: In the \"Graph Editor,\" you can adjust the audio levels of your clips for perfect sound mixing.
- Render Your Project: Once you\"re satisfied with your edit, it\"s time to render your project. Choose your output settings carefully to ensure the best quality.
With patience and practice, you\"ll soon be able to leverage Blender\"s full capabilities for your video editing projects. The key is to experiment with its features and continuously explore new techniques.

Blender Video Editing Basics: From Setup to Advanced Features
Blender is a powerful tool for video editing that offers a wide range of features from basic cutting and trimming to advanced video effects and color grading. This guide will help you get started with video editing in Blender, covering everything from setup to utilizing its advanced features.
Initial Setup
- Download and install Blender from the official website.
- Open Blender and choose \"Video Editing\" from the workspace menu at the top.
- Adjust your layout if necessary to have the Sequencer, Preview, and Properties panels visible.
Importing Media
- To add video or audio files, go to the Sequencer panel, click \"Add\" then select the type of media you\"re importing.
- Use the file browser to locate your files and add them to the sequencer.
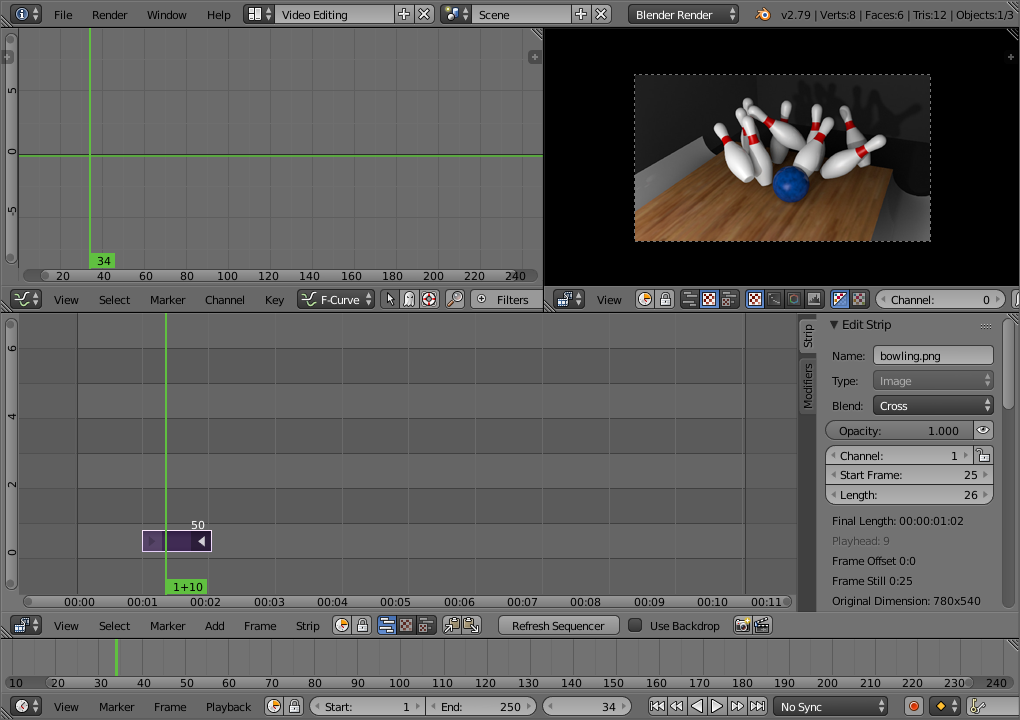
Basic Editing Tools
Blender\"s sequencer allows you to perform basic edits like cutting, trimming, and arranging your clips.
- Cut and Trim: Select a clip, then press K to cut it. Use the mouse to adjust the beginning or end of a clip to trim it.
- Moving Clips: Click and drag to reposition clips on the timeline.
- Adding Transitions: Right-click between two clips and select \"Add Transition\" for smooth changes between scenes.
Advanced Features
Blender also includes several advanced features for more complex projects:
- Color Grading: In the Properties panel, under the \"Modifiers\" tab, you can add a color balance modifier to adjust the color properties of your clip.
- Effects and Filters: Blender offers various effects like Gaussian Blur, Glow, and Wipe transitions. These can be added from the \"Add\" menu in the Sequencer.
- Audio Syncing and Mixing: You can adjust audio clips directly in the sequencer, syncing them with your video and using the properties panel to mix sound levels.
Rendering and Exporting
- Once your project is complete, go to the \"Output Properties\" tab to set your video\"s resolution, frame rate, and file format.
- In the \"Rendering\" menu, select \"Render Animation\" to export your final video project.
With practice, you\"ll be able to leverage Blender\"s full suite of video editing capabilities to create professional-quality videos. Remember, the key to mastering Blender\"s video editor is experimentation and continuous learning.
Blender as a Video Editor - It\'s Actually Really Good!
Efficient: Discover the power of efficiency in action in this video that demonstrates smart techniques and tools to streamline your tasks. Witness time-saving hacks and maximize your productivity with these effective strategies.
Blender as a Video Editor - It\'s Actually Really Good!
Efficient: Discover the power of efficiency in action in this video that demonstrates smart techniques and tools to streamline your tasks. Witness time-saving hacks and maximize your productivity with these effective strategies.
Step-by-Step Guides and Tutorials for Video Editing in Blender
Embarking on video editing in Blender can seem daunting at first, but with the right guides and tutorials, you can quickly become proficient. This section compiles essential step-by-step resources designed to elevate your video editing skills in Blender.
1. Getting Started with Blender for Video Editing
- Introduction to Blender\"s Interface: Learn the basics of Blender\"s layout and how to navigate the Video Sequence Editor (VSE).
- Setting Up Your Project: Instructions on setting your project\"s resolution, frame rate, and aspect ratio to ensure your video exports correctly.
- Importing Your Media: A guide on how to import video, audio, and images into Blender for editing.
2. Basic Editing Techniques
- Basic Cuts and Trims: Learn how to cut your footage and trim clips to the desired length.
- Adding Transitions: A tutorial on creating smooth transitions between clips using Blender\"s built-in effects.
- Adding Text and Titles: Instructions on incorporating text overlays and titles into your video projects.
3. Advanced Editing Skills
- Color Grading and Correction: A detailed guide on enhancing your video\"s color and correcting any color imbalances.
- Working with Audio: Learn how to sync audio, adjust levels, and add effects to your audio tracks.
- Adding Effects and Filters: Explore how to add visual effects, including blurs and lighting effects, to enhance your video.
4. Animation and Effects
- Animating Text and Objects: A step-by-step tutorial on creating animated text and objects within your video.
- Using Blender\"s 3D Capabilities: Learn how to incorporate 3D models and animation into your video projects for dynamic effects.
5. Rendering and Exporting
- Rendering Settings: A guide to understanding the rendering options available in Blender and how to optimize them for your project.
- Exporting Your Final Video: Step-by-step instructions on exporting your edited video, including format options and compression settings.
Each step is designed to build upon the last, ensuring that you develop a comprehensive understanding of video editing in Blender. Whether you\"re a beginner looking to create your first video project or an experienced editor aiming to expand your skill set, these guides and tutorials will provide the knowledge you need to succeed.

_HOOK_
Advanced Video Editing Techniques in Blender
Once you\"ve mastered the basics of video editing in Blender, it\"s time to elevate your skills with advanced techniques. These methods can significantly enhance your projects, adding a professional polish that sets your work apart. Here\"s a comprehensive guide to mastering advanced video editing techniques in Blender.
Complex Transitions and Effects
- Custom Transitions: Beyond basic fades and wipes, learn how to create custom transitions using Blender\"s animation tools. This includes animating masks and using the video sequence editor to control the transition\"s timing and appearance.
- Video Effects: Dive into more sophisticated video effects such as Chroma Key (green screen), color grading, and light effects to add depth and emotion to your videos.
3D Integration
Blender\"s unique advantage is its powerful 3D modeling and animation tools. Integrating 3D elements into your video projects can add an entirely new dimension of creativity.
- Adding 3D Objects: Learn how to import or create 3D models to use in your video scenes. This includes texturing, lighting, and animating these models.
- Camera Tracking: Master the art of camera tracking to blend 3D elements seamlessly into your footage. This technique allows you to add objects that interact realistically with the movement and perspective of your video.
Audio Techniques
- Advanced Mixing: Explore advanced audio mixing techniques to balance multiple audio tracks, add effects, and create a sound mix that complements your video perfectly.
- Sound Design: Delve into sound design using Blender\"s audio tools. Learn how to create or modify sound effects and ambient audio tracks to enhance the storytelling in your videos.
Color Grading and Correction
Color grading is crucial for setting the mood and style of your video. Advanced techniques can transform the visual appeal of your footage.
- Using Nodes for Color Correction: Utilize Blender\"s node-based compositing for precise color correction and grading. This includes adjusting contrast, color balance, and creating a cinematic look.
- LUTs and Presets: Learn how to apply Look-Up Tables (LUTs) and presets for quick color grading that matches various cinematic styles.
Performance and Workflow Optimization
- Proxy Editing: For handling high-resolution footage smoothly, discover how to use proxy editing to speed up your workflow in Blender.
- Custom Keyboard Shortcuts: Increase your editing speed by creating custom keyboard shortcuts for frequently used actions and tools.
By mastering these advanced video editing techniques in Blender, you\"ll be able to tackle complex projects with confidence. Each new skill opens up more possibilities for creativity, allowing you to bring your most ambitious video ideas to life.

Audio Editing and Synchronization in Blender
Blender is not just for visual effects and 3D modeling; it\"s also a competent platform for audio editing and synchronization. This guide will take you through the steps to edit and perfectly sync audio with your video projects in Blender, ensuring your final product has the impact and polish it deserves.
Importing Audio
- Adding Audio Files: Start by importing your audio tracks into Blender. You can add audio files by going to the Video Sequence Editor, clicking \"Add\" > \"Sound\" and selecting your audio file from the file browser.
- Arranging Tracks: Once imported, you can click and drag your audio strips to align them with your video clips. Use the waveform displayed on the audio strip to help match audio cues with visual events.
Basic Audio Editing
- Trimming and Cutting: Trim audio clips by selecting the ends and dragging them to the desired length. Use the \"K\" key to cut audio strips at specific points.
- Volume Adjustment: Adjust the volume of your audio clips directly in the Video Sequence Editor by selecting the strip, opening the \"Strip\" menu on the right, and adjusting the volume slider.
- Fading In and Out: Create audio fades by animating the volume of audio strips. Place the playhead where you want the fade to start or end, insert a keyframe for the volume, move the playhead, adjust the volume, and insert another keyframe.
Audio Synchronization
- Syncing Audio to Video: For precise synchronization, zoom in on the timeline and match audio cues (like dialogue or sound effects) to visual cues. You can also use markers to note specific sync points.
- Adjusting Audio Offset: If an audio clip needs to be offset slightly, select the clip and adjust its start frame in the \"Strip\" menu to align it perfectly with the video.
Advanced Audio Techniques
- Layering Sounds: Blend multiple audio tracks for background music, dialogue, and sound effects by layering them in the Video Sequence Editor. Adjust the volume levels to ensure a balanced mix.
- Audio Effects: Apply effects like echo or reverb to your audio clips by using Blender\"s modifiers. Select an audio strip, go to the \"Modifiers\" tab, and choose an effect to add depth and texture to your sound.
- Exporting Audio: When you render your video, Blender automatically includes the audio in the final file. Ensure your output settings are configured to include audio in your preferred format.
With these tools and techniques, audio editing and synchronization in Blender can elevate your video projects, providing a rich auditory experience that complements your visual content. Whether you\"re making a short film, a video blog, or any other multimedia project, mastering audio in Blender is a valuable skill.

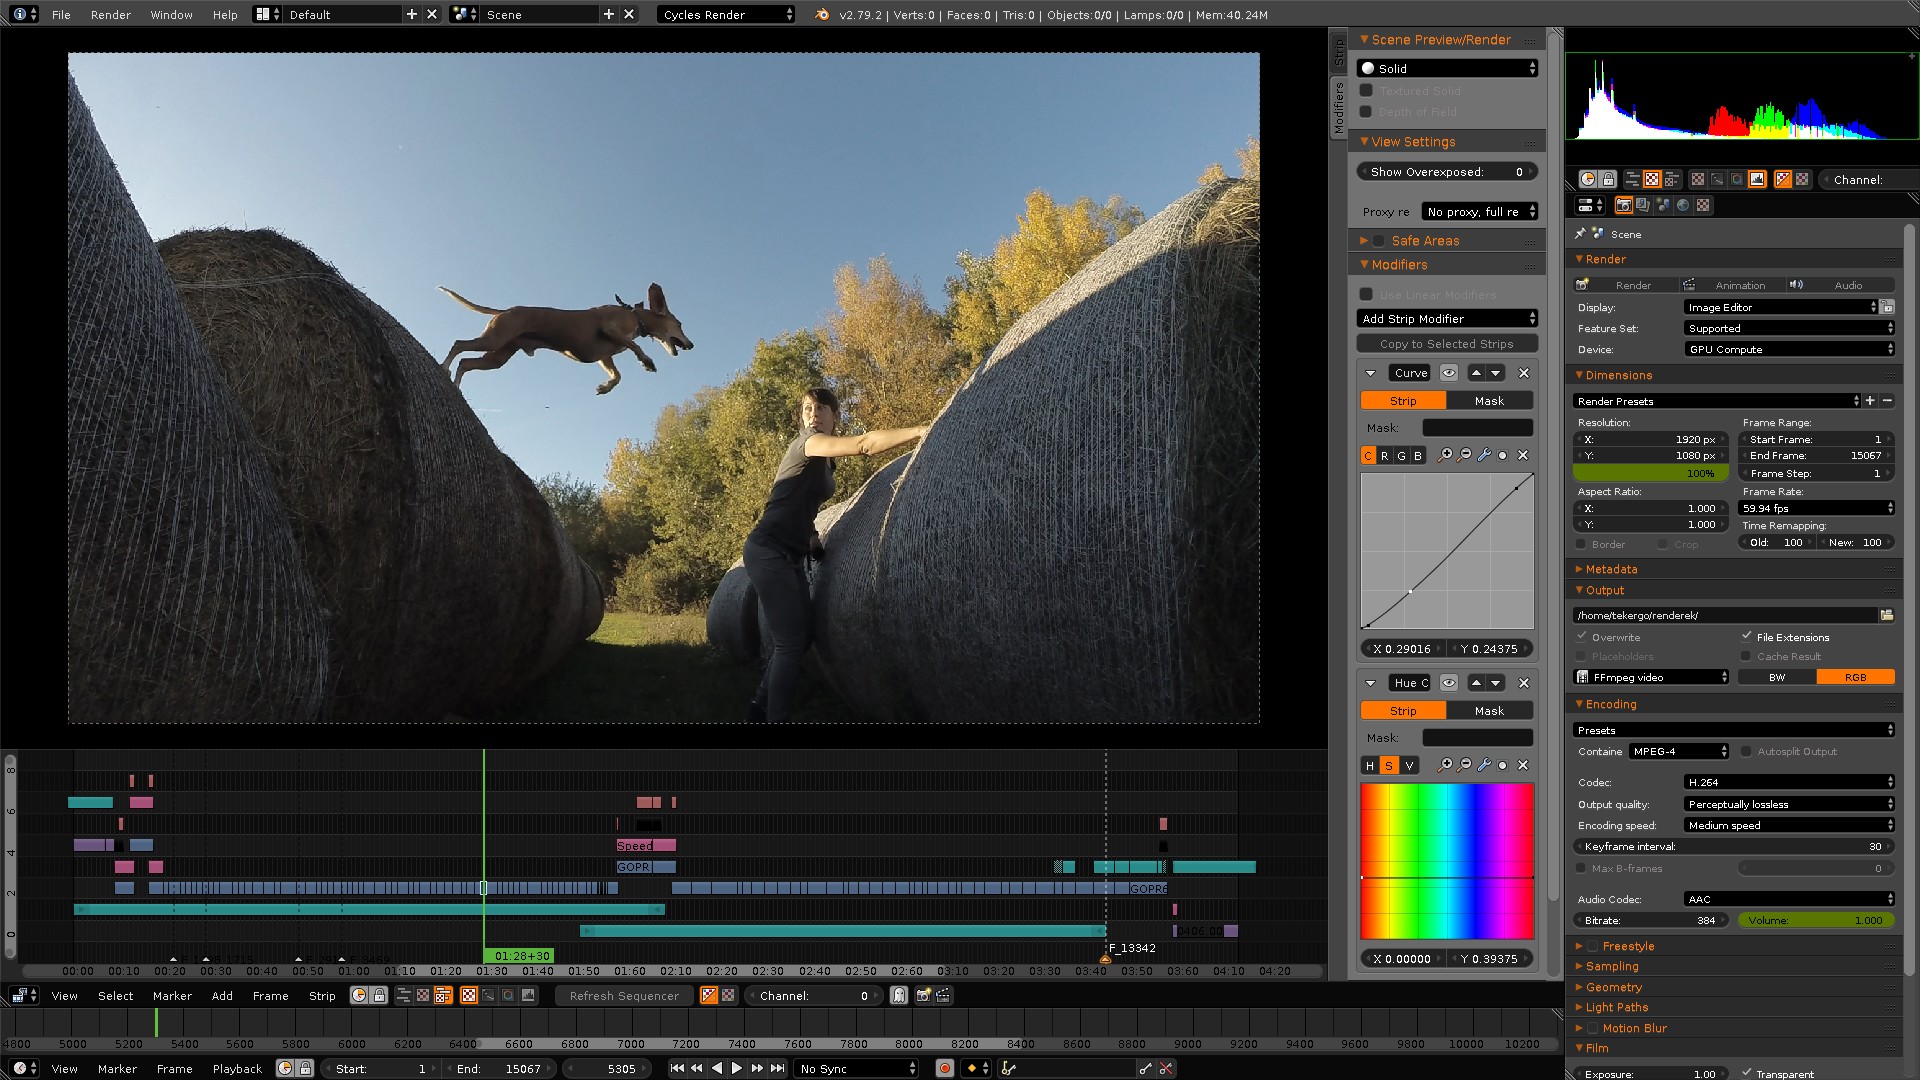
Rendering and Exporting Your Video Projects in Blender
Completing your video project in Blender is a significant achievement, but it\"s not truly finished until it\"s rendered and exported into a shareable format. This process can be complex, given the various options available. Here\"s a step-by-step guide to rendering and exporting your video projects in Blender, ensuring you get the best possible output for your efforts.
Setting Up Your Render Options
- Choose Your Output Format: Go to the Output Properties tab. Here, you can select your desired file format for the video. Common formats include MPEG, AVI, and QuickTime for video files, or PNG and JPEG sequences for still images.
- Specify Output Resolution: In the same tab, set your video\"s resolution. You can use preset values or enter custom dimensions to match your project\"s requirements.
- Frame Rate: Ensure the frame rate matches the one you used during editing. Consistency is key for smooth playback.
Audio Settings
Don\"t forget to include audio in your final render.
- Check the \"Audio Codec\" settings in the Output Properties tab to ensure audio is enabled and set to the desired format.
Rendering Your Project
- Perform a Test Render: Before rendering the entire project, perform a test render of a short segment to check for any issues.
- Render Settings: Access the Render Properties tab to fine-tune rendering options like sampling, which can affect both the quality and speed of your render.
- Start Rendering: With everything set, go to Render > Render Animation or press Ctrl+F12 to start the rendering process. This can take a significant amount of time, depending on the complexity of your project and your computer\"s capabilities.
Post-Rendering
- Review Your Video: After rendering, it\"s crucial to review your video thoroughly. Check for any missed errors, rendering issues, or unsynchronized audio that may require fixing.
- Final Export: If your project renders as a sequence of images, you\"ll need to compile these into a video file. This can be done within Blender or with an external video editing software.
Tips for Efficient Rendering
- Utilize Blender\"s proxy rendering feature for complex scenes to speed up the rendering process.
- Consider rendering your project overnight or during off-hours to minimize disruptions, as rendering can be resource-intensive.
Rendering and exporting are the final steps in bringing your Blender project to life. With patience and careful attention to detail, you can achieve professional-quality videos ready for sharing with the world.

Leveraging Blender\"s VFX for Video Editing
Blender is renowned not only for its capabilities in 3D modeling and animation but also for its powerful suite of VFX (Visual Effects) tools. These tools can transform ordinary video projects into cinematic experiences, adding depth, realism, or fantastical elements to your work. Here\"s how to leverage Blender\"s VFX for video editing, enhancing your projects with visual effects that captivate your audience.
1. Adding 3D Elements to Video
- Integrate 3D Models: Use Blender\"s 3D modeling tools to create or import models that can be incorporated into your video scenes, adding a new layer of interest and complexity.
- Scene Setup: Match the lighting and camera angles of your 3D scene with your video footage for seamless integration.
- Rendering: Render the 3D elements with transparency and composite them into your video using the Video Sequence Editor or the Compositor.
2. Creating Special Effects
- Simulations: Utilize Blender\"s physics simulations for effects like fire, smoke, water, and explosions, adding dramatic impact to your scenes.
- Particle Systems: Generate dynamic effects such as rain, snow, or magical particles to enrich the visual experience of your video.
3. Compositing and Post-Processing
- Node-Based Compositing: Blender\"s node-based compositor allows for complex post-processing effects, including color correction, blurring backgrounds, and integrating various visual elements into a cohesive final scene.
- Green Screen (Chroma Keying): Remove green screen backgrounds and replace them with digital or real environments to transport your subjects to new locations.
4. Motion Tracking and Camera Solving
- Track Camera Movement: Use motion tracking to follow the movement of objects or the camera itself, allowing 3D elements to interact realistically with live-action footage.
- Integration: Apply the tracking data to your 3D scene to ensure that the motion of 3D elements matches the video footage, enhancing the illusion of reality.
5. Enhancing Visual Quality
- High Dynamic Range Imaging (HDRI): Use HDRI backgrounds to provide realistic lighting and reflections on 3D objects, matching the environmental conditions of your live-action footage.
- Depth of Field: Add depth of field effects in post-production to focus attention on specific parts of your scene, mimicking the optical properties of cameras.
By mastering these VFX techniques in Blender, you can significantly enhance the production value of your video projects. Whether you\"re working on a film, a music video, or any other multimedia project, Blender\"s VFX tools offer endless possibilities for creative expression and storytelling.

Common Issues and Troubleshooting in Blender Video Editing
While Blender is a robust and versatile tool for video editing, users may encounter certain issues that can hinder their editing process. Identifying and resolving these common problems promptly can ensure a smoother and more efficient workflow. Here are some frequently encountered issues in Blender video editing and how to troubleshoot them.
1. Video Playback is Laggy or Choppy
- Solution: This often occurs with high-resolution footage. Try reducing the preview quality or using proxy clips for editing. You can set up proxy rendering in the properties panel of the video sequence editor.
2. Audio and Video Out of Sync
- Solution: Ensure the frame rate in Blender matches the frame rate of your video footage. Also, check the audio offset and adjust it in the strip properties if necessary.
3. Difficulty in Color Grading
- Solution: Use Blender\"s node-based compositor for advanced color grading options. If you\"re new to nodes, start with basic color correction nodes like RGB Curves and Color Balance.
4. Rendered Video Quality is Poor
- Solution: Check your output settings. Increase the bit rate for better quality. For rendering, ensure you\"ve selected an appropriate format and codec that supports high quality, such as H.264.
5. Blender Crashes During Rendering
- Solution: This may be due to insufficient system resources. Close unnecessary programs to free up memory and ensure your system meets Blender\"s recommended specifications. Also, consider rendering your project in smaller sections.
6. Effects Not Appearing in Final Render
- Solution: Make sure all effects and adjustments are applied to the correct video or audio strip. Also, verify that the layers you want to render are enabled in the render layer settings.
7. Trouble Importing Video Files
- Solution: Blender may not support the video format you\"re trying to import. Convert your video to a compatible format like AVI or MPEG using external software, then try importing again.
8. Audio Distortion or Noise
- Solution: Check the audio strip\"s properties and reduce the volume if it\"s too high, which can cause clipping. Use external audio editing software for noise reduction before importing the audio into Blender.
Encountering issues during video editing in Blender is common, especially as you explore its vast capabilities. However, with the right approaches to troubleshooting, you can overcome these challenges and harness the full power of Blender for your video editing projects.

_HOOK_
READ MORE:
Comparative Analysis: Blender vs. Other Video Editing Software
When it comes to video editing software, the market offers a plethora of options, each with its own set of features, strengths, and limitations. Blender, while primarily known for its 3D modeling and animation capabilities, also includes a comprehensive video editing suite. This section provides a comparative analysis of Blender against other popular video editing software, helping you understand how Blender stands in the competitive landscape.
Blender
- Pros: Free and open-source; extensive 3D modeling and animation features; node-based compositing; supports video editing and VFX.
- Cons: Steeper learning curve for beginners; limited audio editing capabilities compared to dedicated video editors.
Adobe Premiere Pro
- Pros: Industry-standard software with robust editing features; excellent integration with other Adobe Creative Cloud apps; wide range of supported formats.
- Cons: Subscription-based pricing model; may be overkill for casual or beginner users.
Final Cut Pro X
- Pros: Powerful video editing capabilities tailored for Mac users; magnetic timeline for easier editing; great performance and optimization on Apple hardware.
- Cons: Available only on macOS; pricing may be prohibitive for some users.
Davinci Resolve
- Pros: Strong color correction and audio post-production features; scalable from individual artists to large production teams; offers a free version with comprehensive features.
- Cons: Full feature set requires the paid version; complex interface with a steep learning curve.
Comparison
| Software | Pros | Cons | Best For |
| Blender | Free, 3D/VFX features, open-source | Steeper learning curve, limited audio editing | 3D artists, indie filmmakers |
| Adobe Premiere Pro | Industry-standard, integration with Adobe apps | Subscription-based, can be complex for beginners | Professional video editors, production studios |
| Final Cut Pro X | Optimized for macOS, magnetic timeline | Mac-only, higher upfront cost | Mac users, professional editors |
| Davinci Resolve | Excellent color and audio tools, free version available | Paid version needed for full features, steep learning curve | Colorists, audio professionals, filmmakers |
This comparative analysis highlights that while Blender offers a comprehensive suite of tools for video editing and 3D modeling, other software may be more suitable for users with specific needs, such as advanced color grading, audio editing, or industry-standard workflows. Ultimately, the choice of video editing software depends on your project requirements, budget, and personal preference.
Discover the unparalleled flexibility and creativity Blender offers for video editing, from basic cuts to advanced VFX, making it a top choice for artists and filmmakers seeking a comprehensive, cost-effective tool.