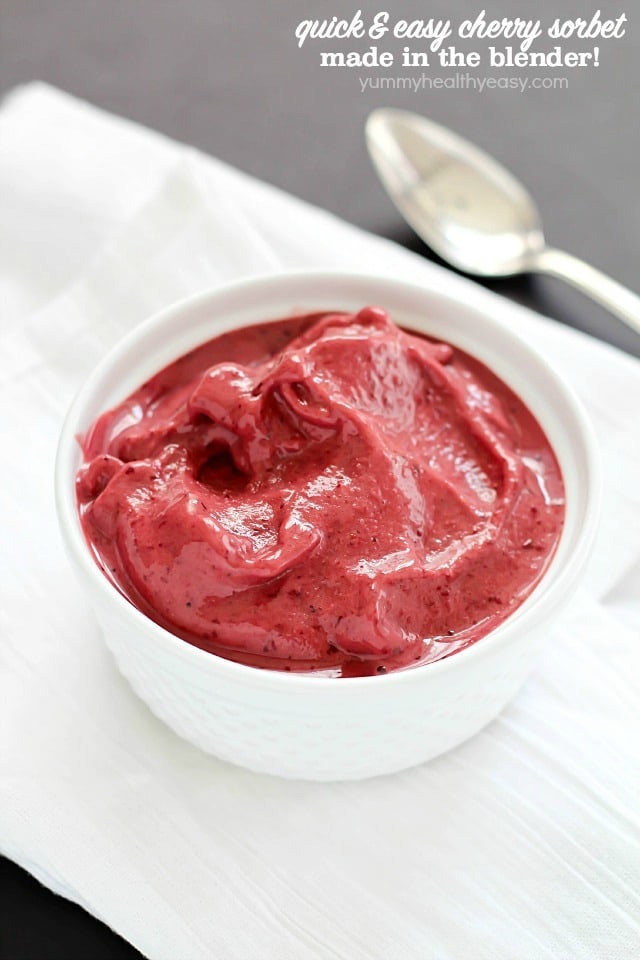
Topic how to make sorbet in a blender: Discover the joy of making homemade sorbet with just a blender! This guide will show you how to easily create refreshing and flavorful sorbets, perfect for any occasion.
Table of Content
- How long should I blend sorbet in a blender to achieve a smooth consistency?
- Choosing the Right Fruits
- Prepping and Freezing the Fruit
- Creating Simple Syrup for Sweetness
- Blending the Ingredients
- Taste Testing and Adjusting Sweetness
- Chilling the Sorbet Mixture
- YOUTUBE: How to Make Sorbet Using a Blender with Nutribullet | ao.com
- Freezing to the Perfect Texture
- Serving and Storage Tips
- Variations and Flavor Ideas
- Troubleshooting Common Issues
How long should I blend sorbet in a blender to achieve a smooth consistency?
To achieve a smooth consistency for sorbet in a blender, you should blend the ingredients for an adequate amount of time. Blending times can vary depending on the power of your blender and the desired texture of the sorbet. However, a general guideline is to blend the sorbet mixture in short bursts until it reaches a smooth consistency.
Here is a step-by-step guide on how to make sorbet in a blender:
- Gather all the necessary ingredients for your sorbet recipe.
- Peel and slice the fruits you want to use in your sorbet.
- Add the sliced fruits, sweetener (if needed), and a small amount of liquid (such as fruit juice or water) to the blender.
- Secure the lid of the blender tightly.
- Start by pulsing the blender to break down the fruits and incorporate the liquid.
- Blend the mixture on high speed for about 30 seconds or until the fruits are completely pureed.
- Stop the blender and scrape down the sides if needed.
- Continue blending in short bursts until the sorbet mixture reaches the desired smooth consistency.
- Be cautious not to overblend as blending for too long can cause the mixture to heat up and potentially melt the sorbet.
- Once the sorbet reaches the desired consistency, it is ready to be served immediately.
If you prefer a firmer texture, transfer the blended sorbet mixture into a freezer-safe container and freeze it for a few hours until it reaches the desired firmness.
Remember, the exact blending time may vary depending on the ingredients and the power of your blender. It\'s always best to refer to the specific instructions and recommendations provided in your sorbet recipe.
READ MORE:
Choosing the Right Fruits
Creating delicious sorbet starts with selecting the perfect fruits. The key is to choose fruits that are ripe and in season for the best flavor and natural sweetness. Consider the following tips when selecting your fruits:
- Seasonality: Opt for seasonal fruits for peak freshness and taste. Summer fruits like berries, peaches, and melons make excellent choices for sorbet.
- Ripeness: Choose fruits that are ripe but not overripe. The ripeness will greatly affect the sweetness and consistency of your sorbet.
- Variety: Experiment with different fruit combinations to create unique flavors. Mixing acidic fruits like citrus with sweet fruits like mangoes can produce delightful results.
- Freeze-ability: Some fruits freeze better than others. Fruits with high water content like watermelon can become icy, so consider blending them with creamier fruits like bananas for a smoother texture.
- Sugar content: Fruits with higher natural sugar content will help ensure your sorbet freezes to a nice consistency without being too hard.
Remember, the quality of your fruits will directly impact the final taste of your sorbet, so choose wisely!
Prepping and Freezing the Fruit
Proper preparation and freezing of your fruit are crucial steps to ensure your sorbet has the perfect texture and flavor. Follow these steps to prep your fruit like a pro:
- Wash and Dry: Thoroughly wash your fruits to remove any dirt or pesticides. Pat them dry with a clean towel to remove excess moisture.
- Peel and Cut: Peel fruits with thick skins like mangoes and peaches. Cut all fruits into small, uniform pieces to ensure they freeze and blend evenly.
- Remove Seeds: Discard any pits or seeds from fruits like cherries or plums to avoid any bitter flavors in your sorbet.
- Pre-Freeze: Spread the fruit pieces on a baking sheet lined with parchment paper, making sure they are not touching. This prevents the fruits from clumping together when frozen.
- Freeze: Freeze the fruit pieces for at least 4 hours, or overnight, until they are completely solid. This step is essential for achieving the smooth, icy texture of sorbet.
Once your fruits are prepped and frozen, they’re ready to be transformed into delicious, refreshing sorbet in your blender. Remember, the better the prep, the smoother your sorbet will be!

Creating Simple Syrup for Sweetness
Simple syrup is a key ingredient in sorbet to add sweetness and improve texture. Making it is easy and can be customized to your taste. Here’s how:
- Combine Sugar and Water: In a small saucepan, mix equal parts of sugar and water. Common ratios are 1 cup sugar to 1 cup water for a standard syrup, but you can adjust according to how sweet you like your sorbet.
- Heat to Dissolve: Place the saucepan over medium heat. Stir continuously until the sugar has completely dissolved into the water. There’s no need to bring it to a boil; just make sure the mixture is clear and the sugar is fully dissolved.
- Cool the Syrup: Remove the saucepan from the heat and allow the syrup to cool to room temperature. For a quicker cooling process, you can place the saucepan in a larger bowl filled with ice water.
- Flavor Infusions (Optional): For added flavor, consider infusing your simple syrup with herbs like mint or basil, citrus zest, or spices like cinnamon or vanilla. Add these at the heating stage, then strain before cooling.
- Store or Use: Once cooled, your simple syrup can be used immediately or stored in a clean, airtight container in the refrigerator for up to a month.
Adding simple syrup to your sorbet mixture helps to balance the flavors and prevents the sorbet from freezing too hard, ensuring a smooth, scoopable texture.
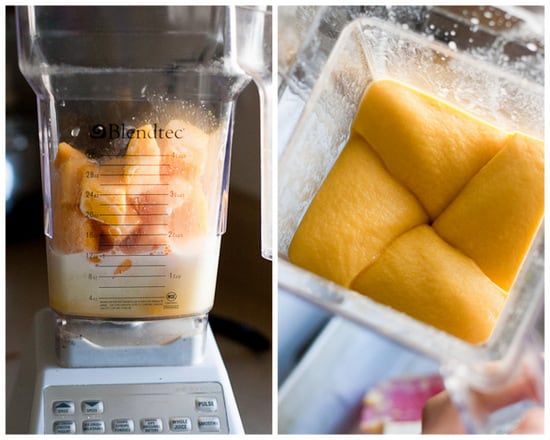
Blending the Ingredients
Once your fruits are prepped, frozen, and your simple syrup is ready, it\"s time to blend everything together into a smooth sorbet. Follow these steps for the perfect blend:
- Prepare Your Blender: Make sure your blender is clean and capable of handling frozen ingredients. High-powered blenders work best for making sorbet.
- Add the Frozen Fruit: Place the frozen fruit pieces into the blender. For best results, don\"t overload the blender; work in batches if needed.
- Pour in Simple Syrup: Add the cooled simple syrup over the frozen fruits. Start with a smaller amount; you can always add more to taste after blending.
- Start Blending: Begin blending on a low speed to break up the fruit, then gradually increase to high speed. Use the tamper tool if your blender has one to push down the ingredients safely.
- Check Consistency: Pause blending to check the consistency. If the mixture is too thick, you can add a little bit of cold water or more simple syrup to help it blend smoothly.
- Taste and Adjust: Once blended to a smooth consistency, taste your sorbet. If it needs more sweetness, add a bit more simple syrup and blend again.
- Final Blend: Once satisfied with the taste and consistency, give it one last blend to ensure everything is perfectly combined.
Your sorbet should now have a smooth, creamy texture. If it\"s too soft, you can freeze it for a bit before serving. Enjoy your homemade sorbet fresh out of the blender or freeze it for later!
_HOOK_
Taste Testing and Adjusting Sweetness
Taste testing your sorbet before freezing it allows you to adjust the sweetness and ensure it\"s just right. Here’s how to fine-tune the flavor:
- Taste Before Freezing: Once blended, taste your sorbet mixture. Keep in mind that freezing can dull the sweetness slightly, so it should be a tad sweeter than you want the final product to be.
- Adjusting Sweetness: If your sorbet isn\"t sweet enough, add a little more simple syrup and blend again. Do this gradually, as it\"s easier to add more sweetness than to correct an overly sweet sorbet.
- Consider Acidity: Sometimes, what your sorbet needs is not more sugar, but a hint of acidity to balance the flavors. A splash of lemon or lime juice can brighten the taste without adding more sugar.
- Re-Taste After Adjusting: After making any adjustments, taste the sorbet again to ensure the balance of flavors is perfect. Repeat the adjustment process if necessary.
- Final Consistency Check: In addition to taste, check the consistency. If the sorbet is too thick to blend after adjustments, add a small amount of cold water or juice to help it blend smoothly.
Once you\"re satisfied with the taste and consistency, your sorbet is ready to be chilled or frozen to your desired texture. Remember, the perfect sorbet is all about personal preference, so don\"t be afraid to adjust until it\"s just right for you!

Chilling the Sorbet Mixture
After blending your sorbet to the perfect consistency and flavor, chilling it properly is key to achieving the best texture. Follow these steps to chill your sorbet mixture:
- Prepare the Container: Choose a shallow, airtight container for chilling your sorbet. A shallow container helps the sorbet freeze evenly and quickly.
- Cool Before Freezing: If your sorbet mixture is too warm, let it cool in the refrigerator for about an hour before freezing. This helps prevent ice crystals from forming.
- Cover the Surface: Press a piece of plastic wrap directly onto the surface of the sorbet mixture to prevent ice crystals from forming on top.
- Seal and Freeze: Close the container with its lid or cover it tightly with aluminum foil. Place the container in the coldest part of your freezer.
- Stir Occasionally: For an even smoother texture, stir the sorbet every 30 minutes during the first two hours of freezing. This helps break up any ice crystals that start to form.
- Freeze Until Set: Freeze the sorbet for at least 4 hours or until it is firm. Freezing times may vary depending on your freezer and the depth of your container.
Once your sorbet is chilled and set, it\"s ready to be served. Enjoy your homemade sorbet as a refreshing treat any time!
How to Make Sorbet Using a Blender with Nutribullet | ao.com
Discover the magic of Nutribullet and unlock a world of healthy possibilities! Watch our video to learn how this powerful blender can effortlessly blend your favorite fruits and veggies into delicious and nutritious smoothies.
Making Peach Sorbet in a Blender - Blending with the Beast
Indulge in the sweet and juicy goodness of peaches with our mouthwatering recipe ideas! Join us in this video as we show you creative ways to incorporate this luscious fruit into your breakfast, desserts, and drinks. Don\'t miss out on the peachy paradise!
Freezing to the Perfect Texture
Achieving the perfect texture is crucial for delicious sorbet. Follow these steps to freeze your sorbet to perfection:
- Initial Freeze: After chilling, transfer the sorbet mixture to the freezer. For best results, use a shallow, airtight container to promote even freezing.
- Stir Regularly: During the first few hours of freezing, stir the sorbet every 30 to 45 minutes. This process, known as churning, helps to break up ice crystals and incorporate air, leading to a smoother texture.
- Monitor the Consistency: After each stir, check the consistency of the sorbet. It should gradually become more solid but still somewhat soft.
- Final Freeze: Once the sorbet has reached a mushy consistency, let it freeze without stirring for several hours or overnight. This will help it firm up to the right texture.
- Thaw Slightly Before Serving: Sorbet can become quite hard in the freezer. To achieve the perfect serving texture, let it sit at room temperature for about 5 to 10 minutes before scooping.
By following these steps, you\"ll create a sorbet with a delightful texture that\"s both smooth and scoopable. Enjoy your homemade sorbet as a refreshing treat!

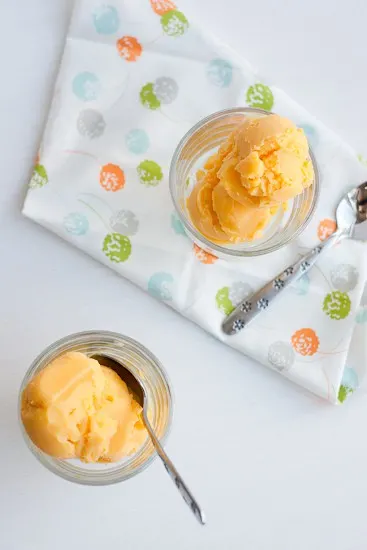
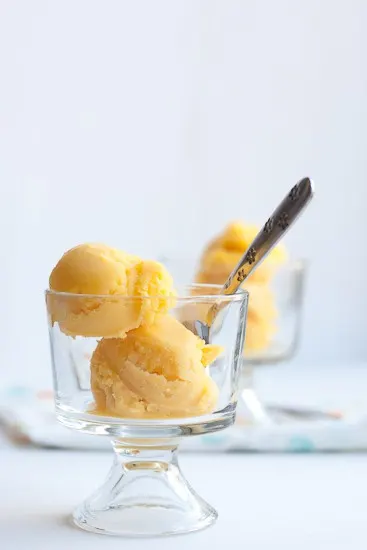
Serving and Storage Tips
Enjoying your homemade sorbet at its best requires proper serving and storage. Here are some tips to keep in mind:
- Serving: For the best texture, remove the sorbet from the freezer and let it sit at room temperature for 5 to 10 minutes before serving. This makes it easier to scoop and enhances the flavor.
- Scoop Size: Use a warm, wet scoop for easier serving and to create beautiful, round scoops of sorbet.
- Storage: Sorbet can be stored in the freezer for up to a month without losing its flavor and texture. Use an airtight container to prevent freezer burn and to keep the sorbet from absorbing odors from the freezer.
- Re-Freezing: Avoid re-freezing sorbet once it has thawed, as this can create ice crystals and affect the texture. Instead, only thaw the amount you plan to serve.
- Refreshing Flavors: To refresh the flavor of your sorbet after it has been stored, briefly blend it in the blender again before serving. This can help bring back the smooth texture and brighten the taste.
By following these serving and storage tips, you can ensure that every scoop of your homemade sorbet is as delicious as the first.
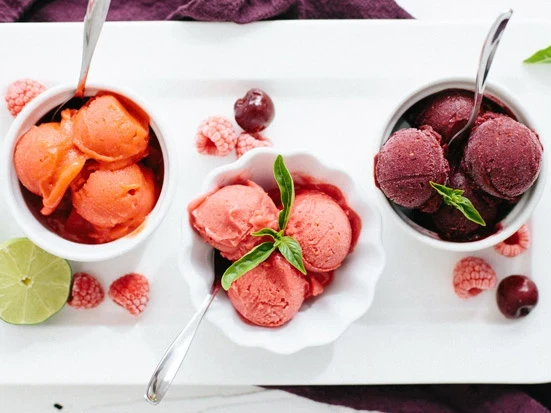
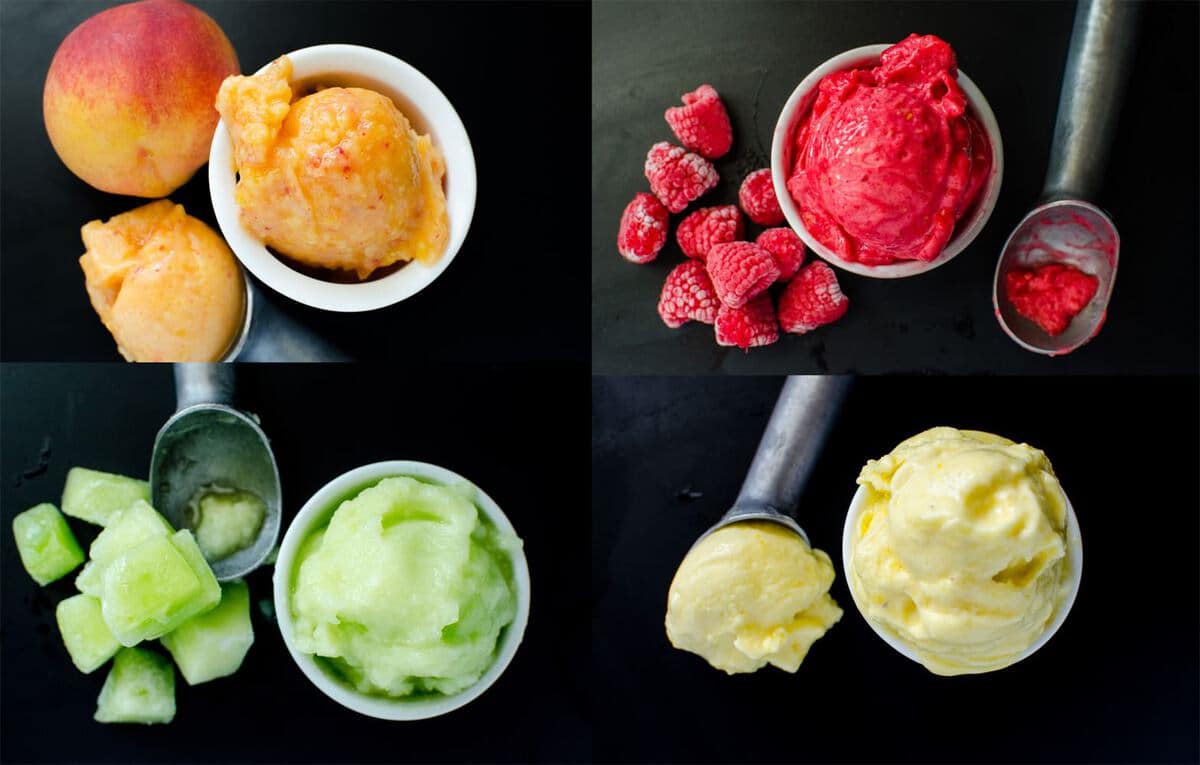
Variations and Flavor Ideas
Creating sorbet is an art that allows for endless creativity. Here are some variations and flavor ideas to inspire your next batch:
- Citrus Sorbet: Combine lemon, lime, and orange for a refreshing and tangy treat. Add a splash of vodka or limoncello to elevate the flavors.
- Berry Sorbet: Mix strawberries, raspberries, and blackberries for a deep and rich berry flavor. A hint of balsamic vinegar can add an intriguing depth.
- Tropical Sorbet: Blend mango, pineapple, and coconut for a taste of the tropics. Incorporate coconut milk for a creamier texture.
- Herb-Infused Sorbet: Experiment with adding fresh herbs like mint, basil, or thyme to fruit sorbets for a surprising twist.
- Spiced Sorbet: Spice up your sorbet with cinnamon, cardamom, or ginger. These work especially well with pear or apple sorbets.
- Chocolate Sorbet: For a decadent option, make a dark chocolate sorbet. Serve with a sprinkle of sea salt or chili for contrast.
- Wine-Infused Sorbet: Infuse your sorbet with wine, such as rosé for a floral note or red wine for depth. Be mindful of the alcohol content for proper freezing.
These ideas are just the beginning. Feel free to mix and match flavors or add your favorite fruits and ingredients to create your own signature sorbet.

_HOOK_
READ MORE:
Troubleshooting Common Issues
While making sorbet is generally straightforward, you might encounter some issues. Here’s how to solve the most common problems:
- Sorbet is Too Hard: If your sorbet freezes too solid, let it sit at room temperature for a few minutes before serving. For future batches, increase the amount of simple syrup to lower the freezing point.
- Sorbet is Too Soft: A sorbet that doesn\"t freeze properly may have too much sugar or alcohol. Reduce the simple syrup or alcohol content in your next batch.
- Ice Crystals Formed: To prevent ice crystals, ensure the fruit is fully frozen before blending and the sorbet mixture is chilled before freezing. Stirring the sorbet during the initial freezing phase can also help.
- Flavors are Too Mild: Flavors can dull when frozen. Make sure your sorbet mixture is slightly oversweetened and more intensely flavored than you think it should be before freezing.
- Sorbet Separates: If your sorbet\"s texture seems separated or grainy, it may not have been blended thoroughly. Re-blend the mixture until smooth and freeze again.
- Sorbet is Icy: An icy texture can result from too much water in the fruit or not enough sugar. Next time, try using fruits with lower water content or adding more simple syrup.
With these troubleshooting tips, you\"ll be able to perfect your sorbet-making technique and enjoy smooth, flavorful treats every time.
Embrace the simplicity and joy of making your own sorbet in a blender. With these tips and tricks, you\"re well on your way to creating delicious, refreshing treats that will impress and delight everyone!