Topic blender weight paint not working: Struggling with Blender weight paint not working? Discover effective solutions and expert tips to enhance your rigging and animation workflow in Blender, ensuring a seamless creative process.
Table of Content
- How can I fix the issue of weight paint not working in Blender?
- Understanding Weight Paint and Vertex Groups in Blender
- Setting Up for Weight Painting: Ensuring Proper Vertex Group Configuration
- Common Issues and Fixes for Weight Paint Mode
- Adjusting Weight Paint Settings for Optimal Results
- Advanced Weight Painting Techniques for Armatures and Rigging
- Using Automatic Weights for Rigging: Tips and Troubleshooting
- YOUTUBE: Fixing Weight Paint Issues After Applying Automatic Weights in Blender 2.91
- Manual Weight Painting: Precision and Control for Character Rigging
- Dealing with Weight Paint Problems: Locked Layers and Unresponsive Areas
- Optimizing Your Workflow: Weight Painting Shortcuts and Efficiency Tips
- Conclusion: Mastering Weight Painting in Blender
How can I fix the issue of weight paint not working in Blender?
To fix the issue of weight paint not working in Blender, you can follow these steps:
- Ensure you are in Edit Mode by pressing Tab on your keyboard.
- Select the faces or vertices you want to paint weights on by right-clicking on them while holding down Shift to select multiple elements.
- Switch to Weight Paint Mode by selecting it from the dropdown menu in the top-left corner of the 3D Viewport or by pressing Ctrl + Tab and selecting Weight Paint.
- Adjust the weight value and start painting on the selected areas. If the painting doesn\'t seem to work, try increasing the weight value or checking if you have any hidden geometry that might be interfering.
- If you\'re still facing issues, check for overlapping or duplicated vertices by going to Mesh > Clean Up > Merge by Distance to remove any extra vertices that could be causing problems.
- Once you have adjusted the weights as needed, switch back to Object Mode to see the changes applied.
READ MORE:
Understanding Weight Paint and Vertex Groups in Blender
Weight Paint mode in Blender is a powerful tool for rigging and animation, allowing artists to specify how much influence a bone has on different parts of a mesh. Vertex Groups play a crucial role in this process, serving as containers that hold weight values for vertices. Here\"s a step-by-step guide to mastering these concepts:
- Vertex Groups: Begin by creating vertex groups in your mesh. These groups allow you to assign weights to specific areas, controlling how they deform when bones move.
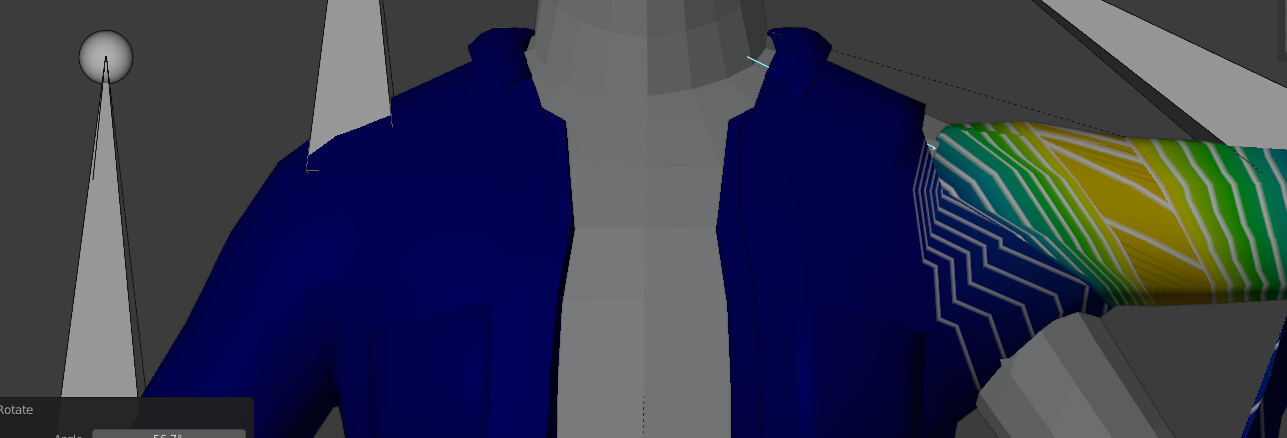
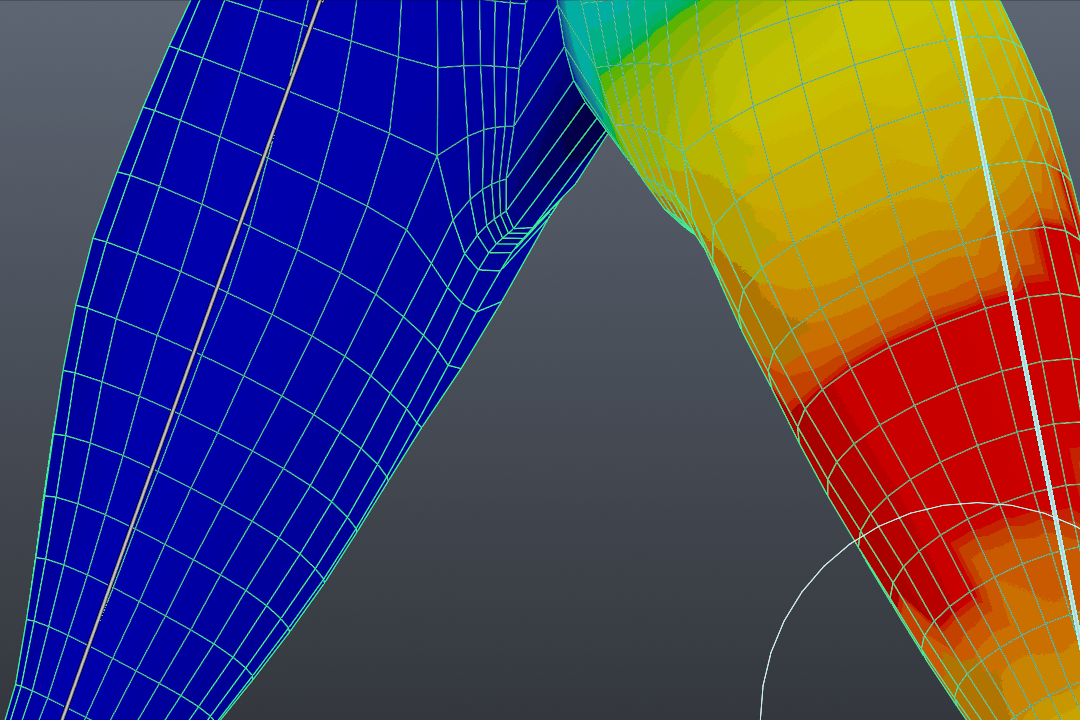
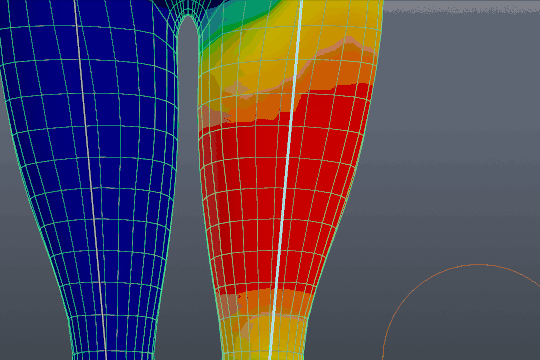
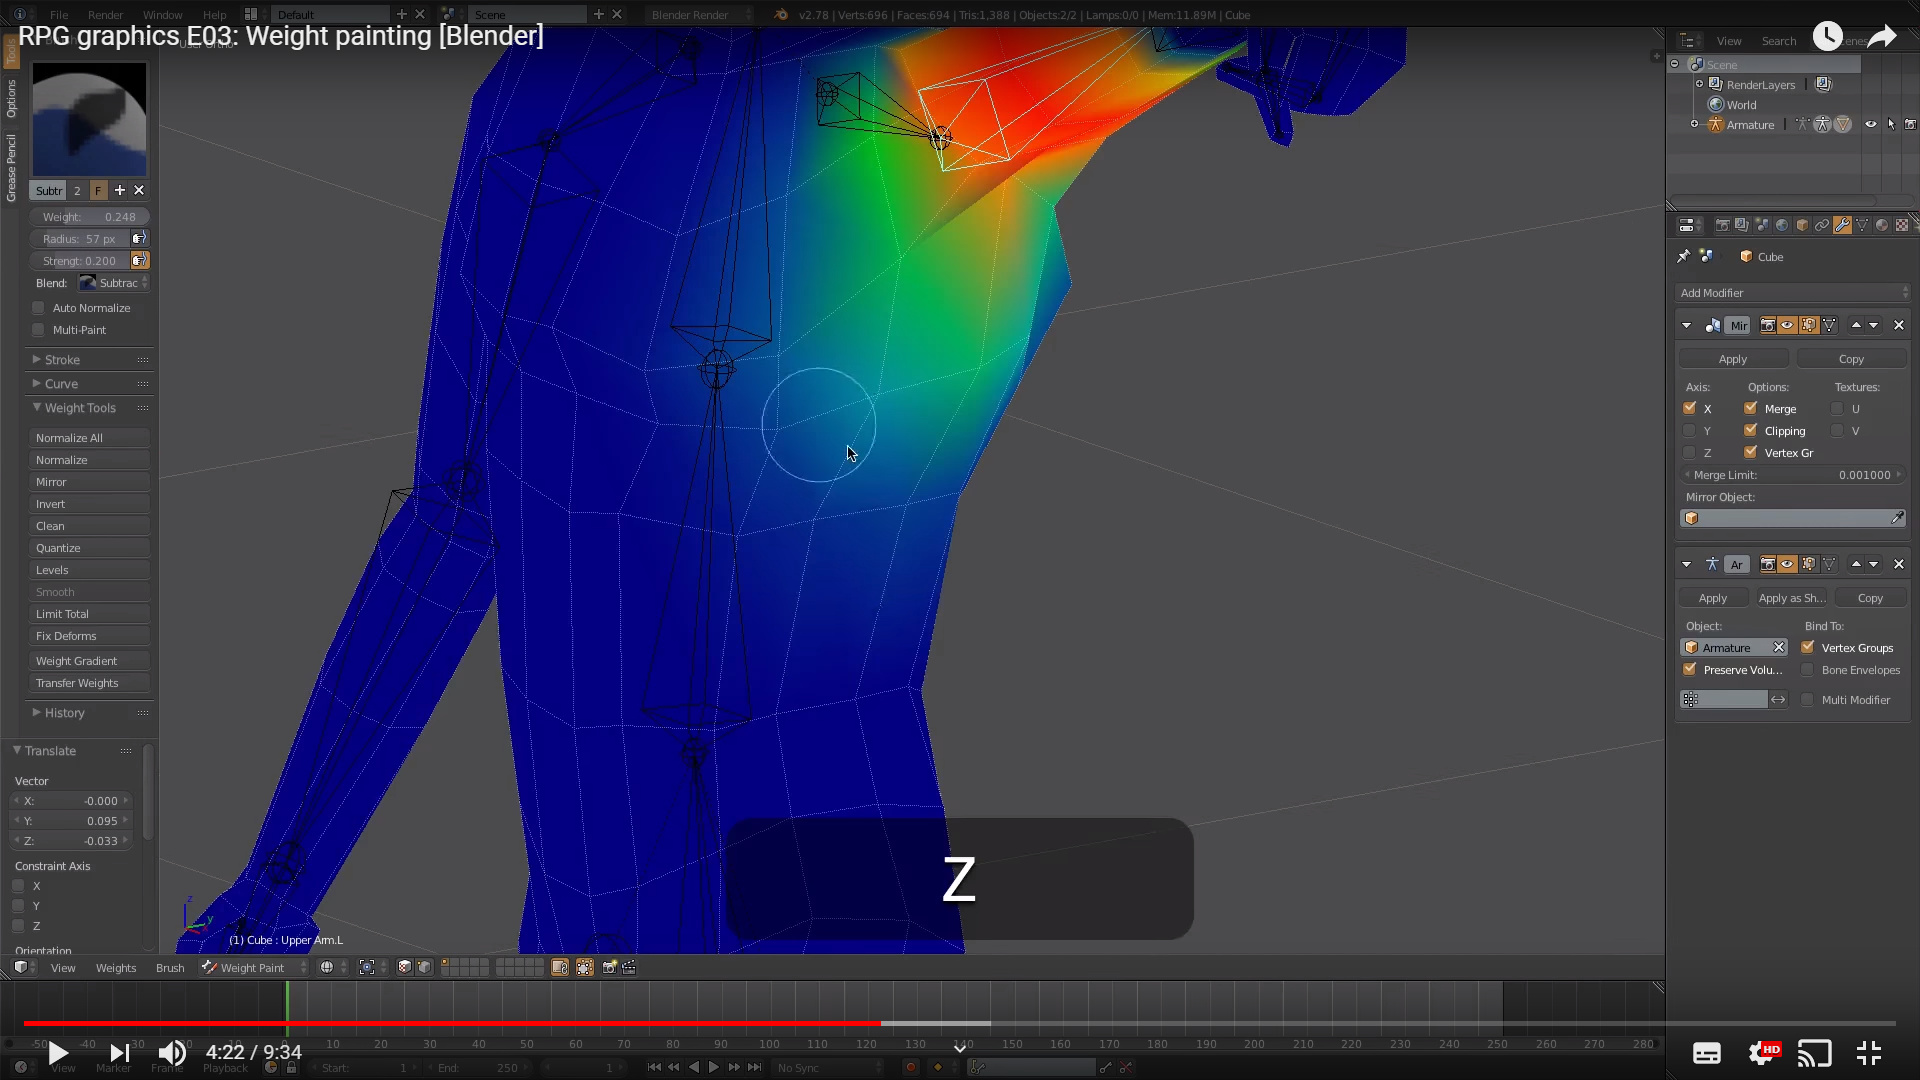
- Entering Weight Paint Mode: With your object selected, switch to Weight Paint mode. This mode visually represents the weight of each vertex, with colors ranging from blue (no weight) to red (full weight).
- Painting Weights: Use the weight painting tools to paint weights onto your mesh. The brush size, strength, and weight influence how the paint is applied.
- Adjusting Weights: For more precise control, you can adjust weights manually in the Vertex Groups panel. This method is ideal for fine-tuning weights after painting.
- Testing Deformations: Pose your armature to test how the mesh deforms with the applied weights. Adjust as necessary to ensure smooth deformations.
Understanding the relationship between Weight Paint and Vertex Groups is essential for creating realistic animations and deformations. With practice, you can leverage these tools to bring your Blender creations to life.

Setting Up for Weight Painting: Ensuring Proper Vertex Group Configuration
Proper setup is crucial for effective weight painting in Blender. Ensuring your mesh has the correct vertex group configuration is the first step toward successful deformation and animation. Follow these detailed steps for a smooth start:
- Preparing Your Mesh: Before weight painting, make sure your mesh is clean and has no doubles. Use the \"Remove Doubles\" feature in edit mode to merge any overlapping vertices.
- Creating Vertex Groups: In the Object Data properties tab, create vertex groups for each part of the mesh you plan to deform. Naming these groups according to the corresponding bones can streamline the rigging process.
- Assigning Vertices: In Edit mode, select the vertices that you want to influence a specific bone and assign them to the corresponding vertex group. Use weight values between 0 (no influence) and 1 (full influence).
- Automatic Weights: For an initial setup, you can parent your mesh to the armature with \"Automatic Weights\". This can give you a good starting point, which you can then refine in Weight Paint mode.
- Checking Weight Distribution: Enter Weight Paint mode to visually check the distribution of weights across your mesh. Look for areas that may have been missed or need adjustment.
- Refining Weights: Use the weight painting tools to add or subtract weight as needed. Pay special attention to joint areas, ensuring smooth transitions between influenced vertices.
Correctly setting up vertex groups and initial weights can significantly affect the success of your rigging and animation efforts. By following these steps, you\"ll be better prepared to utilize Blender\"s weight painting tools effectively.
Common Issues and Fixes for Weight Paint Mode
Encountering issues in Weight Paint mode can be frustrating, but many common problems have simple fixes. Here are some typical challenges Blender users face, along with solutions to get you back on track:
- Weight Paint Not Applying: Ensure the mesh has an associated armature and vertex groups. Without these, weights cannot be assigned. Also, verify the object is in Weight Paint mode.
- Uneven Weight Distribution: If painting applies uneven weights, adjust the brush’s weight and strength settings. Utilizing the \"Smooth\" brush can also help create more natural transitions between weights.
- Vertices Not Responding to Weight Paint: Check if the vertex group is locked or if the mesh has any hidden vertices. Unlocking the group and revealing all vertices can resolve this issue.
- Automatic Weights Fail: This can happen with non-manifold meshes. Ensure your mesh is clean, removing any double vertices, internal faces, or non-manifold edges before attempting to parent with automatic weights again.
- Influence of Bones on Unintended Areas: Use the \"Subtract\" brush mode to remove unwanted weights. Manually adjusting the weights in the vertex groups panel can also offer more precise control.
- Weight Paint Mode Crashes or Lags: This may be due to high mesh complexity. Consider simplifying the mesh or working on a lower subdivision level when weight painting.
By tackling these common issues with the suggested fixes, you can streamline your weight painting process and enhance your rigging workflow in Blender.

Adjusting Weight Paint Settings for Optimal Results
Mastering weight painting in Blender involves tweaking various settings to achieve the desired influence and smoothness of your deformations. Here are some key adjustments for optimal results:
- Brush Size and Strength: Tailor the brush size and strength according to the precision needed. Larger brushes are great for broad strokes, while smaller brushes offer fine control. Adjusting the strength influences the intensity of the applied weights.
- Weight and Radius: The \"Weight\" setting determines the maximum weight that can be applied with each stroke. Use a lower weight for subtle adjustments. The \"Radius\" controls the area affected by the brush.
- Auto Normalize: Enabling \"Auto Normalize\" ensures that the total weights remain normalized to 1. This prevents any vertex from being influenced by more than 100% across all groups, maintaining realistic deformations.
- Front Faces Only: Activating this option allows painting only on the faces directly visible to the user, preventing accidental weight painting on the backside of the model.
- Use Falloff: The falloff shape affects how weights are distributed from the center of the brush outward. Experiment with different falloff shapes to see which best suits the area you’re working on.
- Subtract and Add Mode: Utilize \"Add\" to apply weight and \"Subtract\" to remove it. Balancing these modes is crucial for fine-tuning the influence of bones on your mesh.
- Smooth and Levels: The \"Smooth\" tool can help even out abrupt transitions between weighted areas, while the \"Levels\" adjustment can increase or decrease the contrast in weight distribution.
By adjusting these settings, you can significantly improve the accuracy and efficiency of your weight painting process, leading to more natural and controlled deformations in your Blender projects.
_HOOK_
Advanced Weight Painting Techniques for Armatures and Rigging
Going beyond the basics, advanced weight painting techniques can significantly enhance your rigging and animation workflow in Blender. These strategies focus on refining deformations and ensuring your characters move realistically:
- Gradient Weights: Use gradient tools to create smooth transitions between weighted areas. This technique is particularly useful around joints for more natural movement.
- Locking Vertex Groups: When focusing on specific areas, lock other vertex groups to prevent accidental changes. This allows you to concentrate on refining weights without affecting the rest of your model.
- Weight Transfer: Utilize the weight transfer tool to copy weights from one part of the mesh to another or even from one object to another. This is especially handy when dealing with symmetrical models.
- Using the Data Transfer Modifier: For complex rigs, the Data Transfer Modifier can precisely transfer weight data between meshes. This is ideal for characters with multiple clothing items or gear.
- Mirror Weight Painting: Ensure symmetrical weight distribution by using Blender\"s mirror weight painting feature. This saves time and ensures consistency across your model.
- Corrective Smooth Modifier: After weight painting, use the Corrective Smooth Modifier to iron out any unnatural deformations. This modifier can be applied in specific areas where weights cause pinching or stretching.
- Weight Painting with Pose Mode: Paint weights directly while the armature is in pose mode to see real-time deformation feedback. This approach helps in adjusting weights based on the actual posed positions of your model.
These advanced techniques require patience and practice but can lead to highly realistic and flexible character rigs. By integrating these methods into your workflow, you can push the boundaries of what\"s possible with Blender\"s rigging and animation tools.
Using Automatic Weights for Rigging: Tips and Troubleshooting
Blender\"s Automatic Weights feature can be a powerful tool for rigging, streamlining the process of assigning weights to your mesh. However, it\"s not without its challenges. Here are some tips and troubleshooting strategies to help you get the most out of Automatic Weights:
- Ensure Clean Geometry: Before using Automatic Weights, ensure your mesh has clean geometry. Remove doubles, fix non-manifold edges, and ensure there are no internal faces.
- Proper Armature Placement: The position of your armature relative to your mesh can significantly affect the outcome. Ensure your armature is correctly placed inside or close to the mesh for optimal weight distribution.
- Parenting with Automatic Weights: Select your mesh first, then the armature, and use Ctrl+P to parent them. Choose \"With Automatic Weights\" from the menu. If Blender fails to assign weights, it may indicate issues with the mesh or armature.
- Troubleshooting Failed Weight Assignments: If Automatic Weights fail to assign correctly, check for loose parts or isolated vertices within your mesh. These can often disrupt the automatic weighting process.
- Manual Corrections: Automatic Weights may not always be perfect. Be prepared to enter Weight Paint mode to manually adjust weights for more natural deformations.
- Use of Modifiers: Certain modifiers, like the Mirror modifier, should be applied before rigging. This ensures symmetrical weight distribution when using Automatic Weights.
- Weight Painting Tools: Utilize Blender\"s weight painting tools, such as the gradient and smooth tools, to refine the weights assigned by the automatic process.
Automatic Weights can save significant time in rigging characters or objects but knowing how to troubleshoot common issues and make manual adjustments is crucial for achieving the best results.
Fixing Weight Paint Issues After Applying Automatic Weights in Blender 2.91
Troubleshooting: Dive into a world of problem-solving and innovation with our troubleshooting video. Explore expert tips and tricks that will help you overcome any technical challenges with ease. Get ready to conquer obstacles and elevate your skills!
4 Most Common Blender Rigging Problems and Solutions
Rigging: Unleash your creativity and master the art of rigging with our captivating video tutorial. Discover the secrets behind creating realistic animations and movements that will bring your projects to life. Join us on this exciting journey of exploration and transformation!
Manual Weight Painting: Precision and Control for Character Rigging
Manual weight painting in Blender offers unparalleled precision and control over character rigging, enabling animators to fine-tune how mesh deforms in response to bone movements. Here’s how to master manual weight painting for character rigging:
- Select Your Mesh and Switch to Weight Paint Mode: With your character mesh selected, switch to Weight Paint mode. This mode allows you to manually apply weights to vertices.
- Understanding Weight Color Code: Blender uses a color gradient to indicate weight strength, from blue (no weight) to red (full weight). This visual guide helps in applying precise weight values across the mesh.
- Choose the Correct Brush: Blender offers various brushes for weight painting, including Add, Subtract, and Smooth. Use the Add brush to apply weight, Subtract to remove it, and Smooth to even out weight distribution.
- Adjust Brush Settings for Detail Work: For detailed areas, adjust the brush size, strength, and falloff to achieve finer control. Smaller brush sizes are ideal for tight spaces, while lower strength settings allow for gradual weight application.
- Use Vertex Selection for Precision: Activate vertex selection to isolate specific vertices or groups, making it easier to apply weights to targeted areas without affecting neighboring vertices.
- Applying Weights to Mirror Bones: Ensure symmetrical weight distribution by using Blender\"s X-Mirror option, which mirrors weight painting across the X-axis, saving time and ensuring consistency.
- Testing and Refining: Regularly switch to Pose Mode to test how the mesh deforms with the rigged bones. This iterative process of testing and refining helps achieve realistic character movement.
Manual weight painting is a critical step in character rigging, requiring patience and precision. By following these steps, you can ensure your characters move in a lifelike manner, enhancing the quality of your animations.

Dealing with Weight Paint Problems: Locked Layers and Unresponsive Areas
When working with Blender\"s Weight Paint mode, artists occasionally encounter issues like locked layers and unresponsive areas that hinder the rigging process. These problems can be frustrating, but there are effective ways to address them:
- Identifying Locked Layers: Blender allows you to lock vertex groups to prevent accidental modifications. If you find certain areas unresponsive to weight painting, check the Vertex Groups panel to ensure none are locked.
- Unlocking Vertex Groups: To unlock a vertex group, simply click the padlock icon next to the group\"s name in the Object Data properties panel. This will allow you to edit the weights for that group.
- Dealing with Unresponsive Areas: If certain areas of your mesh do not respond to weight painting, it may be due to hidden faces or vertices. Enter Edit Mode and ensure all vertices are visible by selecting all (A) and removing any hide (Alt+H).
- Checking for Weight Limits: Blender has a limit to the number of vertex groups a single vertex can be influenced by. If you\"ve reached this limit, consider merging or simplifying your vertex groups.
- Mesh Integrity: Non-manifold geometry or overlapping vertices can cause issues with weight painting. Use Blender\"s Clean Up tools in Edit Mode to ensure your mesh is ready for weight painting.
- Adjusting Weight Paint Brush Settings: Sometimes, the brush settings might not be suitable for the mesh\"s scale or the detail level needed. Adjust the brush radius, strength, and weight to better suit the task at hand.
- Using the Normalize All Operation: After making several changes, some weights might not sum up to 1, leading to unpredictable deformations. Use the Normalize All operation in Weight Paint mode to correct this.
By methodically addressing these common issues, you can overcome obstacles in the weight painting process, ensuring smoother rigging and more realistic animations in your Blender projects.
Optimizing Your Workflow: Weight Painting Shortcuts and Efficiency Tips
Optimizing your workflow in Blender\"s weight painting mode can significantly enhance your rigging and animation projects. Here are some shortcuts and efficiency tips to help you work more effectively.
- Use Auto Normalize: Enable the \"Auto Normalize\" feature in the tool settings to ensure that all weights sum up to 1.0 across all bones, preventing unintentional influence from other bones.
- Brush Strength and Size: Adjust the brush strength and size directly using the F and Shift + F shortcuts. This allows for quick changes without interrupting your workflow.
- Masking: Use vertex groups to mask out areas you don\"t want to affect. This is particularly useful for painting weights on dense meshes or when working close to other bones.
- Gradient Tool: Utilize the Gradient tool for smooth transitions between weights. This is perfect for creating natural deformation in skin or clothing.
- Copy Weights: You can copy weights from one part of your mesh to another by using the Copy Vertex Group option. This is great for symmetrical models, saving time on manually painting both sides.
- Use the Blur Brush: The Blur brush can be used to smooth out harsh transitions between weights, creating more natural movements in your rigged models.
- Shortcut Keys: Familiarize yourself with Blender\"s shortcut keys for weight painting. For example, \"W\" brings up the weight paint menu, and numbers 1 through 0 adjust the weight from 0% to 100%.
- Isolate View: Pressing \"/\" on the numpad will isolate the selected bone or vertex group, making it easier to focus on specific areas without distraction.
- Layer Management: Keep your vertex groups organized by naming them appropriately. This helps in quickly finding the correct group for editing weights.
- Dynamic Topology: For high-density meshes, consider using dynamic topology to add detail where needed without affecting the entire mesh. This allows for finer control over weight distribution.
By incorporating these shortcuts and tips into your weight painting process, you can achieve more precise control and efficiency, leading to better rigged models and animations.

_HOOK_
READ MORE:
Conclusion: Mastering Weight Painting in Blender
Mastering weight painting in Blender is a crucial skill for anyone involved in character rigging and animation. It requires patience, practice, and a deep understanding of how weights influence the movement of your models. Here are some final tips to help you refine your weight painting skills and create more lifelike and responsive animations.
- Practice Regularly: Like any skill, becoming proficient in weight painting takes practice. Spend time experimenting with different techniques and tools within Blender to understand their effects on your models.
- Study Anatomy: For character rigging, a basic understanding of anatomy can greatly improve the realism of your animations. Knowing how muscles move and joints bend can guide you in applying weights more accurately.
- Use Reference Materials: Reference images and videos can be invaluable in understanding how different parts of a character should move. Use these resources to guide your weight painting decisions.
- Seek Feedback: Getting feedback from other artists or animators can provide new insights into your work. Don’t hesitate to share your projects with the Blender community for constructive criticism.
- Experiment with Add-ons: Blender has a vibrant community that develops add-ons which can enhance or simplify the weight painting process. Explore these tools to see if they can improve your workflow.
- Stay Updated: Blender is constantly being updated with new features and improvements. Stay informed about the latest versions and how they might affect or improve your weight painting techniques.
- Keep a Clean Topology: A clean, well-organized mesh topology is essential for effective weight painting. Ensure your models are well-constructed to avoid issues with weight distribution.
- Be Patient: Weight painting can be a time-consuming process, especially for complex models or when striving for high-quality animations. Take your time and remember that patience often leads to the best results.
In conclusion, mastering weight painting in Blender is a journey that combines technical skill with artistic insight. By following these tips and dedicating yourself to continuous learning and practice, you can achieve professional-quality rigging and animations that bring your characters to life.
Mastering weight painting in Blender is a crucial skill for anyone involved in character rigging and animation. It requires patience, practice, and a deep understanding of how weights influence the movement of your models. Here are some final tips to help you refine your weight painting skills and create more lifelike and responsive animations.
In conclusion, mastering weight painting in Blender is a journey that combines technical skill with artistic insight. By following these tips and dedicating yourself to continuous learning and practice, you can achieve professional-quality rigging and animations that bring your characters to life.