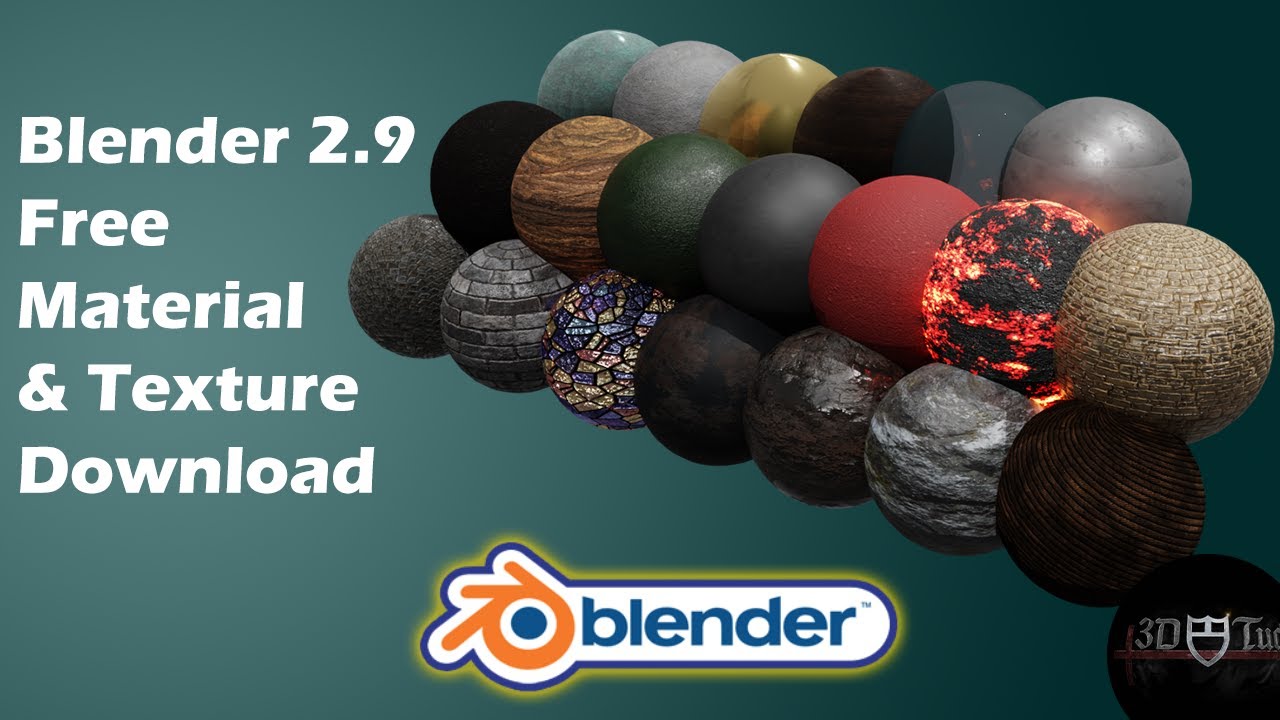
Topic blender textures free: Discover the best free Blender textures to elevate your 3D projects. From photorealistic to fantastical, these resources will unleash your creativity and transform your designs.
Table of Content
- What are the best free Blender textures available for architectural visualization, animation, and VFX projects?
- Top Free Texture Libraries
- Features of Free Textures
- Features of Free Textures
- Introduction to Free Blender Textures
- Top Websites for Free Blender Textures
- How to Download and Use Free Textures in Blender
- YOUTUBE: Blender Tutorial: PBR Texturing in 3 Minutes for Beginners
- Benefits of Using High-Quality Blender Textures
- Understanding Texture Maps: Diffuse, Normal, Specular, and More
- Creating Realistic Materials with Free Textures
- Legal Considerations and Licenses of Free Textures
- Community and Resources for Blender Artists
- Advanced Tips for Texturing in Blender
- Conclusion and Further Reading
What are the best free Blender textures available for architectural visualization, animation, and VFX projects?
To find the best free Blender textures for architectural visualization, animation, and VFX projects, you can follow these steps:
-
Visit websites that offer free PBR textures specifically designed for Blender such as Poliigon, Texture Haven, and CC0 Textures.
-
Look for textures that are high-quality and come with all the necessary map types needed for Blender, such as diffuse, specular, normal, and displacement maps.
-
Check user reviews and ratings to ensure that the textures are reliable and recommended by the Blender community.
-
Download a variety of textures to have a diverse library to choose from for different projects.
-
Experiment with different textures in Blender by applying them to objects and scenes to see how they enhance the visual quality of your projects.
READ MORE:
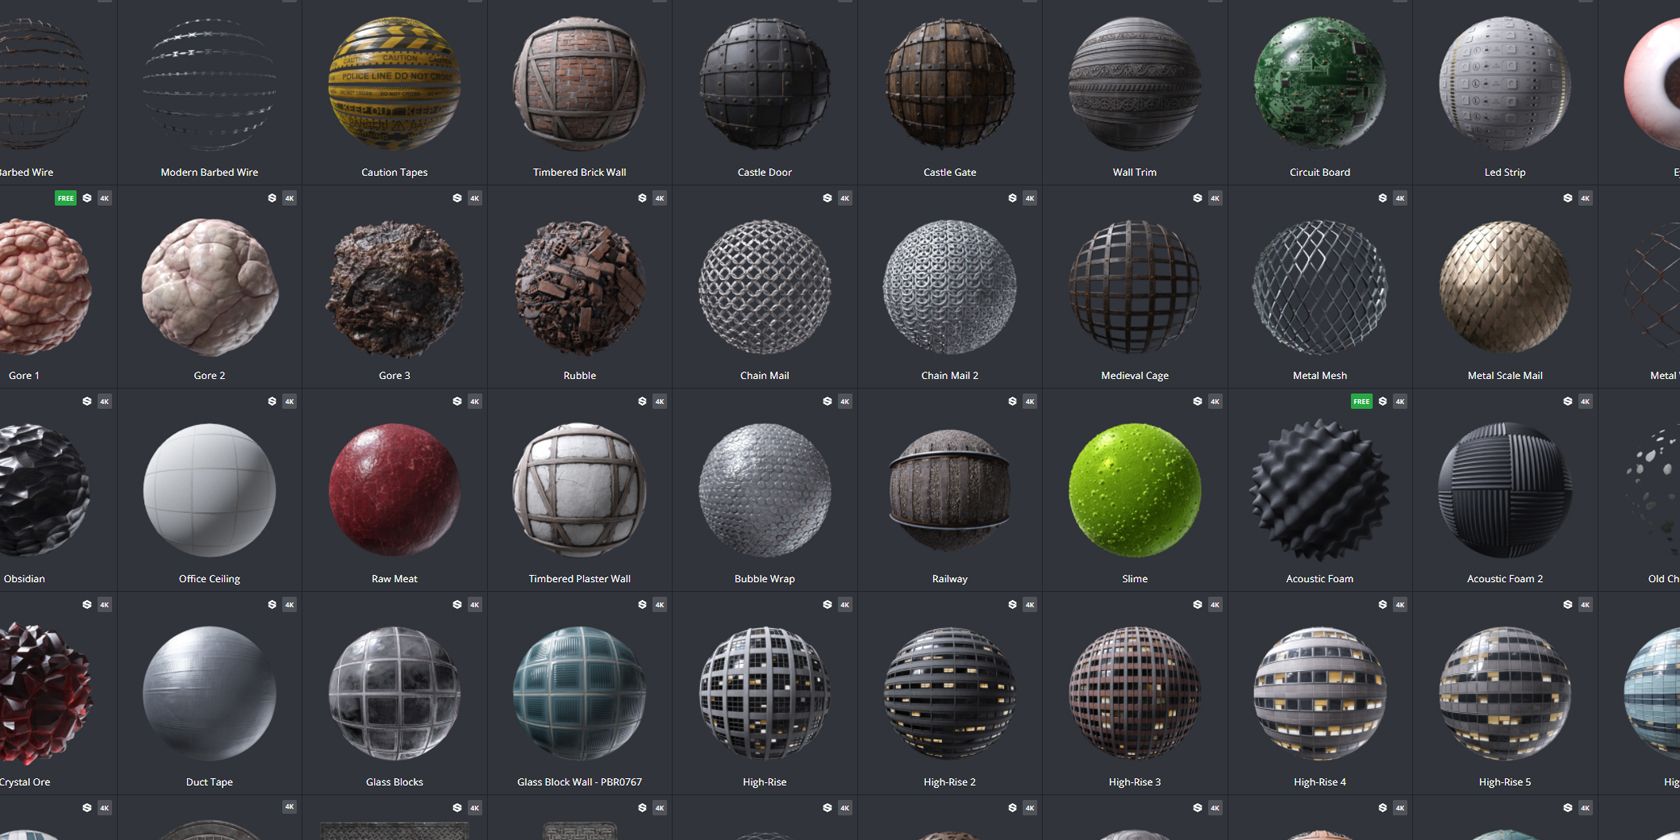
Top Free Texture Libraries
- Poliigon - Offers high resolution, seamless PBR textures for architectural visualization, animation, vfx, games, and product visualization.
- ambientCG - Provides over 2000+ PBR materials, HDRIs under the Public Domain license. Textures come with PBR maps and tile seamlessly.
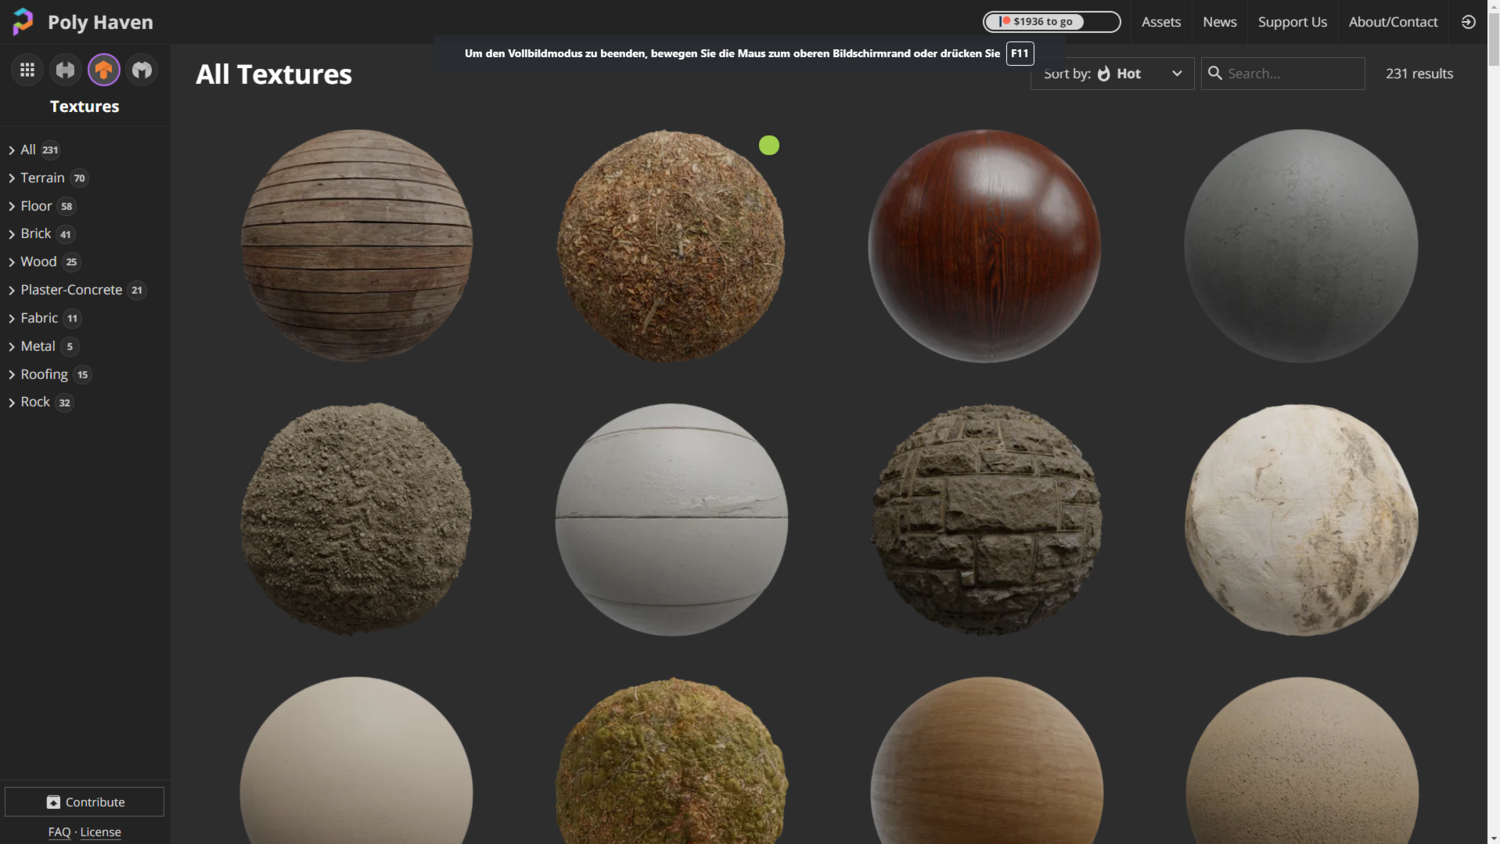
- Poly Haven - Hundreds of free PBR texture sets, ready to use for any purpose, no login required.
- BlenderKit - Access to 22,341 free models, materials, add-ons, and brushes for creating beautiful 3D artwork and visualization.

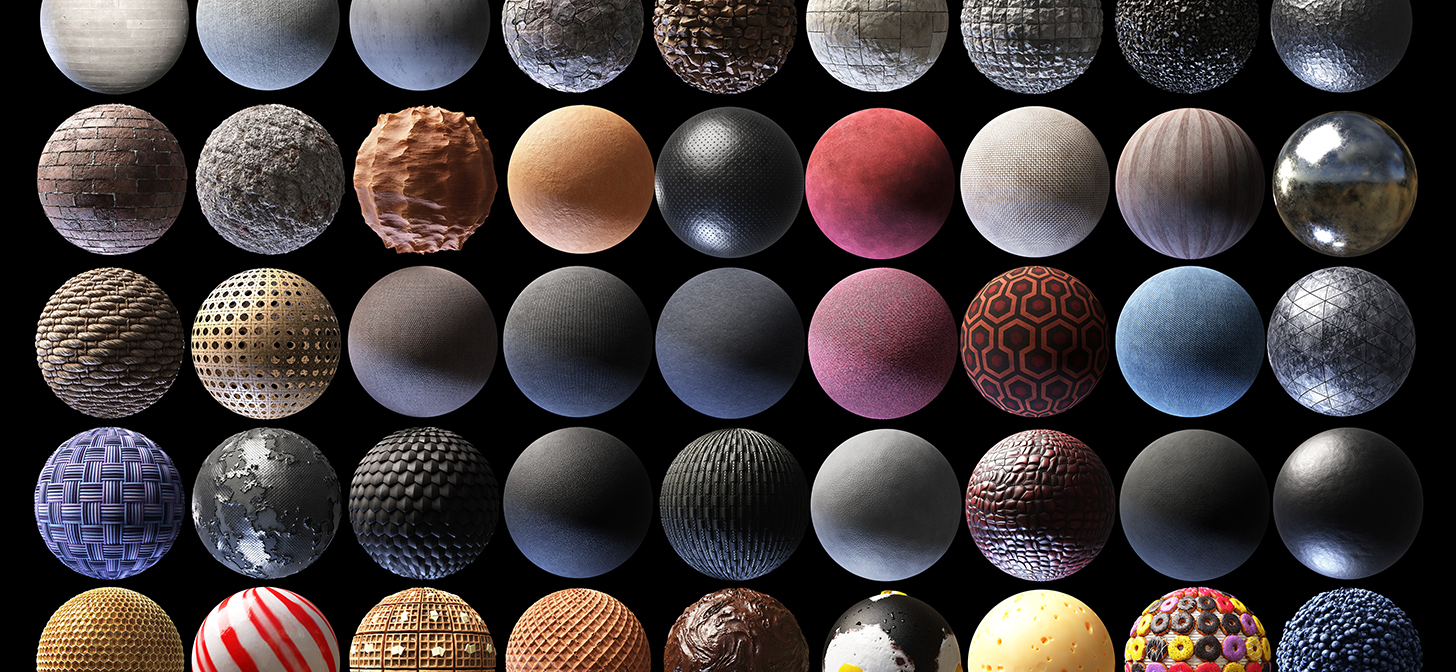
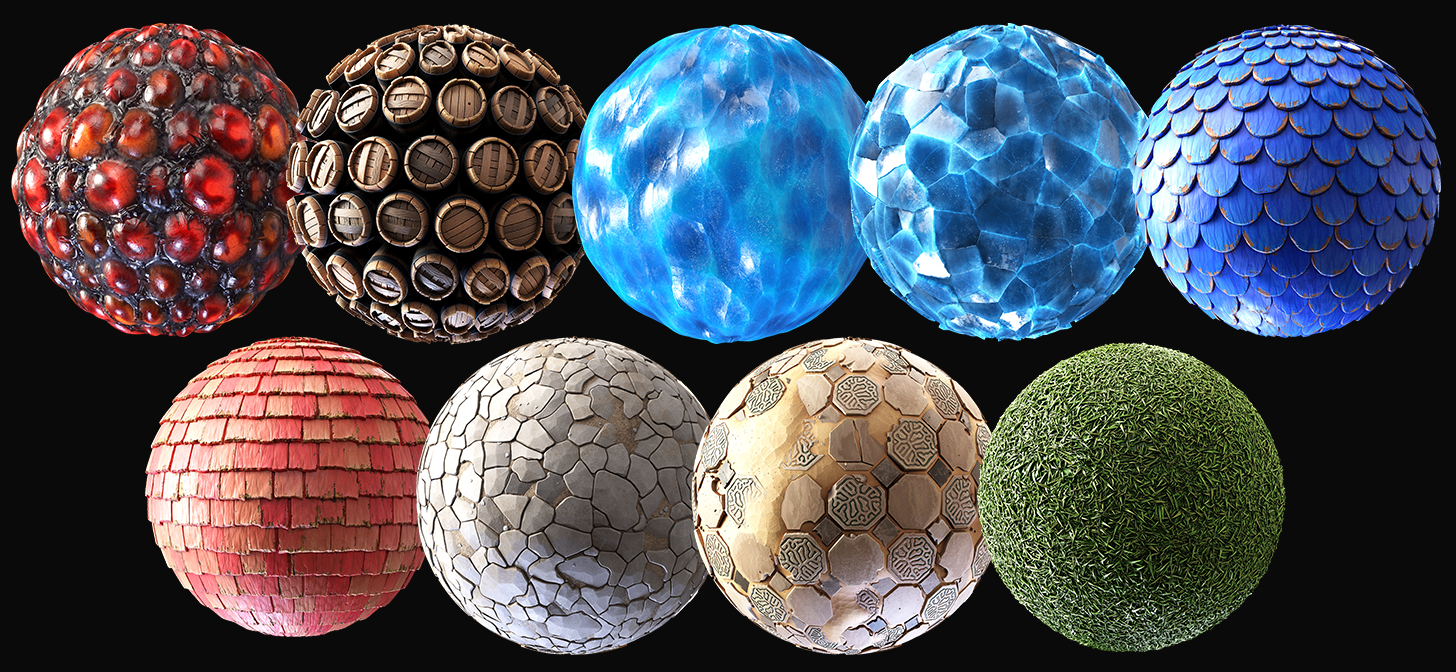
Features of Free Textures
- High resolution and seamless integration
- Compatible with major 3D software like Blender, Maya, Cinema4D, and 3ds Max
- Includes a variety of materials including wood, metal, fabric, and more
- Available under Public Domain or CC0 licenses for commercial use
How to Use
These textures can be directly downloaded and imported into Blender or any other 3D software, enhancing your 3D projects with realistic materials and finishes.
Introduction to Free Blender Textures
Blender artists and 3D designers constantly seek quality resources to elevate their projects. Free Blender textures offer an economical way to add realism and detail to 3D models without compromising on quality. These textures range from photorealistic materials to stylized assets, catering to various artistic needs and project requirements. Websites like Poliigon, ambientCG, and Poly Haven provide thousands of free PBR (Physically Based Rendering) textures, HDRIs, and models that are compatible with Blender and other 3D software. These resources are invaluable for architectural visualization, animation, VFX, games, product visualization, and more.
Utilizing free textures can significantly reduce project costs while allowing artists to explore a wide range of materials and finishes. High-quality textures come with multiple maps, including diffuse, normal, specular, and displacement maps, offering detailed control over the material\"s appearance in different lighting conditions. The availability of seamless textures ensures that artists can create large, uninterrupted surfaces without visible repeats or seams.
Moreover, these textures often come under liberal licenses such as Public Domain or Creative Commons, allowing for commercial use without legal concerns. This accessibility fosters a supportive community of 3D artists who share resources and knowledge, further enriching the Blender ecosystem.
Whether you\"re a hobbyist or a professional, free Blender textures can enhance your 3D projects, making them more immersive and visually appealing. In the following sections, we will explore the best sources for free Blender textures, how to download and use them in your projects, and tips for achieving the best results.
_HOOK_
Top Websites for Free Blender Textures
Finding high-quality free textures for Blender projects is crucial for artists and designers. The internet offers a plethora of resources, but navigating them can be challenging. Here, we highlight the most reliable websites providing free textures that can bring your 3D artwork to life.
- Poliigon - Although Poliigon offers premium textures, it also provides free samples that are perfect for various projects, showcasing high-resolution, PBR textures.
- ambientCG - Known for its vast collection of over 2000+ PBR materials, ambientCG offers textures that are completely free and under the Public Domain license, ensuring easy integration into any project.
- Poly Haven - Poly Haven stands out as a public asset library offering HDRIs, 3D models, and textures. Its commitment to quality and openness makes it a favorite among the Blender community.
- BlenderKit - BlenderKit is an integrated Blender plugin providing thousands of free models, materials, and brushes directly within Blender, simplifying the workflow for artists.
- Texture Haven - Texture Haven offers 100% free 3D textures, all under a CC0 license, with no strings attached. The textures are high quality and cater to various needs.
- CG Bookcase - This website features a wide range of Diverse textures for 3D artists, including unique fabrics and intricate designs, all available for free.
These websites are invaluable resources for Blender users, from beginners to professionals, looking to enhance their 3D models with realistic materials. Whether you\"re working on architectural visualization, animation, or game design, these sites provide the textures you need to take your work to the next level.
How to Download and Use Free Textures in Blender
Adding textures to your Blender projects can dramatically enhance their appearance. Here’s a step-by-step guide on how to find, download, and apply free textures in Blender, making your 3D models come to life.
- Find Free Textures: Start by visiting reputable websites like Poliigon, ambientCG, and Poly Haven. These sites offer a wide variety of free, high-quality textures suitable for various applications.
- Download the Desired Textures: Once you find a texture that fits your project, download it. Most textures come in ZIP files containing multiple maps for different effects (e.g., diffuse, normal, specular).
- Prepare Your Blender Project: Open Blender and select the object you wish to texture. Ensure it\"s properly UV unwrapped to achieve the best results.
- Apply the Texture:
- Go to the Shader Editor and create a new material for your object.
- Add an \"Image Texture\" node and open the downloaded texture file.
- Connect the texture node to the appropriate input on the shader. For example, connect the diffuse map to the Base Color input.
- Adjust the Settings: Experiment with the texture settings and shader nodes to achieve the desired look. You may need to adjust the scale, rotation, and mapping of the texture.
- Render Your Scene: Once you\"re satisfied with the texture application, render your scene to see the final result. Adjust lighting and camera angles as needed to highlight the texture’s effect.
Using free textures in Blender not only enhances the realism of your projects but also saves time and resources. By following these steps, you can easily incorporate various textures into your 3D models, creating more engaging and visually appealing renders.
Blender Tutorial: PBR Texturing in 3 Minutes for Beginners
Tutorial: \"Unleash your creativity with our step-by-step tutorial video. Learn new skills and techniques that will elevate your creations. Join us on a journey of inspiration and innovation!\" Library: \"Dive into the world of knowledge and discovery with our video tour of the library. Explore the shelves filled with endless possibilities and embark on a literary adventure like never before.\"
Substance to Blender Addon Material Library
Adobe has now created a addon for its materials to be imported directly into Blender. There are 319 materials to pick from to bring ...
Benefits of Using High-Quality Blender Textures
Integrating high-quality textures into Blender projects significantly enhances visual appeal and realism. These textures, often featuring detailed surface information, bring life to models, making them more compelling and photorealistic. Here\"s a look at the key benefits:
- Enhanced Realism: High-resolution textures offer detailed surface characteristics, improving the realism of 3D models. This is crucial for projects aiming for photorealistic outputs.
- Increased Versatility: A wide range of textures allows for greater creative freedom, enabling artists to accurately represent various materials like metal, wood, fabric, and more.
- Time and Cost Efficiency: Access to a library of textures reduces the need for creating materials from scratch, speeding up the production process and lowering project costs.
- Improved Lighting and Shadow Effects: Quality textures come with maps that enhance lighting and shadow details, contributing to the overall mood and depth of scenes.
- Community and Support: Many texture resources also offer forums and tutorials, providing valuable support and learning opportunities for both novice and experienced Blender users.
Ultimately, using high-quality textures can transform your Blender projects, making them stand out with their depth, realism, and artistic flair. Whether for animation, game development, or architectural visualization, these textures play a pivotal role in achieving professional-grade results.
Understanding Texture Maps: Diffuse, Normal, Specular, and More
Texture maps are crucial in 3D modeling and animation, offering depth, realism, and visual interest to objects in Blender. Understanding the different types of texture maps and their functions can significantly enhance the quality of your projects:
- Diffuse Maps: These are the most common type of texture map, defining the object\"s base color or pattern. They help in simulating a variety of materials by influencing how colors appear under different lighting conditions.
- Normal Maps: Normal maps add small-scale detail to surfaces without increasing the polygon count. They simulate bumps and dents, enhancing the texture\"s realism, especially under dynamic lighting.
- Specular Maps: Specular maps control the intensity and color of reflections on an object\"s surface, allowing for the simulation of diverse materials from matte to high gloss.
- Displacement Maps: These maps alter the geometry of the surface, adding high-fidelity detail by physically displacing mesh vertices during rendering, ideal for creating complex surface textures.
- Ambient Occlusion Maps: Ambient occlusion maps provide soft shadowing in the creases and folds of an object, enhancing depth and realism by simulating the way light radiates in real life.
- Reflection and Refraction Maps: These maps simulate how surfaces reflect or refract light, crucial for materials like glass, water, and polished metals.
Each map plays a unique role in texture creation, allowing artists to achieve detailed and nuanced effects. By combining these maps, you can create textures that are visually rich and highly realistic, thereby bringing your Blender projects to life with impressive accuracy and depth.

Creating Realistic Materials with Free Textures
Transforming your 3D models into lifelike representations requires not just any textures, but the right approach to applying them. Here\"s how to create realistic materials using free textures in Blender:
- Choose the Right Textures: Start by selecting high-quality textures that match the material you\"re trying to replicate. Look for textures with multiple map types (diffuse, normal, specular) to add depth and realism.
- Adjust the Scale: Ensure the texture\"s scale aligns with your model\"s dimensions. Incorrect scaling can break the illusion of realism.
- Layer Multiple Maps: Utilize diffuse, normal, and specular maps together to create a material that reacts realistically under various lighting conditions. This can greatly enhance the perception of depth and surface complexity.
- Modify Texture Settings: Experiment with Blender\"s texture settings to fine-tune the appearance. Adjusting parameters such as glossiness, reflectivity, and bump strength can make a significant difference.
- Combine Textures: For more complex materials, consider layering multiple textures. This technique is particularly useful for creating surfaces like aged metal, peeling paint, or mixed materials.
- Use Displacement Maps: For materials that require a 3D surface alteration, such as rocky terrains or engraved details, displacement maps can add that extra layer of realism.
- Test Under Different Lighting: Lighting can dramatically affect the appearance of materials. Test your materials under various lighting setups to ensure they maintain their realism.
By carefully selecting and applying textures, and adjusting their properties within Blender, you can achieve remarkably realistic materials that will enhance the overall quality of your 3D projects.
_HOOK_
Legal Considerations and Licenses of Free Textures
When incorporating free textures into your Blender projects, understanding the legal landscape is crucial. The right knowledge ensures your creative work remains unencumbered by legal issues. Here\"s what you need to know:
- Public Domain (CC0): Textures labeled as Public Domain or CC0 can be used without attribution or permission, even in commercial projects. They are the most flexible in terms of usage rights.
- Creative Commons Licenses: These licenses can range from allowing any type of use with attribution (CC BY) to more restrictive forms that limit commercial use or derivative works. Always check the specific CC license attached to the texture.
- Royalty-Free: Royalty-free textures can be used in commercial projects without paying ongoing royalties, but there might be initial costs or specific terms to follow.
- Licensing Agreements: Some textures, especially from premium sites, come with licensing agreements that specify how you can use them. Read these carefully to avoid infringing on the creator\"s rights.
- Attribution Requirements: Many free resources require you to credit the creator. Ensure you adhere to these requirements to respect the creator\"s work.
- Commercial Use: If you plan to use textures in commercial projects, verify that the license explicitly allows for this. Some textures might be free for personal use but not for commercial purposes.
Respecting the legal and licensing requirements of free textures not only protects you legally but also supports the creators and the community by acknowledging their contributions. Always double-check the terms associated with the textures you use to ensure your projects remain compliant.
Community and Resources for Blender Artists
The Blender community is a vibrant and supportive network of artists, developers, and enthusiasts who share a passion for 3D modeling, animation, and rendering. Here are key resources and communities to engage with:
- Blender Artists Community: An online forum where users share their work, ask for feedback, and offer tips and tricks. It\"s a great place for both beginners and professionals to learn and grow.
- BlenderNation: Offers daily news about Blender and the community, including tutorials, art showcases, and development updates. It\"s a central hub for all things Blender.
- Blender Guru: A popular tutorial website run by Andrew Price, offering in-depth guides on various aspects of Blender, from modeling and texturing to lighting and rendering.
- CG Cookie: Provides a wide range of Blender tutorials and courses, suitable for all skill levels. It\"s perfect for artists looking to enhance their skills systematically.
- Blender Foundation: The official website for Blender, where you can find the latest software updates, documentation, and information about the Blender Conference.
- Blender Stack Exchange: A question and answer site for people who use Blender to create 3D graphics, animations, or games. It\"s a great place to find solutions to technical challenges.
Engaging with these communities and resources can provide invaluable support, inspiration, and education, helping Blender artists of all levels to improve their skills, share their work, and connect with like-minded individuals around the globe.
Advanced Tips for Texturing in Blender
To elevate your texturing skills in Blender beyond the basics, consider these advanced strategies that can add complexity and realism to your 3D models:
- Utilize Node-Based Materials: Blender\"s powerful node editor allows for the creation of complex materials. By combining different nodes, you can create unique textures that respond dynamically to lighting and environment.
- Experiment with Procedural Textures: Procedural textures are generated by algorithms within Blender, offering endless customization. These can be adjusted for scale, detail, and variation without losing quality.
- Incorporate Ambient Occlusion: For added realism, use ambient occlusion in your textures to simulate soft shadows in crevices and where objects meet, enhancing depth and detail.
- Layer Textures with Masks: Using masks to layer textures can achieve effects like wear and tear, adding history and realism to objects. This technique is particularly useful for creating aged or used items.
- Control Reflections with Fresnel: Implementing Fresnel effects can help control how reflections appear on curved surfaces, making materials like glass, water, and certain metals look more realistic.
- Use Displacement Modifiers: For textures that require physical depth, such as rugged landscapes or detailed surfaces, displacement modifiers can alter geometry based on a texture map for ultra-realistic effects.
- Optimize Your Textures: High-quality textures can be resource-intensive. Use optimization techniques such as baking textures or reducing resolution where high detail is not necessary to maintain performance.
These advanced techniques require practice and experimentation but can significantly improve the realism and aesthetic appeal of your Blender projects. By mastering these skills, you\"ll be able to push the boundaries of what\"s possible with texturing in Blender.
READ MORE:
Conclusion and Further Reading
In the journey to master Blender and 3D design, free textures play a pivotal role in enhancing the visual quality and realism of your projects. By leveraging the resources and techniques discussed, artists can elevate their work, explore creative possibilities, and engage with a vibrant community of peers. Remember, the key to success lies in continual learning and experimentation.
For those eager to delve deeper, consider exploring additional Blender tutorials, community forums, and advanced texturing techniques. Websites like Blender Artists Forum, CGCookie, and BlenderNation offer vast amounts of knowledge, tips, and inspiration to further your skills. Engaging with these communities can provide support, feedback, and new ideas to inspire your next project.
As you continue your 3D modeling and texturing journey, keep experimenting with different textures, maps, and materials. The world of Blender is vast and full of potential—embrace it fully to unlock your creative prowess.
Embrace the power of free Blender textures to bring your 3D creations to life. With endless possibilities at your fingertips, start exploring today and unlock a world of creativity and realism in your projects.