Topic how to make textures in blender: Unlock the secrets of creating stunning textures in Blender, and elevate your 3D projects to new heights. This guide covers everything from basic techniques to advanced texturing methods, empowering you to bring your artistic visions to life.
Table of Content
- Getting Started with Basic Texturing
- Advanced Texturing Techniques
- Resources for Textures
- Advanced Texturing Techniques
- How can I create textures in Blender?
- YOUTUBE: Texture Painting Quick Start Guide Blender
- Resources for Textures
- Resources for Textures
- Introduction to Texturing in Blender
- Understanding Basic Texturing Techniques
- Exploring Image Textures and UV Mapping
- Advanced Texturing: Procedural Textures and Shaders
- Utilizing PBR for Realistic Materials
- Creating and Applying Normal, Specular, and Displacement Maps
- Optimizing Textures for Performance
- Resources for Finding and Creating Textures
- Tips and Tricks for Efficient Texturing Workflows
- Common Texturing Challenges and Solutions
- Conclusion: Enhancing Your 3D Projects with Professional Texturing
Getting Started with Basic Texturing
To begin, you need to assign a material to your object and understand the importance of UV mapping. This foundational step is crucial for applying textures correctly.
Creating a Material
- Start by creating a new material for your object.
- Use the Shader Editor to connect textures to the material\"s nodes.
Importing Image Textures
- Drag and drop your image texture into the Shader Editor.
- Alternatively, use the Add menu to manually add an Image Texture node.
READ MORE:
Advanced Texturing Techniques
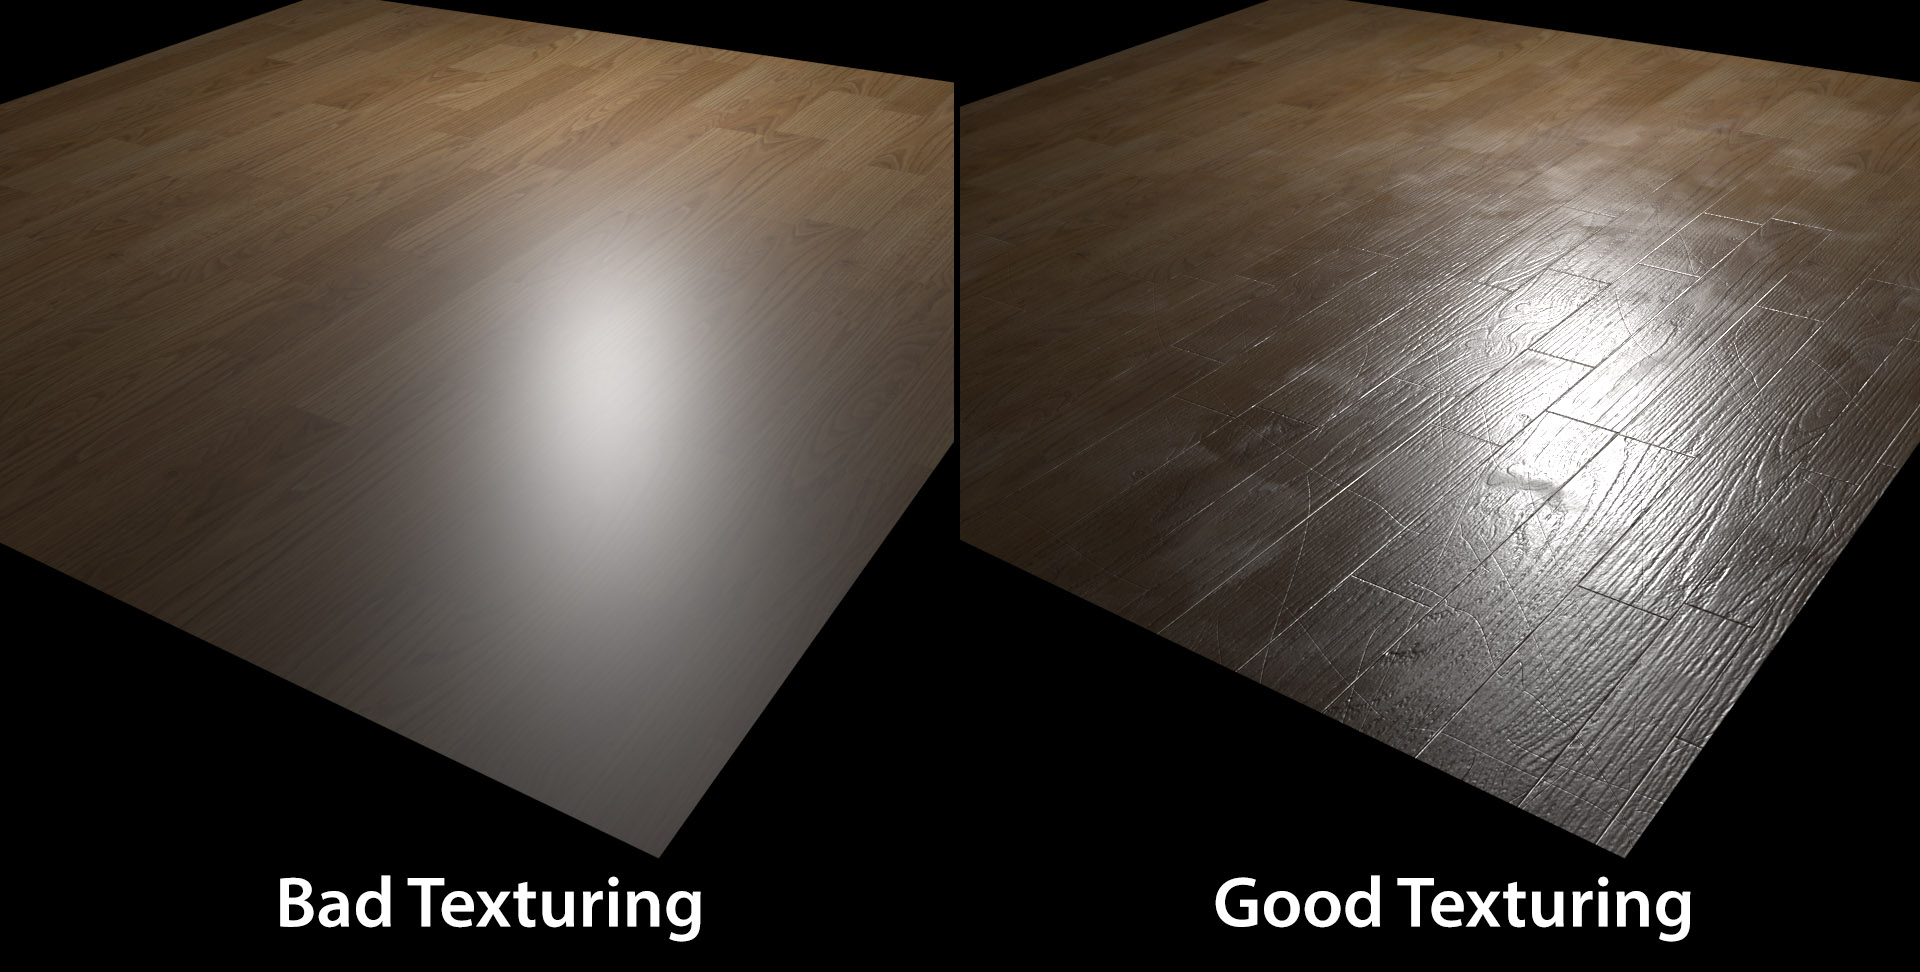
For more realism, consider creating variations of your texture in an image editing software and importing them into Blender. This can include normal, specular, and displacement maps to add depth and detail to your materials.
Procedural Textures
Blender\"s procedural texturing capabilities allow for the creation of complex materials without the need for external images. You can create a wide range of effects, including wood, metal, and more, using only mathematical algorithms.
Using PBR Materials
Physically Based Rendering (PBR) materials use realistic lighting models to simulate real-world materials. Blender supports PBR through the Principled BSDF shader, enabling the creation of materials with accurate light interaction.
Resources for Textures
Finding high-quality textures is essential for creating realistic materials. Websites such as ambientCG offer a vast library of free textures that can be used in Blender projects.
Conclusion
Texturing in Blender is a broad and complex topic, but by starting with basic techniques and gradually exploring more advanced methods, you can significantly enhance the realism and appeal of your 3D models.

Advanced Texturing Techniques
For more realism, consider creating variations of your texture in an image editing software and importing them into Blender. This can include normal, specular, and displacement maps to add depth and detail to your materials.
Procedural Textures
Blender\"s procedural texturing capabilities allow for the creation of complex materials without the need for external images. You can create a wide range of effects, including wood, metal, and more, using only mathematical algorithms.
Using PBR Materials
Physically Based Rendering (PBR) materials use realistic lighting models to simulate real-world materials. Blender supports PBR through the Principled BSDF shader, enabling the creation of materials with accurate light interaction.

How can I create textures in Blender?
Creating textures in Blender involves several steps to achieve the desired look for your 3D objects. Here is a step-by-step guide:
- UV Unwrapping: Before you can apply textures, you need to unwrap your object\'s UV map. This process involves laying out the object\'s surfaces in 2D space so that textures can be accurately applied.
- Adding a Material: In Blender, materials are responsible for how an object appears when rendered. To add a material, go to the Material Properties tab and click the \"New\" button to create a new material slot.
- Texture Slot: Within the material properties, add a new texture slot. You can choose different types of textures such as Image Texture, Noise Texture, or even Procedural textures.
- Mapping the Texture: In the Texture properties, you can map how the texture is applied to the object. You can choose from different mapping options like UV, Generated, or Object.
- Adjusting Texture Settings: Fine-tune the texture settings such as scale, rotation, and offset to get the desired look for your object. You can also adjust the color, transparency, and other properties of the texture.
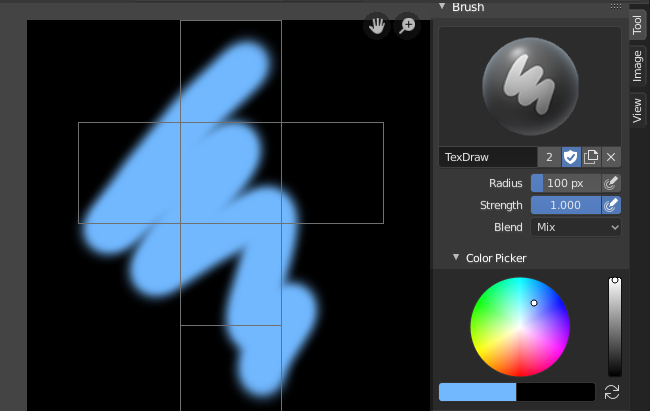
- Texture Painting: If you want to create custom textures, you can use the Texture Paint mode in Blender. This allows you to paint directly on the object\'s surface to create unique textures.
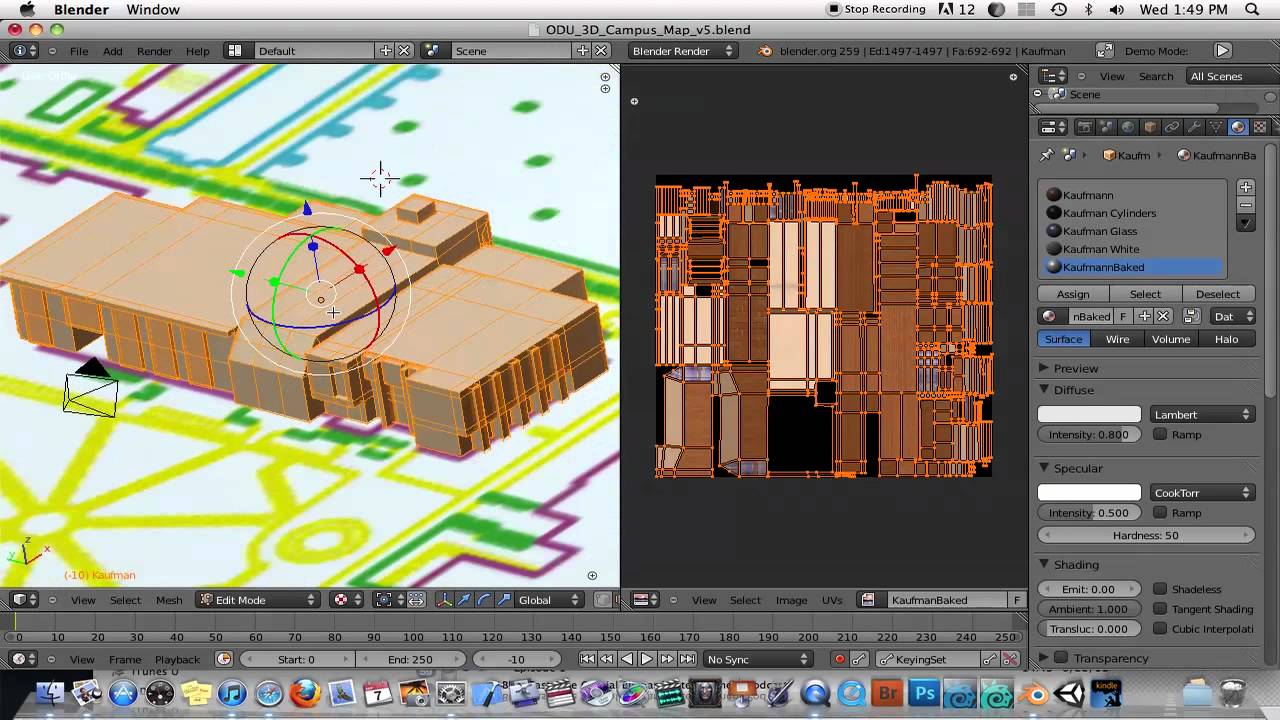
- Baking Textures: To optimize performance or export the model, you can bake the textures. This process involves transferring all the textures onto a new image, which can then be applied to the model.
_HOOK_
Texture Painting Quick Start Guide Blender
Texture painting: Explore the fascinating world of texture painting and unleash your creativity through tactile artistry. Watch as colors and patterns come alive to add depth and dimension to your work. Tutorial: Ready to learn something new and exciting? Dive into this engaging tutorial that breaks down complex concepts into simple, step-by-step instructions. Enhance your skills and expand your knowledge effortlessly.
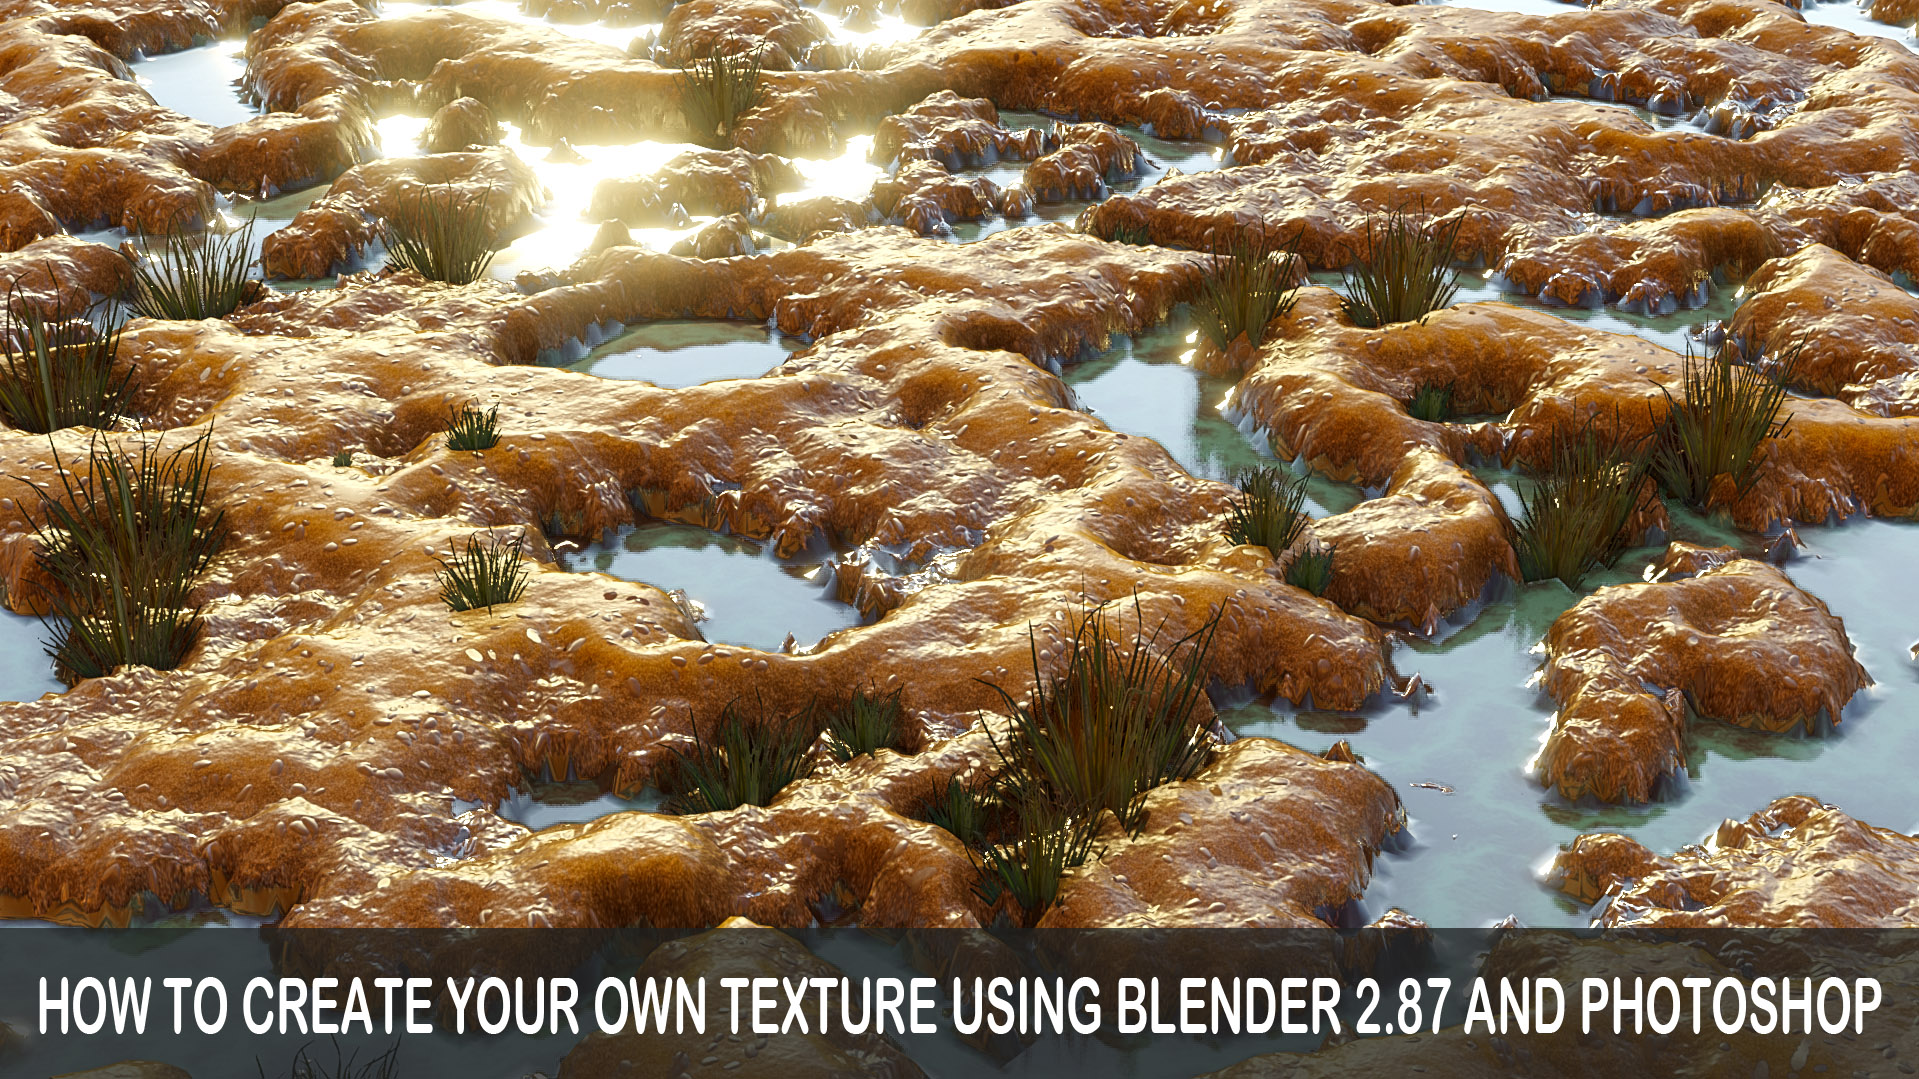
How to make your own textures for Blender epic tutorial
In this lil video, I show you guys how to make your own textures for use in Blender, Unreal, or whatever you want! And... it\'s ...
Resources for Textures
Finding high-quality textures is essential for creating realistic materials. Websites such as ambientCG offer a vast library of free textures that can be used in Blender projects.
Conclusion
Texturing in Blender is a broad and complex topic, but by starting with basic techniques and gradually exploring more advanced methods, you can significantly enhance the realism and appeal of your 3D models.

Introduction to Texturing in Blender
Texturing in Blender begins with understanding UV Mapping, a process that assigns 2D coordinates to your 3D object, allowing for detailed texture application. Blender supports multiple mapping techniques, including box, generated, and object coordinates, with UV Mapping being the most versatile and commonly used method. Initially, all primitive mesh objects in Blender come with a default UV Map, which may require adjustments if the object\"s shape is altered. This adjustment is done in the UV Editor, where you can also manage multiple UV Maps for a single object.
For image textures, Blender offers various projection methods, such as box mapping for tri-planar projections. When dealing with procedural textures, generated and object coordinates are commonly used. Viewing textures in Blender is facilitated through different view modes, with Material and Rendered views displaying textures. Creating a material is essential for linking textures to objects, which involves using the shader editor to add and configure an image texture node. Procedural textures replace the image texture node with specific procedural texture nodes, further manipulated through texture coordinate and mapping nodes for precise control over texture placement and effects.
Effective texture mapping enhances the realism and visual appeal of 3D projects, making mastering these techniques crucial for Blender artists aiming for professional-level outcomes.

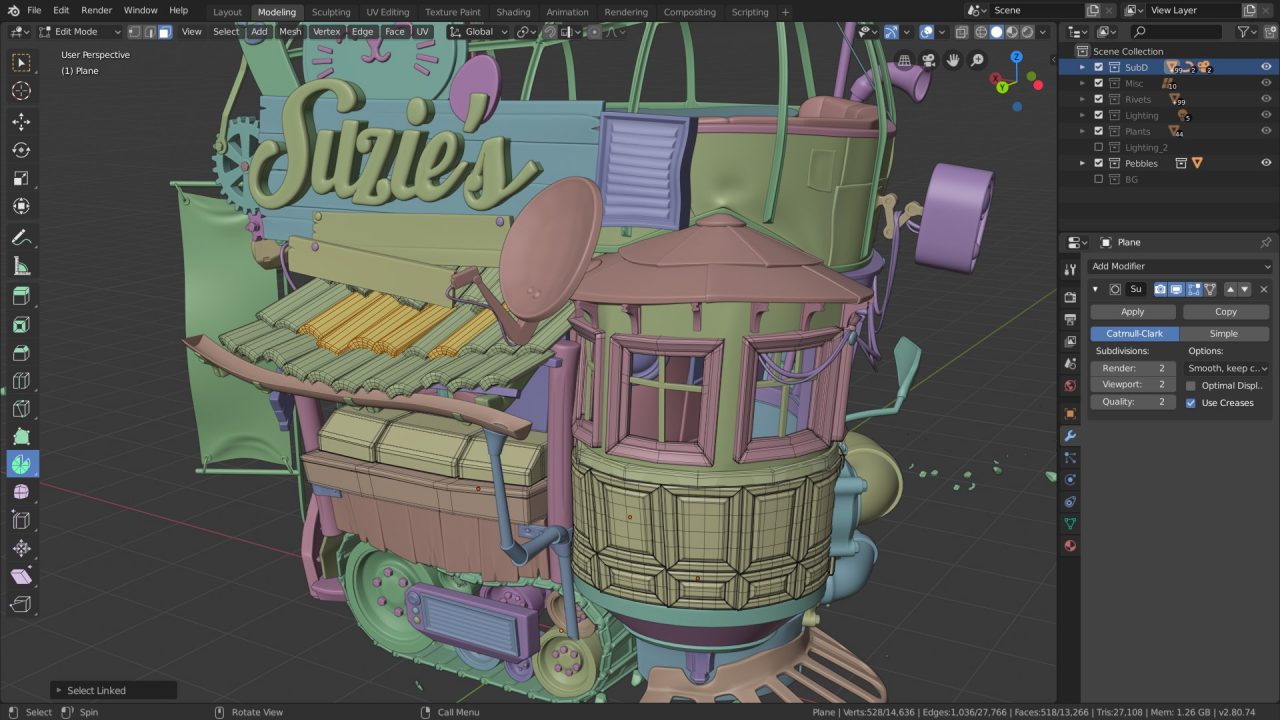
Understanding Basic Texturing Techniques
Mastering basic texturing in Blender involves a few fundamental techniques. Firstly, UV Mapping is essential, allowing you to map 2D textures onto 3D objects effectively. Blender offers several methods for texturing, including UV, box, generated, and object mapping. Each technique has its use case, with UV Mapping being the most versatile for image textures.
Creating a material is the next step, serving as the bridge between your object and its texture. Blender\"s shader editor allows for the simple to complex material creation, accommodating multiple textures. Adding an image texture involves either dragging and dropping an image into the shader editor or manually adding an image texture node.
For procedural textures, Blender provides nodes like Noise, Musgrave, and Voronoi, offering a variety of patterns without using actual images. Adjusting these textures is made easier with texture coordinate and mapping nodes, enabling precise control over how textures apply to your objects.
Understanding these basics lays the groundwork for more advanced texturing techniques, enhancing the realism and immersion of your 3D projects.
Exploring Image Textures and UV Mapping
Delving into image textures and UV Mapping in Blender opens up a world of possibilities for enhancing the realism of your 3D models. This process involves applying 2D images as textures onto the surfaces of 3D objects through careful mapping and coordination.
- Start by selecting your object and switching to the UV Editing layout to see both 3D Viewport and UV Editor side by side.
- In the UV Editor, open your image texture. This image will serve as the basis for texturing your 3D model.
- Use the UV Mapping techniques to align the vertices of your 3D model with the corresponding parts of the image texture. This could involve scaling, rotating, or moving the UV islands to match the texture layout.
- Once satisfied with the UV Map, apply the image texture to your model using a material. This involves setting up a shader that uses the UV coordinates to map the image onto the model accurately.
Through UV Mapping, you can achieve detailed and realistic texturing on your models, making them come to life in Blender\"s 3D space.

_HOOK_
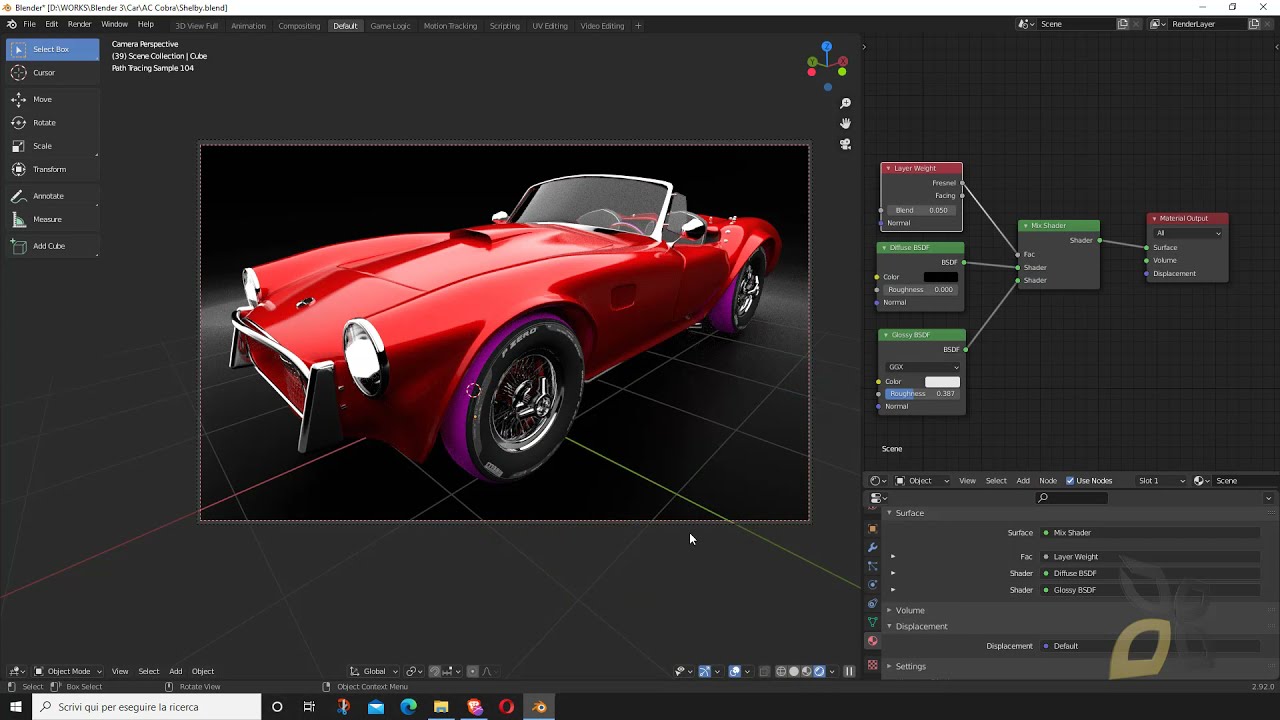
Advanced Texturing: Procedural Textures and Shaders
Advancing into procedural textures and shaders in Blender elevates the complexity and realism of 3D models without relying on traditional image textures. Procedural textures are mathematically generated within Blender, offering endless customization and detail. Explore these steps to master procedural texturing:
- Access the Shader Editor and create a new material for your object.
- Utilize nodes like Noise, Voronoi, and Musgrave to generate unique textures directly in Blender.
- Combine these procedural textures with various shaders to control the surface appearance of your 3D model, adjusting settings such as color, roughness, and metallic properties.
- Experiment with node connections to create complex materials, simulating everything from simple surfaces to intricate, dynamic textures that respond to lighting and environment changes.
This method allows for a high degree of control and creativity, pushing the boundaries of texturing in digital art and 3D modeling.
Utilizing PBR for Realistic Materials
Physically Based Rendering (PBR) is a methodology in Blender that enhances realism by mimicking how light interacts with materials in the real world. To utilize PBR for creating realistic materials, follow these steps:
- Begin with the Principled BSDF shader, designed to simplify the creation of complex, realistic materials.
- Adjust material properties such as Base Color, Roughness, and Metallic to match real-world materials.
- Incorporate texture maps (Normal, Displacement, Roughness maps) to add detail and depth to the materials.
- Experiment with lighting and environment settings to see how your materials react under different conditions.
This approach ensures your materials look believable across various lighting scenarios, making your 3D projects more immersive.
Creating and Applying Normal, Specular, and Displacement Maps
Creating and applying Normal, Specular, and Displacement Maps in Blender significantly enhances the realism of 3D models by simulating textures and surface details. Here\"s a step-by-step guide:
- For Normal maps, use the Shader Editor to add a Normal Map node connected to your shader\"s Normal input, enhancing surface detail without additional geometry.
- Specular maps control the reflectivity of surfaces. Connect your Specular texture to the Specular input of the Principled BSDF shader to simulate different material properties.
- Displacement maps add real geometric changes to the surface. Connect a Displacement node to the Material Output\"s Displacement input, adjusting the scale for desired effects.
These techniques allow for detailed and realistic material simulations in Blender.
Optimizing Textures for Performance
Optimizing textures is crucial for improving performance in Blender. Key strategies include:
- Reducing texture resolution for less critical assets to decrease memory usage.
- Utilizing Blender\"s built-in tools to compress textures without significantly compromising visual quality.
- Implementing LOD (Level of Detail) techniques to dynamically adjust texture quality based on the camera\"s distance to the object.
- Consolidating textures using texture atlases to minimize the number of texture files and draw calls required.
- Applying procedural textures where possible, as they can be less resource-intensive than high-resolution image textures.
These steps help ensure your Blender projects run smoothly, especially in real-time applications like game development.
Resources for Finding and Creating Textures
Finding and creating textures for Blender projects can be achieved through various resources:
- Texture libraries and websites offer a wide range of high-quality, pre-made textures suitable for different types of projects.
- Photogrammetry software allows you to create textures from photographs, providing a realistic and unique look.
- Procedural texture generation tools within Blender, like the Shader Editor, enable the creation of customizable and scalable textures without the need for external images.
- Online forums and communities where Blender users share free resources, tips, and tutorials on texture creation.
Utilizing these resources can significantly enhance the visual quality of your 3D models and scenes.
_HOOK_
Tips and Tricks for Efficient Texturing Workflows
Enhancing your texturing workflow in Blender can significantly improve both the quality of your projects and your efficiency. Here are some expert tips:
- Utilize non-destructive editing techniques with node-based materials to easily adjust textures without starting from scratch.
- Leverage Blender’s texture painting tools to directly paint textures onto your 3D models, allowing for precise control and artistic freedom.
- Integrate Blender with other software and libraries to access a broader range of textures and tools for specific needs.
- Organize your texture assets and Blender files to streamline your workflow and save time on future projects.
- Stay updated with Blender’s latest features and community resources to continually refine your texturing techniques.
Applying these strategies can lead to more dynamic and realistic textures, elevating the visual quality of your 3D models.
Common Texturing Challenges and Solutions
Texturing in Blender can present various challenges, but with the right strategies, these can be effectively overcome:
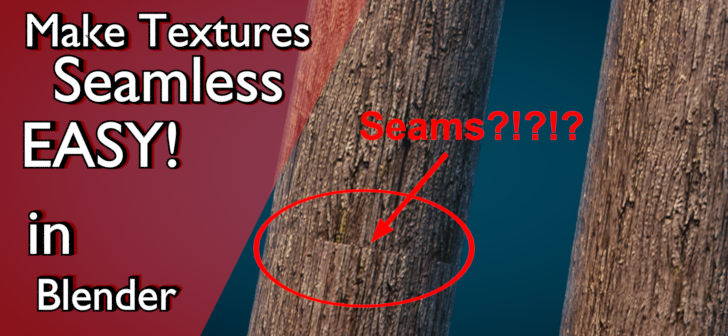
- Seams and Stretching: Use Blender\"s \"Smart UV Project\" feature to minimize seams and choose appropriate projection methods for complex shapes.
- Inconsistent Texture Resolution: Ensure all textures used in a project are of similar resolution to prevent blurriness or pixelation.
- Normal Map Issues: Verify the normal map is correctly applied and consider using the \"Non-color\" data color space for accurate results.
- Material Realism: Utilize PBR (Physically Based Rendering) workflows and textures to enhance material realism in different lighting conditions.
Addressing these common issues can significantly improve the quality and realism of your texturing efforts in Blender.
READ MORE:
Conclusion: Enhancing Your 3D Projects with Professional Texturing
Mastering texturing in Blender is key to elevating your 3D projects from good to great. Through understanding basic to advanced techniques, optimizing textures for performance, and overcoming common challenges, you can create visually stunning and realistic models. Whether you\"re working on animations, games, or visualizations, the skills to apply and manipulate textures effectively are indispensable. Remember, practice and experimentation are your best tools for growth. Happy blending!
Embark on a journey to elevate your 3D models in Blender with professional texturing techniques. This comprehensive guide unlocks the secrets to creating realistic, captivating textures that will bring your projects to life. Transform your digital art today!