Topic blender texture baking: Discover the secrets of Blender texture baking to elevate your 3D models, ensuring optimal performance and stunning visual quality, perfect for both beginners and seasoned artists.
Table of Content
- Understanding Texture Baking
- Getting Started with Blender Texture Baking
- Advanced Techniques
- Getting Started with Blender Texture Baking
- Advanced Techniques
- Advanced Techniques
- What is the process for texture baking in Blender for beginners?
- YOUTUBE: Quick Tutorial: How to Bake Textures in Blender in Under 3 Minutes
- Introduction to Texture Baking in Blender
- Benefits of Texture Baking for 3D Projects
- Step-by-Step Process for Texture Baking in Blender
- Understanding Different Types of Bakes in Blender
- Optimizing Your Workflow: Tips and Tricks
- Common Challenges and Solutions in Texture Baking
- Advanced Techniques and Tools for Efficient Baking
- Real-World Applications of Blender Texture Baking
- Conclusion: Mastering Texture Baking for Enhanced 3D Art
Understanding Texture Baking
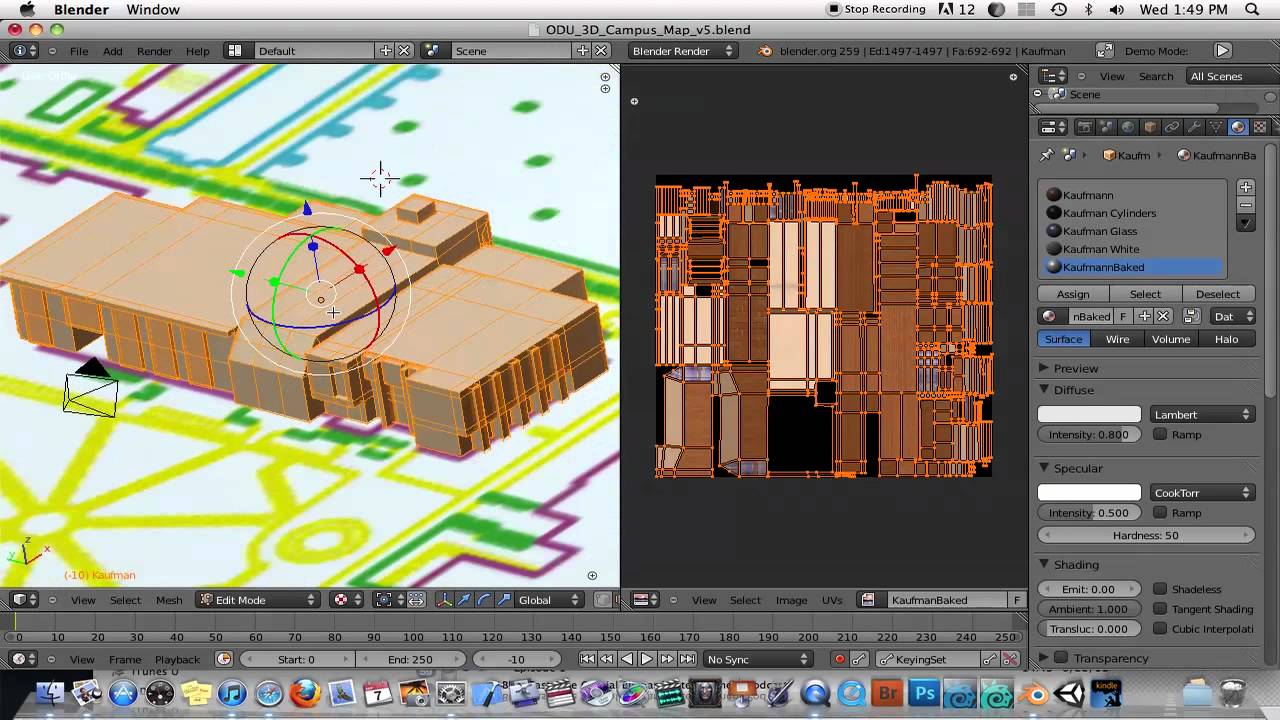
Texture baking is the process of transferring details from a high-resolution model to a lower-resolution model, preserving visual quality while improving performance. It involves capturing the appearance of materials, including color, lighting, and shadow details, into texture maps.
Why Texture Bake?
- Optimizes real-time performance
- Reduces model complexity
- Preserves visual details
- Improves animation and rendering quality
READ MORE:
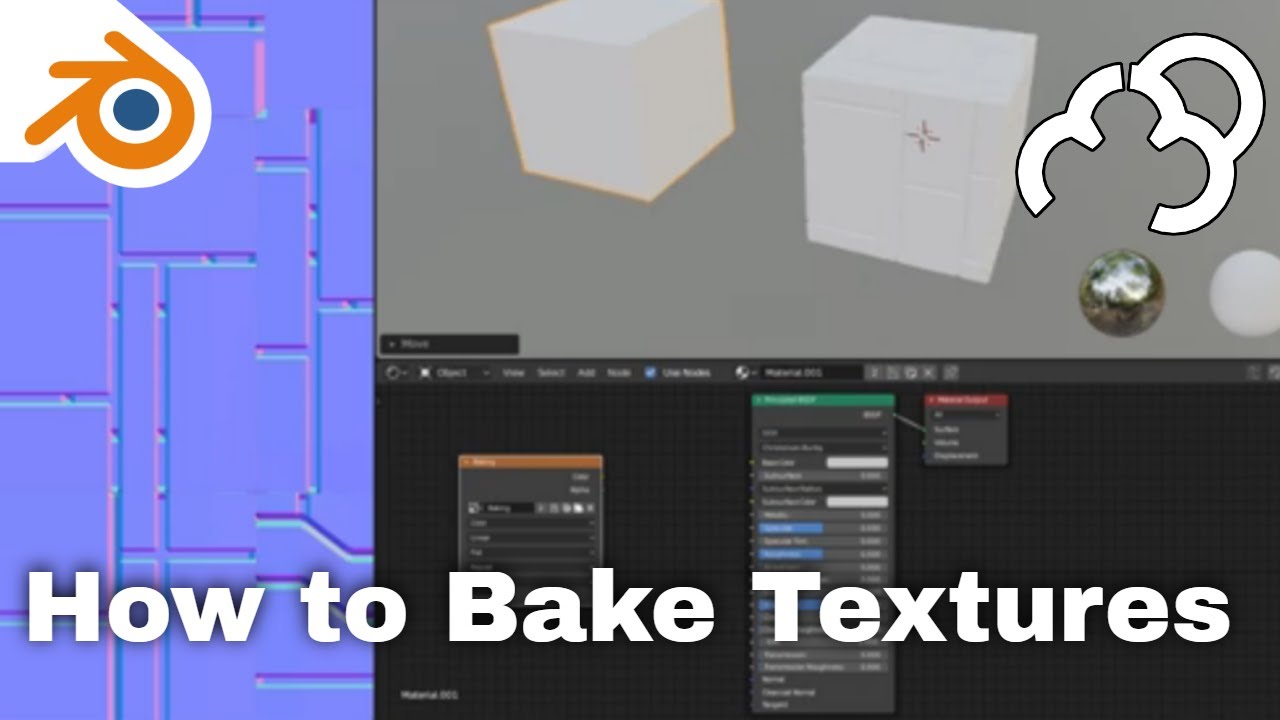
Getting Started with Blender Texture Baking
- Select Cycles as your render engine for better quality results.
- Add an image texture node to your material and create a new texture, ideally square-sized (e.g., 512x512, 1024x1024).
- Adjust bake settings according to your needs, selecting the appropriate bake type like Diffuse, and ensuring only necessary contributions are enabled.
- Press \"Bake\" to start the baking process, and then connect the baked image to your shader.
Advanced Techniques
For more complex scenarios, consider using add-ons like SimpleBake or Texture Baking Assistant to simplify and automate the baking process. These tools offer a more intuitive interface and additional features to enhance your workflow.
Tips for Efficient Baking
- Ensure your textures are square and to the power of two for optimal compatibility.
- Experiment with different bake types to find the best fit for your project.
- Adjust tile size in Cycles render settings for faster baking times.
With practice and the right tools, texture baking in Blender can become a seamless part of your 3D modeling and animation workflow, helping you create high-quality, performance-optimized content.

_HOOK_
Advanced Techniques
For more complex scenarios, consider using add-ons like SimpleBake or Texture Baking Assistant to simplify and automate the baking process. These tools offer a more intuitive interface and additional features to enhance your workflow.
Tips for Efficient Baking
- Ensure your textures are square and to the power of two for optimal compatibility.
- Experiment with different bake types to find the best fit for your project.
- Adjust tile size in Cycles render settings for faster baking times.
With practice and the right tools, texture baking in Blender can become a seamless part of your 3D modeling and animation workflow, helping you create high-quality, performance-optimized content.
What is the process for texture baking in Blender for beginners?
Texture baking in Blender is a process that allows you to transfer the details of high-polygon models to low-polygon models, improving performance in real-time applications. Here is a step-by-step guide for beginners to texture baking in Blender:
- Ensure you have a high-polygon model and a low-polygon model in your scene.
- Create a new image texture in the UV Image Editor. This will be the texture that will store the baked information.
- Select the low-polygon model and go to the \'UV Editing\' workspace.
- Unwrap the low-polygon model by selecting all faces and hitting \'U\' then choosing \'Unwrap\'.
- Switch back to the \'Layout\' workspace and select the high-polygon model.
- Shift-select the low-polygon model so that both models are selected.
- Go to the \'Render\' tab in the Properties panel and scroll down to the \'Bake\' section.
- Choose the type of bake you want (e.g., Diffuse, Normal, AO) and adjust settings as needed.
- Click the \'Bake\' button to start the baking process.
- After baking is complete, save the baked texture to an image file.
By following these steps, you can successfully perform texture baking in Blender for your models. Remember to experiment with different settings and types of bakes to achieve the desired results.
Quick Tutorial: How to Bake Textures in Blender in Under 3 Minutes
Quick: \"Discover the fastest way to achieve your goals with our quick tutorial video! Get ready to boost your productivity and streamline your tasks in just a few minutes of viewing.\" Beginner\'s: \"New to this topic? No worries! Our beginner-friendly video breaks down the basics in simple steps, making it easy for anyone to understand and jumpstart their journey towards expertise. Join us now!\"
Beginner\'s Guide to Texture Baking in Blender
In this Blender tutorial I will show you how to do texture baking for beginners. ○ Texture Baking Tutorial Playlist: ...
Introduction to Texture Baking in Blender
Texture baking in Blender is a powerful technique that allows 3D artists to transfer the visual details of a high-resolution model onto a lower-resolution version. This process helps optimize models for better performance in real-time applications while preserving the essential aesthetic qualities.
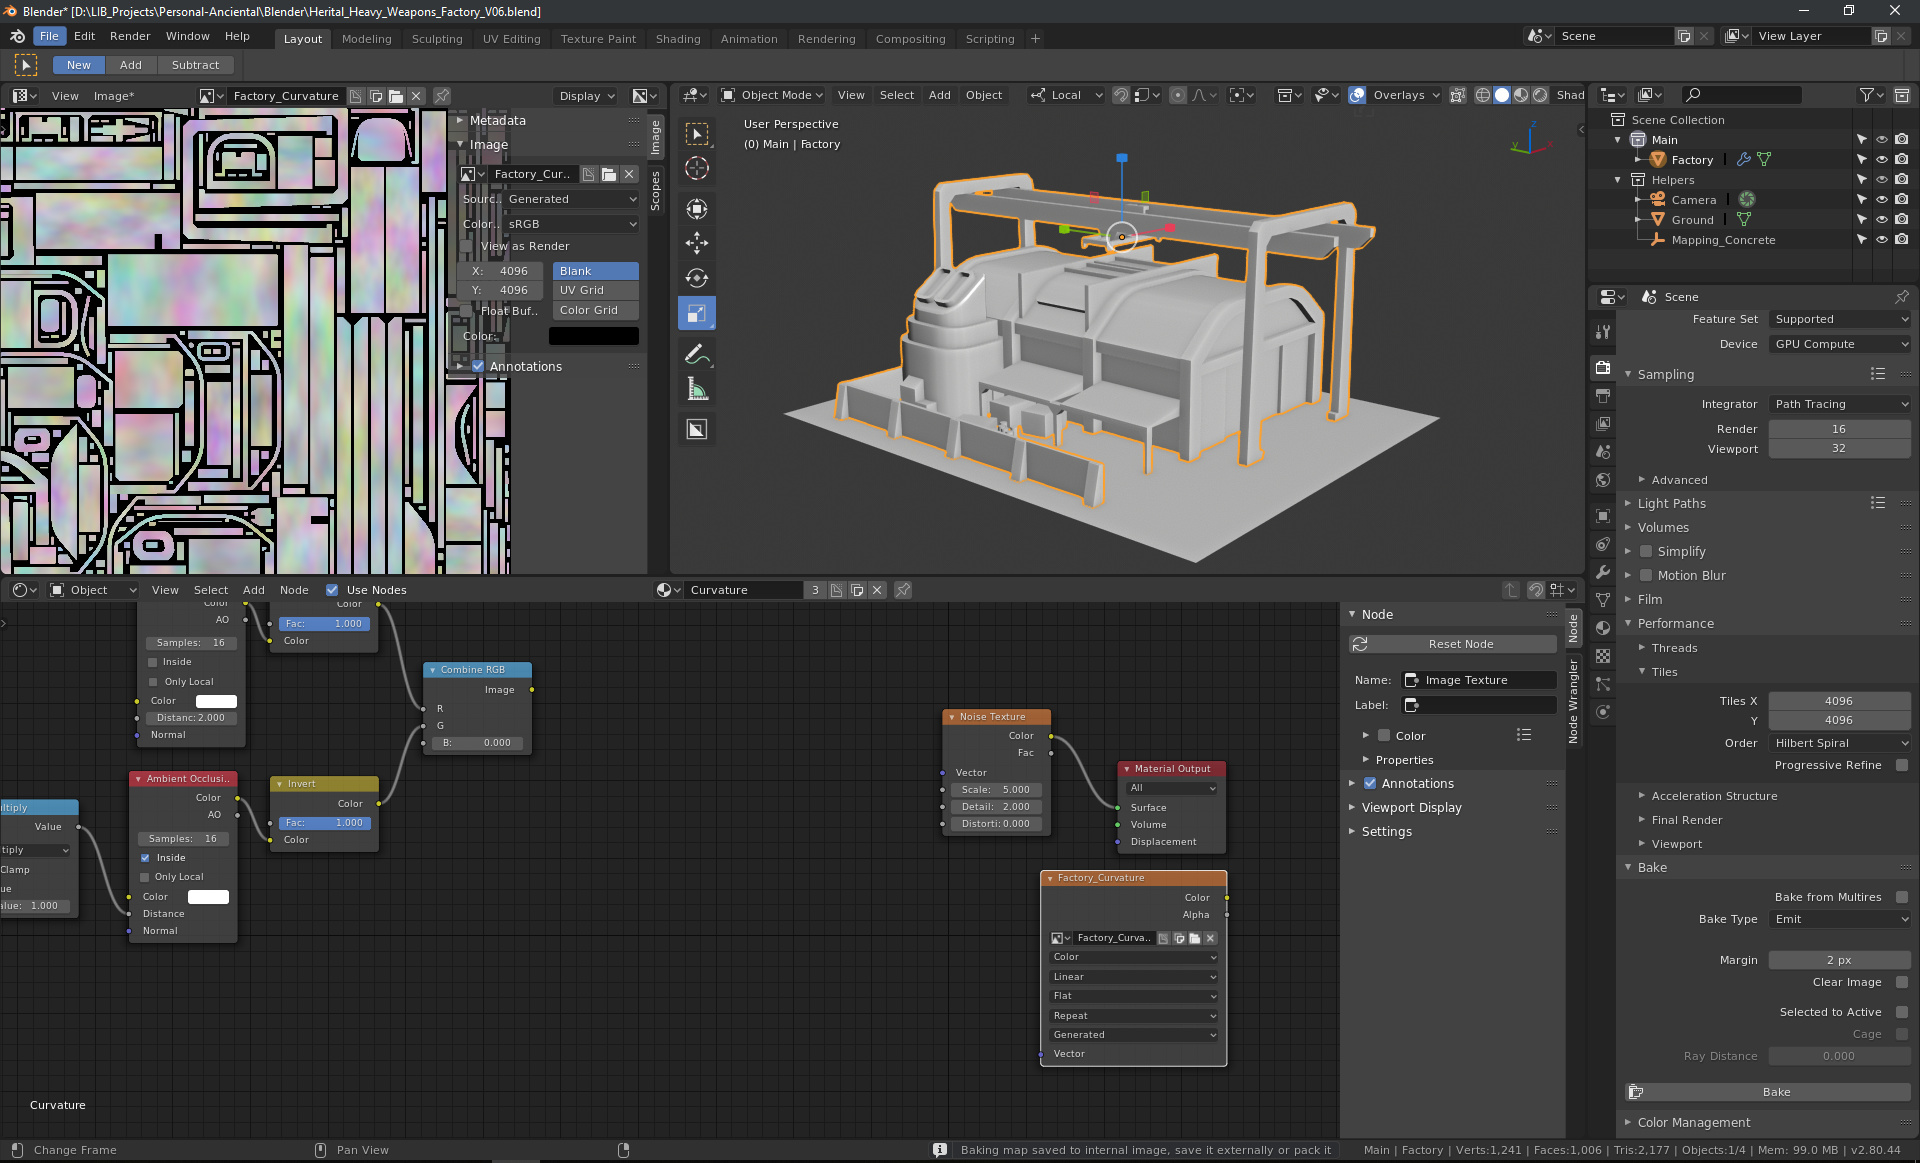
The first step in texture baking is to choose Cycles as your render engine, known for producing high-quality results. Next, add an image texture node to your material and create a new texture. It\"s recommended to use square textures, ideally to the power of two (e.g., 512x512, 1024x1024), to ensure compatibility and performance.
Baking settings play a crucial role in the process. You\"ll select the type of bake you need, such as Diffuse, ensuring that only the necessary contributions (like color) are enabled. Once your settings are adjusted, pressing \"Bake\" begins the transfer of details from the high-resolution model to the texture map applied to the lower-resolution model.
- Optimize real-time performance by reducing model complexity.
- Preserve visual details and improve the quality of animations and renderings.
- Ensure compatibility with various rendering engines.
Advanced users might consider add-ons like SimpleBake or Texture Baking Assistant to streamline the process. These tools offer more intuitive interfaces and additional features, making the baking process even more efficient.
In conclusion, mastering texture baking in Blender can significantly enhance your 3D modeling workflow, enabling you to create high-quality, performance-optimized content.
Benefits of Texture Baking for 3D Projects
Texture baking in Blender offers significant advantages for 3D modeling, enhancing efficiency, and improving visual quality in various applications. This process involves transferring detail from high-poly models to low-poly counterparts, making it indispensable in game development, AR/VR experiences, and digital visualization.
- Performance Optimization: Baking reduces the complexity of models, ensuring smoother performance in real-time environments like games and AR/VR platforms. It allows for detailed visuals without the computational overhead of rendering high-poly models on the fly.
- File Size Reduction: By simplifying models, texture baking significantly lowers file sizes, facilitating easier sharing and faster loading times. This is crucial for web-based applications and platforms with strict asset size limitations.
- Visual Consistency: Baking captures the intricate details of high-poly models onto textures applied to low-poly versions, maintaining visual fidelity and consistency across different resolutions.
- Workflow Efficiency: Advanced tools and algorithms streamline the baking process, saving hours of manual work. Solutions like VNTANA\"s optimization technology automate baking, allowing for flexible mesh and material configurations even after baking.
- Material and Mesh Flexibility: Modern baking techniques offer the ability to swap out meshes and materials post-baking, overcoming traditional limitations and enhancing creative freedom.
Texture baking is a cornerstone technique in 3D content creation, pivotal for optimizing performance while preserving the artistic integrity of digital assets. Its benefits extend beyond mere visual enhancement, touching on every aspect of 3D project development from conceptualization to final implementation.
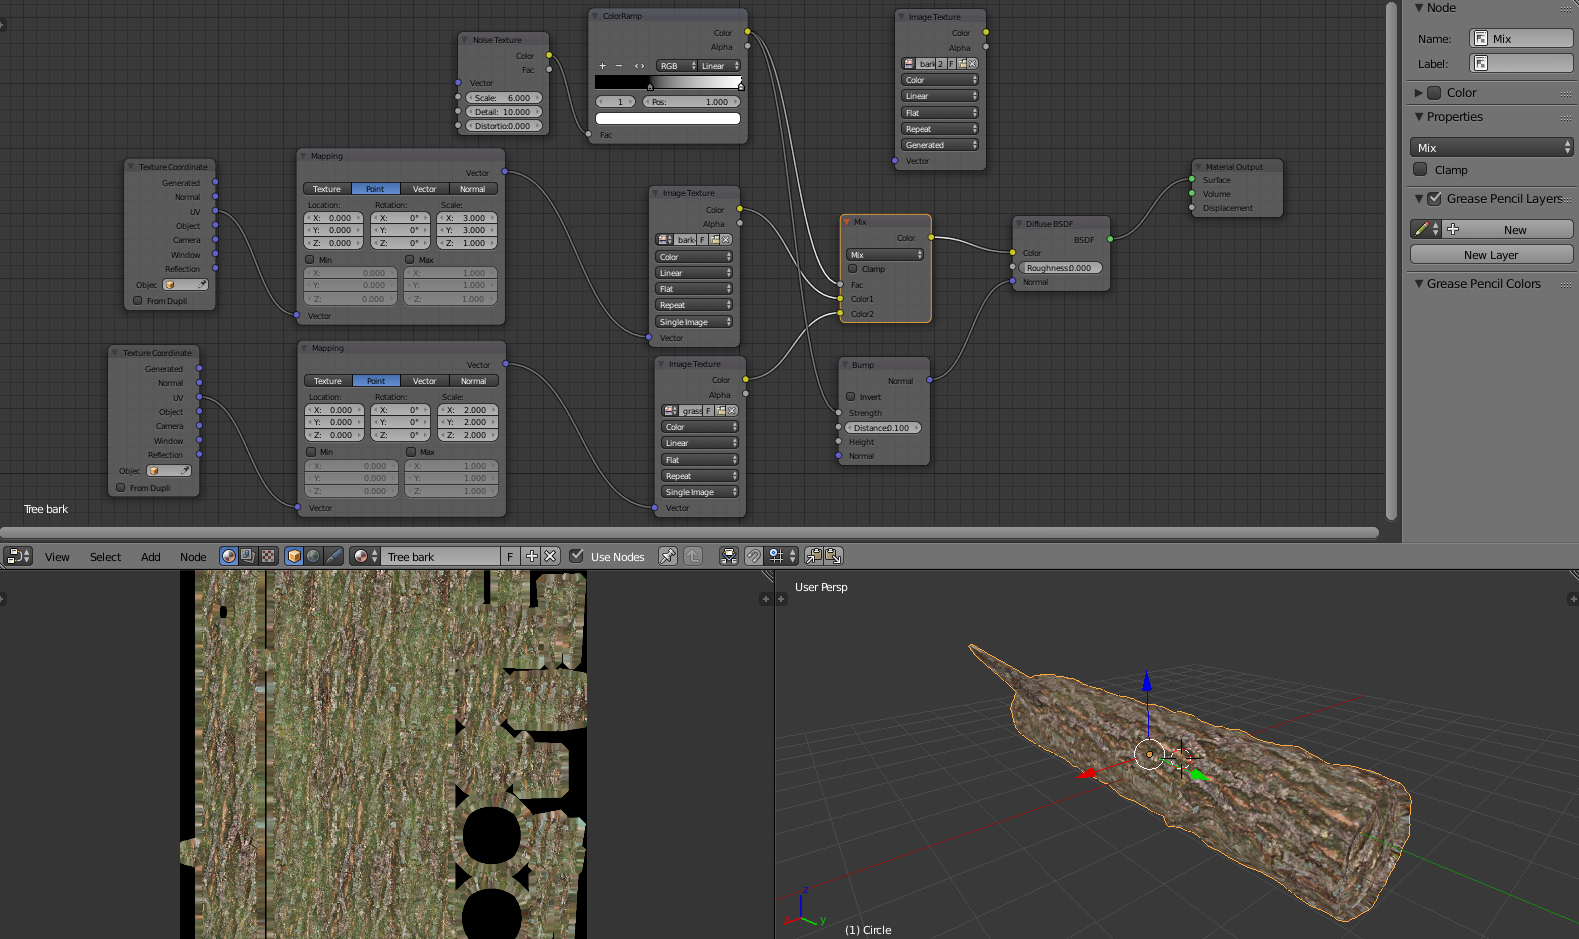
Step-by-Step Process for Texture Baking in Blender
Texture baking in Blender is a crucial technique for 3D artists aiming to create detailed, high-performance models. This guide outlines a comprehensive step-by-step approach to simplify the texture baking process, ensuring that even beginners can achieve professional results.
- Prepare your models: Ensure your high-resolution and low-resolution models are ready. The high-resolution model should contain all the detailed textures, while the low-resolution model should be optimized for performance.
- Select the Render Engine: Change Blender’s render engine to Cycles, as it offers advanced baking options that are essential for quality texture baking.
- UV Unwrapping: Properly unwrap the low-resolution model to ensure that the baked textures align correctly. This step is critical for the success of the baking process.
- Create a new Image Texture: In the Shader Editor, create a new Image Texture node for the low-resolution model. This image will be the target for the baked texture.
- Configure Bake Settings: In the Render Properties panel, find the Bake section. Select the bake type (e.g., Diffuse, Normal, etc.) and adjust the settings according to your needs.
- Baking the Texture: With the low-resolution model selected, click on the Bake button. Blender will start the process of transferring details from the high-resolution model to the texture of the low-resolution model.
- Saving the Baked Texture: Once baking is complete, save the baked texture image. This step is crucial to avoid losing your work.
- Applying the Baked Texture: Apply the baked texture to the low-resolution model by connecting the Image Texture node to the appropriate shader inputs.
Following these steps carefully will help you achieve detailed textures for your low-poly models without compromising on performance. With practice, texture baking can significantly enhance your 3D modeling workflow, enabling you to create visually stunning and performance-optimized content for games, VR, and more.

_HOOK_
Understanding Different Types of Bakes in Blender
Blender offers a variety of baking types, each serving a unique purpose in the 3D modeling and animation workflow. Understanding these types is crucial for effectively optimizing models, enhancing visual detail, and improving performance in games and simulations.
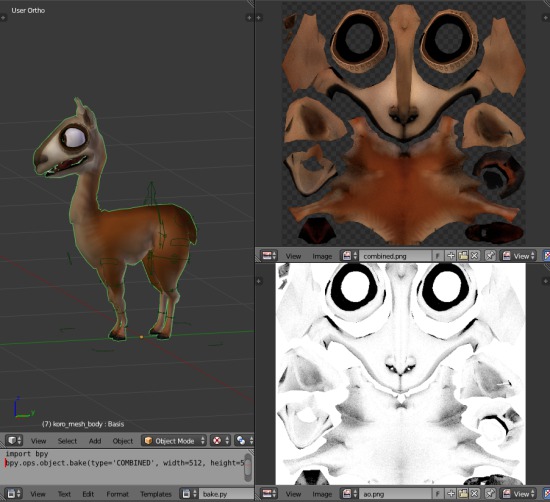
- Diffuse: Captures the base color or albedo of the material. It\"s essential for creating the fundamental color texture of objects without reflections or lighting.
- Normal: Bakes the details of the surface geometry into a texture. This allows low-poly models to simulate the appearance of being more detailed by affecting how light bounces off them.
- Ambient Occlusion: Simulates soft shadowing that occurs in creases, holes, and surfaces that are close to each other. It adds depth and realism to textures by highlighting geometry details.
- Specular: Reflects the material\"s shininess and highlights, capturing how light reflects off surfaces. It\"s crucial for materials like metals and plastics.
- Emission: Bakes the light emitted by materials, useful for creating self-illuminated textures.
- Displacement: Stores height information, allowing the simulation of detailed geometry at render time without the need for a high polygon count.
Each baking type in Blender is designed to capture specific aspects of the material and geometry, contributing to the final appearance of the 3D model. By combining these bakes, artists can create detailed and performance-efficient models suitable for a variety of applications, from gaming to virtual reality.
Optimizing Your Workflow: Tips and Tricks
Optimizing your Blender workflow for texture baking can significantly enhance efficiency and output quality. Here are some key strategies and tools to streamline your process:
- Texture Size and Format: Utilize square textures with sizes like 512, 1024, 2048, etc., as they are optimized for RAM storage and easier to work with.
- Efficient Topology: Focus on creating an efficient topology by localizing geometry, dissolving unnecessary edges, and considering mesh separation for complex objects to optimize performance without compromising detail.
- Optimizing Textures: Simplify materials into a single set of baked maps to enhance engine efficiency. Employ texture baking to converge diverse materials into one consolidated material, and consider channel packing to optimize resource usage.
- Sharpening with Nodes: Utilize Blender\"s compositor and the diamond sharpen filter to enhance the appearance of lower-resolution images, making them as visually appealing as higher-resolution counterparts without the extra file size.
- Use of Add-ons: Tools like SimpleBake and Texture Baking Assistant can automate and simplify the baking process. They offer features like PBR baking simplification, flexible channel packing, batch baking, and smart UV handling, enhancing workflow efficiency and output quality.
Implementing these tips and leveraging the right tools can make texture baking in Blender a more streamlined, efficient, and enjoyable process. Whether you\"re working on game assets, movies, or architectural visualizations, these strategies will help you optimize your workflow and produce high-quality textures.
Common Challenges and Solutions in Texture Baking
Texture baking in Blender is a powerful technique but comes with its own set of challenges. Here, we explore common issues faced by 3D artists and practical solutions to overcome them, drawing insights from various sources.
- Complex Node Setups: A common challenge is dealing with complex node setups required for baking different texture channels. To streamline this, ensure each material has a new image for baking and adjust nodes accordingly. Directly connecting color outputs to the Material Output node simplifies the shader adjustments needed for baking.
- UV Mapping Issues: Proper UV mapping is crucial for successful texture baking. Using tools like UV Packmaster Pro can optimize your UV map efficiently. Remember to use non-overlapping UV maps contained within the image space for the best results.
- Optimization for Various Outputs: Managing texture resolution and format can be tricky. Utilizing square textures in powers of two (e.g., 512, 1024) optimizes memory usage and compatibility.
- Automation and Efficiency: Add-ons like SimpleBake and Texture Baking Assistant offer solutions to automate and simplify the baking process. These tools provide features for batch baking, smart UV handling, and improved folder organization, significantly enhancing workflow efficiency.
- Export and Integration: Exporting baked textures for use in other software or platforms requires careful management. Add-ons often include features to efficiently export baked maps to external files in common formats like FBX, OBJ, and STL, while also applying necessary object modifiers.
Understanding and leveraging the right tools and techniques can help mitigate these challenges, making texture baking a more manageable and efficient process in your 3D projects.
Advanced Techniques and Tools for Efficient Baking
Maximizing efficiency in texture baking within Blender can be achieved through advanced techniques and the integration of specialized tools. These methods and tools aim to streamline the baking process, enhance texture quality, and save valuable time.
- SimpleBake: Simplifies the texture baking process with features like PBR baking, flexible channel packing, and batch baking. It\"s designed to be user-friendly, offering a seamless integration with Sketchfab and the ability to export your bakes efficiently.
- Texture Baking Assistant: Offers enhanced folder organization, smart object handling, and support for OpenEXR format. It includes a variety of improvements to streamline baking workflows, such as automatic UV unwrapping and the ability to create materials post-baking.
- BakeMaster: Facilitates the baking of high to low poly models with advanced features like automatic UV unwrap for objects and atlases, shading correction, and customizable bake output settings. It\"s designed for both simplicity and depth, catering to a wide range of baking needs.
- TexTools: Provides a comprehensive suite of UV and texture tools, including extensive options for UV layout adjustments, a variety of baking types, and color ID management. It\"s a versatile addon for handling complex UV and texture tasks.
- BakeTool: Aims to simplify the baking process with features like Bake to Target, auto-save externally, automatic image format configuration, and support for all color space options. It\"s noted for its ease of use and comprehensive baking solutions.
Utilizing these tools can significantly enhance your baking workflow in Blender, from simplifying complex setups to automating repetitive tasks. Each tool offers unique features that cater to different aspects of the baking process, allowing for a more efficient and streamlined workflow.
Real-World Applications of Blender Texture Baking
Blender texture baking is a versatile technique used across various industries to enhance visual quality and optimize performance. This process has multiple real-world applications, demonstrating its value in creating detailed and efficient 3D models.
- Animation and Simulation: Baking is crucial in simplifying complex animations and simulations, converting detailed actions into a more manageable form. This makes the animations easier to process and render, preserving their quality while reducing computational load.
- Game Development: In the gaming industry, texture baking is used to create detailed maps for low-poly models, allowing them to appear more complex without the computational expense. This technique is essential for optimizing game performance while maintaining visual fidelity.
- Virtual Reality (VR) and Augmented Reality (AR): Texture baking enhances VR and AR experiences by allowing detailed models to be used in real-time applications without overwhelming the system. It helps in creating immersive environments with realistic lighting and textures.
- Content Creation for Social and Online Platforms: Baking is also applied in creating content for platforms like IMVU, where detailed models and animations are used to enhance user experiences. It allows creators to develop high-quality assets that are optimized for online interaction.
These applications highlight the importance of texture baking in streamlining the workflow for 3D artists and developers, ensuring that detailed models can be efficiently integrated into various digital mediums.
_HOOK_
READ MORE:
Conclusion: Mastering Texture Baking for Enhanced 3D Art
Texture baking in Blender represents a pivotal technique in the realm of 3D art and design, offering artists the ability to create visually stunning and performance-optimized content. Through the exploration of various methods, tools, and real-world applications, we have seen the transformative power of texture baking in enhancing the visual quality and efficiency of 3D models.
- Streamlining Workflows: The mastery of texture baking techniques simplifies complex scenes, ensuring artists can focus on creativity without compromising on detail or performance.
- Optimizing Performance: By reducing the computational load, texture baking allows for the seamless integration of detailed models into real-time applications such as games and VR environments.
- Enhancing Visual Quality: Baked textures bring high-resolution details to low-poly models, bridging the gap between artistic vision and technical constraints.
- Adapting to Industry Standards: Understanding and applying advanced baking techniques ensures compatibility with various platforms and engines, meeting industry demands for high-quality assets.
As we continue to push the boundaries of digital art and technology, the role of texture baking in Blender remains indispensable. By mastering these techniques, artists and developers can not only elevate their craft but also contribute to the evolving landscape of 3D visualization and interactive media.
Unlock the full potential of your 3D projects with Blender texture baking—your key to creating visually stunning, performance-optimized content that stands out in the digital art world.