Topic blender rigging tips: Discover the art of Blender rigging with our comprehensive guide, offering expert tips and strategies to elevate your character animation skills. Embark on a journey to bring your creations to life like never before.
Table of Content
- Essential Rigging Concepts
- Advanced Rigging Techniques
- Specialized Rigging Scenarios
- Getting Started with Blender Rigging
- Advanced Rigging Techniques
- What are the best Blender rigging tips for ensuring stable joints and a smooth setup process?
- YOUTUBE: Blender - Completely Rigging A Character in 5 Minutes
- Specialized Rigging Scenarios
- Getting Started with Blender Rigging
- Specialized Rigging Scenarios
- Getting Started with Blender Rigging
- Getting Started with Blender Rigging
- Introduction to Blender Rigging
- Core Rigging Concepts and Techniques
- Advanced Rigging Strategies for Realistic Animation
- Common Rigging Challenges and Solutions
- Weight Painting and Fine-tuning Your Rig
- Animating Non-humanoid Characters
- Using Python Scripts to Enhance Rigging
- Optimizing Rigs for Performance
- Rigging Tips from Industry Professionals
- Resources for Further Learning
Essential Rigging Concepts
Understanding Normals and Mesh Preparation
Before diving into rigging, ensure your model\"s normals are correctly oriented. Use the \"Recalculate Outside\" feature to correct any inside-out normals, combining all models into a single mesh for efficiency. Properly positioning your mesh in the scene is crucial, with the model\"s center ideally at the base of its feet for natural rotations.
Building the Skeleton Structure
Rigging in Blender involves creating a skeleton, or armature, for your 3D mesh, allowing for realistic movement and animation. Start with a central root bone and extend branches for limbs, adjusting bone placement for optimal control. Utilize X-ray mode to place and connect bones accurately within your model.

READ MORE:
Advanced Rigging Techniques
Weight Painting and Bone Constraints
Learn to bind your 3D mesh to the rig effectively using weight painting, ensuring smooth animations. Understanding bone constraints and parenting is key to creating complex rigs that move realistically. Dive deep into Blender\"s rigging tools, including armature modifiers and key shortcuts for efficiency.
Animation Fundamentals
From basic keyframing to complex animations involving multiple bones and shape keys, mastering animation principles is essential. Explore various interpolation modes, learn to animate organic and inanimate objects, and understand the importance of root bones in creating lifelike movements.
Specialized Rigging Scenarios
Animating Non-humanoid Characters
Rigging non-humanoid characters requires creativity and an understanding of unique bone structures. Whether you\"re animating animals, fantastical creatures, or inanimate objects, the principles of rigging apply, adapted to the specific needs of your model.
Practical Exercises and Real-World Applications
Hands-on practice is crucial. Engage in exercises that cover a range of rigging techniques, from simple rigs to complex animations like walk cycles and morphing objects. Each exercise builds on the last, reinforcing your understanding of rigging fundamentals.

Getting Started with Blender Rigging
- Begin with basic mesh preparation, ensuring normals are correctly oriented.
- Create a central root bone and build out the skeletal structure with appropriate branches for limbs.
- Utilize weight painting to bind the mesh to the rig, allowing for realistic movement.
- Experiment with bone constraints and parenting for advanced control over your rig.
- Practice with hands-on exercises to solidify your understanding and skills.
With these tips and techniques, you\"ll be well on your way to mastering rigging in Blender, capable of bringing any 3D model to life with realistic and dynamic animations.
Advanced Rigging Techniques
Weight Painting and Bone Constraints
Learn to bind your 3D mesh to the rig effectively using weight painting, ensuring smooth animations. Understanding bone constraints and parenting is key to creating complex rigs that move realistically. Dive deep into Blender\"s rigging tools, including armature modifiers and key shortcuts for efficiency.
Animation Fundamentals
From basic keyframing to complex animations involving multiple bones and shape keys, mastering animation principles is essential. Explore various interpolation modes, learn to animate organic and inanimate objects, and understand the importance of root bones in creating lifelike movements.

_HOOK_
What are the best Blender rigging tips for ensuring stable joints and a smooth setup process?
When rigging in Blender, it\'s important to follow some key tips to ensure stable joints and a smooth setup process:
- Prebend Joints: Always prebend your joints to prevent them from wobbling during animation. This helps maintain stability and control over the movements.
- Edit Mode Setup: Perform all your rigging setup in edit mode rather than object mode. This allows you to make precise adjustments to the rig without affecting the overall object.
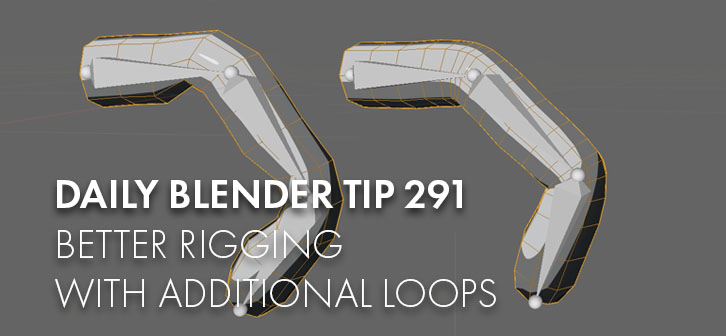
- Topology Patterns: Pay attention to the topology of your model, especially around areas like shoulders and elbows. Ensure the topology flows smoothly to allow for natural movement without distortion.
- Weight Painting: Use weight painting to define how much influence each bone has over specific parts of the mesh. Proper weight painting ensures smooth deformation during animation.
- Constraints: Utilize constraints such as IK (Inverse Kinematics) to simplify the rigging process and make it easier to control complex movements like legs and arms.
Blender - Completely Rigging A Character in 5 Minutes
Character: Discover an inspiring video showcasing the importance of character development in achieving success and building meaningful relationships. Join us to explore the power of authenticity and integrity in this powerful story. Free Model: Dive into an exciting video unveiling the secrets of the free model industry. Learn how to kick-start your modeling career without breaking the bank. Don\'t miss out on this valuable opportunity!
Blender - 7 Rigging Tips in 9 Minutes with Free Model
Here are 7 helpful Blender rigging tips you may not know. This is not a rigging tutorial, and I assume you already know the basics ...
Specialized Rigging Scenarios
Animating Non-humanoid Characters
Rigging non-humanoid characters requires creativity and an understanding of unique bone structures. Whether you\"re animating animals, fantastical creatures, or inanimate objects, the principles of rigging apply, adapted to the specific needs of your model.
Practical Exercises and Real-World Applications
Hands-on practice is crucial. Engage in exercises that cover a range of rigging techniques, from simple rigs to complex animations like walk cycles and morphing objects. Each exercise builds on the last, reinforcing your understanding of rigging fundamentals.

Getting Started with Blender Rigging
- Begin with basic mesh preparation, ensuring normals are correctly oriented.
- Create a central root bone and build out the skeletal structure with appropriate branches for limbs.
- Utilize weight painting to bind the mesh to the rig, allowing for realistic movement.
- Experiment with bone constraints and parenting for advanced control over your rig.
- Practice with hands-on exercises to solidify your understanding and skills.
With these tips and techniques, you\"ll be well on your way to mastering rigging in Blender, capable of bringing any 3D model to life with realistic and dynamic animations.
_HOOK_
Getting Started with Blender Rigging
- Begin with basic mesh preparation, ensuring normals are correctly oriented.
- Create a central root bone and build out the skeletal structure with appropriate branches for limbs.
- Utilize weight painting to bind the mesh to the rig, allowing for realistic movement.
- Experiment with bone constraints and parenting for advanced control over your rig.
- Practice with hands-on exercises to solidify your understanding and skills.
With these tips and techniques, you\"ll be well on your way to mastering rigging in Blender, capable of bringing any 3D model to life with realistic and dynamic animations.
Introduction to Blender Rigging
Embark on your Blender rigging journey, a crucial step for character animation. Rigging in Blender involves creating a skeleton for your 3D model, allowing for intricate movements and animations. This process begins with preparing your model, ensuring normals are correctly aligned and the model is properly positioned within the scene for optimal rigging symmetry.
- Start by examining your model\"s normals to ensure they face the correct direction, crucial for lighting and texture application later.
- Combine your model into a single mesh for efficiency, adjusting normals collectively if needed.
- Position your model strategically in the scene, setting the origin to facilitate easier animation and rigging work.
With your model prepared, the actual rigging starts by creating a central root bone and extending this skeleton to crucial parts of the model like limbs and head, laying the foundation for complex animations. This skeleton, or armature, is crucial for defining how your character moves. Utilizing Blender\"s armature system, you\"ll introduce bones to the model, enabling the animation of your character through a hierarchical structure of bones.
- Use the Armature option to add bones and define your character\"s skeletal structure.
- Adjust bones for critical areas such as limbs, spine, and head, ensuring a comprehensive rig that supports a wide range of movements.
- Explore the symmetry in your rigging process to ensure a balanced and functional character skeleton.
After structuring the armature, link it with your model through parenting and automatic weights, allowing for seamless movement manipulation. This integration is pivotal, transforming your static model into a dynamic character ready for animation.
Blender rigging is both an art and a technical skill, demanding patience and practice. With dedication, you can bring any character to life, creating animations that capture the essence of your artistic vision.
Core Rigging Concepts and Techniques
Rigging in Blender involves creating a skeleton for your 3D model, enabling it to move in a realistic or desired manner. This process is essential for animation and involves several core concepts and techniques that are fundamental to mastering rigging.
- Understanding Armatures: Armatures are the bones of your rig. They are used to build the skeleton structure that will control the movement of your model. You start by adding a central root bone and then extend outwards to create the skeletal structure, including arms, legs, and spine.
- Positioning and Parenting: Correctly positioning your mesh in the scene and ensuring normals are facing the correct direction are crucial steps before rigging. Parenting the armature to the mesh with automatic weights allows the bones to influence the mesh\"s movement.
- Creating a Bone Hierarchy: A hierarchical tree of bones is necessary for a functional rig. This involves setting parent-child relationships between bones, ensuring that movements are correctly propagated through the rig.
- Weight Painting: Weight painting is used to define how much influence each bone has on different parts of the mesh. This step is crucial for achieving realistic deformations during animation.
- Using Inverse Kinematics (IK): IK is a technique that allows for more natural and intuitive posing of the character by manipulating the end effector (like a hand or foot) to determine the position of the rest of the limb.
- Armature Modifiers and Constraints: Modifiers and constraints are used to control the behavior of bones within the rig. This includes limiting movements to certain axes, mirroring actions, and automating complex movements.
These core concepts are the foundation of rigging in Blender. Understanding and mastering these techniques will enable you to create complex and realistic animations for your characters and models.
Advanced Rigging Strategies for Realistic Animation
Advanced rigging in Blender encompasses a range of techniques aimed at achieving smooth, realistic animations for characters. By leveraging Blender\"s robust toolset, animators can create detailed and flexible rigs that allow for intricate movements and expressions.
- Corrective Shape Keys: Utilize shape keys to correct and refine deformations in your character\"s movements, ensuring smooth transitions and realistic poses.
- Weight Painting: Master weight painting to assign precise influence of bones over the mesh, enabling finer control over the animation\"s deformation for more lifelike results.
- Inverse Kinematics (IK) and Forward Kinematics (FK): Combine IK and FK to animate characters with natural motion. IK simplifies the control of limb movements, while FK offers detailed control over each bone\"s rotation.
- Modifiers and Constraints: Leverage modifiers like Subdivision Surface for smoother meshes, and constraints to restrict bone movements for realistic joint and muscle dynamics.
- Advanced Spine and Torso Rigging: Implement advanced techniques for spine and torso rigging to enable your characters to bend, twist, and stretch in a natural manner. Utilize IK systems, shape keys, and drivers for dynamic spine and torso animations.
- Custom Bone Shapes and Rig Layers: Customize bone shapes for intuitive control and organize your rig with layers for easier management during complex animations.
- Mesh Deform Modifier: Use the Mesh Deform modifier for complex characters, allowing for a cage to control the mesh deformation for advanced rigging scenarios.
These advanced strategies require a deep understanding of Blender\"s rigging system, anatomy, and movement principles. Experimentation and practice are key to mastering the art of rigging for creating captivating and realistic character animations.
Common Rigging Challenges and Solutions
Rigging in Blender, while powerful, can present a series of common challenges that may deter even the most enthusiastic 3D artists. Understanding these challenges and knowing how to address them is key to a successful rigging process.
- Inaccurate Bone Rotations: Bones must have correct orientations and no rotations for a rig to function properly. Utilize Blender\"s tools to ensure that bones are accurately aligned and oriented.
- Binding Mesh with Bones: The binding process is crucial for rig deformation. Selecting the right bind method, such as closest distance for weighting, can significantly impact the rig\"s effectiveness.
- Weight Painting Adjustments: For precise control over how bones influence the mesh, use weight painting tools. Techniques like smoothing and flooding weights allow for detailed adjustments.
- Setting Up Controllers: Choosing between Inverse Kinematics (IK) and Forward Kinematics (FK) for control setup can affect the rig\"s animation process. Utilize constraints to attach bones to controllers for better animation management.
- Rig Size Issues: Sometimes the generated rig may not match the model\"s size. Applying all transformations to your model can correct the rig size to fit the model perfectly.
- Accessory Rigging: Accessories like grenades or handbags may not follow the main rig correctly. Removing and then properly parenting the armature to the accessories ensures they move with the character.
- Incorrect Bone Bending: Bones bending in the wrong direction can be fixed by adjusting the initial pose of the knees or elbows before rigging.
- Mesh Distortion: Distorted meshes not following the rig properly can be corrected through meticulous weight painting, ensuring the mesh deforms naturally with the rig.
Addressing these common challenges involves a combination of Blender\"s rigging tools and techniques, patience, and practice. With the right approach, overcoming these hurdles can lead to highly effective and realistic character animations.
_HOOK_
Weight Painting and Fine-tuning Your Rig
Weight painting is a crucial step in the rigging process within Blender, allowing animators to define how much influence each bone has on various parts of the mesh. This section provides a comprehensive guide to mastering weight painting and fine-tuning your rig for optimal animation.
- Basic Steps for Weight Painting: Begin by selecting your object and entering Edit Mode. Clear any existing weight paint from vertex groups by adjusting the weight slider to zero and pressing assign. This ensures a clean slate for weight painting.
- Exporting and Flipping Weight Paint: Export weight paints using the FBX file format, ensuring objects are parented to an armature. To flip weight paint across the X axis, utilize the mirror functionality in weight paint mode to transfer weights from one side of the object to the other.
- Gradient Weight Paint: Utilize the gradient tool for varying density effects, ideal for scenarios like distributing foliage. The tool allows for linear or radial gradients, aiding in realistic and memory-efficient detailing.
- Selective Weight Painting: Limit weight painting to selected faces or vertices to avoid unintentional spillover. This technique is invaluable for painting complex rigs or when specific areas require isolation.
- Hiding Mesh Parts in Weight Paint Mode: Hide parts of the mesh to focus on specific areas without interference from other mesh sections. This is especially useful for detailed work on intricate character parts.
- Transferring Weight Paints: Transfer weight paints between objects with similar mesh structures. Use the data transfer modifier for objects with different meshes, allowing for more versatile weight paint copying.
Weight painting is both an art and a science, requiring a blend of technical skill and artistic insight. By following these tips and exploring the various tools and options Blender offers, animators can achieve precise control over their character\"s deformations, leading to more lifelike and expressive animations.
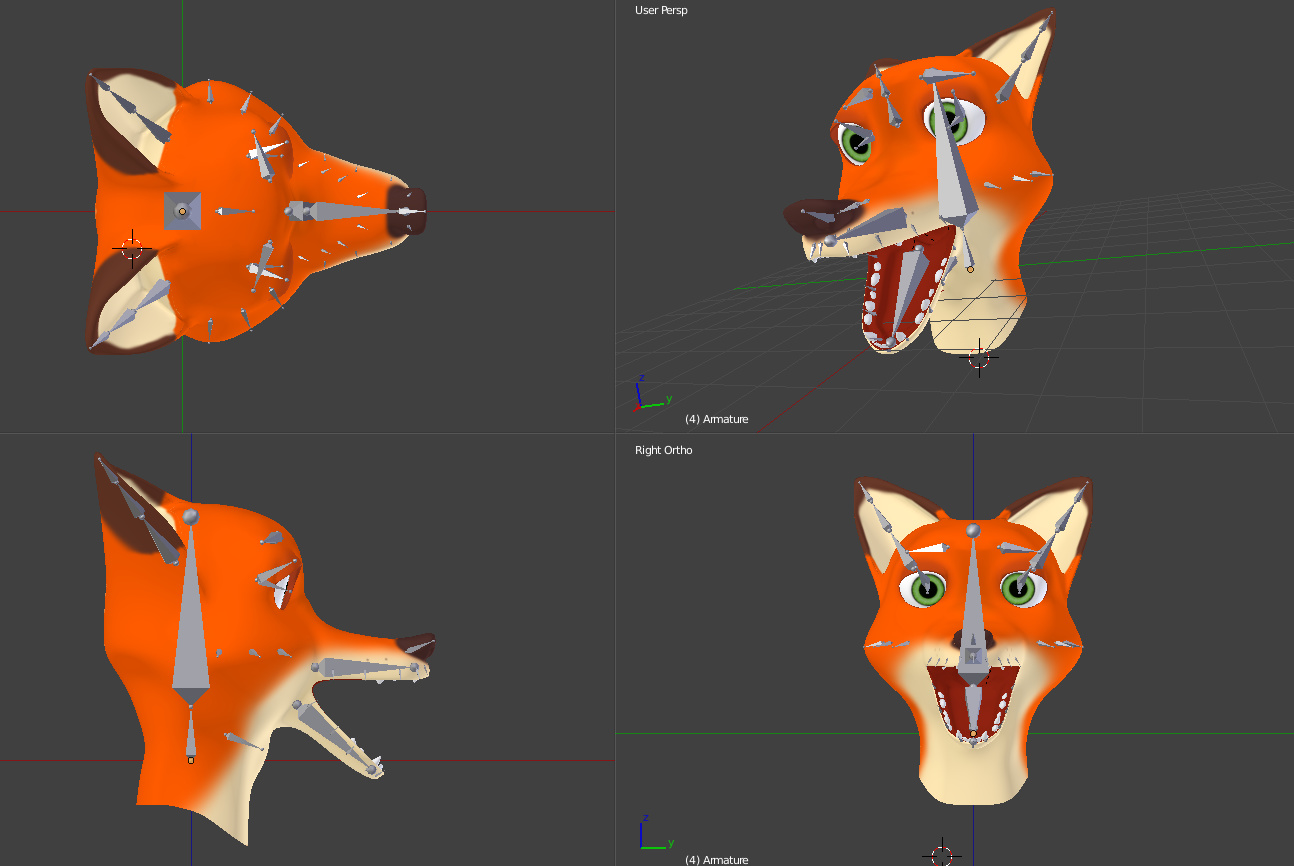
Animating Non-humanoid Characters
Animating non-humanoid characters in Blender involves a set of specialized rigging techniques due to their unique anatomical structures. Unlike humanoid characters, non-humanoids may have additional limbs, wings, tails, or entirely different body configurations that require creative rigging solutions.
- Starting with the Spine: Begin by identifying and rigging the spine or the main body part of the character. This foundational step ensures that the primary structure has the necessary rig elements for movement and flexibility.
- Creating Rig Elements: Utilize a combination of Point Controllers, Box Controllers, and Rigid Bodies to form the rig. These elements should be linked in a chain, providing the basis for movement and rotation within the character\"s structure.
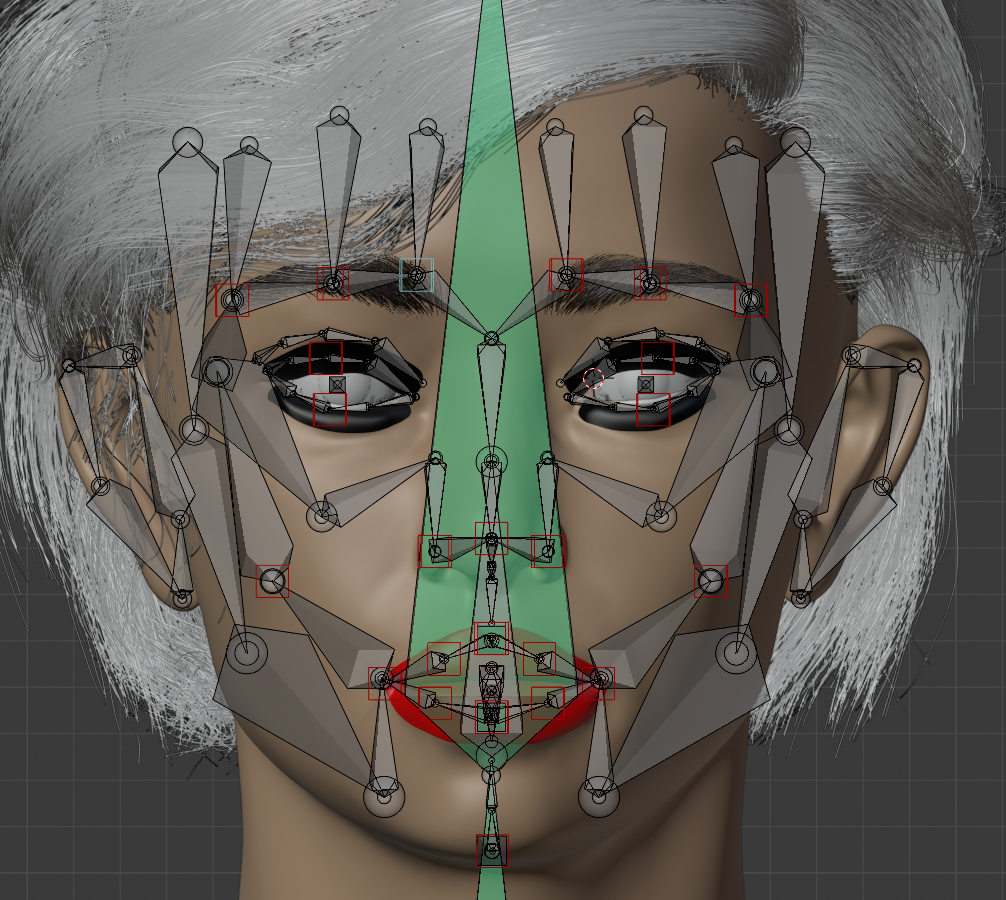
- Head and Facial Features: For characters with complex facial structures, such as movable jaws or expressive eyes, create specific rig elements like Box Controllers to handle these parts. This allows for detailed facial expressions and movements.
- Symmetry and Limb Rigging: Take advantage of symmetry for characters with identical limbs on either side. Rig one side first, then mirror the rig elements to the other side to save time and ensure consistency.
- Limb Bending Axes: Define the axes along which limbs will bend, using Additional Points for rig elements. This is crucial for achieving naturalistic movement in limbs, tails, and other extendable parts of the character.
- Fingers, Ears, and Other Parts: Smaller elements that do not significantly affect the character\"s mass or movement can be rigged with simpler Box Controllers, focusing on basic movements without needing complex rig setups.
- Tail Rigging: For characters with long tails, consider using Spline Controllers to maintain flexibility while reducing the complexity of the rig. This approach allows for smooth, flowing movements along the tail\"s length.
- Setting Masses for Rigid Bodies: Assign appropriate masses to different parts of the rig to influence the character\"s center of mass and physical behavior. Estimations are generally sufficient for achieving balanced movements.
- Mirroring Rig Elements: After rigging symmetrical parts, mirror the rig elements across the character to finalize the setup. This step is essential for ensuring that both sides of the character move in a coordinated manner.
Animating non-humanoid characters requires a flexible approach to rigging, tailoring the rig to fit the specific needs of the character\"s anatomy and intended movements. By following these guidelines, animators can create dynamic and versatile rigs capable of bringing even the most unconventional characters to life.
Using Python Scripts to Enhance Rigging
Blender, a premier software for 3D modeling and animation, integrates seamlessly with Python, one of the most popular programming languages, to offer scripting capabilities that can significantly enhance rigging processes. Python scripting in Blender allows for the automation of repetitive tasks, creation of custom add-ons, and the application of advanced rigging techniques, making it an indispensable tool for both beginners and seasoned professionals.
Getting Started with Python in Blender
To begin scripting in Blender, no additional libraries or plugins are required. Simply access the \"Scripting\" tab to start writing Python code directly. A crucial first step is enabling Python tooltips via the Preferences menu, which aids in identifying how to reference items within scripts.
Basic Python Scripts for Rigging
Python\"s power in Blender extends to rigging, where scripts can create, modify, and manipulate armatures and bones, enabling complex animations with minimal manual intervention. For example, scripts can automate the addition of primitives to rigs, modify mesh properties, and set keyframes for animation.
Custom Rig Interfaces
Advanced Python scripting can be used to create custom rig interfaces, enhancing the animator\"s workflow. Scripts can generate dynamic UI panels that display custom properties of bones as sliders, making it easier to animate characters and objects. Custom add-ons created through Python allow for the sharing and reuse of these interfaces, streamlining the rigging process across different projects.
Automation and Efficiency
Python scripts excel in automating repetitive rigging tasks, such as exporting models from multiple .blend files or setting up scenes with predefined elements. This automation not only saves time but also ensures consistency across projects.
Debugging and Optimization
Debugging and optimizing Python scripts are crucial for maintaining efficiency and reliability. Strategies include attentive console monitoring for errors, the use of print statements for troubleshooting, and adopting best practices such as adding comments and using descriptive variable names to keep the code clean and understandable.
Learning Resources
For those looking to dive deeper into Python scripting in Blender, numerous online resources, including the Blender Python API documentation, forums, and tutorials, offer extensive learning opportunities. Engaging with the community and exploring educational content can significantly enhance one\"s scripting skills and rigging techniques.
By harnessing the power of Python scripts, Blender users can achieve more sophisticated and realistic animations, tailor their workflow to their specific needs, and significantly reduce the time spent on manual rigging tasks.
Optimizing Rigs for Performance
Optimizing Blender rigs for performance is crucial for a smooth animation workflow. This process involves several strategies aimed at reducing lag and improving the efficiency of your animation projects.
Use Simplified Rigs
Complex rigs can slow down your workflow significantly. To mitigate this, consider creating a simplified version of your original rig with fewer bones and constraints. This simplified rig should be used during the animation phase, while the original rig can be reserved for final renders. Employing proxy objects can also enhance viewport performance.
Enable Simplify Option
Blender\"s Simplify option allows you to reduce scene complexity, improving performance. This feature can be found in the Render Properties tab, where you can adjust settings for both viewport and render simplification. Simplifying physics simulations is another aspect of this strategy, which can be configured in the Scene Properties tab to reduce the accuracy of simulations for faster performance during animation.
Manage Add-ons and Plugins
While add-ons enhance Blender\"s functionality, too many can bog down your system. Keep your setup lean by disabling unnecessary add-ons through the Preferences menu. Regularly updating your add-ons can also prevent compatibility issues and optimize performance.
Upgrade Your Hardware and Software
Hardware upgrades, such as increasing RAM and updating your graphics drivers, can significantly boost Blender\"s performance. For software, consider switching to Blender\"s Long-Term Support (LTS) version for a more stable and reliable experience, especially on larger projects.
Utilize Rigging Add-ons
Several Blender add-ons can streamline the rigging process and enhance performance. Add-ons like Rigify simplify rigging with an automatic rigging system generator, making the process quicker and less technically demanding. Other specialized add-ons, like Car-Rig Pro for vehicles and COA Tools for cut-out animation, offer tailored solutions that save time and improve rig performance.
By adopting these strategies, you can optimize your rigs for better performance in Blender, ensuring a smoother and more efficient animation process.
Rigging Tips from Industry Professionals
Mastering the art of rigging in Blender is a blend of technical skill and creative insight. Here are some tips from industry professionals that can elevate your rigging skills.
Understanding Rigging Fundamentals
Rigging is the backbone of animation, providing a digital skeleton to your 3D models. It\"s essential to grasp the basics, such as bone creation, armatures, and parenting relationships between bones. These elements are crucial for enabling movement and adding life to your characters.
Leveraging Rigify for Efficiency
Rigify, an addon in Blender, simplifies the rigging process significantly by automating much of the technical work. It offers a modular system, allowing you to build rigs from predefined components. This tool is especially useful for artists who need a versatile character rig but lack the time to delve into complex rigging details.
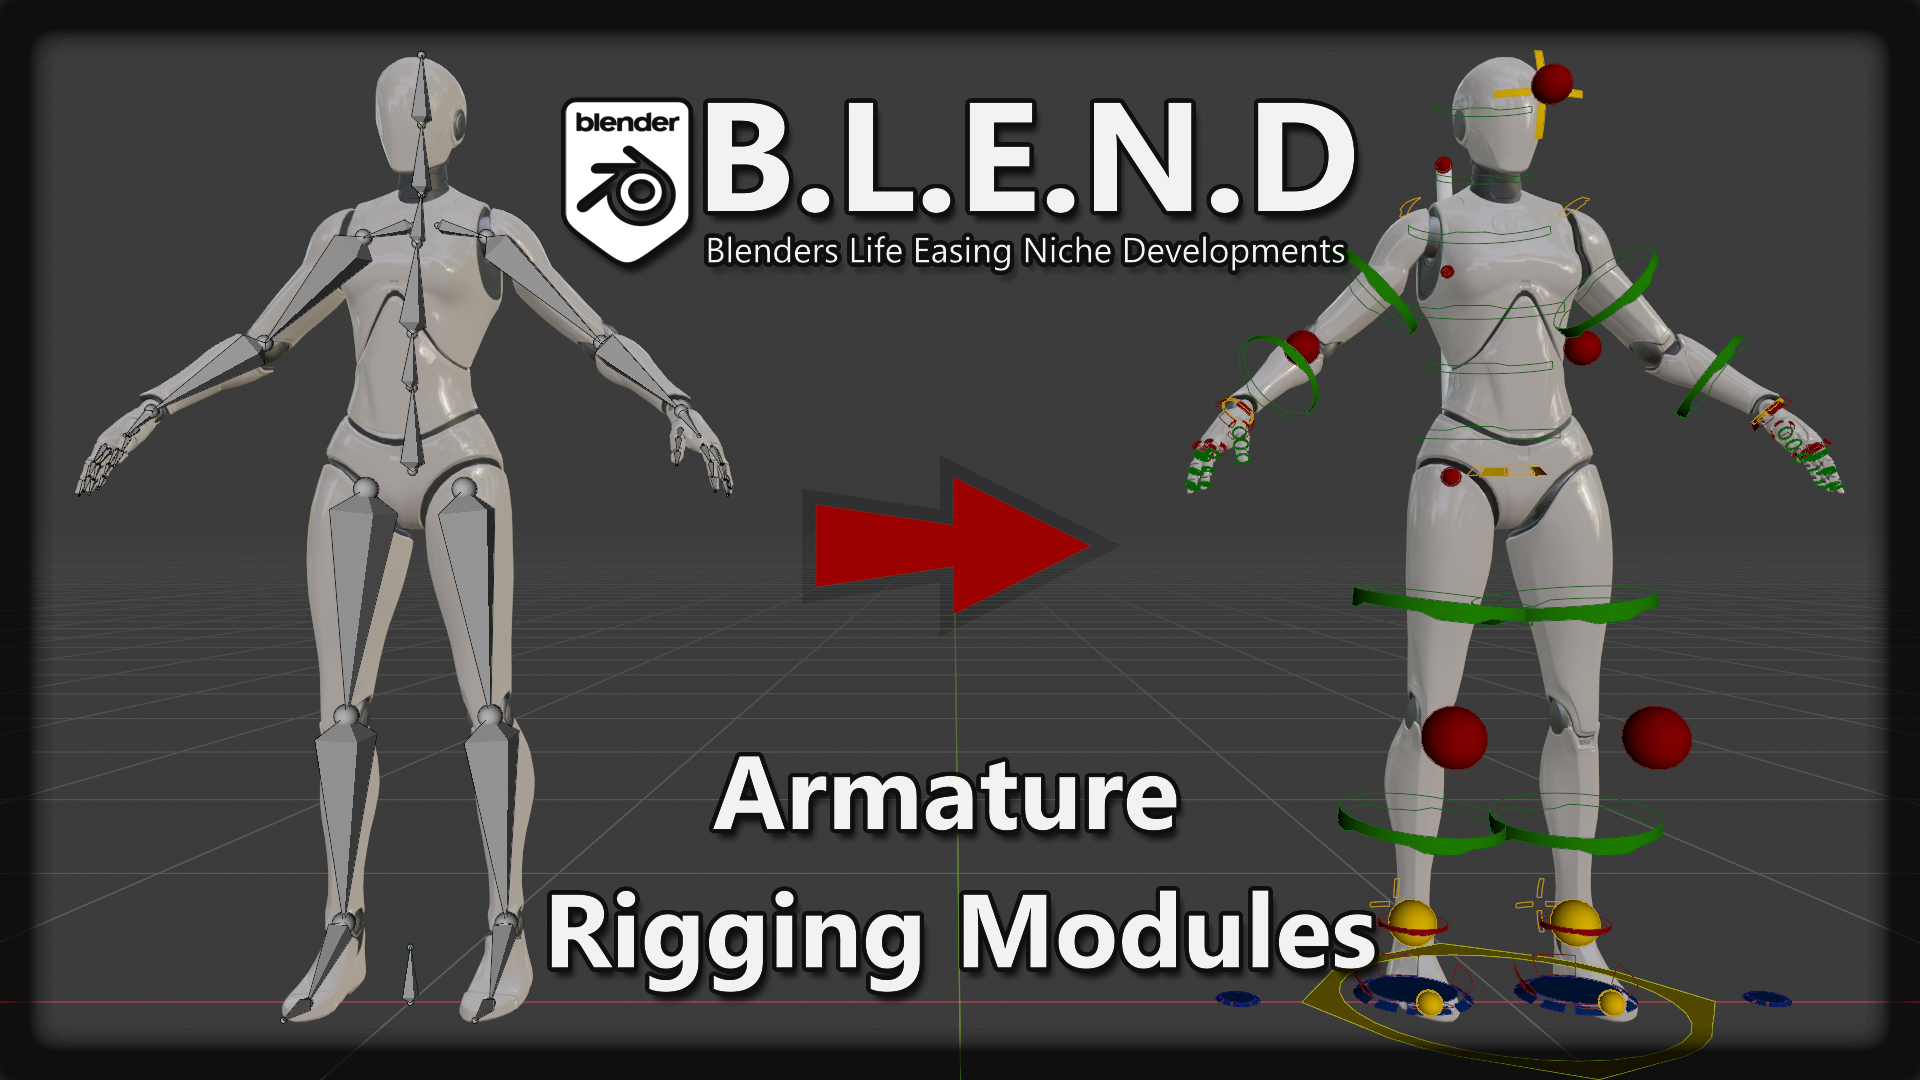
Modular Building Blocks with Rigify
- Human leg
- Animal leg
- Arm, Tentacle, Spine
- Head and Neck, Tail
- Face, Simple Bone (without automation)
These modules can be combined to rig almost any character, saving time and streamlining your workflow.
Practice Makes Perfect
Before diving into advanced rigging or utilizing tools like Rigify, it\"s beneficial to have a solid understanding of Blender\"s armature and bones. Start with simple projects to familiarize yourself with the basics of rigging, including constraints, skinning, and weight painting. As you become more comfortable, gradually tackle more complex rigging challenges.
Continuous Learning and Experimentation
The field of rigging is ever-evolving, with new techniques and tools being developed regularly. Stay engaged with the Blender community, participate in forums, and follow tutorials to keep your skills sharp. Experimentation is key to finding innovative solutions to rigging challenges.
These tips encapsulate the wisdom of seasoned professionals in the industry, aiming to guide you through the complexities of rigging in Blender. Whether you\"re a beginner or looking to polish your skills, these insights can help you achieve more dynamic and realistic animations.
_HOOK_
READ MORE:
Resources for Further Learning
Blender\"s rigging system offers a comprehensive suite of tools for character animation, enabling artists to bring their creations to life with precision and flexibility. Here are some resources to further your learning in Blender rigging:
Official Blender Tutorials
Blender Studio provides an extensive collection of tutorials covering the fundamentals of Blender, including a dedicated section on rigging. These tutorials are free and cover various aspects of rigging, from basic introductions to more complex techniques like inverse kinematics and bone constraints.
YouTube Channels
- Royal Skys LLC offers fast and quality tutorials, including a playlist on Blender 2.82 Speed Rigging.
- Armin Halac shares in-depth guides on rig creation, focusing on the thought processes behind rigging.
- Luciano Muñoz aims his channel at both beginners and professionals, covering animation and rigging in Blender with production techniques used in the animation industry.
- Index 3d covers everything from rigging to complete animations, with tutorials on Blender constraints and hard surface/mechanical rigging.
Advanced Learning Platforms
CG Cookie offers a comprehensive course titled \"Fundamentals of Rigging - Learn How to Rig in Blender,\" which is perfect for mastering rigging. The course covers everything from bones, armature modifiers, bone constraints, weight painting, and includes hands-on practice with four exercises.
Additional Resources
- The Rigging Dojo provides tailored training to expand your skill set in rigging, focusing on practical application and problem-solving.
- Humane Rigging by Nathan Vegdahl, an in-depth rigging course that remains relevant today, is available for free on YouTube, offering foundational rigging principles.
These resources provide a solid foundation for learning and mastering rigging in Blender. Whether you\"re a beginner looking to understand the basics or an experienced artist seeking to refine your skills, there\"s something for everyone in the vast world of Blender rigging.
Embark on a transformative journey through the art of Blender rigging, unlocking the secrets to animating characters and models with precision and creativity. Our comprehensive guide is designed to inspire and empower artists of all levels, from beginners eager to learn the basics to advanced users refining their skills. Dive in and discover the tools and techniques that will bring your animations to life.